
Honestly Craftable: DIY Shabby Chic Christmas Trees
Are you in the holiday spirit yet? This “Honestly Holidays” series has got me in the mood for carols and cookies and cocoa, but let’s be sure to celebrate Thanksgiving first!
Honestly, the Thanksgiving holidays are probably my favorite, simply because we slow down and enjoy time with our family, eat great food, and watch football. Our family doesn’t fight the Black Friday crowds, or get dressed up or do anything fancy. We’ve had a tradition since I was little that I now share with my own daughter, in which we rent a cabin in the Blue Ridge Mountains for a few days, and just unplug and enjoy the peace, quiet, and the beauty that God has surrounded us with. I am so thankful for all of the memories of family Thanksgiving trips, and one of the highlights for me has always been the time we spend crafting!
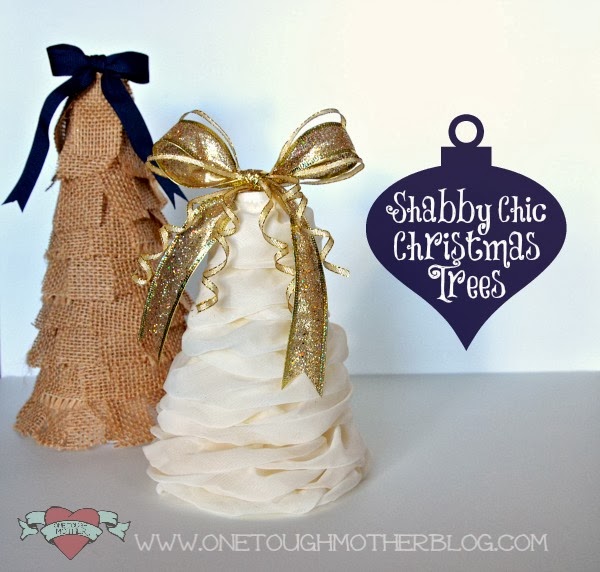
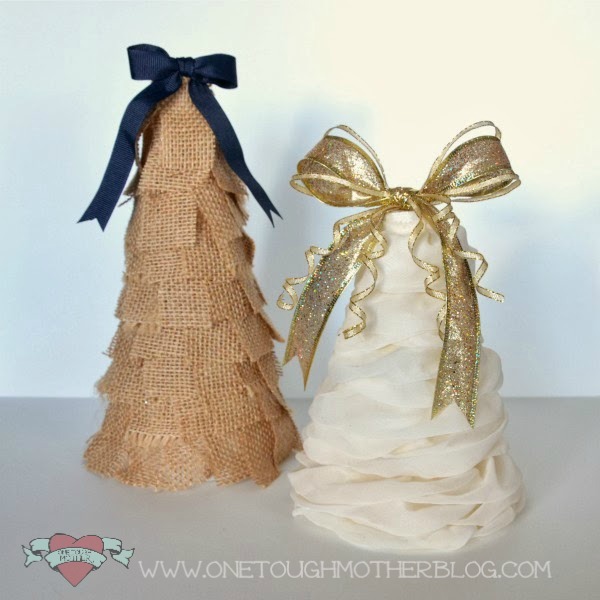
Part of my packing list for our Thanksgiving trip includes gobs of craft supplies. My mom, my daughter and I love to sit around the dining room table, after we’ve stuffed ourselves full of turkey and pie, and start making Christmas decor and handmade gifts while my hubby watches football. Today I want to show you how to make a couple of Shabby Chic Christmas Trees with your family this year. We’ll start with the ruffle ribbon tree.
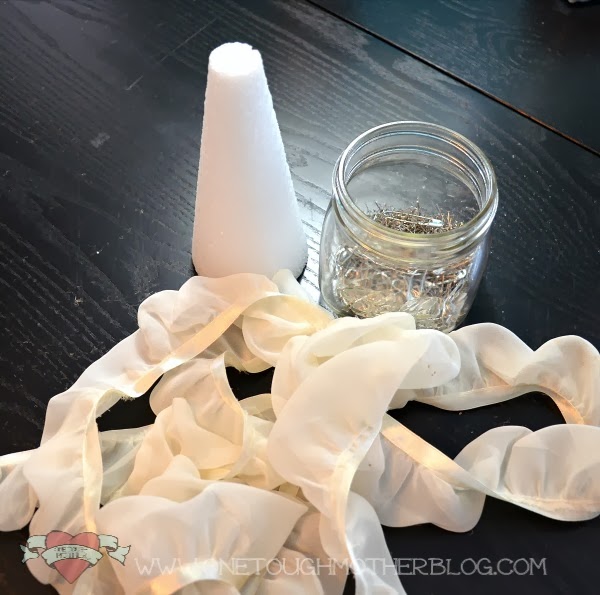
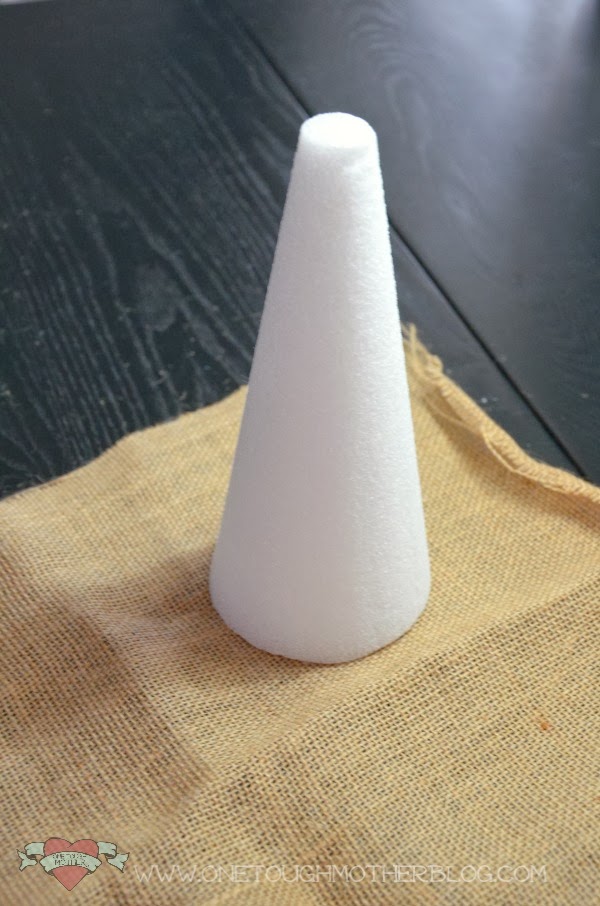
Start with a styrofoam cone – I used a 6″ cone. Choose some soft ruffled ribbon and lots of straight pins.
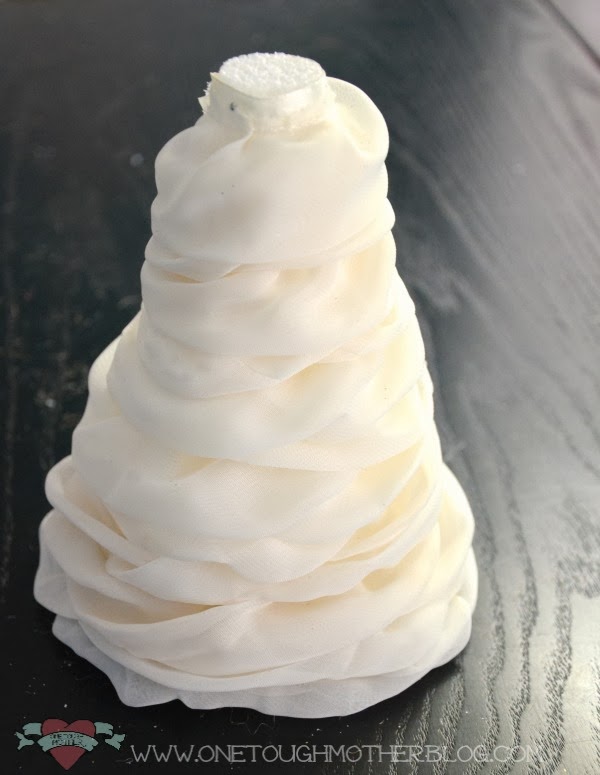
Starting at the bottom of your cone, wrap the ruffled ribbon around and pin as you go. Be sure to leave a little bit of ruffle hanging at the bottom. Wrap the ruffled ribbon all the way up to the top of the cone, pin in place, and snip off the excess.
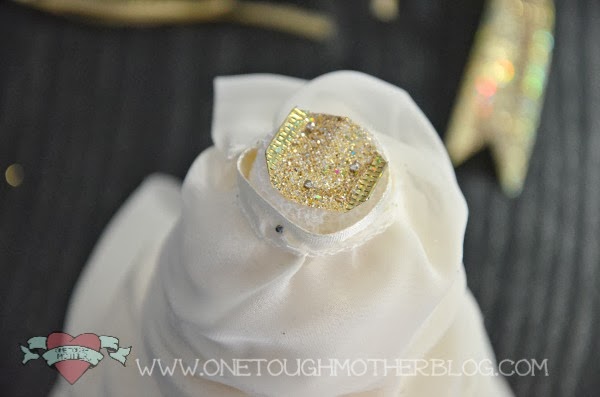
Cut a piece of ribbon to cover the top of the cone. I suggest using the same ribbon from which you will make your bow, so it blends well. I chose a pretty metallic gold wired ribbon, cut a small piece, and secured with pins. Using whatever ribbon you like, make a bow and pin to the top of the tree.
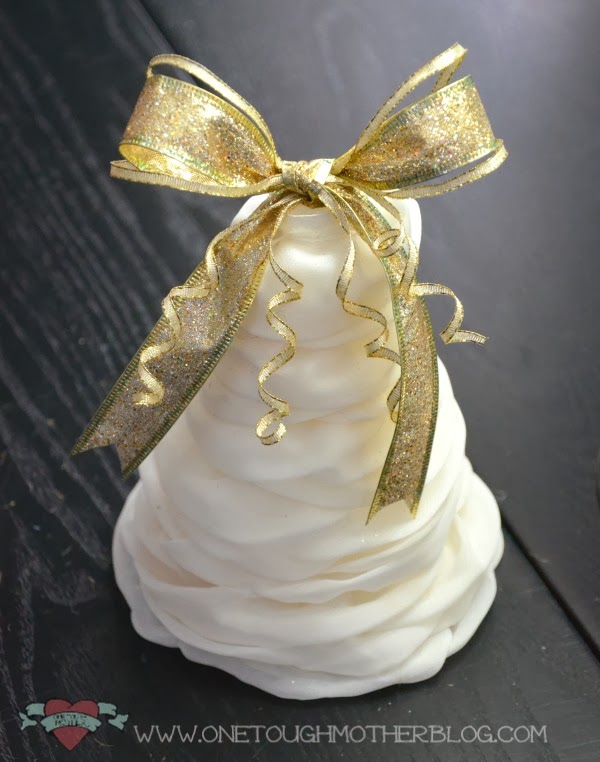
I had some skinny wired ribbon, too, so I added a couple strands of that to my bow for dimension. If your ribbon is wired, just wrap it around a pencil to make the curls. Now let’s get to the burlap tree!
For the burlap tree, I used a taller cone – about 10″ – and some burlap fabric. Cut your burlap into strips roughly 2″ x 1.5″ (this totally doesn’t have to be exact, but you can get an idea of the size). Again, we’re starting at the bottom of the cone and leaving a little bit of fabric hanging over the bottom.
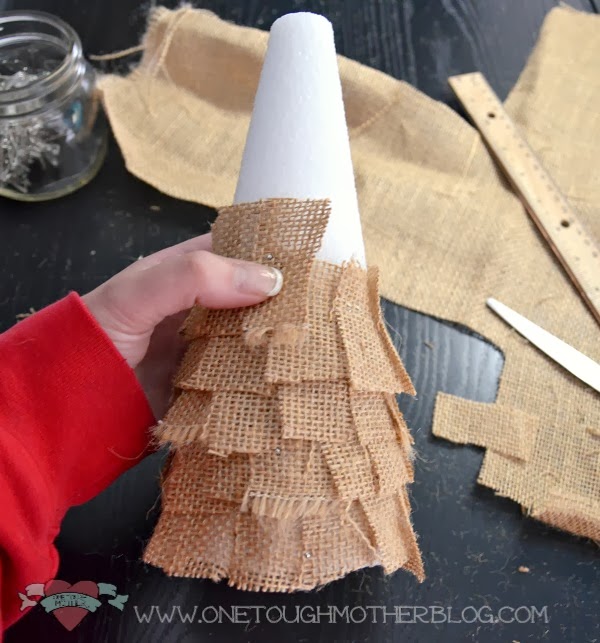
Be sure to overlap your burlap pieces to cover the pins as best you can. You’ll get into a groove as you go along.
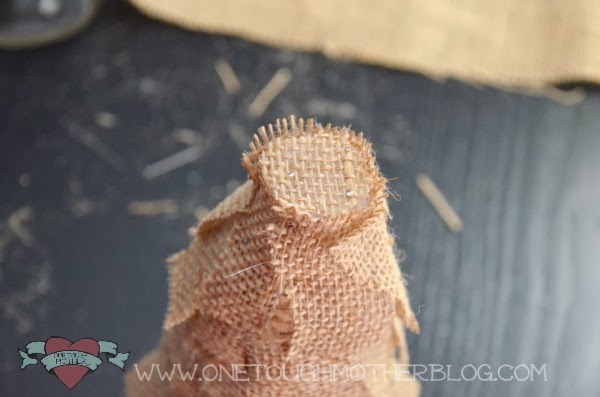
Cut a circle of burlap and pin to the top of the tree, just like we did on the ruffle tree. (You can use ribbon here, too, if you like.) Now just add a ribbon!
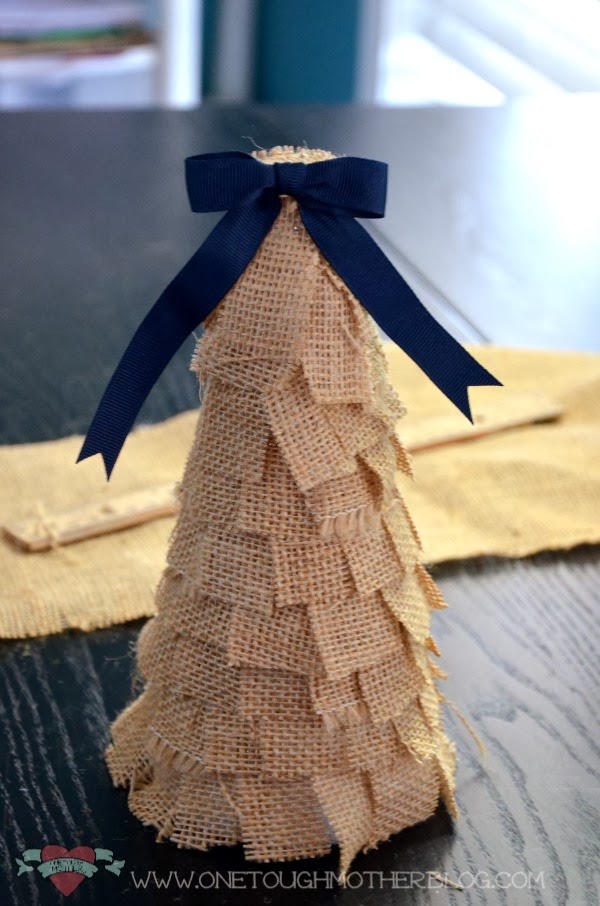
I chose a navy blue grosgrain ribbon for my burlap tree.
I hope you and your family have a wonderful Thanksgiving full of blessings and family fun! Happy crafting!


Love it!! These are super cute!!
Thank you Crystal!
Love how these trees turned out!!!
Thanks so much Katie!