
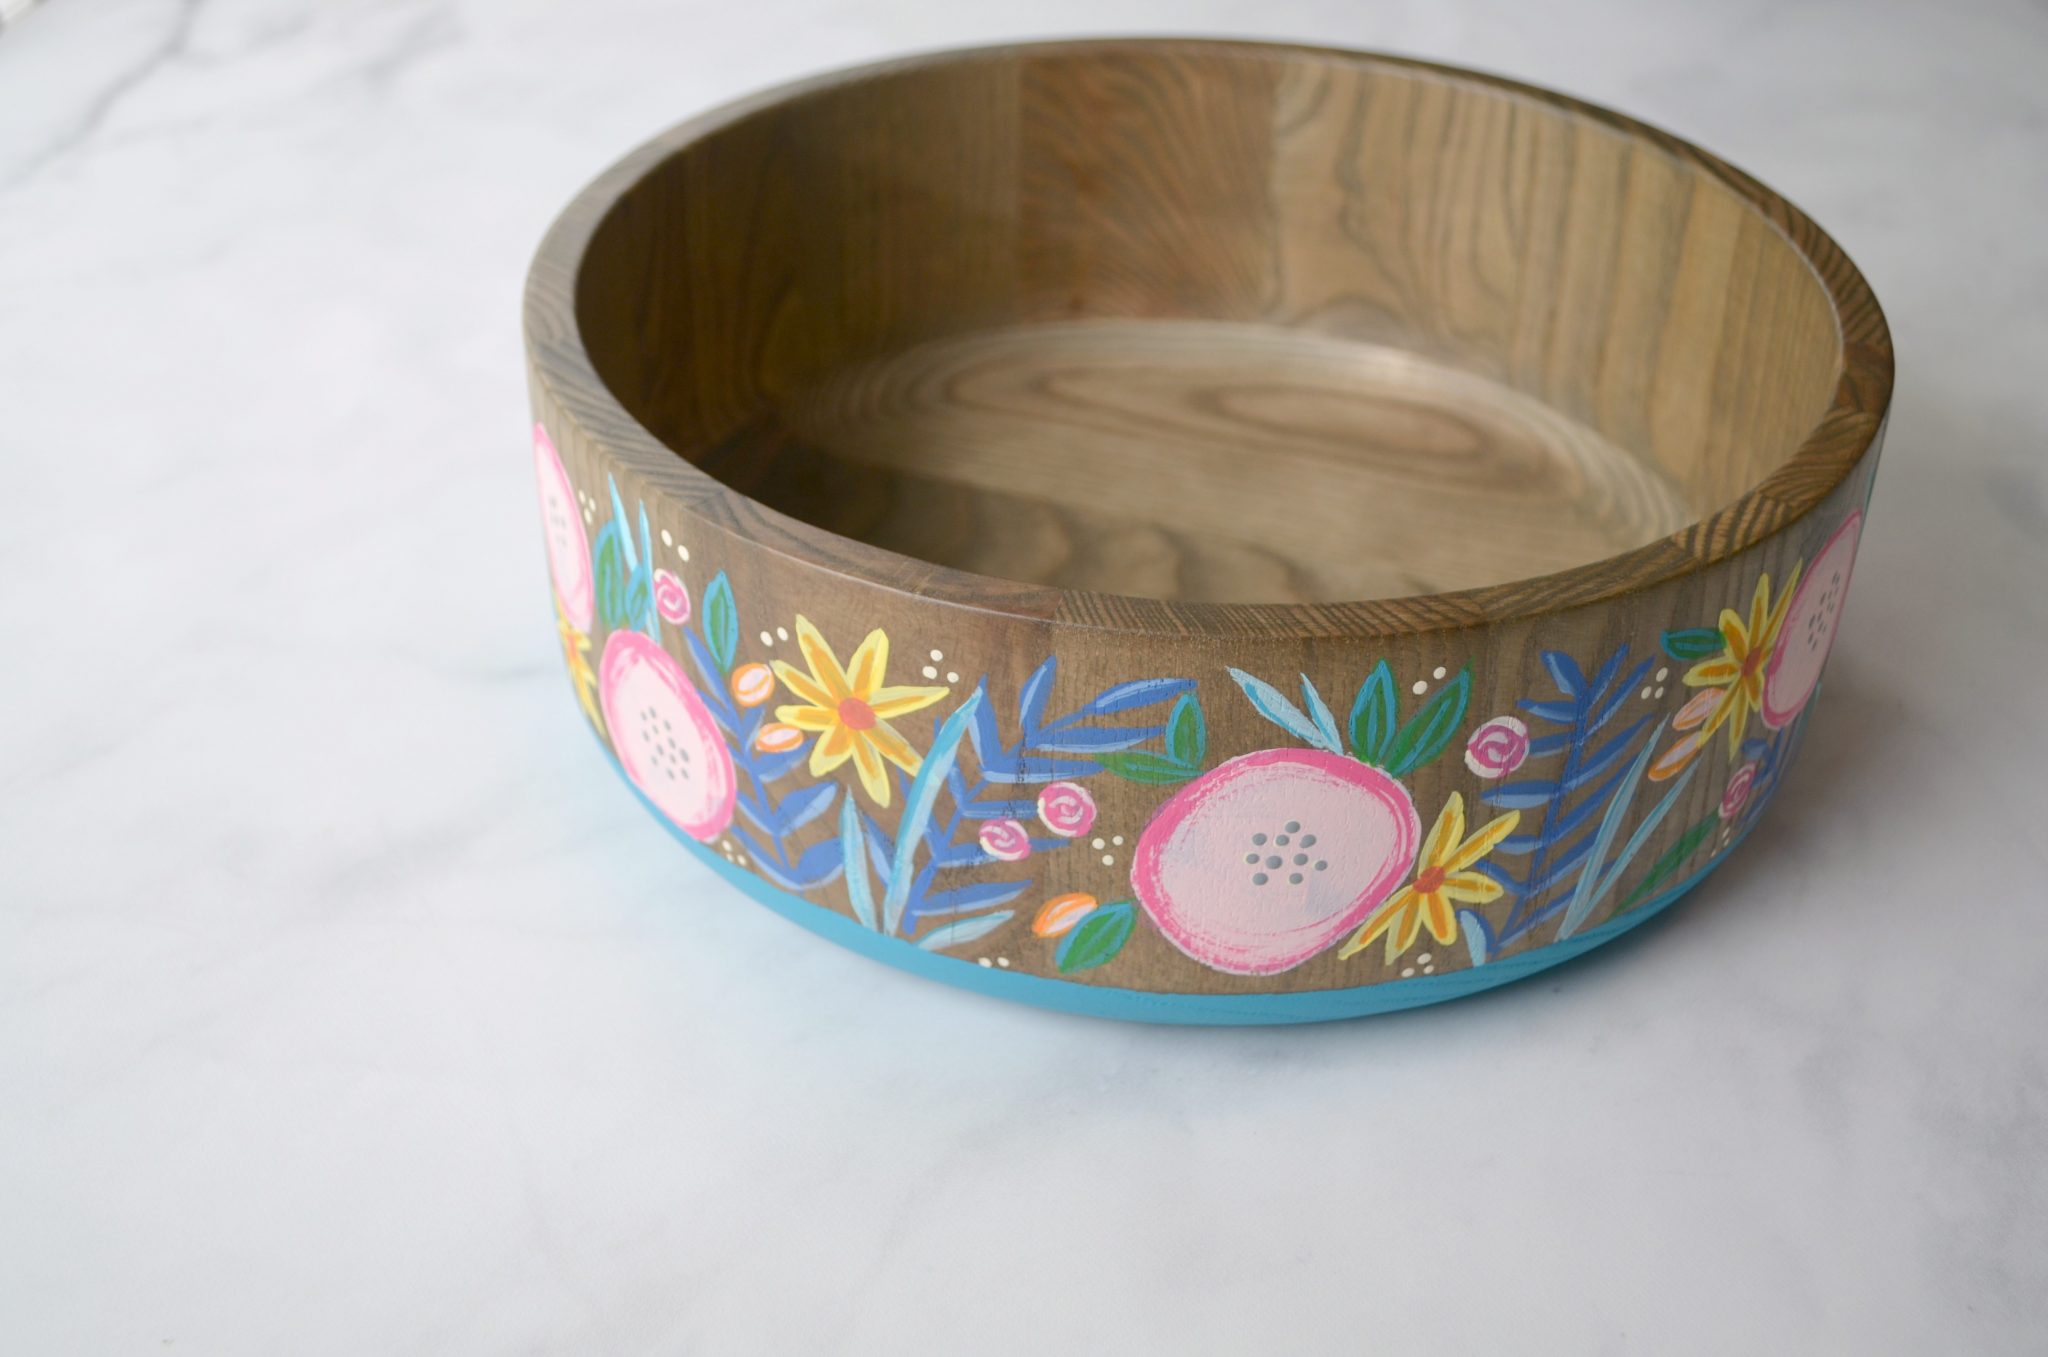
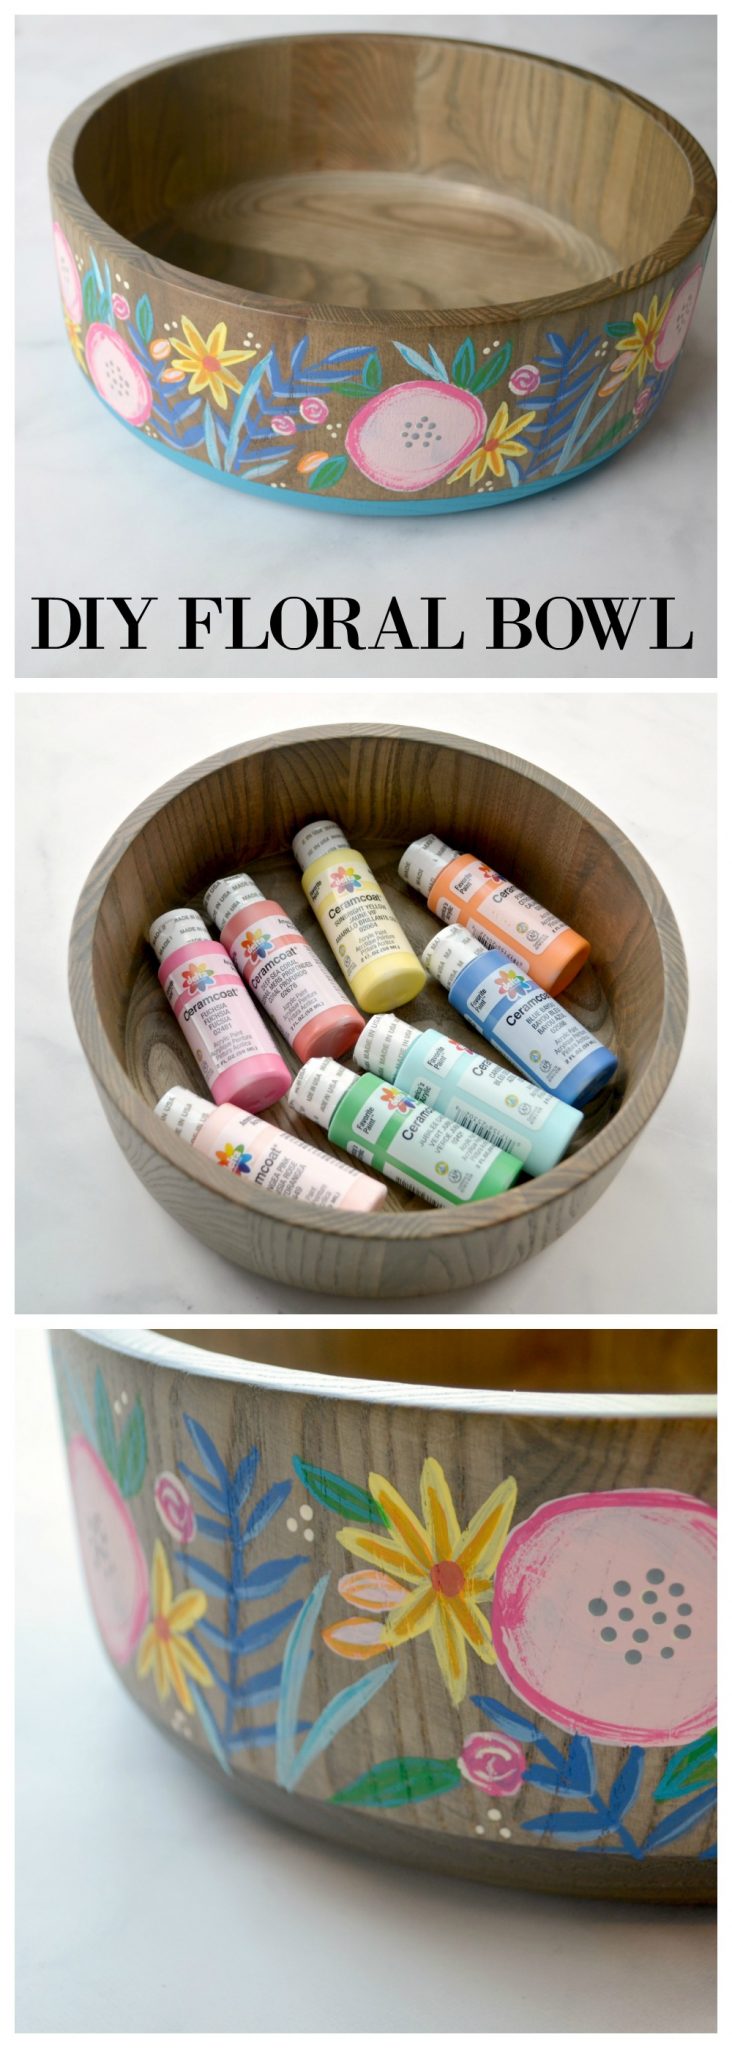
DIY Floral Bowl
Thanks to Plaid Crafts for sponsoring today’s post; all opinions are honestly my own.
In case you haven’t noticed, floral patterns are everywhere for Spring and Summer 2018! Clothing, accessories, and home decor are full of colorful blooms. Today, I want to share with you a super easy DIY project that transforms a plain wooden bowl into an on-trend statement piece for your kitchen. I promise, it’s way easier than it looks, just a series of shapes and lines that turn into gorgeous flowers, so don’t be intimidated; you CAN do this! Take a look.
You’ll need:
Delta Ceramcoat® Acrylic Paint
Wooden Bowl
Paintbrushes {Assorted sizes}
Mod Podge
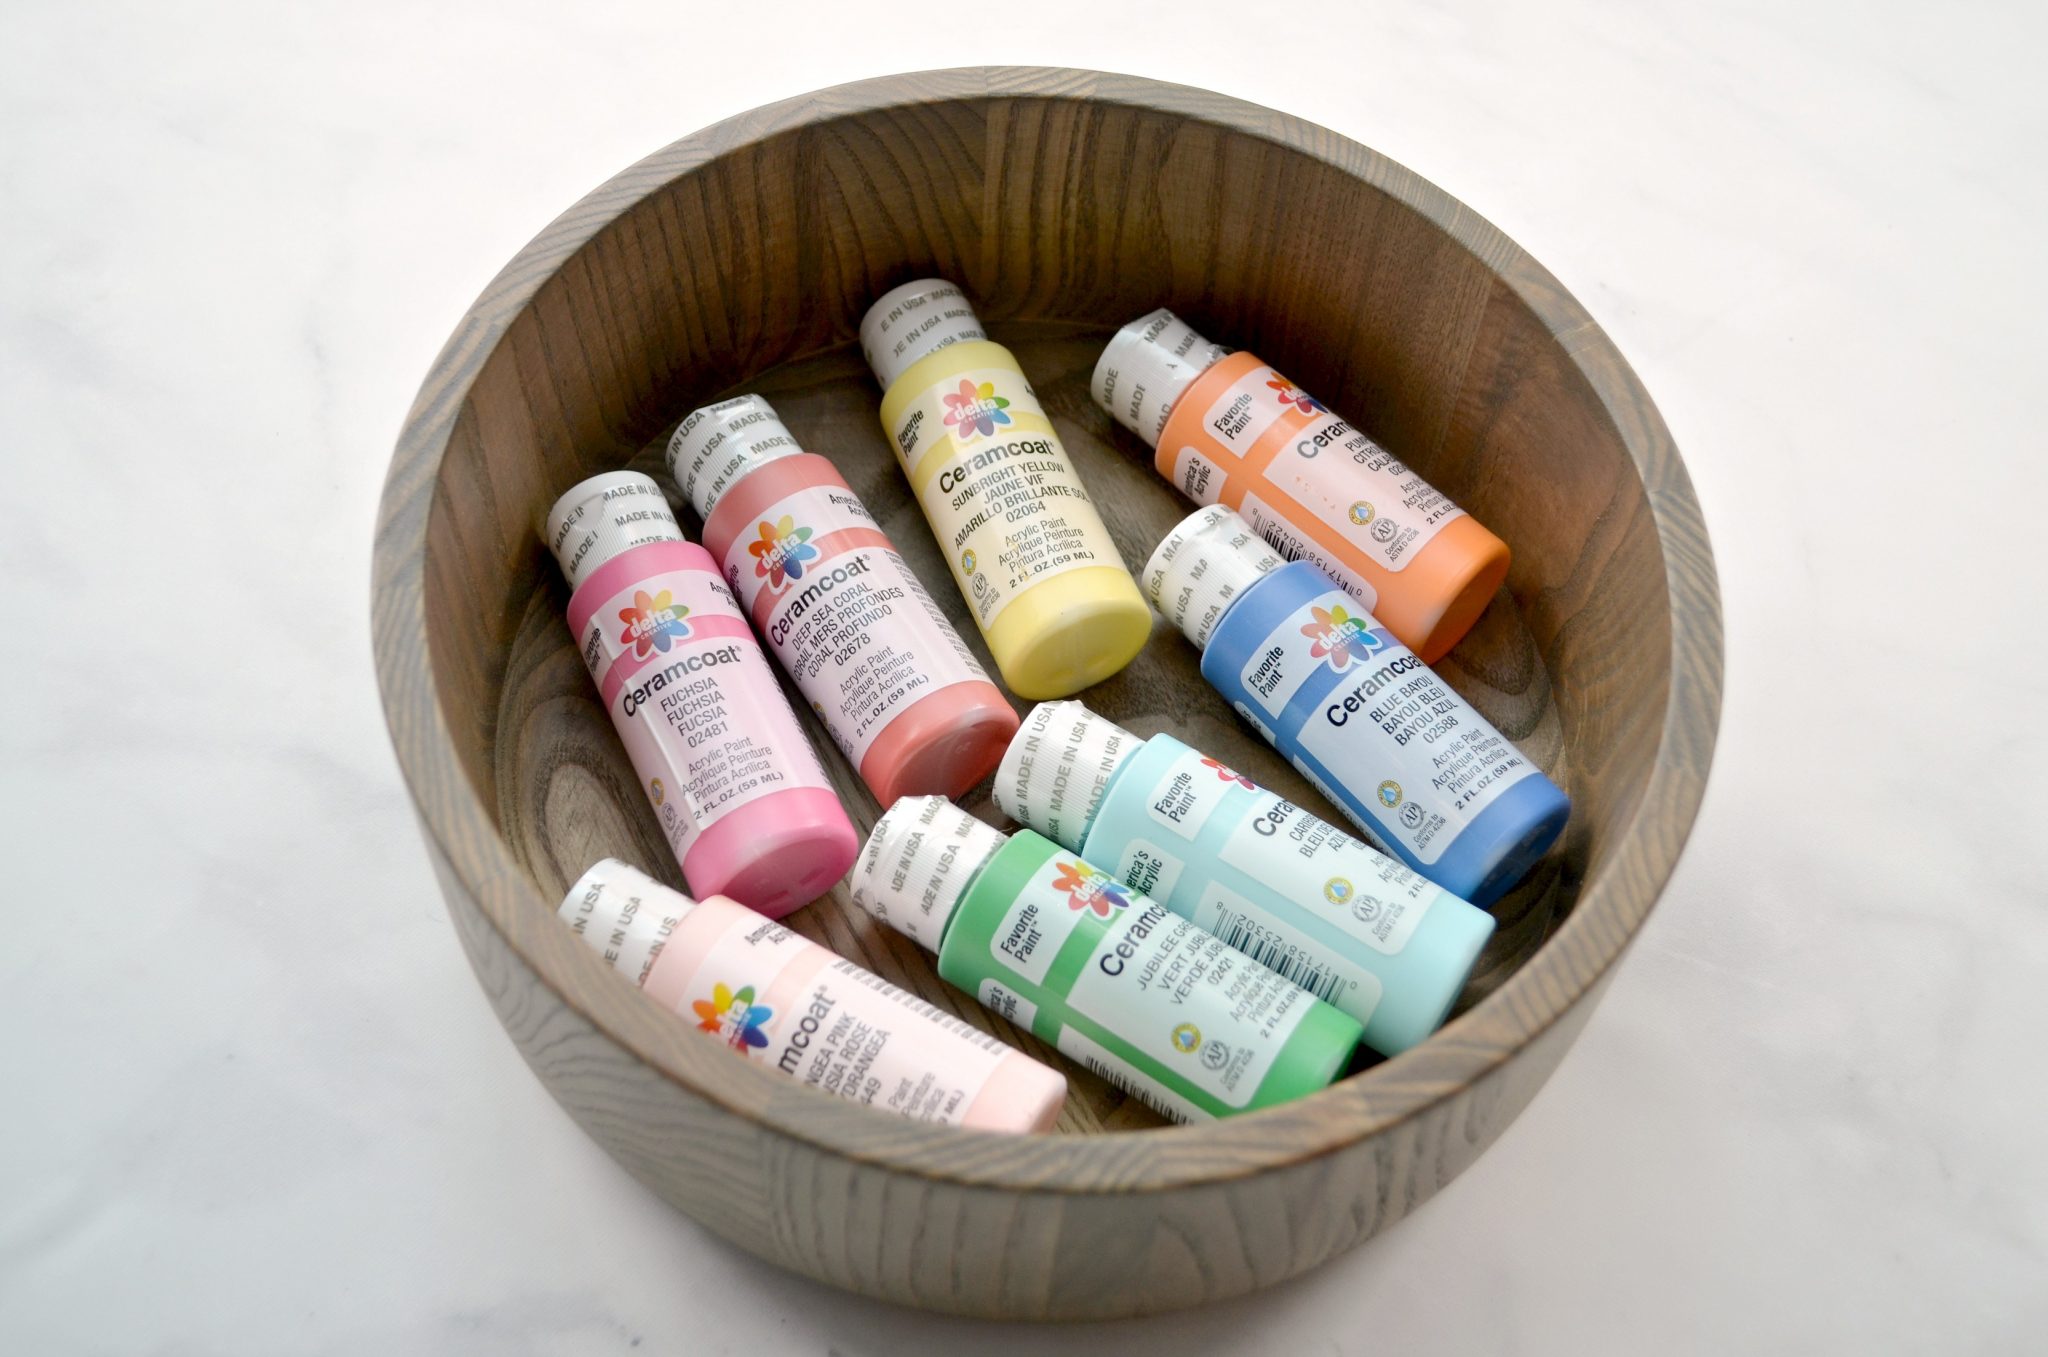
Delta Ceramcoat Acrylic paint is made in the USA and has a rich, creamy formula that gives excellent coverage with a pretty, matte finish. It’s great for base coating, stenciling, and decorative painting on a variety of surfaces including wood, terra cotta, plaster, and paper mache.
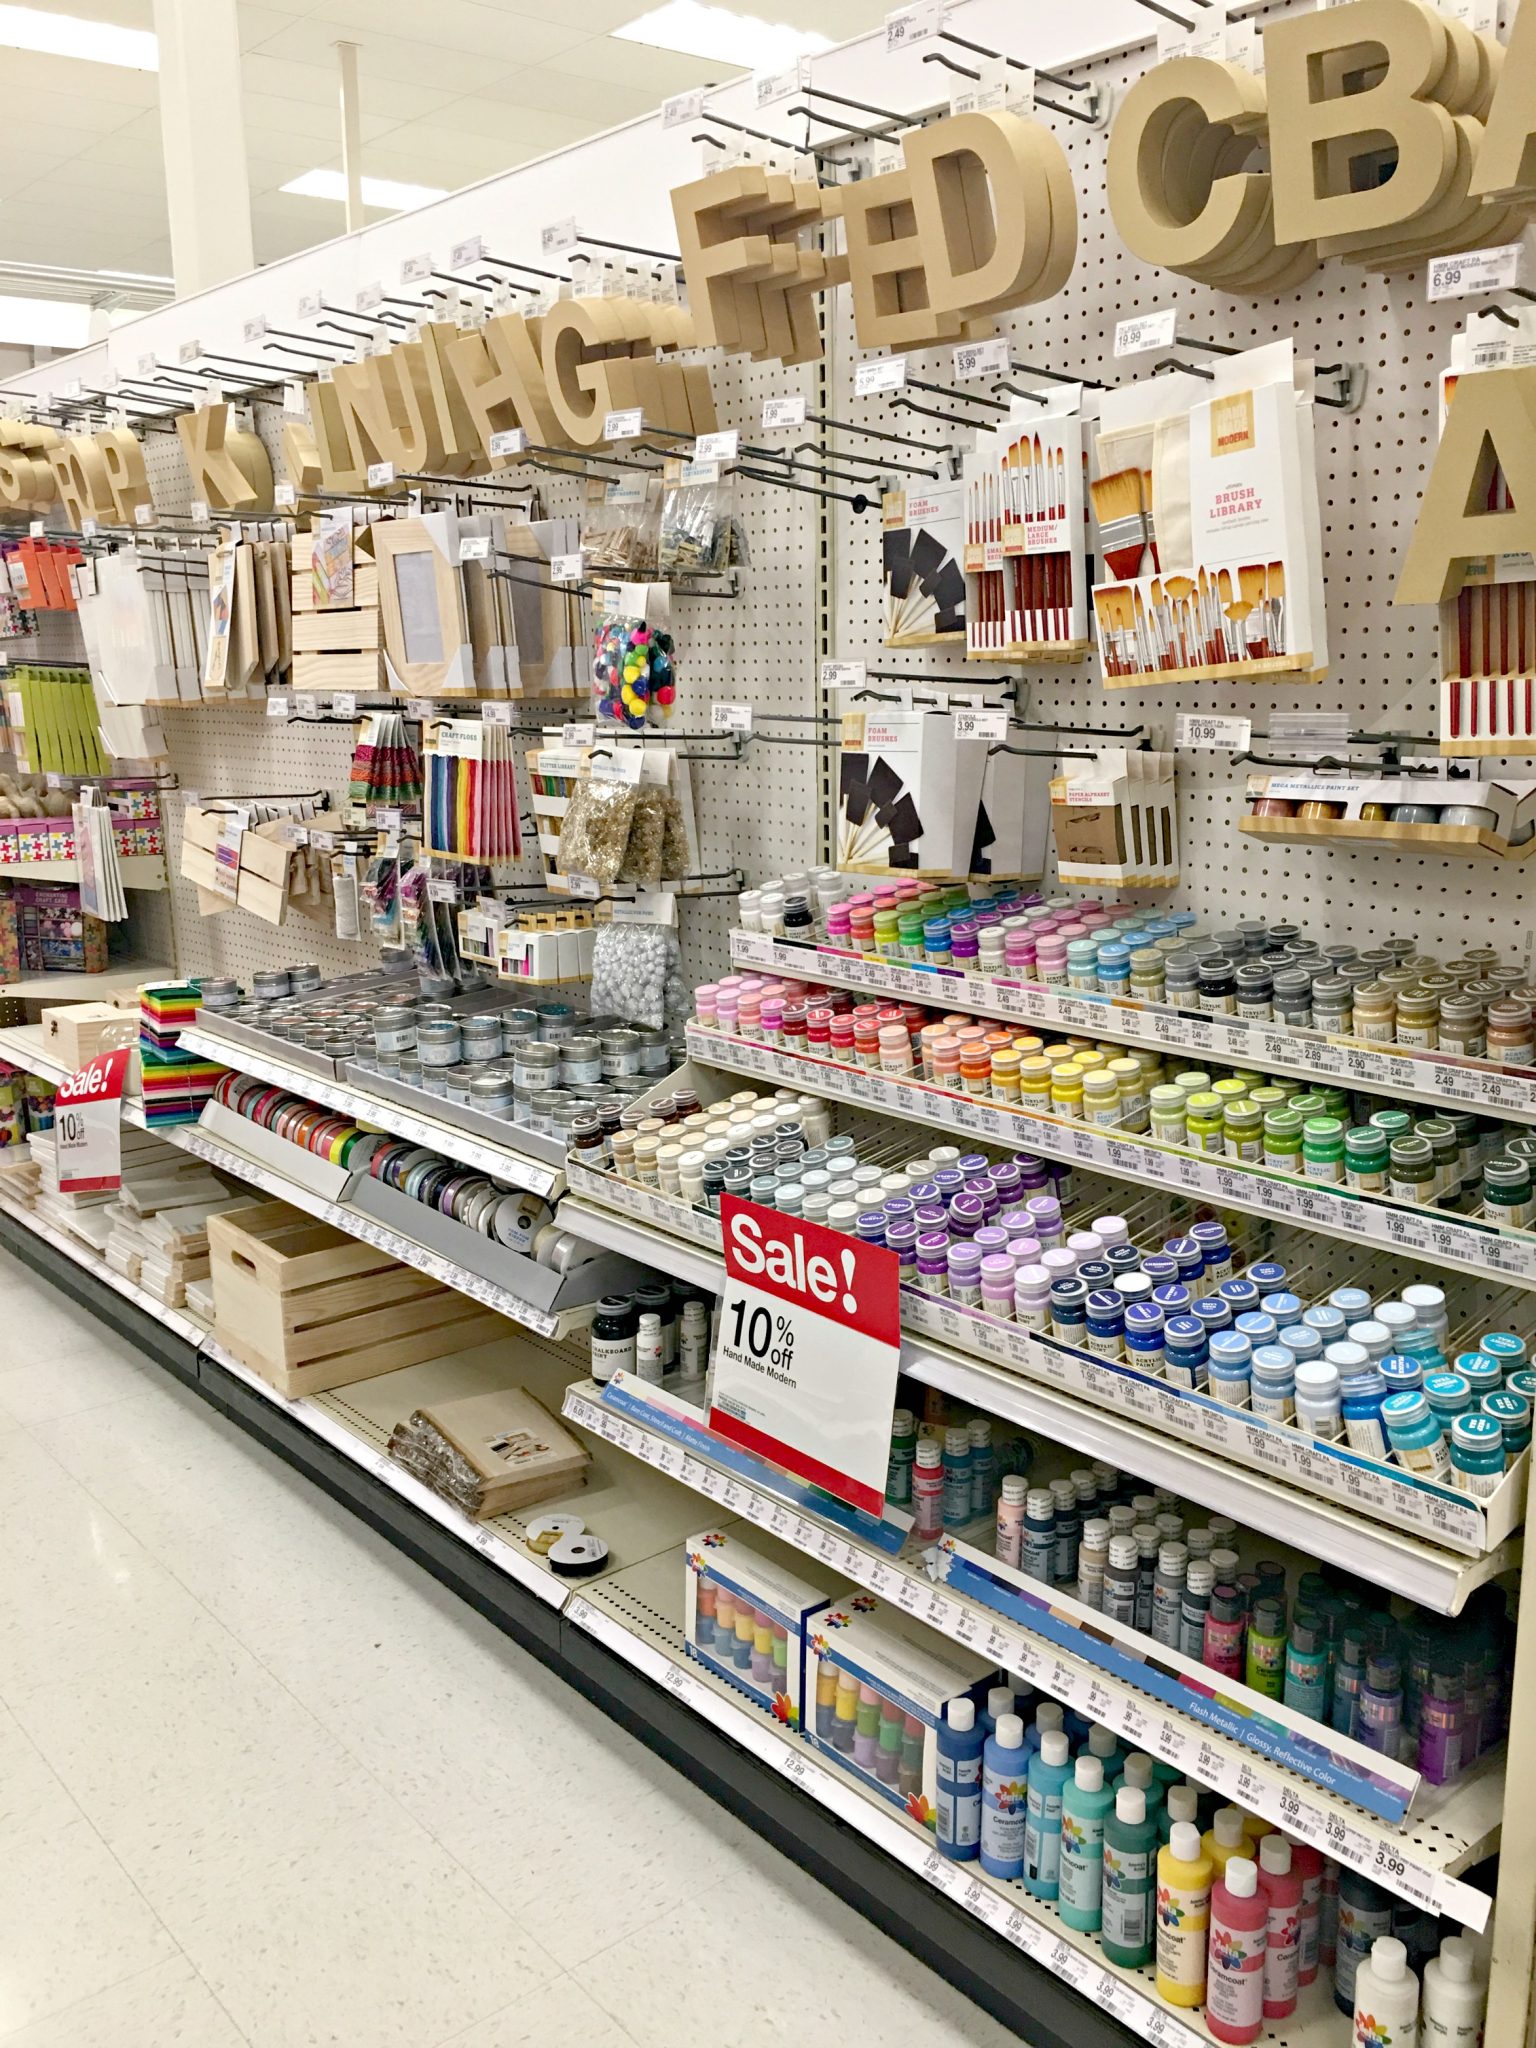
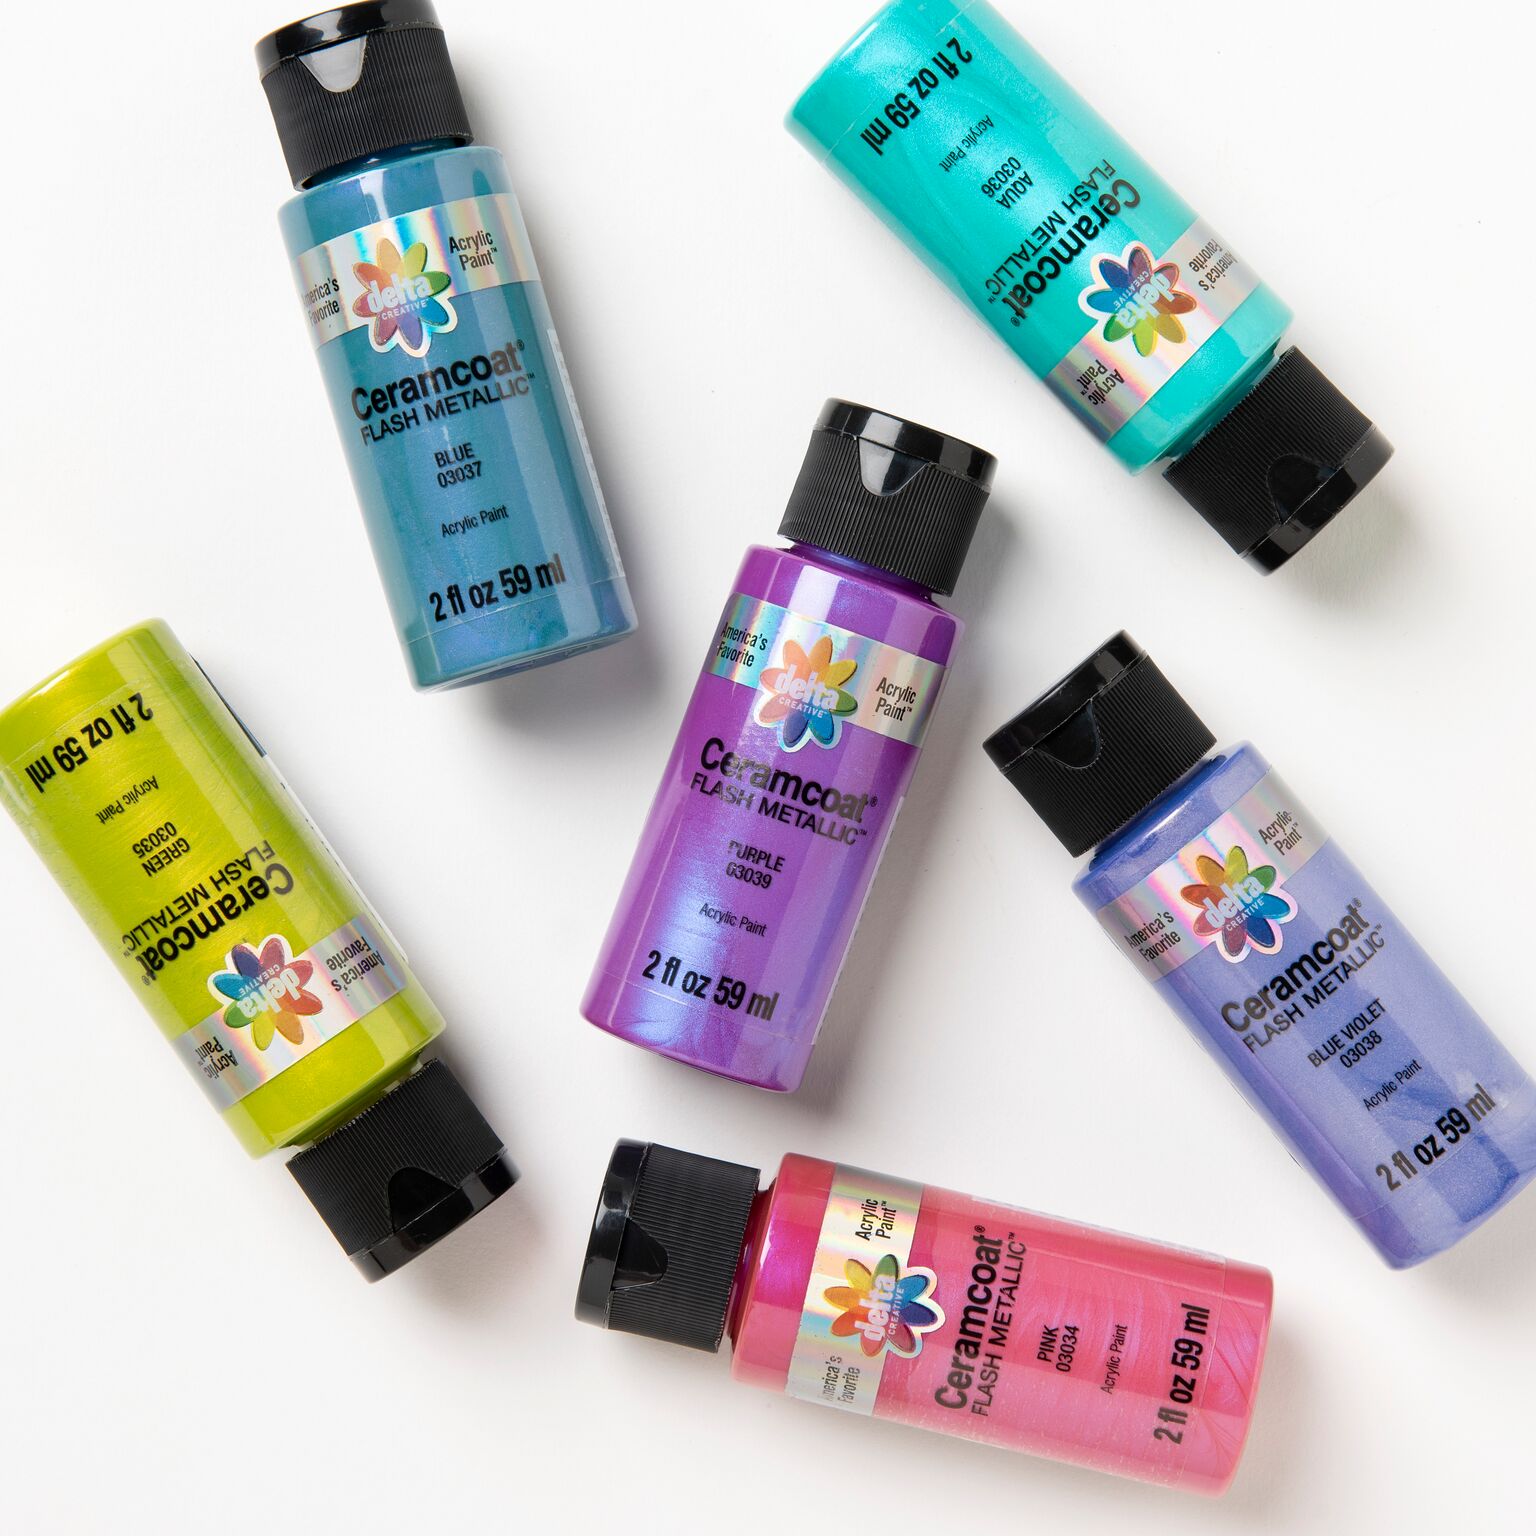
Best of all, it’s now in one of everyone’s favorite places! Find Delta Ceramcoat® Acrylic Paint at Target in 22 colors and six new Flash Metallic colors in the craft aisle or at Target.com. Although I didn’t use the Flash Metallics for this particular project, I love all six of the gorgeous glossy reflective colors and have my eye on them for another craft project soon!
Now, back to our bowl project! I picked up this gorgeous wooden serving bowl in the kitchenware section at my local Target for less than $20. The natural ash wood was so pretty that I didn’t want to cover it up with a base coat, so I decided to just add some decorative flowers on top. Here’s how:
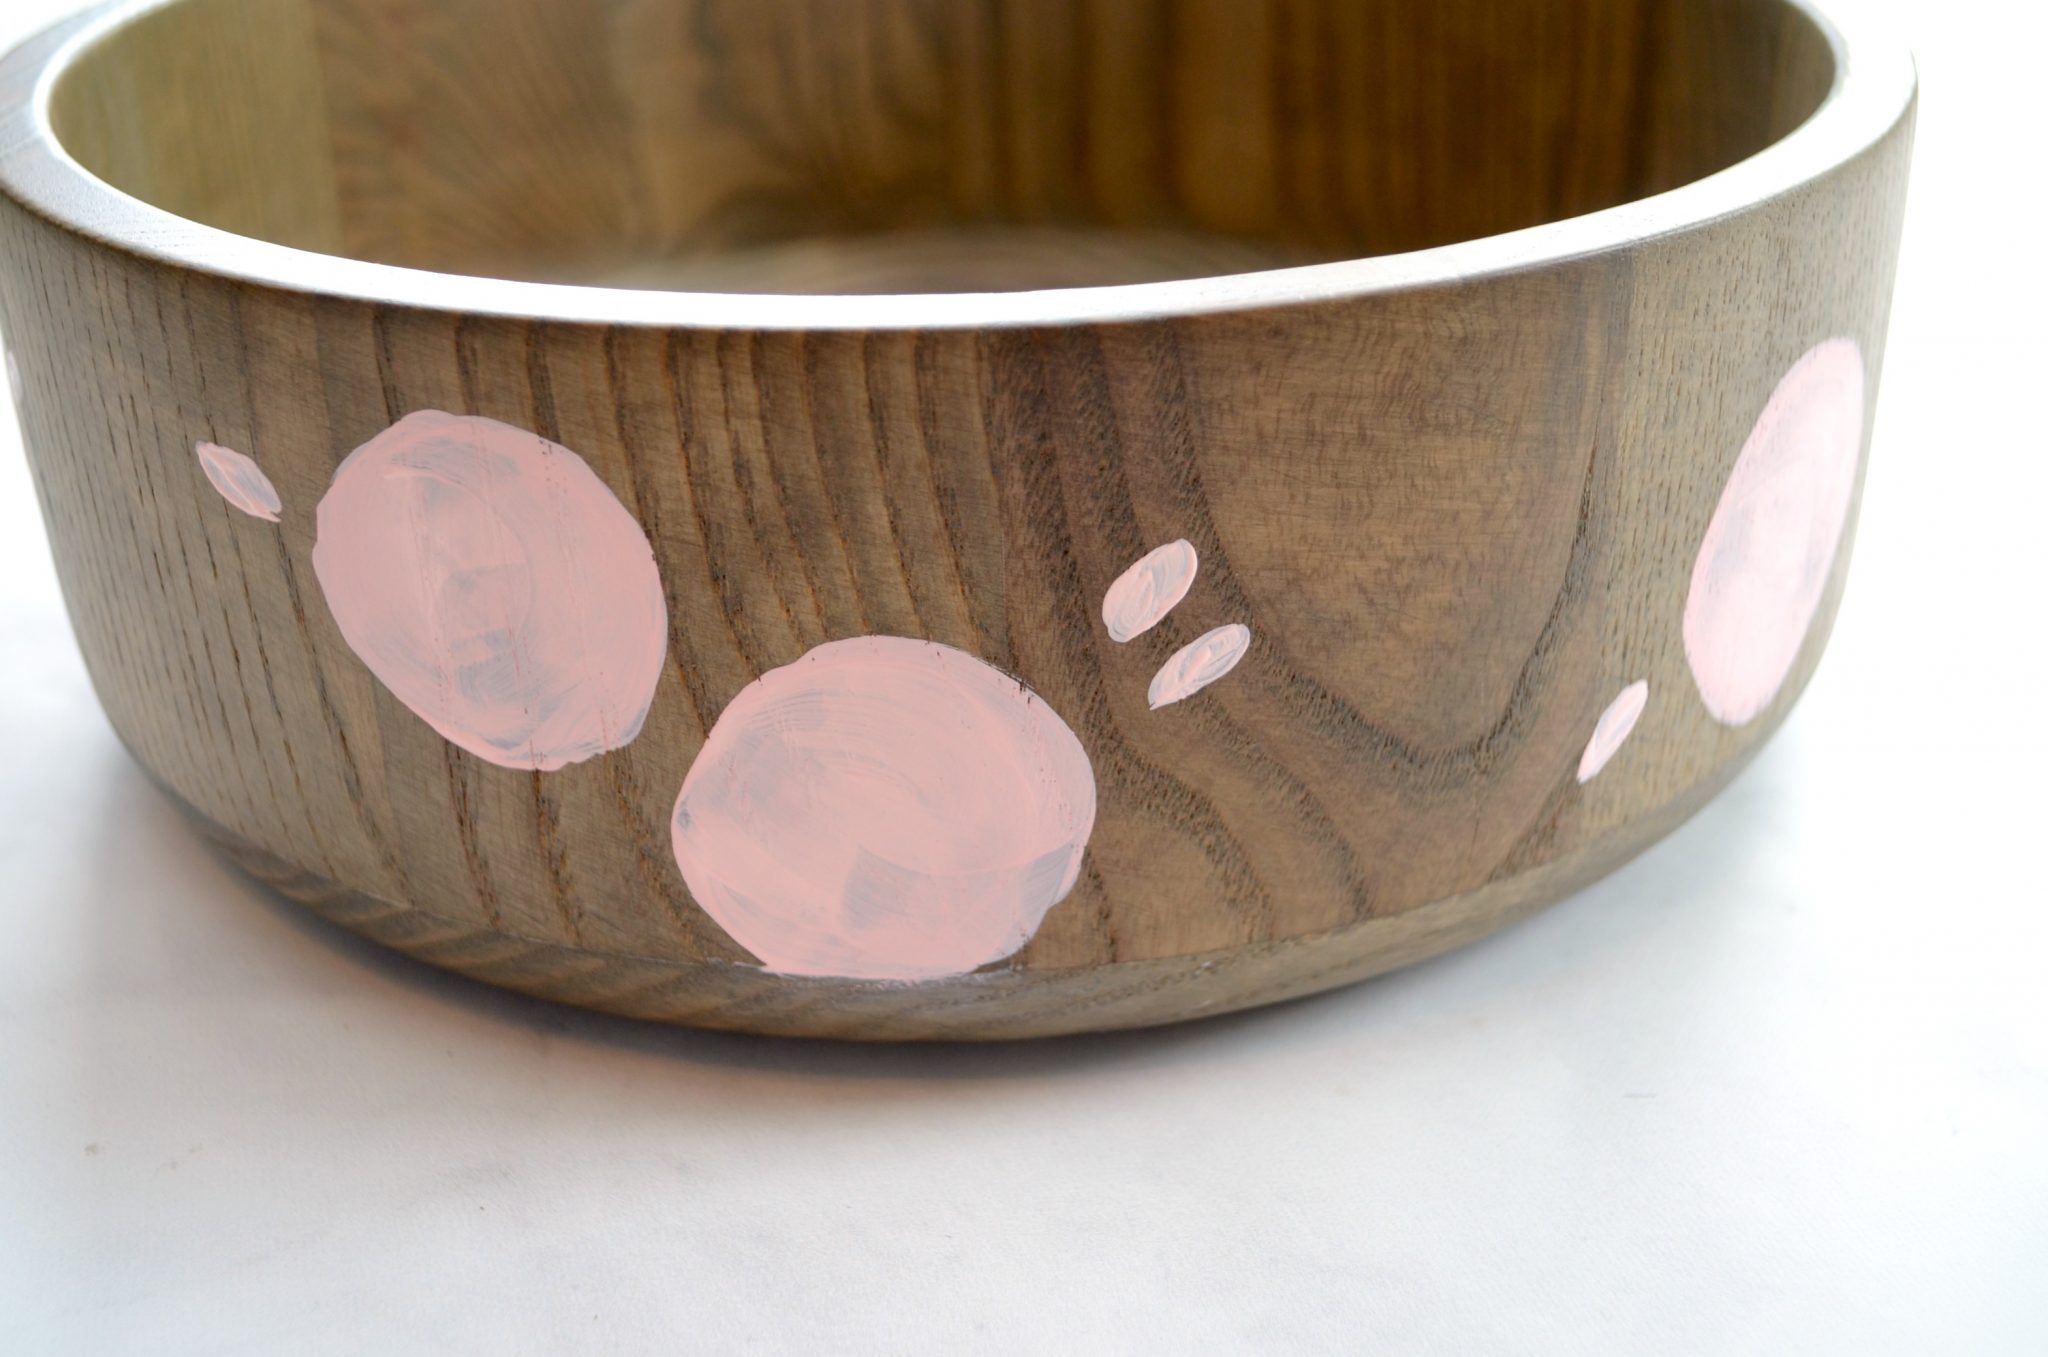
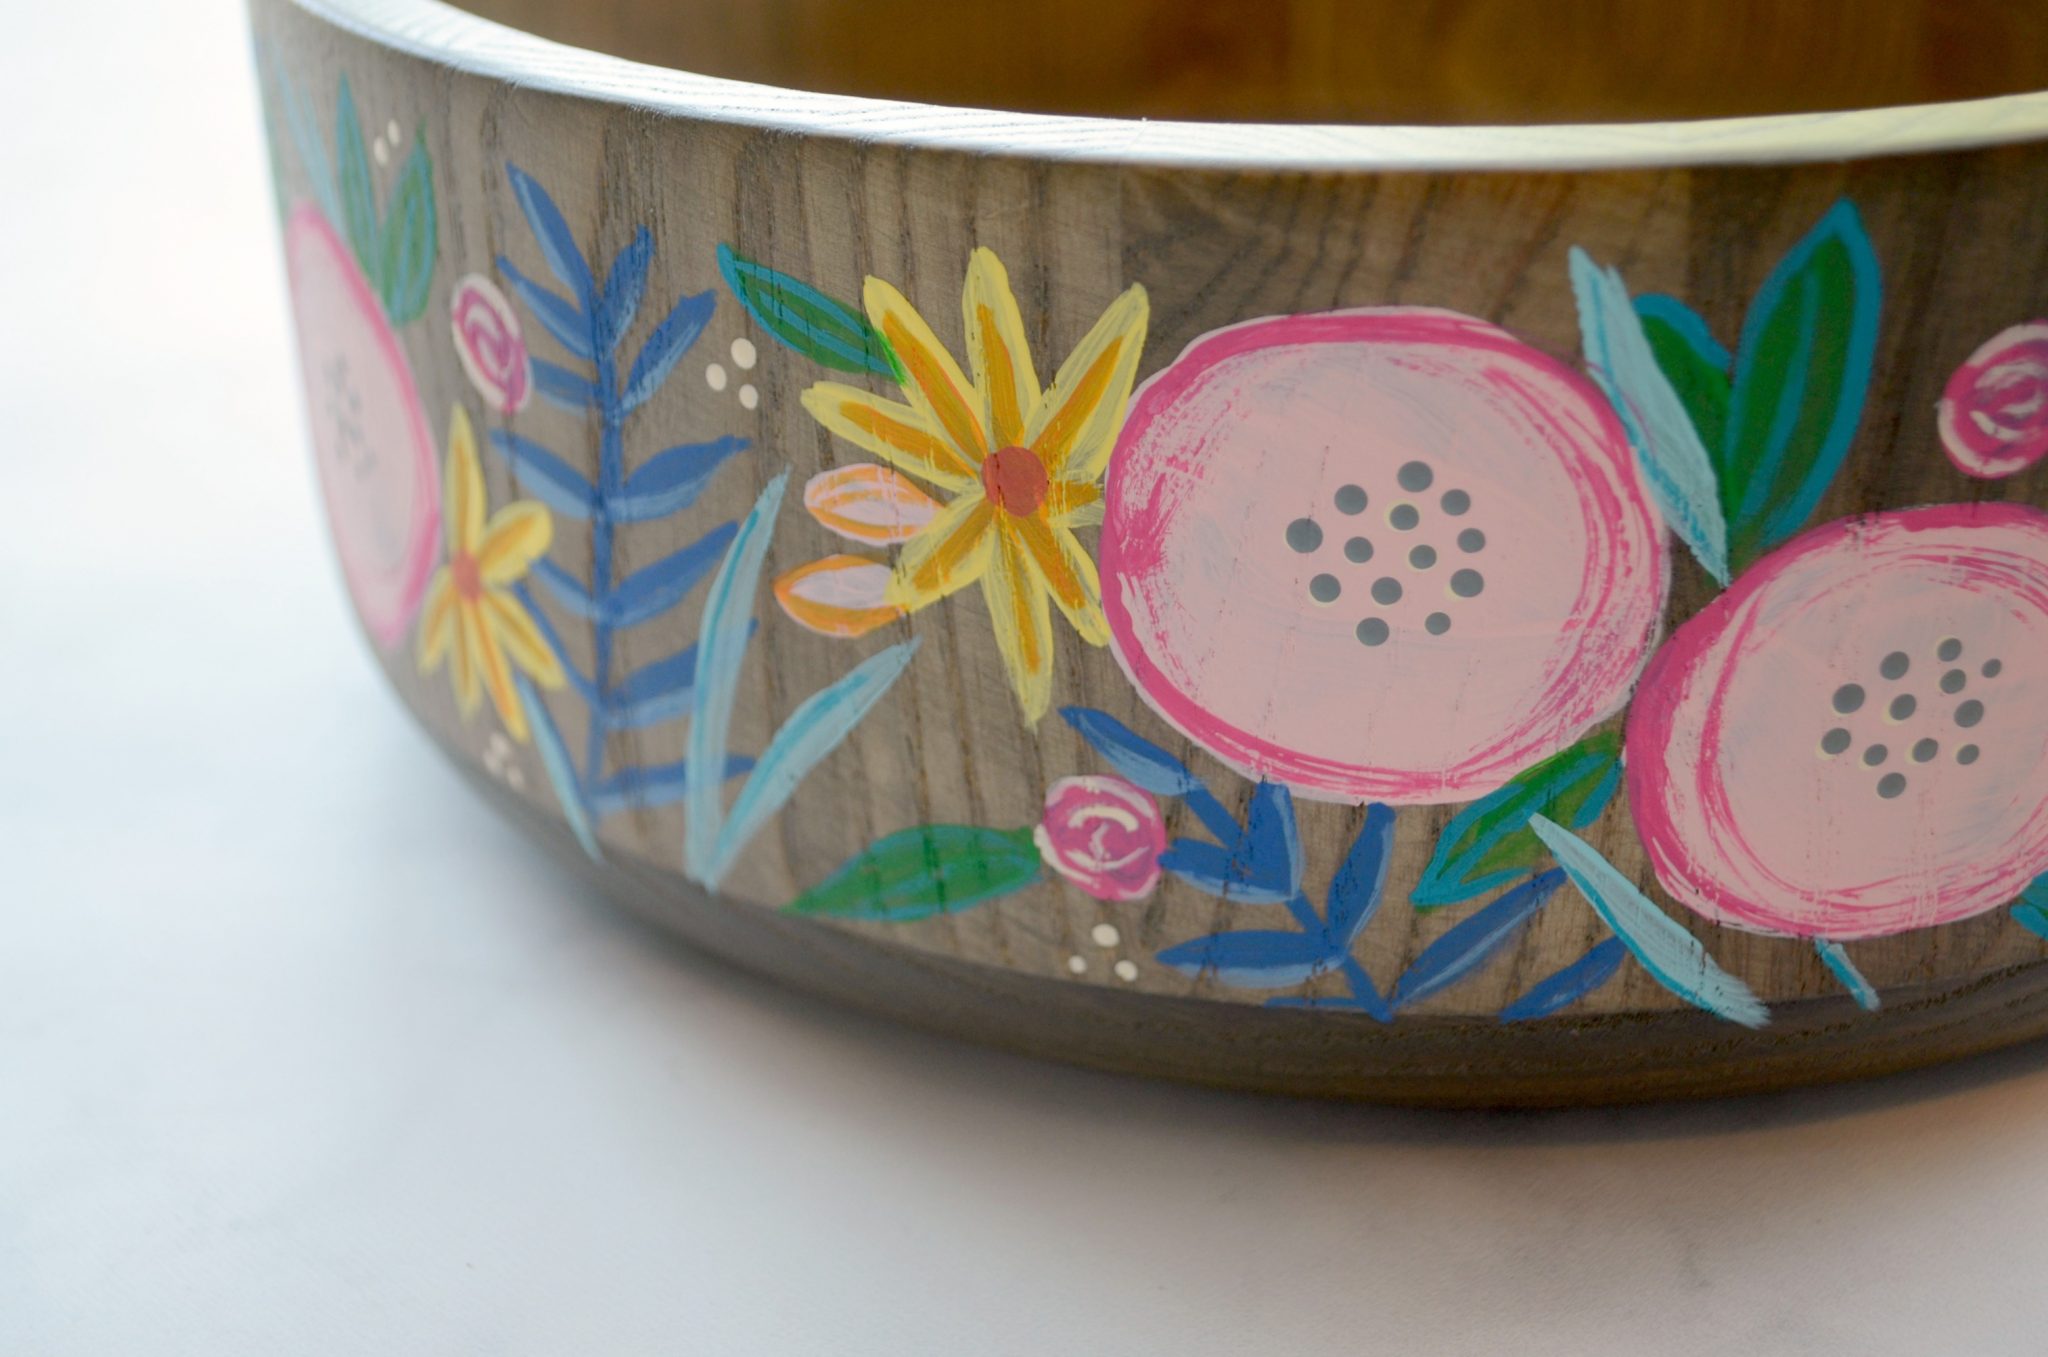
Step 1: Paint a series of large circles and small ovals around the sides of the bowl.
These circles will become your largest flowers in the design, while the ovals will be little buds. You can use any color you like; I chose Hydrangea Pink. I gave the circles two coats of paint since it was such a light color, but everything else I painted on the bowl only got one coat. You can place these flowers anywhere you choose. I did a pattern of two circles, a space, one circle, a space, and so on, repeating around the bowl.
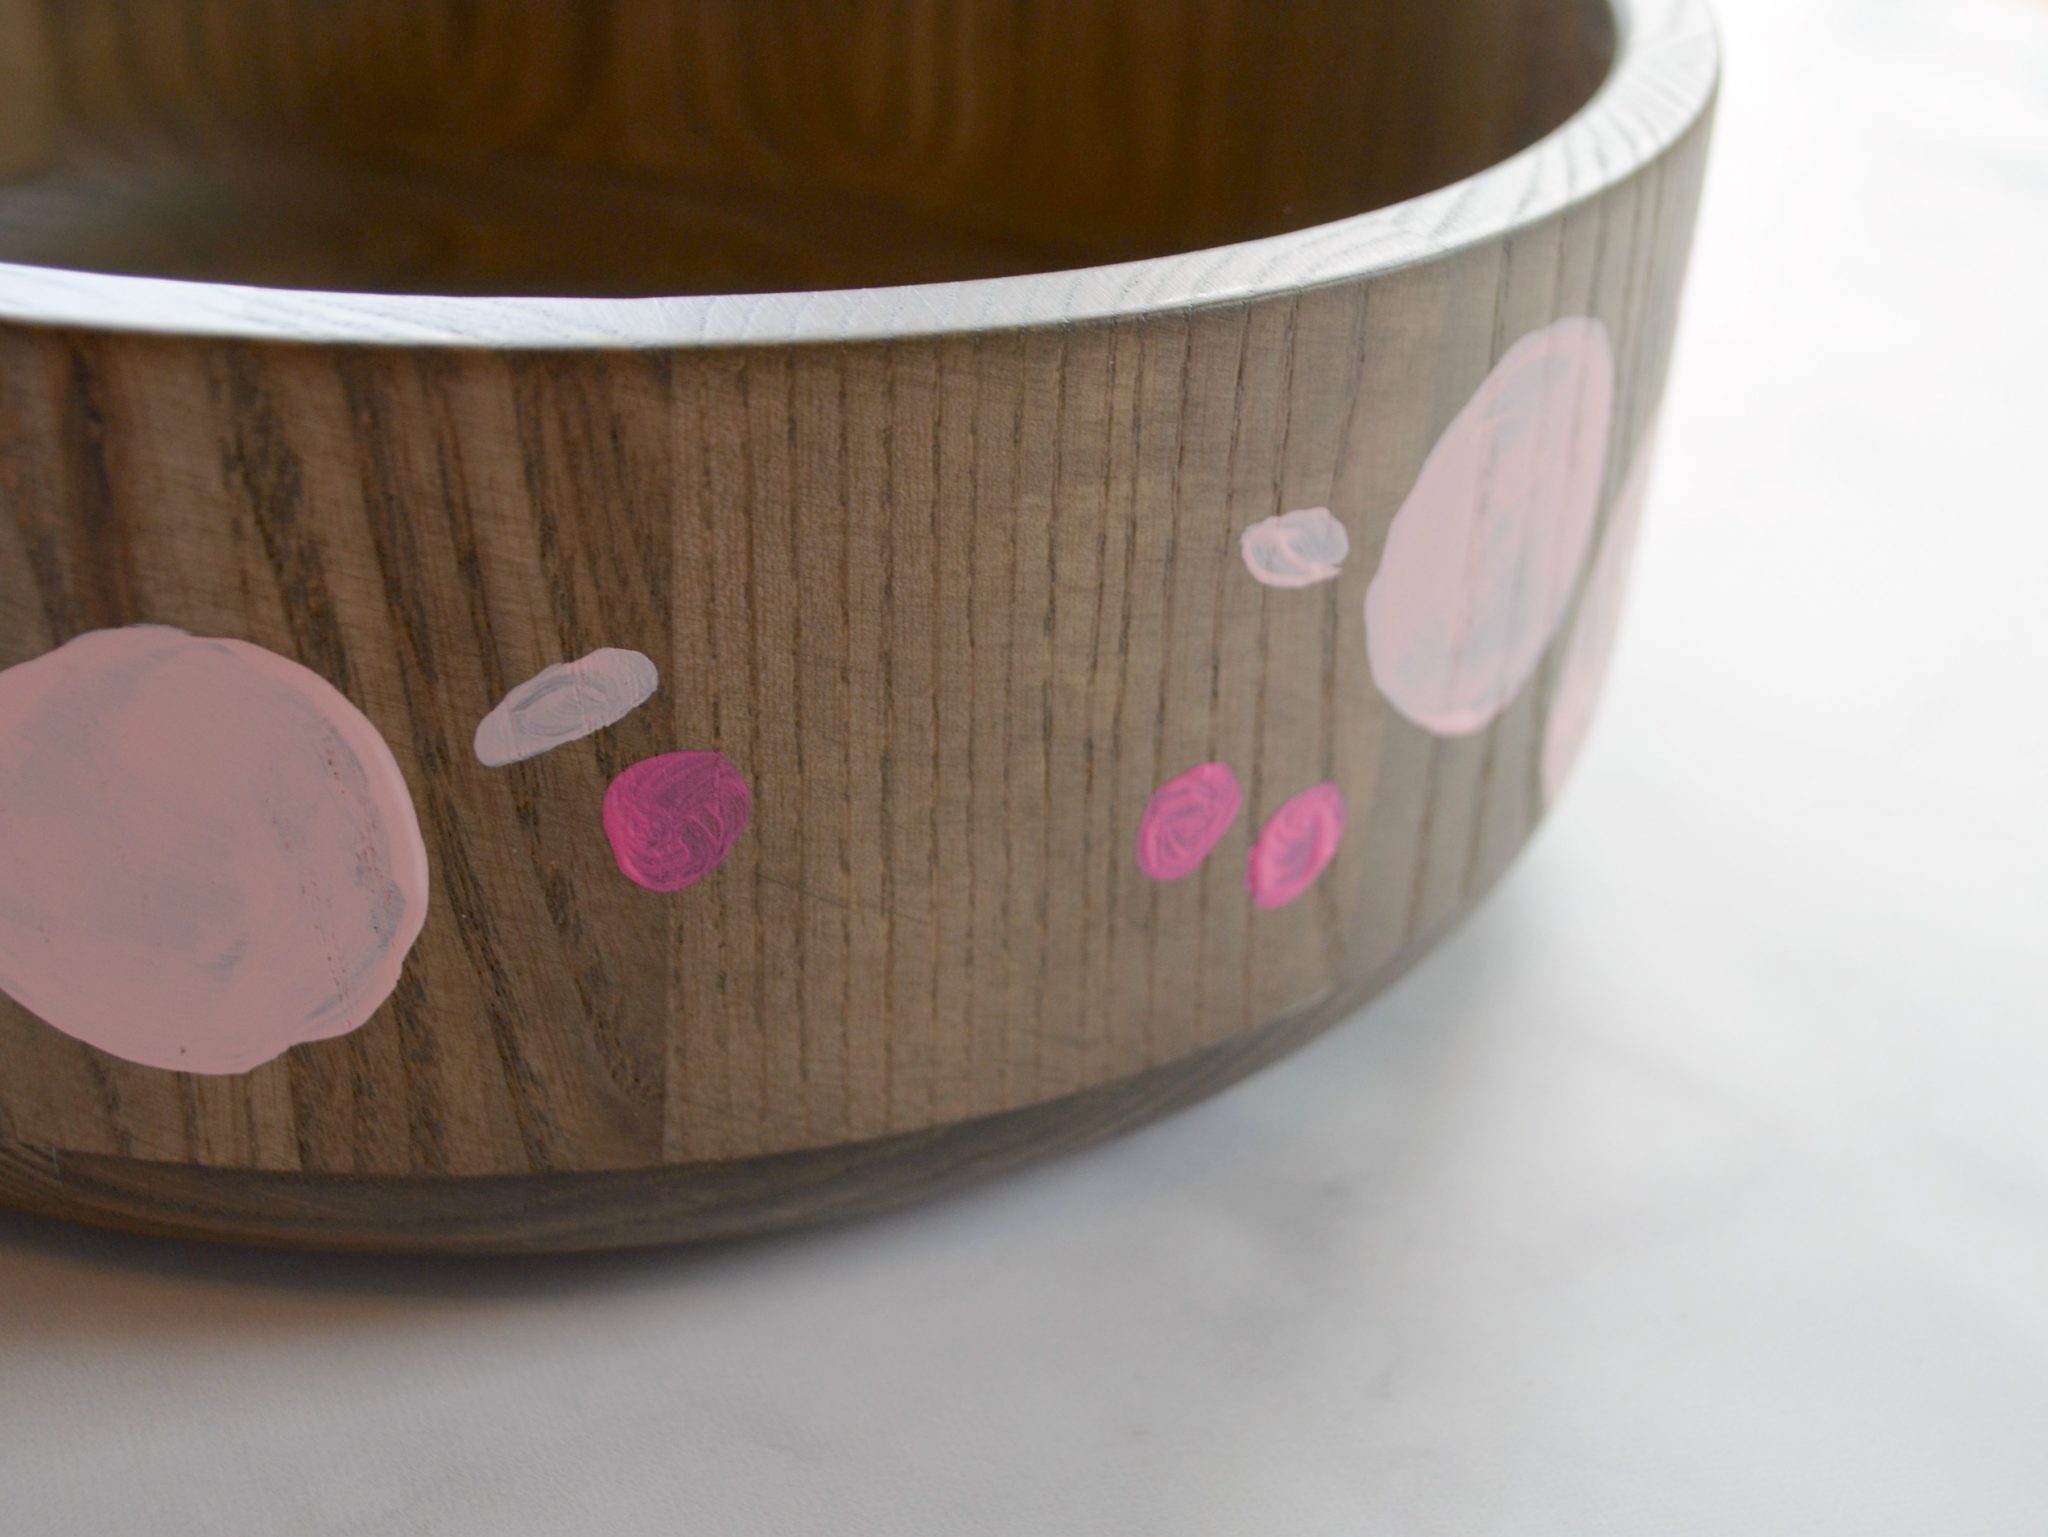
Step 2: Paint several small circles around each large flower.
I used Fuchsia for these little flowers and tried to alternate their heights around the edge of the bowl. Once again, there’s no right or wrong place to paint them. This floral design is meant to look very organic and hand crafted. Don’t get caught up in trying to create perfect shapes or exact placements.
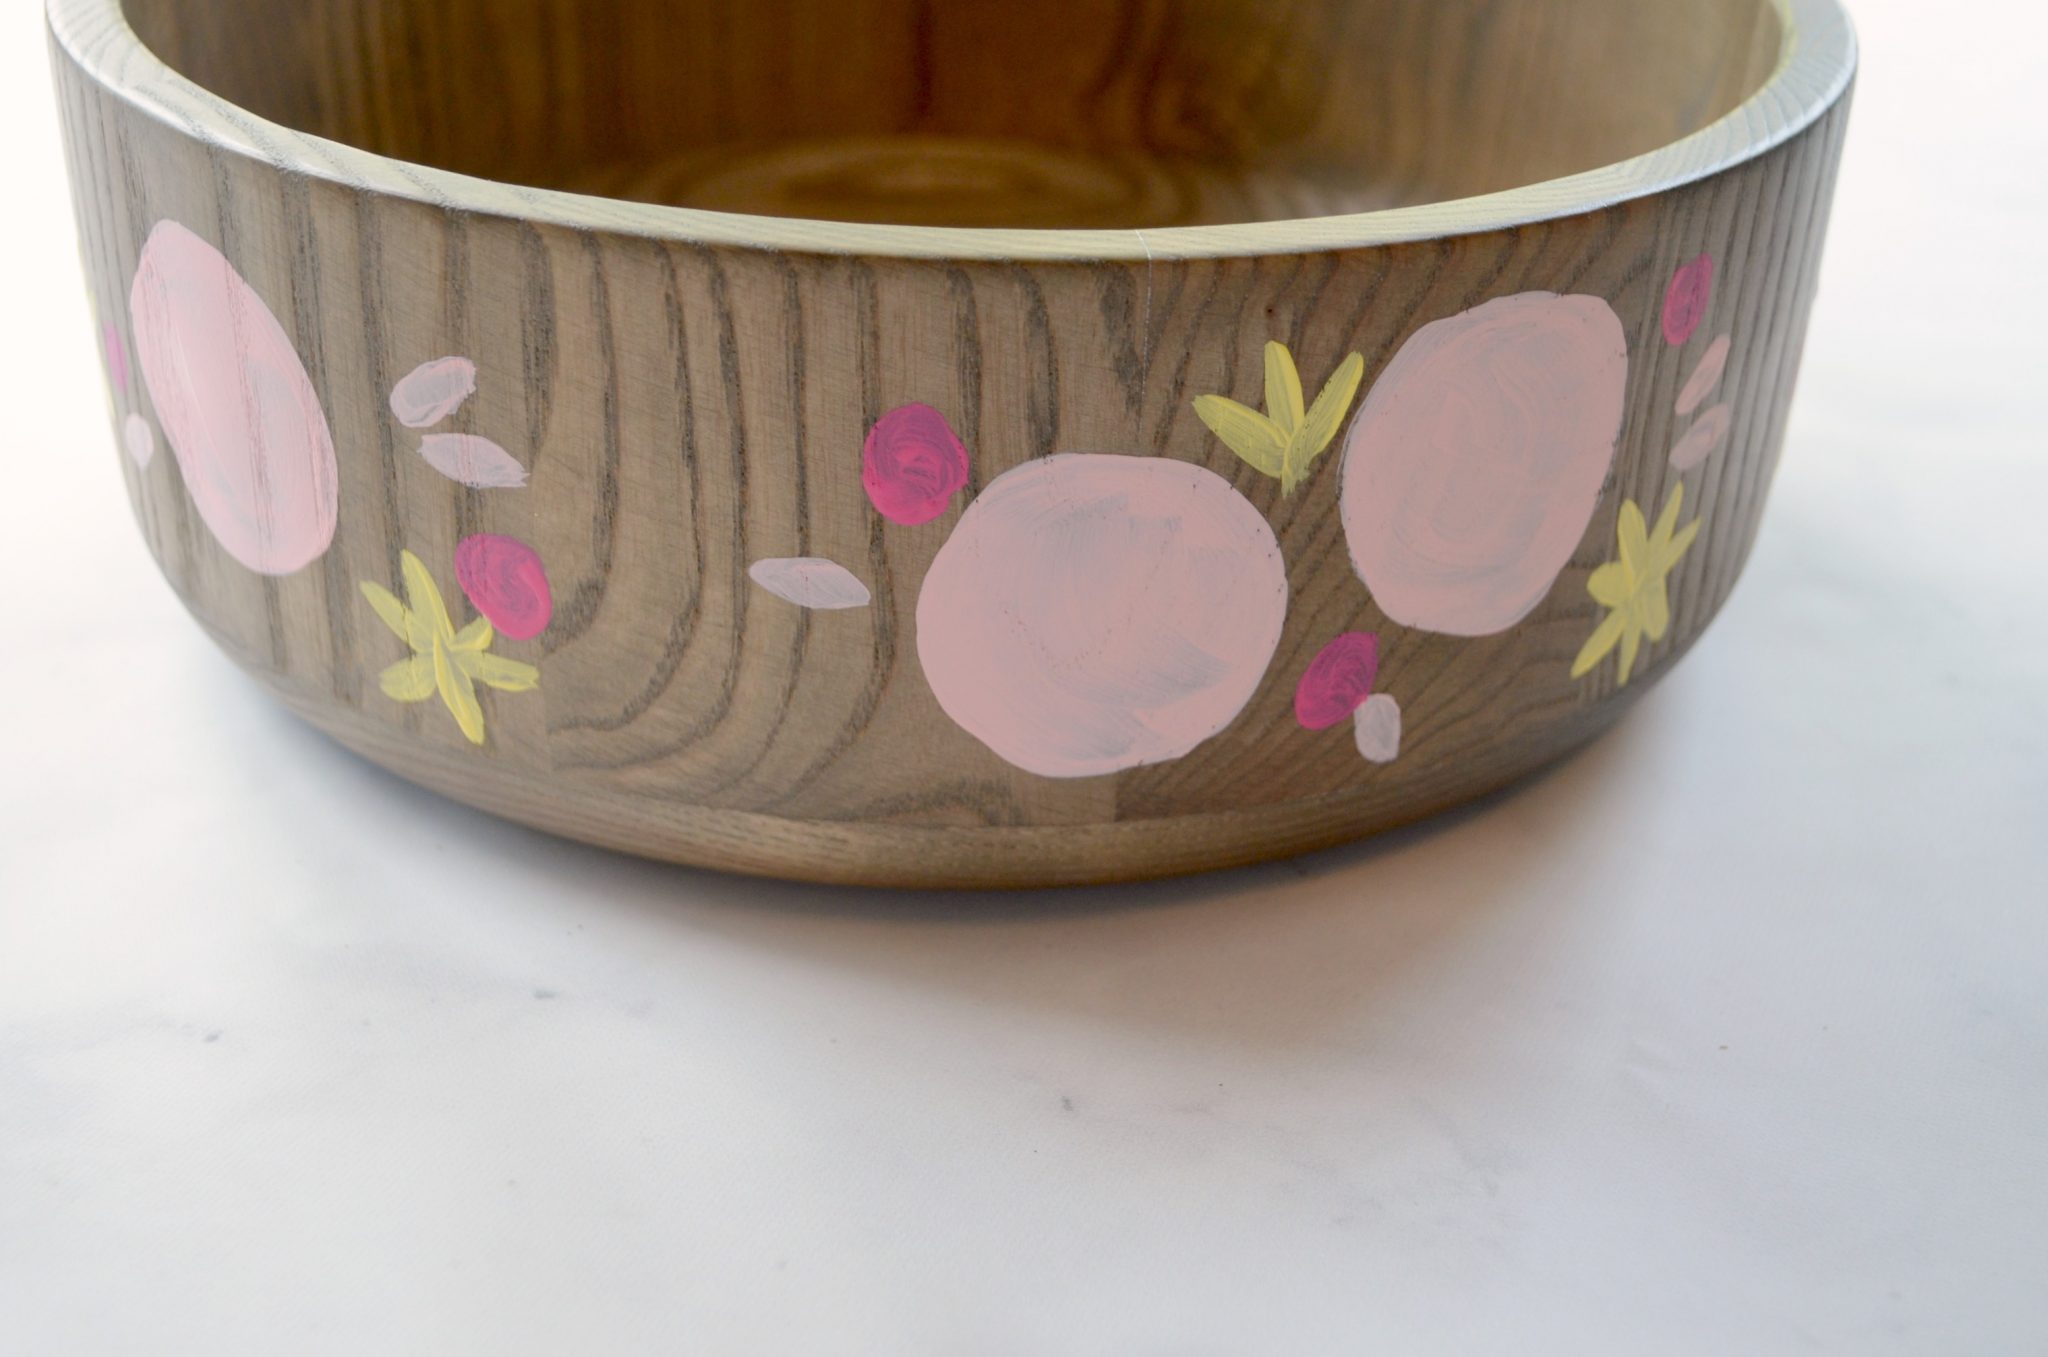
Step 3: Paint some simple petaled flowers around and between your other shapes.
I used Sunbright Yellow and a long, thin paintbrush. To create each petal, just make one short stroke with the brush, making sure that all of the strokes end at the same center point. Your flowers can have as few or as many petals as you choose to paint. They don’t all have to be the same…mine range from three to seven petals. If you’ve never painted this type of flower before, you can practice on a paper plate to get a feel for it before working directly on your bowl.
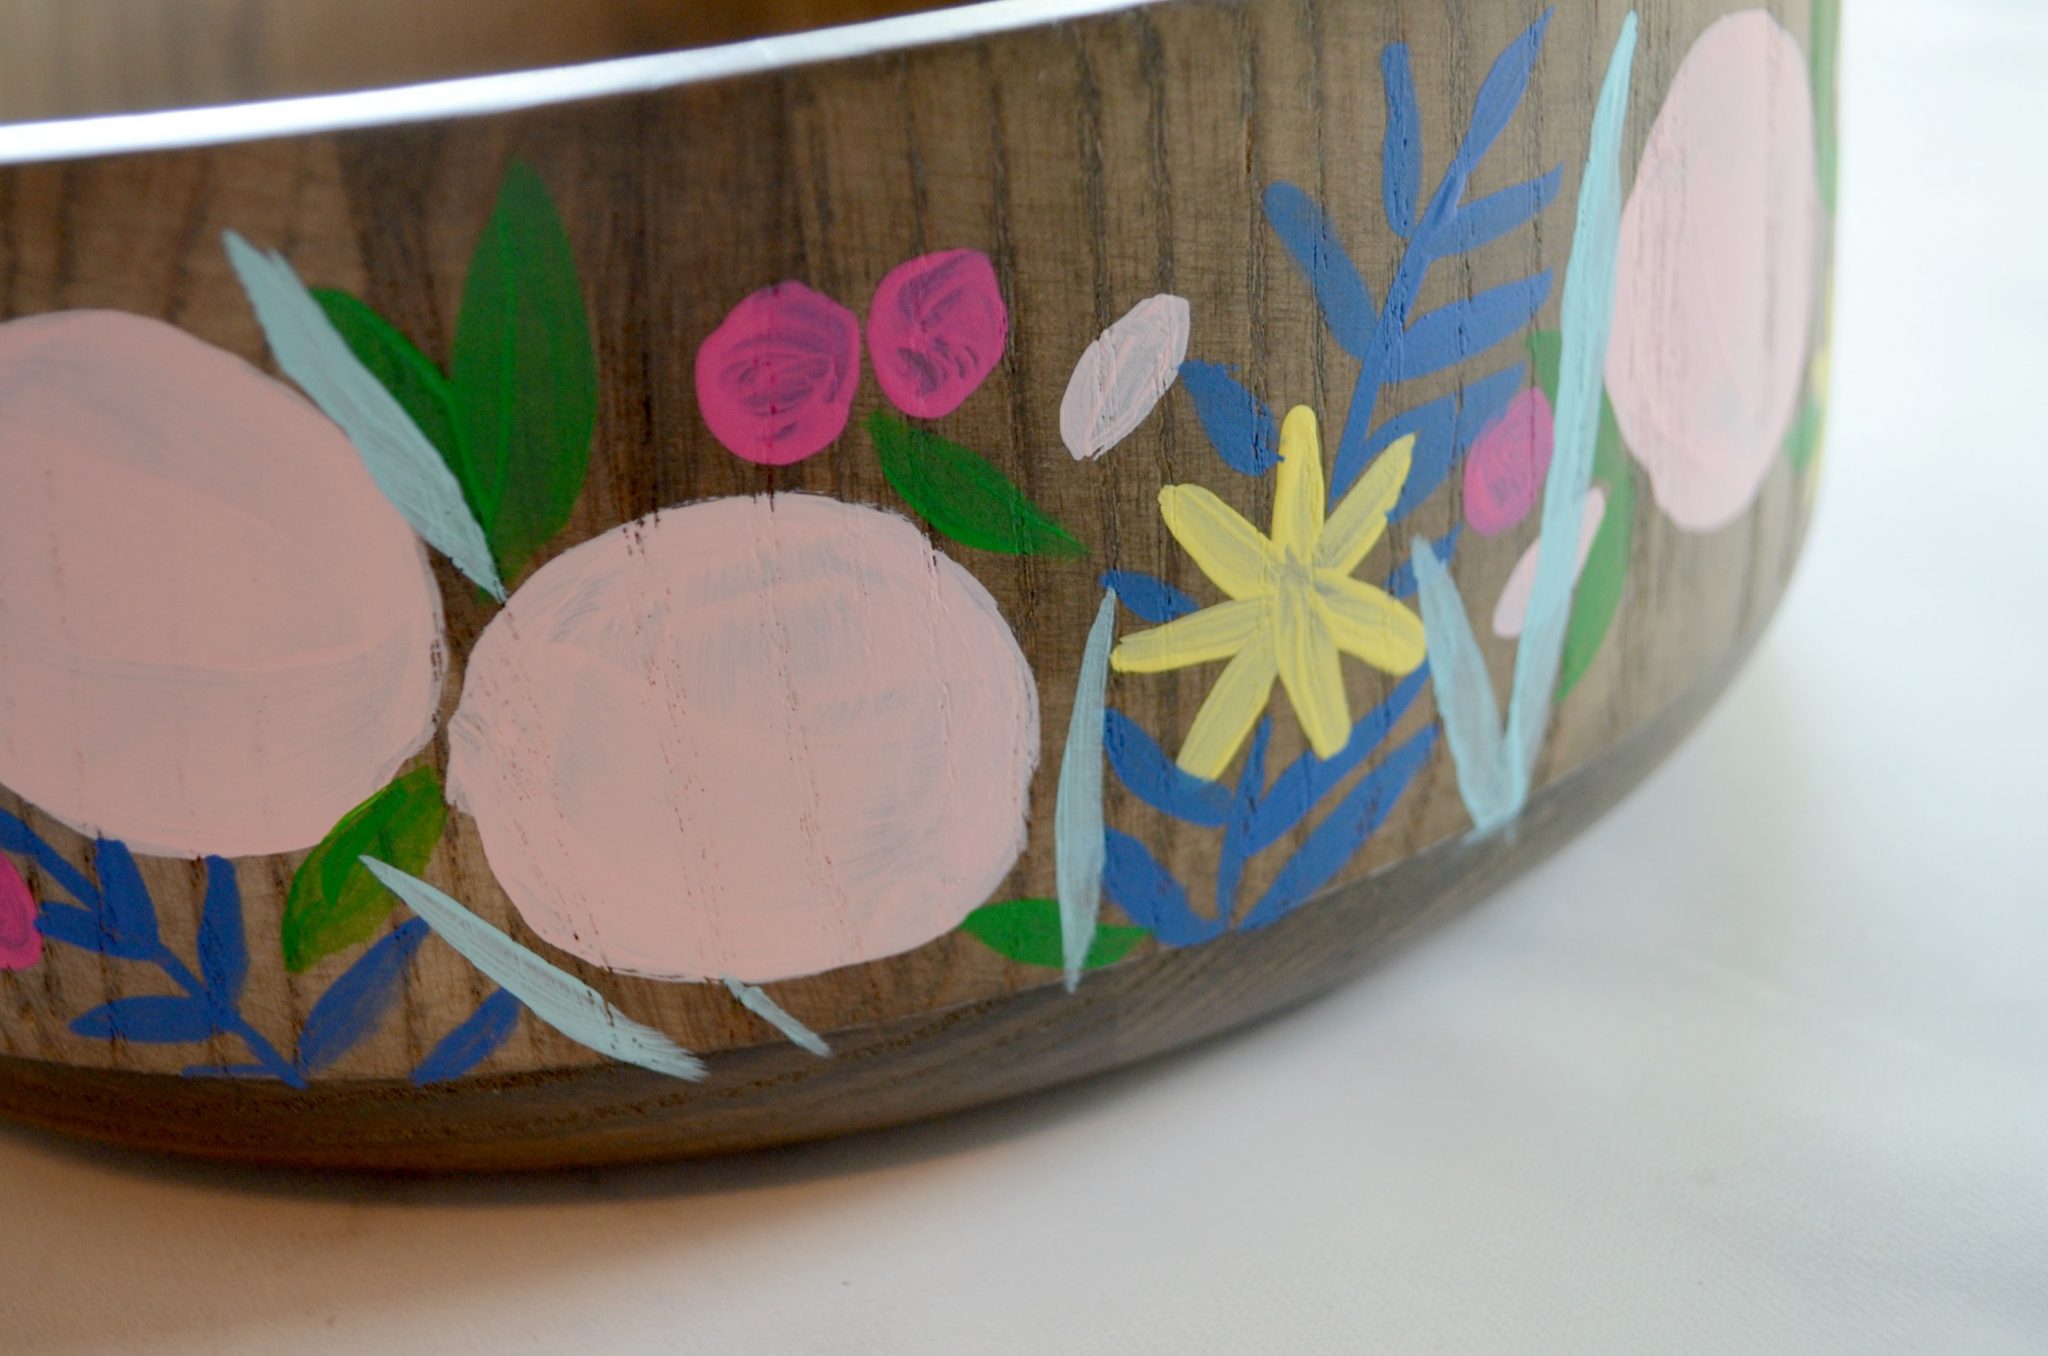
Step 4: Add leaves to your design to fill in some of the empty spaces.
I painted three different types of leaves using three unique colors.
Short Leaves: These were done in Jubilee Green. I started by touching my brush to a flower, then made an oval shape with a point at each end. Some of these leaves stood alone, while I painted others in groups of two or three. Once again, there’s no right or wrong placement, just try to make things look visually balanced.
Tall, Thin Leaves: I painted these with a small angled brush, which I loaded with Caribbean. These were mostly painted by making one long stroke of my brush. Some of these leaves went all the way from the bottom of the bowl to the top of my design, while others were less than half that height. I allowed some of these leaves to overlap other flowers and leaves to add perspective.
Leafy Branches: These leaves started with one long stroke of a very thin brush to create the stem. Then, I painted leaf shapes going down the length of the stem in a “V” pattern using Blue Bayou paint.
Step 5: Add highlights, outlines, & details.
Now, it’s time to go back and add the little details that transform our shapes into flowers and leaves. You can use your favorite combination of colors and any details you can think of. Here’s specifics about what I did to each of my shapes:
Large Circle Flowers: Outline with a very thin liner brush in Fuchsia paint. Add a series of grey dots to the centers. To make the dots, I dipped the handle of my paint brush into the paint and touched the tip to the bowl surface.
Small Pink Buds: Outline with a very thin liner brush and Pumpkin paint. I added an extra line off to one side of the center to indicate separate petals.
Small Fuchsia Roses: Use a very thin liner brush to add short curving lines in Antique White. This will create the suggestion of petals.
Yellow Petal Flowers: With Pumpkin paint and a very thin liner brush, make a line in the center of each petal that starts in the center and stops short of the petal’s top. Then, paint a circular center using Deep Sea Coral.
Short Green Leaves: Outline each leaf and draw a line through the center using a thin liner brush. I chose to use Velvet Teal, but you could stick with a green shade instead if you prefer.
Tall Thin Leaves: I accented these with just one thin line down the left side of the leaf done in Velvet Teal.
Leafy Branches: The highlights on these are short lines on the bottom of each leaf, painted with Caribbean.
The final details I added were groups of 2-3 dots in Antique White to fill in empty spaces. I created these by dipping the handle of my brush into the paint, then touching it to the side of the bowl.
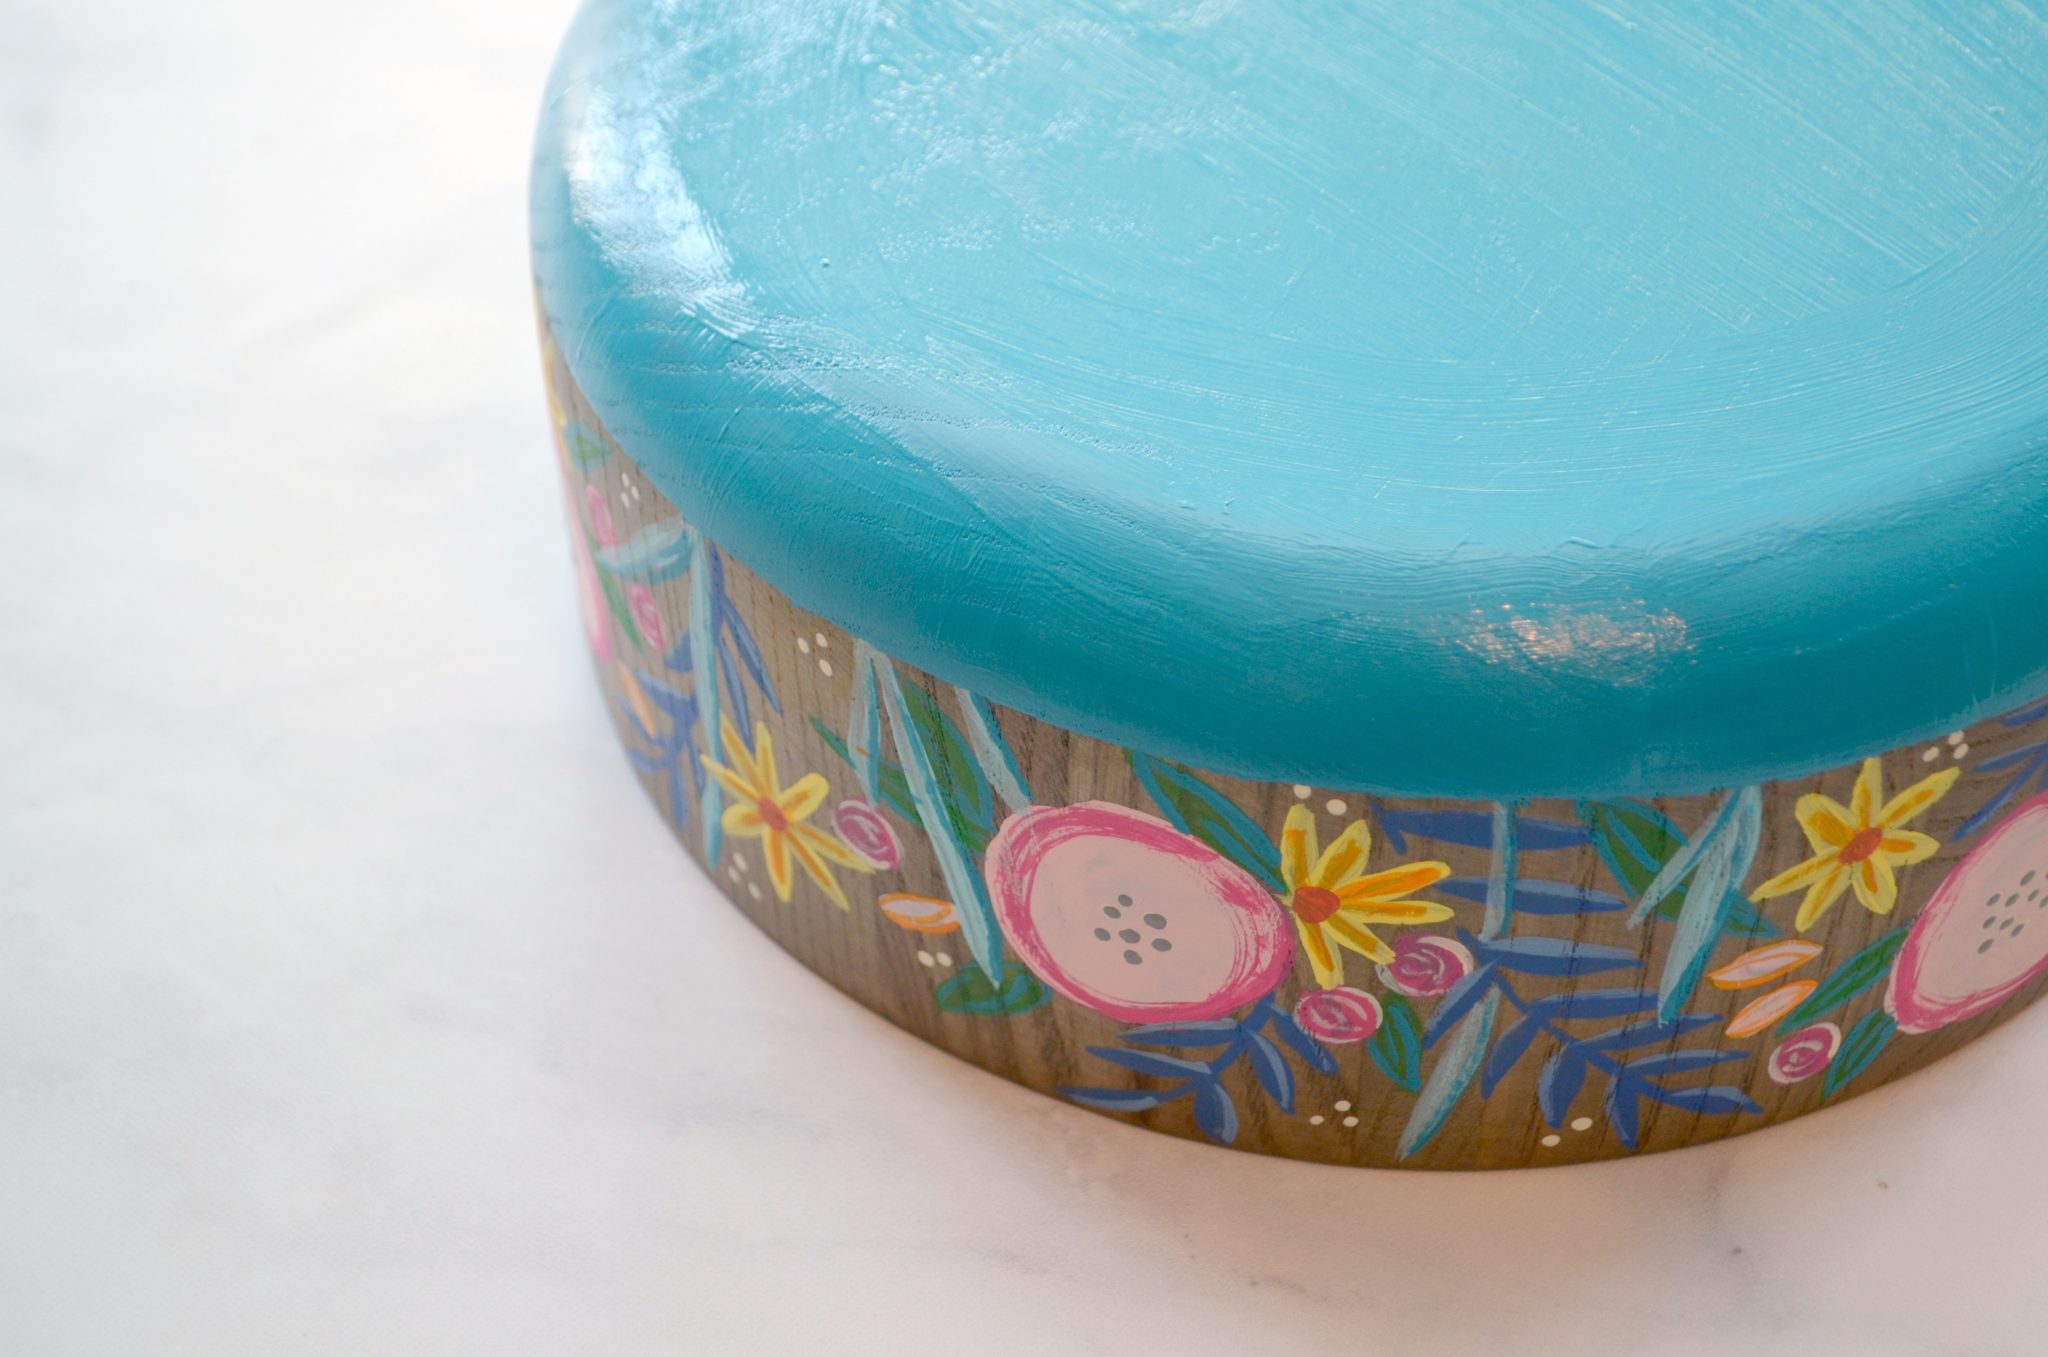
Step 6: Paint the bottom of the bowl.
There was a very clear line on the bowl where the bottom wood stops and the sides begin. I painted that entire bottom section Velvet Teal because it was the best match for the color scheme of teal and grey I have in my kitchen. However, as you can see, the design uses ten different colors, so any one of them would coordinate beautifully, so you could use whichever one you like best!
Step 7 {optional}: Seal with Mod Podge.
Depending on how you’ll be using your bowl, you may want to seal your design to protect it. If it’s going to serve a purely decorative purpose, it may be fine as is, but if you plan on actually using it with any regularity, I recommend applying a coat of Mod Podge {which can also be found at Target}. You can choose from Gloss, Matte, or Dishwasher Safe, depending on the look you want and whether or not you want to be able to clean it with a damp cloth rather than just dusting it with a dry one.
Now, your bowl is ready to use! It looks beautiful as is, to sit on a shelf or table. Fill it with real or faux fruit, decorative accents, or anything else you like! Because the painted surface is on the exterior only, you can safely use the inside of the bowl for serving food, but I recommend sticking to something like fruit or candy that won’t require extensive cleaning instead of a messy dish like mac and cheese!
What do you think? Aren’t these pretty florals easy to create once you start seeing them as just basic lines and shapes? If you don’t believe me, just take a look at this quick little video:
And the best thing is that you can grab all your supplies in one trip to Target! Nothing like an excuse to run there and shop, right? Hope you’re feeling inspired, and I’d love to see what you create with these Delta paints!
PS. If you like it, don’t forget to put a Pin on it!
Be sure to check out these other projects made by my fellow Plaid Creators for more inspiration using Delta paints!


2 Comments