
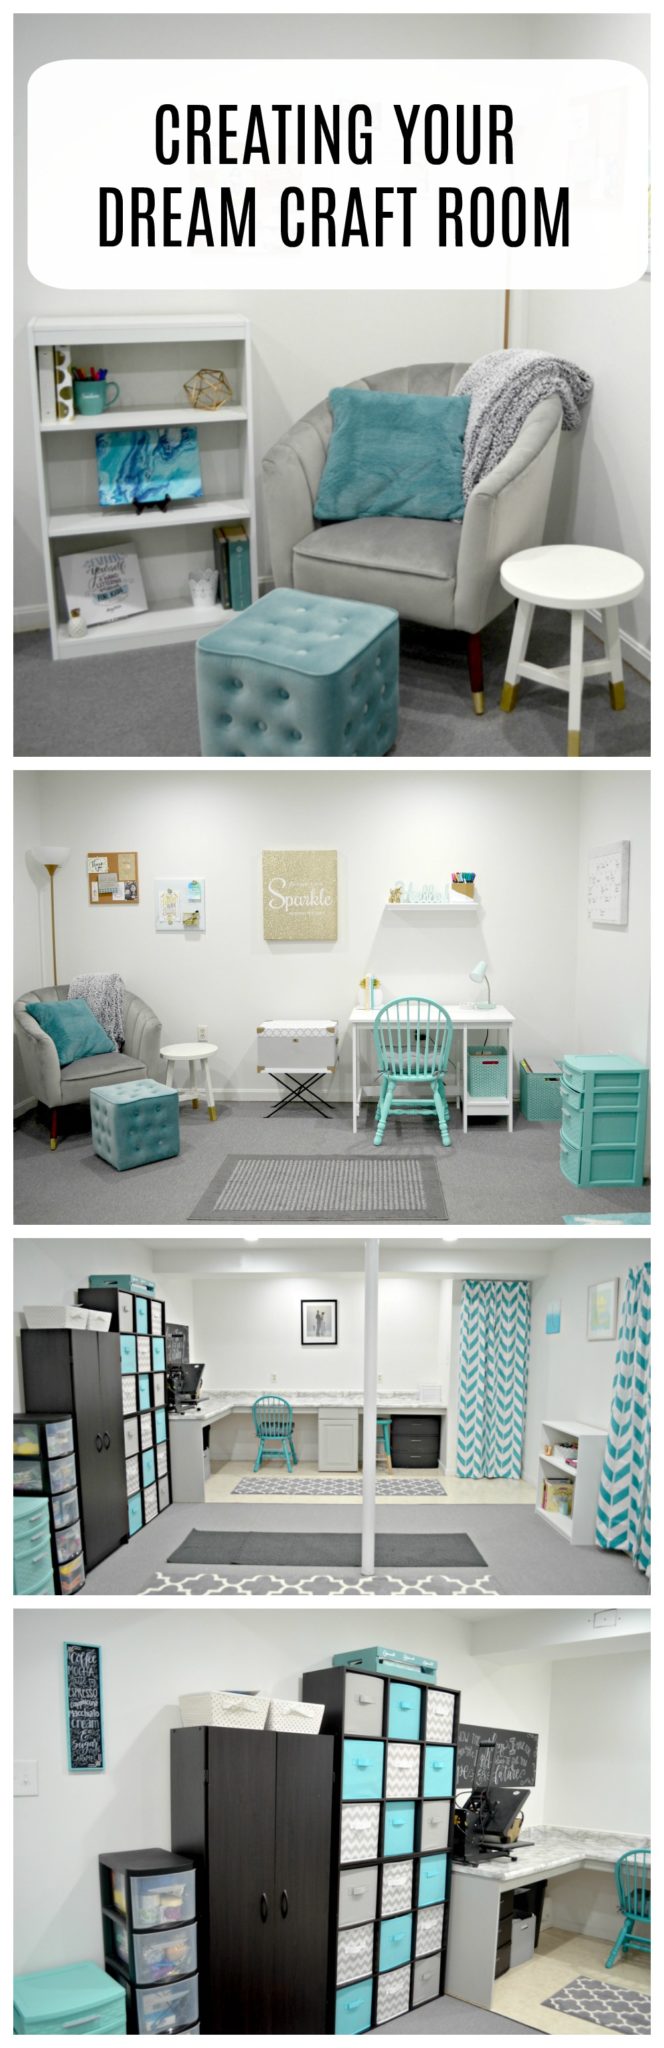
Creating a Crafting Space You Love: My Dream Craft Room
Friends, in all the time I’ve been blogging, I don’t know if I have ever been this excited to share a project with you! Maybe that’s because it’s literally the biggest project I’ve ever taken on, or maybe it’s because I couldn’t be more thrilled with the results. The project is…creating my dream craft room!
Before I share all the photos and info with you, let me give you a little bit of background information. Three years ago, when we moved to our current house, one of the huge attractions was that it had a very large, open, finished room that I could turn into my office and crafting space. I set it up the best I could at the time, but even at its neatest, it had multiple problems, the first and foremost being it was dark! There were only four small overhead lights for the whole space, which made it difficult to create and impossible for good photography. I didn’t even want to be down there any longer than necessary, let alone see it as an inspiring place to work. As a result, over time it turned into a dumping ground. Literally.
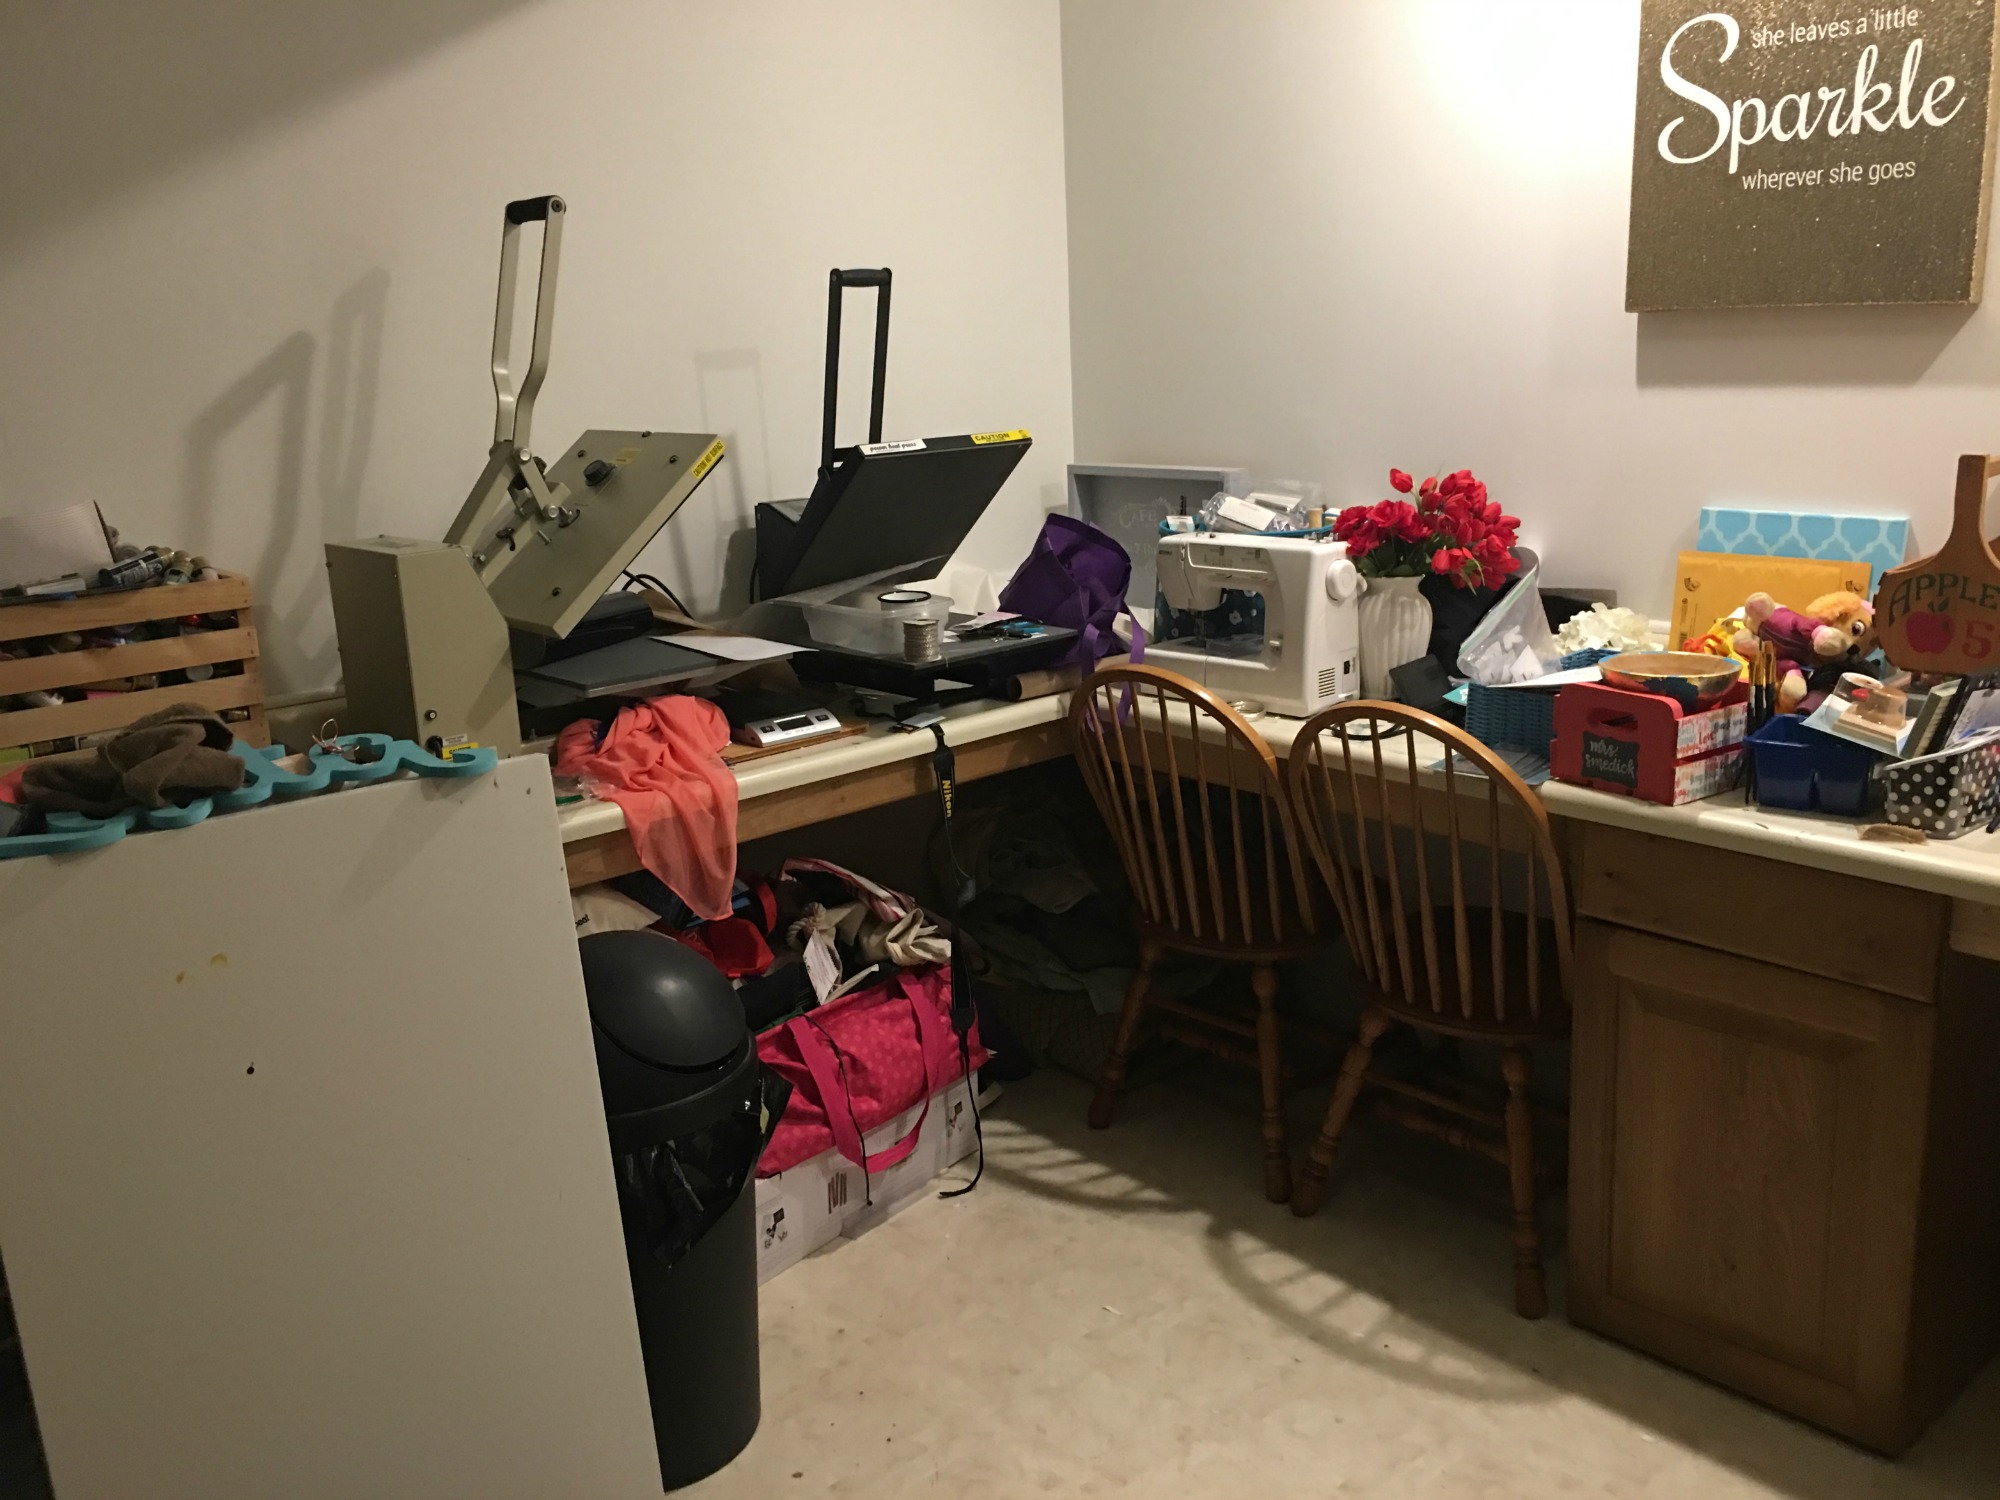
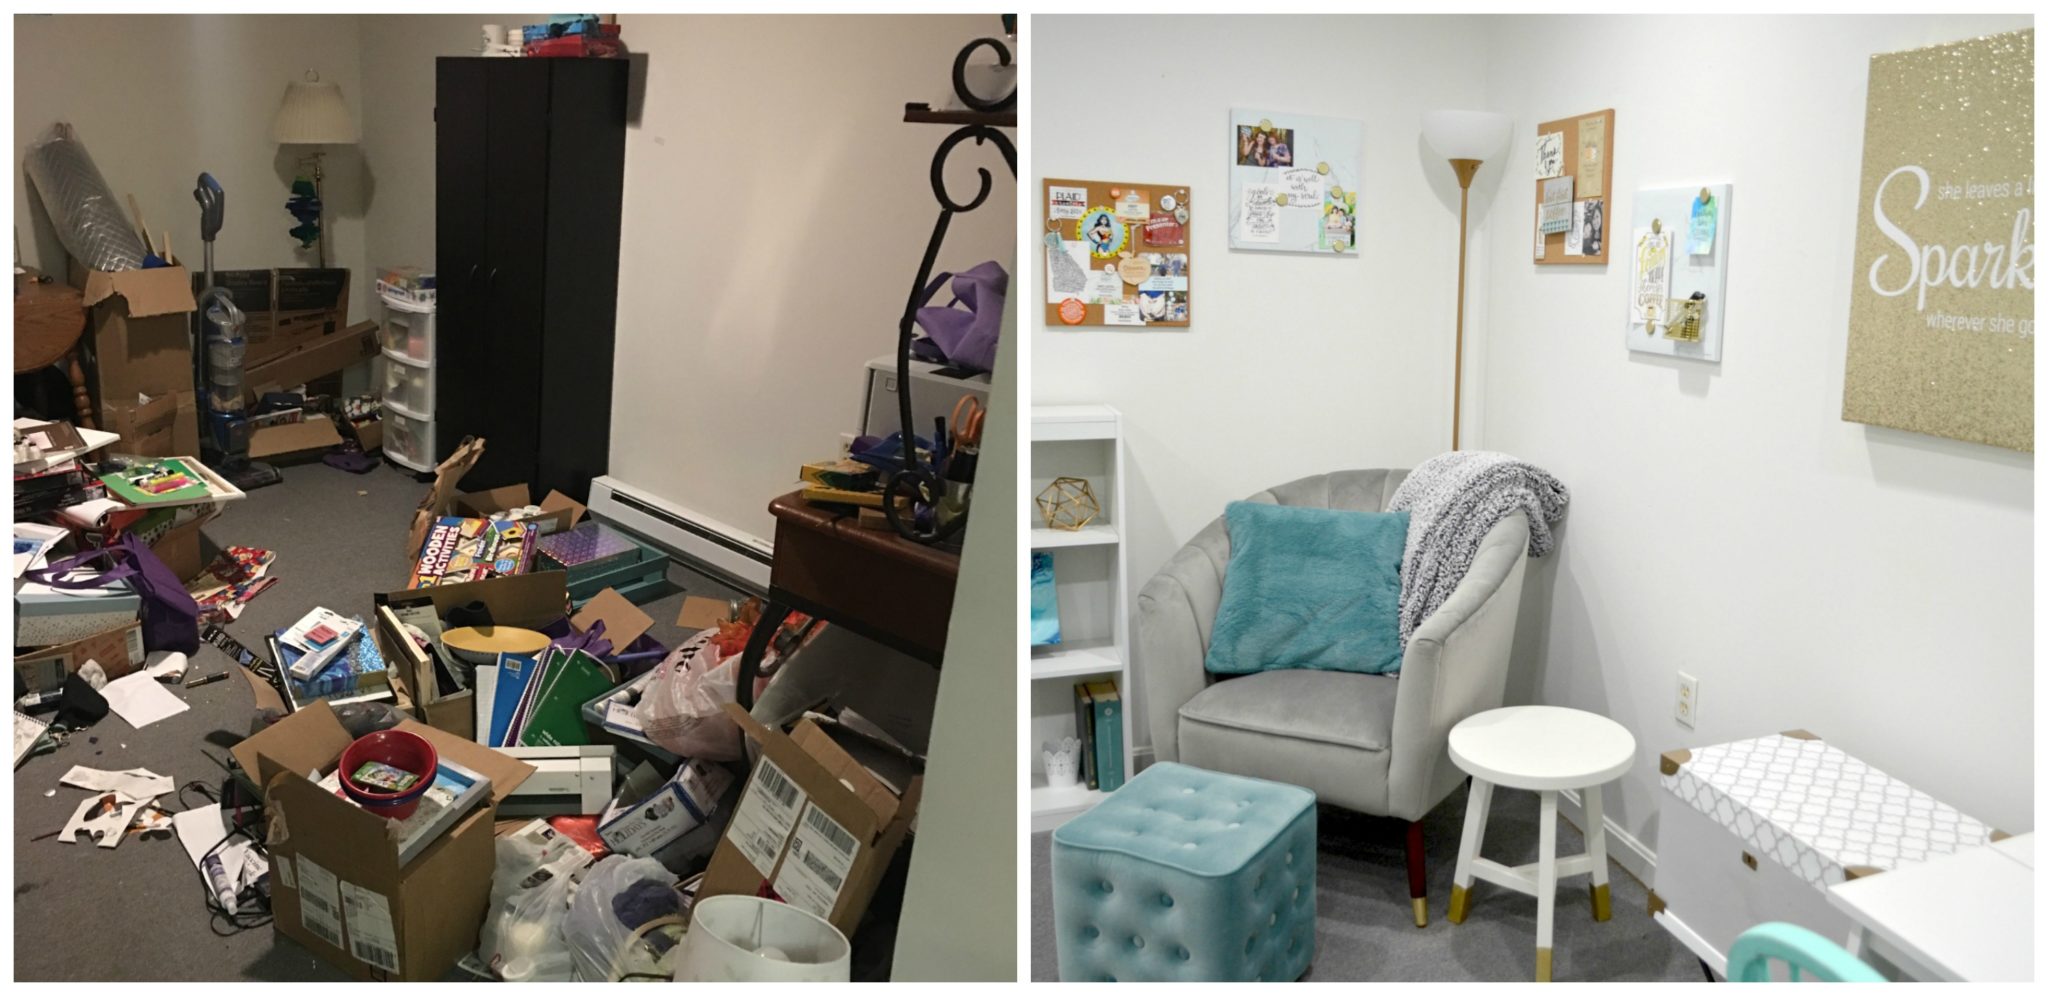
I am 100% honest when I say that it’s incredibly hard for me to show you this photo of what I had let the room become. Partly because I’m ashamed, and partly because I think someone might call and report me to some TV show as a hoarder out of control… but this is how it looked a week ago when I started my project. Please note that the overhead lights are ON in this photo. That’s how dark it was.

There were literally things strewn everywhere; I’d make a project upstairs on either the kitchen table or the floor {which drove my hubby batty}, then throw the supplies back down here on the floor. I’d given up on trying to organize anymore because the sheer amount of things I had was too overwhelming. It also became a place to stash random things when I was trying to clean the upstairs levels of the house. I’m talking to you, exercise ball and snowman gift bag…
One great feature of the room was that a previous owner had installed a built-in “L” shaped countertop as a workspace, but not only had I ruined the surface by painting things all over it, I’d let it become a dumping ground too. As you can see, there was no place to work. At all. And once again this is with ALL the lights in the room ON. Can you say dungeon?
Finally, my husband and I talked about the problem, and he offered to have an electrician come in and install whatever lighting I needed. He also gave me a budget {minus the lighting} of $1000 to do whatever other improvements and changes I wanted to make it the room of my dreams. Not being an organizer by nature, I called in an expert, my assistant and best friend Erin, who sat with me and listened as I described what I wanted. She helped me envision a totally different kind of room…one that would fit my crafting needs and also be a space where I wanted to work as well as relax. More on that later. She gave me the vision I needed to get started on a completely overwhelming task.
The first job I had was to start going through what I had and purge. I had supplies I’d never use, plus lots of things I no longer need. I had a pile for things to keep, a pile of things to donate to Goodwill or the art teacher, and a pile for trash. Here’s how our curb looked on garbage day. Yep, all mine.
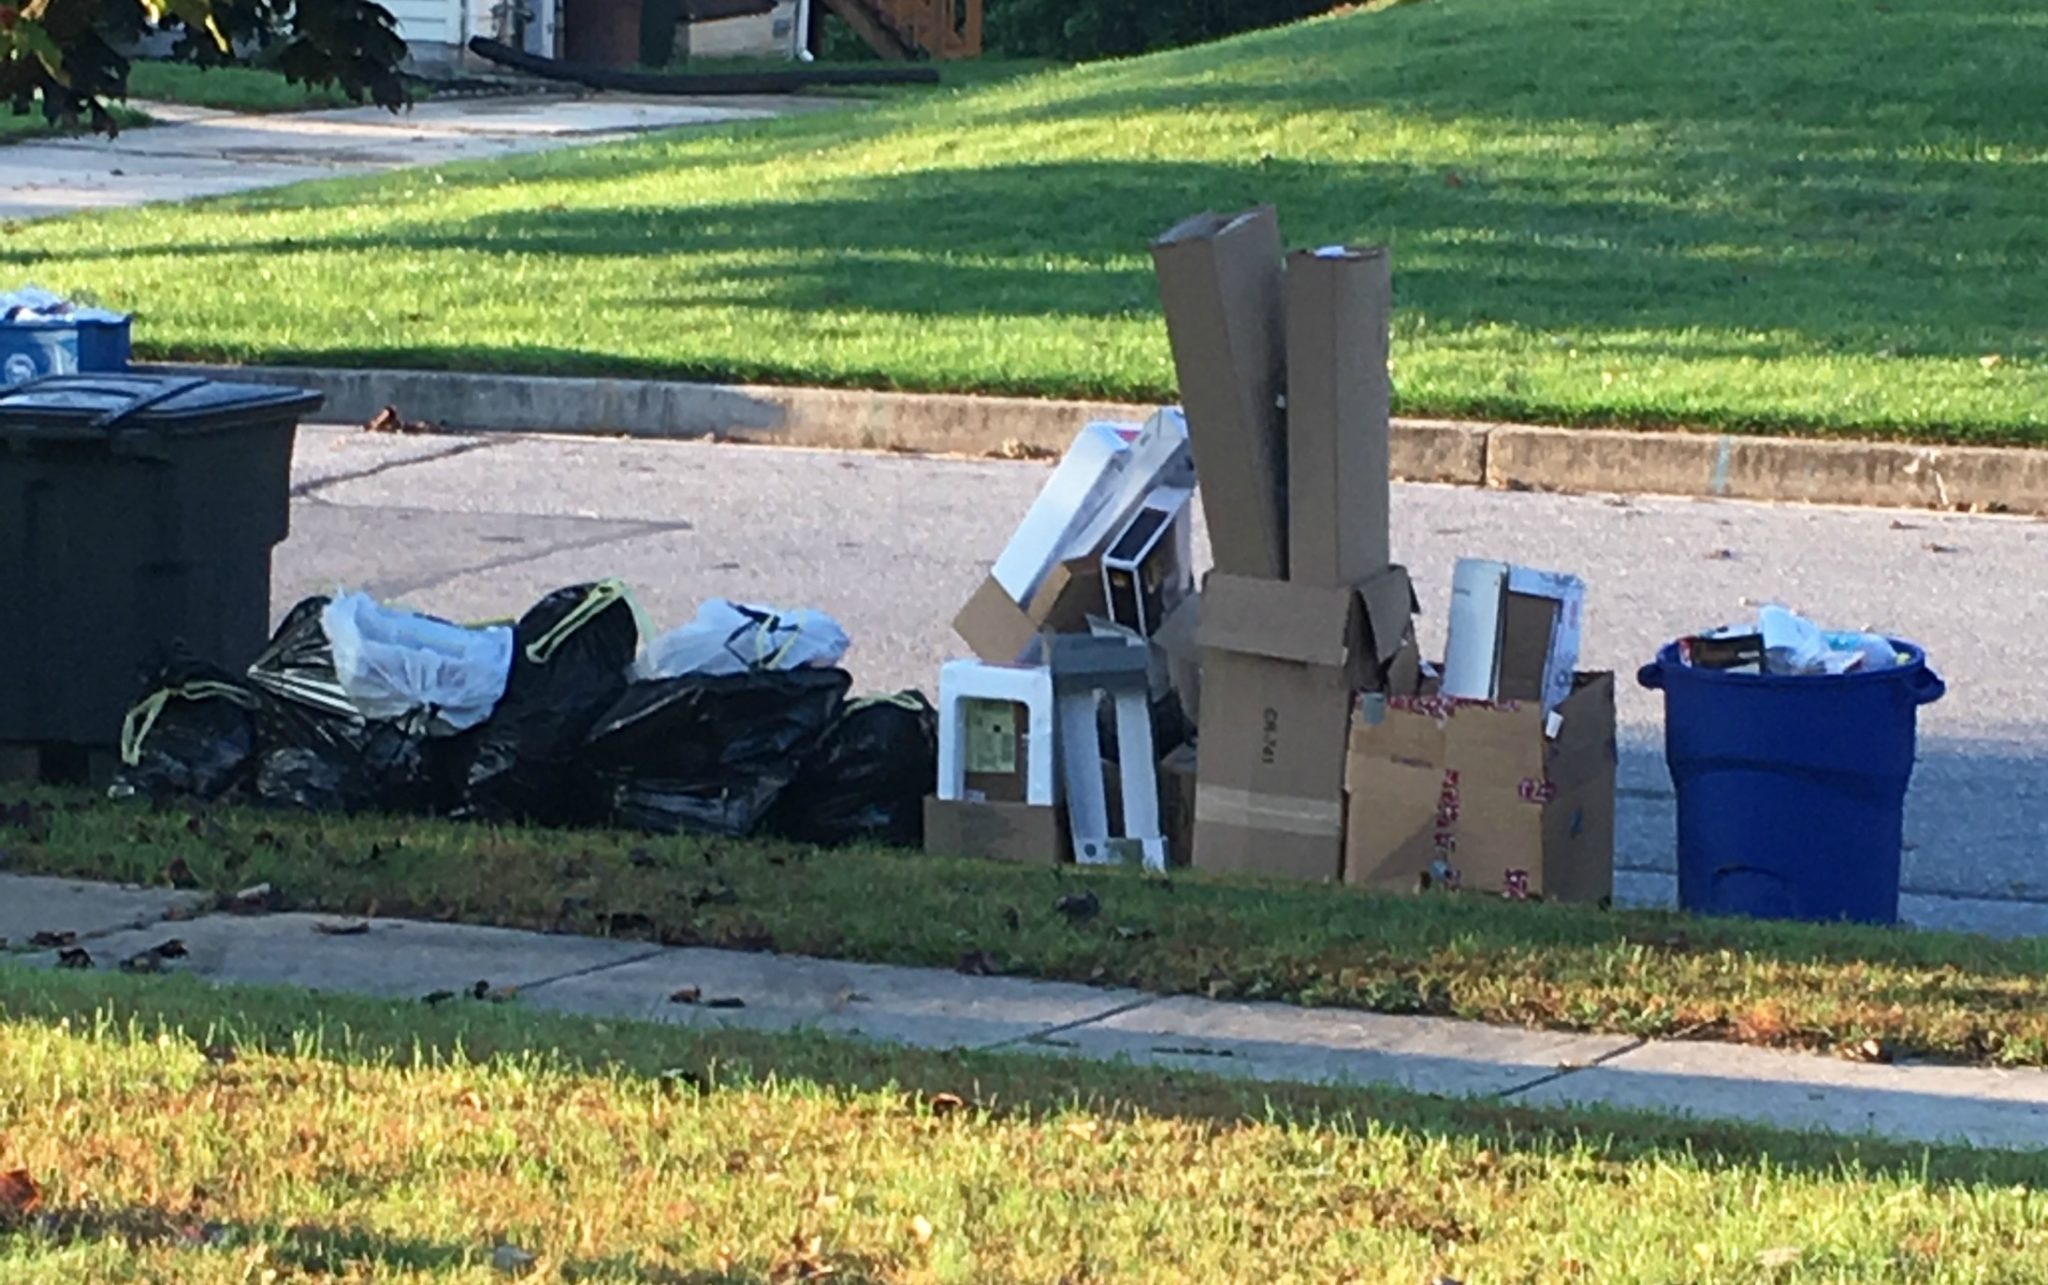
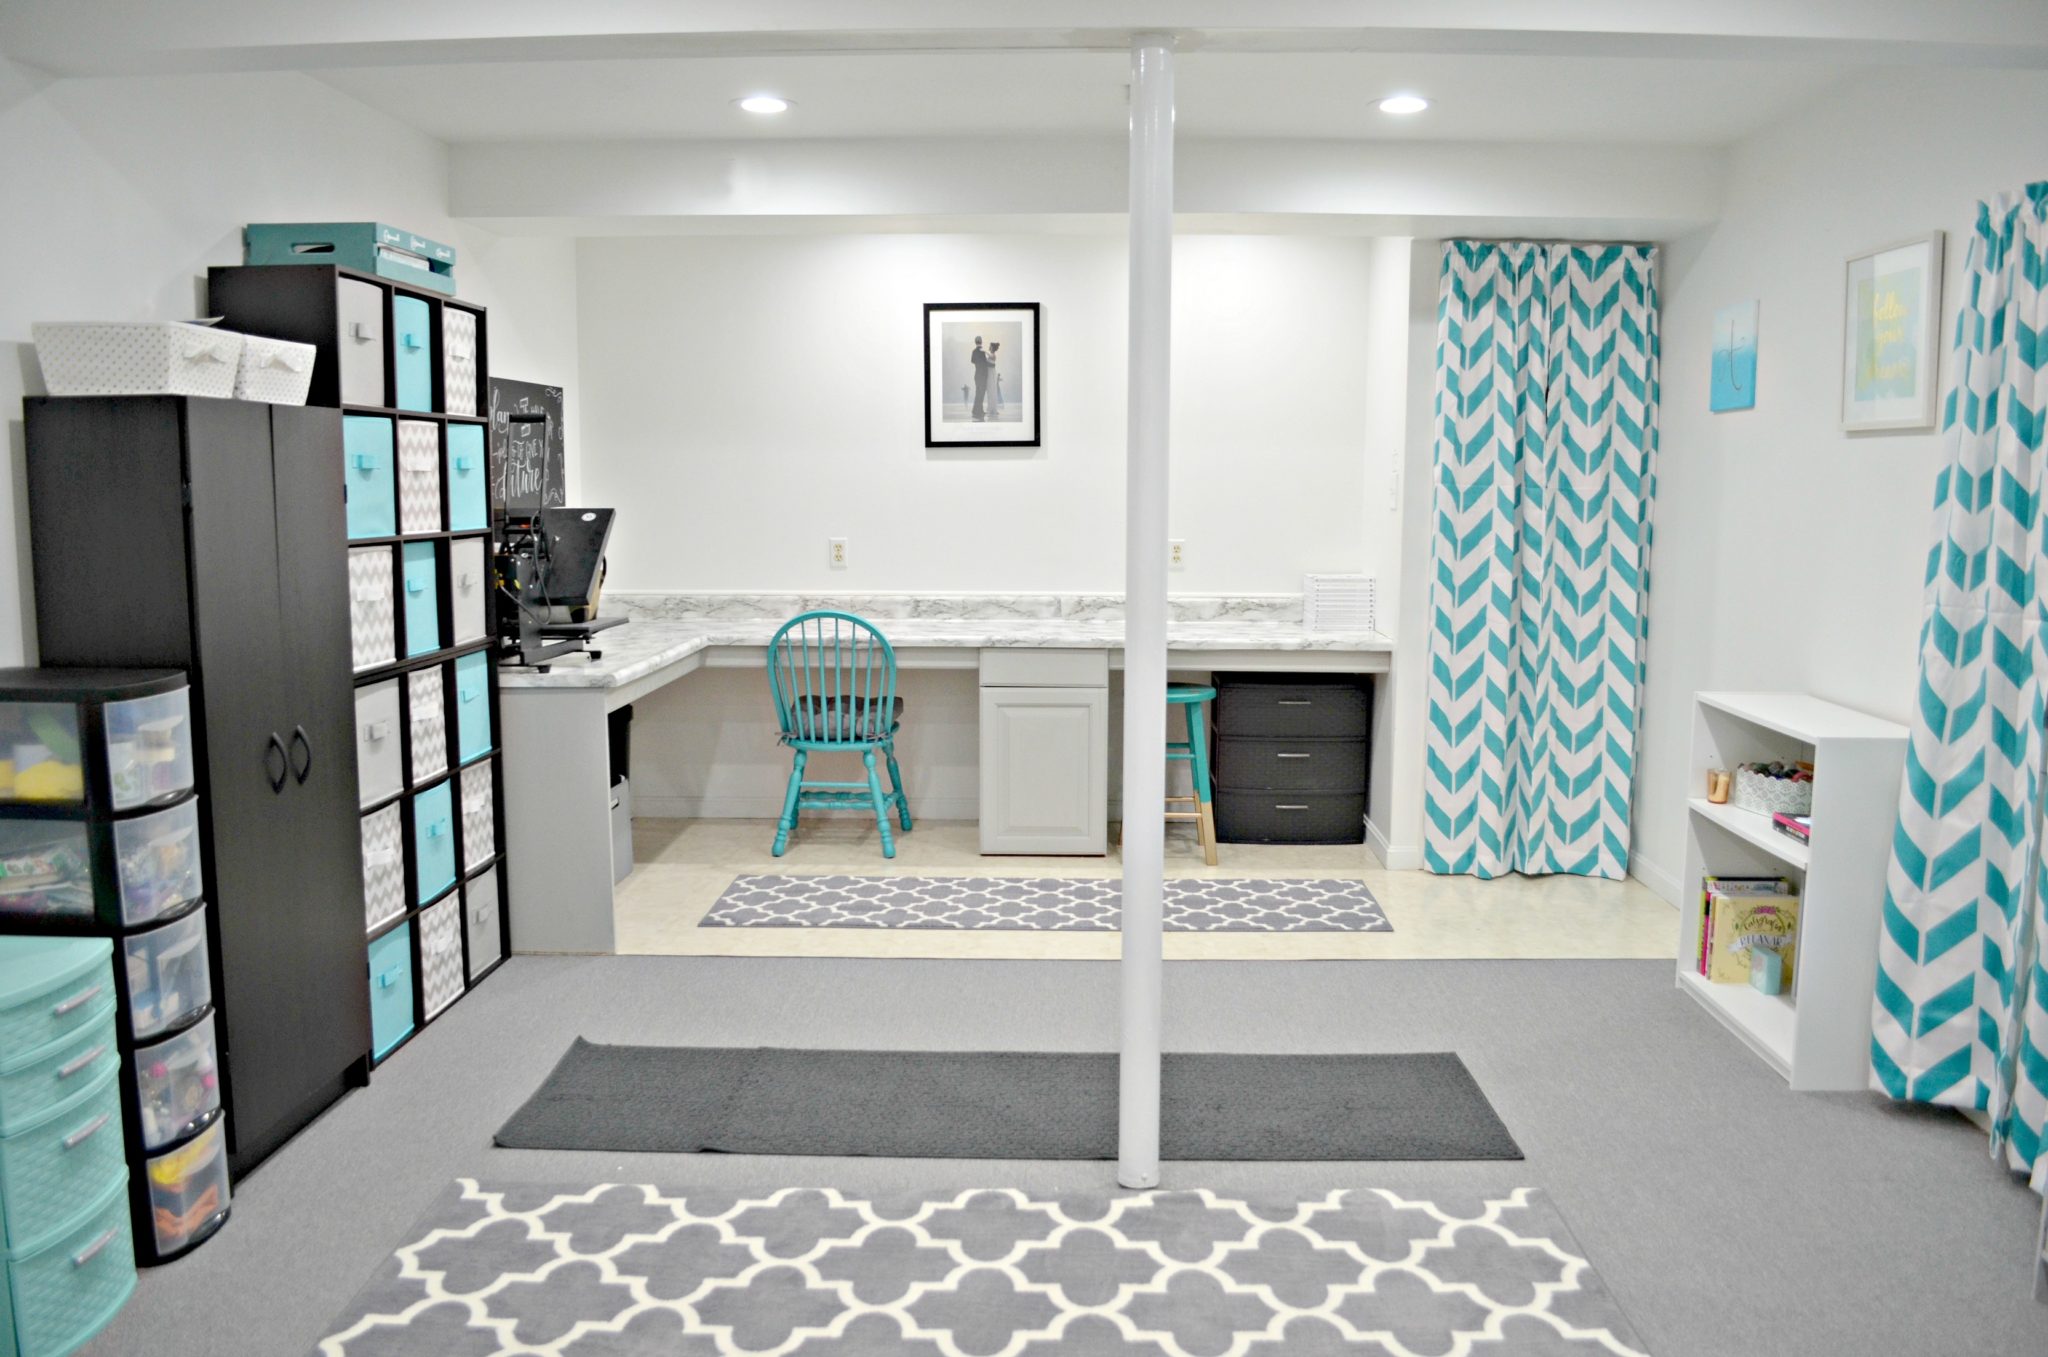
But once the excess “stuff” was out and the lights went in {12 of them!! Beautiful, bright white LED lights!!}, I could see the potential the room held. For example, I had no idea the walls were actually white. Honestly. And, it meant I could go shopping!! Let’s take a tour of the different areas of my “new” room so I can show you how I set it up. I’ve tried to list the sources for as many of the things in the room as possible in case you want to grab any of them for your own space. Some are things I already had, while others are part of what I bought with my $1000 budget.
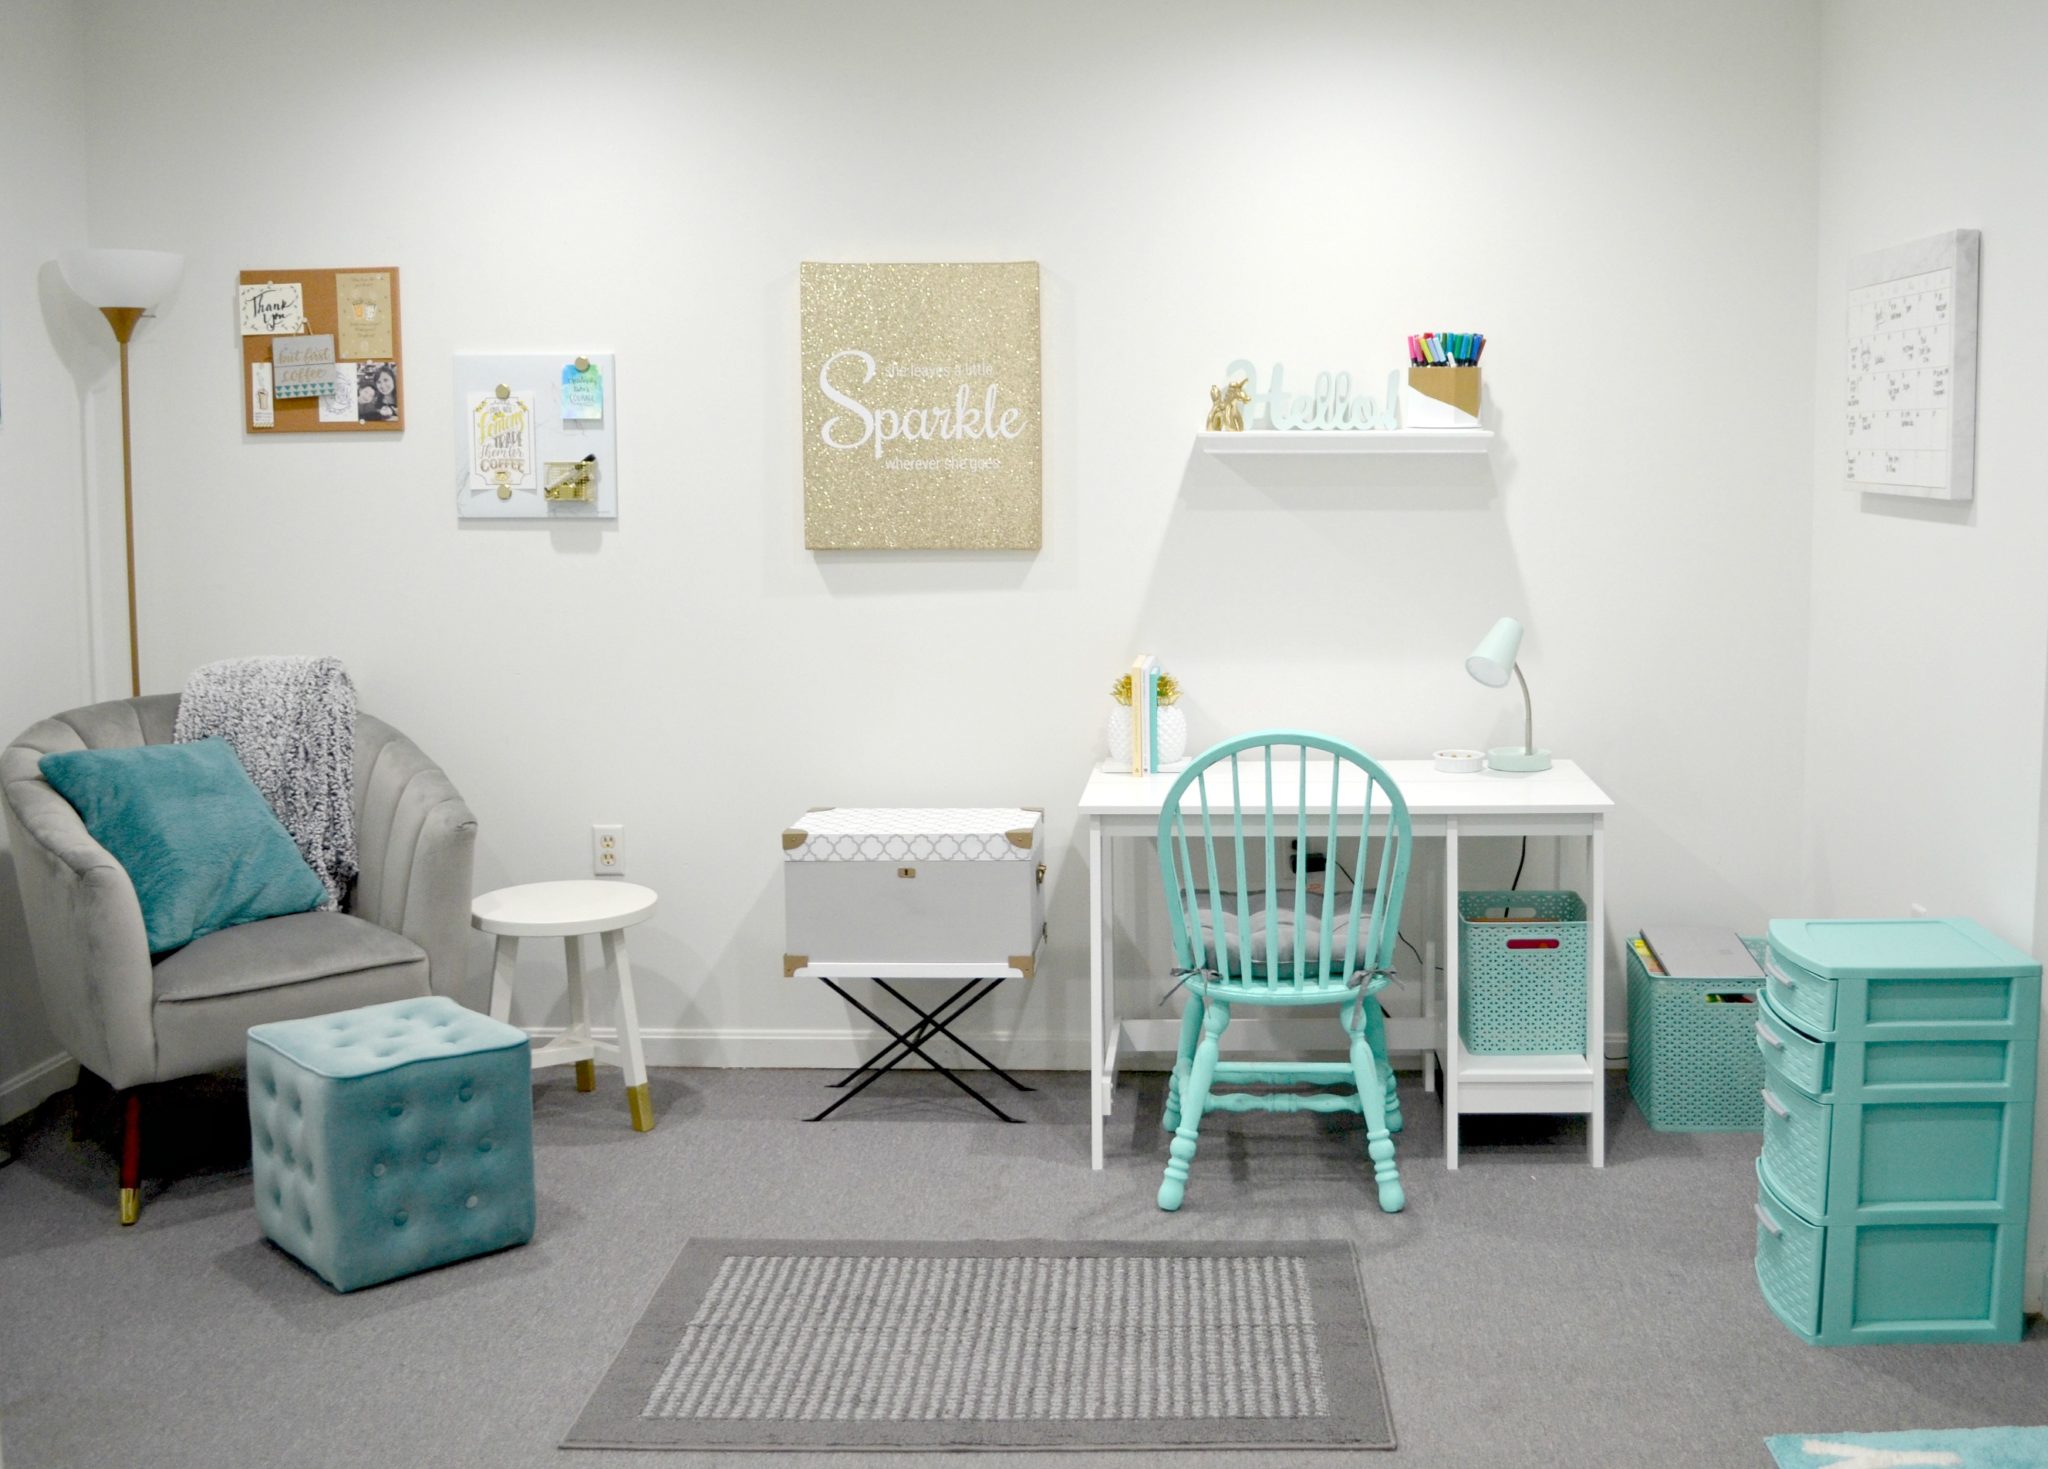
My Lettering Area
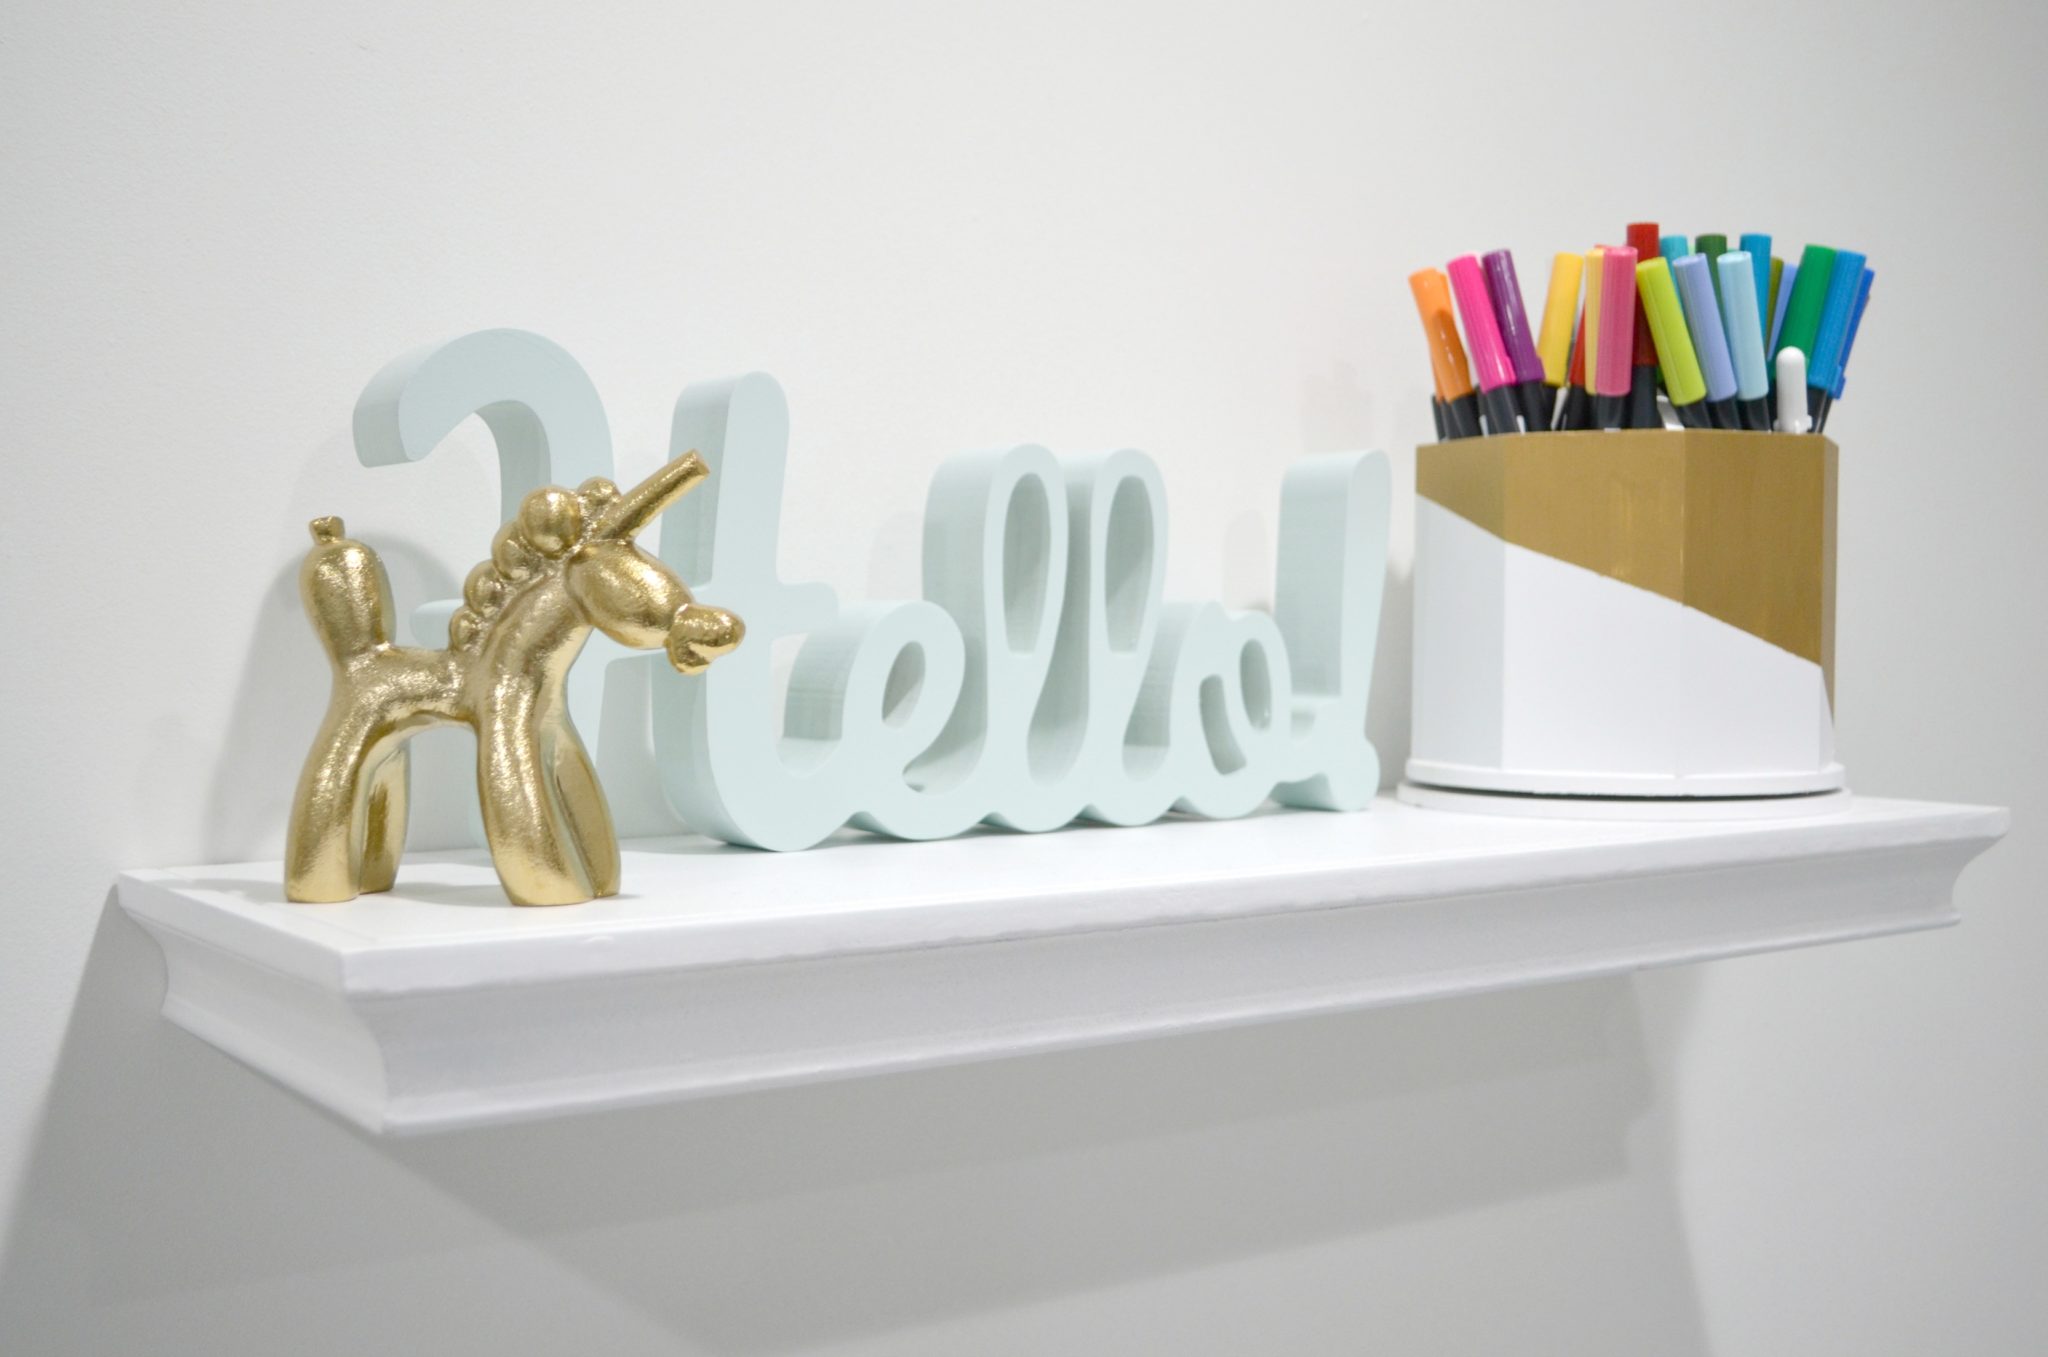
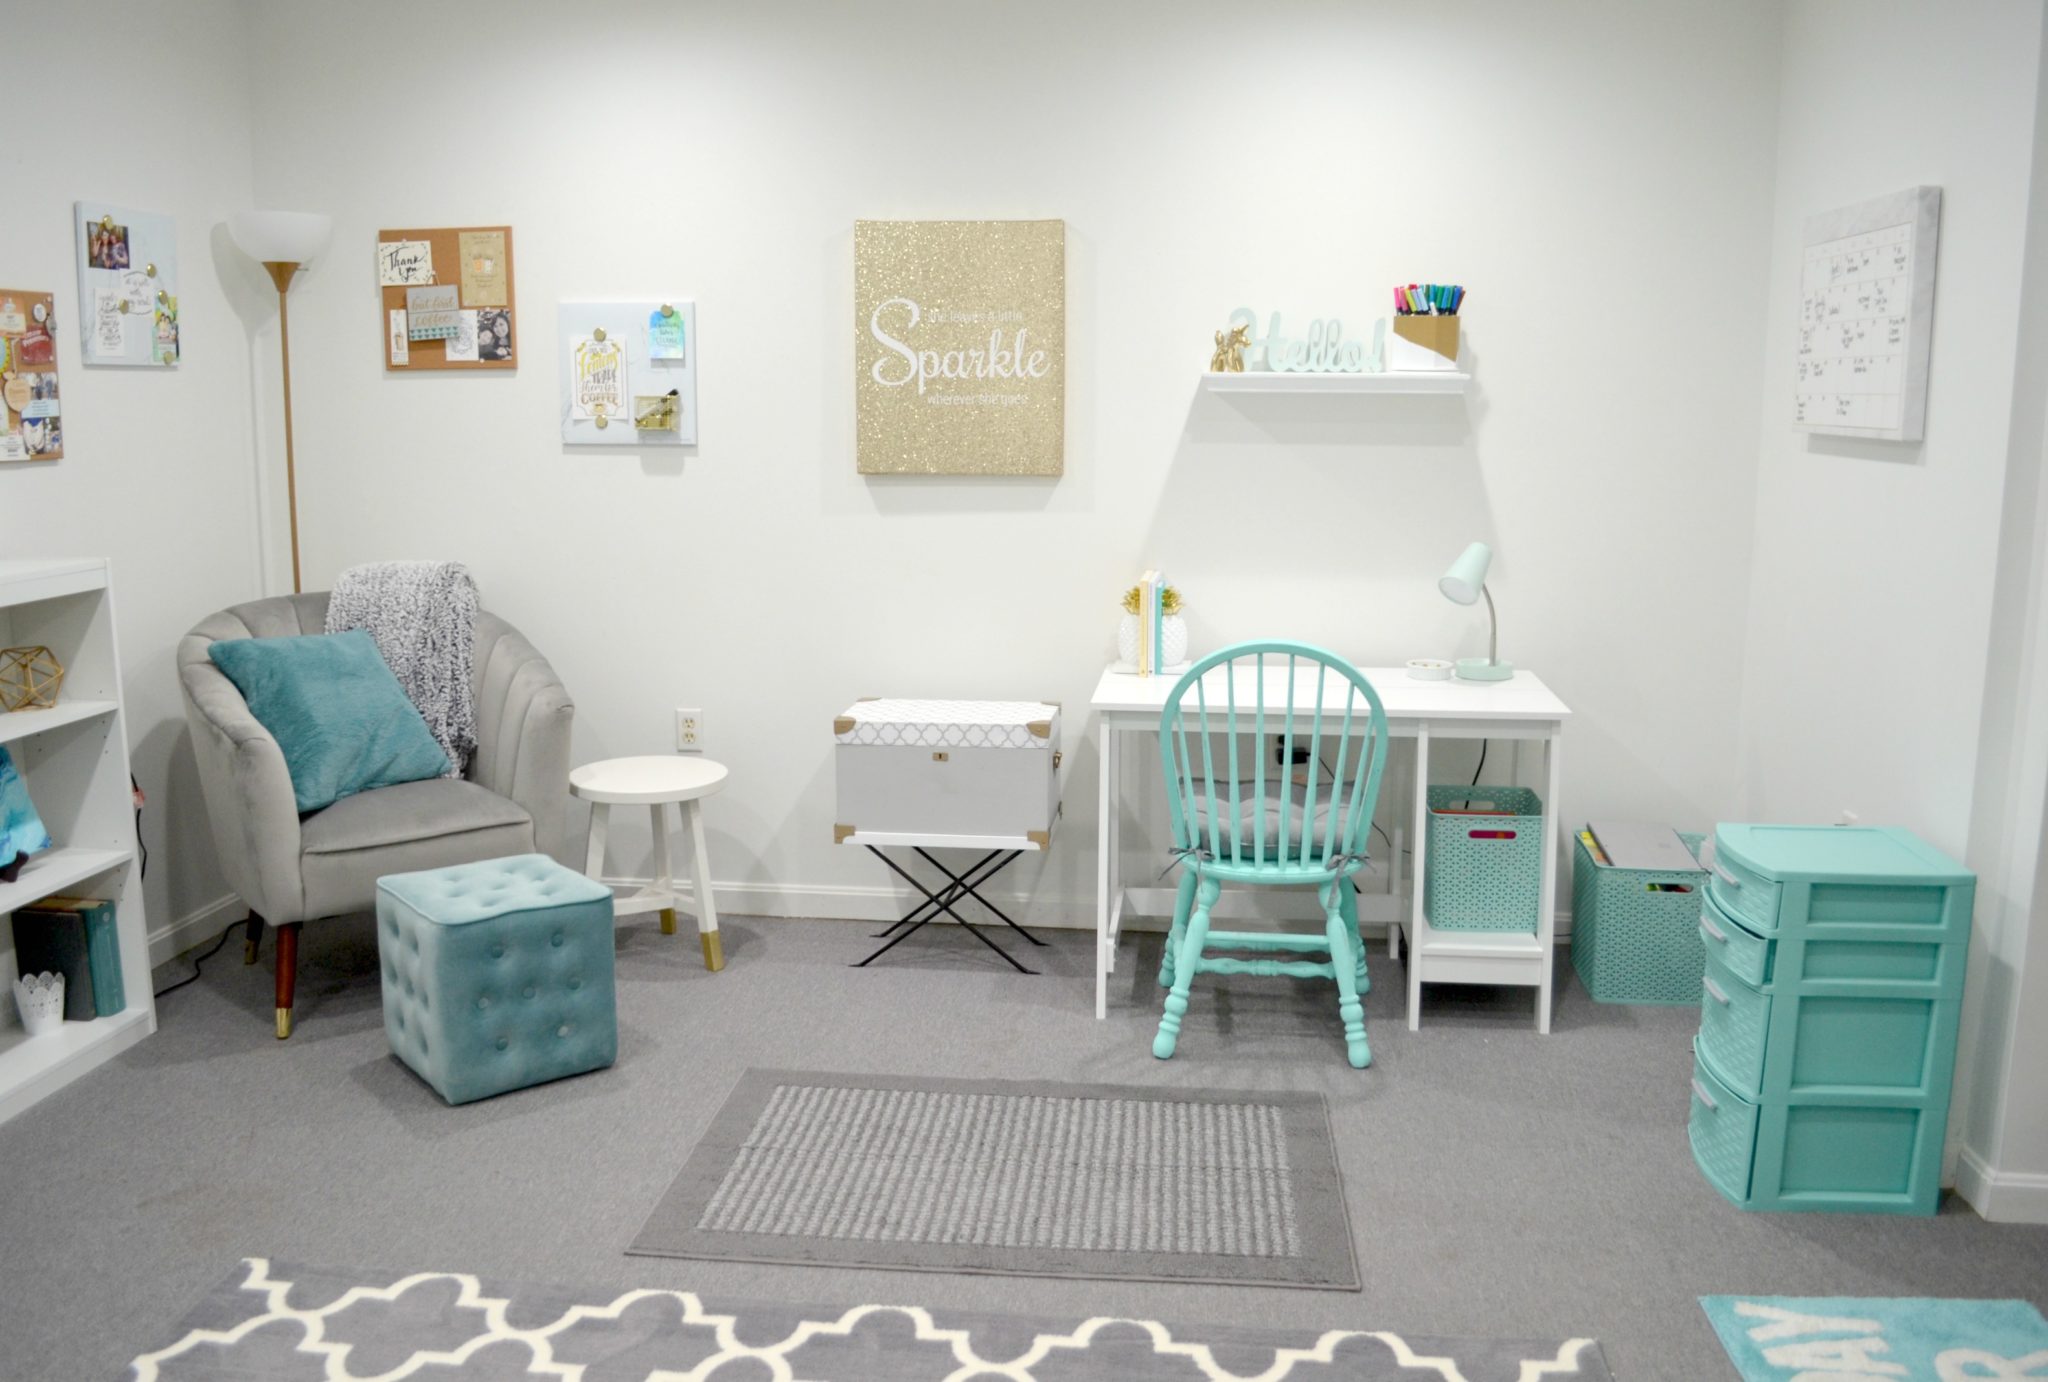
Erin helped me to see that since my major focus is on hand lettering and book writing these days, I needed an area of the room dedicated to those things. That meant buying a desk and making sure I had access to all my lettering supplies. I bought a little desk at Target and re-painted an existing chair. My dad installed a shelf for me where I can store my Dual Brush Pens, and I made use of the trunk I painted last year to hold my other lettering supplies. The four-drawer storage holds chalk pens, paint pens, and paintbrushes, and the bin in the corner is everything I need to take along when I hold a workshop. Erin also encouraged me to get a wall calendar so that I could see my month’s commitments at a glance.
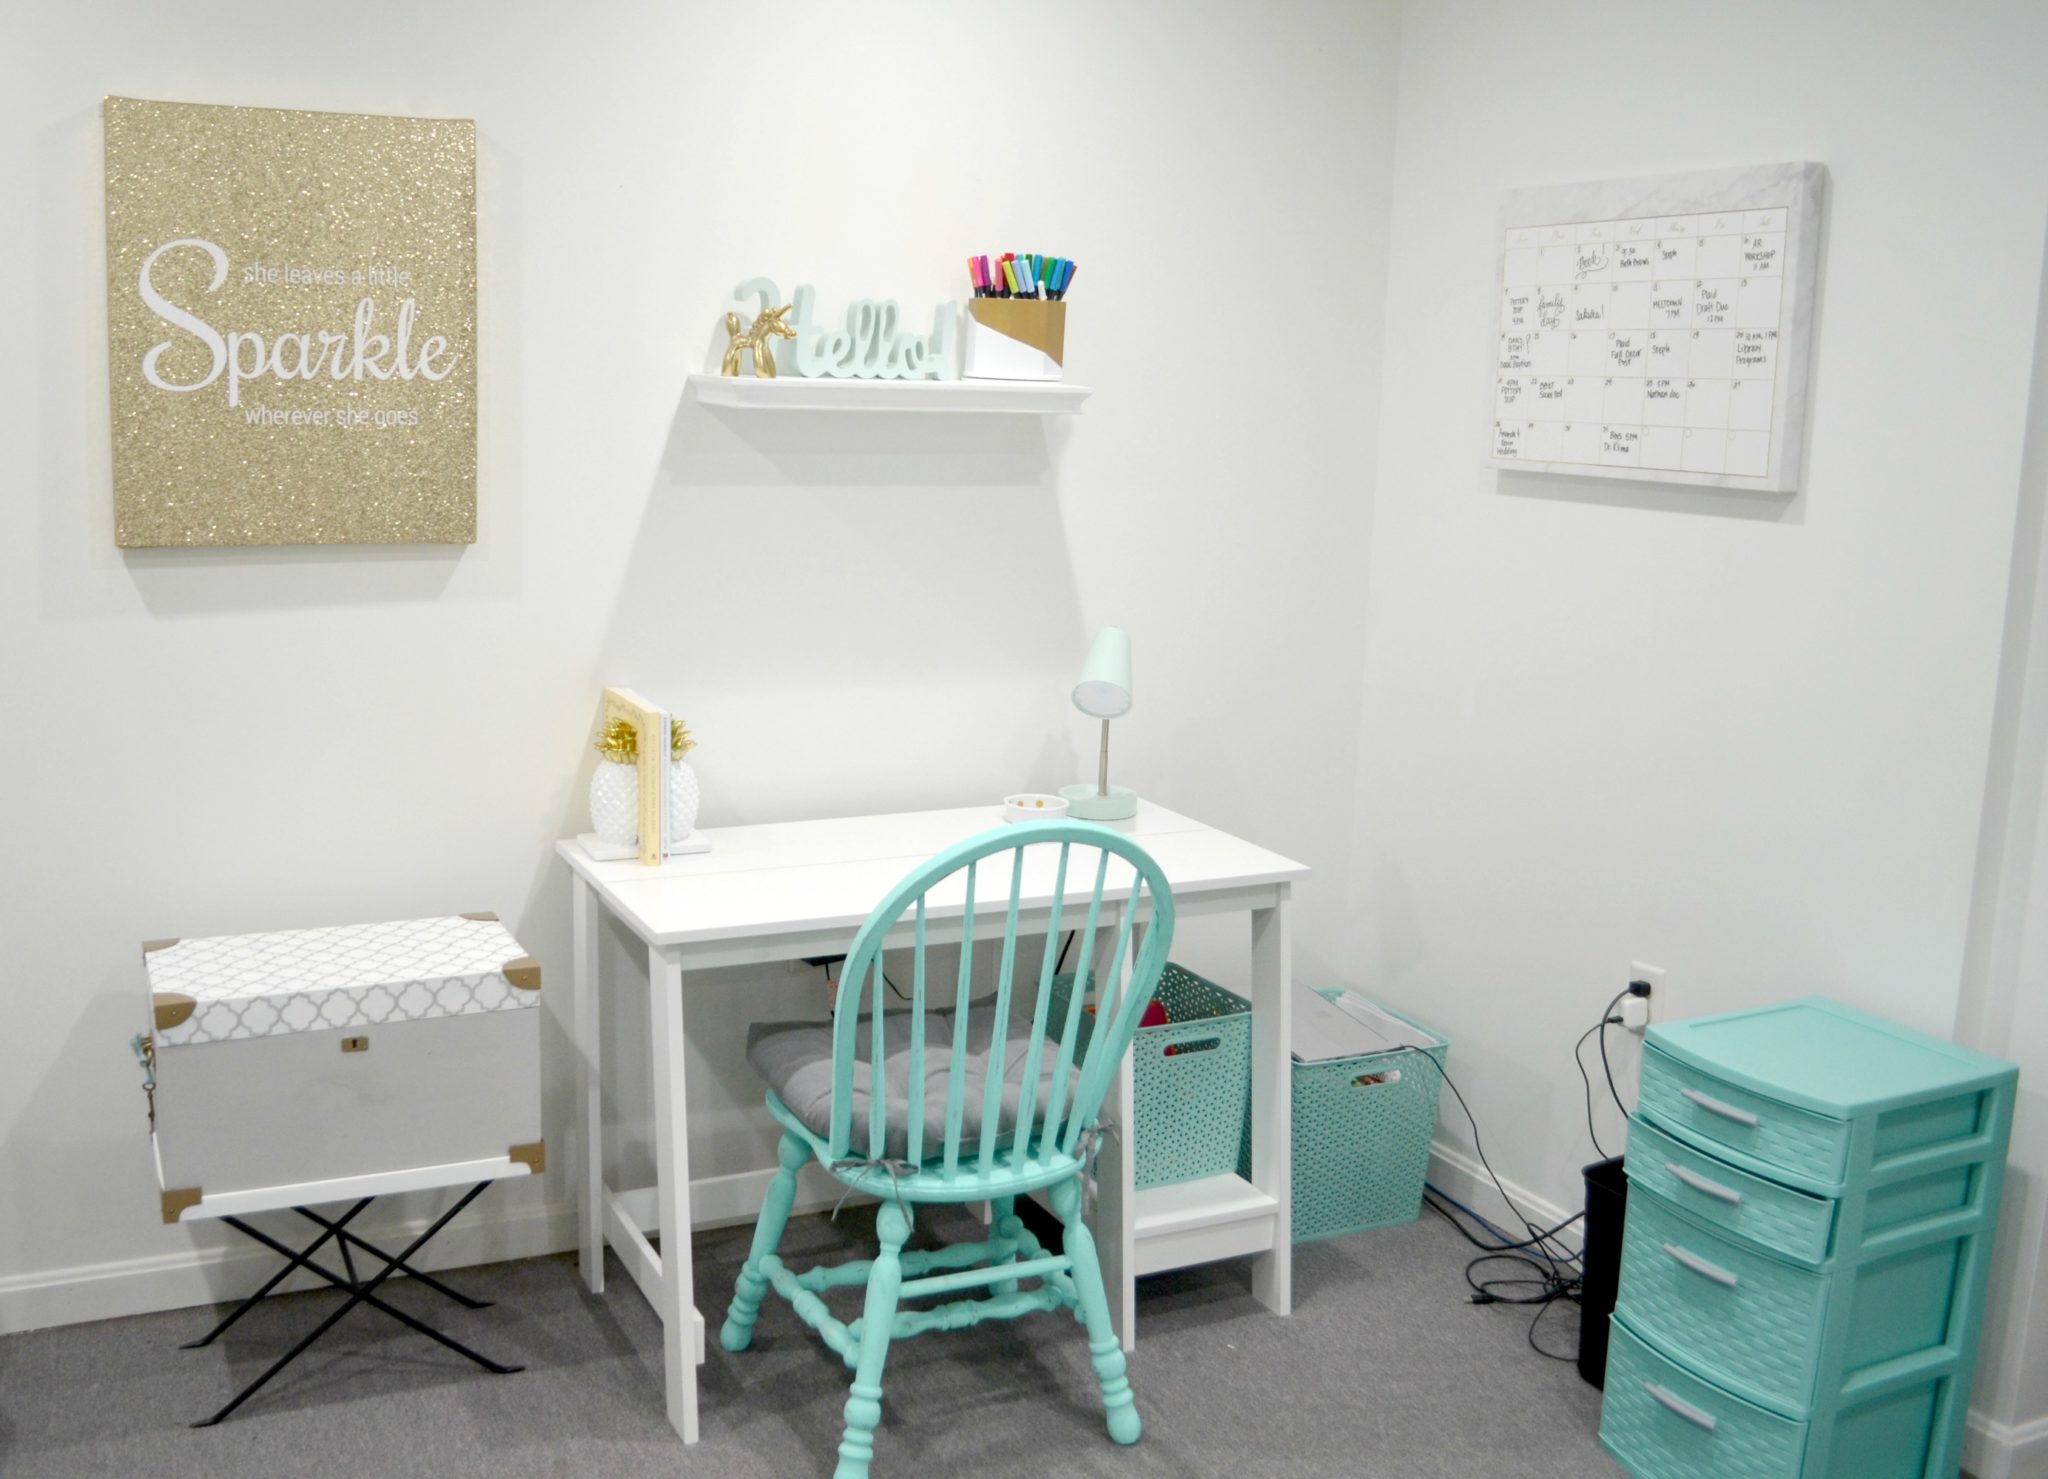
HomeGoods: Sparkle Wall Art, Dry Erase Calendar, Wooden “Hello,” Pencil Holder
Target: Desk, Lamp, Pineapple Bookends, Storage Bins, Wall Shelf, Standing Storage, Unicorn Figurine
Walmart: Chair Cushion, Trash Can
My Projects: Lettering Supply Trunk, Painted Chair, Gold Dots Dish, Painted Pencil Holder
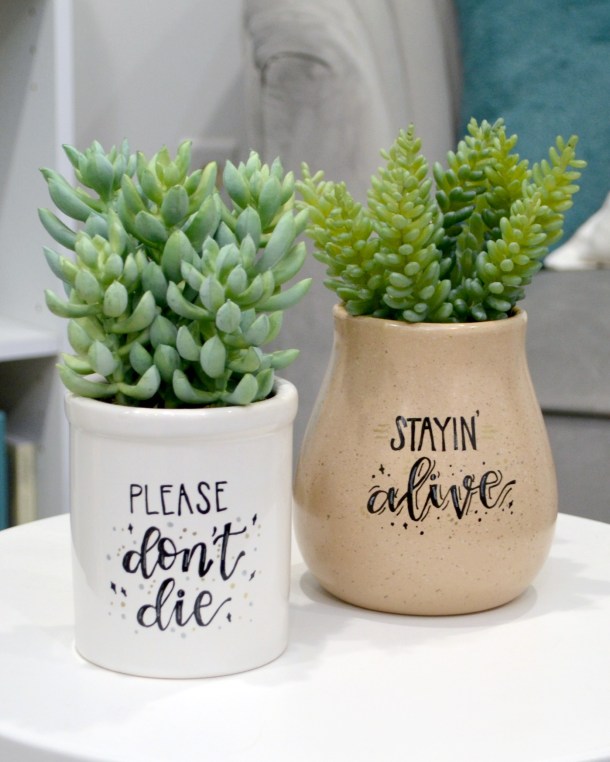
I chose a similar color scheme for my room to what I have in the rest of the house; teal, grey, and white. I also added gold accents to give it an elegant feel. I ended up adding some FolkArt Brushed Metal paint to some of the white things in the room, like my marker holder, just to give them some extra pop. Also, can we talk for a second about “Balloonicorn,” this little guy I found at Target? I mean, who among us doesn’t need one of these in our lives?
My Devotional/Reading/Sitting Area
I have to give credit where it’s due, this entire part of the room would not have existed without Erin suggesting it, because it would never have occurred to me to make myself a cozy corner. As we chatted about what I do and what I needed in an office/craft area, one thing that came up was the daily Bible Journaling devotions I do on my Instagram Stories. {Oh, you didn’t know? Go check them out!} Erin pointed out that I needed a comfy place to sit and journal as well as to read and relax because this is supposed to be MY perfect space. Here’s how that spot turned out…
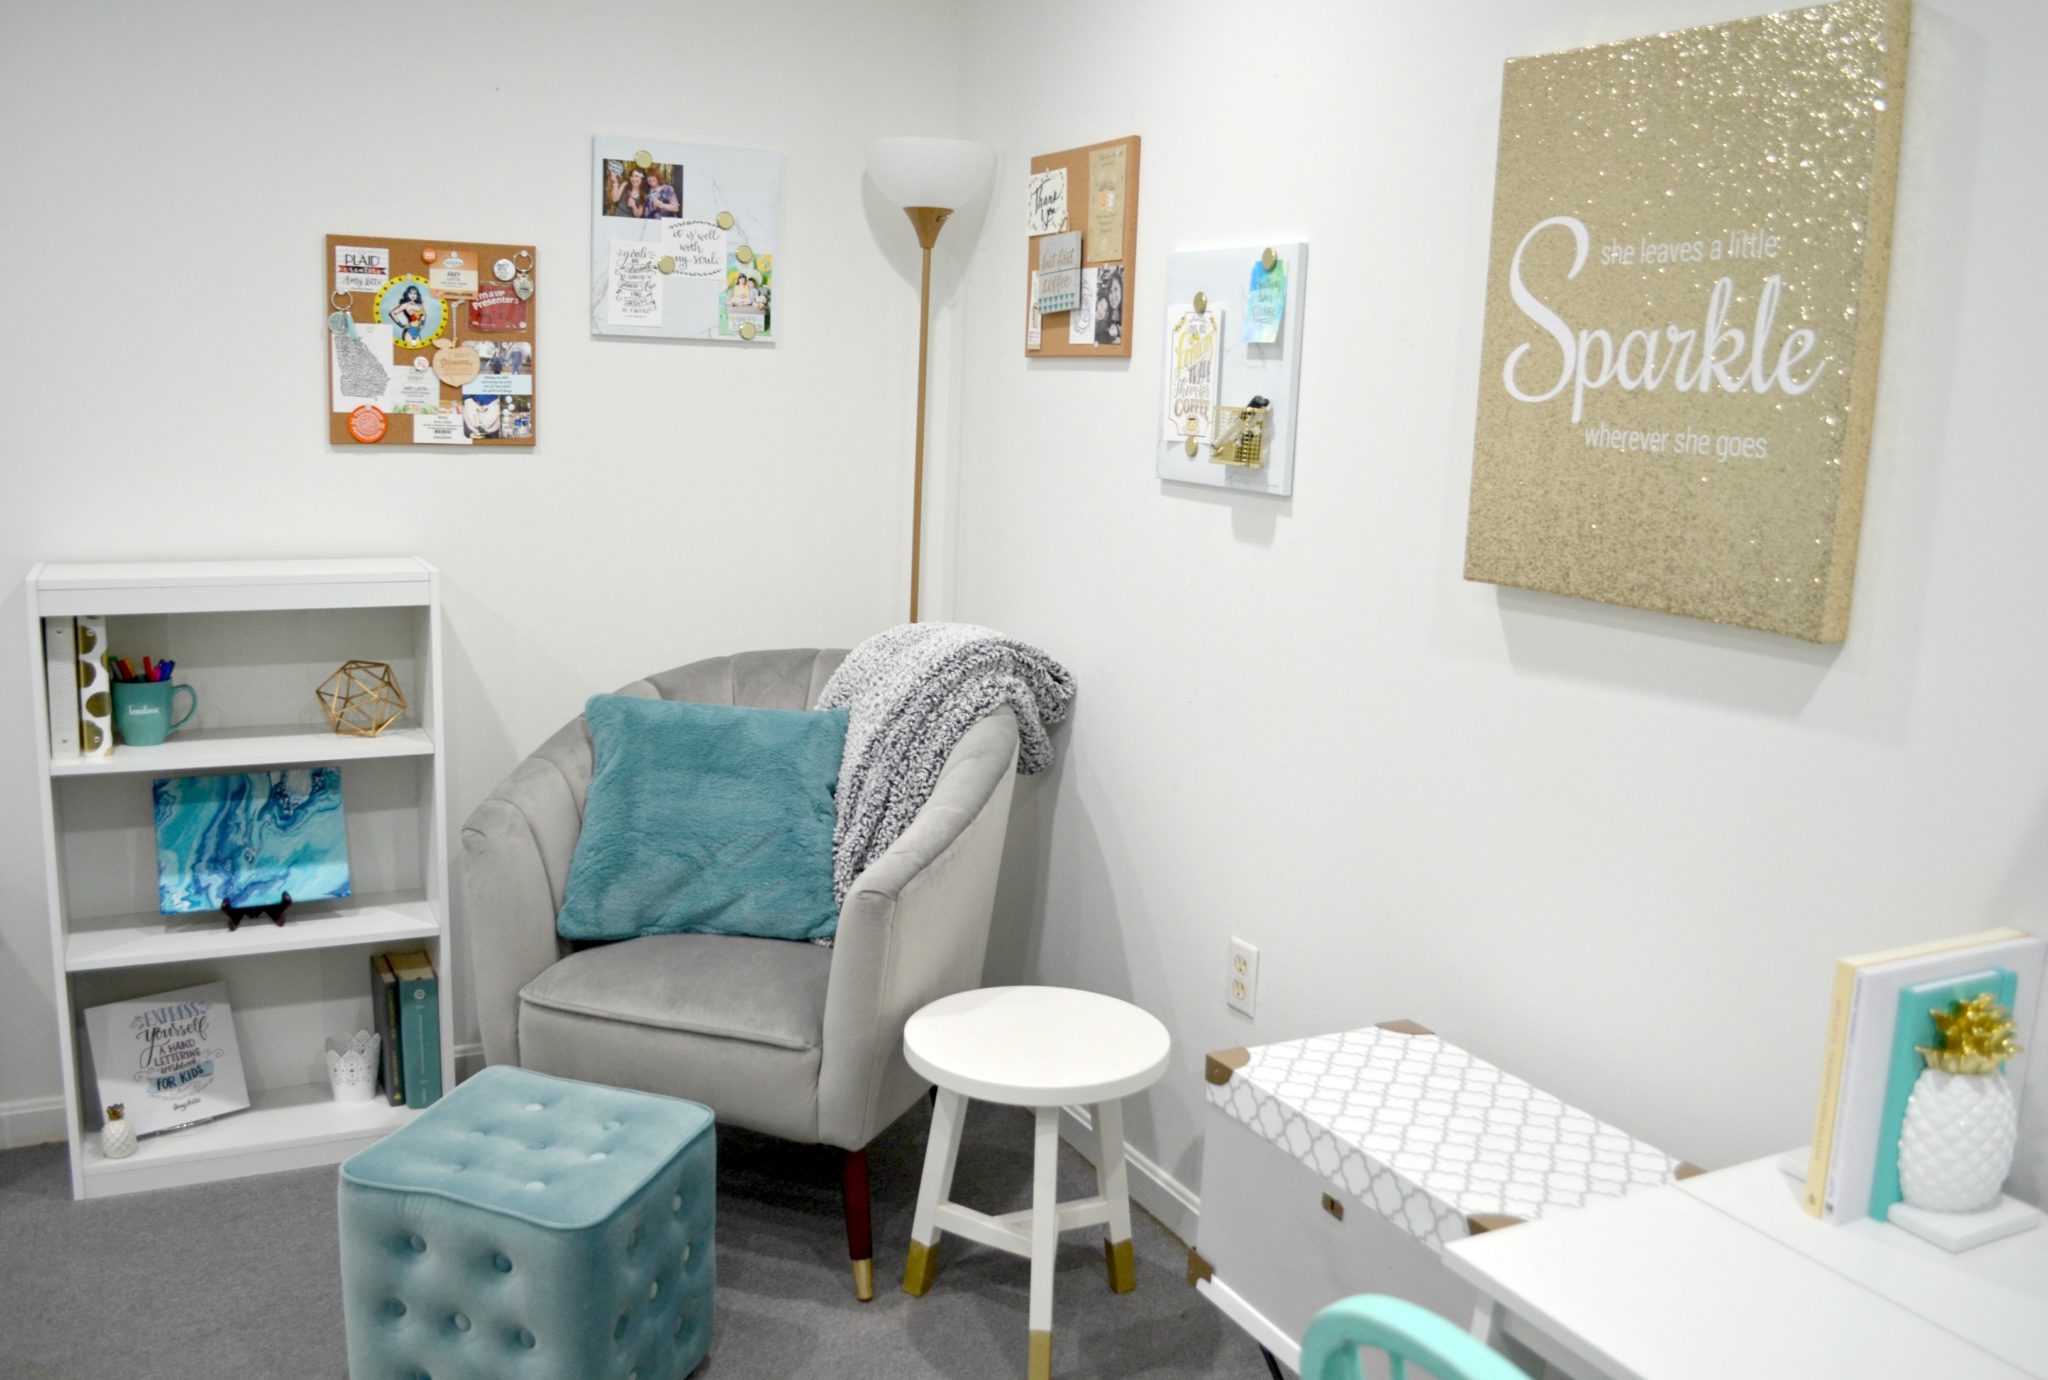
HomeGoods: Chair, Pillow, Ottoman
Target: Marble & Cork board wall hangings, Magnets, Push Pins, Magnetic Pen Holder, Gold & White Binders, Pineapple Salt Shaker
Walmart: Blanket, Table/Stool, Gold Geometric Shelf Decor, Floor Lamp
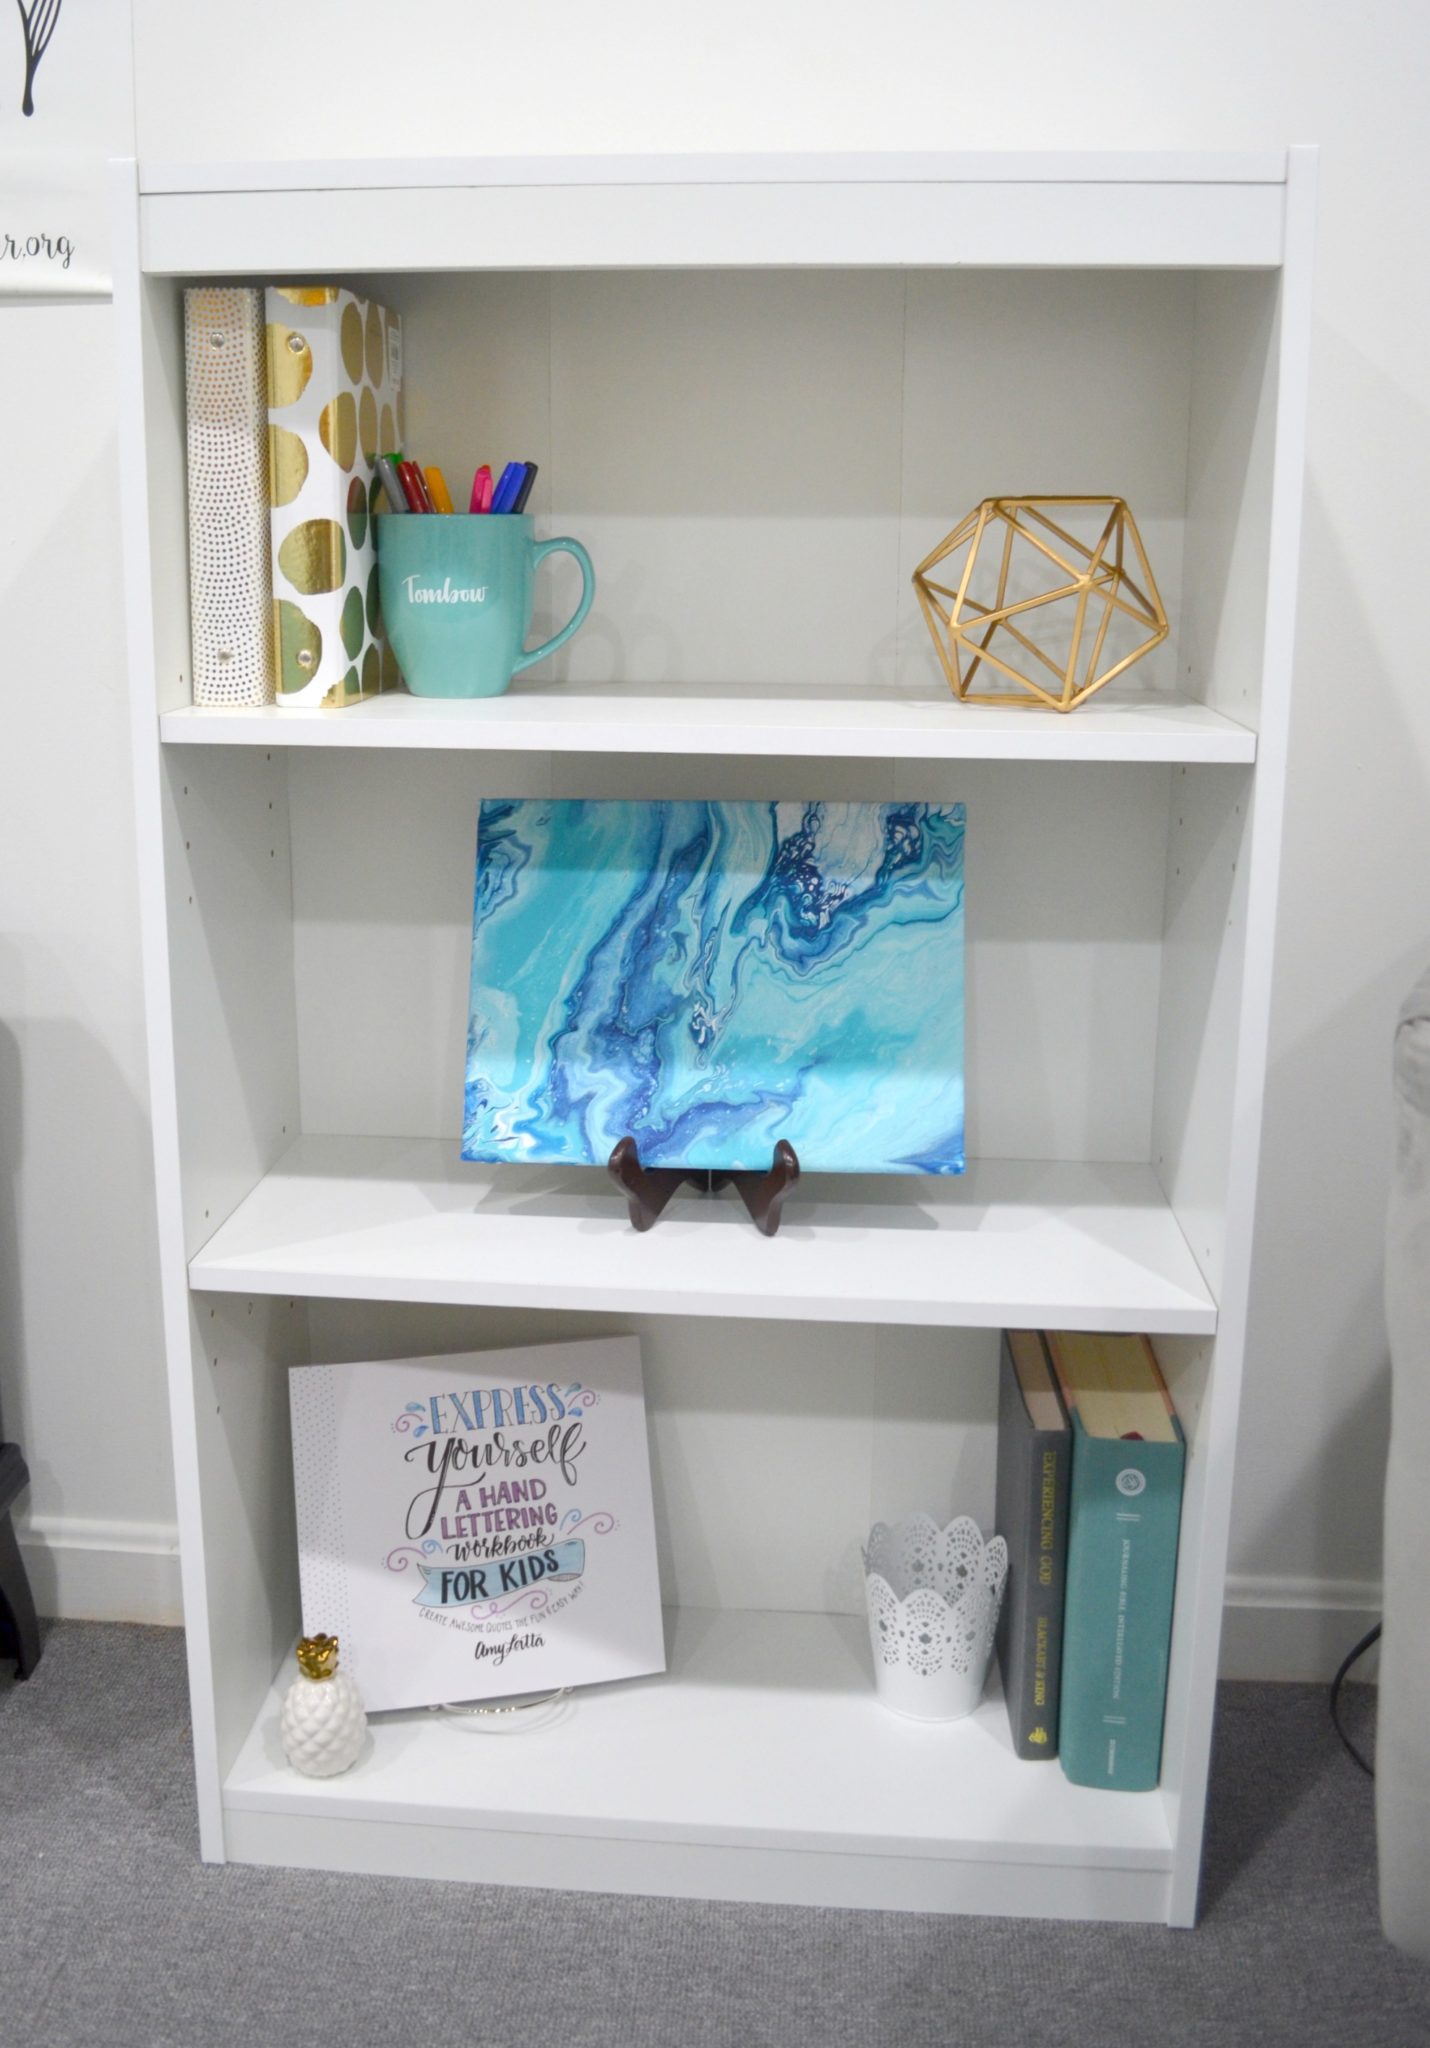
My Projects: Painted Stool Legs, Marbled Canvas Art, Express Yourself book!
The main function of the bookshelf is to hold my Journaling Bible and Colored Tombow Fudenosuke pens. Everything else is just decoration because it makes me happy.
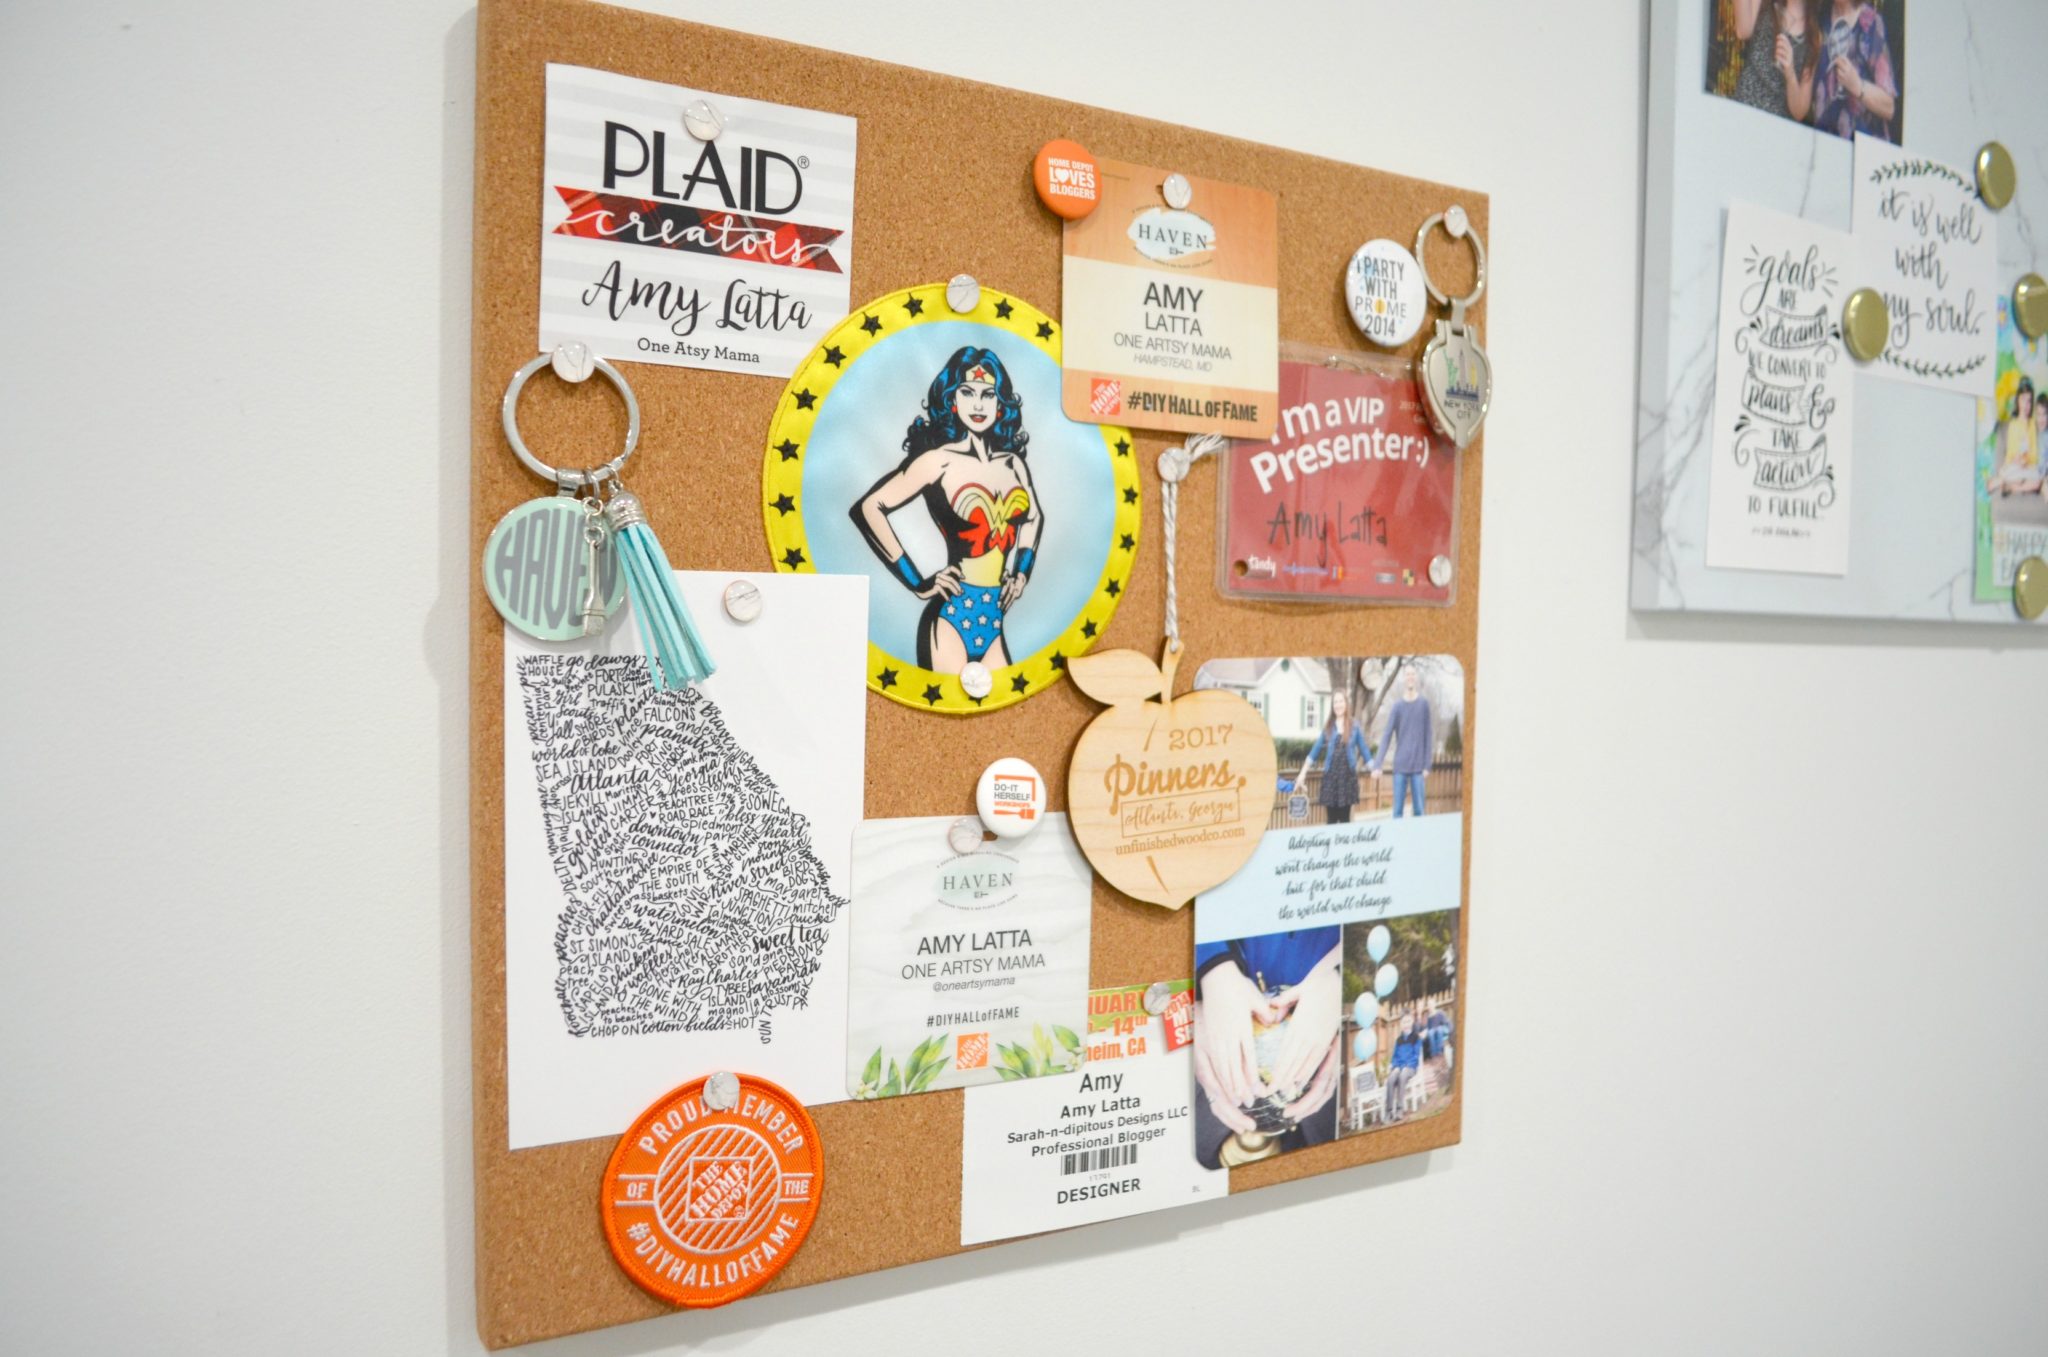
Behind my fluffy chair, I have two magnetic marble dry erase boards and two corkboards. They’re perfect for hanging up photos, cards, artwork, and anything that inspires me. I decided to also use one of the boards for all the things I’ve collected from the various conferences and conventions where I’ve presented and other business trips I’ve taken. Plus Wonder Woman. Because…Wonder Woman.
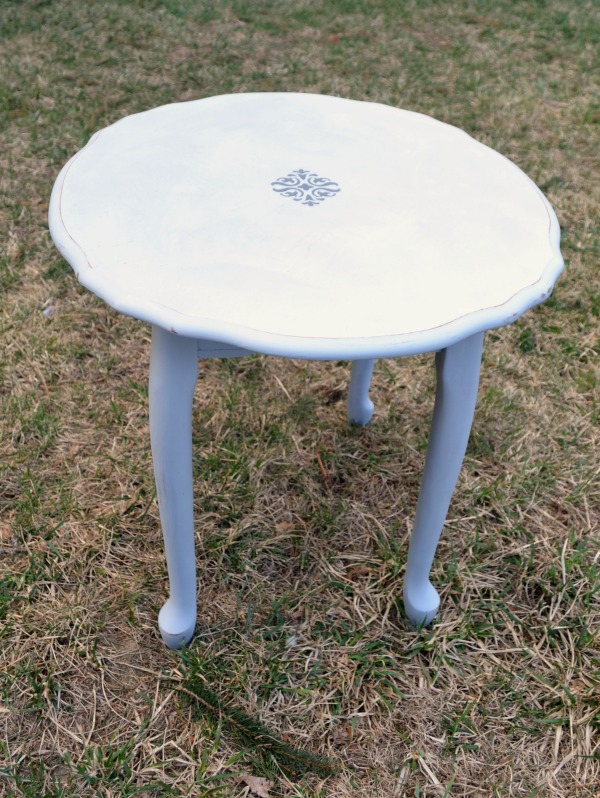
The other thing I splurged on for my cozy area was this adorable tiny electric fireplace from Walmart! I used to have a long, thin, horizontal space heater in this room, and wherever I put it, I wouldn’t have any usable space above it. This takes up far less space, keeps the room comfortable, and is just so darn cute! I turn on the visual part without the heat even when I’m not cold because it’s so home-y! The cabinet to the left was a brown laminate finish before; I painted it and stenciled cute little birdies, which I’ll talk more about in another post.
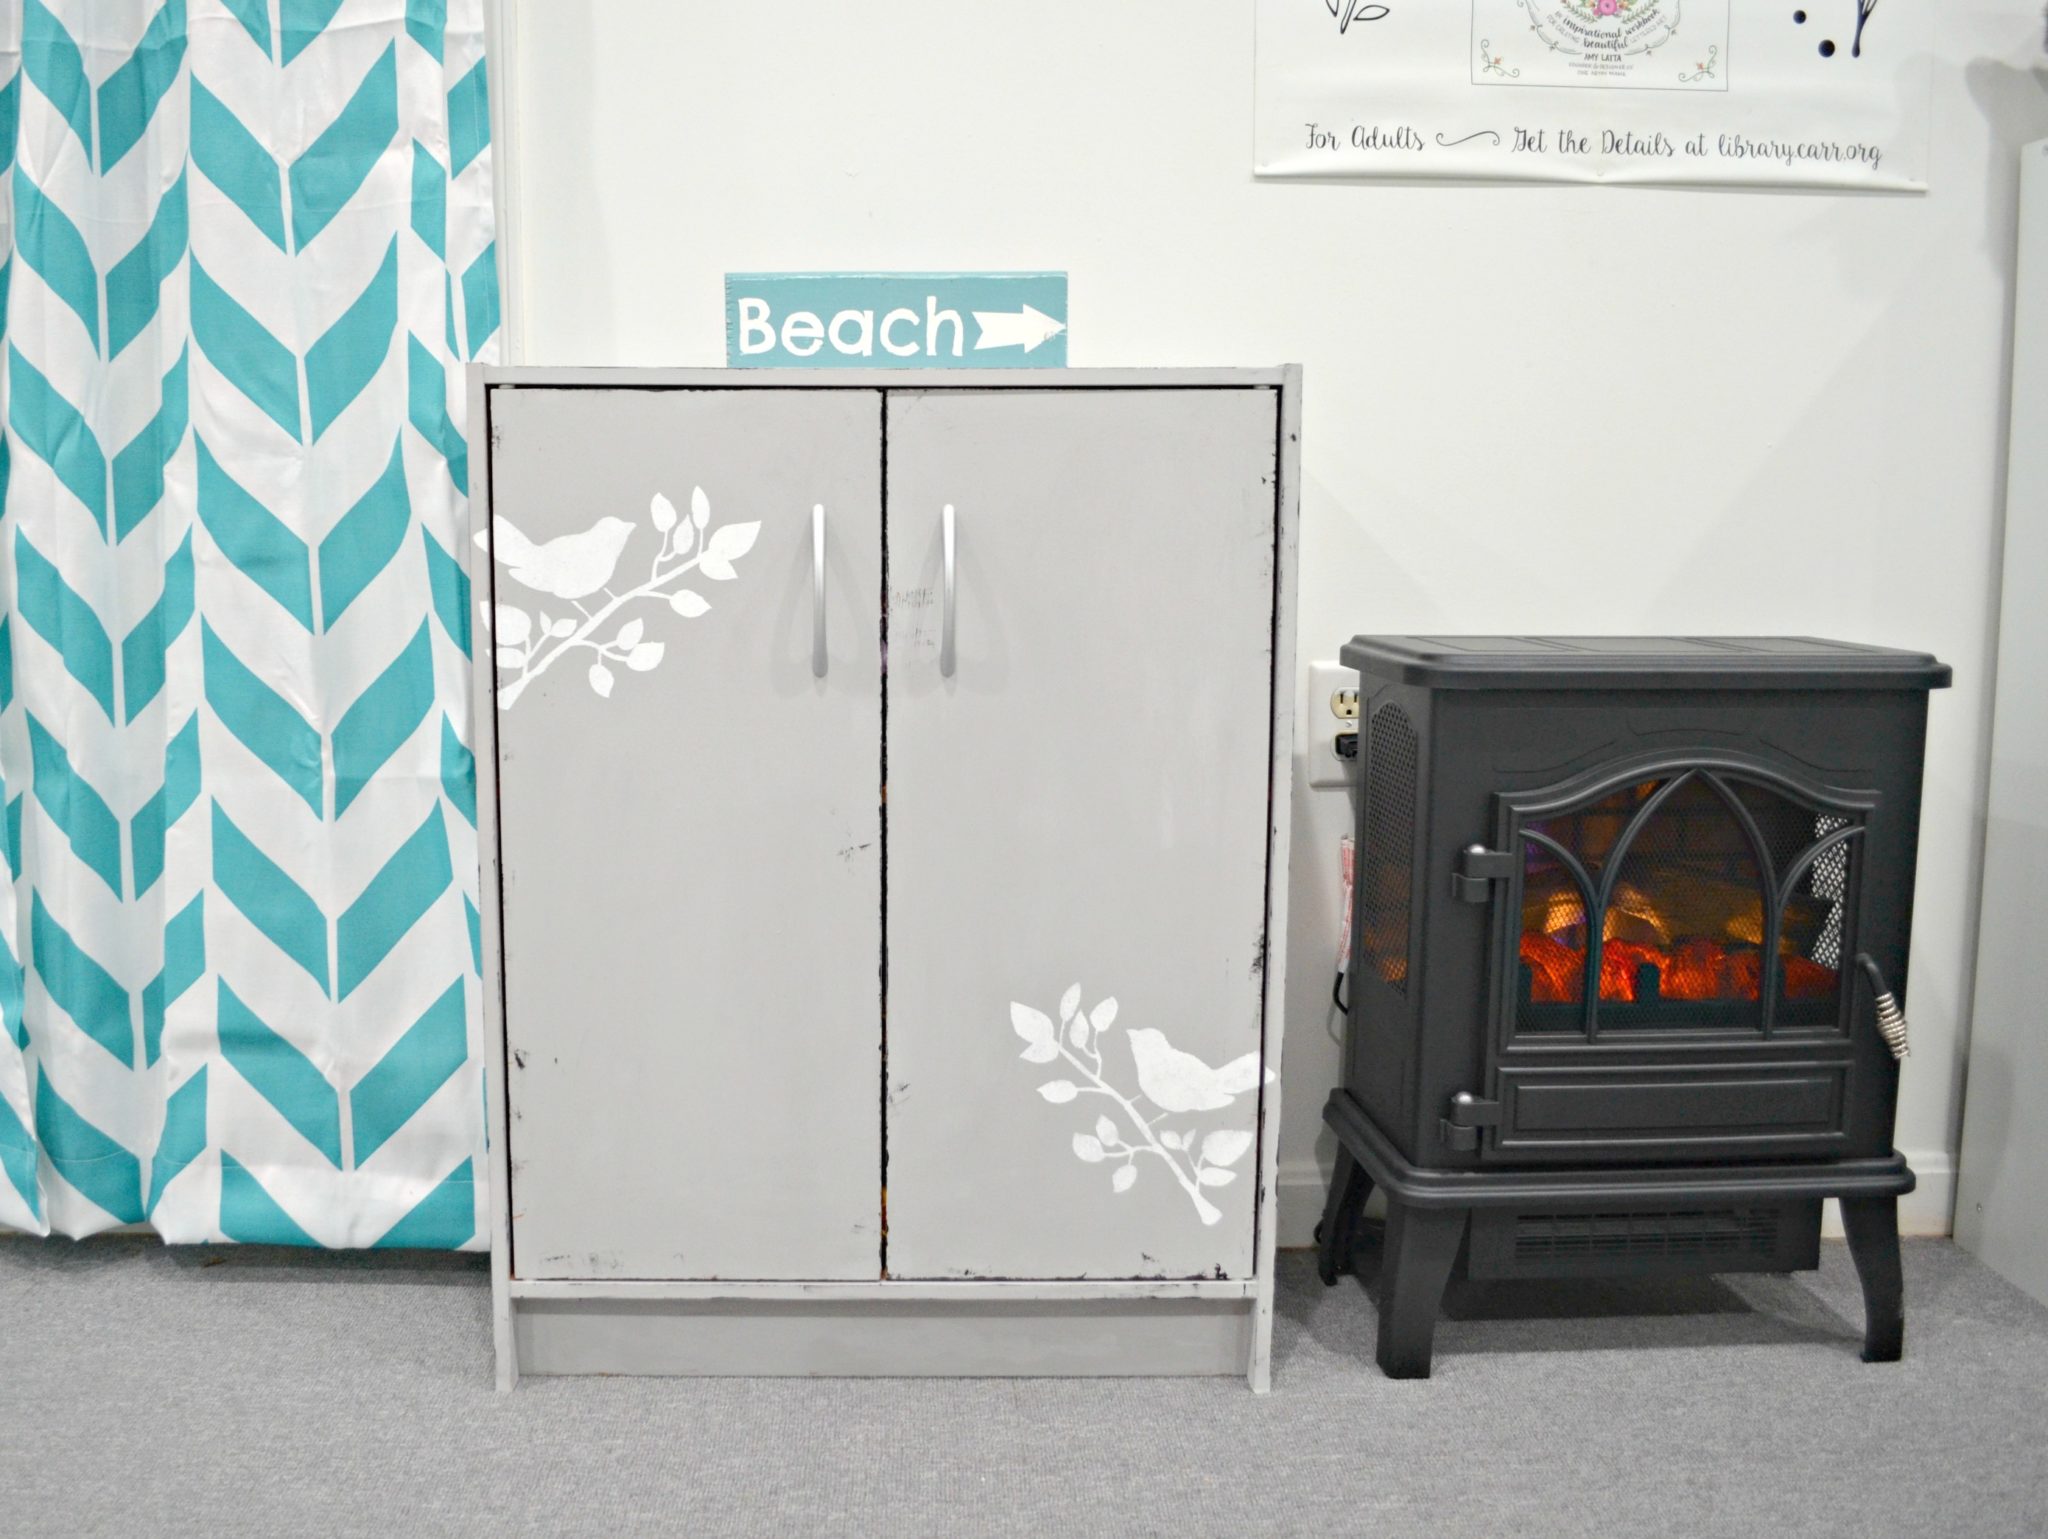
Walmart: Electric Fireplace, Curtains
My Projects: Painted & Stenciled Cabinet
My General Crafting Area
My main creative space for all non-lettering projects is that built-in countertop you saw earlier. To make it beautiful as well as useful, the first thing I did was paint the wooden parts below it grey. But that still left the countertop itself. As I mentioned, it was a hot mess. {My bad.}
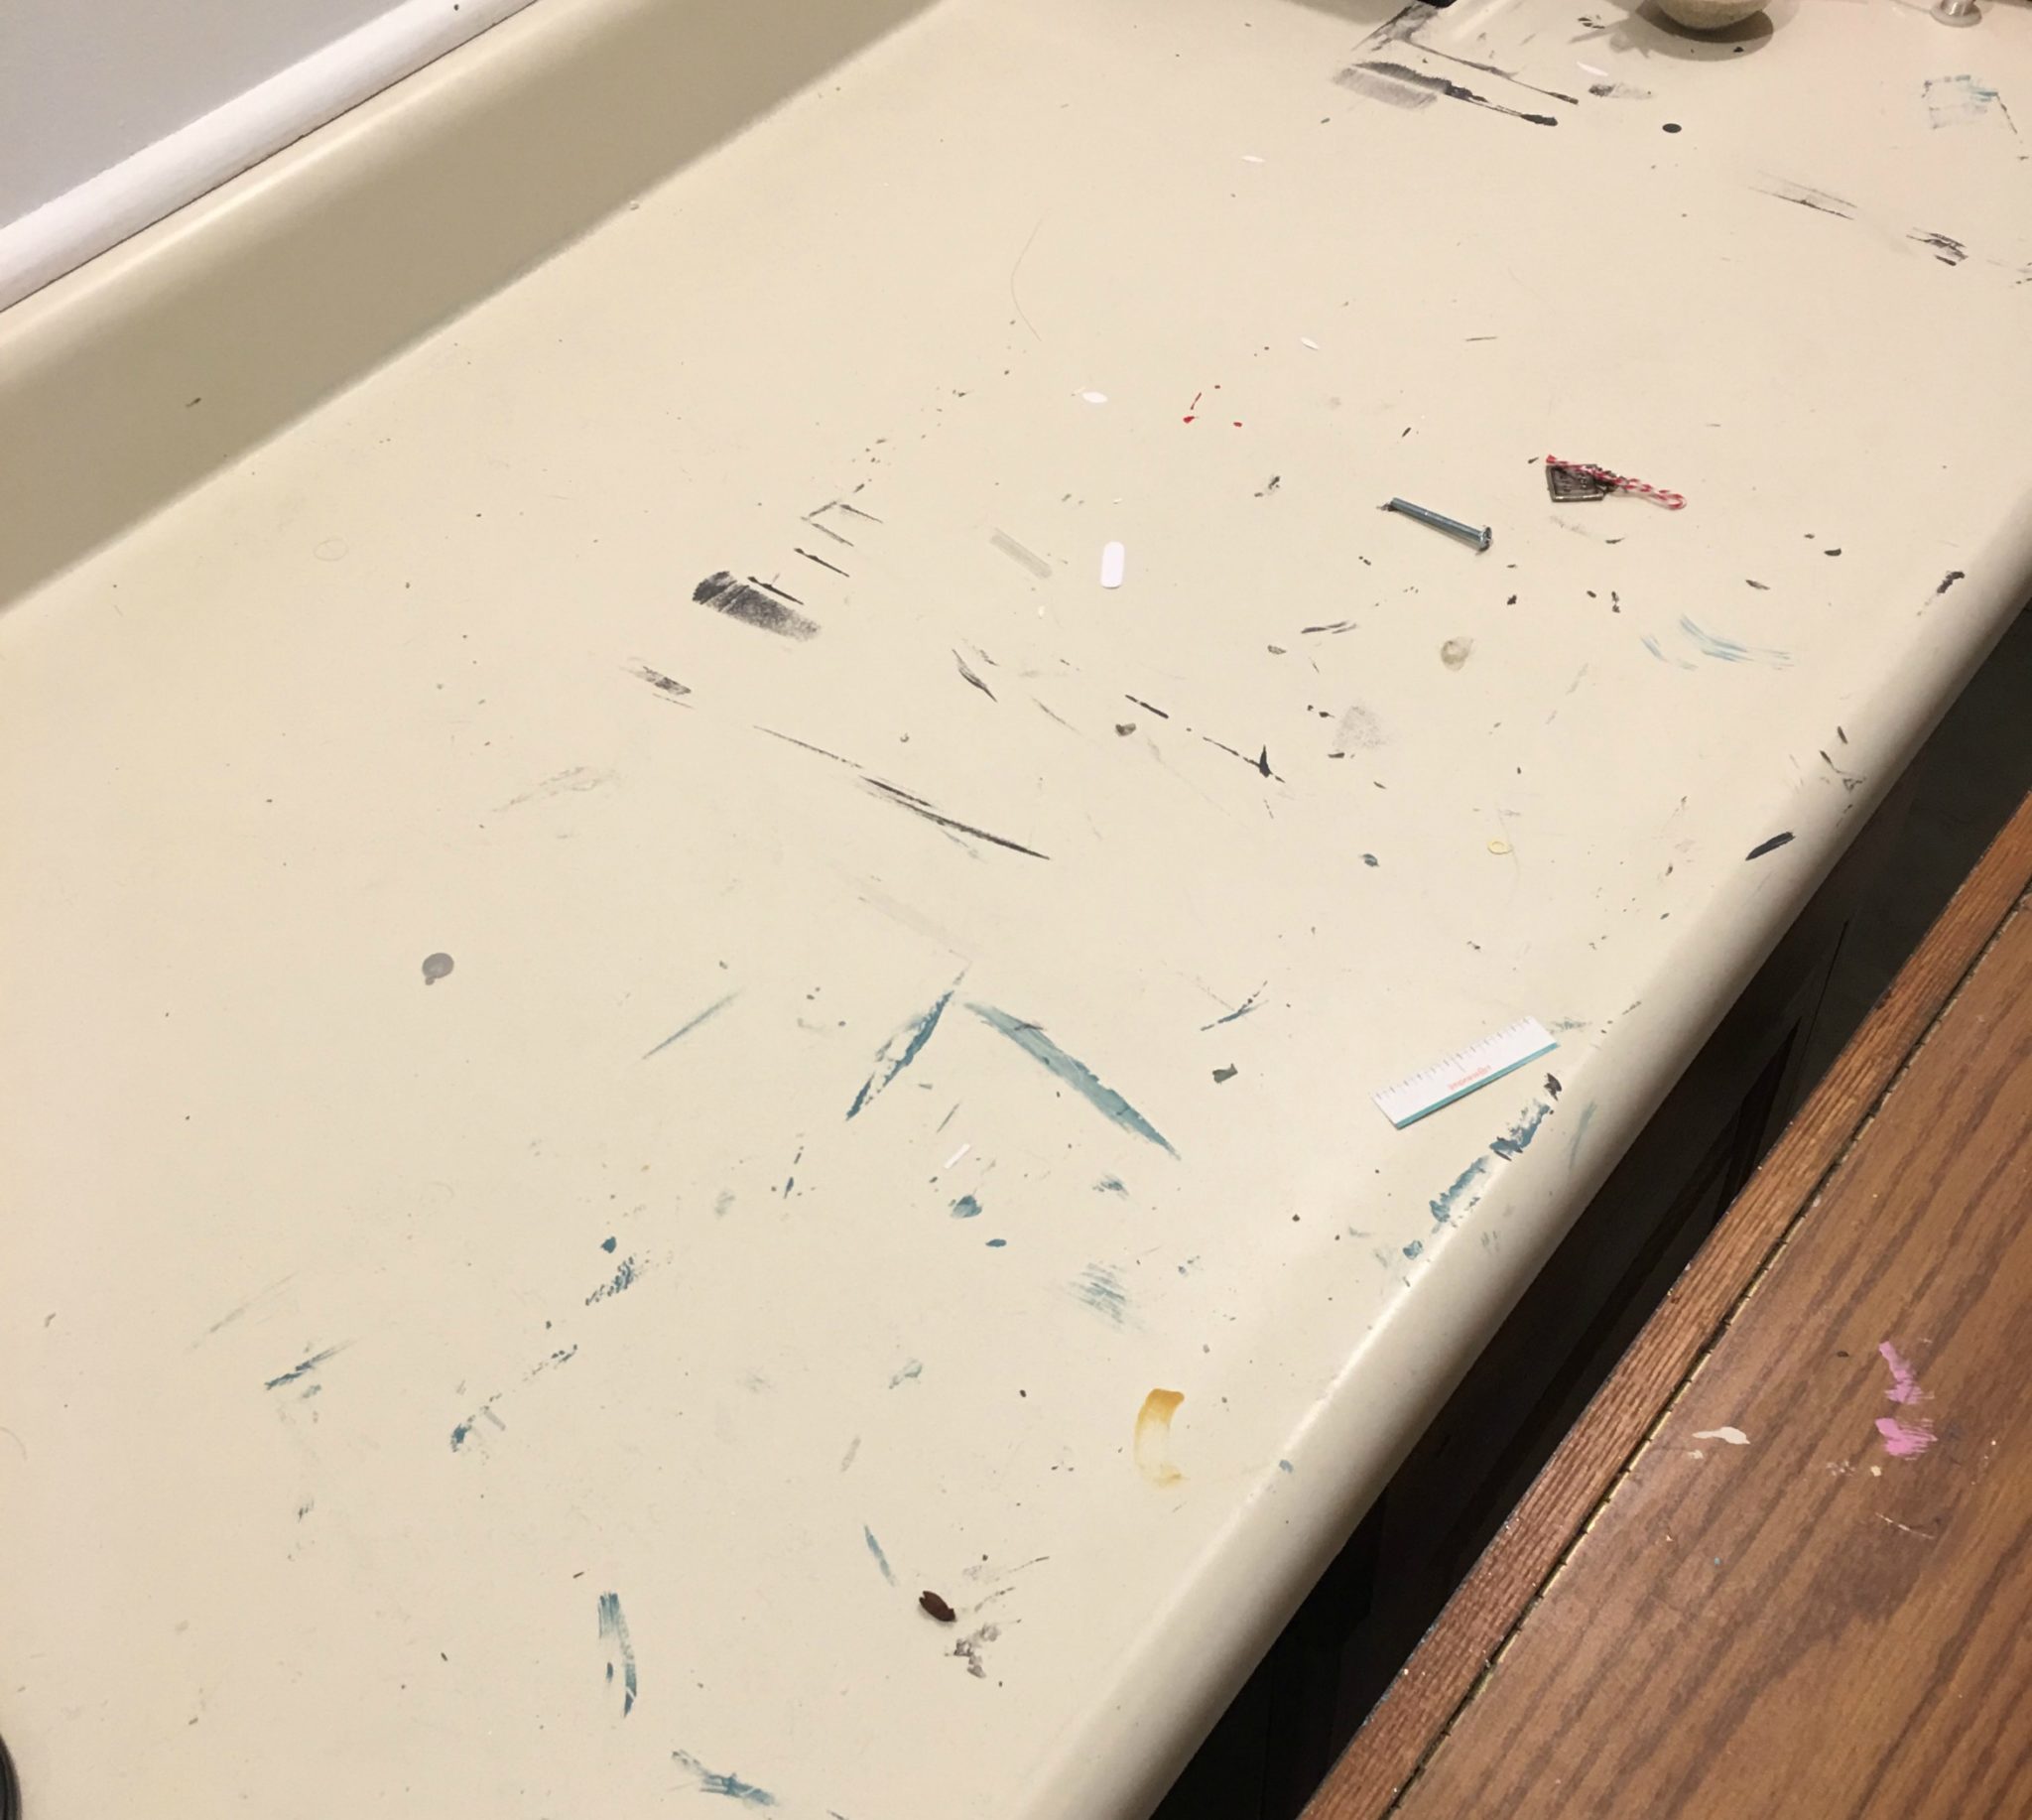
I looked into several options for fixing it and the most cost-effective was to cover it with contact paper. I found a pretty marbled pattern by Duck brand and my hubby and mom helped me to apply it. It’s not perfect; if you look up close, you can see wrinkles and bubbles as well as where I had to piece it together, but it’s a far cry from what it once was! I put a few storage bins underneath, including one for all my metal stamping supplies and one for all my stencils, and I cleared the countertop of everything but my heat press so I have plenty of room to work.
Another great feature of the room was that there were two cutouts in the wall that had shelves for storage. Before, there were ugly pieces of yellow fabric serving as makeshift curtains. I got these curtains for $8 a pair at Walmart.
Target: Area Rug, Grey Runner, Pattern Runner, Cube Organizers, Stacking Storage, Bookcase, White Polka Dot Bins
Walmart: Curtains, Marble Contact Paper, Stacking Storage, Cube Bins, Chair Cushion
My Projects: Painted Chair, Painted Stool
As far as storing my supplies, I already had two cube organizers, which I stacked on top of each other and filled with new color coordinating bins. The double door cabinet, which I also already owned, holds my specialty paints, all my Mod Podge, and other Plaid products.
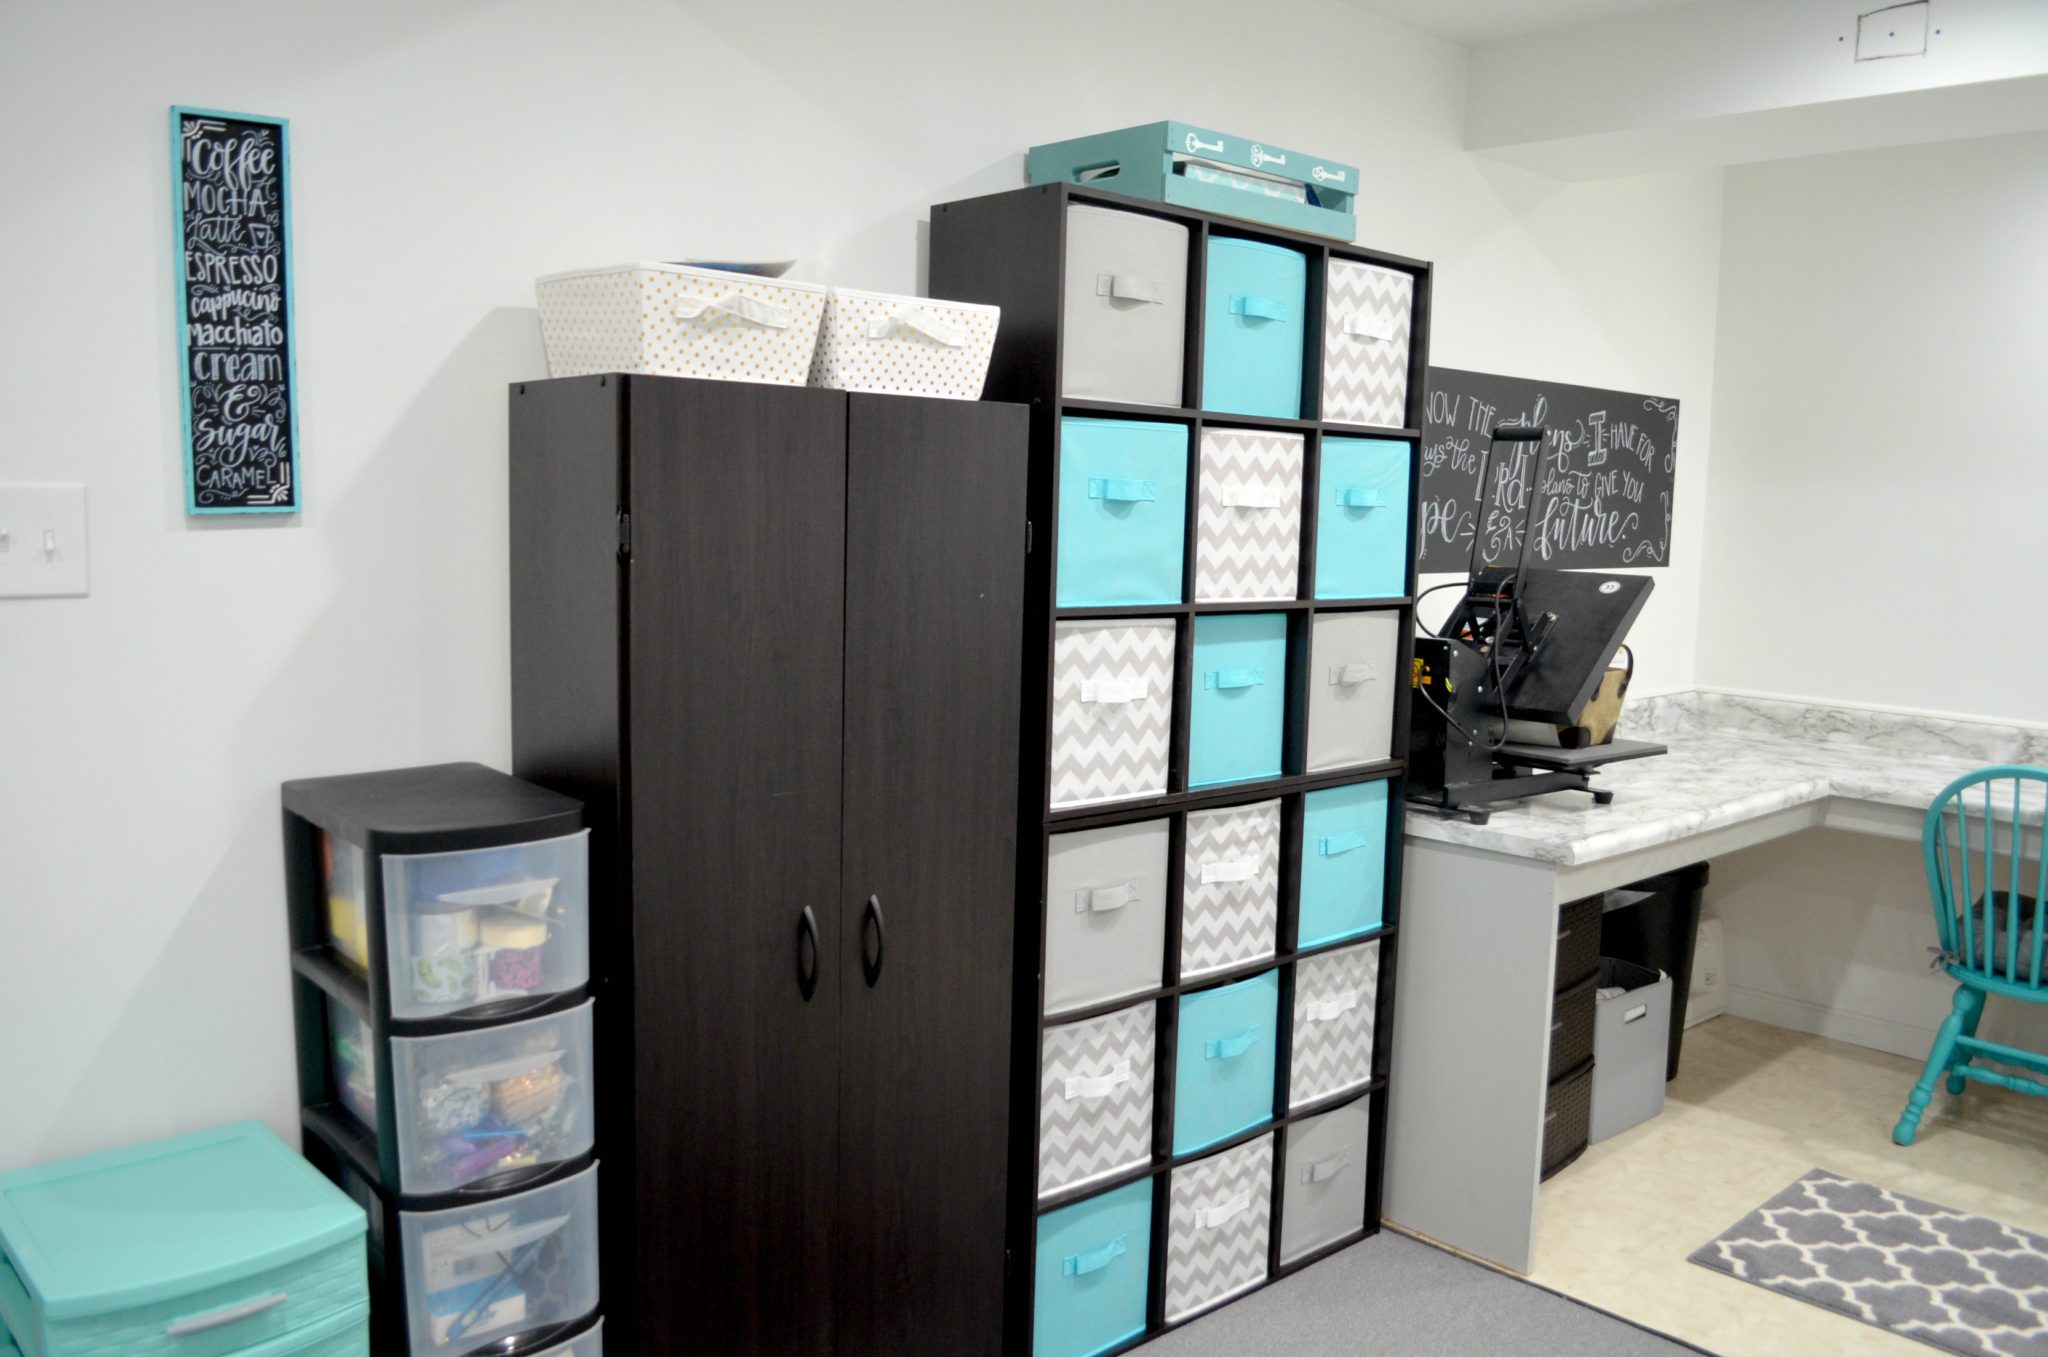
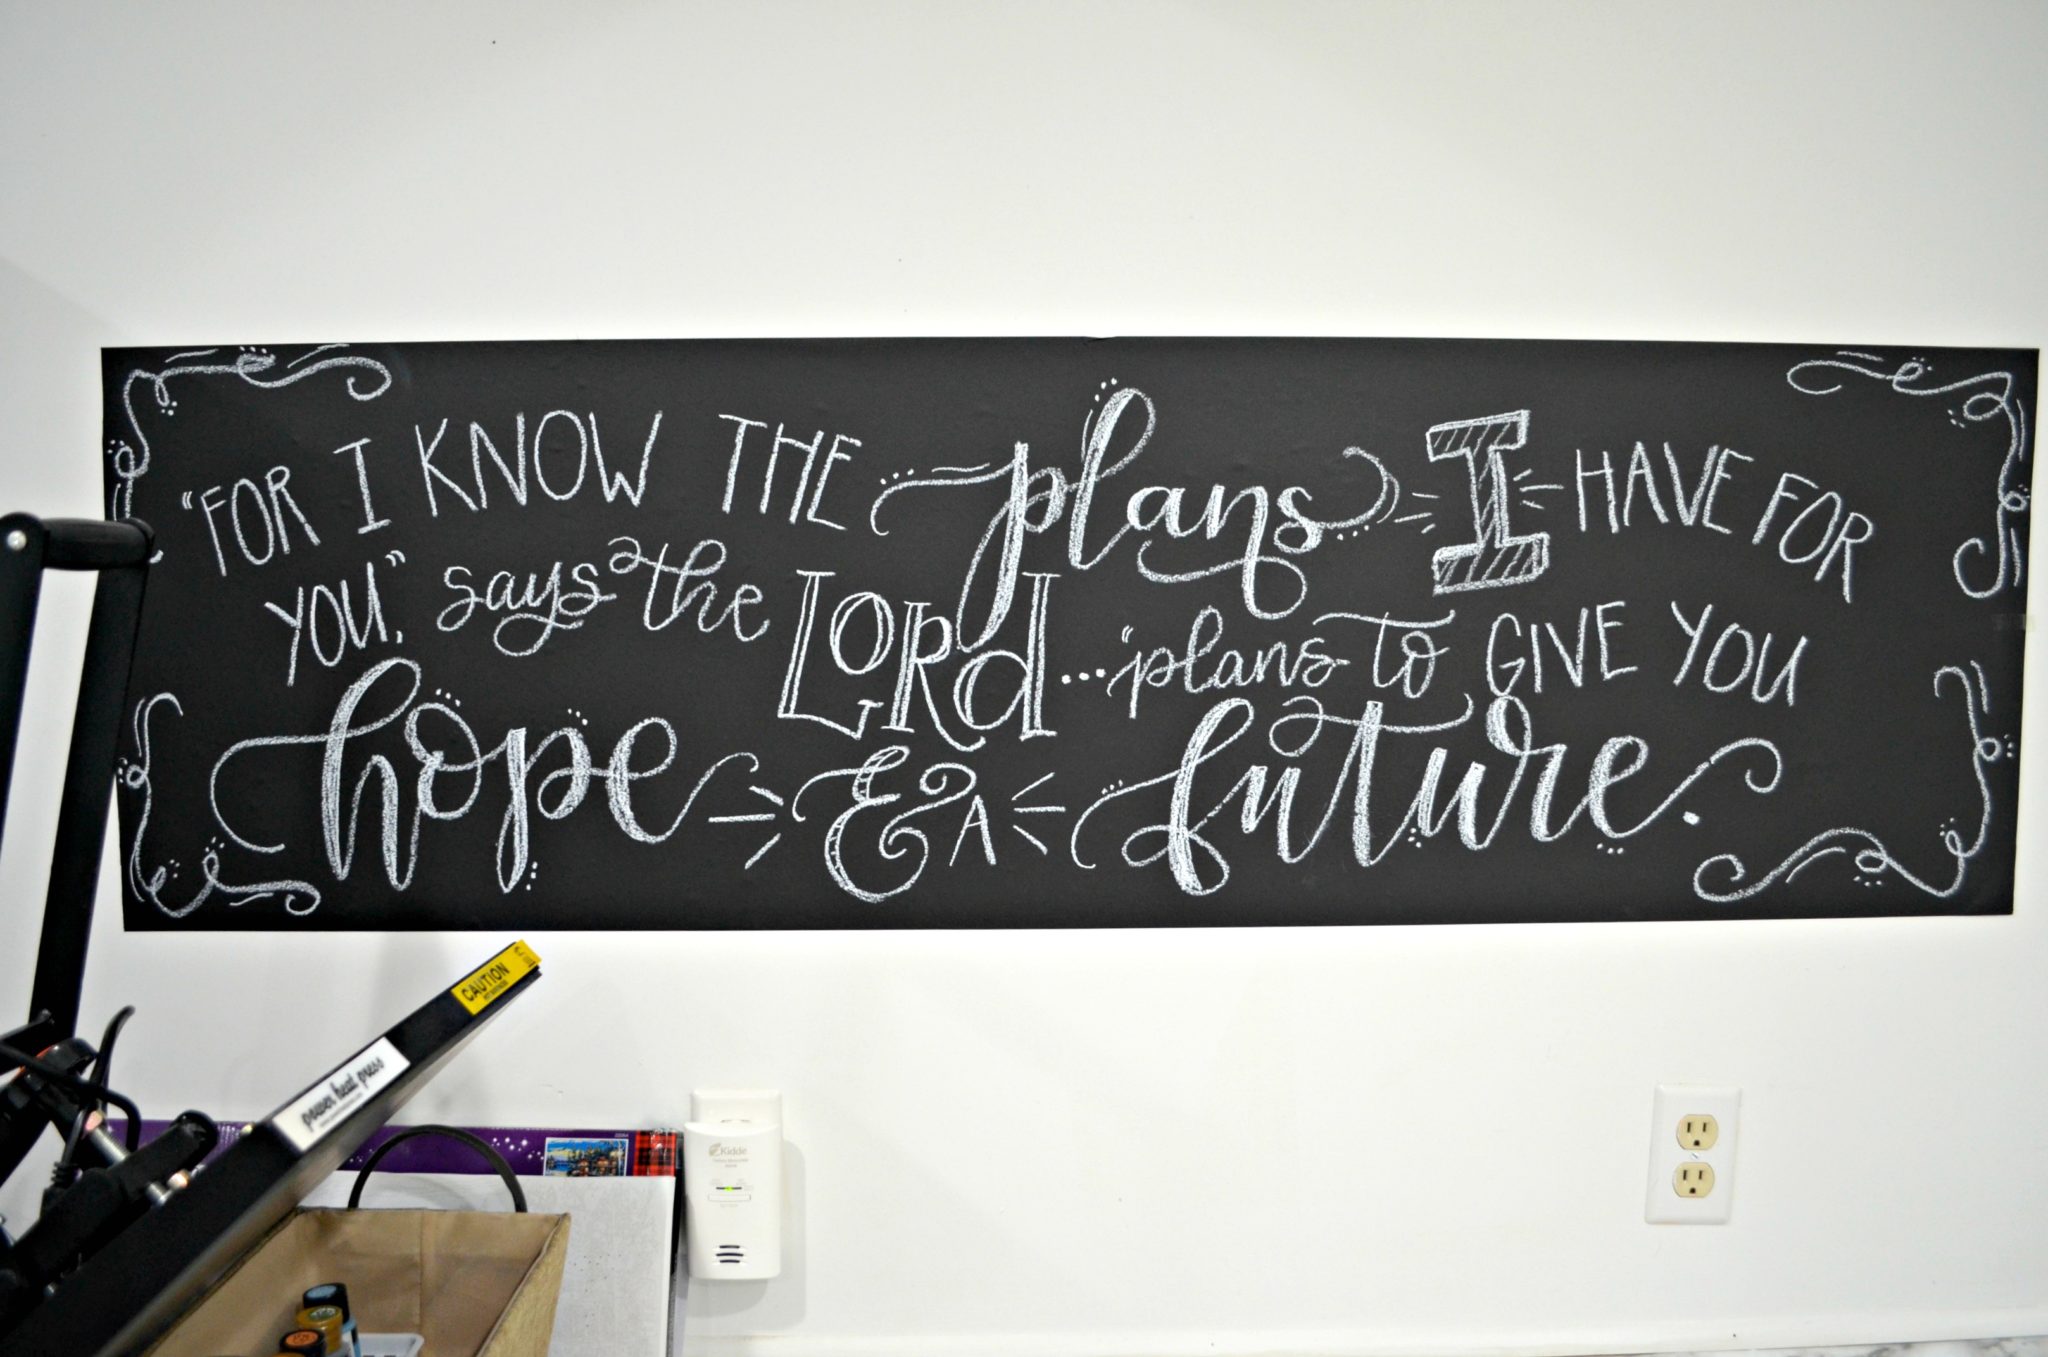
In my purging phase, I found a roll of adhesive chalkboard vinyl that someone had sent to me, so I cut off a piece and stuck it on the wall over part of my workspace. Then, I got to have the fun of decorating it!
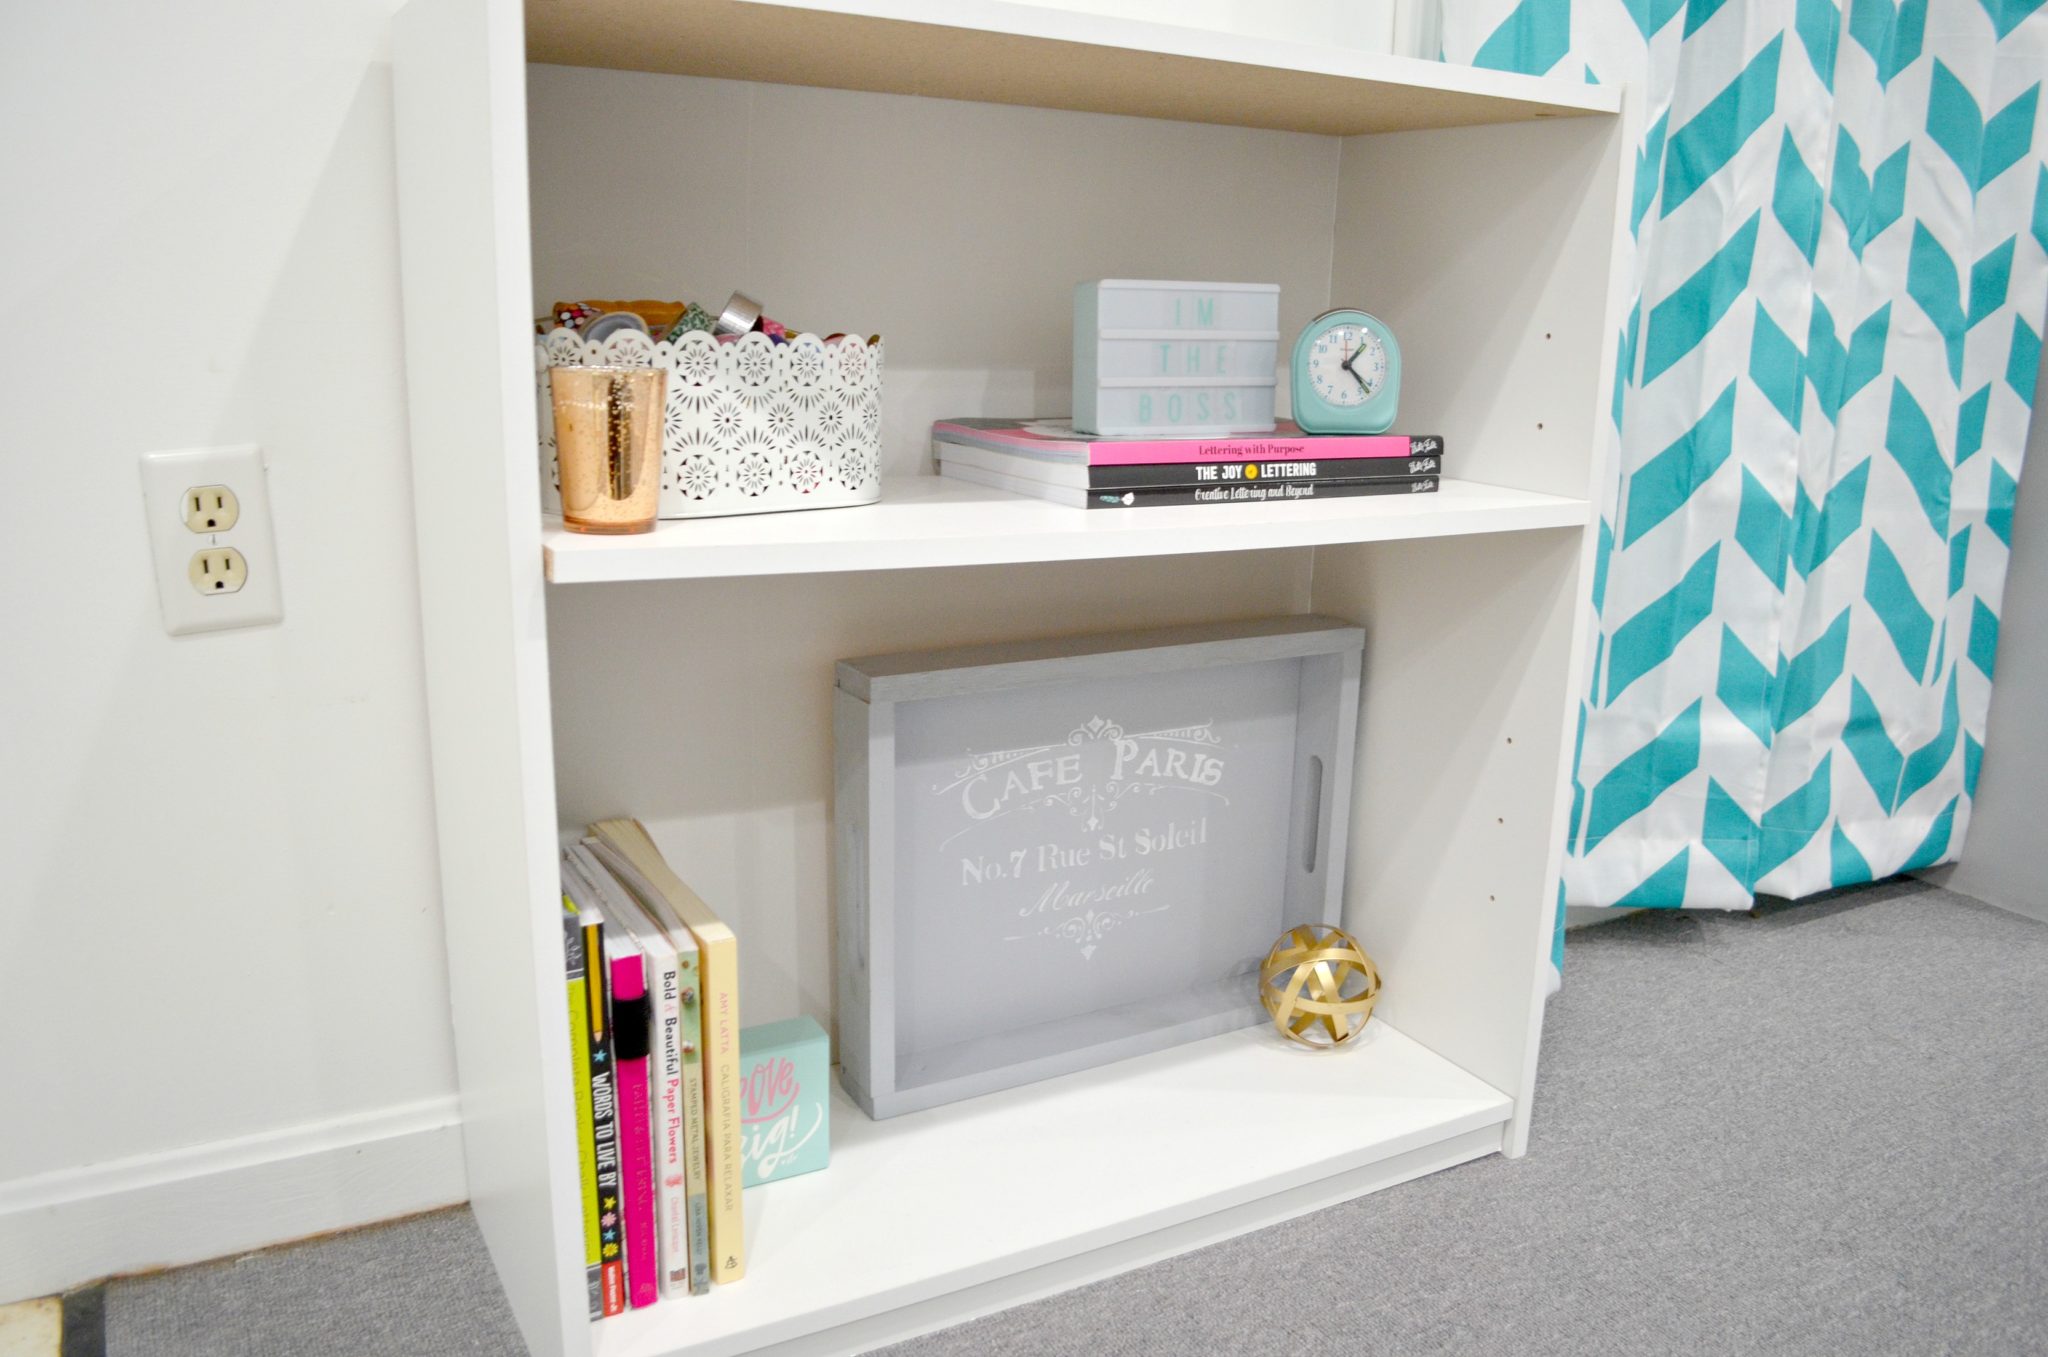
The final piece of furniture is the second bookshelf, which holds my favorite books on lettering, metal stamping, etc. I also found a cute little tin at Target in the wedding aisle that now holds all my washi tape, and a fabulous tiny light board where I wrote myself a reminder, “I’m the boss.”
Target: Washi Tape Holder, Gold Candle
Hobby Lobby: “Love Big” sign, Decorative Gold Sphere
Walmart: Clock
JoAnn Fabrics: Mini Light Box
My Projects: Grey Wooden Tray
Books: Lettering With Purpose {Brittany Luiz}, The Joy of Lettering {Gabri Kirkendall}, Creative Lettering and Beyond {Gabri Kirkendall}, Words to Live By {Dawn Warnaar}, Faith & Lettering Journal {Krystal Whitten}, The Complete Book of Chalk Lettering {Valerie McKeehan}, Bold & Beautiful Paper Flowers {Chantal Larocque}, Stamped Metal Jewelry {Lisa Niven Kelly}
I cannot even tell you how much I am loving every single detail of this space. It’s completely, 100% mine, and everything is just the way I want it. Looking at the before and after photos, I can barely believe I’m looking at the same room.
I basically want to live down here all the time, and Flynn the cat has decided the same. Instead of a dark dumping ground, I now have an inspiring and comfortable place where I can express my creativity in whatever ways I want! I know that none of us will ever create exactly the same spaces in our homes, but my hope in sharing this with you is to inspire you to make sure you have a creative space you love. No matter how big or small it may be, there are a few basic things you can do to make sure your own space is as great as possible.
I actually shared about it in my first-ever Amy Latta Creations podcast this week, and I’d love for you to take a listen! You can find it on iTunes, Google, and anywhere else you subscribe to podcasts, as well as here at Buzzsprout. I’d love to know what you think!
Thanks for letting me give you a tour of my dream craft room! Stay inspired!
xo,
amy
PS. Don’t forget, if you like it, then you oughta put a Pin on it!


Love your transformation. Enjoy your new space.
Amy, I love this room! I just got a new home so I get to design a studio for myself. I may just steal some of your ideas.
Please do!
That’s amazing! I hope I can come up with a space of my own when I have my own place someday
Beautiful! Enjoy!
This looks amazing!! Love the colors!!
This is beautiful! I would live in that room. I really love the colors also.
Just lovely. I love the color combination and the extra light makes all the difference.
I think you did a fabulous job! Your space is really inspiring!
The transformation is amazing. We’ll be adding on to our very small home office soon and you’ve given me some great ideas for my own space. Thank you!