
Fingerprint Frame


All you do to create this fun work of art is dip your finger in each color of paint and dot it onto the frame. We started with red. At this point, I confess I was a little nervous that it wouldn’t turn out like the one we’d seen.

Adding pink into the mix…still not looking like much.

We added red three shades of pink, and white, then Little Crafter started getting fascinated by the idea of mixing the colors. He made me keep squirting a little of each one onto the plate and then mixing them up different ways to see what shades he could make. He also liked swirling the colors and making prints that looked like peppermints. It was actually a lot of fun to watch him do it. Messy, but fun.


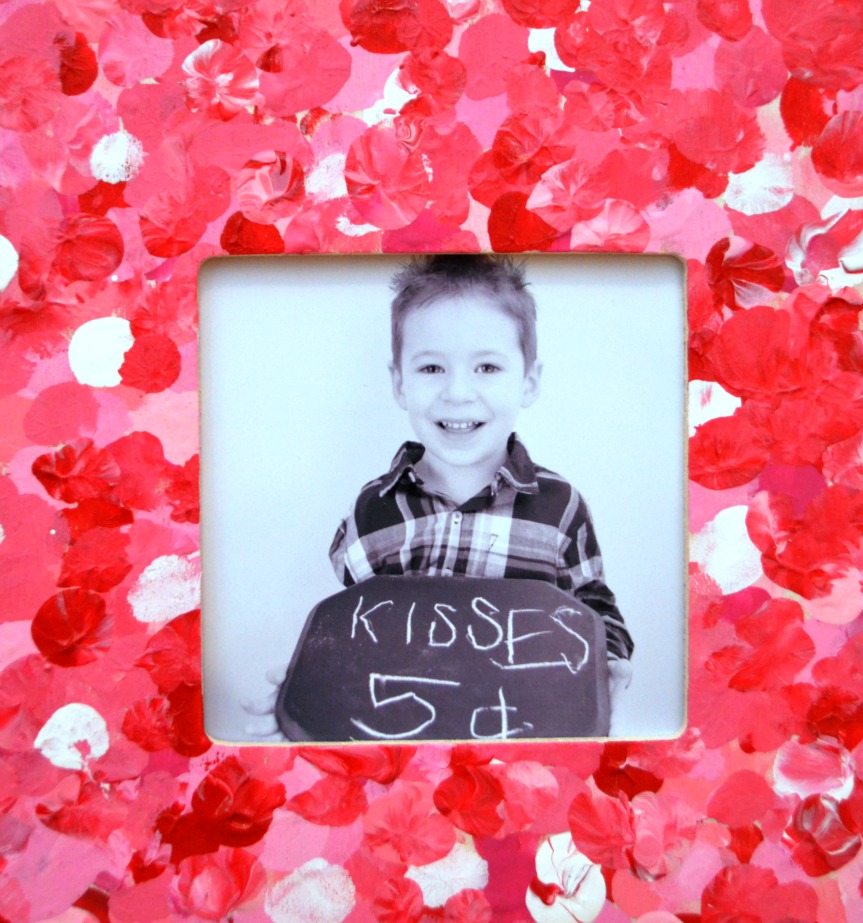
When all the wood was covered, this is what we ended up with…we both love it! We were good and patient and let it get nice and dry. At this point, it’s a good idea to add a coat of Mod Podge to seal it.

Then, the final step was to add Little Crafter’s photo. I black and white-d one of the pics we took for his photo Valentine cards…aaahhh! So. adorable. I think it kind of looks like it was the stock photo in the frame, don’t you? Maybe I should call the company and see if they want to use him as their model cutie…hehe.
I do have one confession to make…prepare to be shocked. Our original plan was to add glitter after it dried. But we didn’t. {gasp!} When it was all said and done, it just looked so cute and so fun and colorful that I was actually afraid the glitter might take away from it and make it too ‘busy.’ I know, I know. Don’t tell anyone.

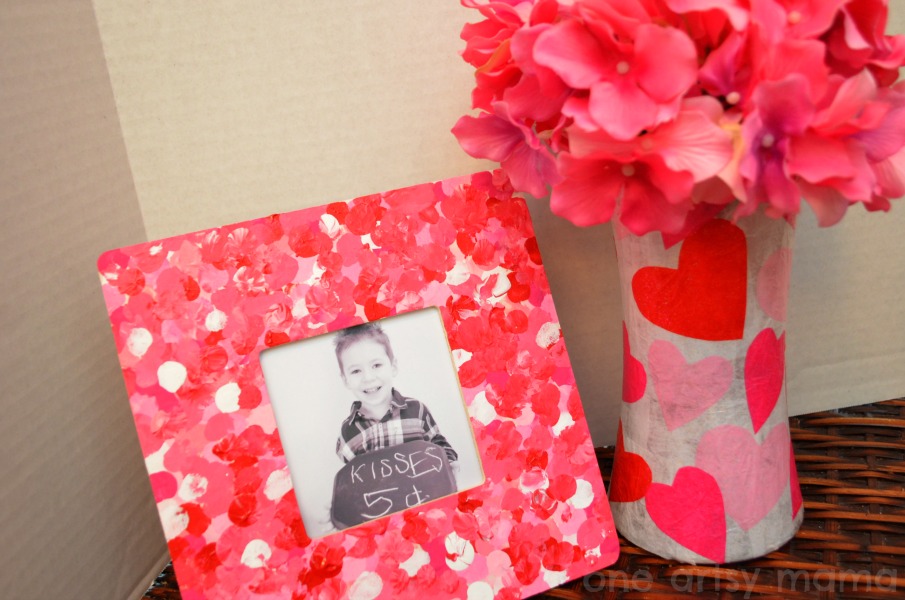
I think it’s so adorable, and it goes so nicely with some of the other festive decor projects we’ve been making, like our vase and coasters!
What do you think? I’d love to see your latest Valentine’s projects, or anything you’ve been making lately. Be sure to stop by our Shine on Fridays party to get and share some inspiration this weekend!


Amy,
This is adorable. Do you have problems with the paint getting on Little Crafter’s clothes. I get so leery about craft paint and my big kid– he seems to always get it on his jeans!
~Emily
http://tossedsaladlife.com
I take a large plastic trash bag and make a hole for the head and two holes for the arms. This covers the child clothes so they do not get paint on them. You need to make sure they are wearing a short sleeve shirt. Then just throw the plastic bag away.
Super adorable!
So cute!! I’ve been trying to think of what my daughter can make her grandparents for V-day and now I know! Thanks for sharing
OMG this frame is sssssooooo cute and so easy. I bet LC loved getting his fingers dirty!
Love it! Co creative 🙂 great kid project!
I love this idea! I am going to make one with my son this week!
How special and completely adorable!! LOVE the vase too! 😉
Your Newest GFC Follower :),
Brenda @ChattingOverChocolate.blogspot.com
What a cute frame…and the vase is nice too.
He is so cute painting with his hands.
What a fun project! He looks like he had a ball 🙂
This is super cute. I think I have some crafty wooden frames that I could let the kids decorate for the grandparents. Cute idea!
It is super cute!!!
Amy, those magical fingers. Every time I see this post I am blown away at it’s simplicity yet how gorgeous it turned out!
Yours turned out really cute Amy! I’m glad you gave the project a try – it’s so fun right?
Amy, you’d think I’d stop smiling but I can’t…whenever I see this post I just grin! I’m so glad you shared this at Loving Valentines Day!
TGIF!
Marilyn
Super Duper
Wow! That is so easy, but it looks really good. A great gift. Stopping by from I should be mopping. Hope to see you at True Aim!
Hi Amy! I love your frame, so cute and so is the little guy inside 🙂 Thanks for sharing it with us on A Crafty Soiree, I’ve featured your project in this week’s new party post. It’ll be up tomorrow at midnight EST. Please come by and see it and share some more of your craft skills!
Hello! I just wanted to let you know that your Fingerprint Frame has been featured at a round up over on my blog! Come on by and check it out!
Sara from A Plethora of Ponderings
http://plethoraoponderings.blogspot.com/2014/01/valentines-day-crafts-for-kids.html
Wow! This is easy and so much fun. I loved the paint colour used for the border. Thanks for sharing.
Amazing idea. Looks adorable. Thank you very much for sharing.
Thank you!
This is just beautiful. Thank you for sharing this idea.
I had so much fun doing this with my kid! This is a really great gift and an awesome activity at the same time!!
So glad you guys enjoyed creating this together!
Yeah correct, I also tried it with my kids It’s Fun. Thanks for sharing this creative idea.
Yay! I am so glad you guys enjoyed it!
Lovely article. Thanks for sharing.
This is simply cool. Thanks for haring this idea.
Amazing valentine’s day photo frames for beloved. thanks for share. keep updating.
Adorable Gift for valentine’s day photo frames for loved ones. . Thanks for sharing.
Very informative
Very interesting
Article s Nice !
Thanks for Sharing
Super! Great idea!!
[…] Valentine Photo Frame – One Artsy Mama […]