If you were to ask me what one crafting supply I refuse to do without, what do you think the answer would be?
Any guesses?
That’s right, my trusty Mod Podge!
I tell ya, that stuff can do almost anything! I think if I had it with me on a deserted island, I could somehow use it to create a raft and build a shelter and signal for help, and maybe even make some cool jewelry while I enjoyed the view and waited for the rescue team to arrive! Ahhhhhh……
Anyway, as I was going through some old photos today, I came across these pics from one of our very first, if not THE first mod podge project Little Crafter and I ever attempted!
And, shocking as it is, I {oh, I’m ashamed to admit it…don’t tell anyone}
I never blogged about it.
But, I’m ready to remedy the situation…here it is and here’s how to make one with your little crafters {or just for you!}
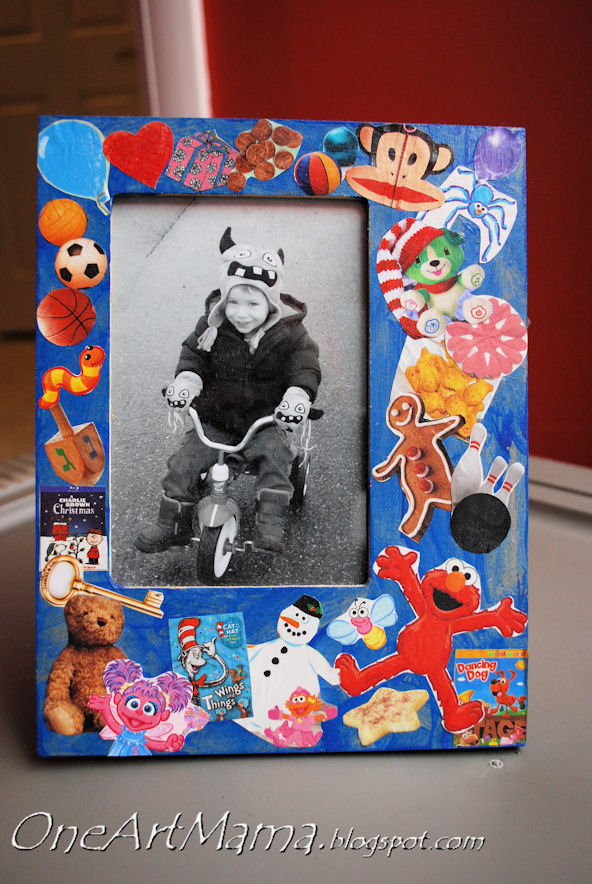
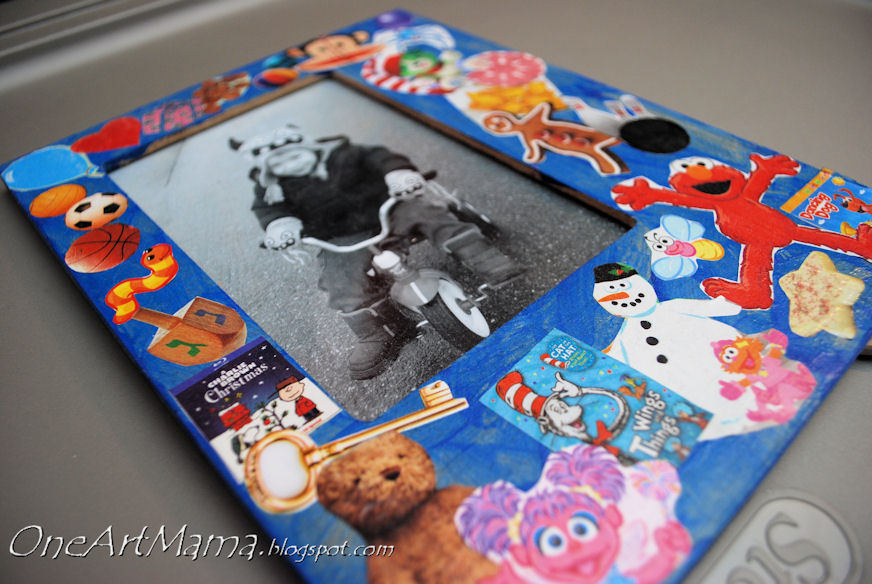
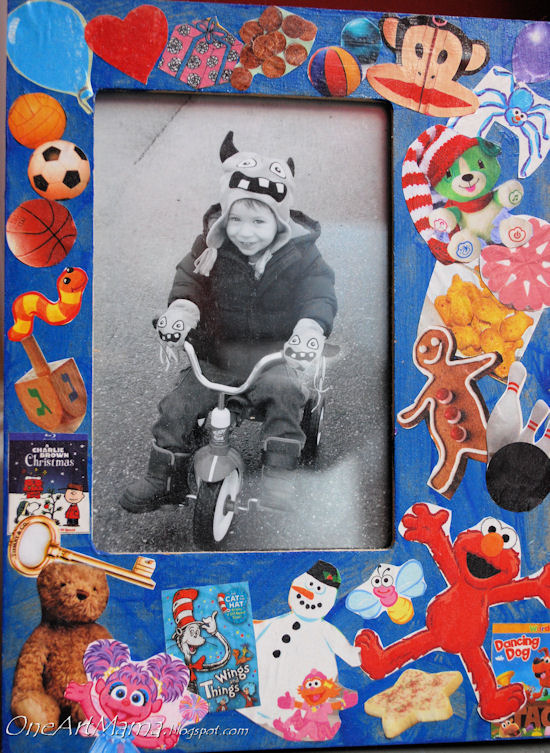
MOD PODGE COLLAGE FRAME
Materials:
unfinished wooden frame
paint and paintbrushes
magazines
scissors
Mod Podge: we used glossy finish
photo
I apologize in advance for not having step by step photos, but we made it last January, before I ever dreamed of having a craft blog, so I didn’t have the camera out during the process.
STEP 1: Paint your frame. Let it dry completely.
We got our frame for $1 at Michaels. You can get any size, any shape or style that you like.
STEP 2: Flip through magazines and have your child find pictures he or she likes that represent favorite characters, activities, hobbies, toys, etc.
Since Little Crafter was only 2 at the time, he just pointed them out and I did the cutting. Older crafters can cut out their own pictures.
STEP 3: Before you glue, play around with the pictures and arrange them in a way that’s appealing to you. Then, put some Mod Podge directly on the frame and place your pictures on top.
STEP 4: After Mod Podge has dried and pictures are firmly in place, paint a thin coat of Mod Podge over the entire frame to seal it and give it a shiny finish.
STEP 5: Add photo.
I have to tell you, I absolutely love this craft because it was fun for both of us, and it preserves that moment in time. Years later, we can look back and remember that at this age his favorite colors were blue, red, and purple and he loved Elmo and Word World. It will remind us that he enjoyed baking and eating cookies, watching Charlie Brown, and playing with money. He liked snowmen and bowling and monkeys and balls, and he loved playing with his Scout toy. A few of the things are a little random, like the key and the spider, but he chose them, so I dutifully cut them out like a good mama since it was his craft to make. Anyway, I love how it captures his personality at 2…and it’s fun even now to see how many of those things are still true at 3 {actually, all of them except for playing with Scout, which he outgrew!}
It’s a relatively quick, easy, cheap project, and it’s one you and your little helpers can enjoy together. What would be on YOUR frame?
Happy crafting!
PS: Don’t forget to link up at our weekly linky party and enter to win a handstamped SHINE necklace!
PPS: The Blessed necklace giveaway from Creative Carmella is still going on too…be sure you enter!


How cool that he still likes most of those things so much…I bought some modpodge the other day…and I thought of you…I’ve never tried it…
I love this. So cute and so many possibilities.
So cute!! Love the idea. I’ve been working with some unfinished frame ideas as well. Thank you so much for sharing at Sharing Saturday, Amy!
I love Mod Podge! I haven’t used it anywhere close to it’s full potential!
I can totally see you mod podging your raft and then working on a few jewelry pieces as you floated along. “Don’t rescue me yet, I just have one more piece to put on this necklace.” lol
Love this project, works as a real time capsule almost doesn’t it. Thanks for sharing it at our Link It Up Thursday party.
love this!!!
Natasha xxx
http://www.serenityyou.blogspot.com
Thank you for sharing at Sharing Saturday this week!!