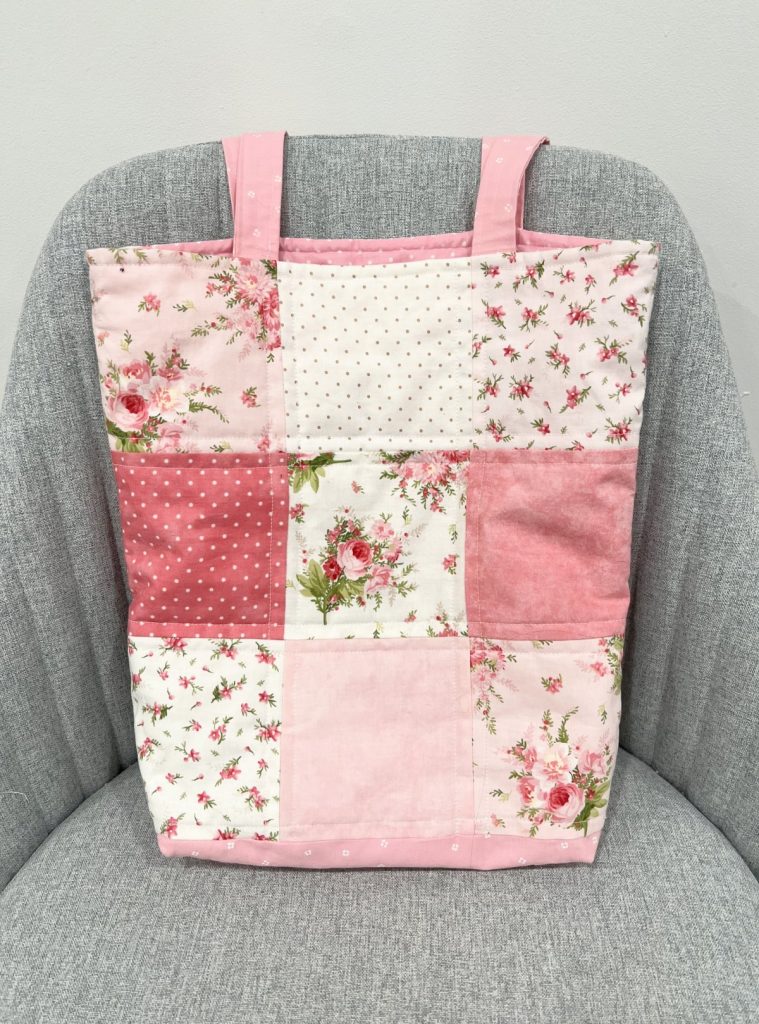
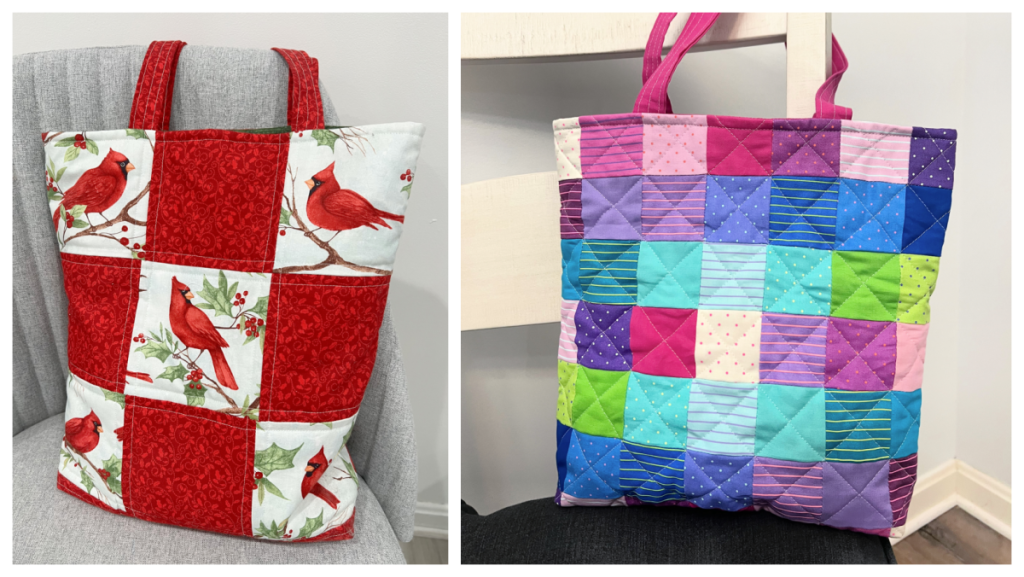
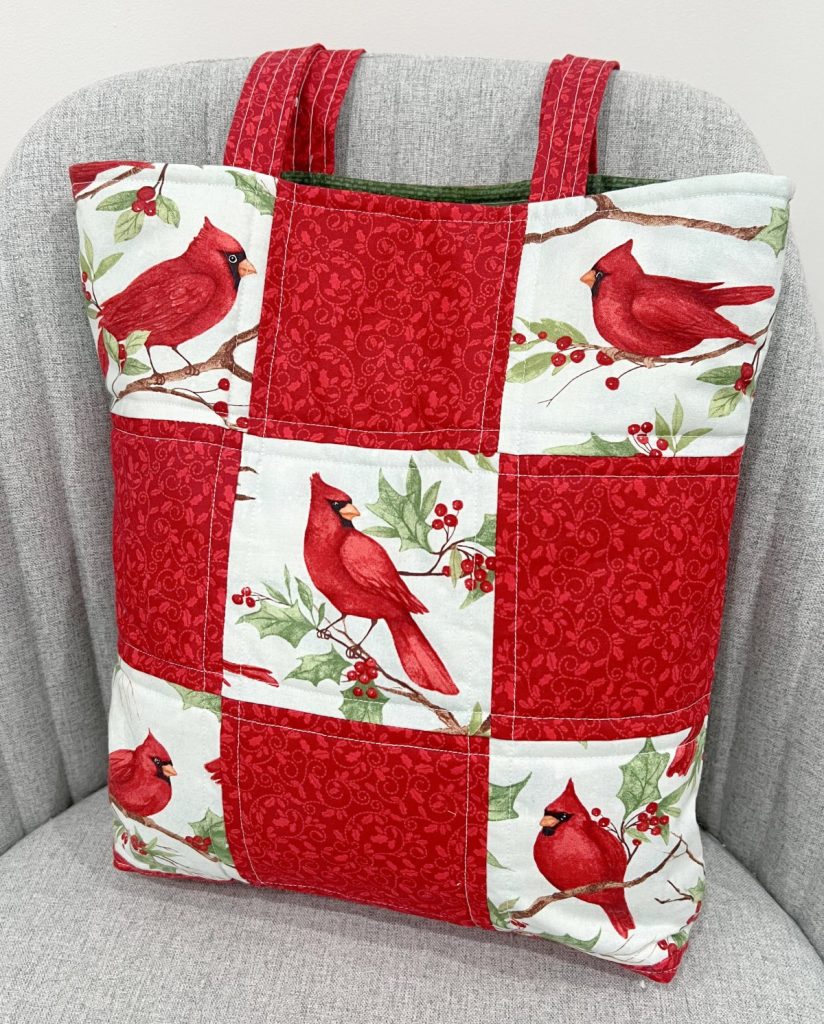
Quilted Tote Bag: Free Pattern
Celebrate Earth Day by creating your own sustainable, reusable fabric tote bag! These bags are fun to make and can look totally unique based on the combination of fabrics you choose. I like to make them using precut 5” squares from a charm pack. They’re perfect for carrying library books, going shopping, and travel. Here’s how you can create your own.
How To Make A Quilted Tote Bag
Supplies:
18 – 5” squares of coordinating fabrics (or 72 – 2 1/2” squares) – 1 charm pack works nicely for this!
1/2 yard fabric for lining
1/4 yard fabric for bag bottom
1/4 yard fabric for handles (or pre-made canvas or leather straps)
1/2 yard Poly-Fil Low Loft batting
CUTTING:
1 – 5” x 14” rectangle for bag bottom
2 – 4” x 29” strips for handles
1 – 14” x 32 1/2” rectangle for bag lining
1 – 16” x 35” rectangle of batting
Instructions
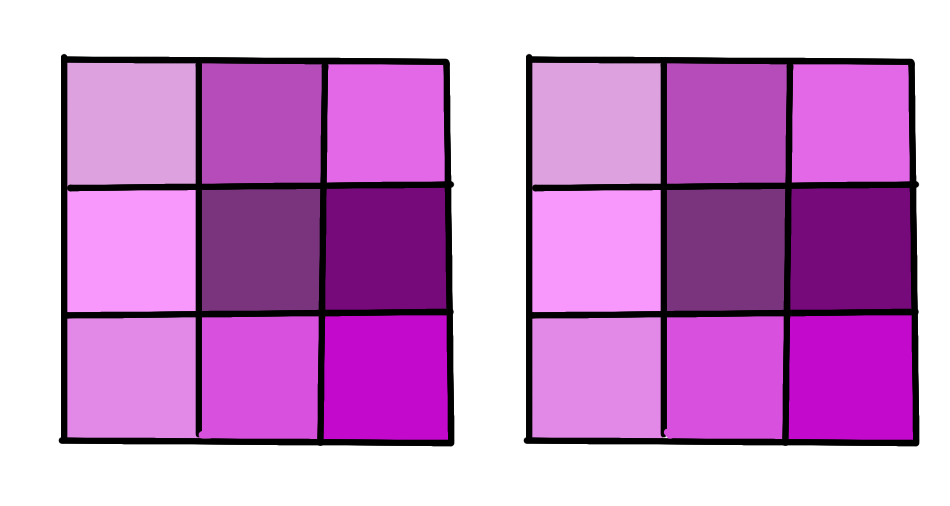
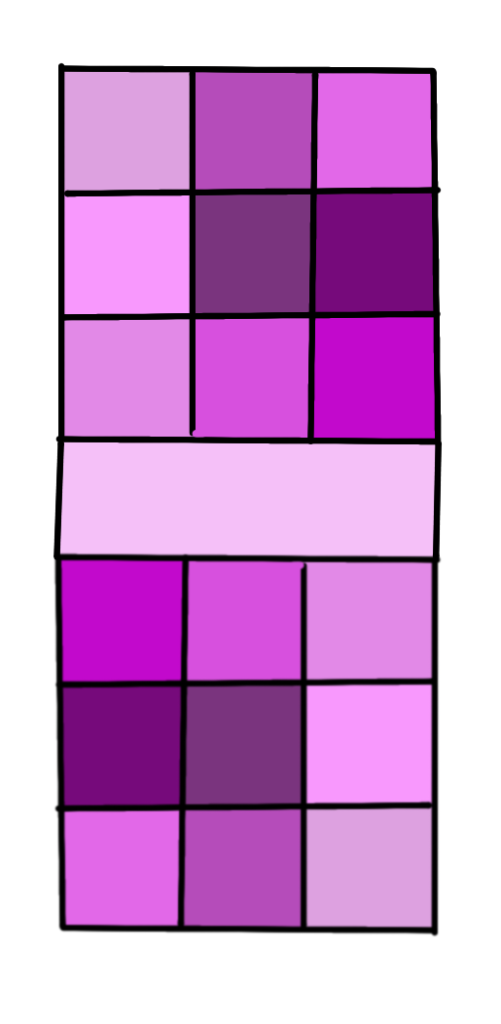
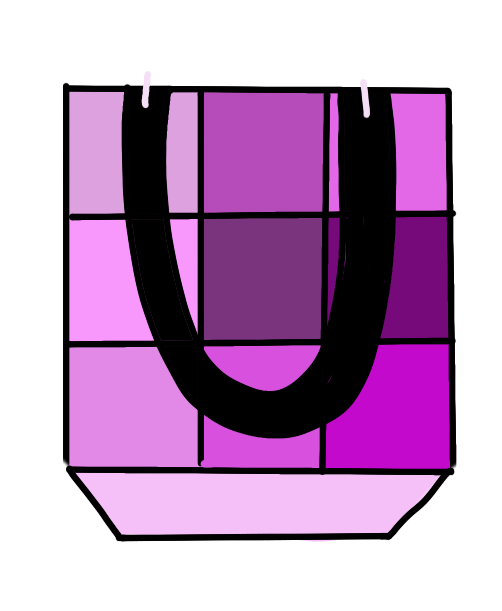
Step 1: Lay out your designs for the bag front and back.
The easiest way to do this is using 9 charm squares (precut 5” fabric squares) for each side and arranging them in three rows of three. Another option is to cut the 5” squares in quarters and use 36 squares that are 2.5” each. Using smaller squares will give you a totally different look!
Step 2: Sew your squares together to form the front and back panels of your bag.
Sew each row of squares together, then sew the rows together. Press the seams as you go so that they lay flat.
Step 3: Sew your bottom piece in between the front and back panels.
Your front panel should be face up, in the correct direction. Sew one edge of the bottom piece to the bottom of your front panel. Then, keeping the back panel face up, turn it around so that it is upside down. Sew the bottom of that panel to the other edge of the bottom piece. Now, you should have one large rectangle that is made up of the bag front, bottom, and back. The right sides of all of the fabric should be up, but the back panel should be oriented upside down.
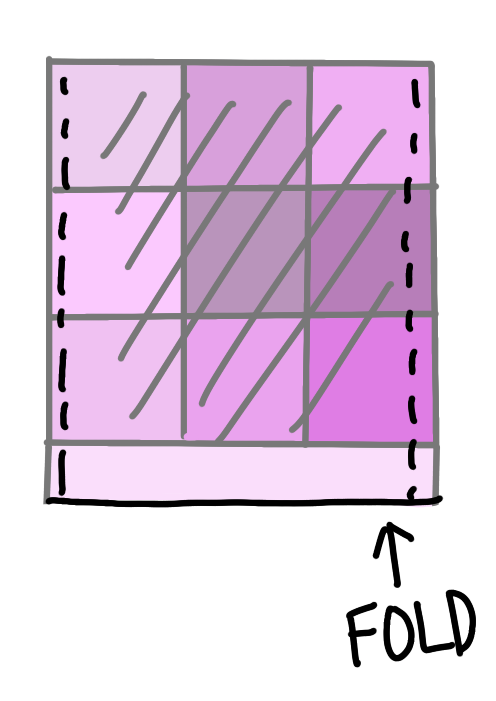
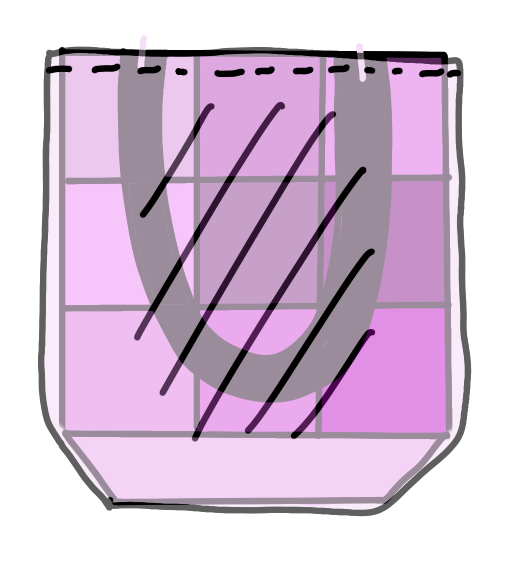
Step 4: Add batting and quilt as desired.
Place your batting behind your fabric piece and pin the two layers together. Then, sew whatever type of decorative design you want through both layers. This is the quilting part. You can make an “x” through each block, sew vertical and horizontal lines through each row and column, or do any type of free motion quilting you like.
Step 5: Fold your quilted piece in half, right sides together, and sew 1/4” seam on each side.
Step 6: Form squared bottom.
Grab the sides of each bottom corner and flatten them with the seam in the center as shown below. Sew a straight seam about 1 1/2” in from the point. Cut off the excess.
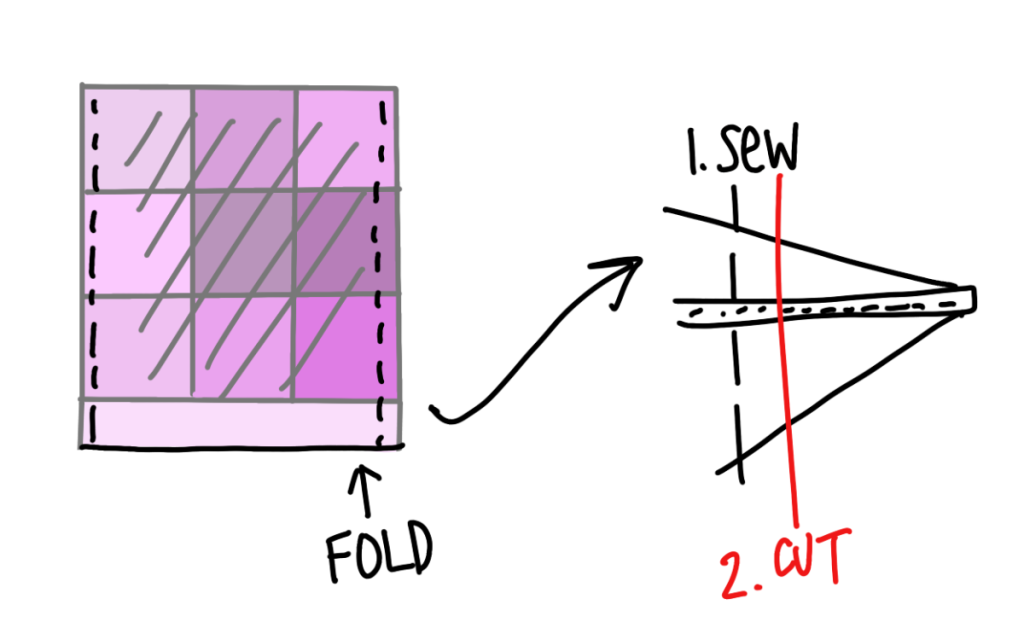
Step 7: Turn your bag right side out and set aside.
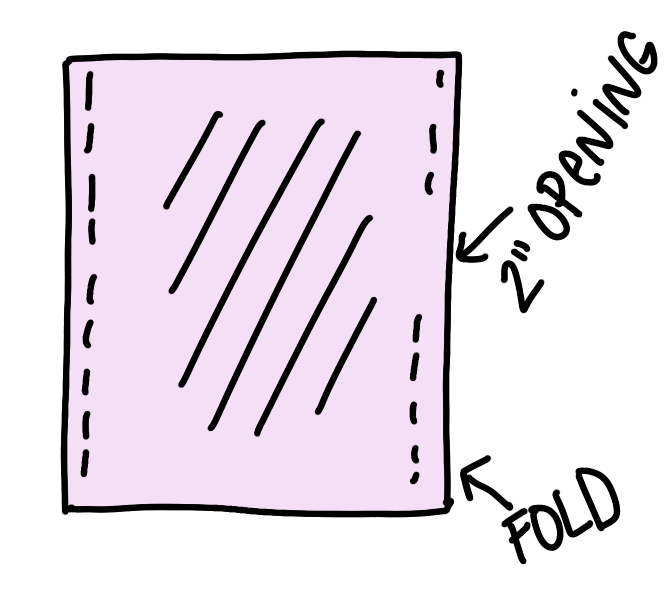
Step 8: Sew the lining.
Fold your lining piece in half with right sides together. With the fold at the bottom, sew a 1/4” seam on each long side, leaving a 2” opening in the center of one side. The top remains open.
Step 9: Square the corners of the lining.
Repeat step 5 on the lining to create squared off corners.
Step 10: Sew handles (optional)
One option for handles is to use canvas or leather strips. Or, you can create matching handles from fabric! To do this, fold each handle strip in half, with right sides facing out, and press. Open it back up and fold the edges in to meet at the center crase. Press, then fold along the center crease again. Sew 1/4” seams along the long edges of the handle. You can also sew additional seams for a decorative touch.

Step 11: Pin handles to bag front.
Pin the ends of one handle to the front side of your bag. You can space them out however you like. I pinned mine about 3 1/2” in from the side seam on each side. Then, pin the other handle to the back side of the bag. Baste in place with 1/8” seams.
Step 12: Sew lining and bag shell together.
Keep the lining wrong side out, and place the (right side out) bag shell inside it. Sew a 1/4” seam around the top.
Step 13: Using the 2” opening in the side of the lining, turn the lining right side out. Sew the opening shut, then stuff the lining inside the bag.
Now, your bag is complete!
More Quilting Projects
It’s up to you to fill it in any way you like. I take mine shopping, especially for my purchases at the fabric store… I also use them when I travel, and to carry things with me like a change of clothes or snacks for the kids. I actually made several as Christmas gifts last year too, because everyone can use a tote bag! How will you use yours? I’d love to see how your bags turn out; be sure you’re part of the Amy Latta & Friends facebook group so you can share your photos and we can all be inspired. See you there!