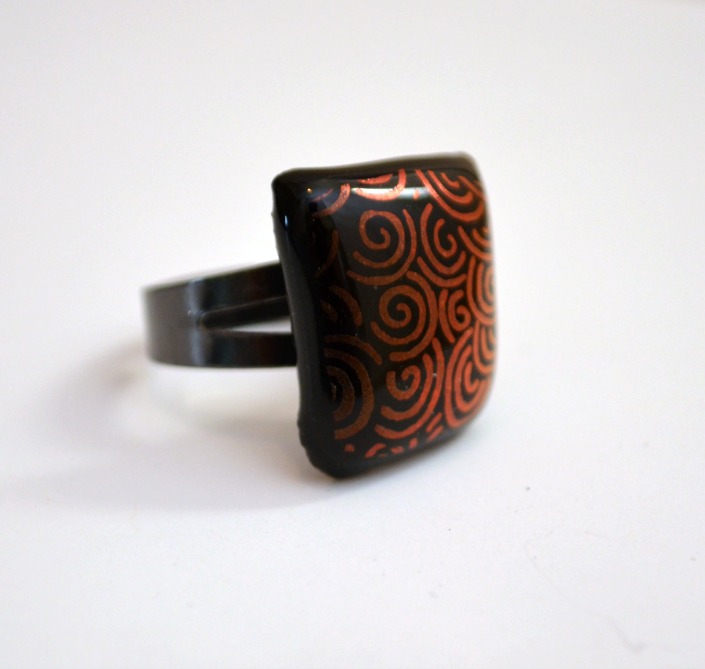
Beaded Cluster Rings

TIME REQUIRED: 40 minutes
DIFFICULTY LEVEL: easy
SPECIAL TOOLS/SKILLS: none

Materials:
– Adjustable Beadable Ring
– 4mm Miracle Beads, assorted colors
– wire cutters
– 28 – 32 gauge wire
I promise, friends, these are way easier to make than they look!
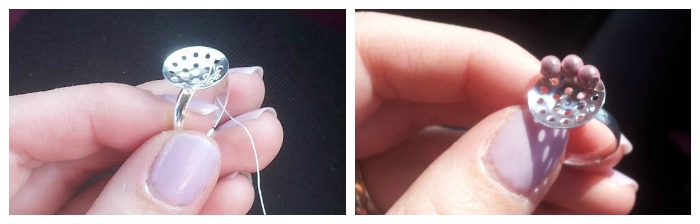
The first thing I did was cut a long piece of wire and thread one end of it through two of the holes in the ring base a few times, wrapping it tightly so it was secure and leaving the loose end on the top {we don’t want any scratched fingers!!
Then, starting with the outside ring of holes, I threaded wire up through a hole, through a bead, and down through the hole on its left. For the next one, I brought the wire up through the hole on the right of my bead, added a new bead, and put the wire back down through the hole underneath my first bead. Make sense? If you know embroidery, I was kind of back stitching.

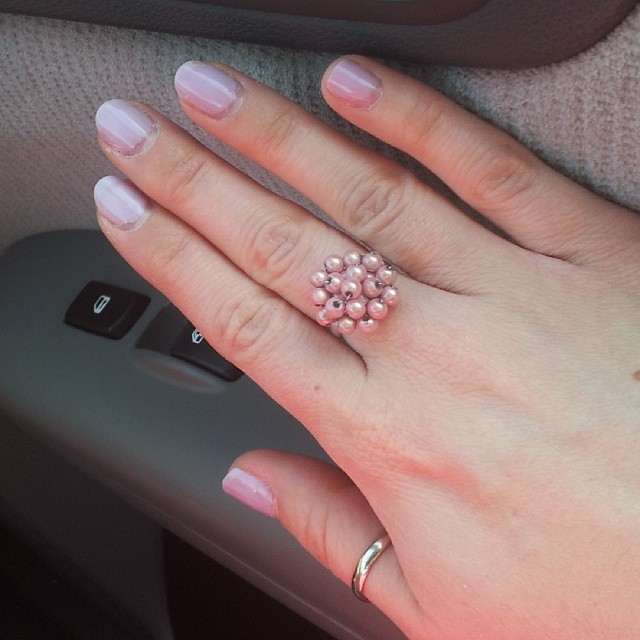
I continued working around the ring base until the whole outside circle was full, then I moved to the inside and did basically the same thing. Then, I added a few beads on top of the ones in the center to give it a full, domed look.
The fun part is coming up with different color combinations and designs! For my first ring, I alternated teal and purple; for another, I did all light pink. They’re the same style but look totally different!

Once I was happy with the amount of beads, I wrapped the wire around the bottom of the ring base a few times, right where it joined the ring band. Then, I cut the extra off and made sure the end was secured and not sharp.

I love that the rings are adjustable, so I can wear them on different fingers too! If I don’t adjust it at all, it fits on my ring finger, or if I open it just a bit, I can wear it like this!
I’m so pleased with how these turned out! They’re colorful and fun, and like nothing else in my jewelry collection. They’re different enough to be a statement piece, but not so huge that they interfere with the daily business of all the things on my to-do list. I do recommend taking them off before showering or washing your hands though to preserve the quality and appearance.
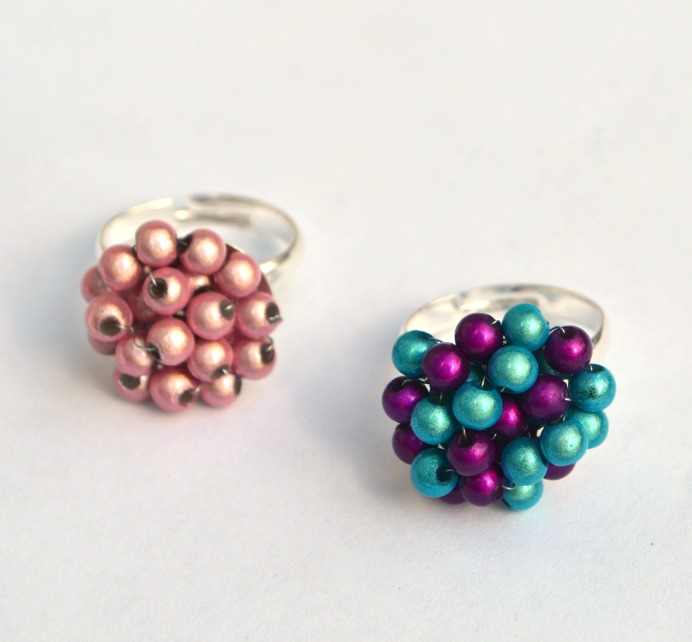
What’s extra fun, I think, is that the particular beads I used {called Miracle Beads from GoodyBeads.com} have a way of reflecting light that makes them appear to almost glow from within, which is a neat effect when the ring is on your hand!
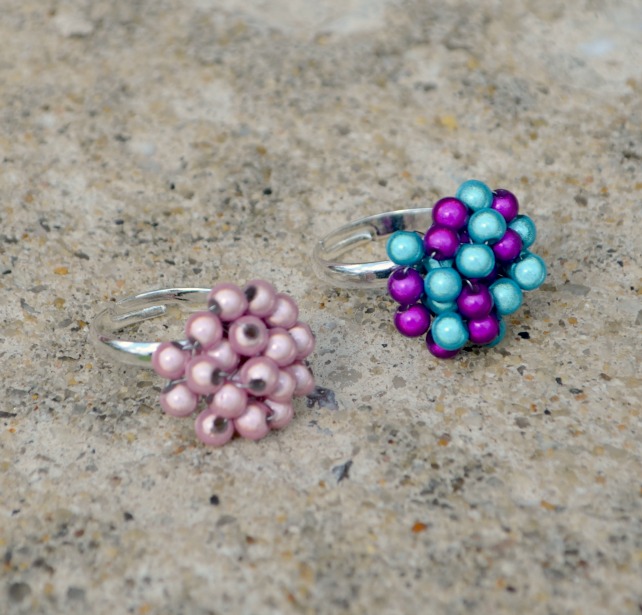
I’m thrilled with how they turned out and can’t wait to try some other color combinations! Would you wear a ring like this?
Like this project? Vote for it in The Craftys!

Amy, These rings are so pretty! Great Job!!
Gorgeous! I love them 🙂
Aw, thanks, Jess!
These are so pretty!! Love them!! Thanks for the tutorial 🙂
So THAT’s how you use those ring bases. Great tutorial! Thanks for sharing.
Oooh … I LOVE this!! Very pretty!
I love these! I really like that they’re a statement piece like you said, but not totally blinging in your face. It’s just enough to dress up an outfit
So cute!! I love how the rings came out!
Aww, thanks!!
Love the rings, where did you order the beads??
I love the different color combinations! These are really pretty – and they do look simple to make!
I like the colors used here. Pretty!
Cute!
Ha! These rings turned out so pretty!
Wow these are so pretty! I love how they turned out. It looks so simple!
Super cute! Fun to make and to wear!
I Love, Love, Love these rings, so adaptable.
I do have a question if you please?
What is the name of the base of this ring. ?
Thank you for sharing.
They are called “Adjustable Beadable Ring” Bases. I got mine at Consumer Crafts. Here is the link: https://www.consumercrafts.com/store/details/catalog/jewelry-findings-rings/2001-99
I bought your book and I love it!