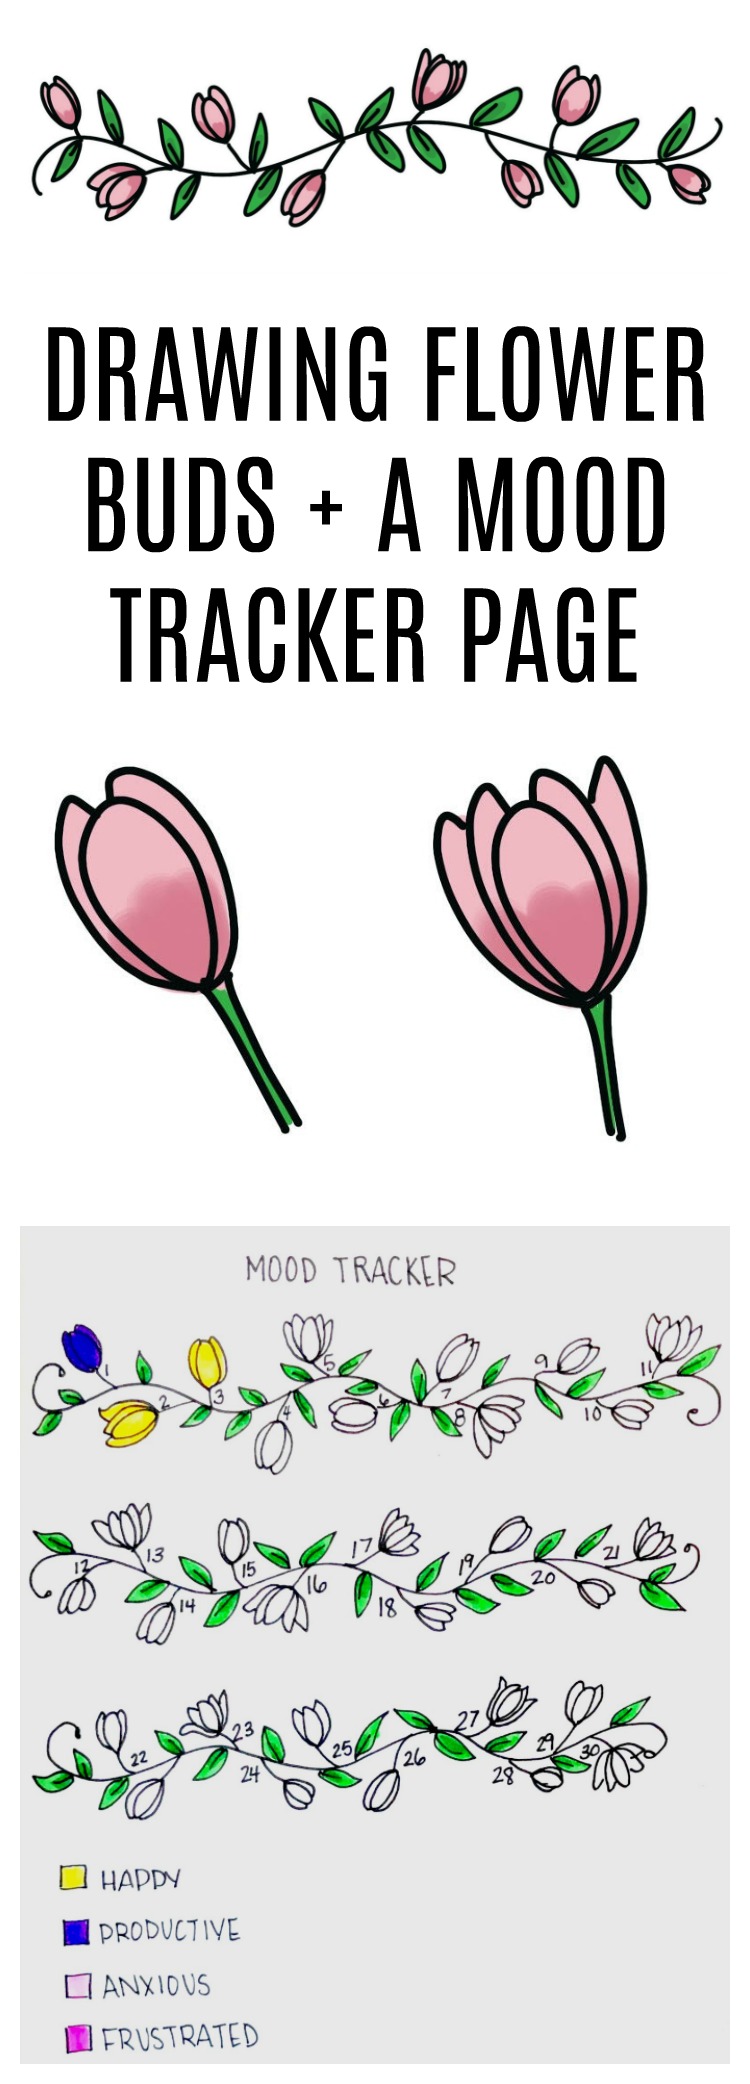
Drawing Flower Buds PLUS a Mood Tracker Page
 Recently, I’ve had multiple requests from folks who want to learn more ways to decorate the space around their hand lettering. With Spring in full bloom all around us, I thought it was a perfect time to do a tutorial for my favorite little flowerbuds! These are simple to draw and make a gorgeous accent to your hand lettered artwork. You can cluster a few together as a focal point, or draw lots of them on a vine to create a pretty little border. Take a look.
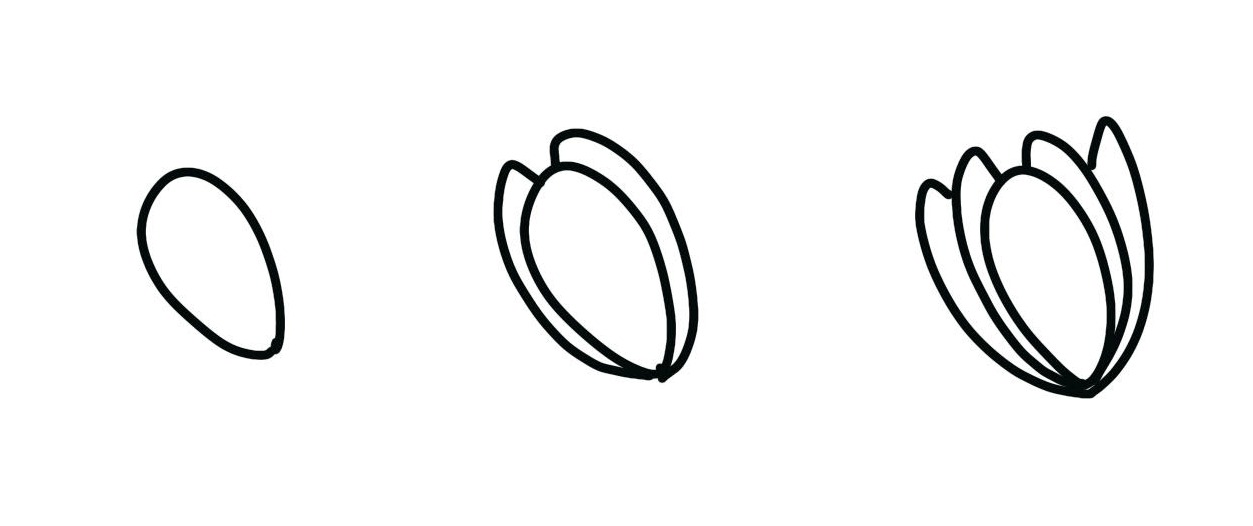
Step 1: Draw an oval shape that’s slightly wider at the top than the bottom.
Step 2: Add a curving line on each side of the oval and connect those lines to the top.
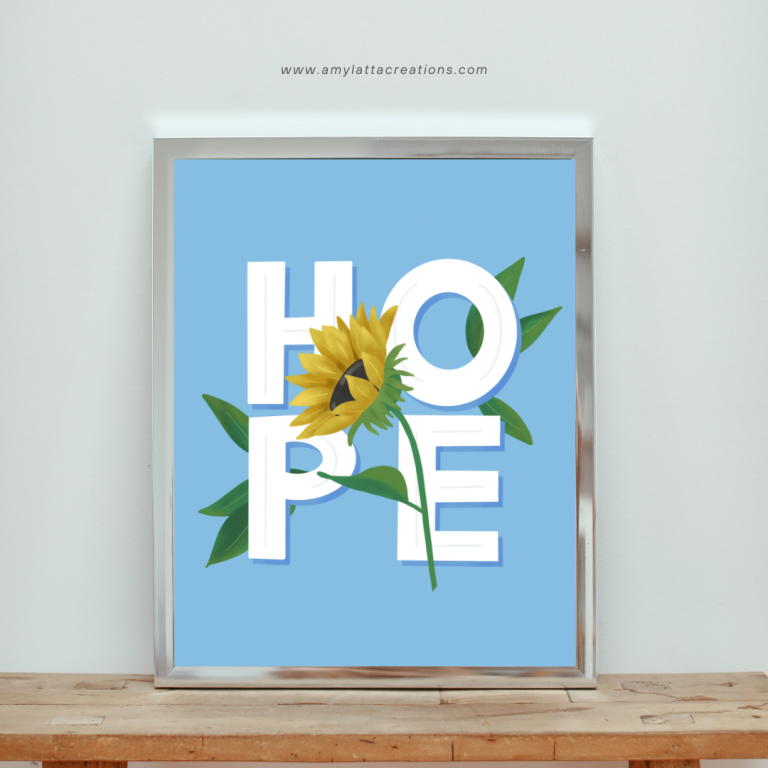
This gives the appearance of a bud that is just beginning to open. You can stop right here for some of your buds and move on to adding a stem and color. For others, you’ll want to continue on to the next step to create a bud that’s slightly more open.
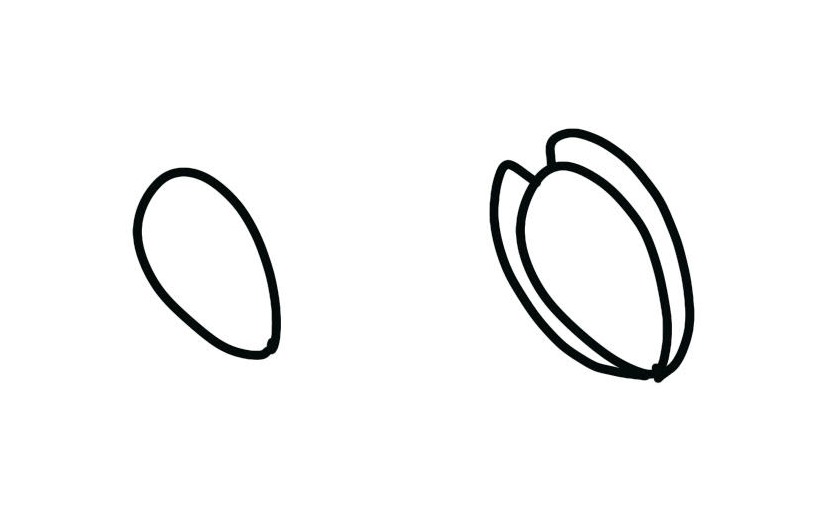
Step 3: Draw another set of curving lines outside the ones you made in the previous step. Attach them to the previous layer of petals.
This gives you a center surrounded by four petals that are beginning to unfurl.
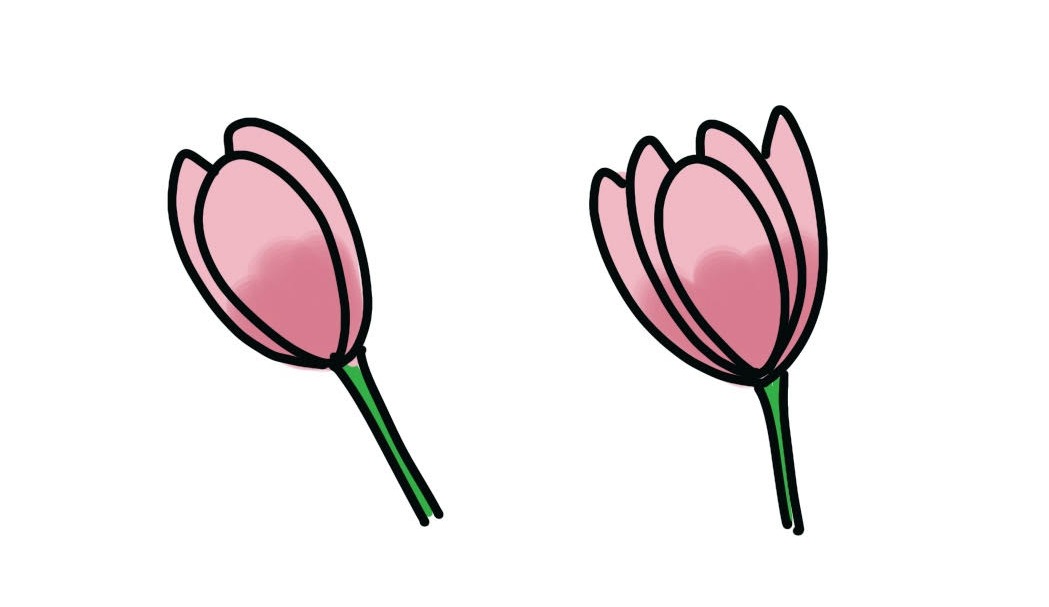
Step 4: Add two lines at the bottom of each bud to form a stem.
Step 5: Add color.
I like to blend darker and lighter shades of the same color to add even more visual interest to my flowers.
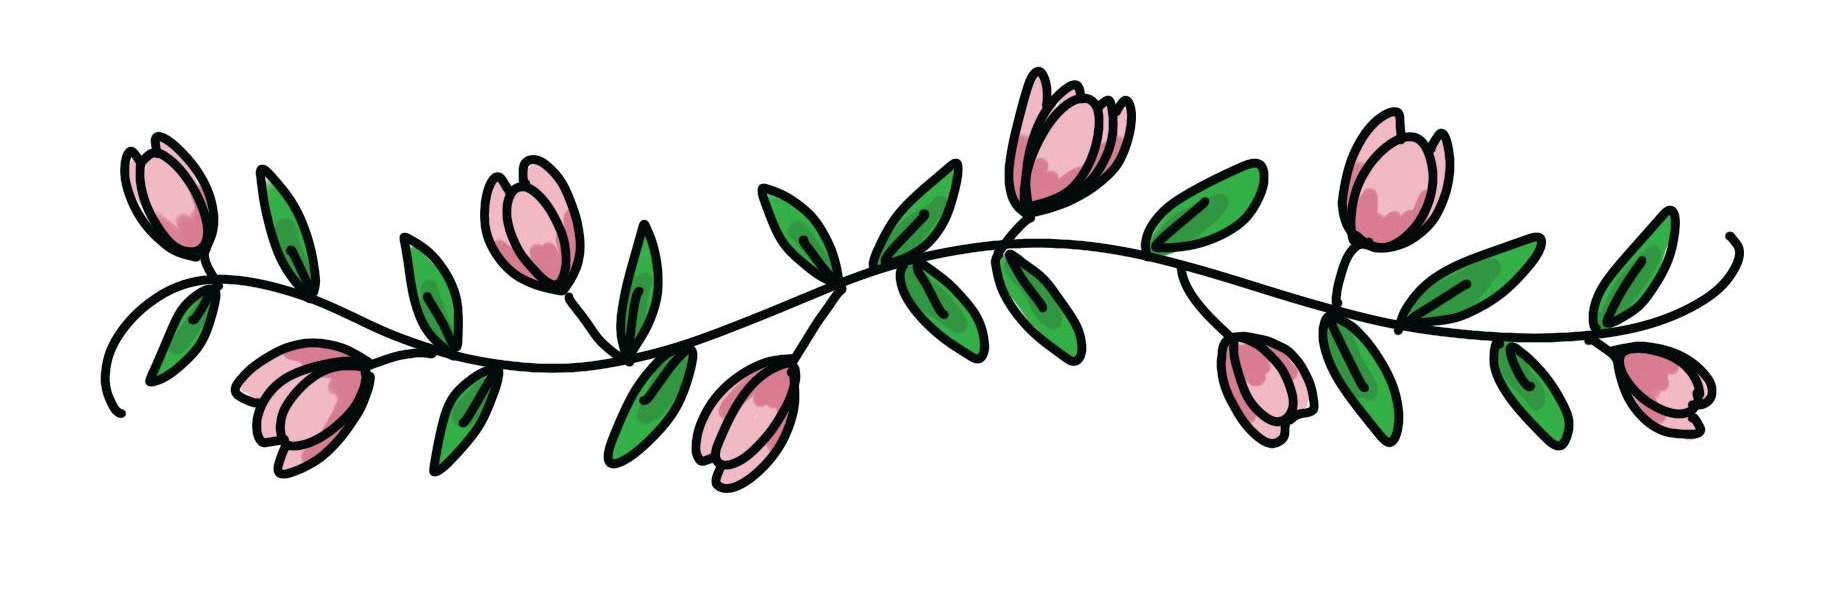
Here’s what they look like spread out on a vine. To do this, you’ll start by drawing a waving line. Then, sketch your buds along the line, mixing in some smaller buds with the fuller ones. Add leaves in between the flower buds, then color your drawing.
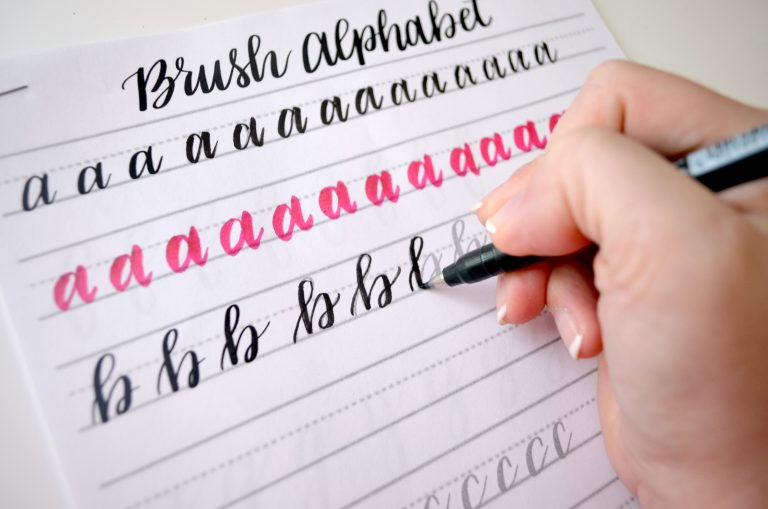
If you’ve been following along with the blog regularly, you might recall that last month I started a Quarantine Journal to help keep me sane during this time of social distancing and staying at home. One of the types of pages I included is a mood tracker. These are common among folks who keep Bullet Journals as well. The idea is that you create a drawing with multiple parts to color in. Each day, you color in a specific area using a color that corresponds to how you’re feeling. I used this budding vine illustration to create my mood tracker for the month of May. I wrote a small number next to each bud that corresponds with the date. I also created a key to show what mood each color represents. Every day, I take time to reflect on my mood, then color in that day’s bud.
![]()
We had a really great weekend, so May is off to a good start so far…a productive day followed by two happy ones. That’s not usually the case in quarantine, so I’ll take it!
These little floral illustrations can be used in so many ways to embellish and enhance your lettering! Use them as a border, a space filler, or in any way you like. I’d love to see what you create; be sure to share it with us in the Amy Latta & Friends Facebook group so we can all be inspired. See you there!
Be sure to check out these other embellishment tutorials to help decorate your lettered art:
Hand Drawn Large Flower Embellishments
And don’t forget to pin this tutorial for later or to share with a friend!


Beautiful…and I love the journal idea…
Hey there! I just wanted to drop by and say how much I loved your recent blog post on drawing flower buds and the mood tracker page. Your step-by-step instructions were incredibly easy to follow, and I can’t wait to try it out myself. The combination of creative expression and mood tracking is such a unique idea, and I absolutely admire your creativity. Thank you for sharing such wonderful content! Keep up the fantastic work! Martin Williamson