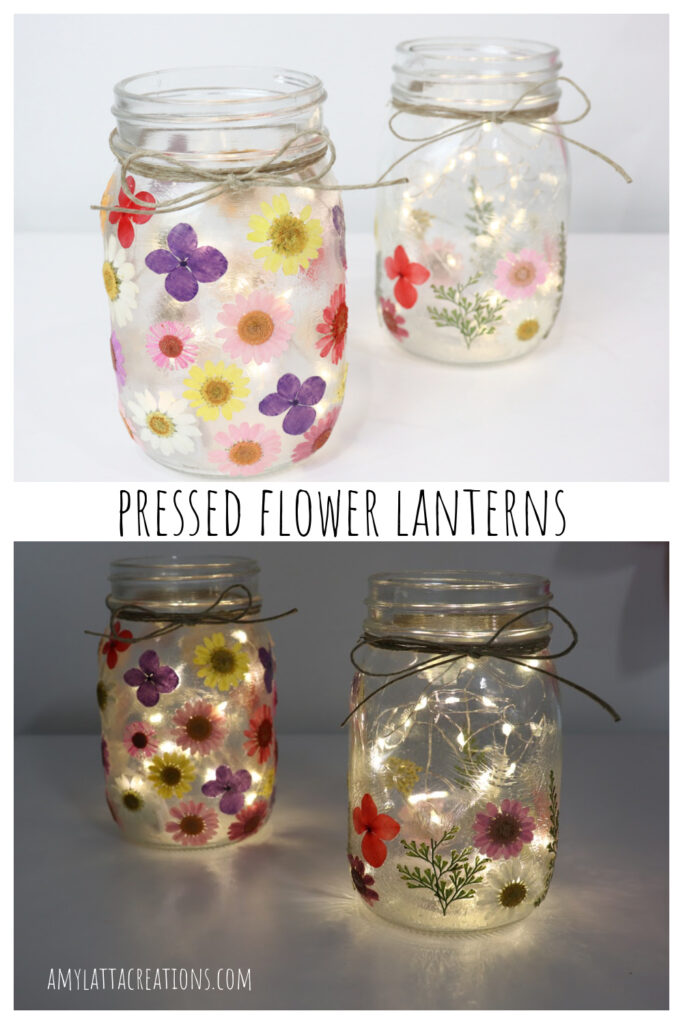
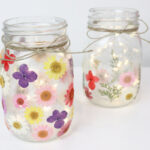
Pressed Flower Lanterns
Bring some of the beauty of spring indoors with these gorgeous and easy Pressed Flower Lanterns!
How to Make Pressed Flower Lanterns
This is a fun craft that only requires a few supplies. It’s easy for crafters of all ages, and the finished project is a gorgeous piece of home decor. These are perfect for any space, including dorm rooms, craft studios, and mantels, and they make great party decorations too!
Materials
- clear glass jar (mine were 12 oz)
- pressed flowers (you can press your own or order a beautiful variety)
- Mod Podge (I used Satin finish) or Tombow MONO Aqua Liquid Glue
- paintbrush
- twine
- tweezers (optional)
- fairy lights (mine are warm white)
Instructions
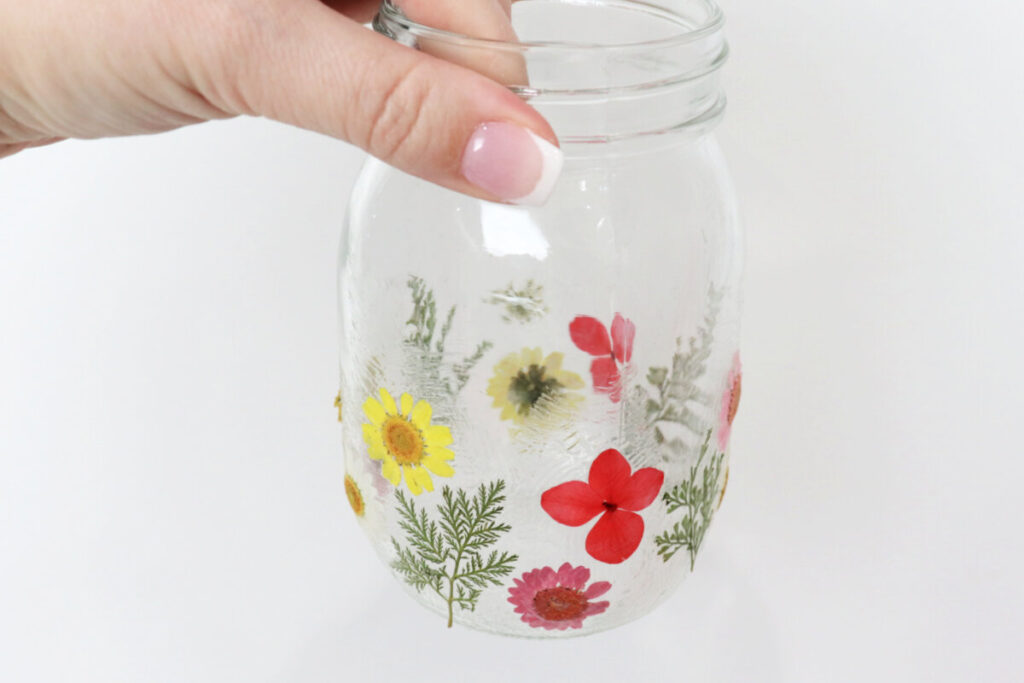
Choose the particular flowers and/or leaves you’d like to use for your jar.
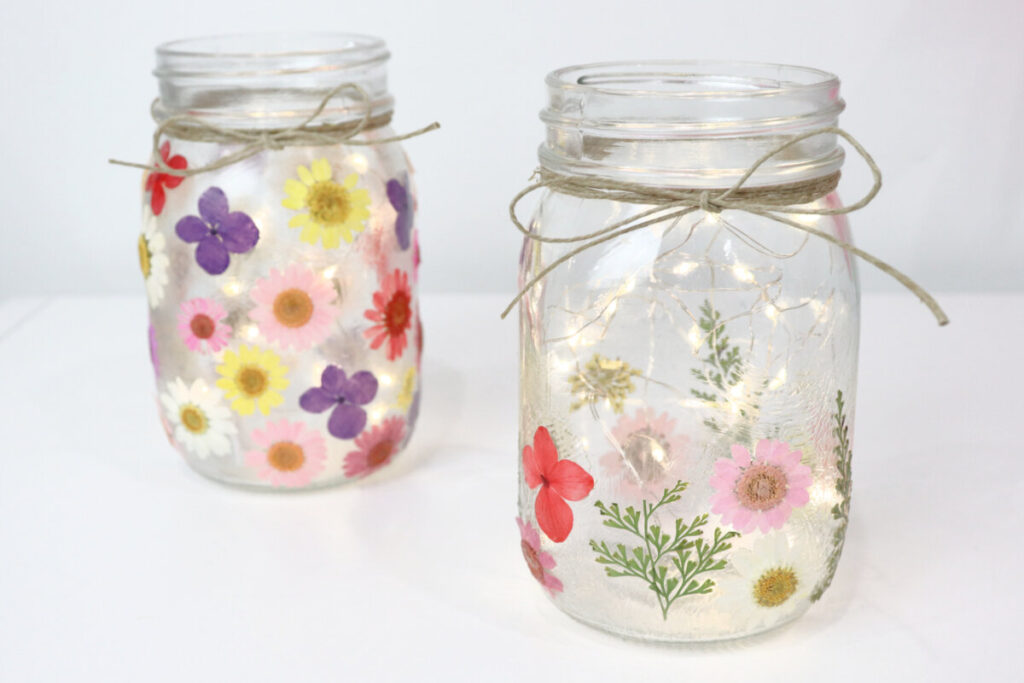
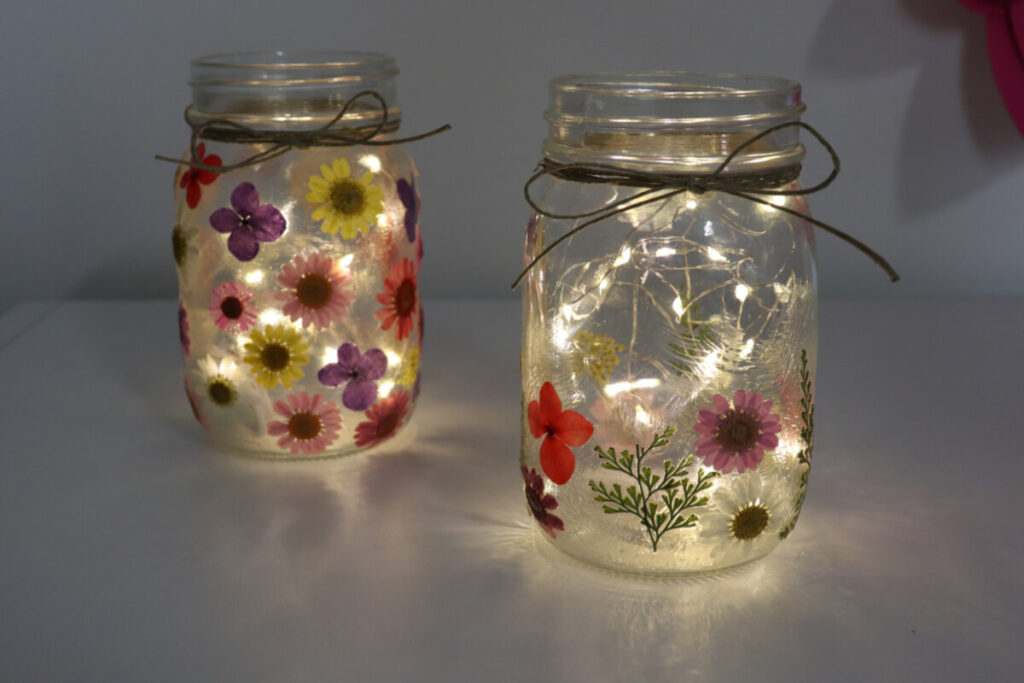
You’ll also want to decide if you’re going to create an all-over design, or just cover the lower part of the jar. As you can see, it creates two different effects!

Starting on one section of your jar, use a paintbrush to apply a thin coat of decoupage formula to the jar, then place your flowers on top.
I recommend using tweezers to pick up and place the flowers, because they’re very delicate. Continue working your way around the jar until all of the flowers are adhered where you want them.
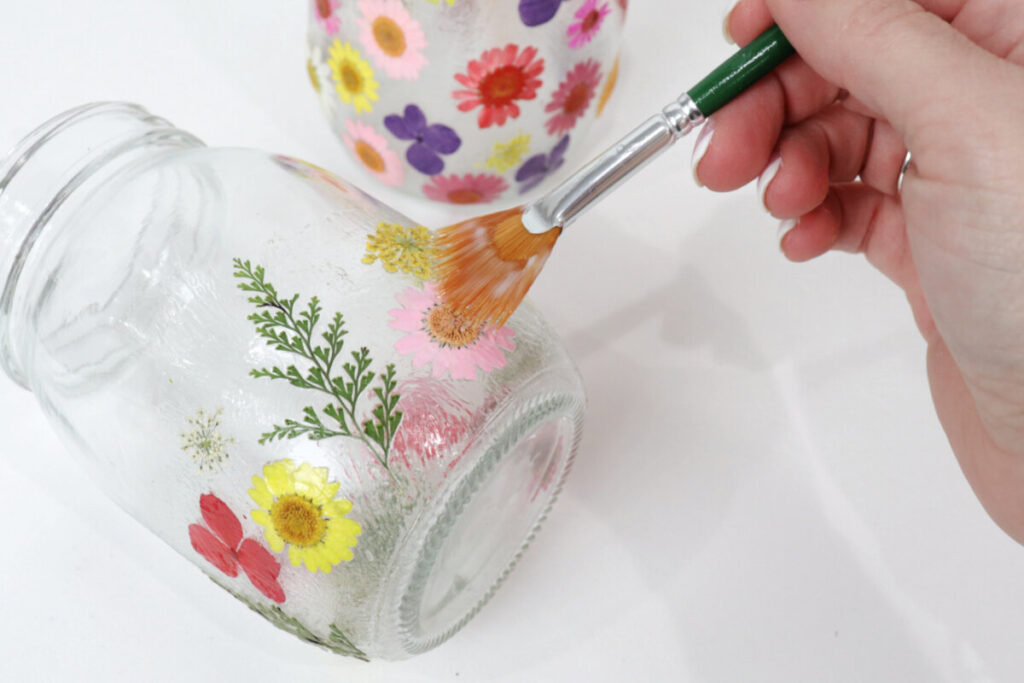
Apply a coat of decoupage formula on top of the flowers.
Use your paintbrush and work very carefully, remembering that the petals are fragile. Don’t worry, though; if a petal does happen to fall off, you can usually glue it back in place.
Let your jar dry completely before moving on to the final steps. When you can touch it without getting sticky, you’re ready to move on.

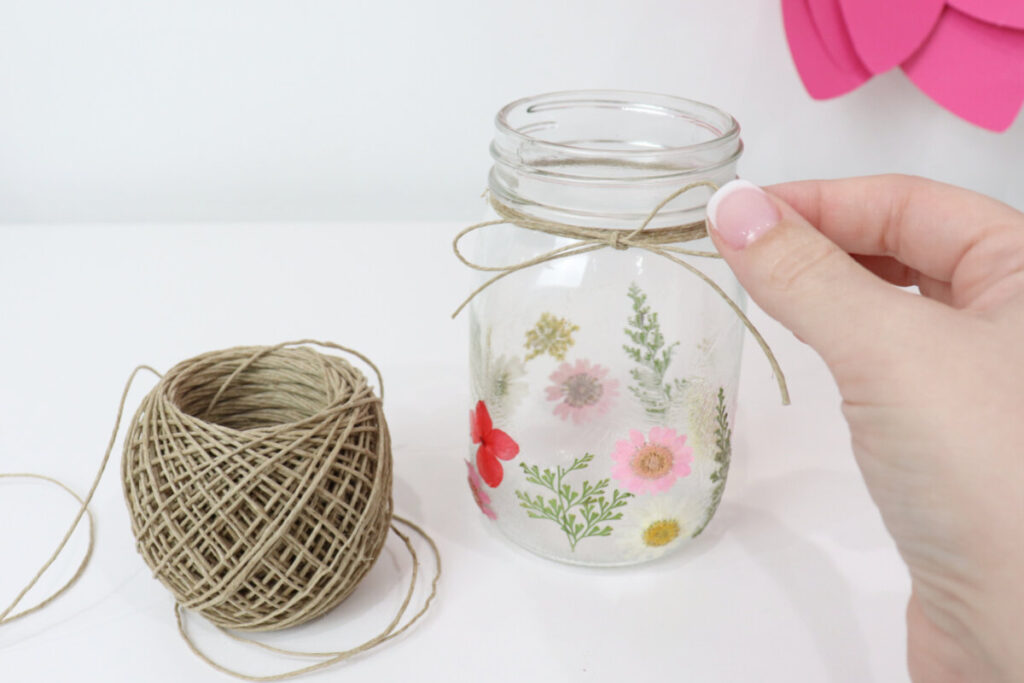
Add twine.
Wrap a piece of twine around the top of the jar several times, then tie a bow on whichever side you’d like to use as the front of the lantern. You could also substitute colored ribbon for the twine.
Add fairy lights.
Place a string of lights inside the jar. Or, if you prefer, you could add a real or battery-operated candle instead.

These pressed flower lanterns are just as pretty in a dark or a bright room!
Crafting Tips
- Each jar you create will be totally unique because of the flowers and design you choose to use. Try using all kinds of color and style combinations and have fun seeing all the different looks you can create!
- Change the look of the finished project by using different colored fairy lights.
- Add some sparkle to your project by using Mod Podge Glitter formula or sprinkling a bit of loose glitter on top of the jar while it’s still wet.
Frequently Asked Questions
Mine are 12 oz, but you can use whatever size you like! Larger jars may take two strands of fairy lights to get the same effect.
Mine are from Amazon. You can also find them at Michaels or other craft stores.
More Spring Crafts
If you enjoyed creating these Pressed Flower Lanterns, take a look at these other spring-themed projects!


If you try making these lanterns, or any other spring projects, I’d love to see your photos. Make sure you are part of the Amy Latta & Friends Facebook Group, where we can all inspire each other. Hope to see you there!
Pressed Flower Lanterns
Equipment
- paintbrush
- scissors
- tweezers
Materials
- clear glass jar
- pressed flowers
- Mod Podge
- twine
- fairy lights
Instructions
- Choose the particular flowers and/or leaves you’d like to use for your jar.
- Starting on one section of your jar, use a paintbrush to apply a thin coat of decoupage formula to the jar, then place your flowers on top.
- Apply a coat of decoupage formula on top of the flowers.
- Add twine.
- Add fairy lights.


We’re planning to do this project with our kids around Easter! It should be a fun project for them, thanks for sharing =). Also I was thinking these would also could double as table center-pieces!
Wonderful! Hope they enjoy it!