Basic Hand Lettering: Arrow Embellishment
Friends, I still can’t believe the overwhelming response I’ve gotten to the recent Hand Lettering posts I’ve shared here on One Artsy Mama. This is such a popular trend right now, and the best part is that it’s totally doable, no matter who you are! We’ve looked at basic tips and the alphabet; now we’re moving on to ways to embellish your projects. Today, I want to share with you how to make a fun arrow that’s going to be really useful in a lot of your work! Ready?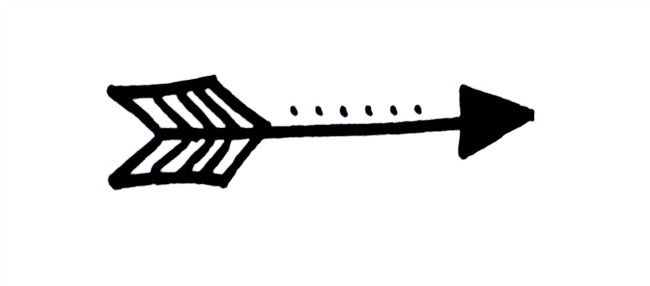
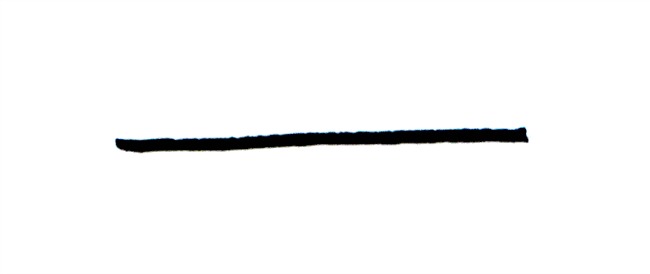
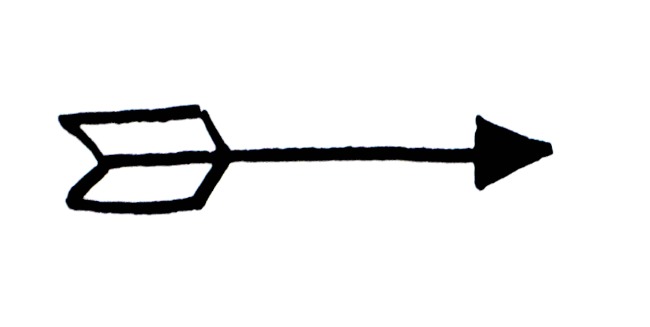
Step 1: Draw a horizontal line.
If you’re one of those folks who needs it to be perfectly straight, by all means use a ruler or other straight edge to make that happen. Personally, I like the imperfection and hand-drawn vibe that a slightly crooked line gives. It’s all about personal preference {plus I’m lazy}. Either way, start with a line.
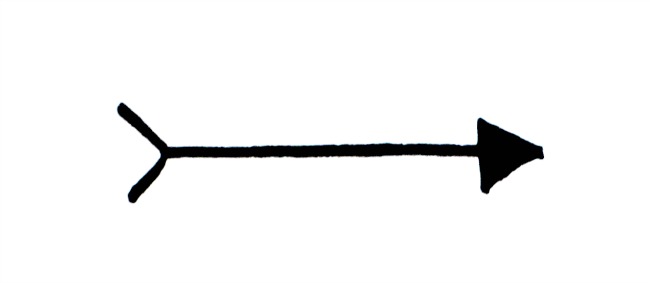
Step 2: Draw a triangle arrow head.
I colored mine in with my black marker, but you could also leave it open or fill it in with a colored marker instead.

Step 3: Draw an inverted V at the end of your arrow.
Again, don’t worry about perfection. The point is that it’s HAND lettering/doodling, not a computer graphic, right?
Step 4: Draw another inverted V about 1/3 of the way up your arrow stem.
If you want the tail of your arrow to be shorter, place the V closer to the first one. Want it longer? Make it closer to the arrow head. Wherever you draw it, just try to make the angle of the V a close match to your original one.
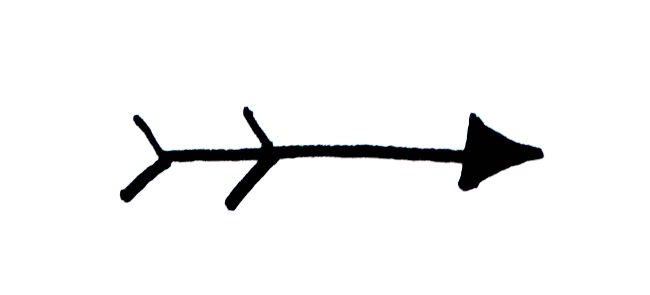
Step 5: Connect your Vs with horizontal lines.
You can free hand this or use your straight edge; either way, you’re forming the tail of the arrow.
Step 6: Draw several more Vs inside the arrow’s tail to add detail.
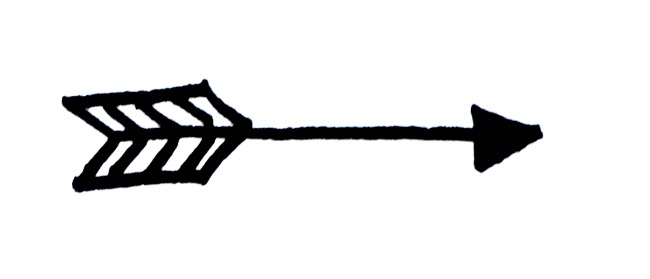
Step 7: If you like, add some dots along the horizontal line just to make things a little fancy!
That’s all there is to it! You can do all kinds of simple variations on this arrow design too. First of all, you can color it in using whatever markers you like, as I did at the bottom of this page.

Another way to change things up a little is to make your arrow curving instead of straight. For this particular design, I also put the dots along the bottom and placed a heart in the center.
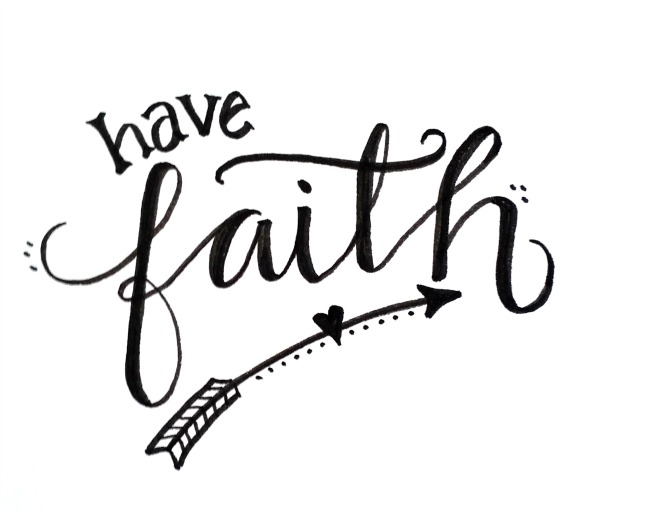
Here, since my theme was love, I made the arrow head into a heart and used tiny hearts in place of dots.

The great part about hand lettering is that there’s really no wrong way to do it! Make the basic techniques fit your own personal style, and you’ll have a winner every time. Now, it’s time to get practicing. I can’t wait to see what you do with this simple arrow. If you’d like to join a community where we’re encouraging each other and practicing hand lettering together, including daily lettering prompts, stop in and join us at the One Artsy Mama & Friends Facebook page!
In case you missed the other posts in the series, here they are for your quick reference:
Basic Hand Lettering {the tips and tricks you need to know}
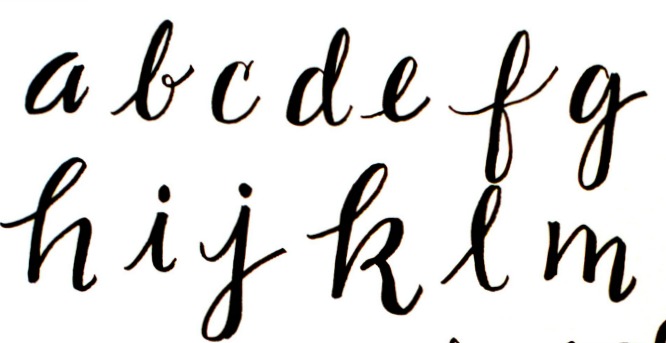
Upper and Lower Case Alphabet Resource
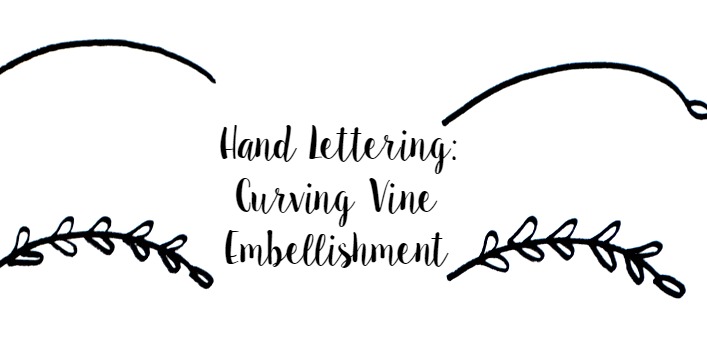
Curving Vine/Branch Embellishment


Girl, I am getting nothing done!! All I want to do is write! Thanks for sharing and keep them coming!!
Love your site
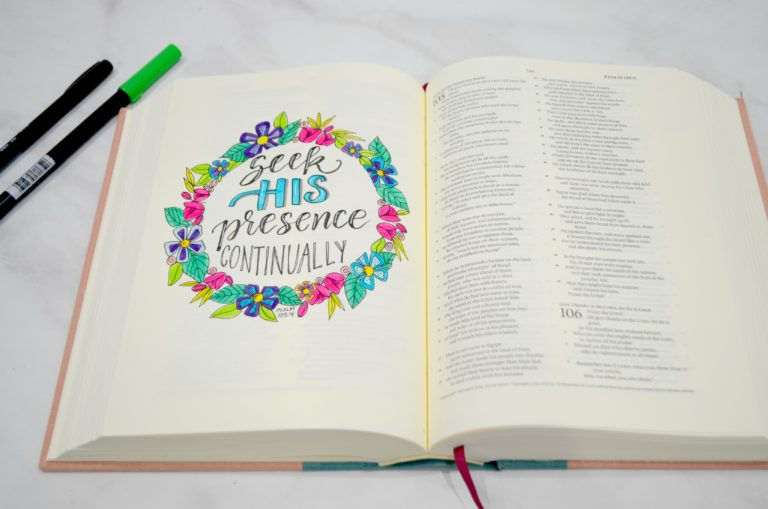
What kind of Bible is that! I love it (:
It is the Crossway ESV Journaling Bible!
Great, now I’m going to get NOTHING done!!! Thanks for all the great tutorials!!!