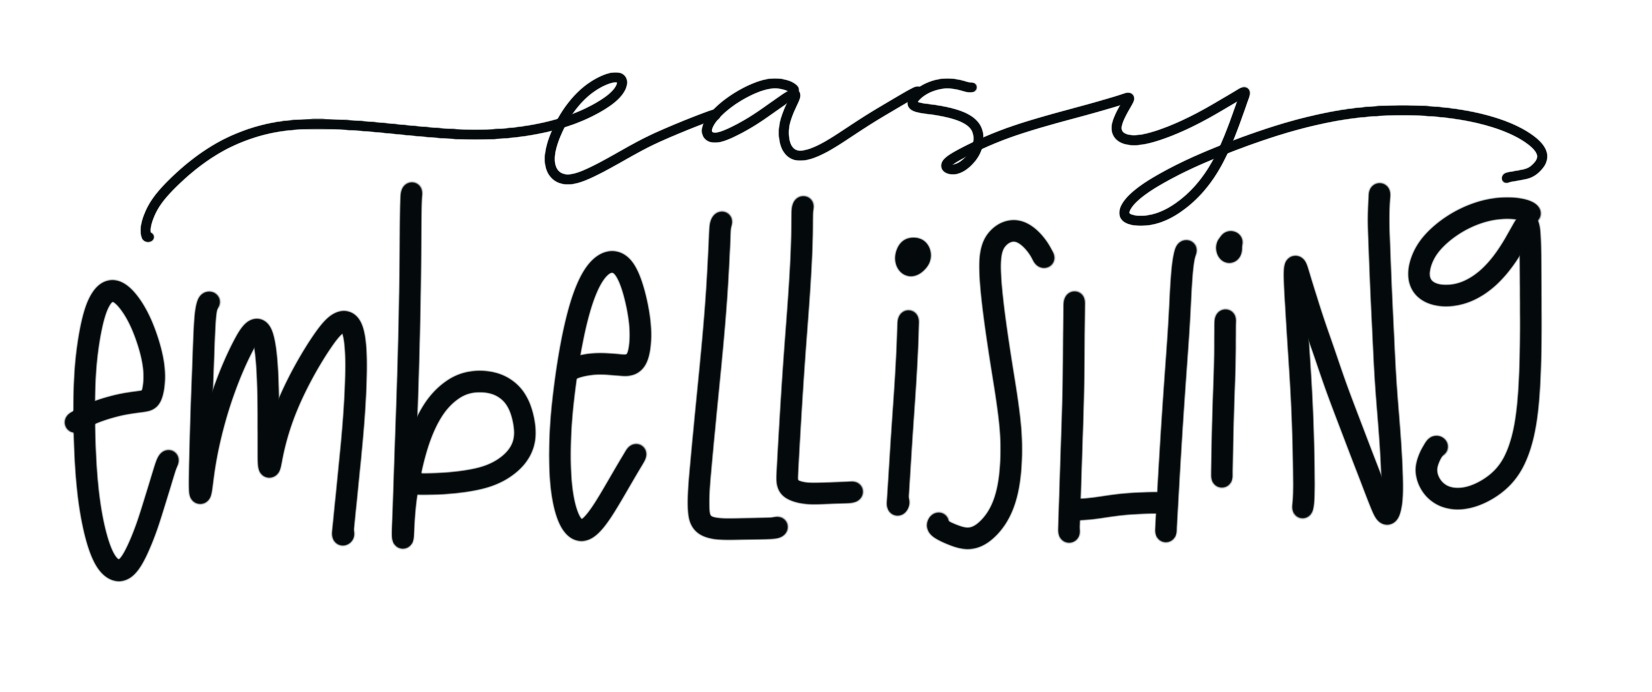
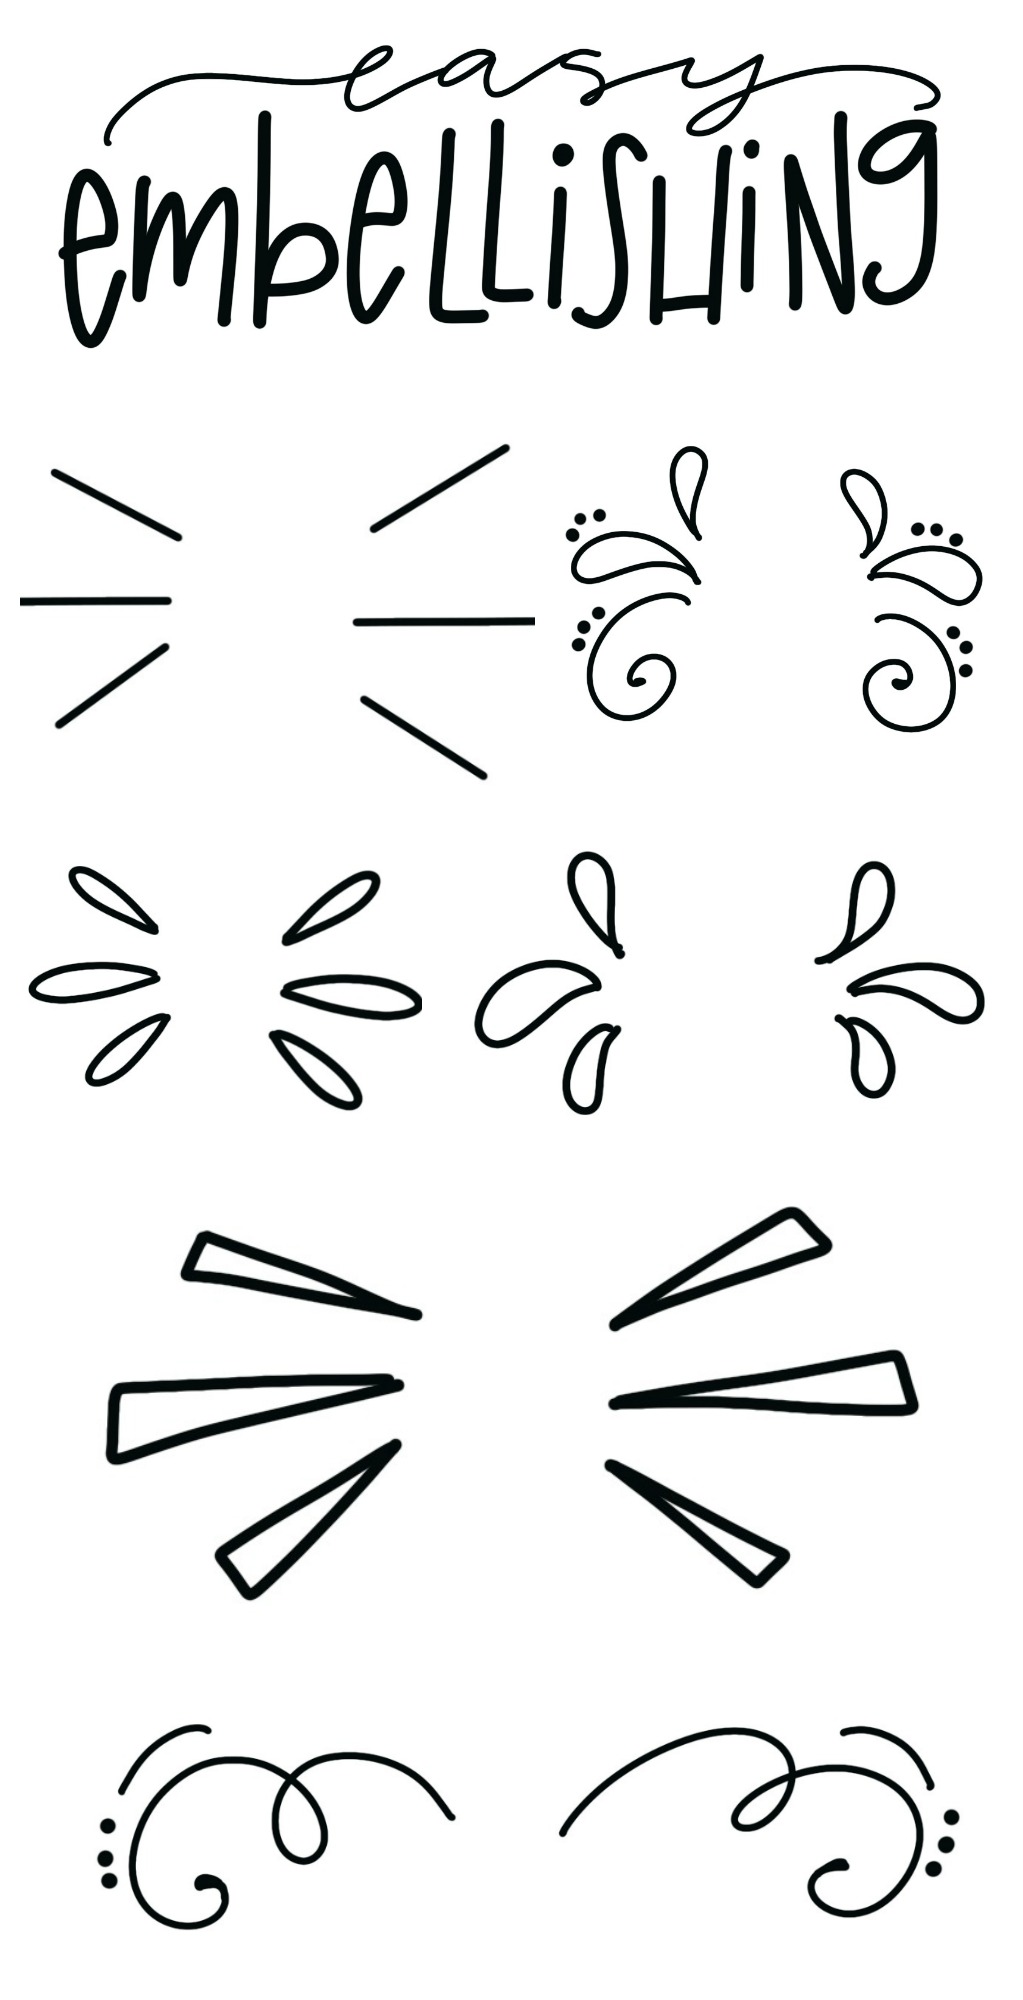
Easy Embellishments for Hand Lettering
When you create a hand lettered design, obviously the lettering itself is the most important part. But that’s not the only key to making something that’s pleasing to the eye. After your words are written, sometimes there’s still a lot of white space left around them…so what do you do with it? I’ve been asked this question a lot lately, so I thought now would be a great time to talk about some easy embellishing that will help you take your hand lettered designs to the next level. We’re going to look at six simple techniques for filling white space and I’ll show you examples of how they work in some of my recent Instagram art. Ready? Grab a marker and let’s get going!
Where do I put embellishments?
Simply put, embellishments can go anywhere you have blank space in your design. You can certainly draw things like floral vines or swirls above, below, or even encircling you words, but sometimes there are blank spaces in the design itself that are just begging to be filled. I usually find this when I have a line that’s shorter than some of the others. There’s blank space on either side, so I need a way to fill it. Embellishments can also work to call attention to certain words and emphasize them, as you’ll see in the examples. Typically, symmetry in a design is a good idea, so if you draw an embellishment on one side, you’ll want to mirror it on the other side. Sometimes, though, if you just have one blank area due to the way your words are arranged, you can fill only that space.
Straight Lines

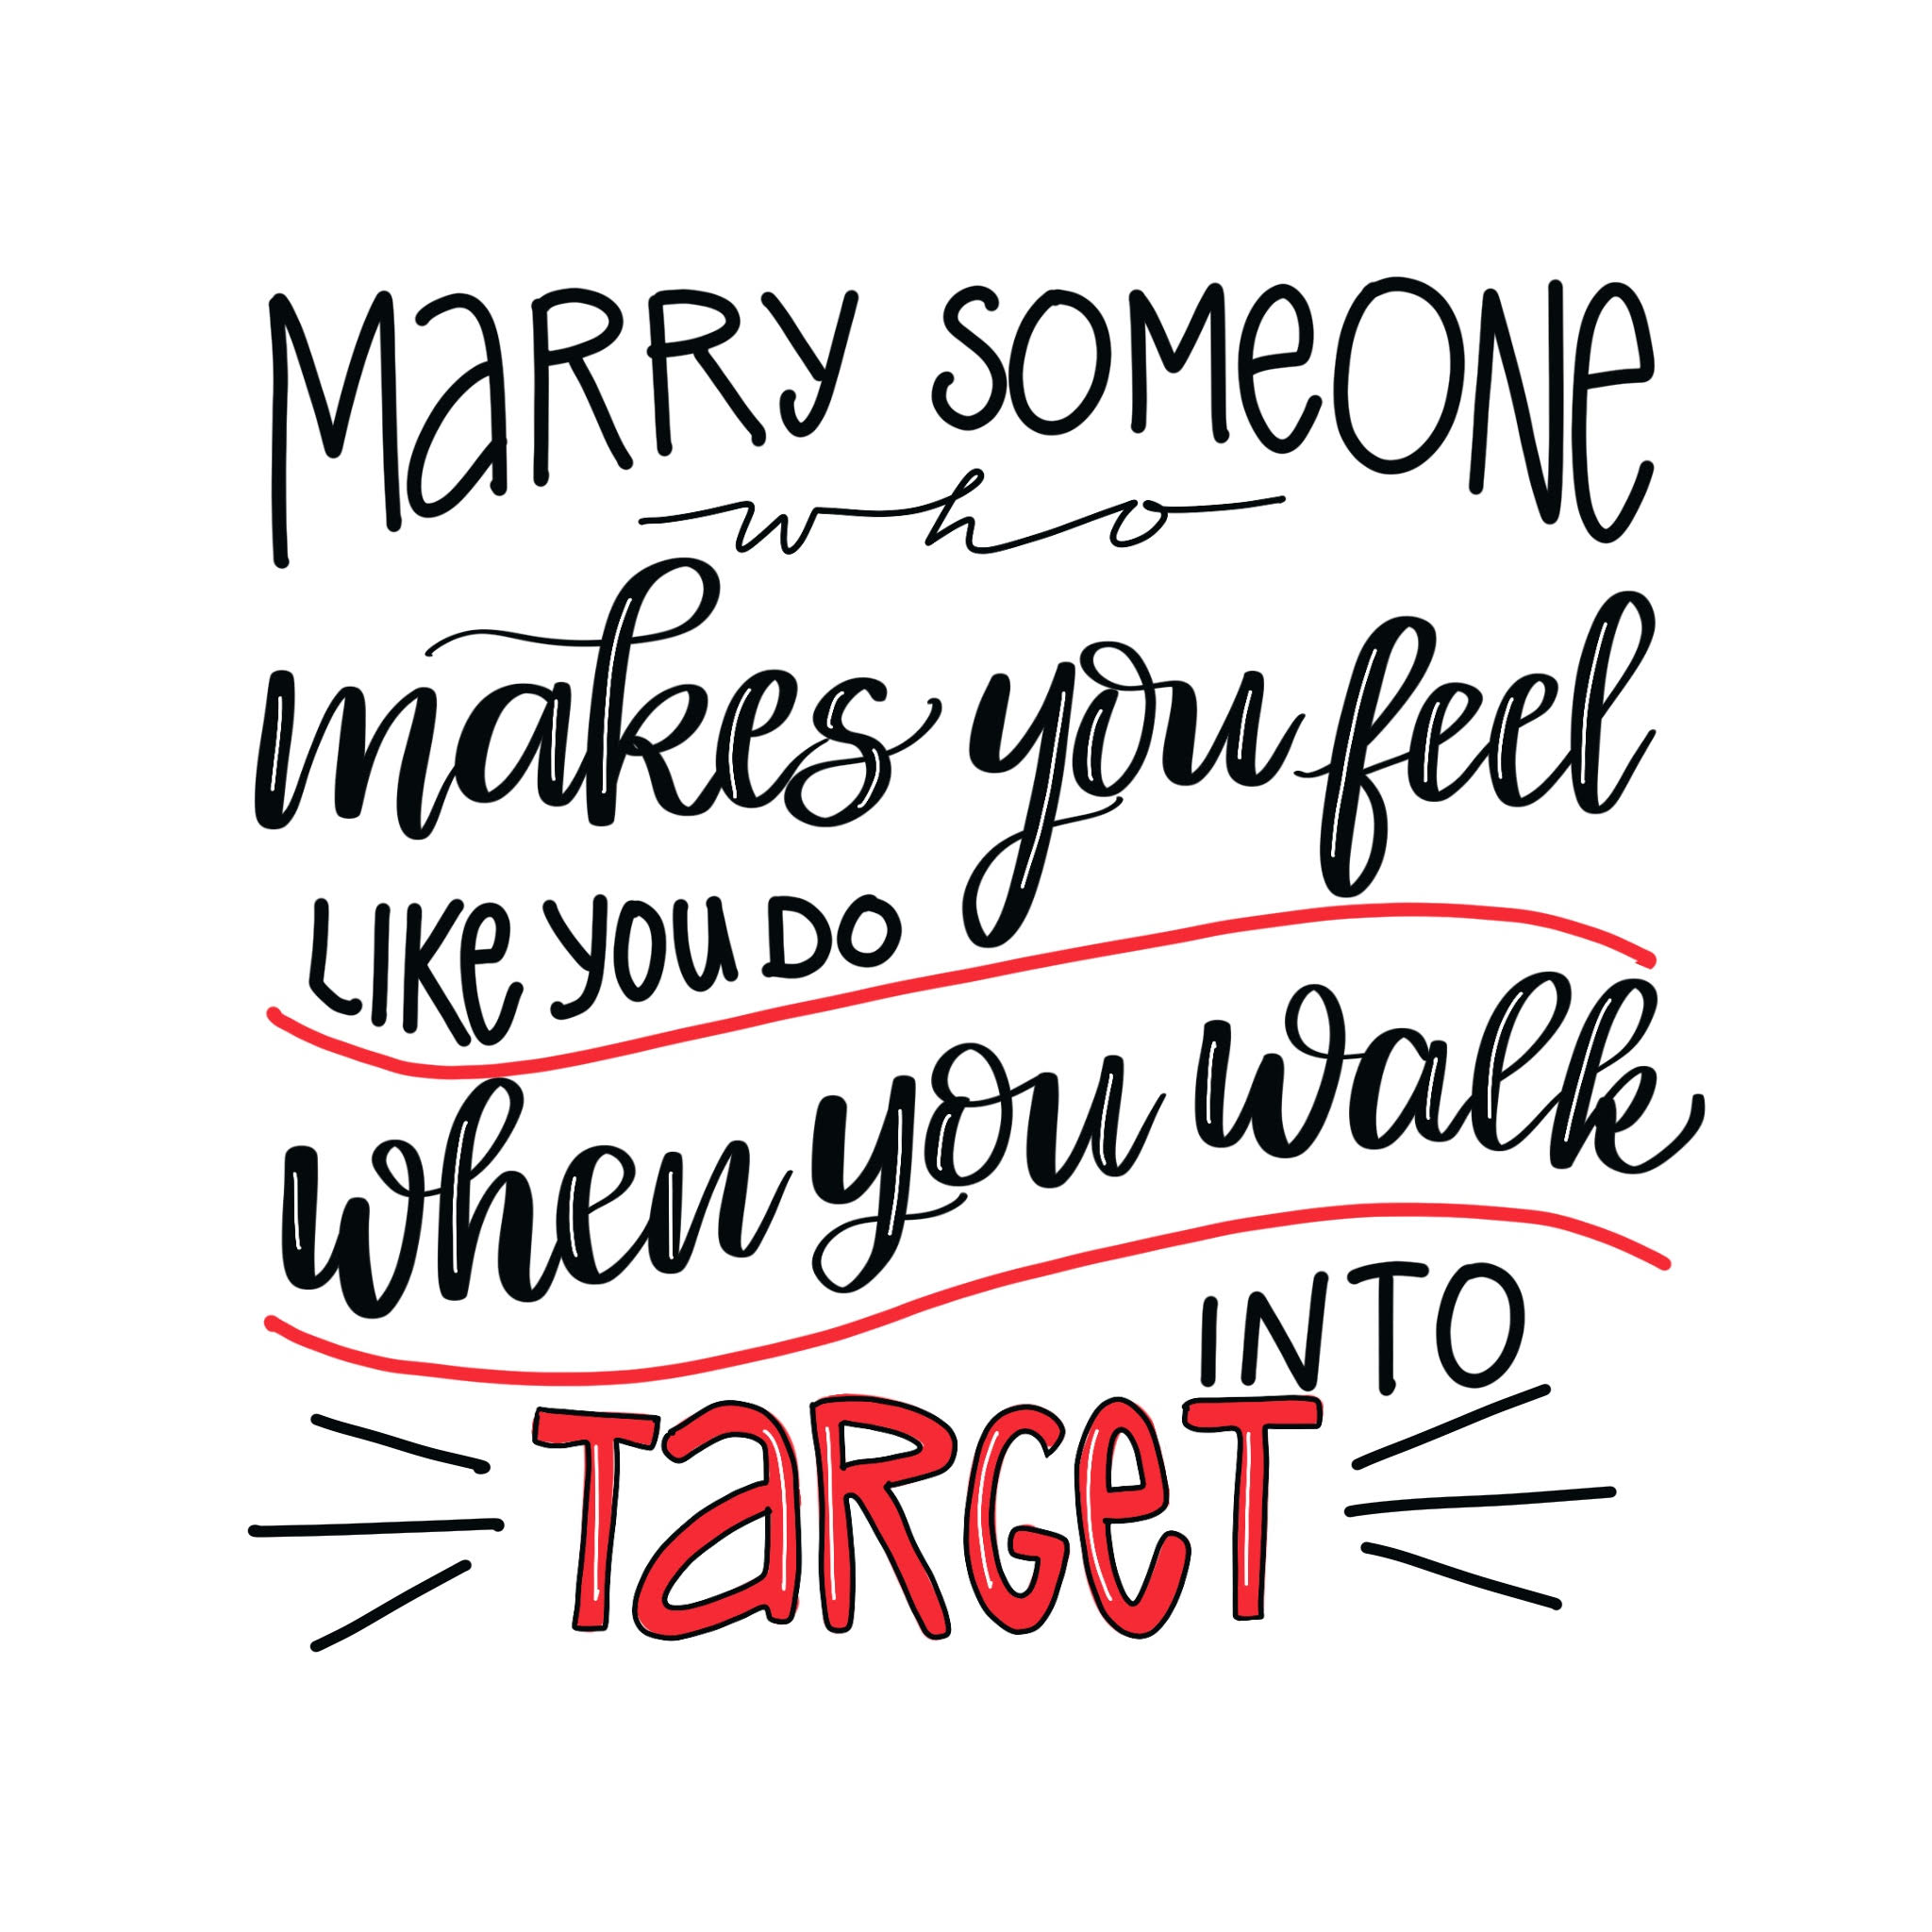
It may seem overly simple, but three lines can do the job of filling space and drawing the eye to a certain word. I usually keep the middle line horizontal and place the top and bottom ones on a diagonal. The middle line is the longest, while the other two are slightly shorter. In the example below, you’ll see how I used this technique to fill up the open space around the word “Target” since it was shorter than the other lines of text.
Sunburst Lines
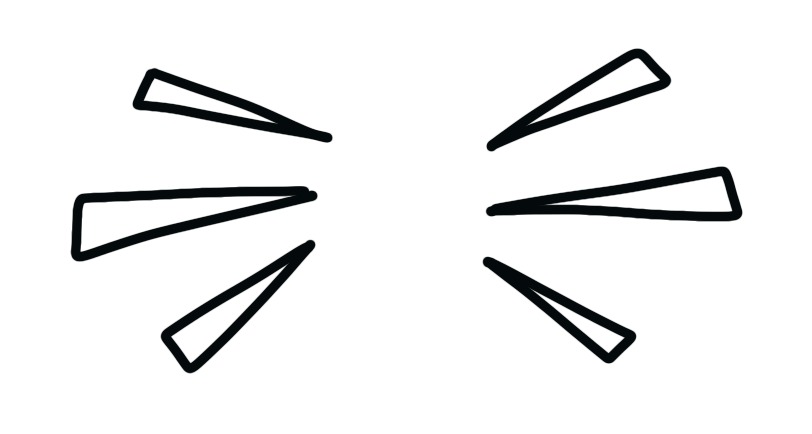
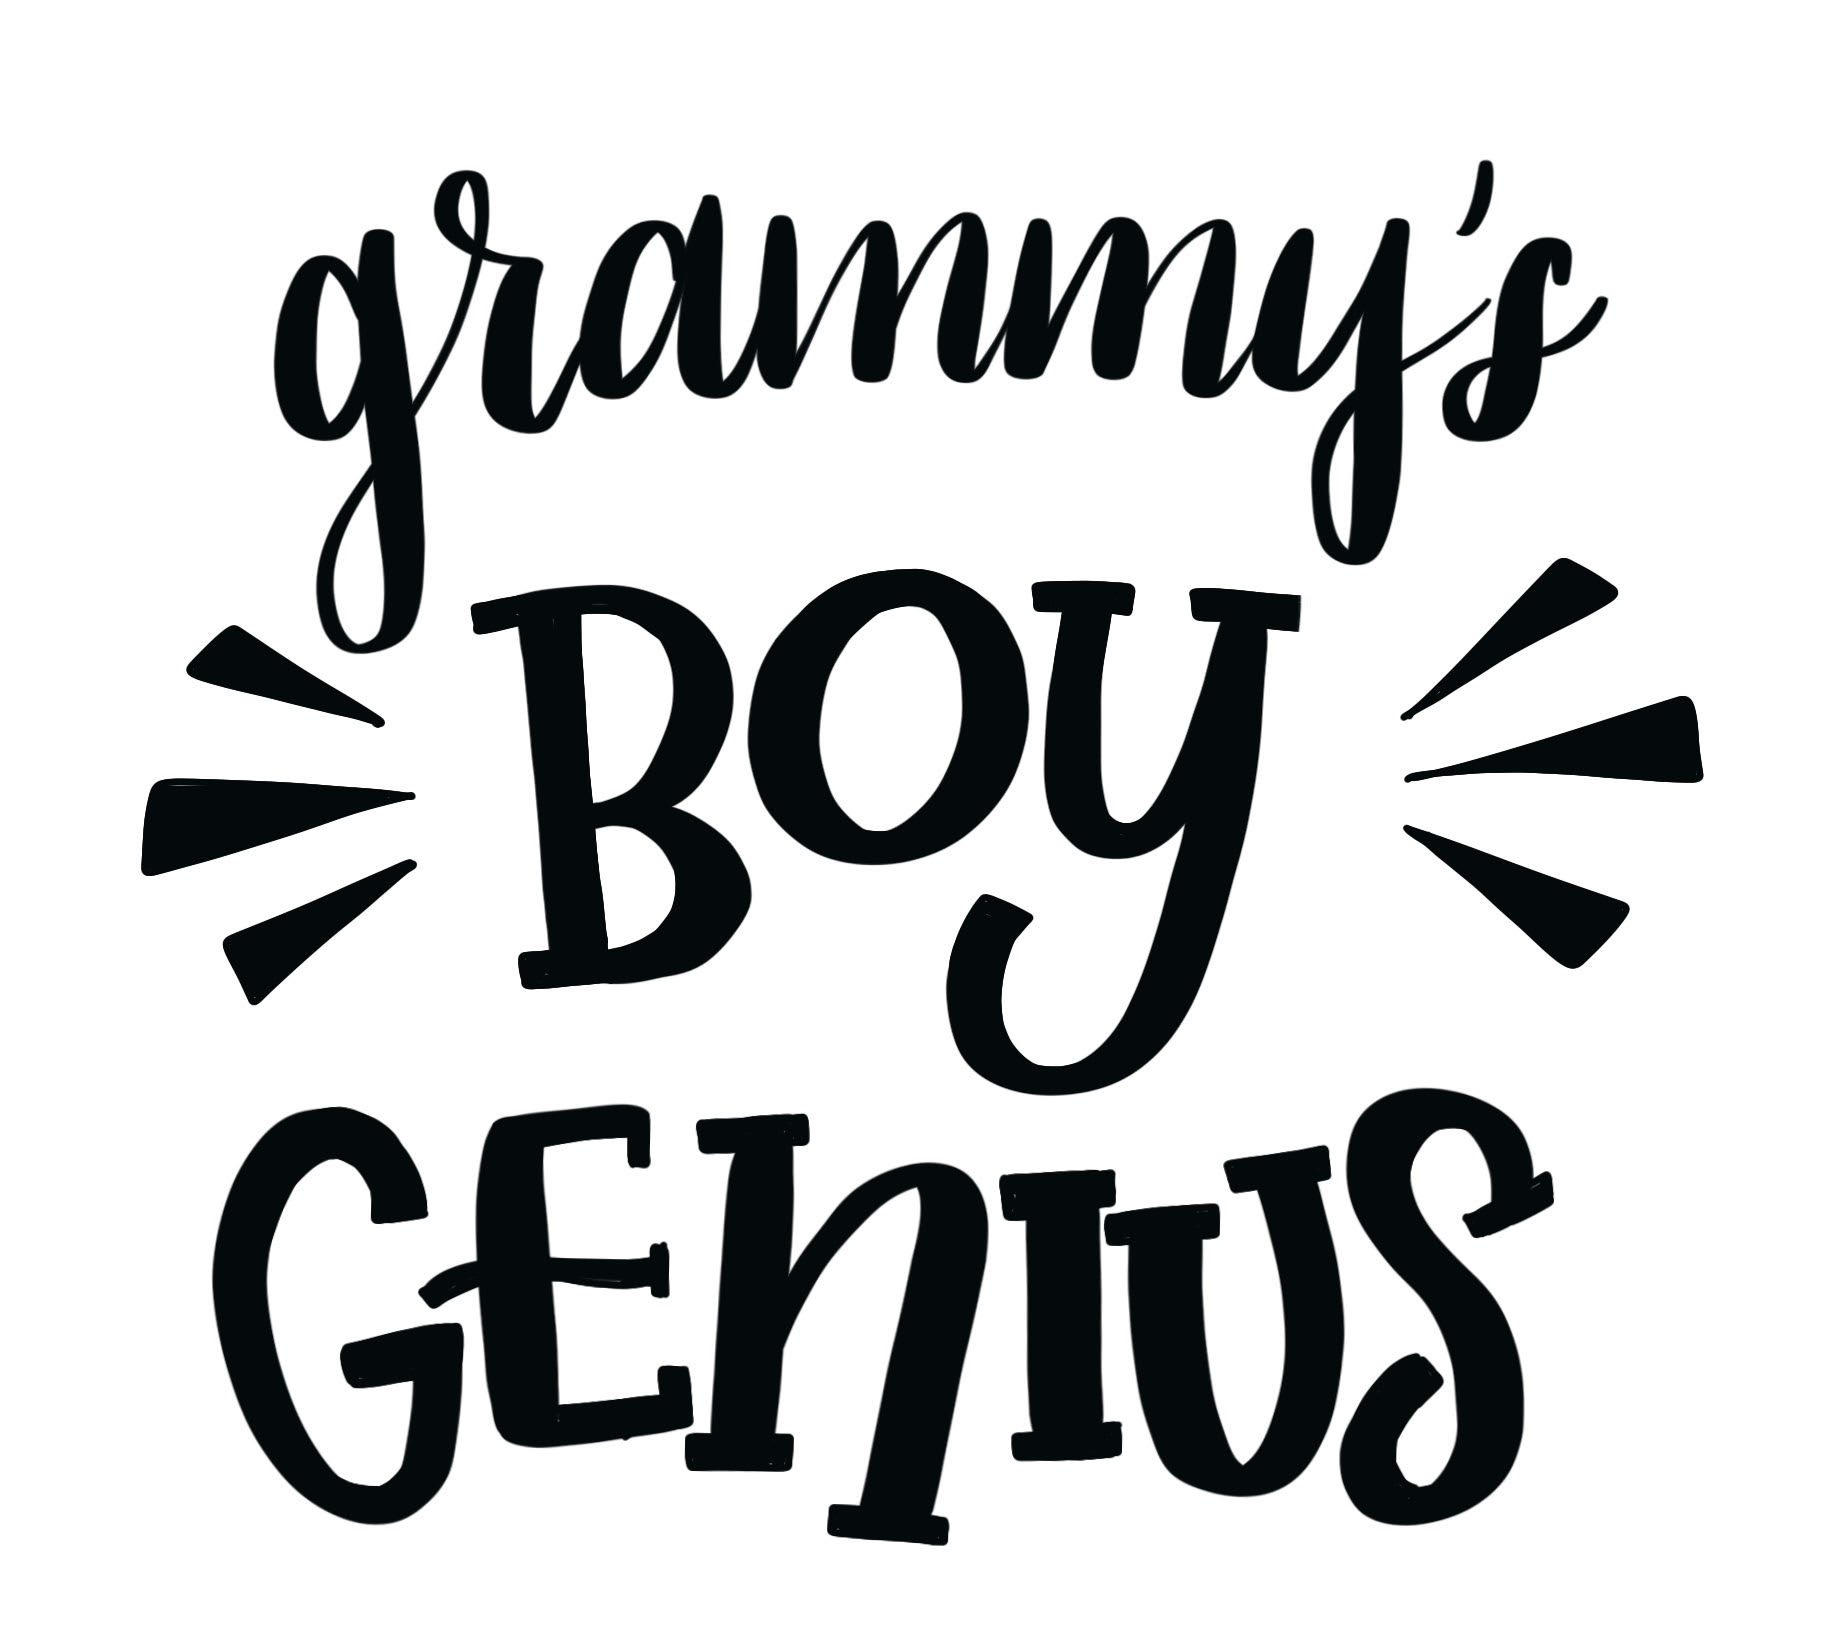
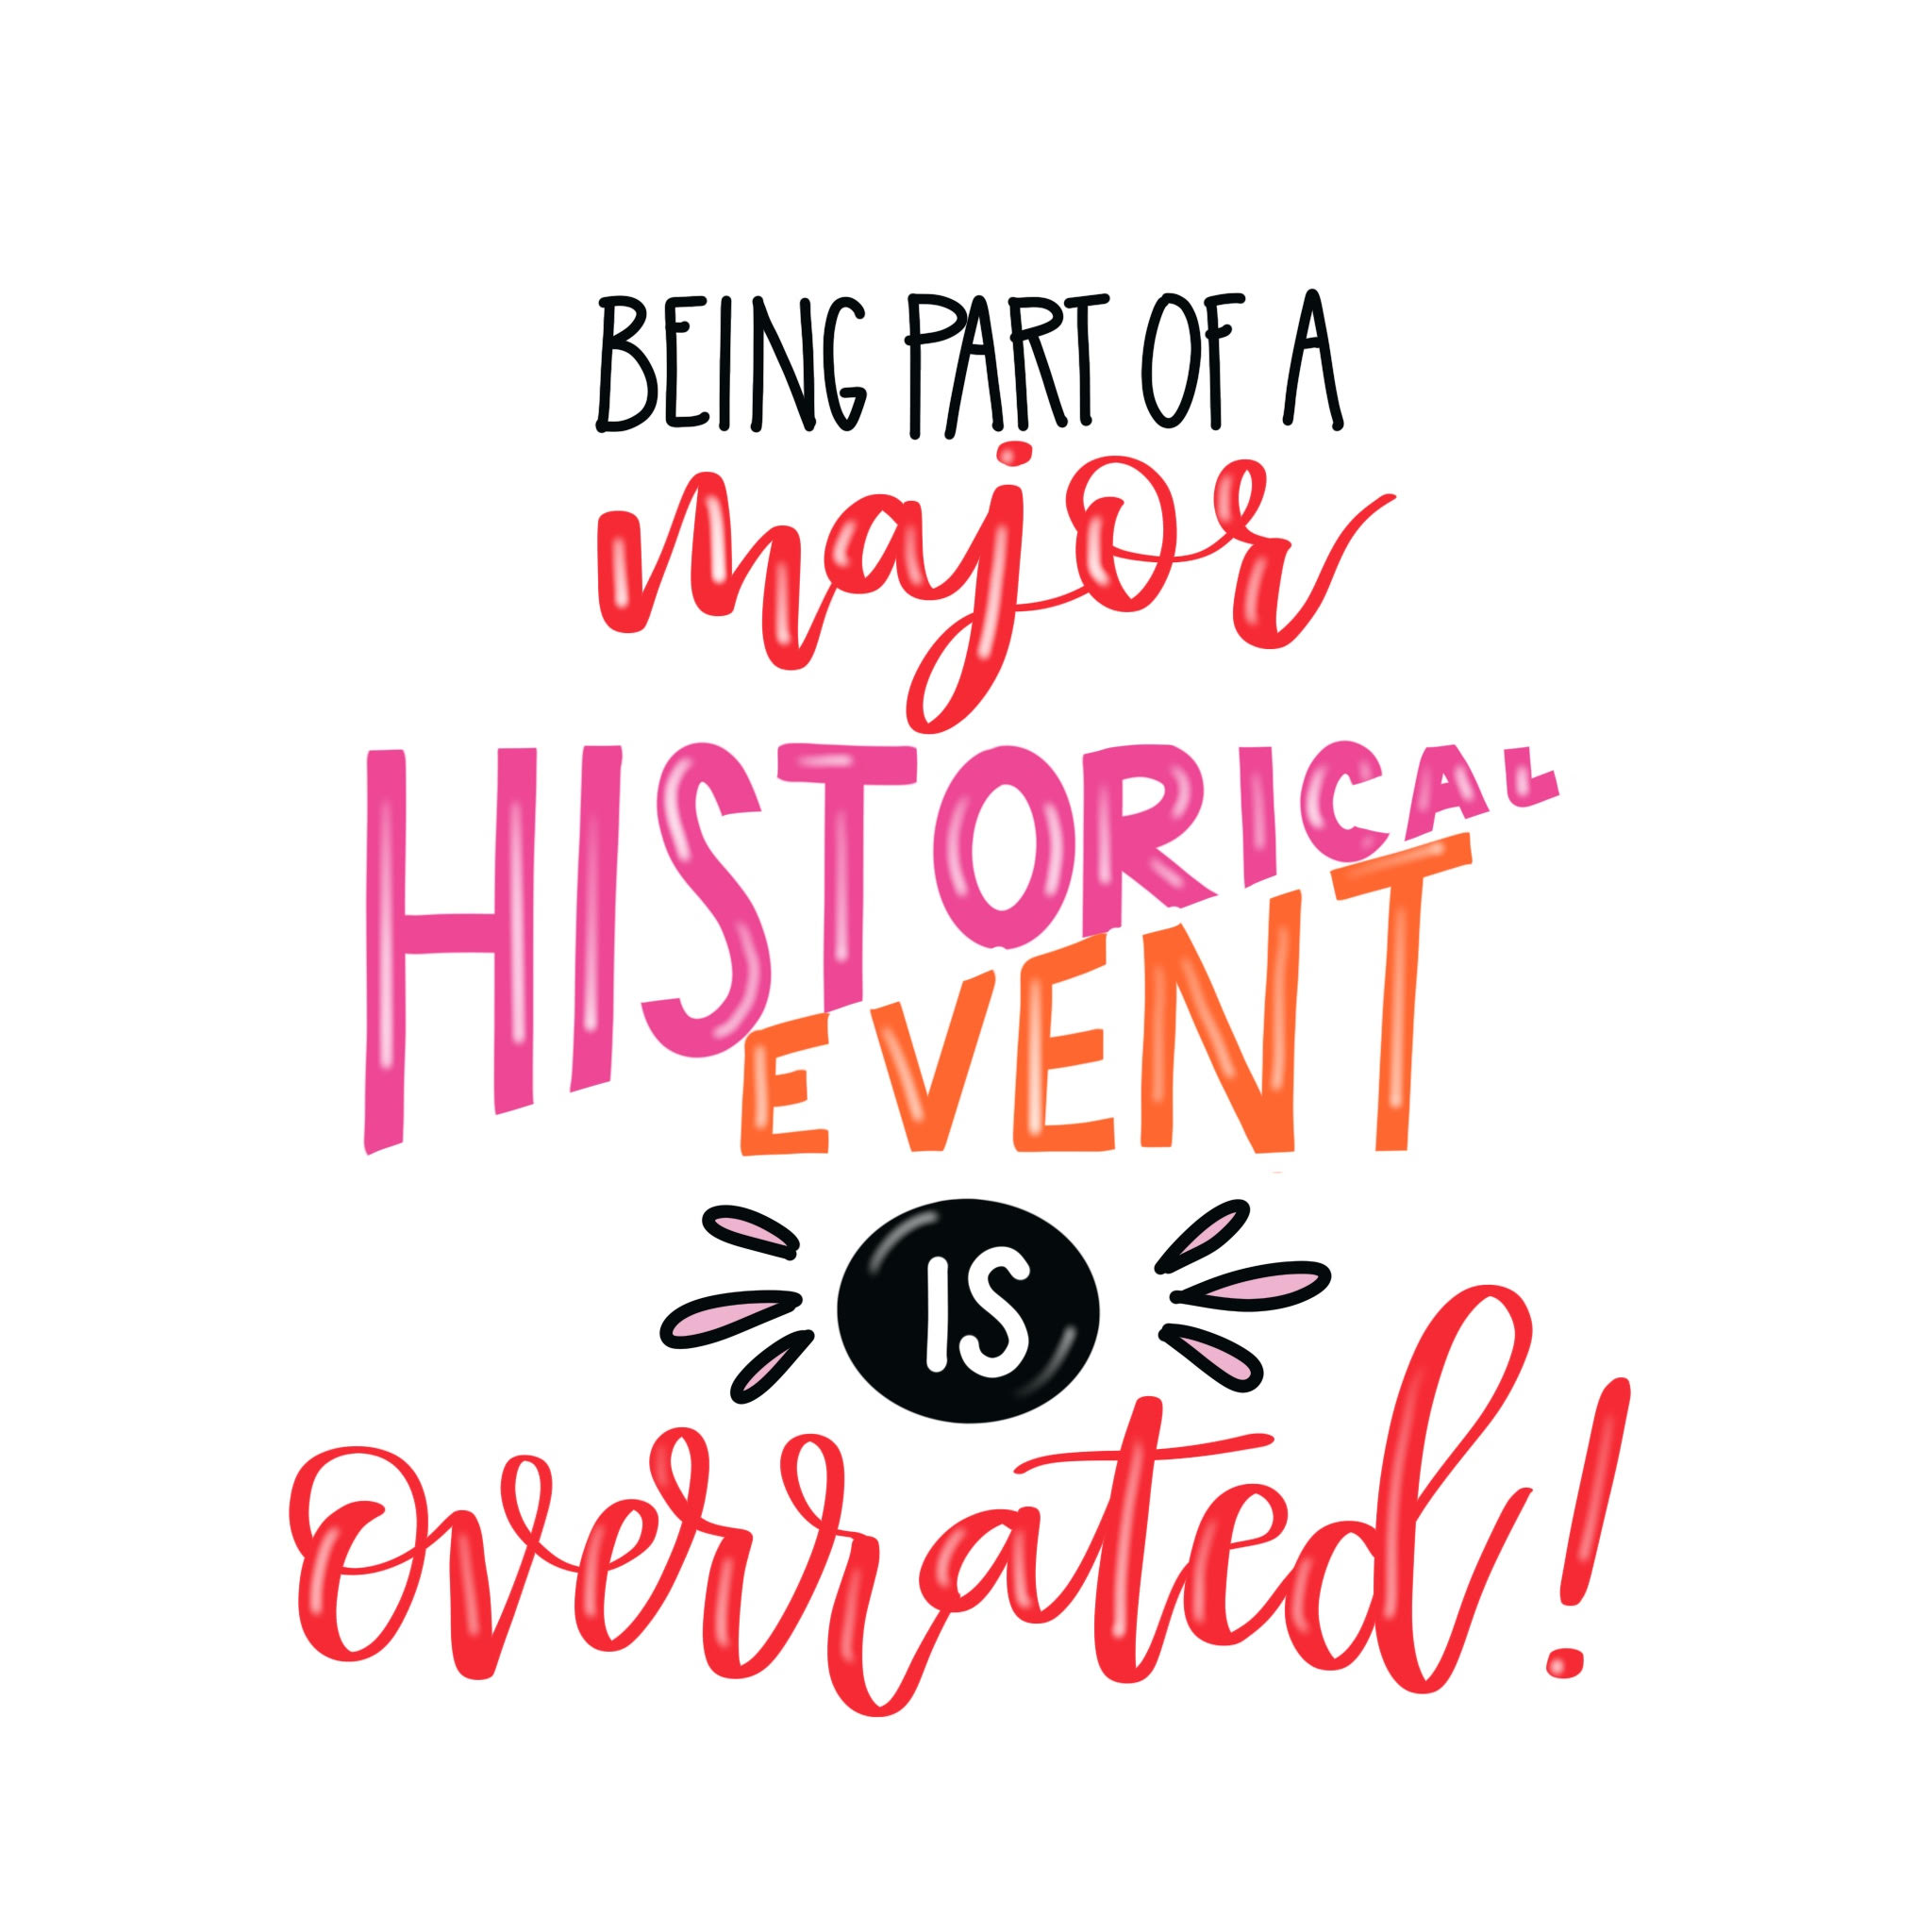
A quick variation on this is to use thin triangles in place of your three straight lines. Once again, the middle one is the longest and straightest, while the others are shorter and go off in different directions. The tips of the triangles point in toward your word. I think this kind of looks like sunbeams, so I tend to use this embellishment around words that have to do with brightness, light, shining, etc. I also use them just for fun in designs with a whimsical feel, like the t-shirt design my mother-in-law had me make for one of my boys a few years ago.
Teardrops
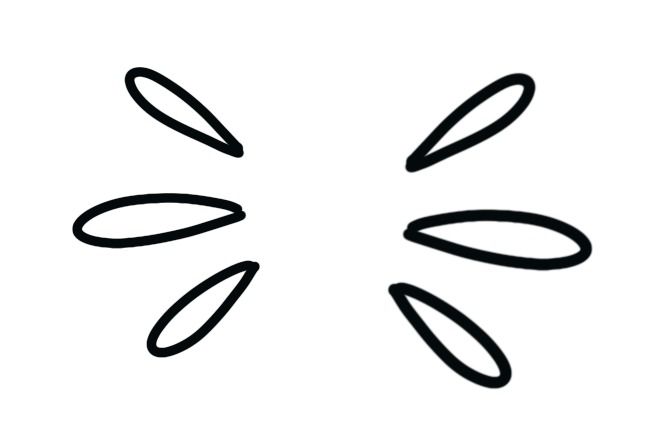
Rather than using straight lines or triangles, another variation is to use shapes that resemble long, thin teardrops, or ovals that come to a point. This gives you a similar effect, but with rounded lines instead of pointed ones, which may work better with a particular design. Below, you’ll see these on either side of the word “in” to fill in some of the empty space in that area.
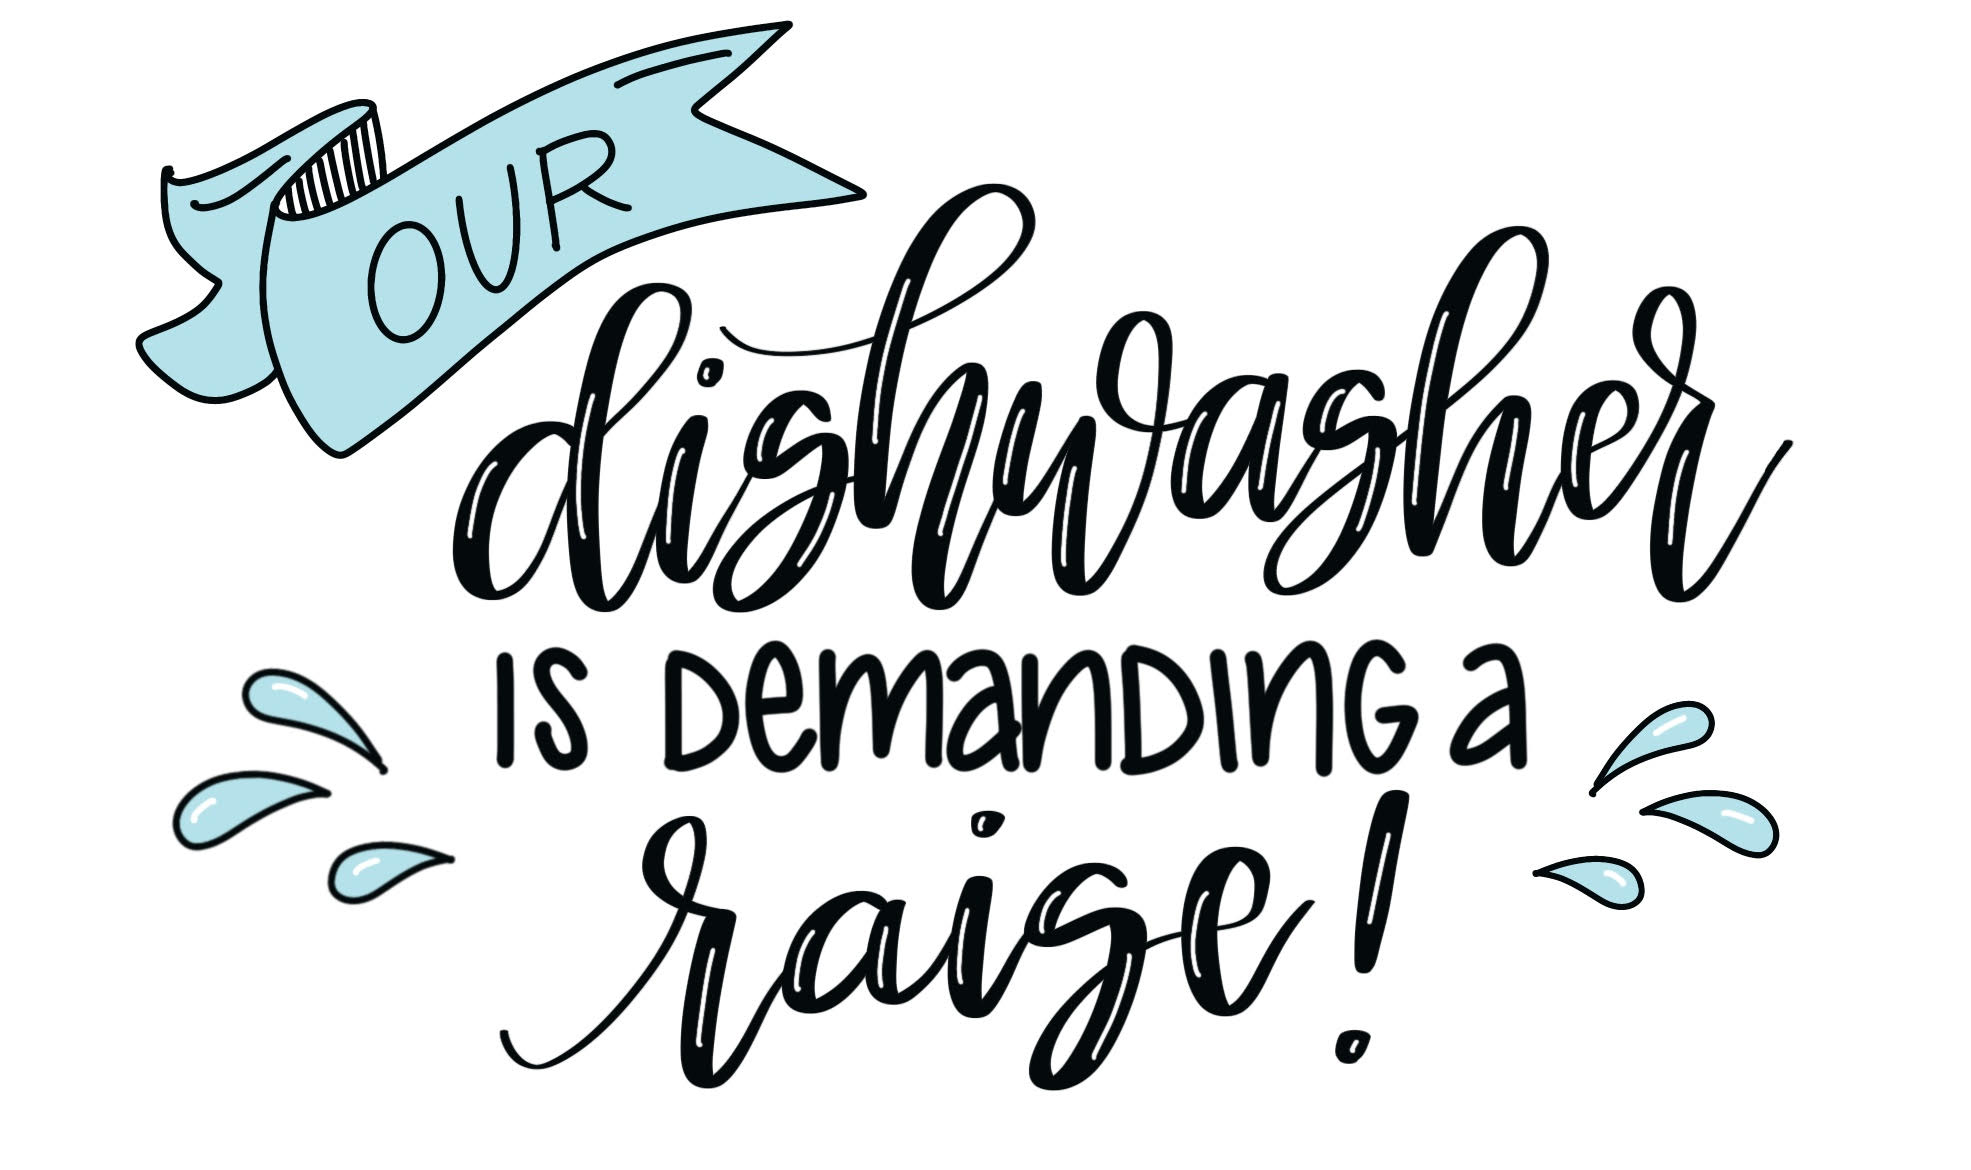
The Splash
Very similar to teardrops, the splash takes those basic shapes and exaggerates them, bending them one way or another to make them look more like drops of water. I use these very purposely (usually colored in blue) in any designs that suggest rain, showers, cleaning, sweating, splashing, or anything else related to water. I also use them in any Bible journaling that’s related to stories about fishing, walking on water, Noah’s ark, etc. Below, you’ll see them used to accent a quote I lettered about life in lockdown during this pandemic…I have never seen so many dirty dishes!
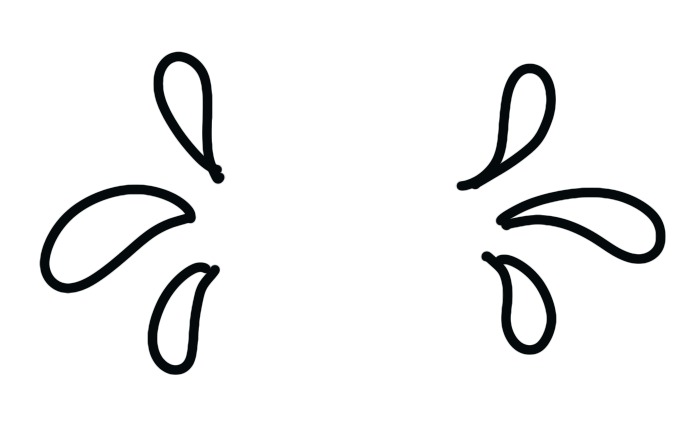
Swirls
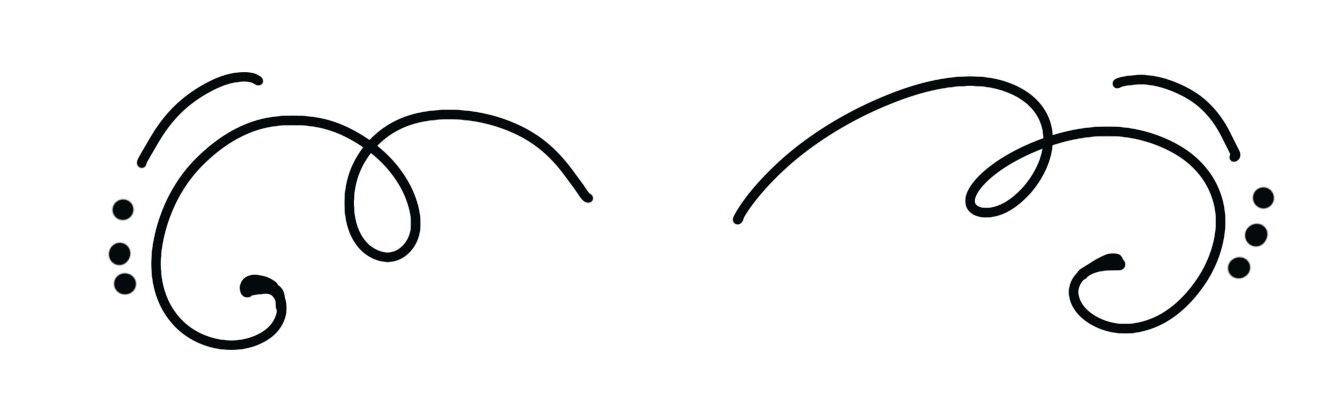
There are many ways to draw swirls, in fact, I have chapters dedicated to this type of embellishment in my books. Here is one of the simplest…just start by taking your pen up, then down to form a loop, then continue with a downward curl. Add short lines and dots as accents if you like! You can change this very easily by taking the part after the loop and curling it upward instead. This will give you a slightly different effect, as you’ll see in the example below.
Splashes and Swirls
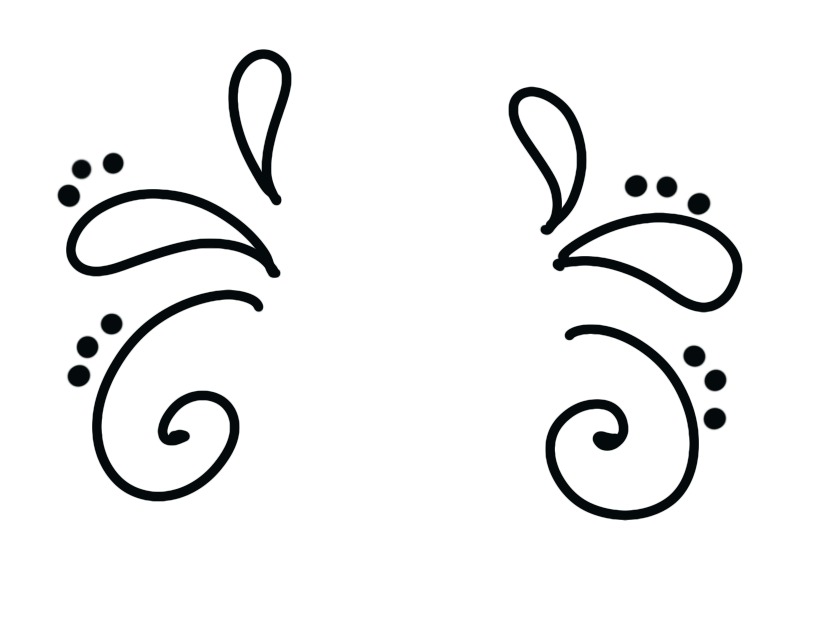
For our final variation, we’re going to combine two of the previous embellishments, the splash and swirls. There’s no wrong way to do this, just combine your droplet shapes and some simple little swirls in any arrangement you like! In the example below, I used a swirls on the top and bottom, with a droplet shape in the center.
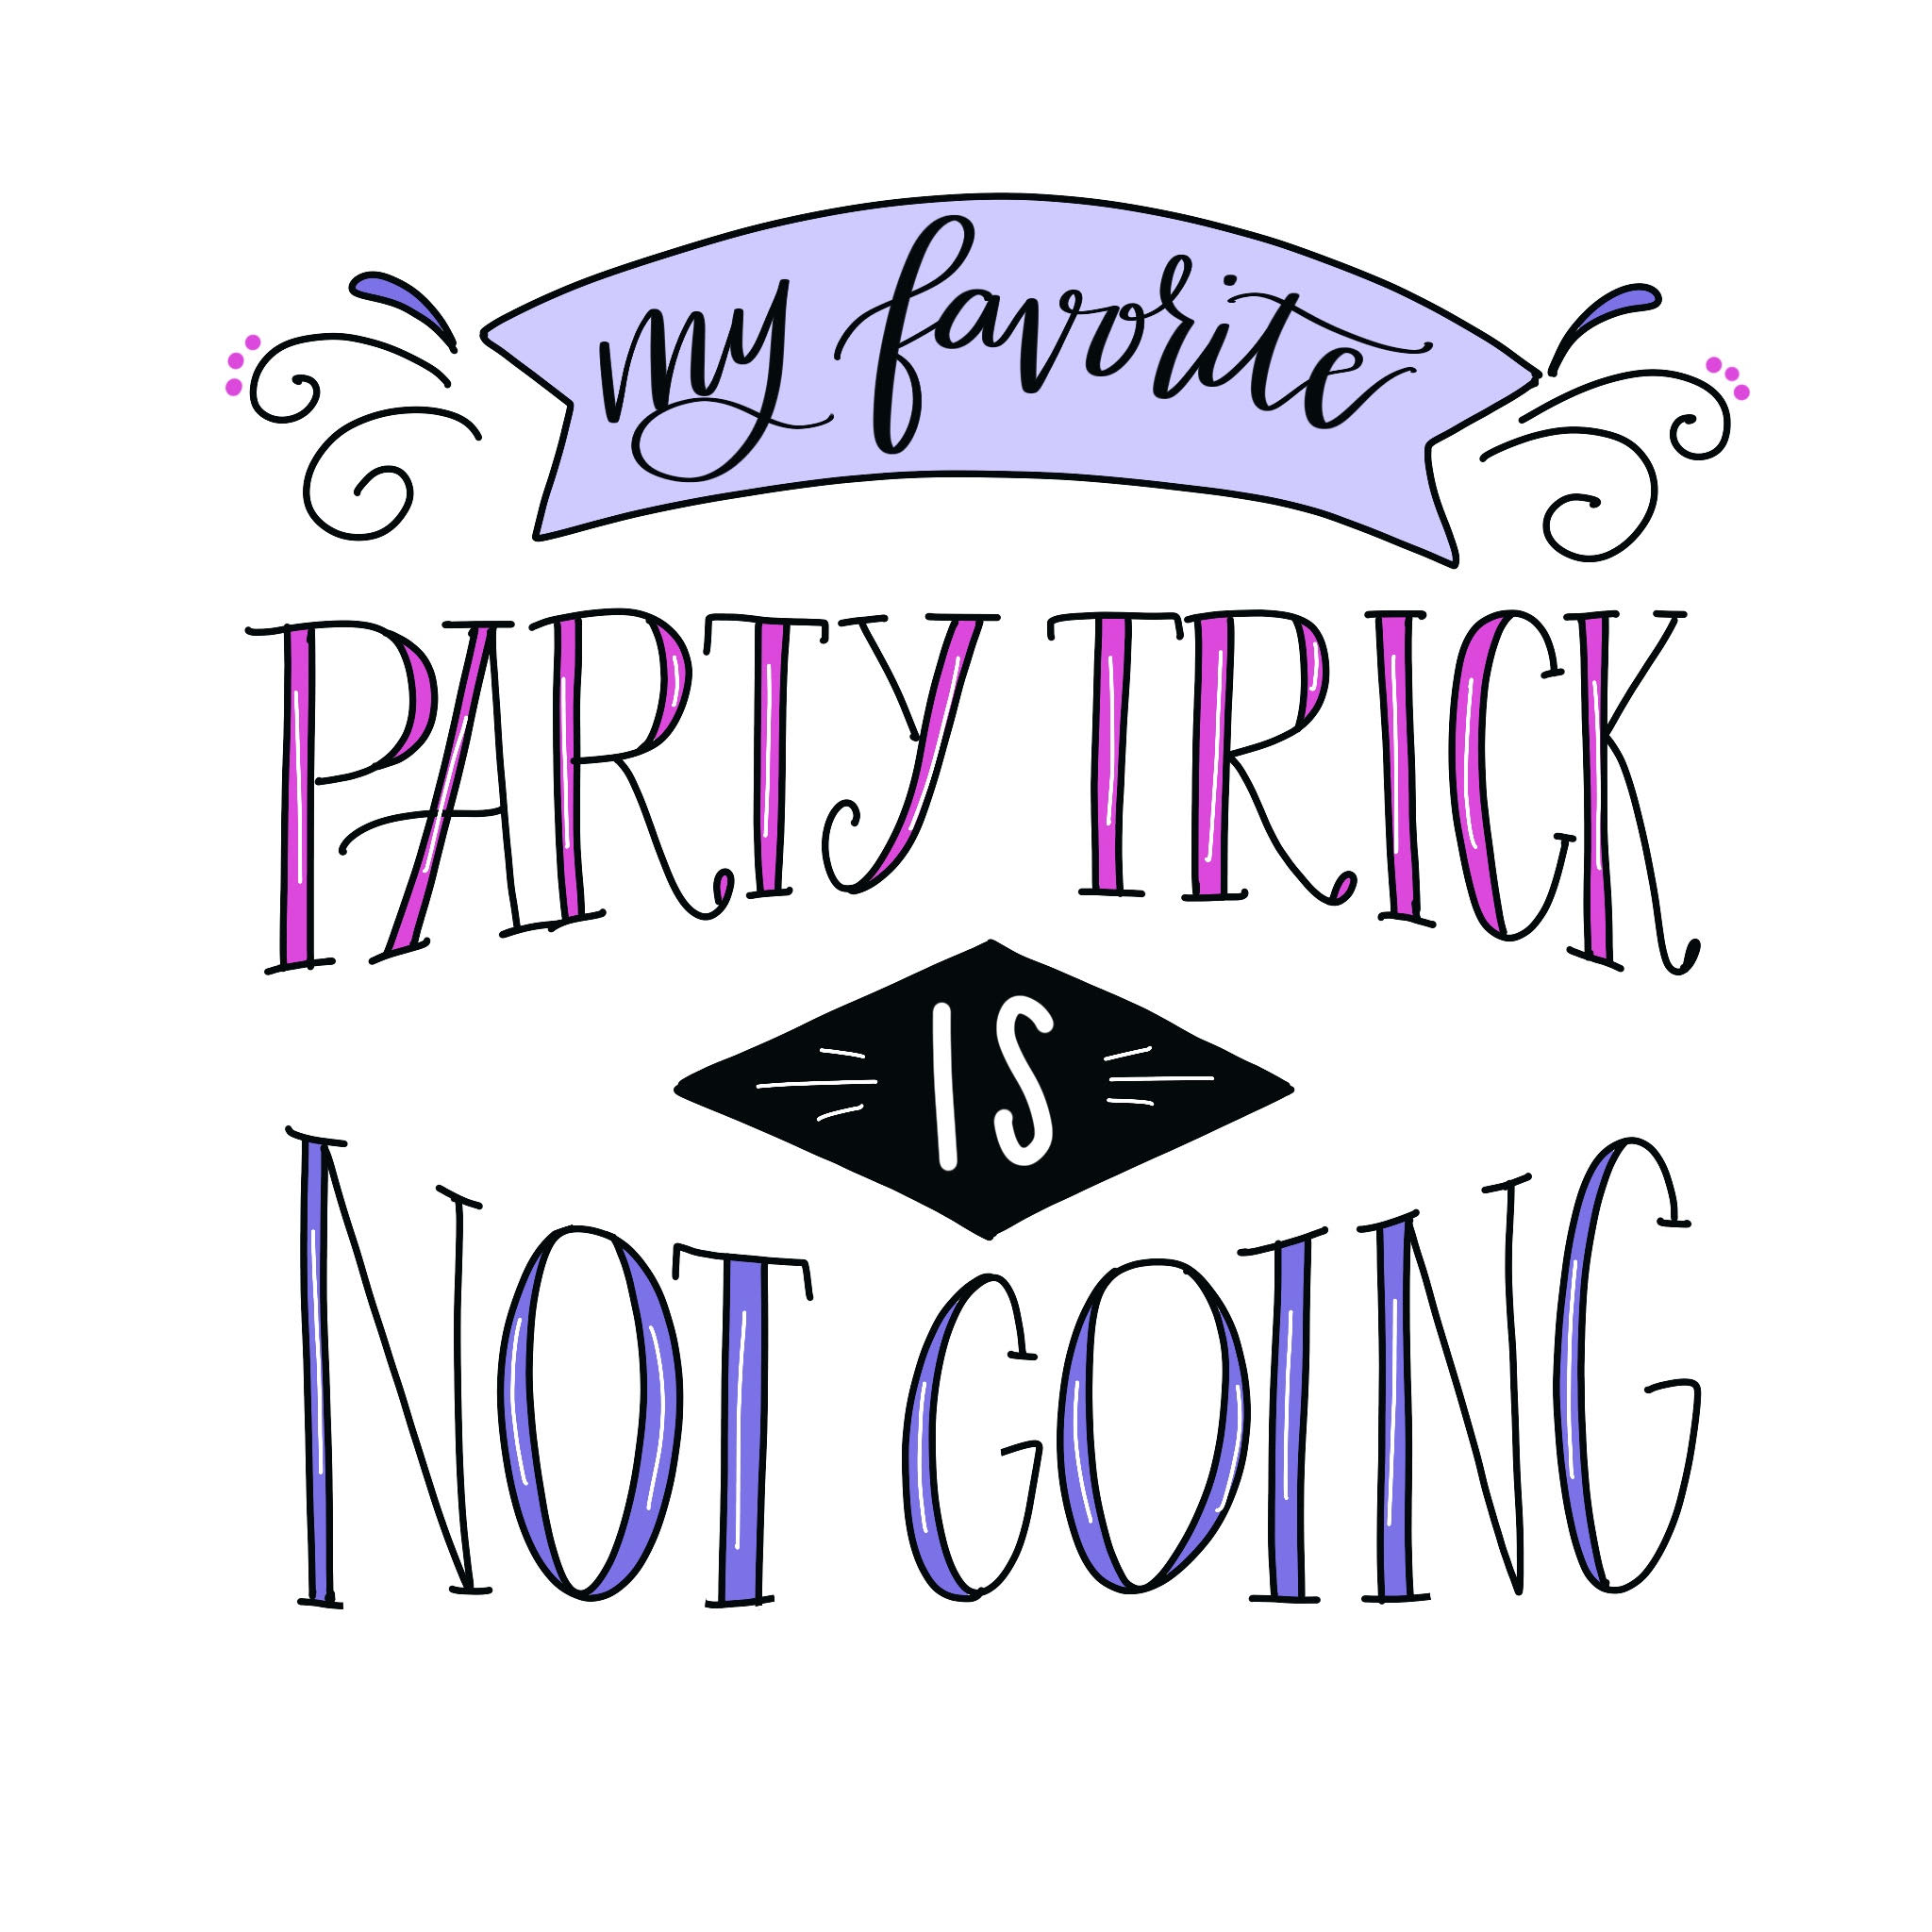
In this next example, which somehow isn’t so funny anymore, I used one droplet shape at the top, then two swirls below it on either side of the banner. You’ll also notice that I used another of our embellishments, the straight lines, on either side of “is” to help fill the space in the diamond.
Choosing the right embellishment is a process of trial and error. There’s no one correct way to do it, just practice sketching different options and see what you like best! This is one reason I like to plan my designs with pencil before tracing over them with marker. Over time, you’ll be able to envision the possibilities in your mind and decide what you want to use when you look at the size and shape of the space you have to work with. This is by no means an exhaustive list of all the embellishments you can use in a lettered design. There are also flowers, vines, leaves, other shapes, and all kinds of little drawings that can help bring your art to life. For now, though, these are a great place to start. I hope you find this helpful, and I’d love to see how you’re using these embellishments in your own lettering. Be sure to share your latest projects (lettering and all other types!) with us in the Amy Latta & Friends Facebook group so we can all be inspired. And, don’t forget to Pin this post for later or to share with a friend. Happy embellishing!
Love hand lettering? Be sure to check out these posts…
Basic Hand Lettering: Faux Calligraphy
AND, don’t miss…
MY FREE 30 MINUTE BASIC HAND LETTERING LESSON


Thanks for sharing the great tips!!