Hey there, friends! You know there are a lot of things I like and a few things I’m pretty obsessed with. *ahem, Starbucks, Silhouette Cameos, and Mod Podge.* So, you can imagine that I was excited when I found out that Mod Podge has something brand new coming out on the market this summer. And you can imagine how much more excited I was when I found out that I got to test it out ahead of time!
The products are called Mod Molds and
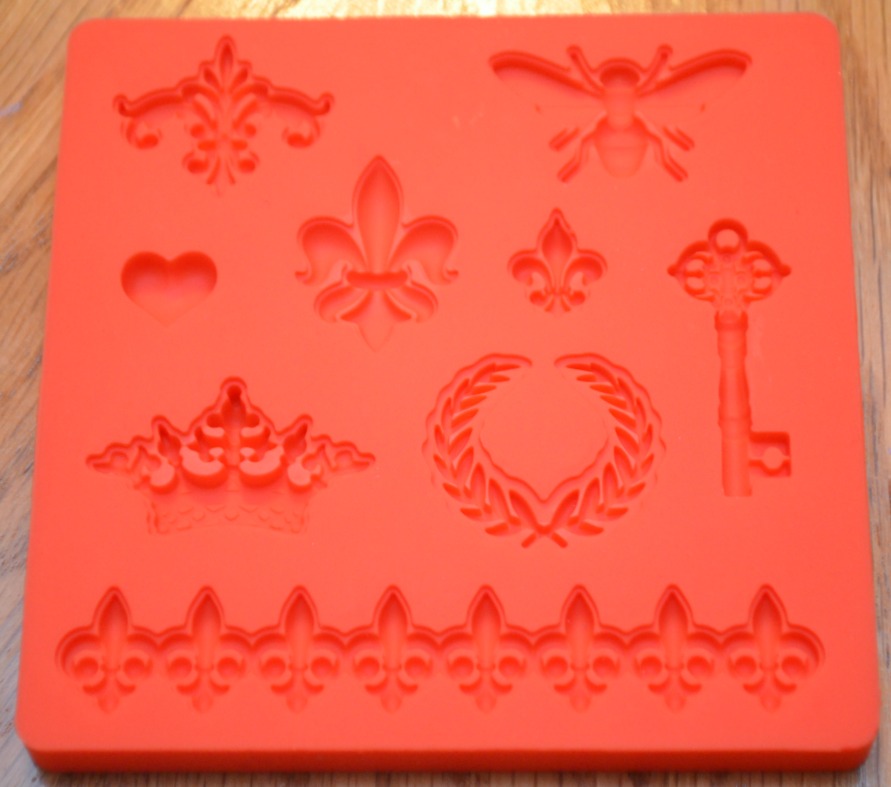
Mod Melts. There are four different molds available: the Flower Mold, the Nature Mold, the Ornamental Frames Mold, and the Royal Icons Mold {which I received, pictured below}.
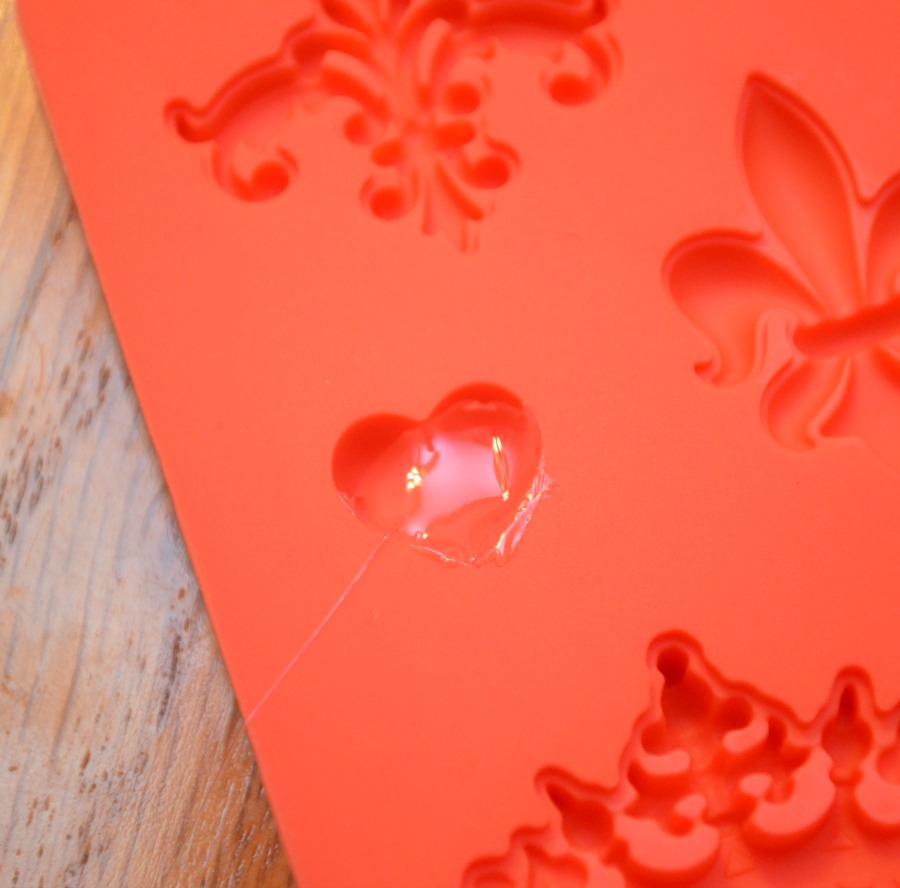
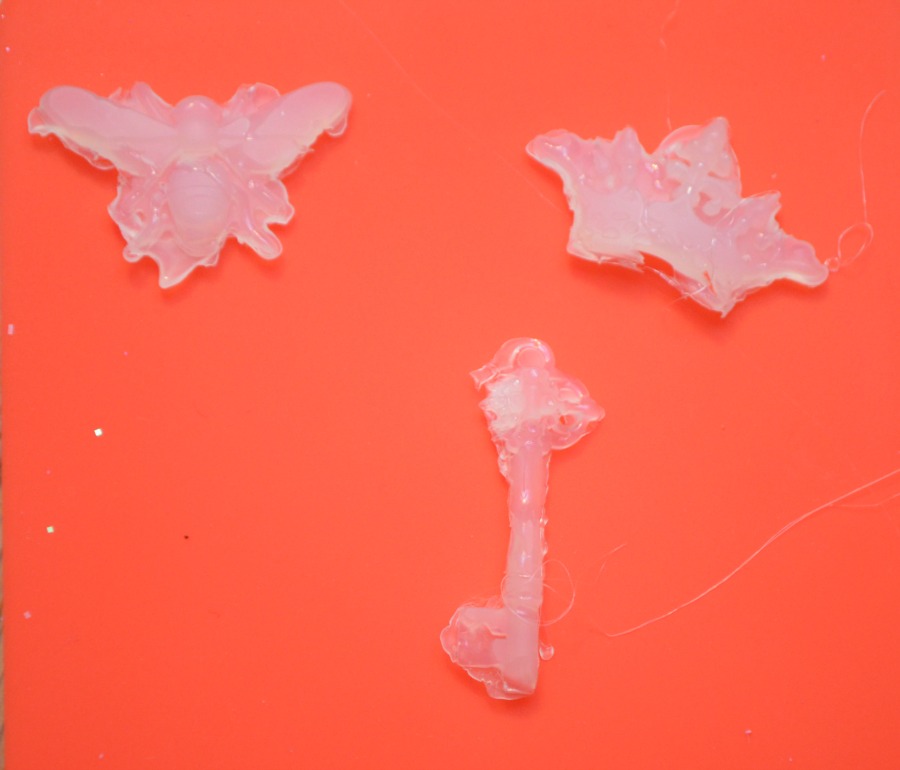
The Mod Melts are available in Sea Glass {clear} and Milk Glass {cloudy} and look like long sticks of hot glue. You use them with a high temp glue gun. Once heated, you fill the mold with the melt and allow it to cool completely, which takes about three minutes unless you have a really large design.
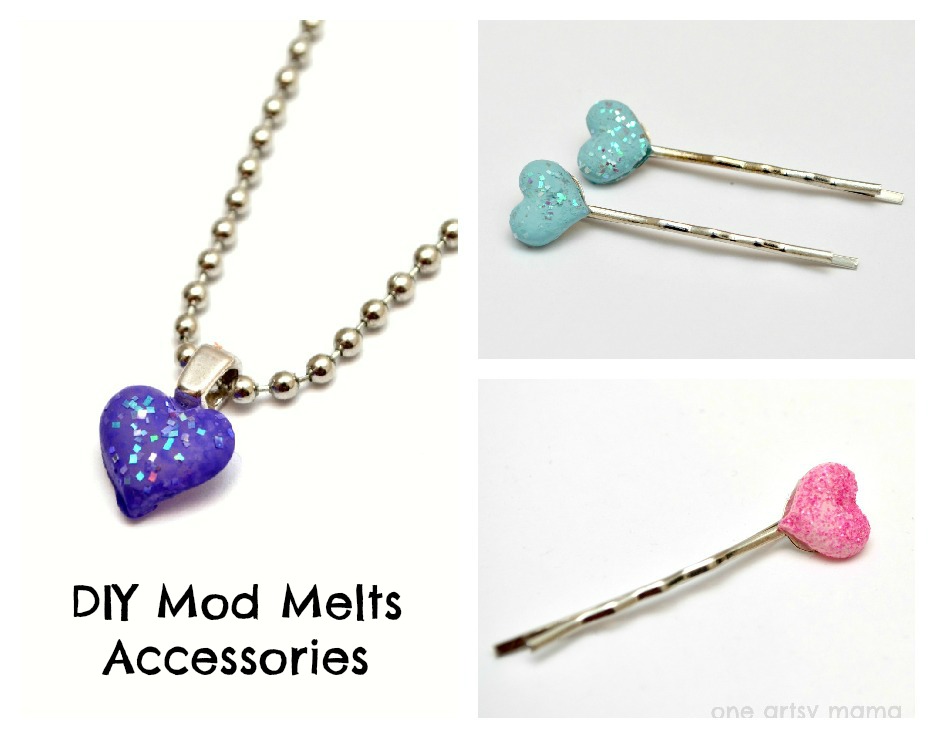
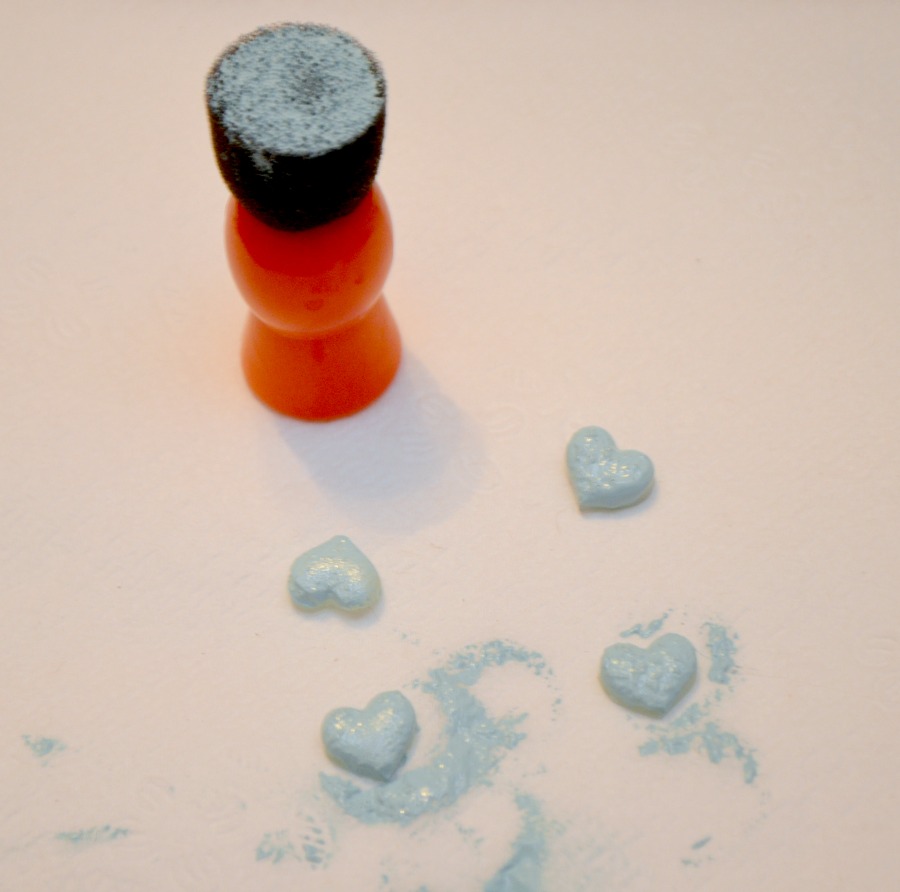
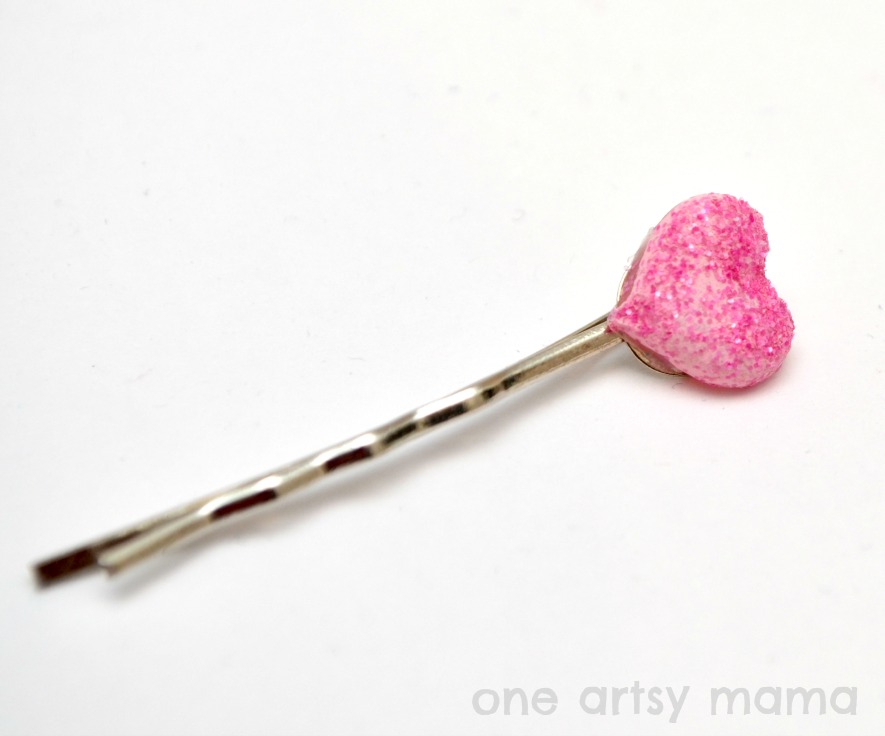
Once the design is cool, it easily pops out of the mold, and you have a shape that’s ready to be painted, embellished, and used for whatever projects you have in mind. Here are a few of the little hearts I made, just waiting to be decorated.
Along with the melts and molds in my package, I received a sponge brush and several colors of Folk Art acrylic paint. I thought these hearts were just the perfect size to turn into some DIY jewelry for a few of the little ladies in LC’s life, so I painted them with blue, purple, and pink Folk Art paint, then sprinkled fine glitter on top while the paint was still wet.
Once everything was dry, I glued them onto some bobby pins…cute, aren’t they?
I also tried gluing one to a necklace bail. It’s a tiny little charm, just the right size for any little princesses you might happen to know.
Now, since we play the honestly game around here, I will share this with you. There’s definitely a learning curve here, and the more intricate the design, the trickier it can be to get a clean, usable image. I got the heart down really well and was able to turn out a bunch of them that looked really great, but when I tried the most detailed of the molds, well, this is what happened.
I did learn that you can easily cut off excess with small sharp scissors or an exacto knife, and I do think that with practice I can do better than what you see above, but in the spirit of the honestly game, well, there it is.
If I were buying a mold myself, I’d go with the nature or flower mold because I think it’s easier to get cleaner results. Either that, or my friends who got those are just better at it than I am. 😉
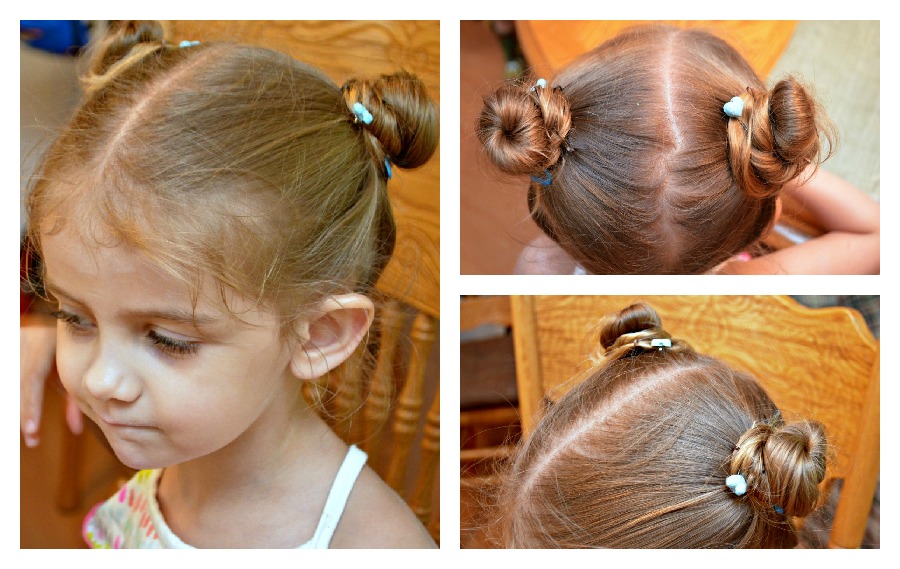
In any case, I do like my little hearts, and more importantly, Little Crafter’s girlfriend, Princess E does too:
For more information, you can connect with Plaid Crafts here:
Hugs & Glitter,


This looks like something my girls and I could have a lot of fun with. I’ll have to keep my eyes open for it in stores.
The heart hair pins are very sweet! Great job, honestly.
I love the heart pins! So cute!
Amy thanks for sharing both the success and the not-so-success! Great post!
Great job with the bobby pins. I really appreciate knowing that it may be more tricky– I get frustrated when I don’t get a perfect result like the pictures the first time through! 🙂
~Emily
A Tossed Salad Life
My daughter just asked me if I could make her something using the heart mold, I love the hair accessories and seeing as I have no less than 100 bobby pins laying about guess what I’m going to make … possibly to match every outfit :).
Here’s my tip for the more detailed molds like the crown. Bend the mold so those tiny little sections are spread open a little wider, quickly fill them then lay the mold flat before the melts dry, you have to work fast though. It was a little trial and error to figure this out when I was making the crowns for Miss M.
Thanks for the tip!! I’ll have to try that! Those little buggers were driving me nuts!
omg the heart bobby pins look SO sweet on your adorable little model!
Those did turn out really cute and thanks for being honest with us. We, as readers, appreciate it!!
So cute!!!! I want these molds!! I’ve yet to find them!!! I bought the bobby pins on Amazon. Just waiting for the other stuff to make it to my local craft store!!!
These turned out nicely!
Such cute heart clips..
These are adorable! How did you glue the hearts to the bobby pins? Did you use something other than hot glue? I’m not sure that would hold the narrow pin and the smooth surface of the heart together for very long. What process did you use ?
It looks like she used pins with glue pads on them, they have flat circles on the end of the bobby pin, so you have room to decorate. And then the glue doesn’t really matter.
So cute! This is the most fun little jewelry!
Thanks for linking up at the TGIF link party last week! So cute, I bet my niece would love to make these! I hope you’ll stop by tonight and link up again!
http://www.livingbettertogether.com/2013/06/tgif-link-party-no-2.html
Have a great day!
Rebecca