Lost Tooth Pillow with Oly*Fun
Thanks to Fairfield for sponsoring today’s post. All opinions are honestly my own.

One of the most fun parts of my job as a blogger is that sometimes I get to find out about and test new products to see what kinds of things you and I will be able to make with them! Recently, I received a big ol’ box full of something brand new from Fairfield called Oly*Fun. What is it? Well, it’s a very versatile material you can use for all sorts of crafting projects…take a look!
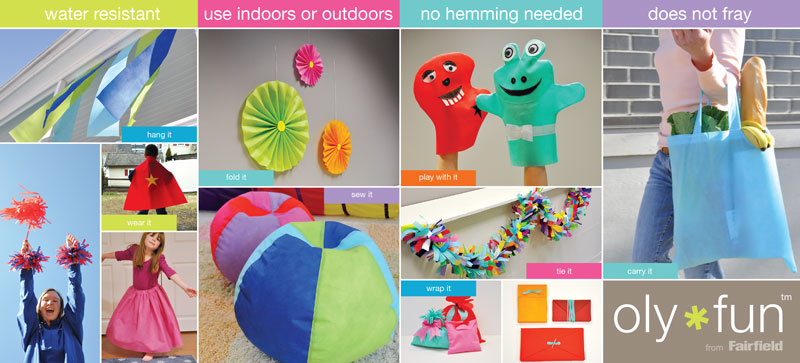
Since it’s water-resistant, it’s great for both indoor and outdoor projects, and the fact that it doesn’t fray means that you don’t have to do any fancy hemming or even any sewing at all if you don’t want to. Kids’ crafts, home decor, fashion…you name it, you can probably make it with Oly*Fun. Needless to say, I was intrigued! I had a thousand ideas of different things I could create; the hardest part was deciding on one to start with. Since Little Crafter is about to turn six next month, I thought it was about time to make him something he could use when he starts losing teeth like his classmates.

I’ve seen lots of tooth-shaped pillows, but I figured a monster is more fun than a tooth any day, right? Plus this way, he can use it for other things before and after he starts losing teeth. Here’s how I did it, and you can too!
Materials:
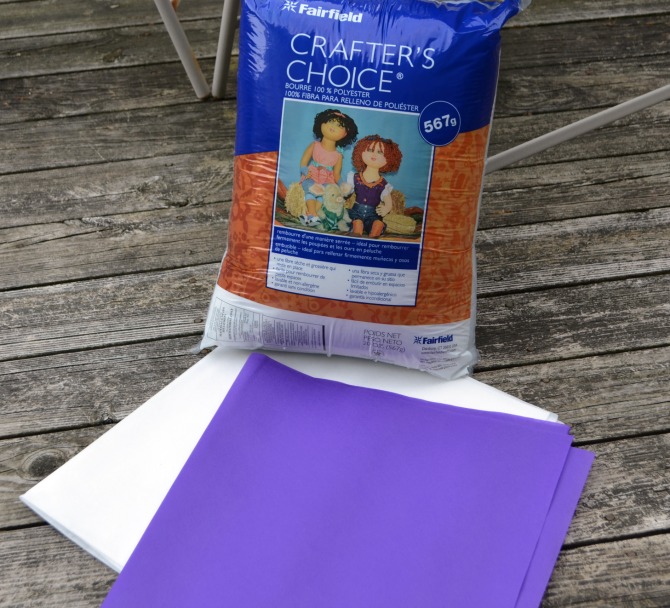
– Oly*Fun, color of choice and white {we used “Jelly”}
– scissors
– Crafter’s Choice polyester fiber filling
– coordinating ribbon
– straight pins
– sewing machine and thread {or glue}
– low temp hot glue gun and glue
Before I start the instructions, I want to note that although I sewed mine, if you’re not a seamstress, you can totally do this project using glue instead! Throughout the steps, I will let you know what to do for a no-sew version.
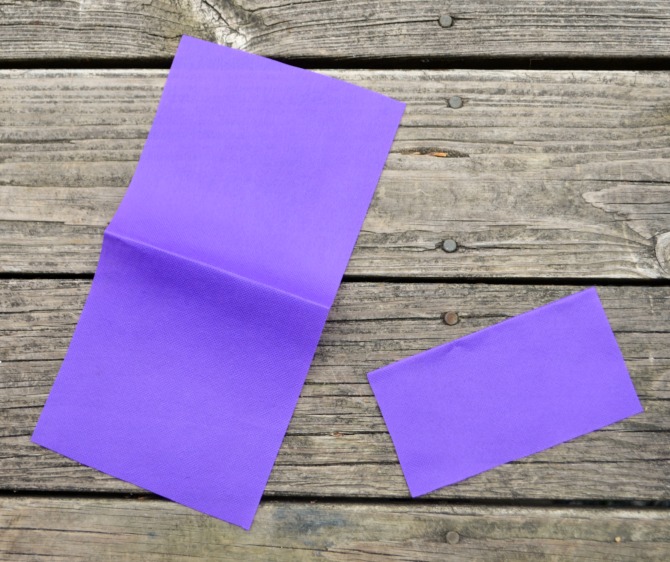
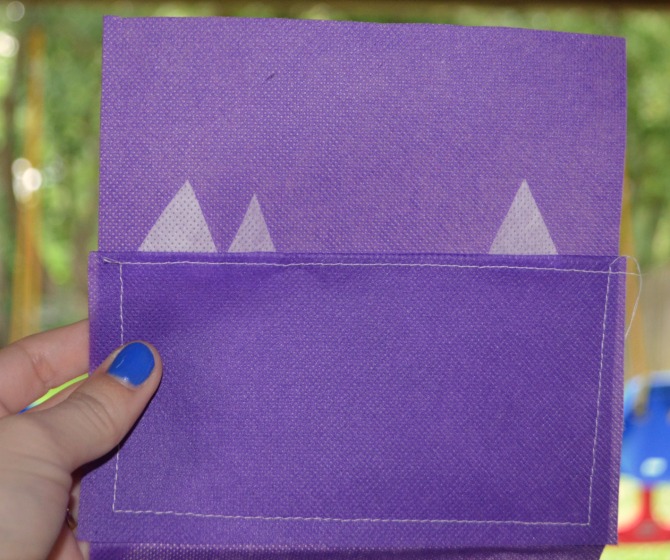
Step 1: Fold your Oly*Fun in half. Cut a square {I made a pattern first} out of both layers. I made the fold one of my edges so that it meant I had less sewing to do later.

Step 2: Cut out another piece that is the same width as your previous square and about half as tall. This will become the pocket.
Step 3: Cut a few triangle shaped teeth from white Oly*Fun. I used three, but you can do however many or few you like.
Step 4: Sew or glue teeth to one of the long sides of the pocket strip you cut.
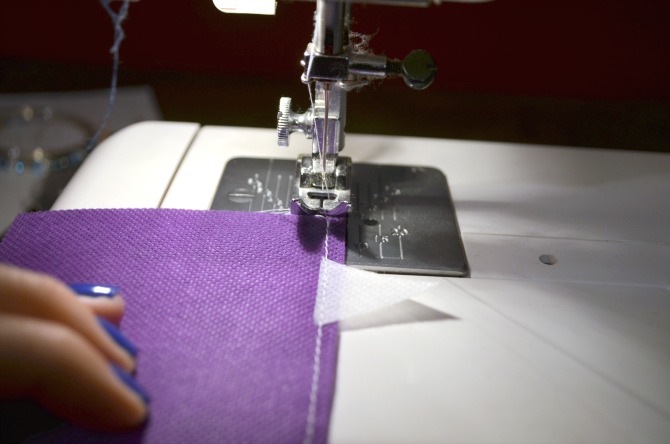
Step 5: Pin your pocket flap to the larger piece of Oly*Fun. The bottom of the pocket should line up with the fold. Sew or glue around the two sides and bottom of the pocket. Be sure to keep your stitches/glue close to the edge and not to seal the top or it won’t be a very good pocket!
Step 6: Fold the bottom half of the larger piece up to meet the top half with the right sides together {this means the pocket part should be on the INSIDE}. Cut a length of ribbon and place it in between the two layers in a “U” shape. The two ends should line up with the top of the fabric and the rest should be hidden inside. Pin in place. If you are doing the no-sew method, fold it the opposite way, with the pocket on the outside. Place the ends of the ribbon on the inside and the rest outside like an upside down U.
Step 7: Sew around the edges, leaving a 2″ opening on one side. Then, using the opening, turn it right side out. If you are not sewing, glue around the edges, leaving an opening for stuffing.

Step 8: Stuff the monster with polyester filling. Hand stitch or glue the opening shut.
Step 9: Glue on eyes.

That’s it! Now you’re ready to hang it from a doorknob or bed post. The kiddo can place a tooth in the pocket, then find it replaced with something more fun in the morning! I love that this can be for a boy or a girl, and you can make it any color{s} you like. You can also go crazy adding hair, glitter, embellishments…anything you want to personalize it for your child.

Like it? Little Crafter sure does! What else can you make with Oly*Fun? Stay tuned, friends, because I’ve got a few more ideas up my sleeve that will hopefully appear on the blog very soon! In the meantime, here are some other places you can find inspiration: Check out Fairfield on Pinterest, Twitter, and Facebook to learn more about Oly*Fun and see other project ideas! Also, take a look at the Oly*Fun website. And when you’re ready to play with it yourself, stop by the shop to order your own. It’s just $2.99/3 yards and is available in 18 different colors! Can’t wait to see what YOU make!

What a clever idea…Really cute and useful too…Love it…
Very cute!!
How cute is that?? Very creative idea, Amy!
What a cute little pillow!
This is soooooo cute!! I wish I had it when my girls were little. Guess I’ll have to wait till grandchildren 🙂
I finally have some time to start sewing! Thanks for sharing, I’m all inspired to try this stuff!!
LOVE this idea!! I’m going to need to make some cute tooth fairy pillows in a few years 🙂