Thrift Store Challenge: Babanees Inspired Painted Stool
Thanks to Plaid Crafts for sponsoring today’s post; all opinions are my own.
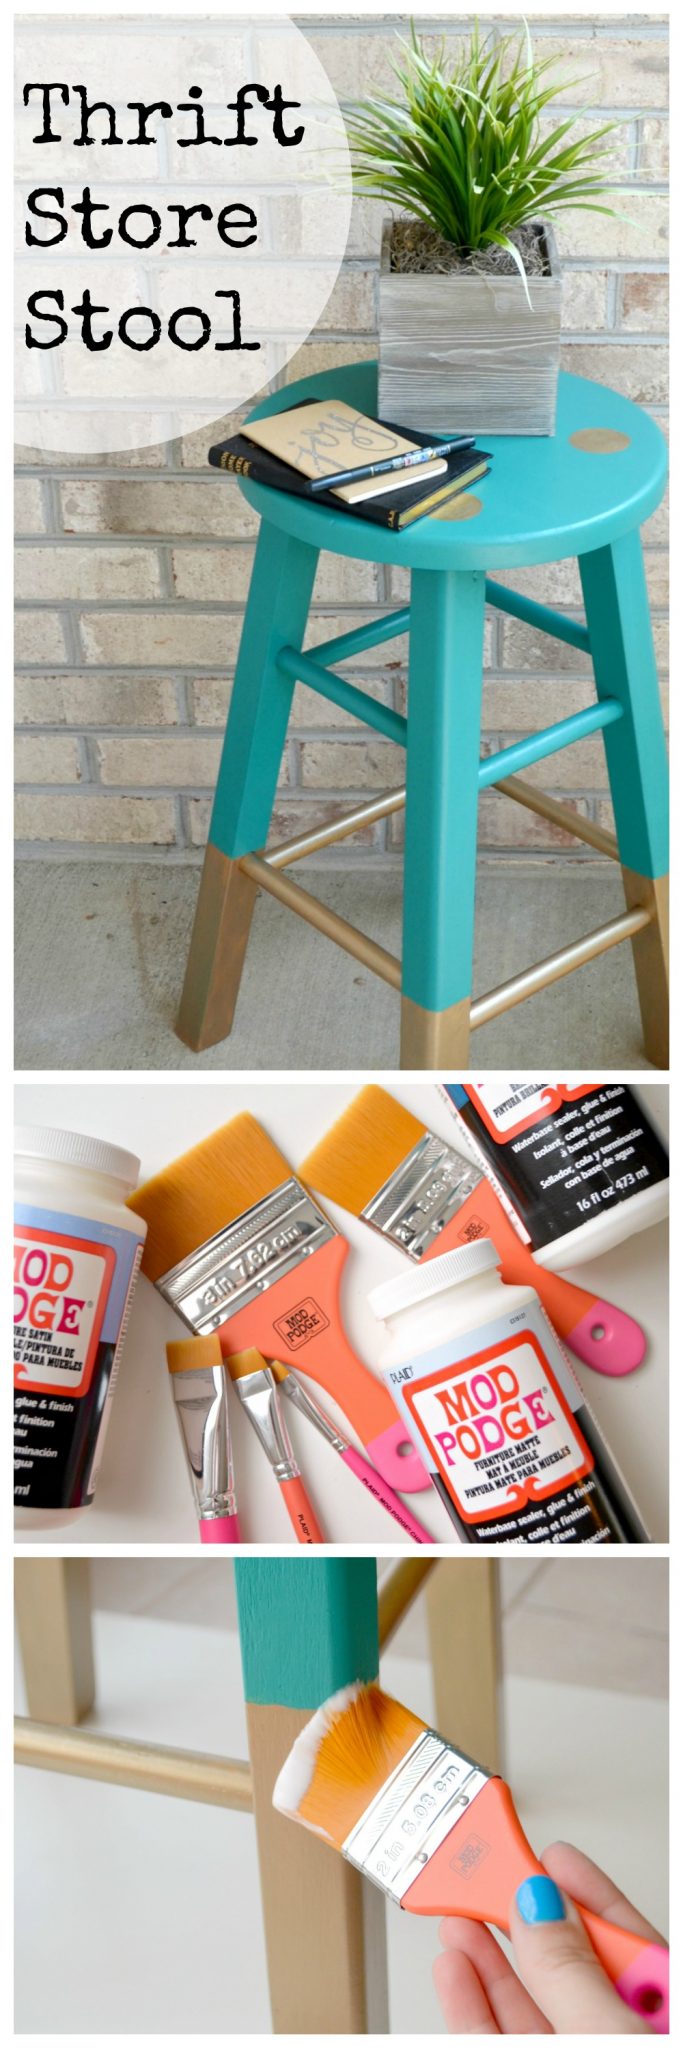
Friends, I am a little obsessed right now with painting all the things! I already painted most of the furniture in our house, so now I’m enjoying picking up roadside rescues and thrift store finds that need a little bit of love. Today, I want to show you one of my most recent projects, a stool inspired by the gorgeous Babanees Bar Stool by Green Cathedral, and how easily you can create one too!
You’ll need:
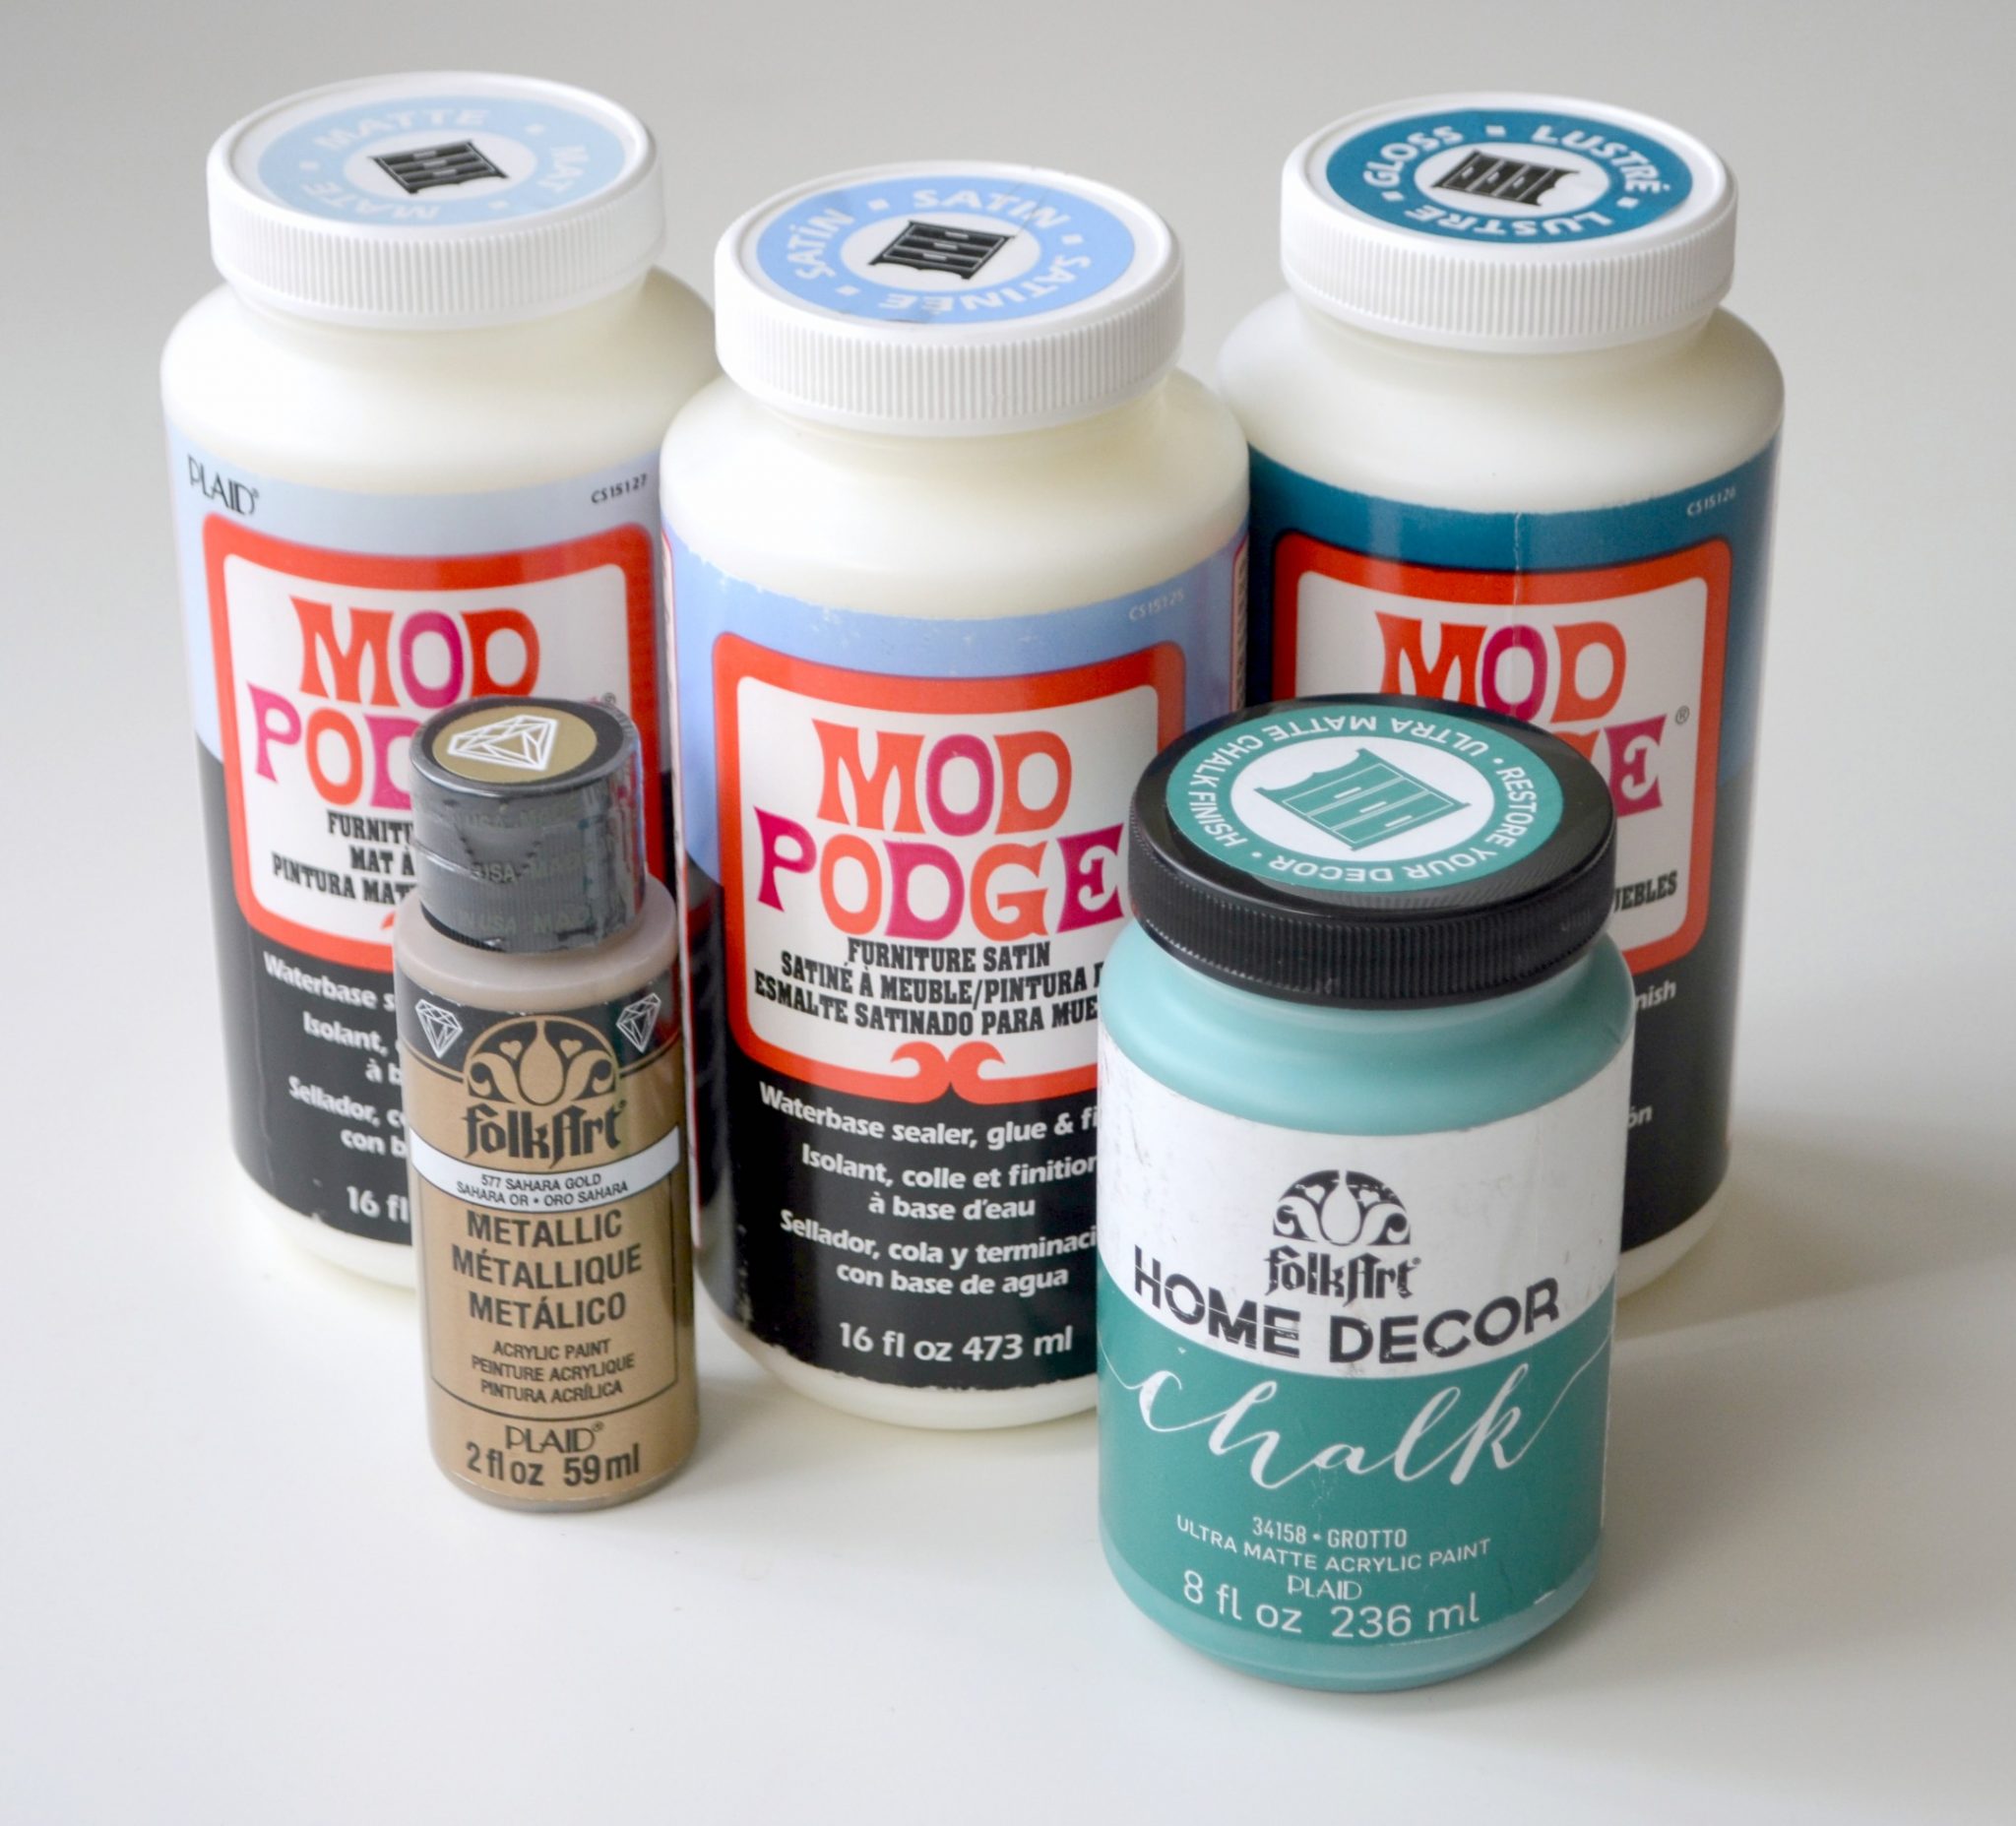
Mod Podge Furniture Satin
FolkArt Home Decor Chalk, Grotto
FolkArt Metallic Sahara Gold
Mod Podge Furniture Brushes
Mod Podge Decoupage Brushes
Round Sponge Brush
Paintbrush
Painters’ Tape
Before we get started with the how-to, I want to take just a minute to talk about Mod Podge. It’s one of those go-to craft supplies I use so often that I just assume everyone is familiar with it, but lately I’ve had several folks ask me, “What’s Mod Podge?” Oh, friends, if you don’t know, you’ve been missing out! Mod Podge is an all-in-one glue, sealer, and finish for decoupage and everyday crafting! I have used it on everything from ornaments, vases, and coasters to giant repainted furniture projects, including a three drawer dresser. There are 21 different formulas of Mod Podge, each with its own special features, so there’s always a perfect formula for every project. Here’s a handy little guide to introduce you to the varieties and help you choose the right one for your project.

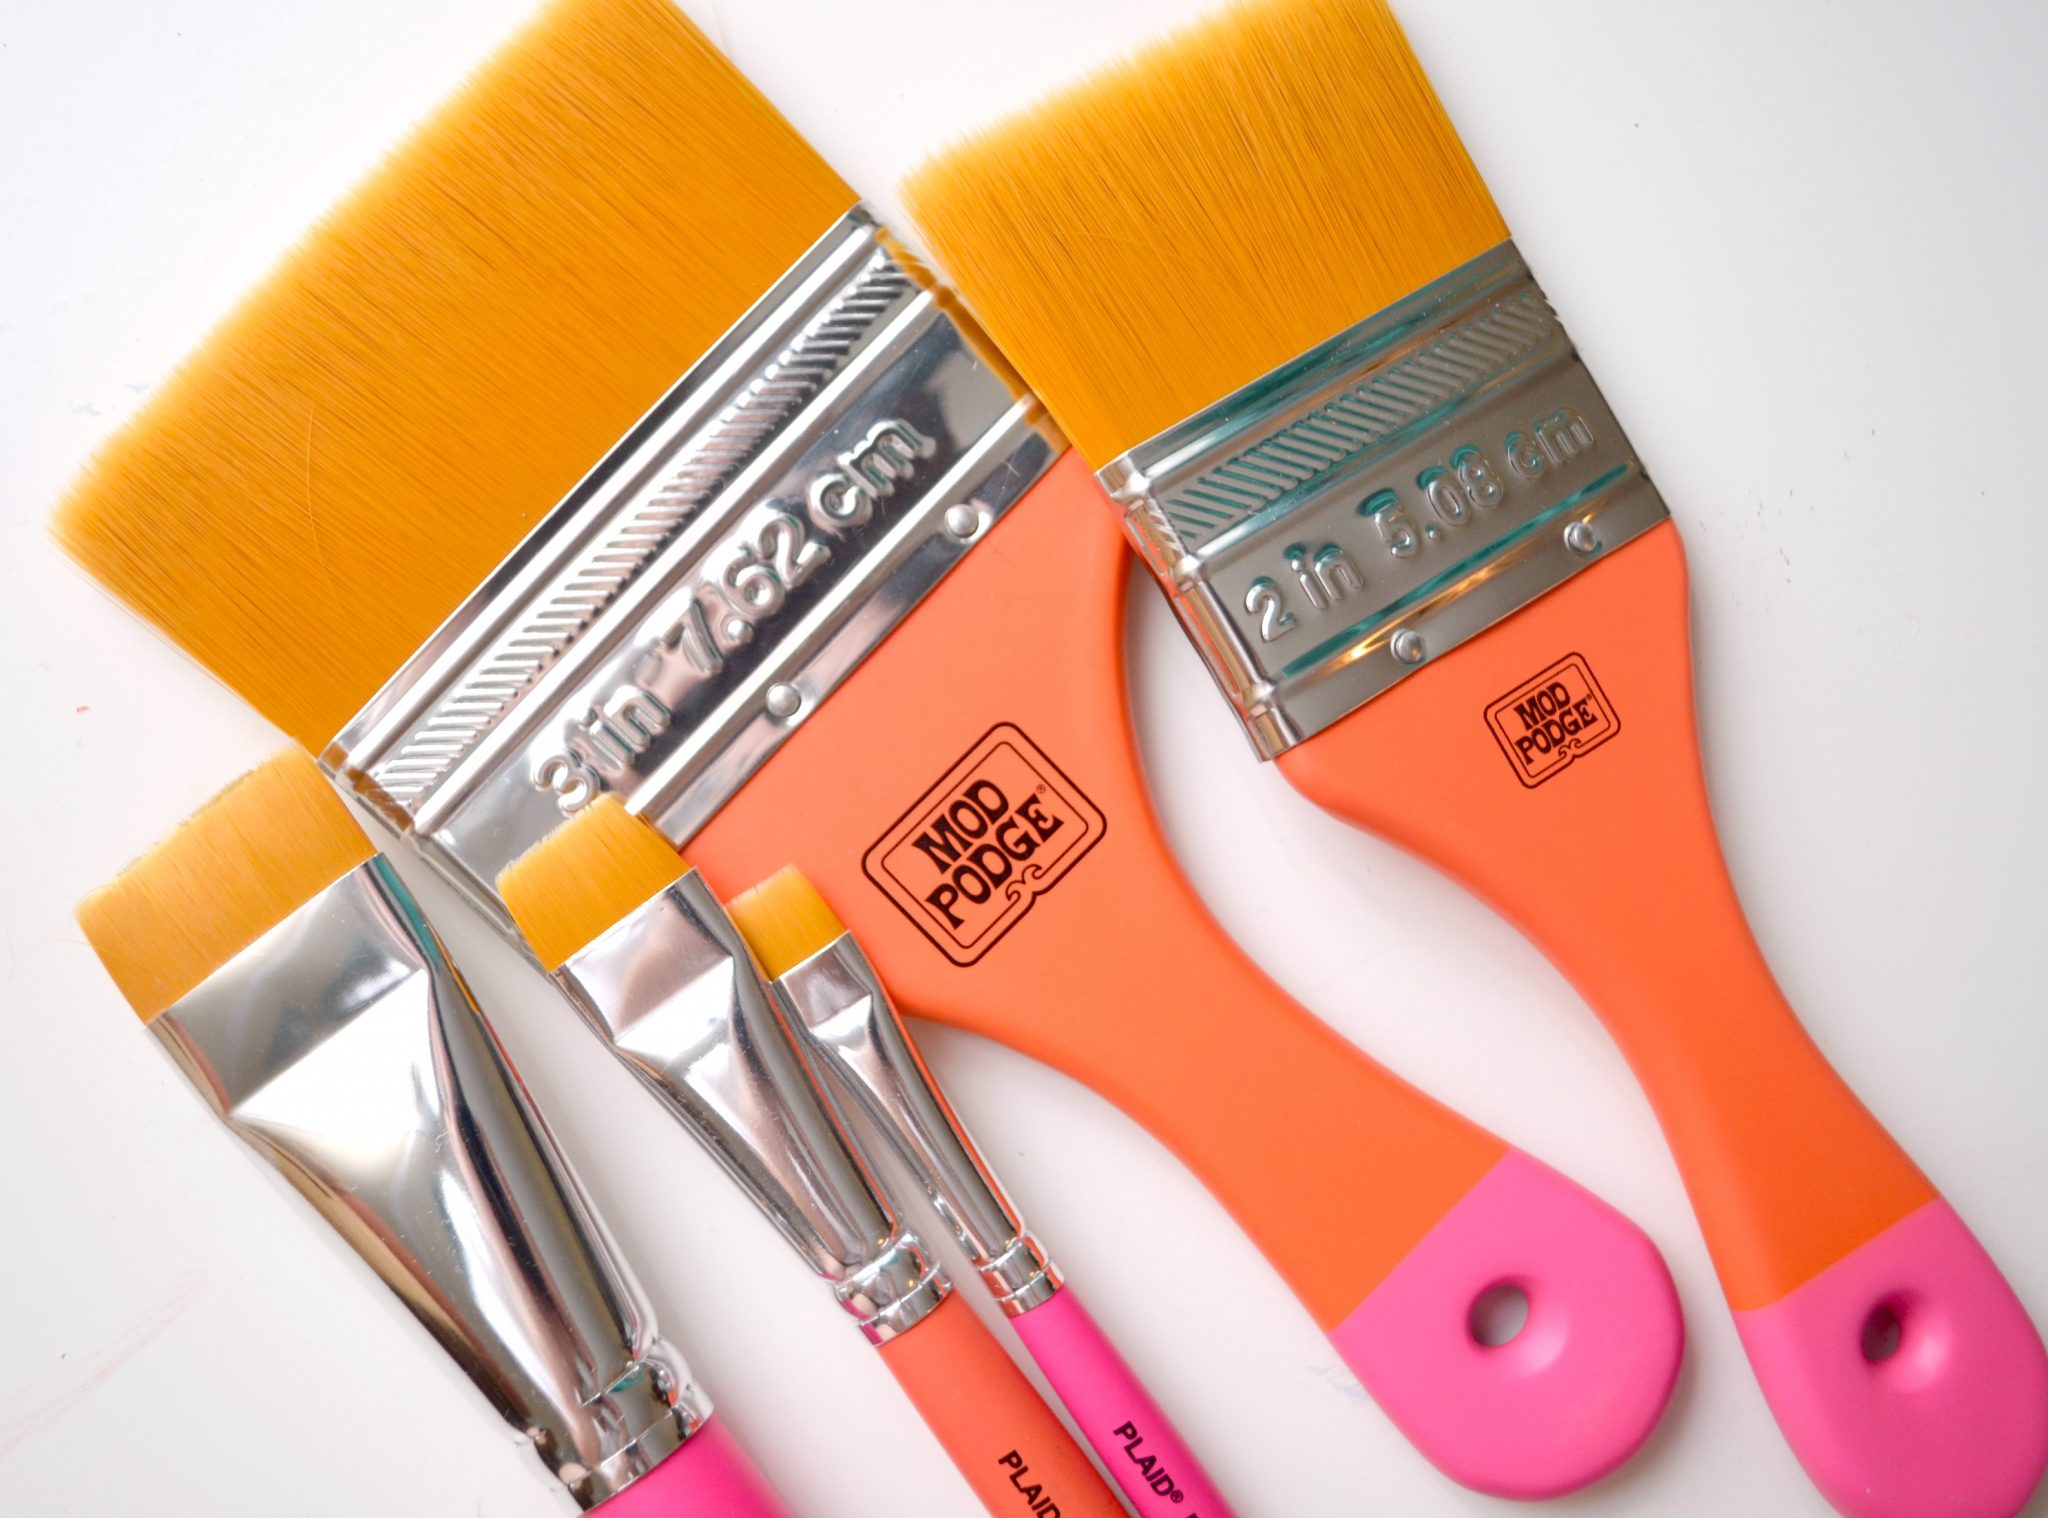
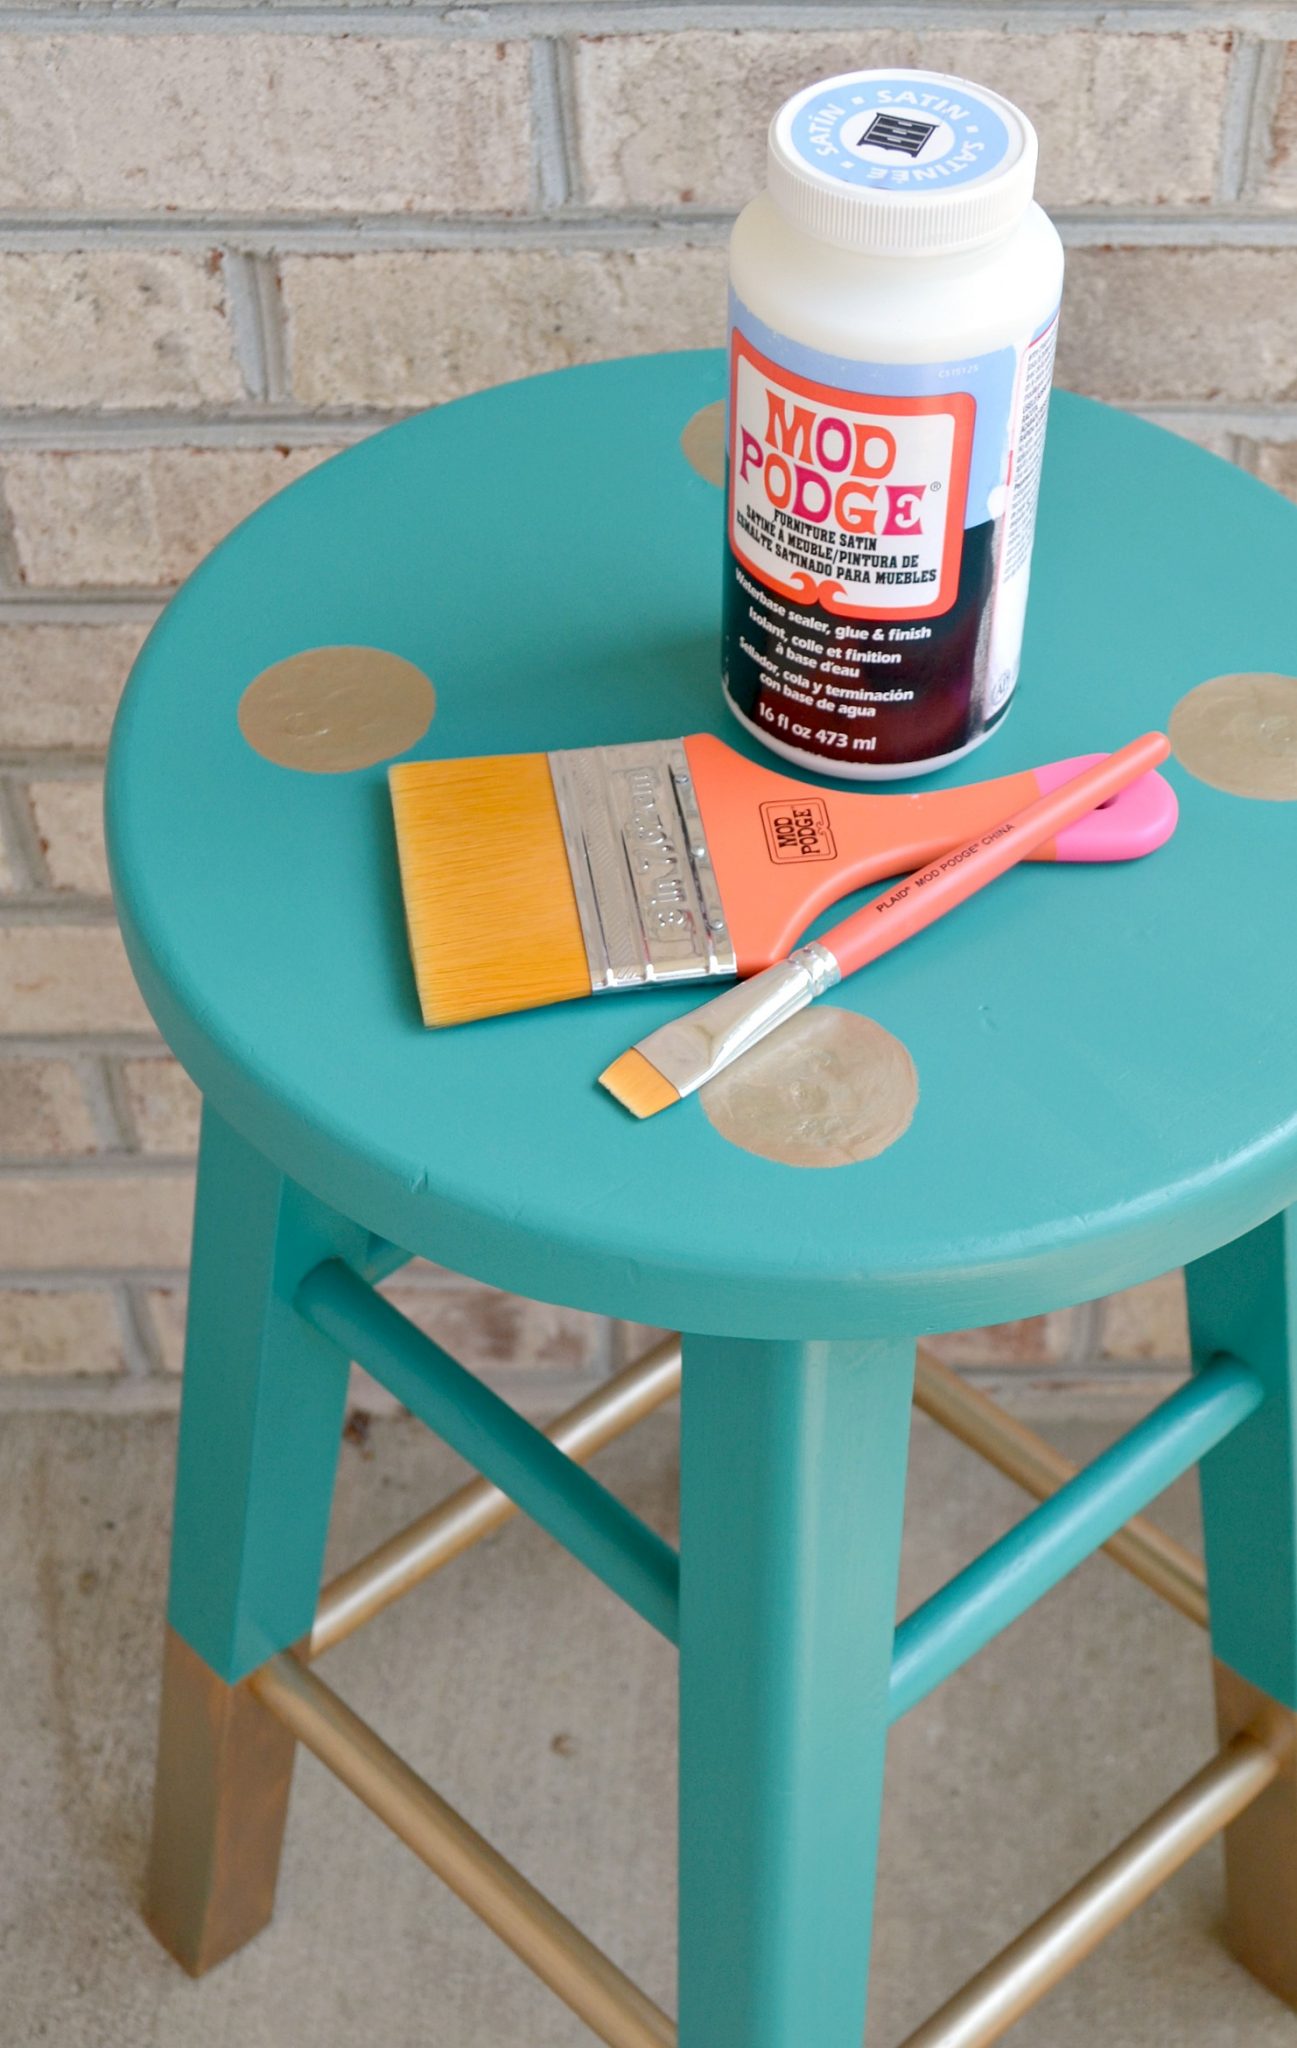
Since my project is a wooden stool, the best choice was the Furniture formula, which is available in three finishes; Satin, Glossy, and Matte. I chose Satin because it was the particular look I wanted for my finished product, but all three will equally seal and protect your furniture projects. I also made use of the brushes in the brand new Decoupage Brush Set and Furniture Decoupage Brush Set. The 2″ and 3″ Furniture Brushes, while they can certainly be used on any media, are perfectly sized for large furniture projects. The Gold Taklon bristles give a super smooth application and help eliminate visible brush strokes. The smaller Decoupage Brushes are designed for detail work on all kinds of projects, and I found them helpful for getting into small crevices on my stool.

Now that you’re up to speed on the important tools for the job, let’s take a look at how to turn a thrift store stool into a designer knockoff! Here’s a look at my original inspiration, the Babanees Bar Stool by Green Cathedral. Isn’t it gorgeous? It also starts at $299. Yep. I don’t know about you, but a $300 stool just isn’t in the budget.
On the other hand, this $5 stool from my local Goodwill most certainly is! It doesn’t have the 3 legged design that the Babanees stool does, but it’s structurally sounds and just in need of some TLC to turn it into something beautiful!

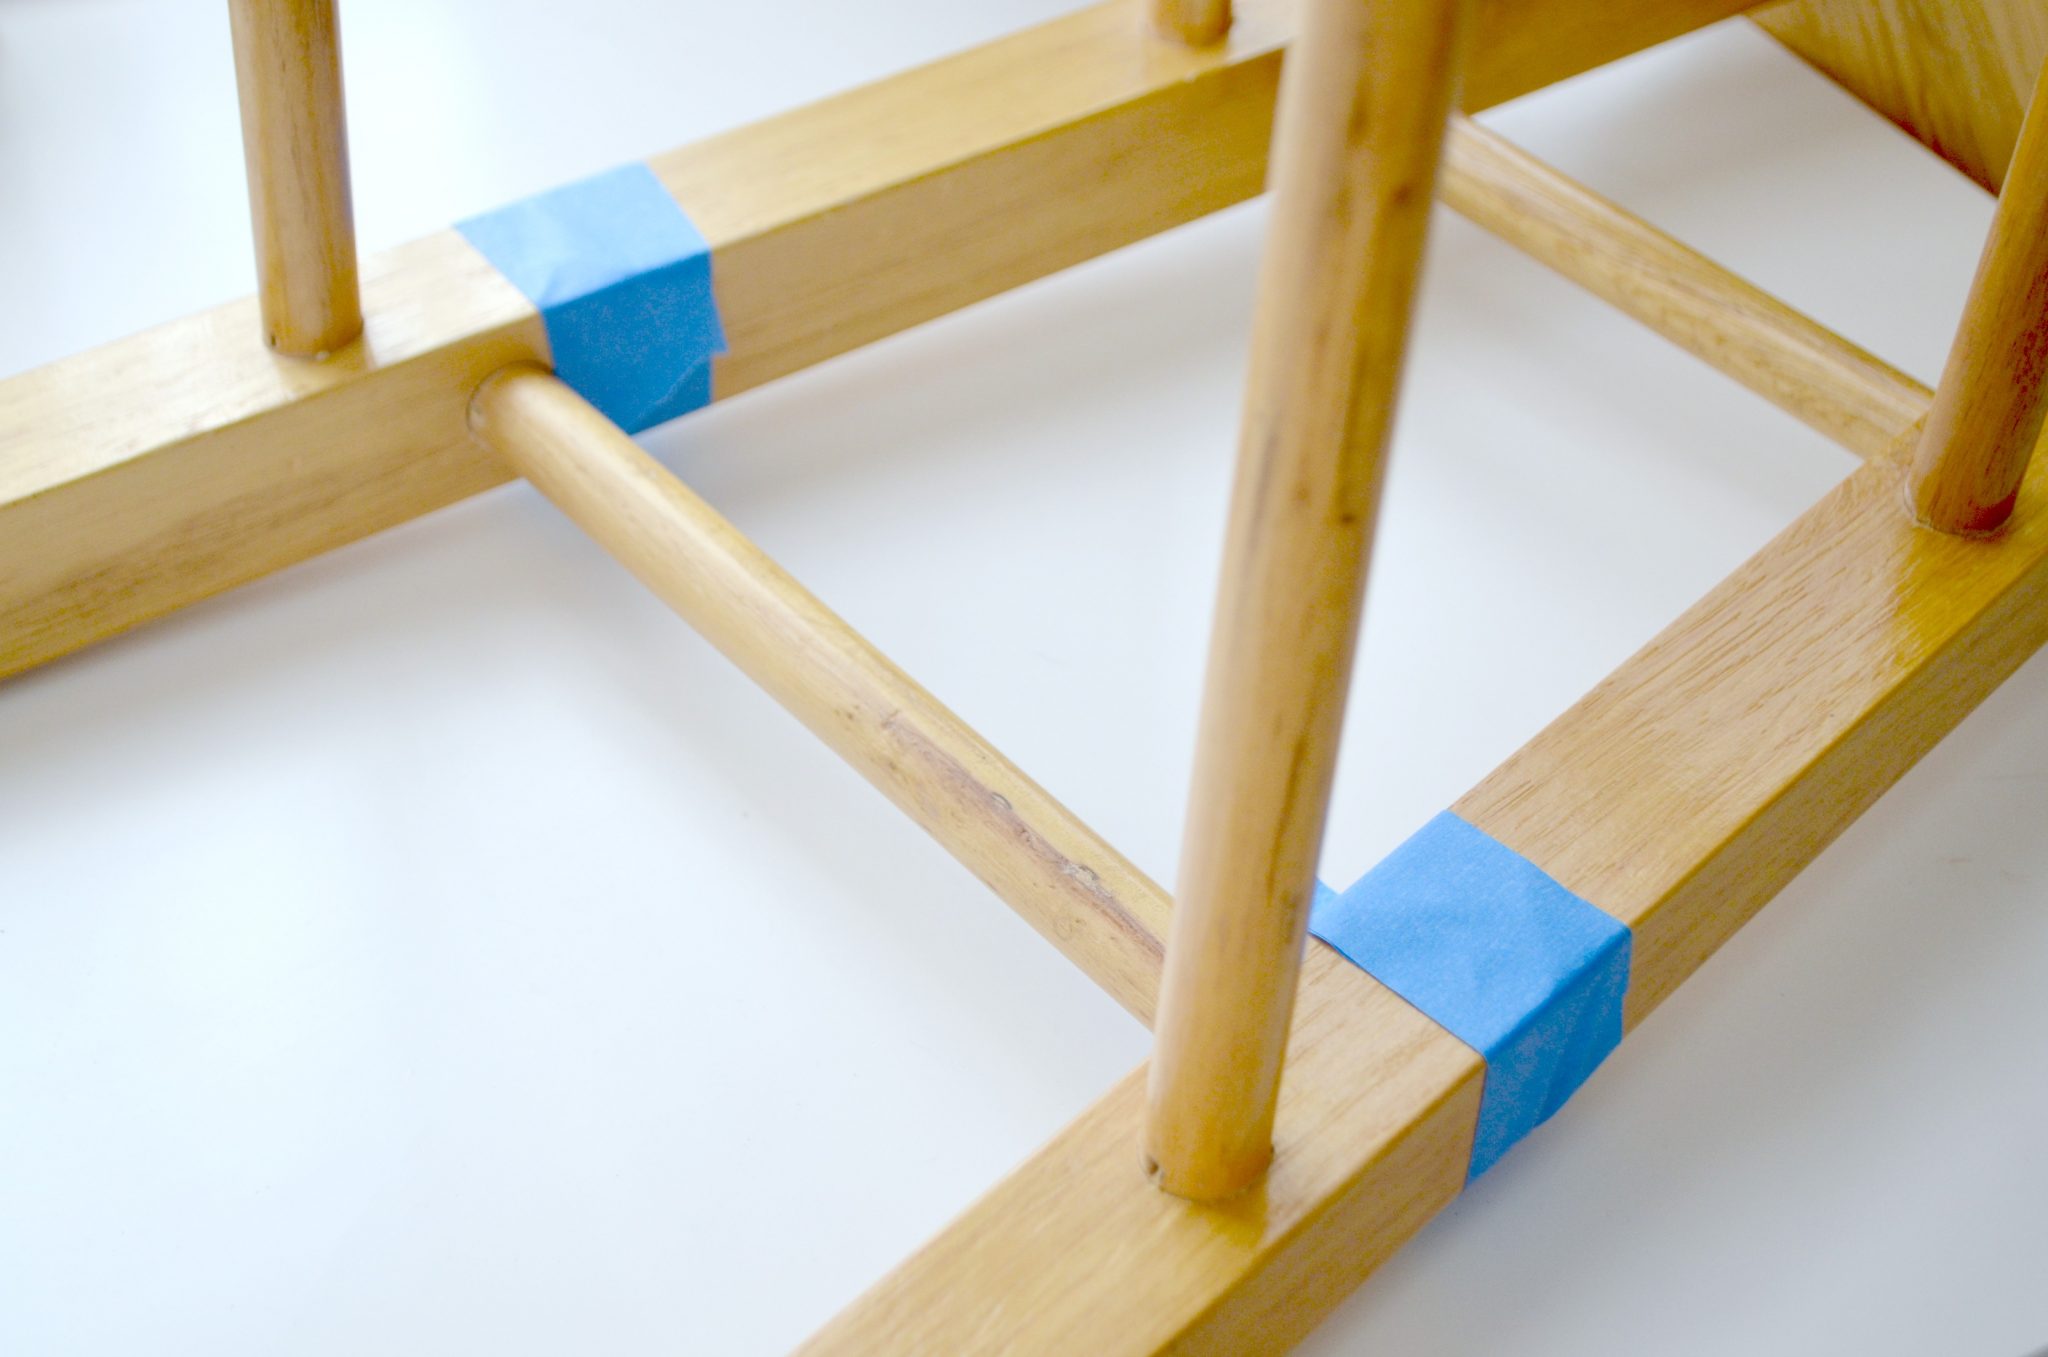
Step 1: Tape off the bottom of each leg.
I used the bottom rail as a guide for where to put my tape, but you can also measure. It’s totally up to you how far up the leg you want to go.
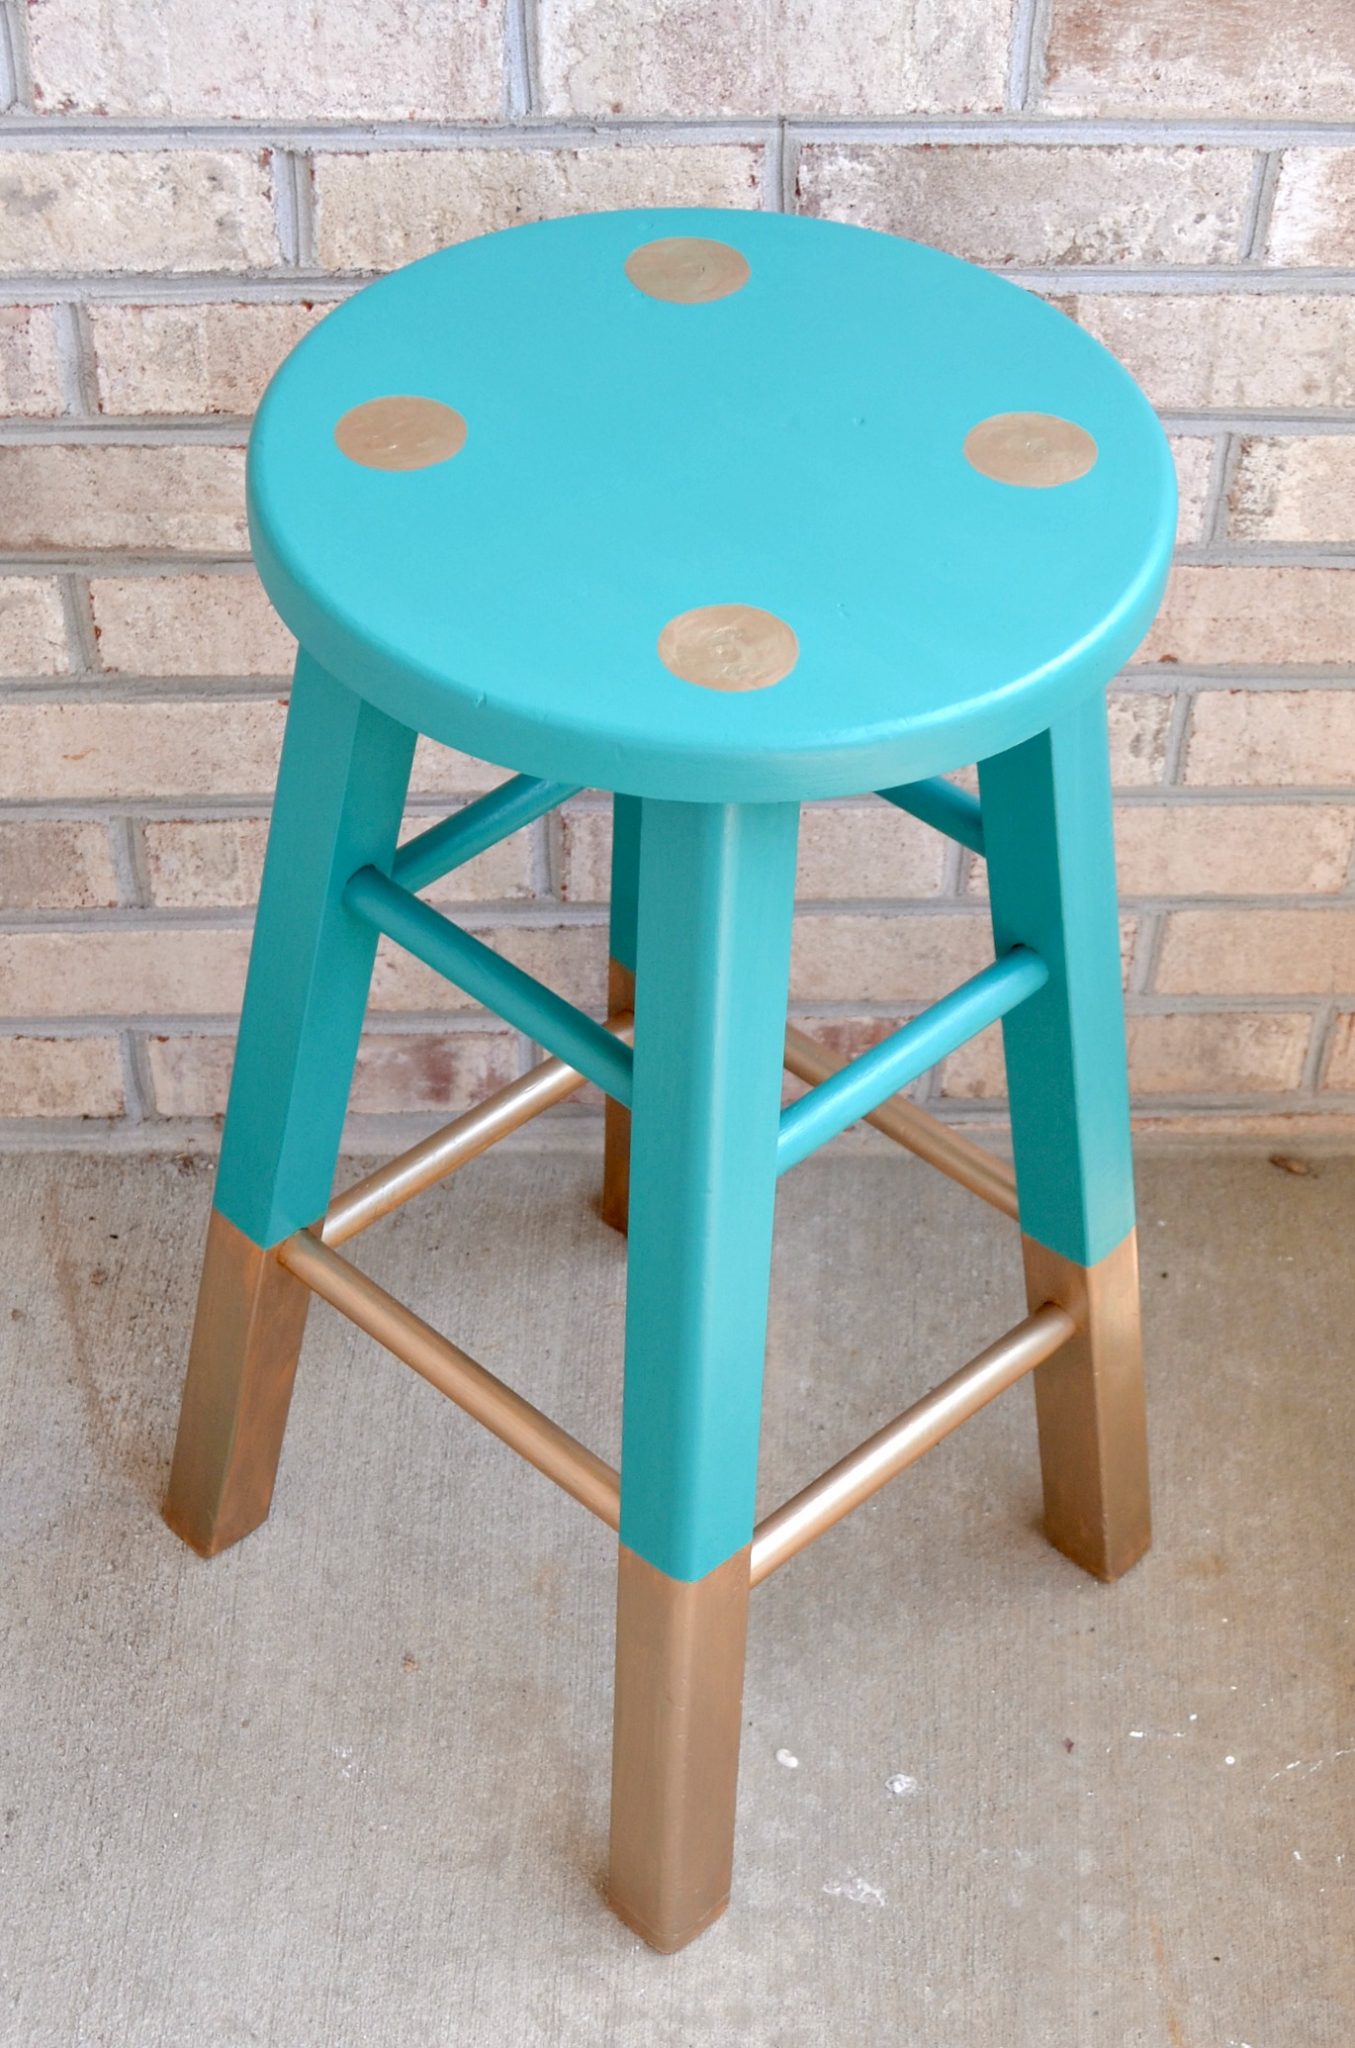
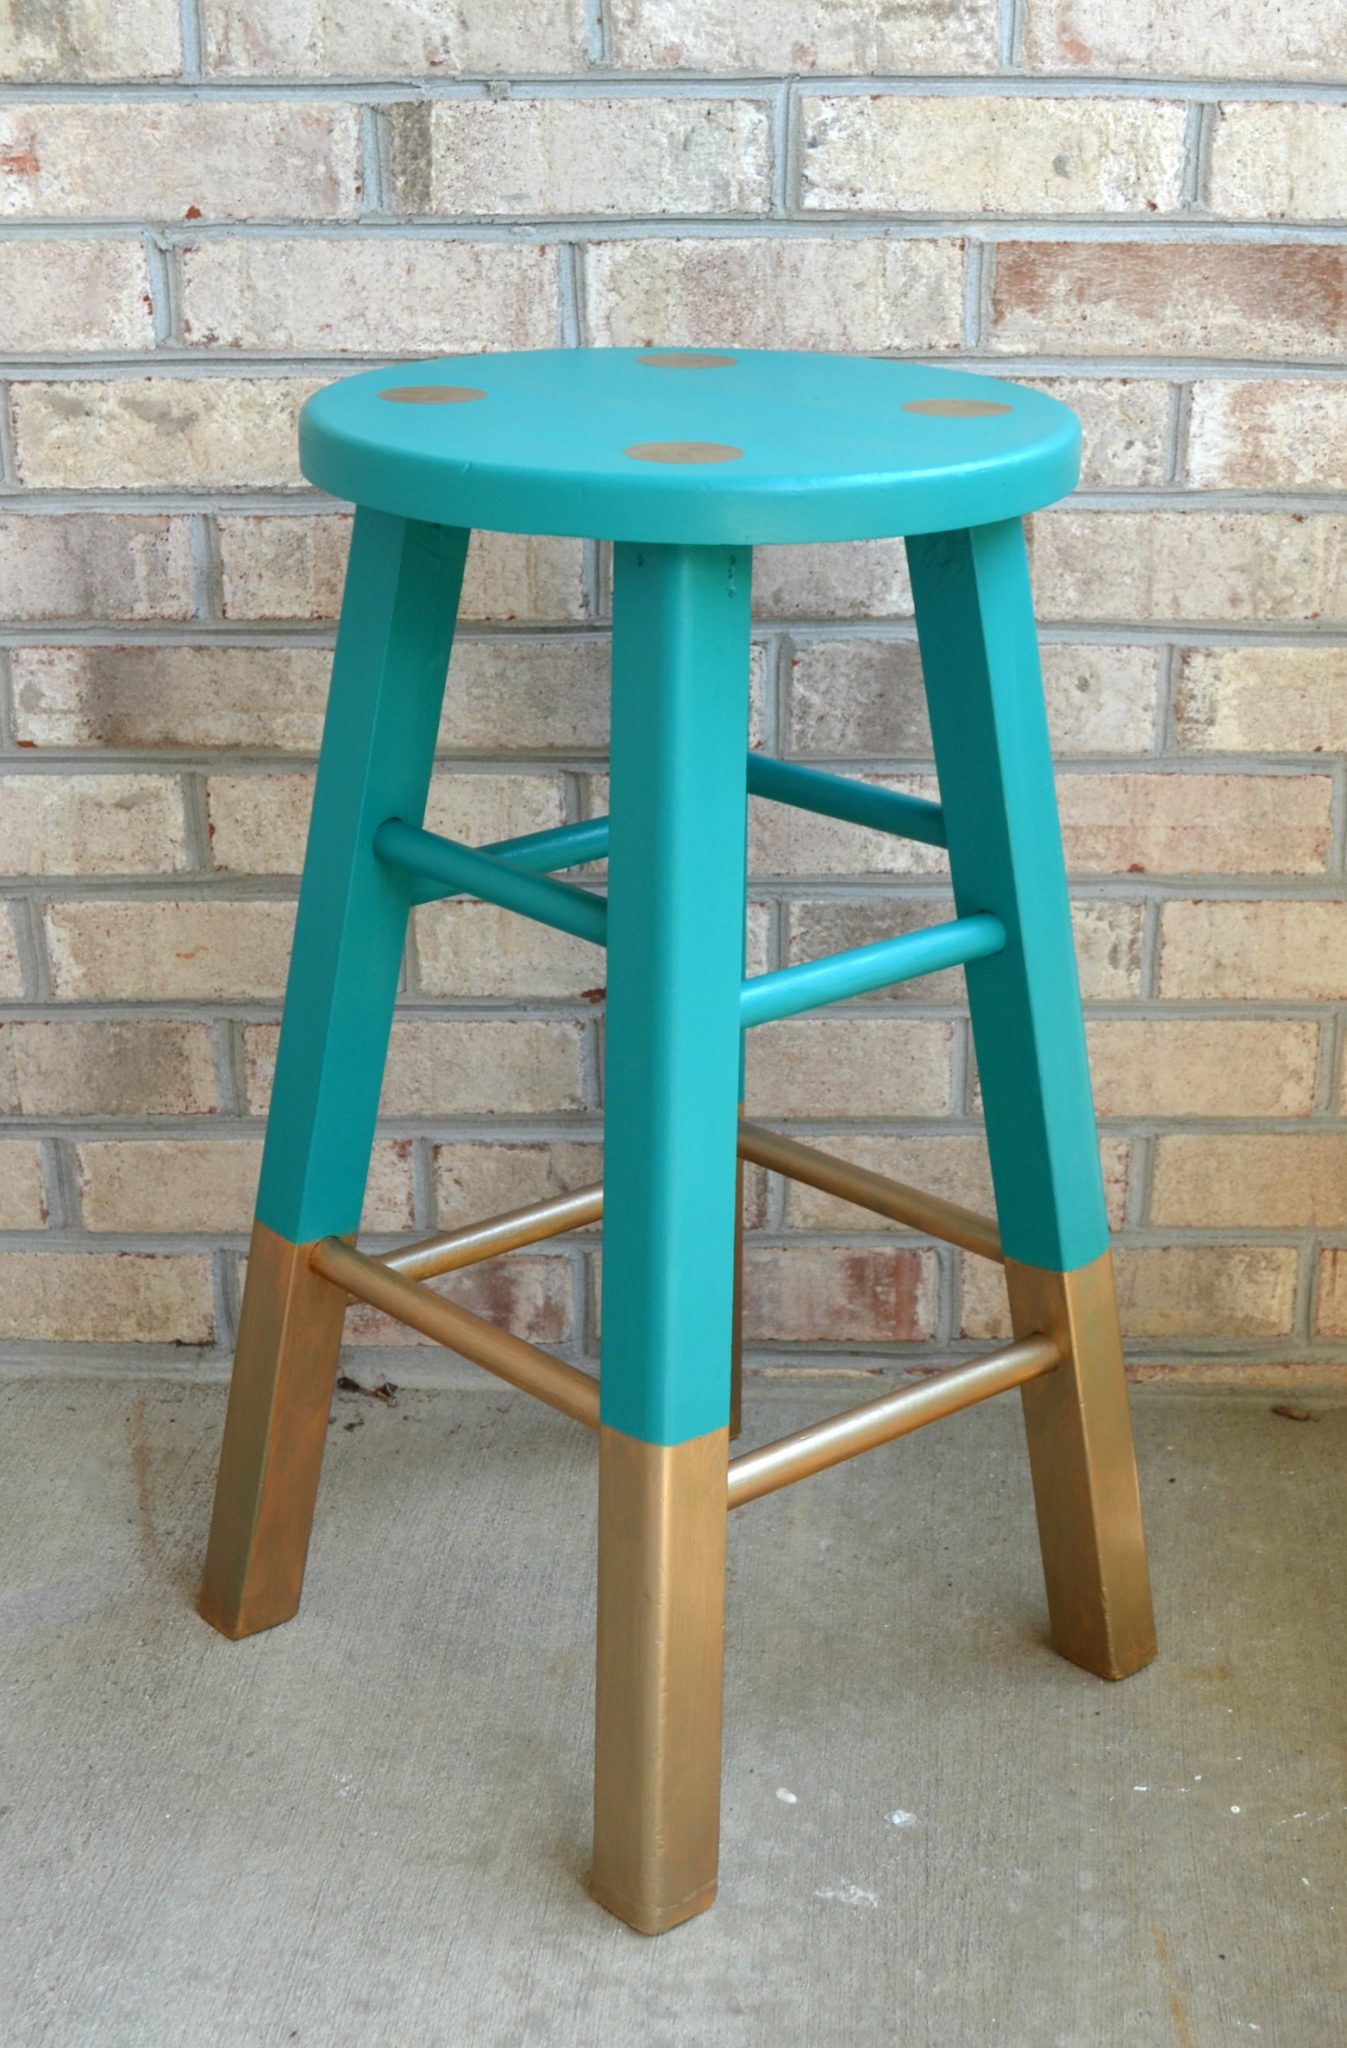
Step 2: Paint everything below the tape with two coats of metallic gold paint. Let it dry completely between coats.
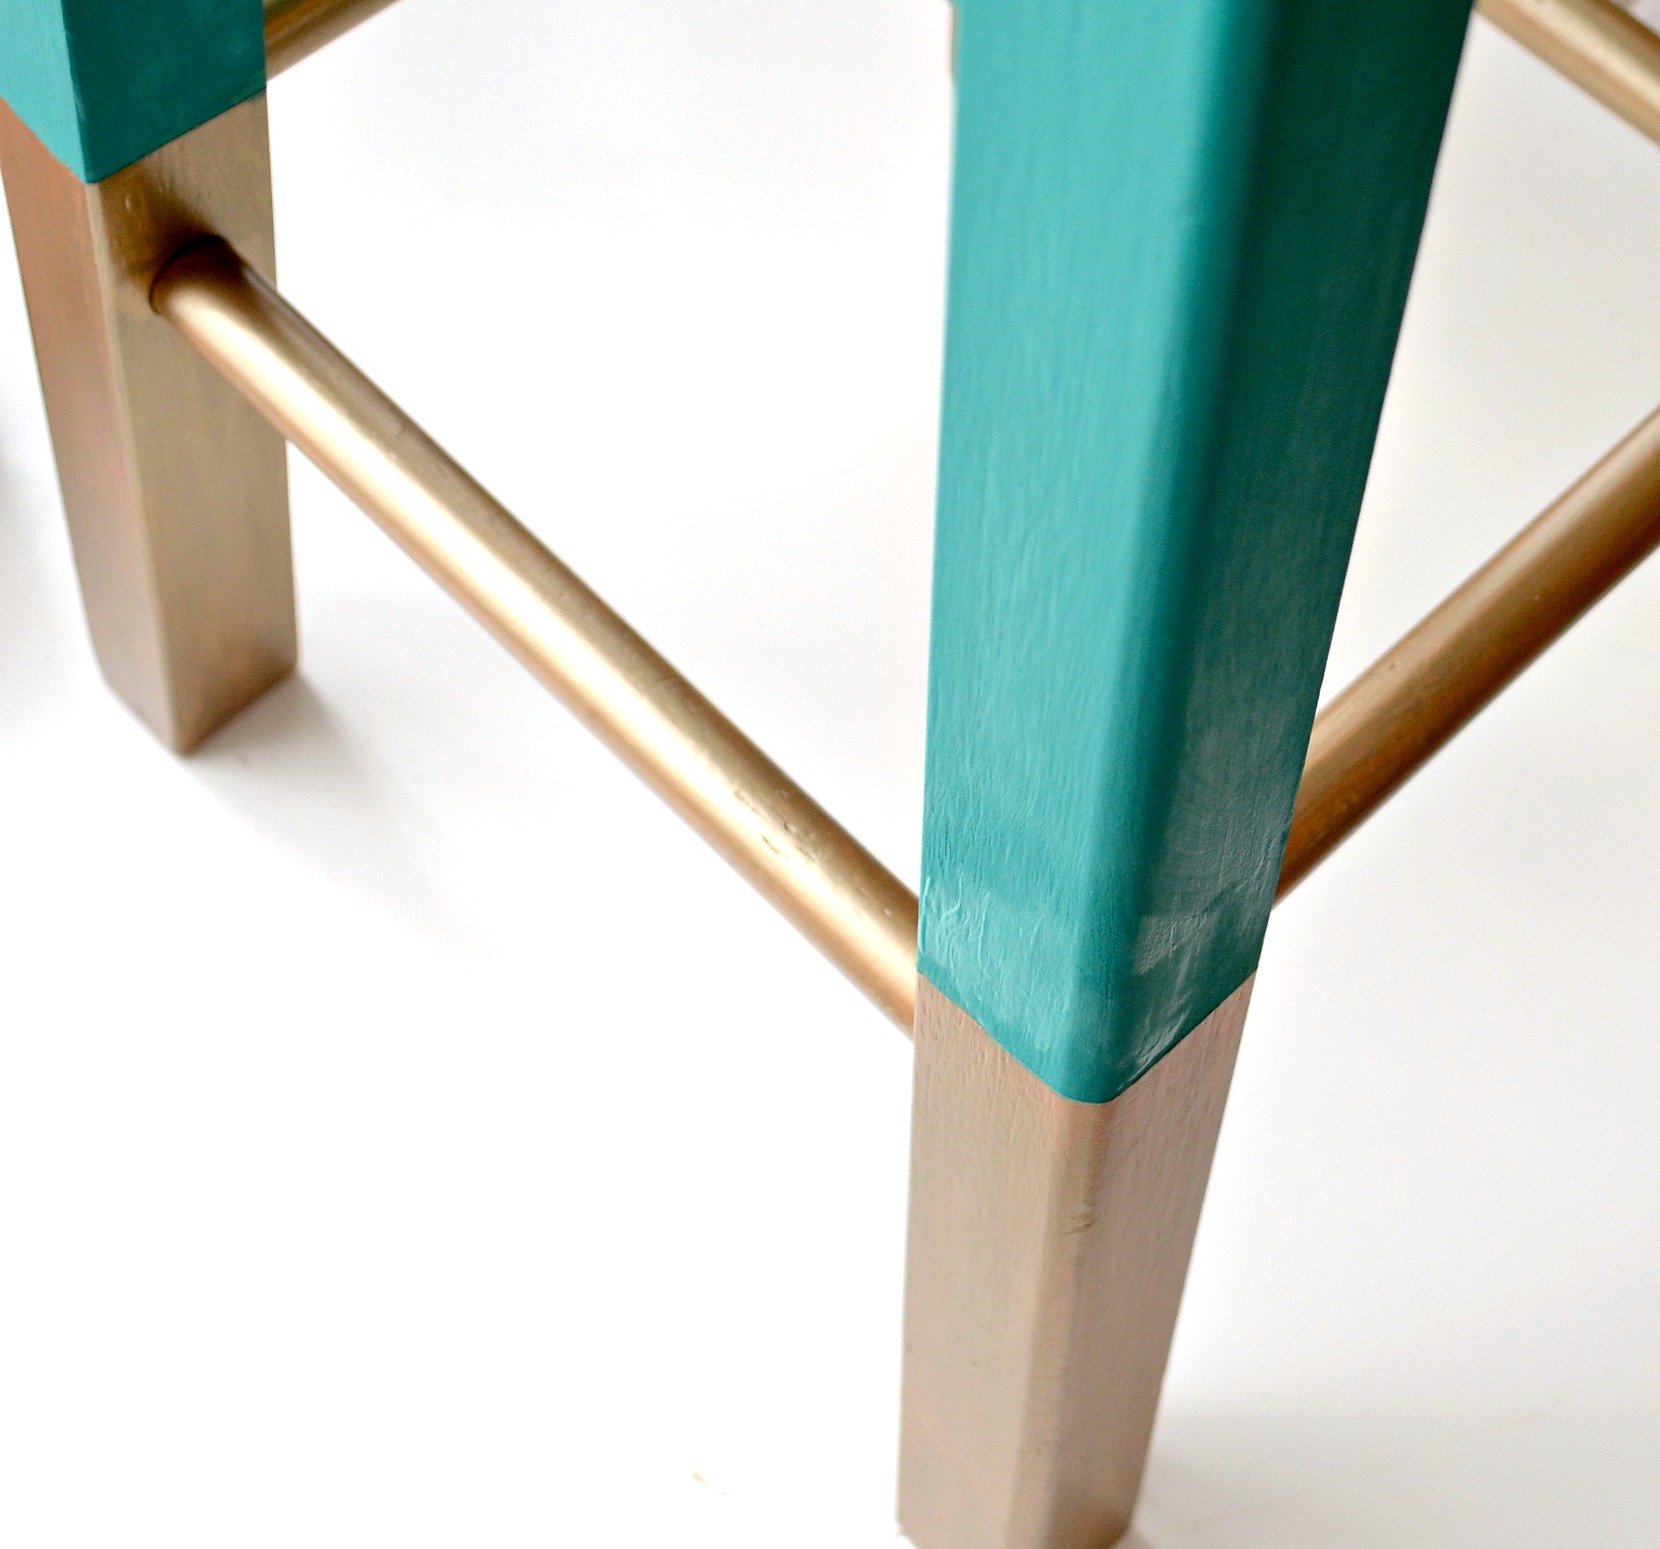
Here’s where I deviated from my inspiration piece a bit. The original Babanees stools are painted partway down the leg, then left as natural wood at the bottom. The wood on my stool legs wasn’t in great shape, though, so I needed to cover the lower part with paint as well. I thought that the Sahara Gold color mimicked the natural color of the Babanees stool well while adding a fun element of metallic shine.
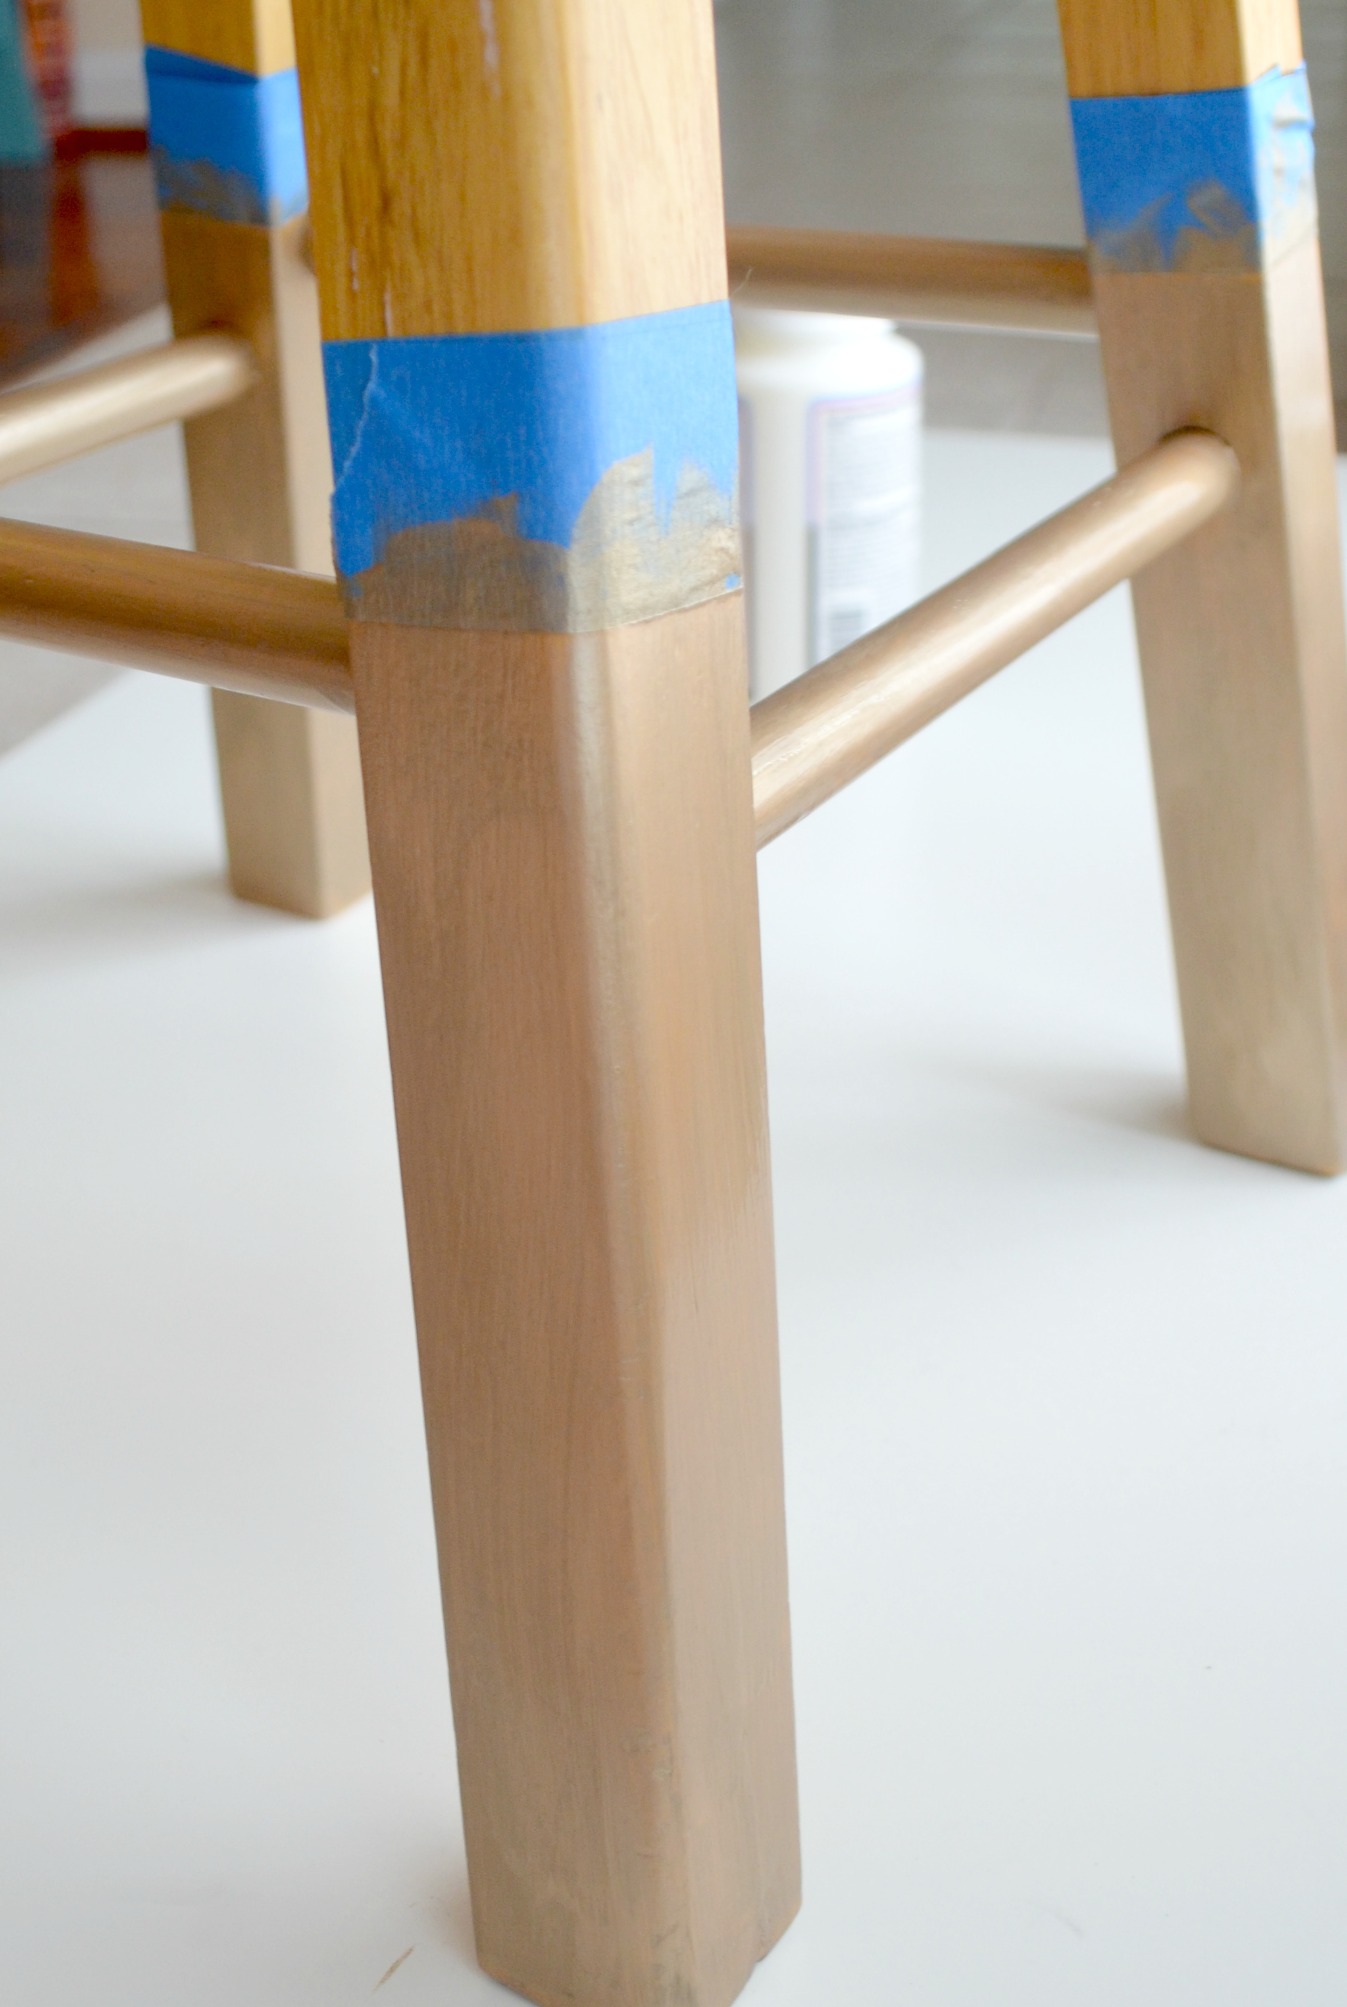
Step 2: Remove the tape and reposition it so that the top is even with the start of your gold paint.
Make sure your paint is thoroughly dry first, or the tape may pull it back off.
Step 3: Paint everything above the tape lines with two coats of your favorite color paint.
In my case, that happened to be Grotto from the FolkArt Home Decor Chalk line. I used a large brush for the majority of the surface, but switched to small brushes for the detail work where the colors join.
Step 4: Remove the tape.
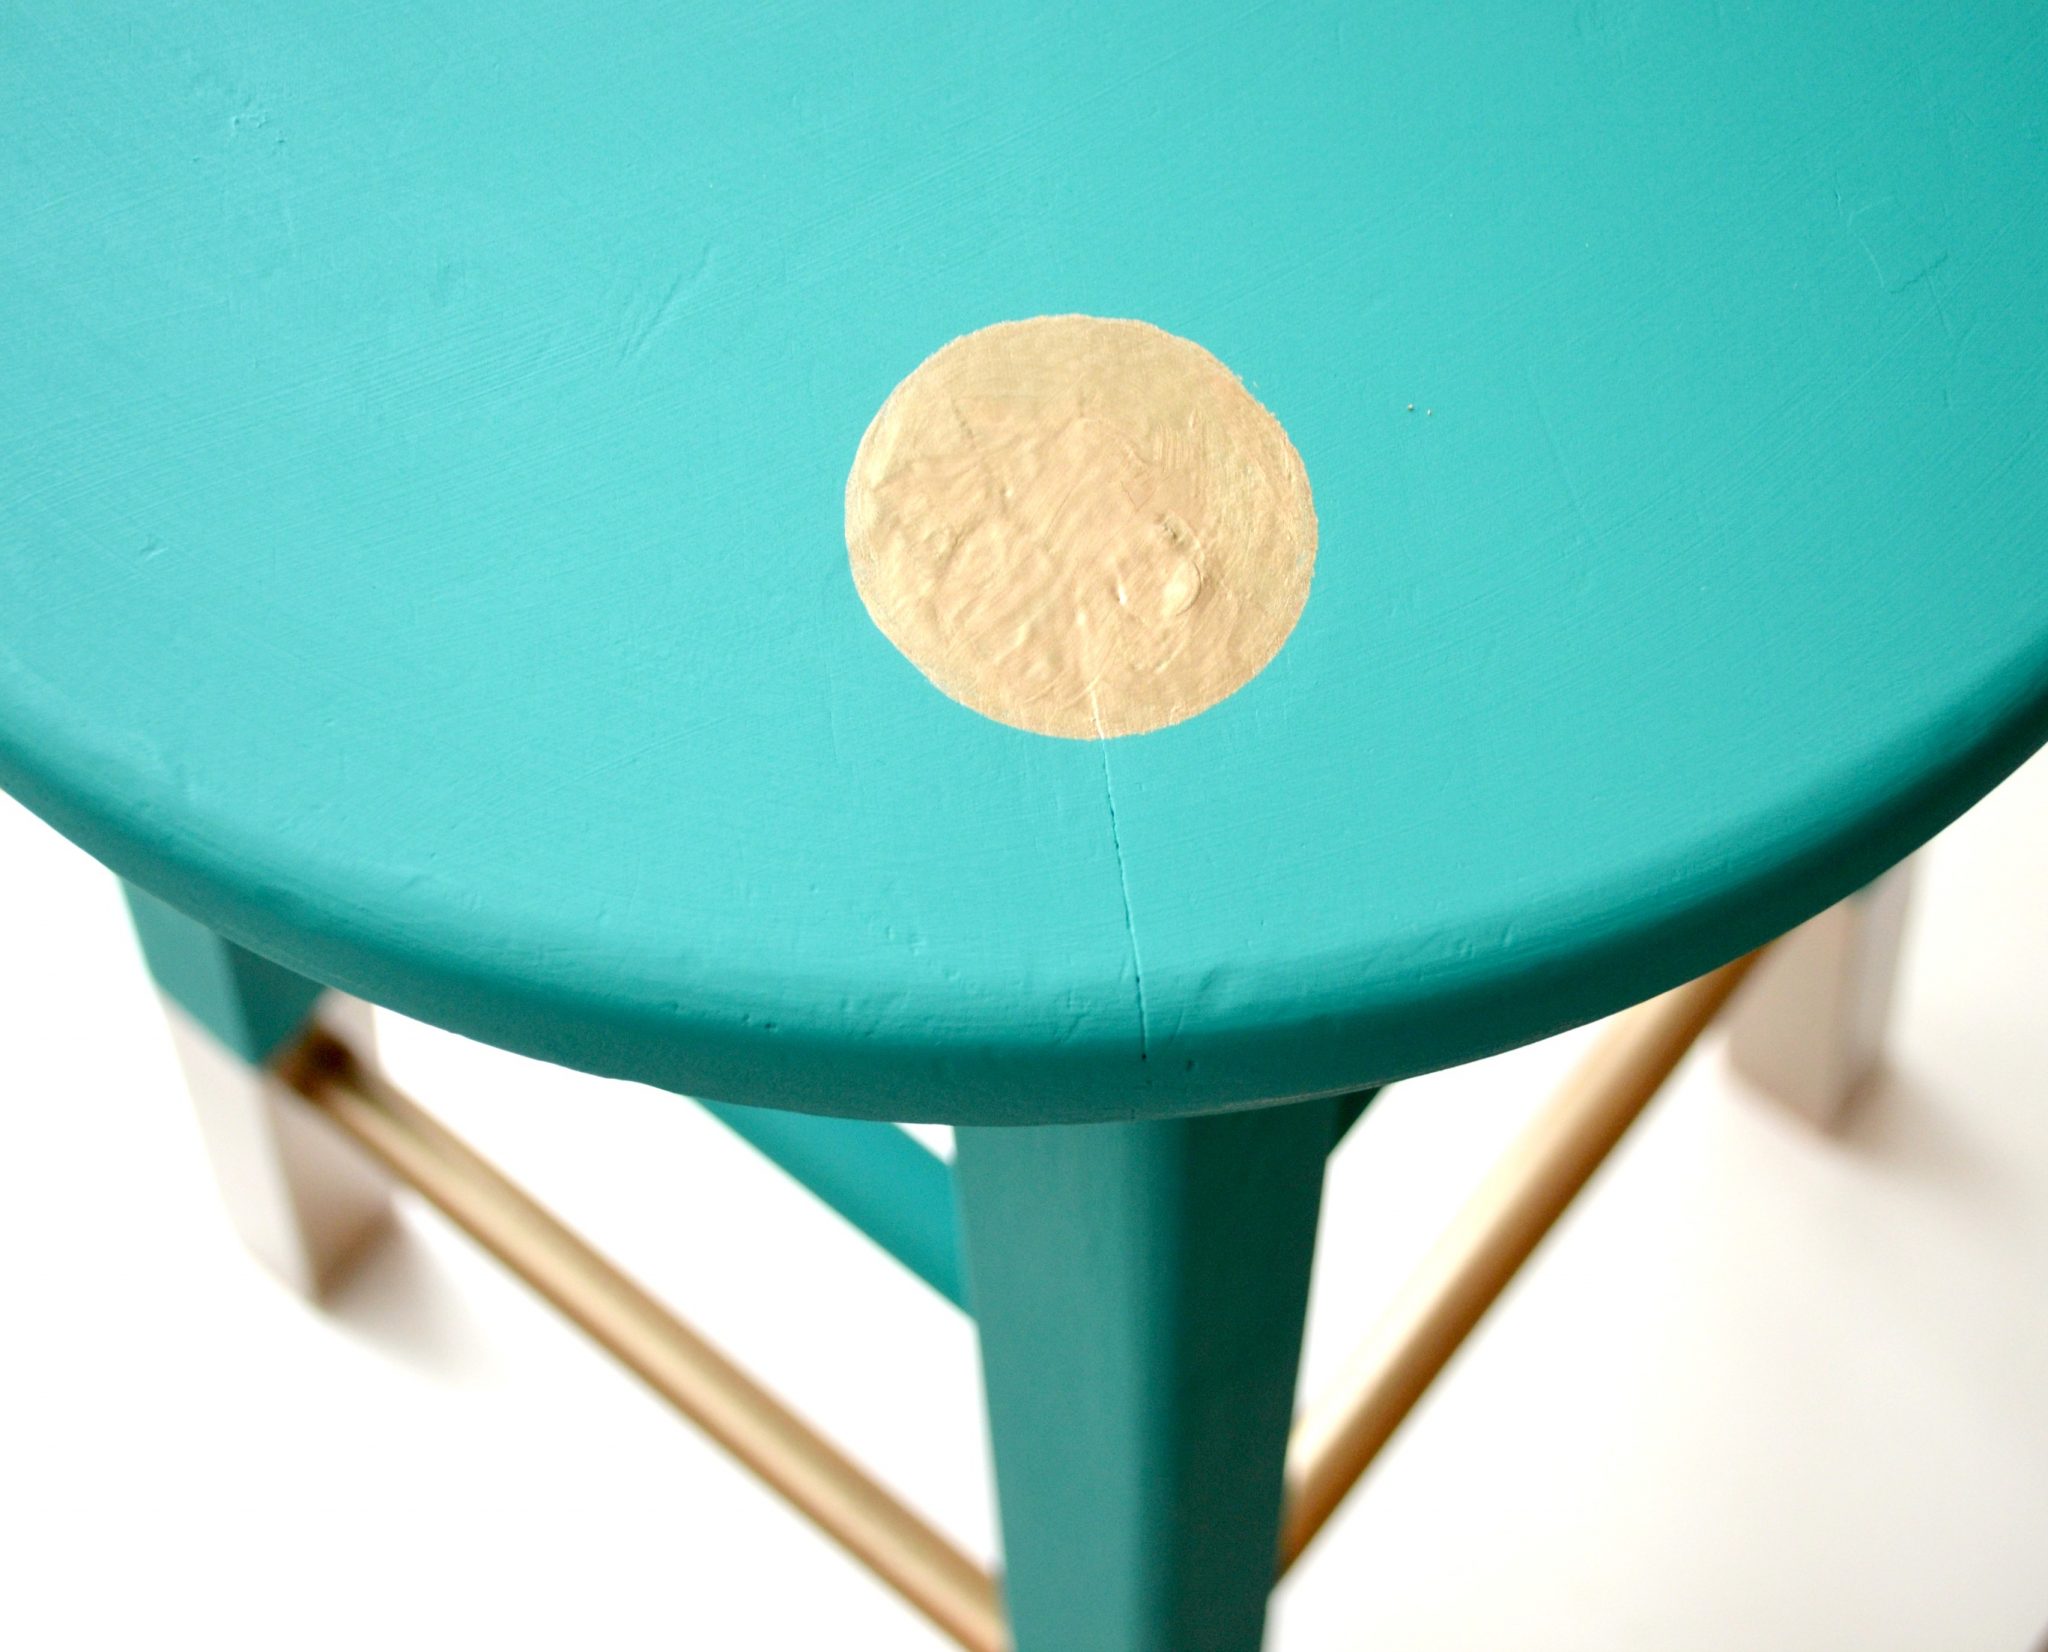
Step 5: Paint gold circles on the top of the stool.
You can lightly trace something circular onto the surface of the stool, or you can use a round sponge brush to create the shape of the circle.
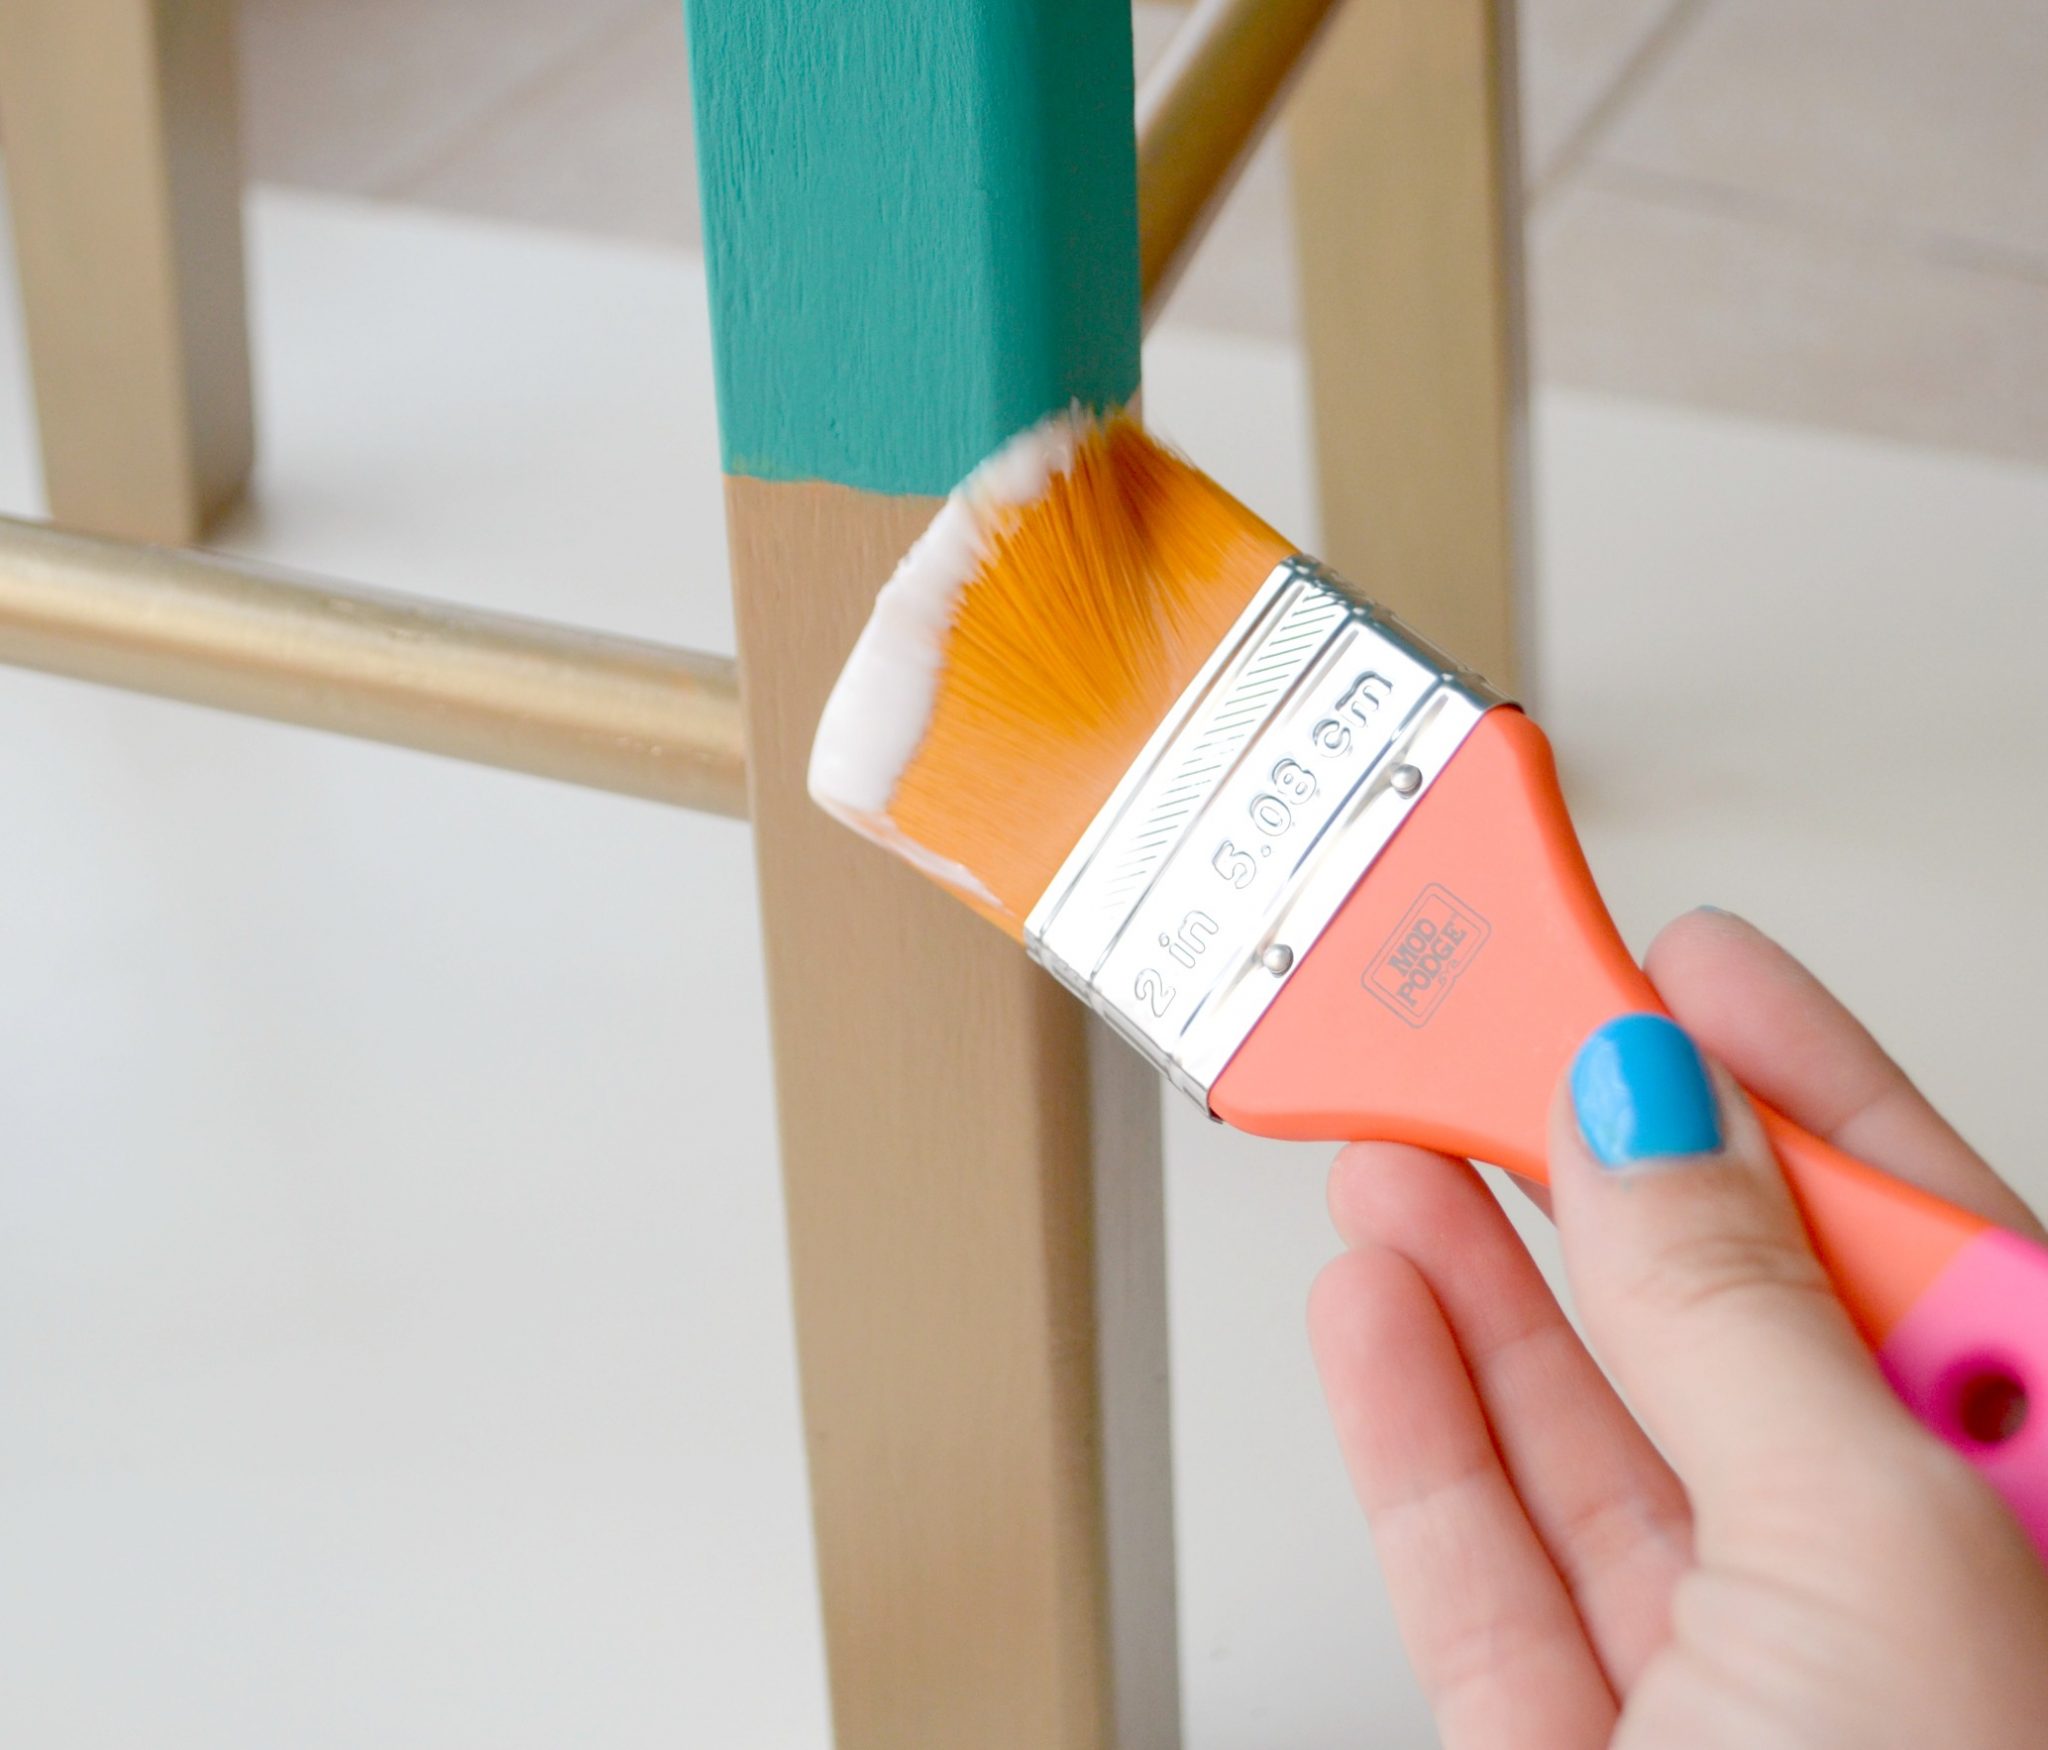
Let your paint dry completely before attempting to seal it. Then, it’s time to let Mod Podge work its magic! Gather your brushes and get ready to add that protective coat!
Step 6: Apply an even coat of Mod Podge Furniture Satin to the entire surface of the stool.
That’s all there is to it! Once your Mod Podge dries, your stool is ready to use!
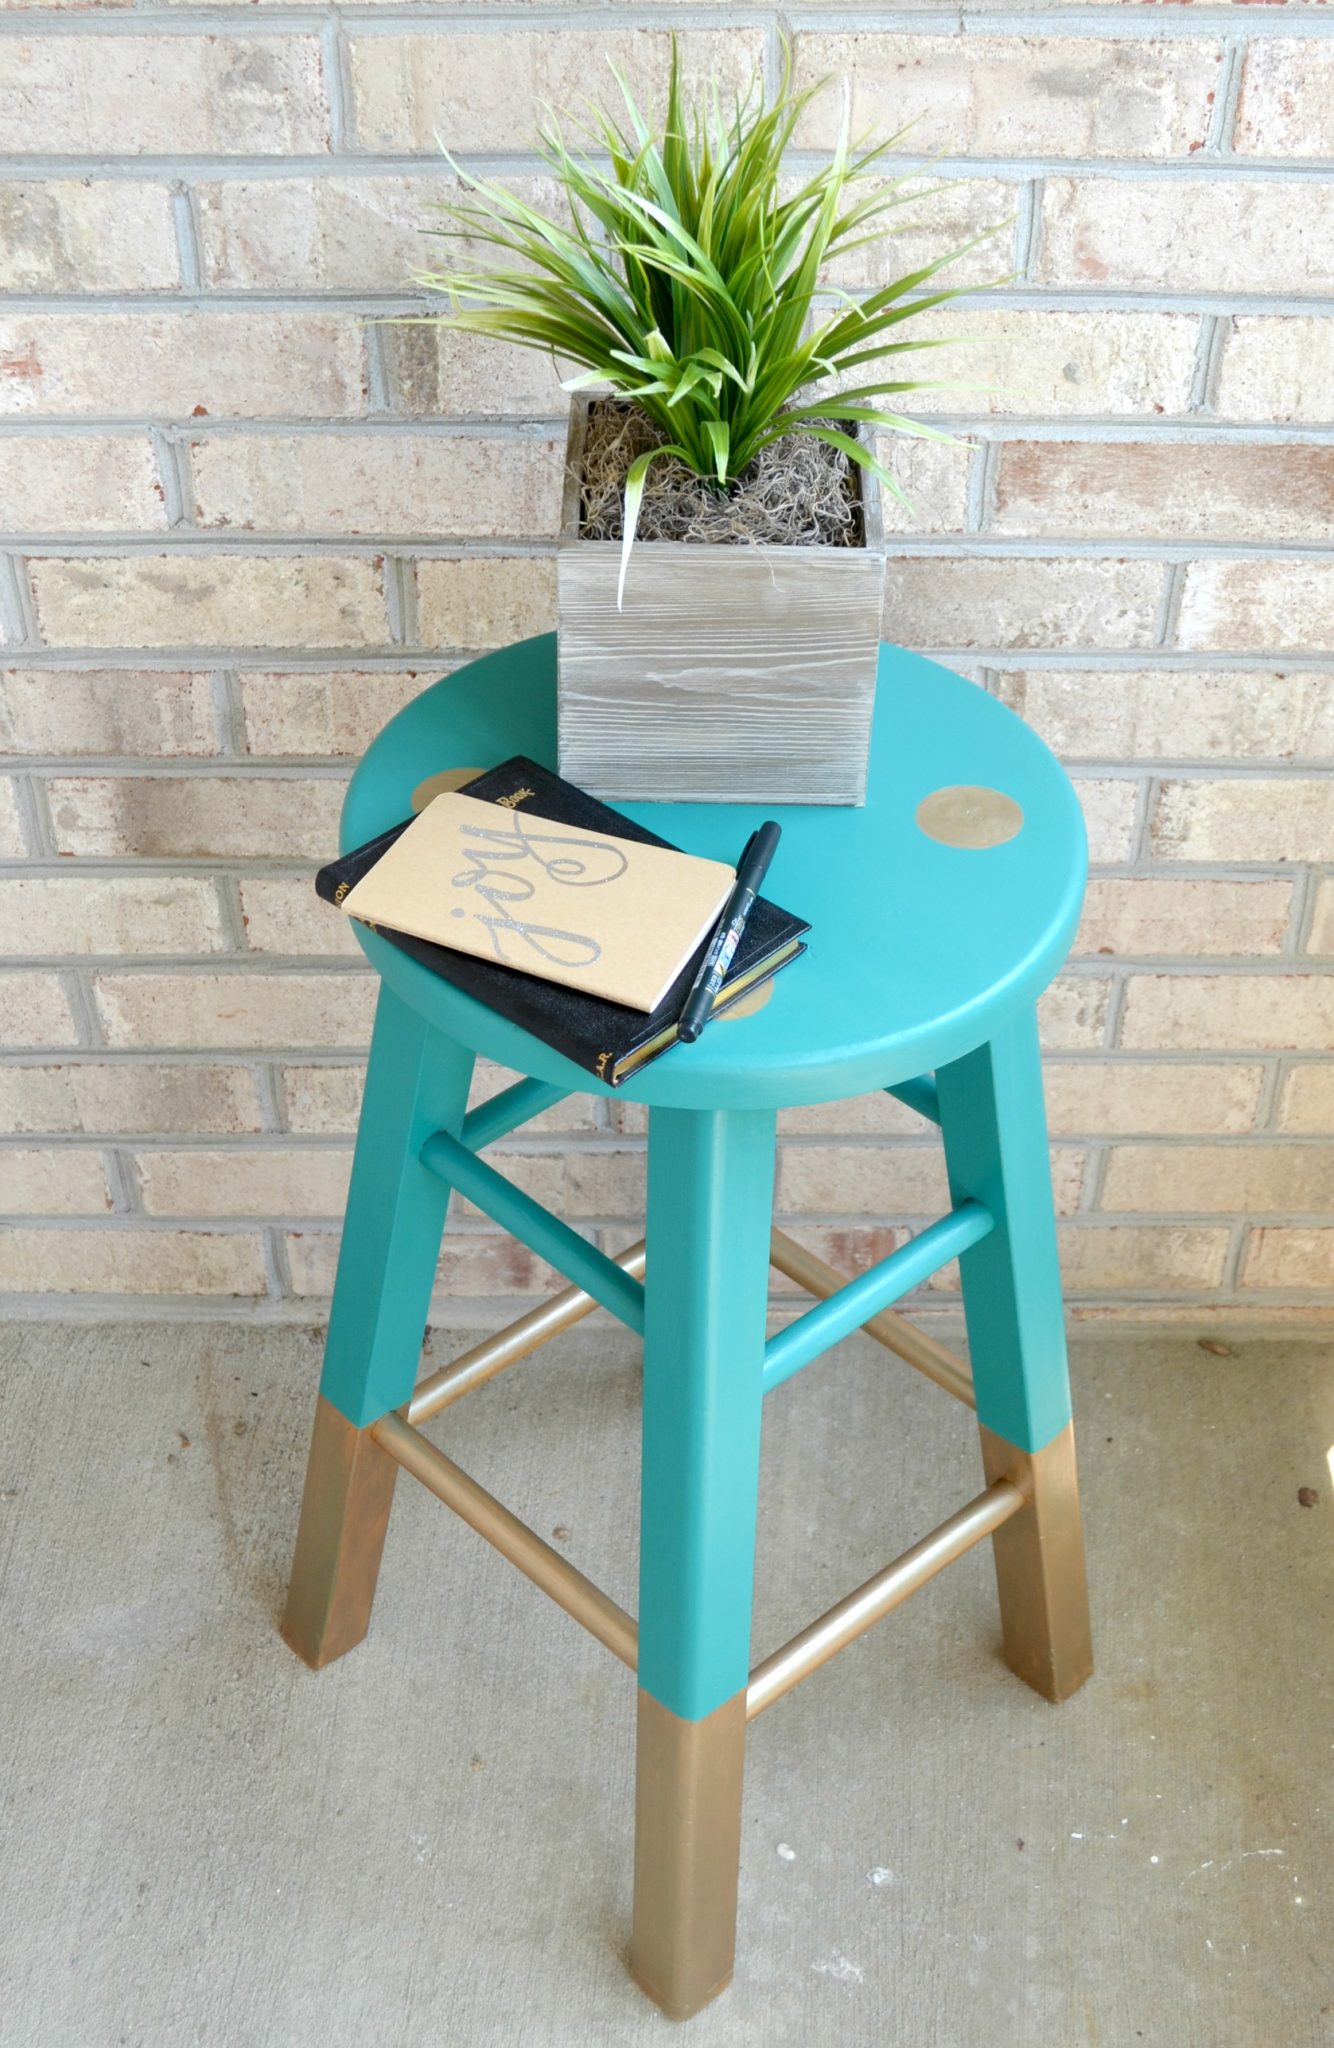
I have to say that I really love how it turned out! Doesn’t it look so different from when I first brought it home from Goodwill?
Now I just have to decide if I want to use it for sitting or for displaying some favorite things! Of course, it matches just about every room in my house, since I used my favorite color.
I’d love to hear about some of your favorite furniture transformations and roadside rescues. What kind of sealers have you used? Be sure to try the new Mod Podge Furniture formulas and see how easy and effective they are. Mod Podge is truly one of my favorite go-to supplies for so many kinds of projects; I hope you love it as much as I do!
Be sure to check out the other Plaid Creators Mod Podge Projects to see how they rocked the Thrift Store Challenge!
Upcycled Window Makeover – The Cards We Drew
Decoupage Planter – Petticoat Junktion
Thrift Store Tray Makeover – Erin Spain
Princess Dress Nightstand Redo – Made to be a Momma
DIY Serving Trays – Pretty Life Girls
Vintage Floral Ladder Shelves – Flamingo Toes
Positively Splendid – Mod Podge Chargers
Restoration Hardware Book Set – Cherished Bliss

I love this look Amy and the turquoise and gold is the perfect color combo.
How cute is this stool?! I am loving that gold!
Thank you, Katie!!
This is such a fun transformation Amy!! I love the colors and the price is soooo much better lol!
Hi Amy,
Thank you for the tag.
Being lovers of refurnished furniture ourselves and totally appreciating that a $300 stool is not in the budget for most of us, we are honoured that you have taken inspiration from our design. You have done a great job.
Sal & Tim – Green Cathedral Furniture
Well, thank you so much, Sal & Tim! I’m totally flattered that you took the time to visit my post and that you like what I did with the stool! Your furniture is gorgeous, and it absolutely inspires me.