Is anyone else already stockpiling Christmas gifts? I absolutely love Christmas…everything about it. And I’ve learned over the years that the sooner I start making and ordering gifts for the loved ones on my list, the more I’m able to enjoy the holiday season when it gets here. My goal for the past several years has been to have all my shopping and gift making completed by the last day in November so that I can spend December really living in the moment and making holiday memories with my family.
Today, I want to share with you a fun and easy DIY gift idea for anyone on your list. It’s perfect for a neighbor, a coworker, or that person who has everything: a
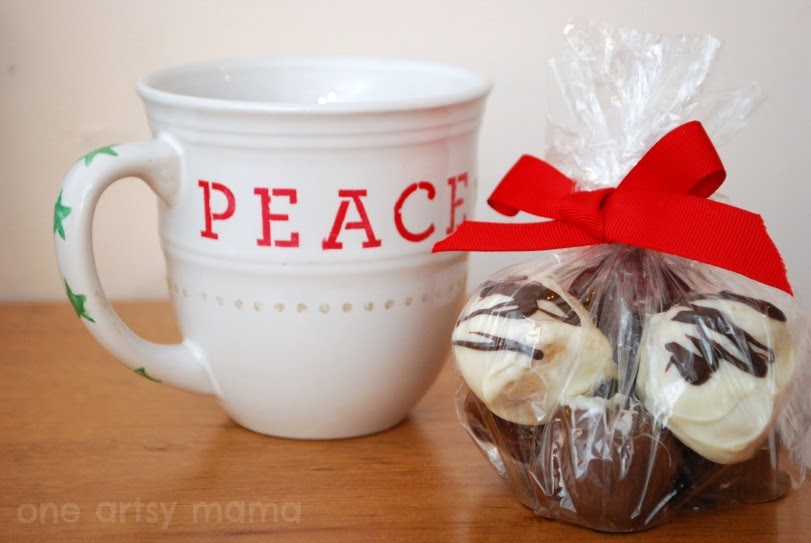
Stenciled Holiday Mug using
Martha Stewart glass paints and stencils.
Everyone loves a mug, right? Whether they prefer coffee, tea, hot chocolate, or hot cider, they’re sure to enjoy curling up with it on a cold day in one of these festive holiday mugs.
Materials:
white coffee mugs {I got mine for $1.75 each at Walmart}
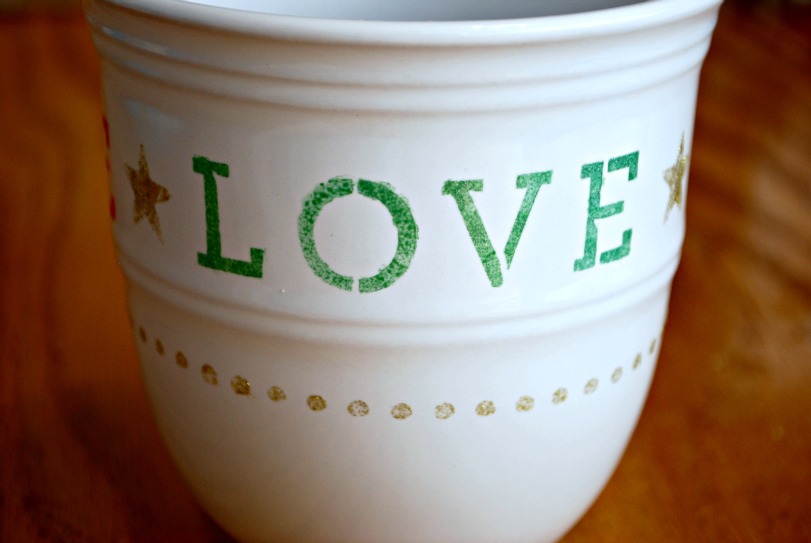
These designs practically created themselves based on the design of the mugs I bought. The strip at the top was just begging for some words, so I chose “Peace, Love, Joy” for the first one. Later, I made another that says “Let it Snow.”
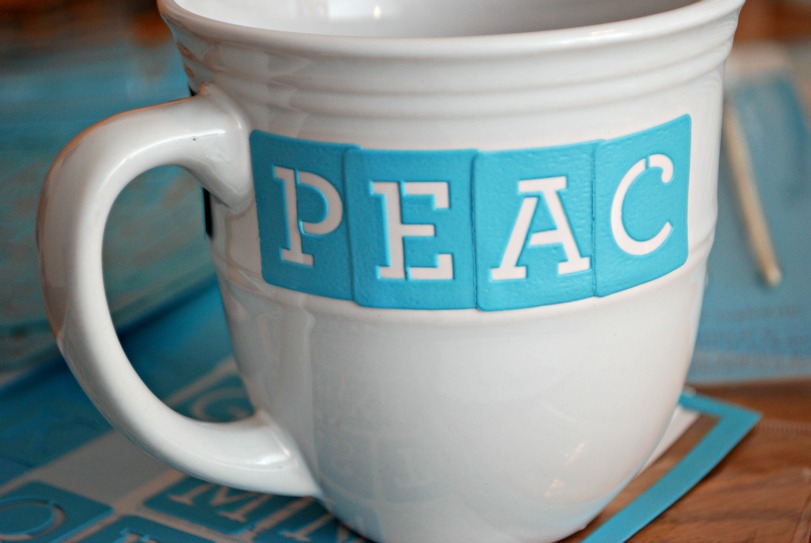
STEP 1: Clean your surface with alcohol.
STEP 2: Align your adhesive stencils on the mug.
Prior to this project I’d never worked with adhesive stencils before, and let me tell you, I don’t want to go back! I. am. in. love. For rounded surfaces like this, they are just amazing! They go on like a sticker and peel right back off when you’re finished, ready to re-stick and use again.
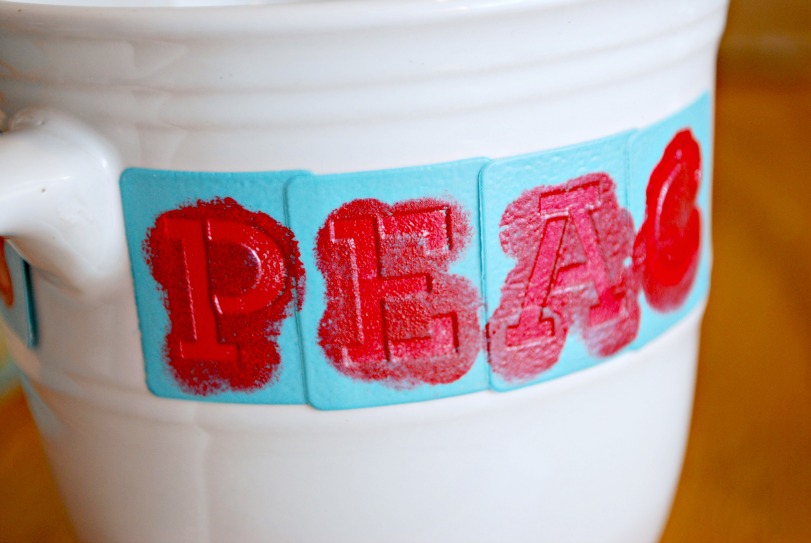
STEP 3: Use a dauber to apply glass paint. Remove stencils while paint is still wet.
STEP 4: Continue, alternating stencils and colors until your design is finished.
For this particular design, I stenciled my three words, as well as stars in between and on the handle, and a tiny polka dot border in gold glitter.
STEP 5: Let your project dry overnight. Bake your finished piece{s} at 350 degrees Farenheit for 30 minutes.
This makes the paint permanent. The other option is to let them air cure for 21 days…but since this is a Christmas gift I went for the {much} quicker option.
To prevent breakage, it’s best to put them in the oven while it’s still cool and to let them cool down in the oven before removing them. Finally, wait 72 hours before using the piece.
The paints are non-toxic but not food-safe, so be sure to paint only on the underside of plates or use them for decorative purposes. Mugs like this one are totally fine as long as you leave 0.8″ from the lip of the cup/mug.
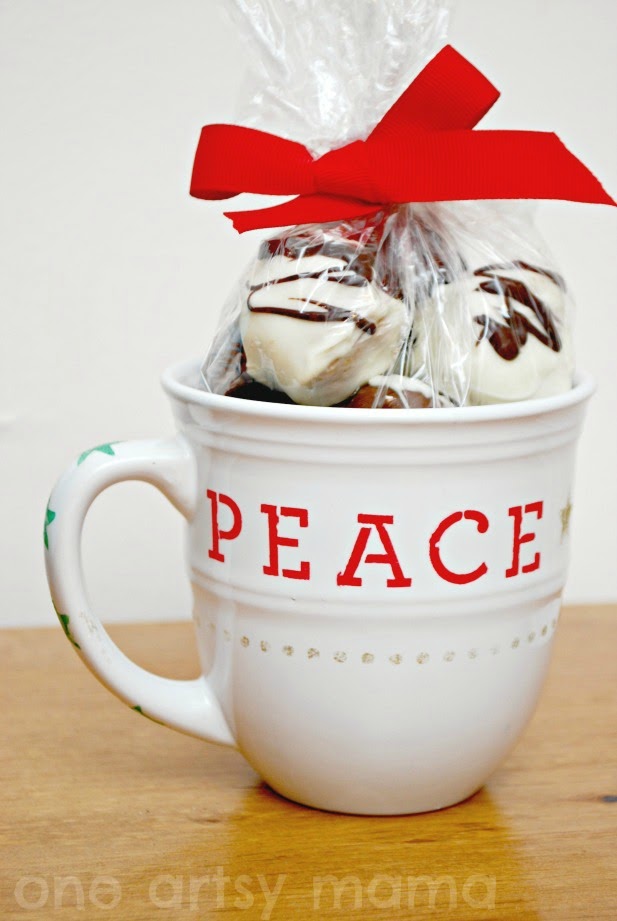
STEP 6: Fill with goodies and give it away!
I chose to fill my first one with some homemade
Crispy Peanut Butter Balls. You could also fill it with packages of coffee, tea, hot cocoa, or any other type of candy or goodies!
I absolutely love the way this project turned out, and I have big plans for other ways I’m going to use these glass paints and adhesive stencils for holiday decor! Be sure to stop by in the next few weeks to see more great ways to use the same supplies!
You can find out more about the products I used by connecting with Plaid and Martha Stewart on Fackbook,
Pinterest, and
Twitter!
Happy Crafting!
Disclosure: received product and payment via The Blueprint Social (www.theblueprintsocial.com) for this post, however, opinions are 100% my own.


I am the same way with doing my Christmas shopping, the sooner the better. I love the mugs this would make a great teacher gift as well.
Those are great, Amy!
Very informative!!
Amy, I love these! Really cute idea and so easy to complete! I love the stick on stencils, I will have to get some of these!
Wow! Love these!
That is so pretty! I love coffee mugs, wish I had more cabinet space for them 🙂
LOVE these, Amy!! The snowflake one is my fave!
Those are so cute, Amy! I love those cute little stencils!
Amy, these are awesome! Shared on my facebook page!
Loved this, Amy! Your design is just perfect on the mugs! You chose the perfect words, and I really liked how you used multiple colors and patterns. This would be a great gift!
These would make great teacher’s gifts! So cute!
The mugs are gorgeous! You did an amazing job. I love those little adhesive stencils too. They make stenciling so easy.
So cute! I would love to have you come share this or any of your great ideas at the link party on ‘Or so she says…’ There’s one going on right now (and every Saturday – Tuesday). Hope to see you there! http://www.oneshetwoshe.com
I’ve been thinking all weekend about doing something like this! Of course you thought of it and did it! LOVE IT!!!
Did it take all the products you are showing to make these beautiful mugs? Would love to make some but this looks like it would be very costly to buy all of these Martha Stewart items at once. Kathy
Kathy, it doesn’t take everything in the photo. You just need one pack of the stencils, and one or two colors of the glass paint. The stencil packs are around $5 and the paints are $3-4 a piece, so it’s not too bad, especially if you make them all at once. I used her daubers too, but any sponge brush would work; you may already have one, or you can get a plain sponge brush for less than a dollar. Hope that helps!
Thanks so much Amy for your quick reply. Going to T-town tomorrow (Texarkana, Texas) so will drop by Michaels and see what I can find. Can’t wait to start this project.
Of course! Have fun, and please email me a photo of yours when you make them; I’d love to see how they turn out! By the way, I recommend the opaque paints rather than the translucent ones. Go for the pearl or gloss ones and make sure they say opaque on them. 🙂 Enjoy!
Another Cute one!! Love it!!!!