So have any of you all seen the “Pay It Forward” posts on Facebook this past week? It looks like this:
2013 Creative Pay-It-Forward. The first five people to comment on this status will receive from me, sometime in the next calendar year, a gift- perhaps a book or baked goods, or a candle, music, – a surprise! There will likely be no warning & it will happen whenever the mood strikes me. The catch? Those five people must make the same offer in their FB status and inbox me their current address. So fun!!
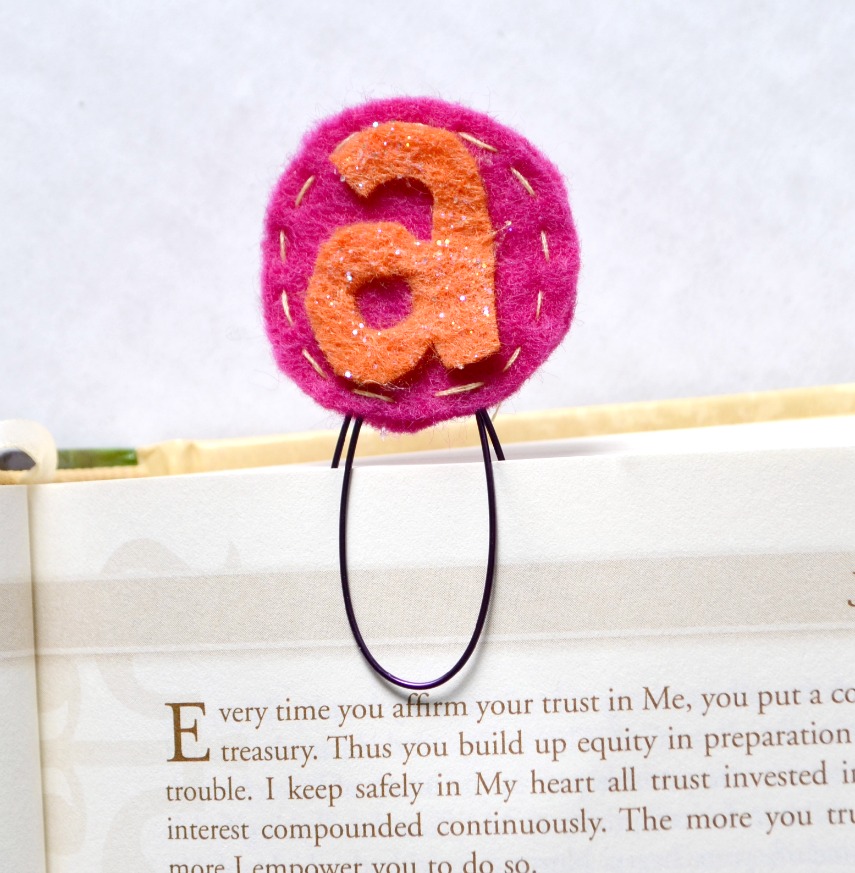
Several of my friends had this posted, and eventually I just couldn’t resist playing along. It didn’t take long before five ladies claimed their free surprises. I know I have all year to make them, but I figure I should start now while I’m thinking about it! My first thought was to send some kind of jewelry. I messaged a few of the girls asking for their favorite color, and the first one to respond was Brandy, who likes blue. Then, I asked her if she likes/wears earrings. Nope. In fact, she told me she’s not a jewelry person. On to plan B! I asked if she likes to read. She loves it. We have a winner! I decided to make her a cute little felt bookmark…and I couldn’t help but make one for myself too while I was at it!
Here’s how I did it, in case you want to pay a few forward, or just make one for yourself!
Materials:
– felt
– hot glue
– wire and wire cutters {you could also use a paperclip}
– thread
– sewing needle
– Martha Stewart glitter medium or Mod Podge Sparkle
STEP 1: Bend your wire into two loops, one larger than the other. I used 20 gauge wire and made my own because I wanted them to be different colors and to be larger and loopier than a standard paper clip. If you don’t have wire, or want to make a lot of these quickly, a paper clip will work too!
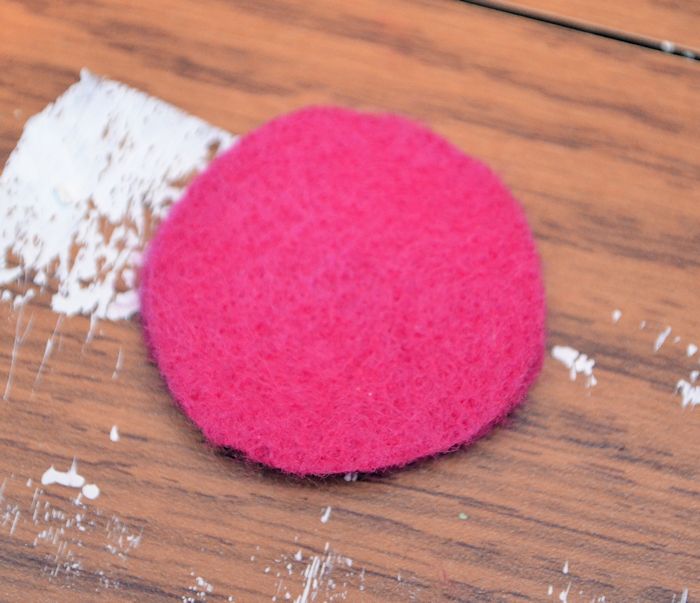
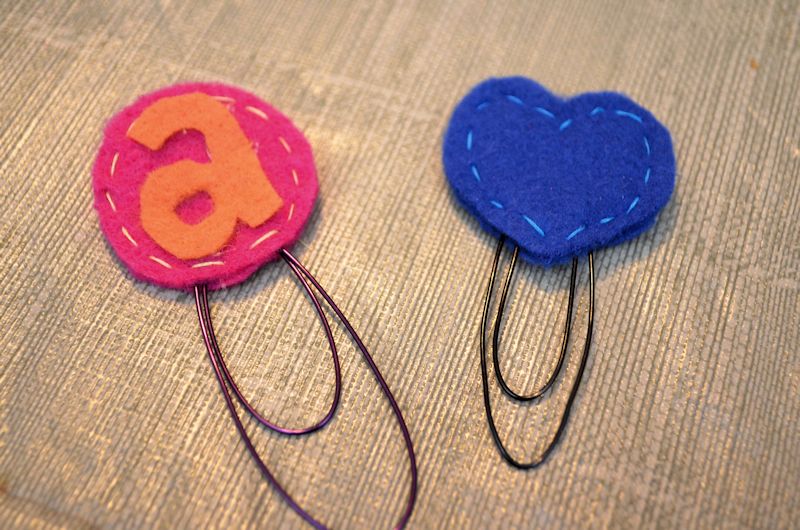
STEP 2: Cut two identical shapes out of felt. Mine is a circle, while Brandy’s is a heart. Anything goes! A butterfly, a football, a star…if you can cut it, you can make it.
{Meanwhile, excuse my painted-up table. And don’t ever ever tell Aunt Vera this is what’s become of the table we bought with her wedding money, k? This is between you and me.}
STEP 3: Cut and add felt embellishments {optional}. I cut a cute little monogram for mine, while Brandy’s was really adorable as-is.
STEP 4: Hot glue the felt pieces to the wire clip. I put glue on the bottom shape, stuck the wire on, then put a bit more glue and added the top piece like a little bookmark sandwich.
STEP 5: Use thread and a needle to hand stitch around the edges of the felt shapes. My thread was doubled so it shows up really well. I think this adds such a cute little handmade accent. Warning: the hardest part of this whole project is getting your needle to go through where the hot glue is!
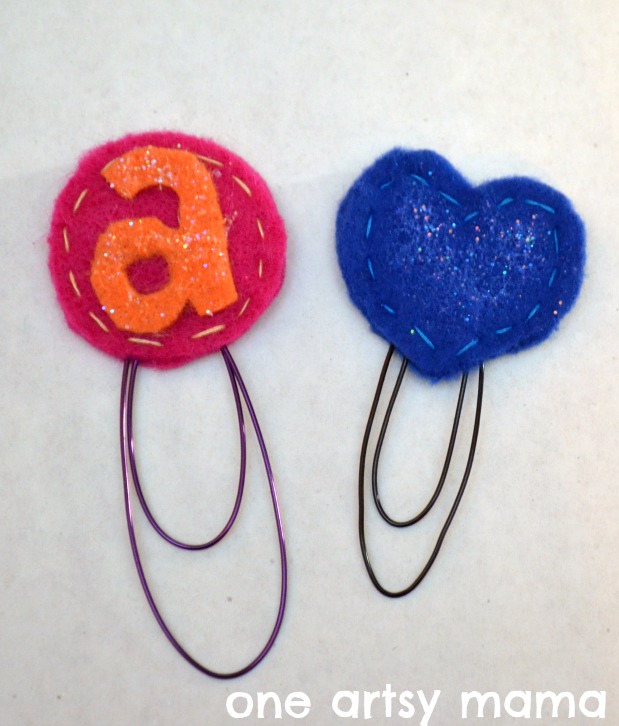
STEP 6: Of course, no project is really finished until you add…{can you guess?}…GLITTER!
Using glitter medium or Sparkle Mod Podge works way better than trying to use loose glitter. Yaaay for sparkle!
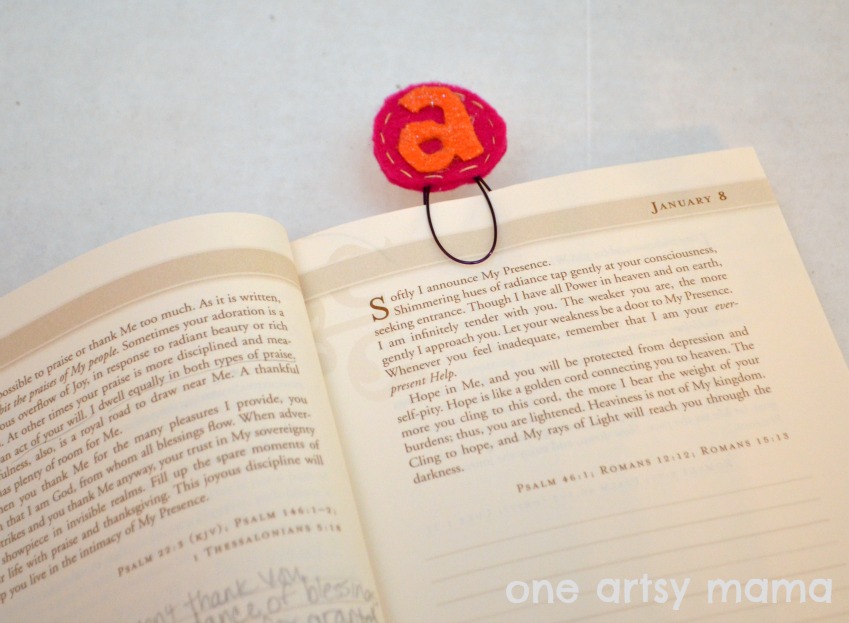
Once the glitter dries, you’re good to go! I actually made mine to go in the devotional book I started in January {if you want to win a copy,
go here}, so as soon as I could, I stuck it in there. It makes me smile every time I see it! I love the fun colors and the personalization!
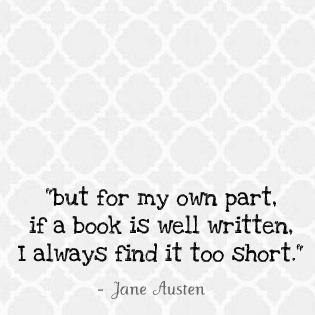
Before I mailed Brandy’s off to her, I thought it needed a little more pizazz, packaging-wise. So, I came up with this little printable using a quote I love from my faaaavorite author, Jane Austen!
So true, isn’t it? I’ve put down many a good book wishing it weren’t over so soon! In case you’d like to use it for your own bookmarks, here is the little printable. Just right click on the image, save it to your computer, and print it out! I sized mine to 3×3″.
Enjoy! Brandy, I hope you enjoy your little present and have fun paying the creativity forward to someone else! Now, four more surprises to go…
Hugs & Glitter,


I love the bookmarks. They are adorable. I can’t wait to try to make some myself.
Aw, these are so cute and creative! I’m behind on my Christmas diy gifts (…unexpected hospital visit right before the holidays) and have been thinking about making the 7-year old girl that I just stopped nannying for a bookmark; this is a perfect idea and she will love it! I will definitely have to make some myself! 🙂
http://apinksunset.com
Awww those are super cute
Those are awesome! What a great, personalized gift! Wonderful job, my friend!
Ooh how fun! Can I play along even though I’ve already posted the Pay It Forward on my FB page?
Very cute!!
What a sweet gift idea!
Cute. Great for valentines day gift!
Simple and cute, love them!Thanks so much for sharing tutorial! I’d love for you to visit my blog.
Have a fabulous week!
Hugs from Portugal,
Ana Love Craft
http://www.lovecraft2012.blogspot.com
I love that! I have a thing for bookmarks and I use a lot with all my school reading 🙂 I need to make one!