Hand Sewing an Invisible Hem
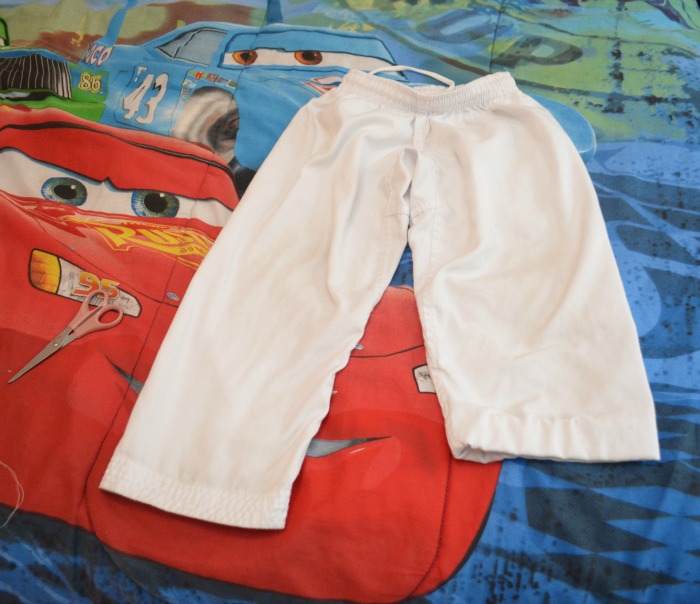
Hey, friends! I know that today is typically “crochet day” around here, but I had a different type of sewing project I had to complete and I thought some of you might be interested in a little “how-to” for that. It starts with Little Crafter’s karate pants.

Many of you know that LC has been taking karate lessons since last October, and he is absolutely loving it! It’s given him just the self-confidence and assertiveness we hoped for when we signed him up, and he is just too cute practicing his kicks, jabs, punches, and rolls! Last week, he took his fourth ability test, which meant he got promoted to a brand new belt for the first time. Think he’s a little proud of himself?

He loves the class, loves the teachers, and loves wearing his uniform. The only problem is, his pants are about a mile too long. He has the smallest size you can get, but he’s still constantly stepping and tripping on them even though we keep rolling them up.
So, I finally decided it was time to give them an invisible hem. Today, I’m going to show you how I did it, because this is one of the single most useful sewing skills I know. I can’t tell you how many times {being the shorty I am}, I’ve bought a dress, a skirt, or a pair of pants that happened to fit perfectly except for being about two inches too long; have you ever had that happen? Or maybe it happens with your child’s clothing. You don’t need a professional tailor; an invisible hem is a quick and easy thing you can do for yourself!
Here’s how:
INVISIBLE HEM
Materials:
– needle
– thread to match the fabric
– scissors
– tape measure or hem gauge ruler
– iron
– straight pins
Step 1: Figure out where you want the garment’s hem to be and mark it with a few pins.
To do this, the garment actually needs to be on the person who’s going to wear it. If you’re hemming something of your own, you can have someone else pin it for you, or you can measure it against another garment you know fits properly. Decide where you want the hem to fall, fold up the excess fabric, and pin it in several places just to give you a rough measurement. Carefully have the person remove the clothing {watch out for pins!}.
Step 2: Measure the hem.
Now that you have a few spots pinned, measure each spot to see how many inches the garment needs to be shortened. It may not measure exactly the same in each spot, so decide on an average.
Step 3: Cut off excess.
If you need to shorten the hem by more than two inches, you’ll want to cut off the excess. It can be scary taking the scissors to it, but if you don’t, you’ll have too much fabric rolled up and it won’t look or feel right. For Little Crafter’s pants, I chose not to cut because as he grows, I want to let the hem down for him.
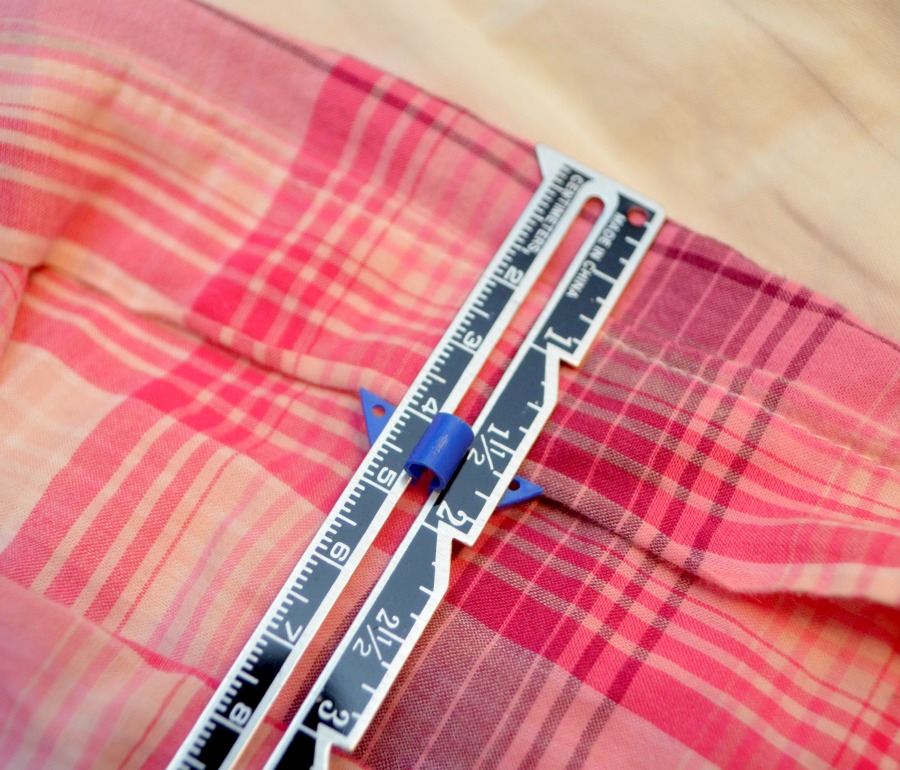
Step 4: Measure and press.
Working your way around the bottom of the garment, measure the number of inches you determined on in step 2 and iron a crease to help hold the fabric in place. A hem gauge ruler works really nicely for this because you just set the plastic piece at the right spot and make sure the fabric hits it as you go around. If you don’t have one, though, a measuring tape or ruler will do the trick. {Obviously, this photo isn’t LC’s karate pants, but I didn’t get a pic of that…hehe}
Step 5: Fold in half and press.
Now, you’re going to work your way around the garment again, this time folding the amount you are hemming in half {does that make sense?}. You’re going to take the edge and fold it down into the crease you ironed in step 4. Iron again to help keep the fabric in place and insert pins.
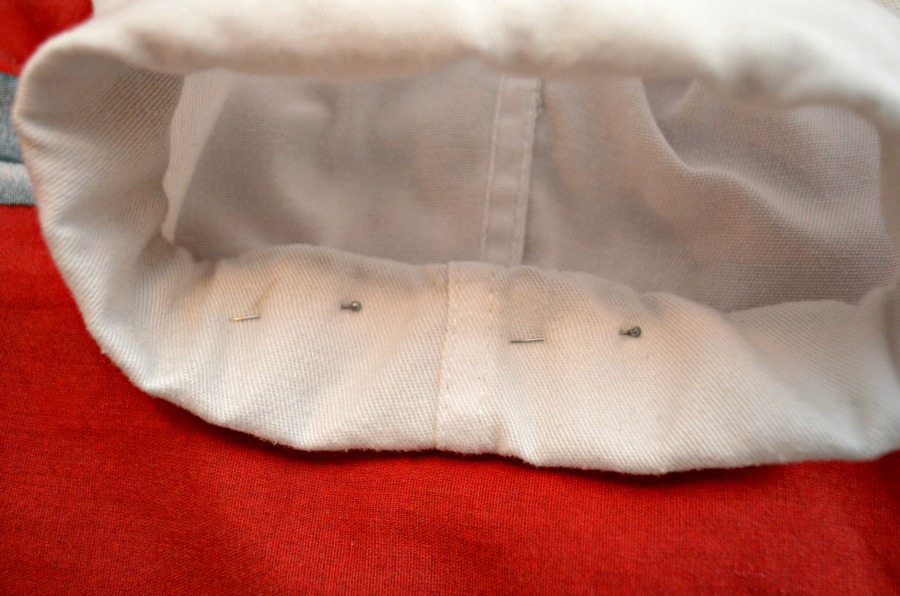
Step 6: Hand stitch in place.
Thread your needle and make a knot in one end of the thread. Insert your needle between the garment and the folded hem piece and pull it through the part you’re hemming so that the knot is hidden.

Then, grab just a few threads of the garment and as much as you want of the excess fabric and pull.

Repeat until you’ve worked all the way around. The trick to making the hem invisible is only placing your needle through one or two threads of the part of the garment that you will see from the outside.
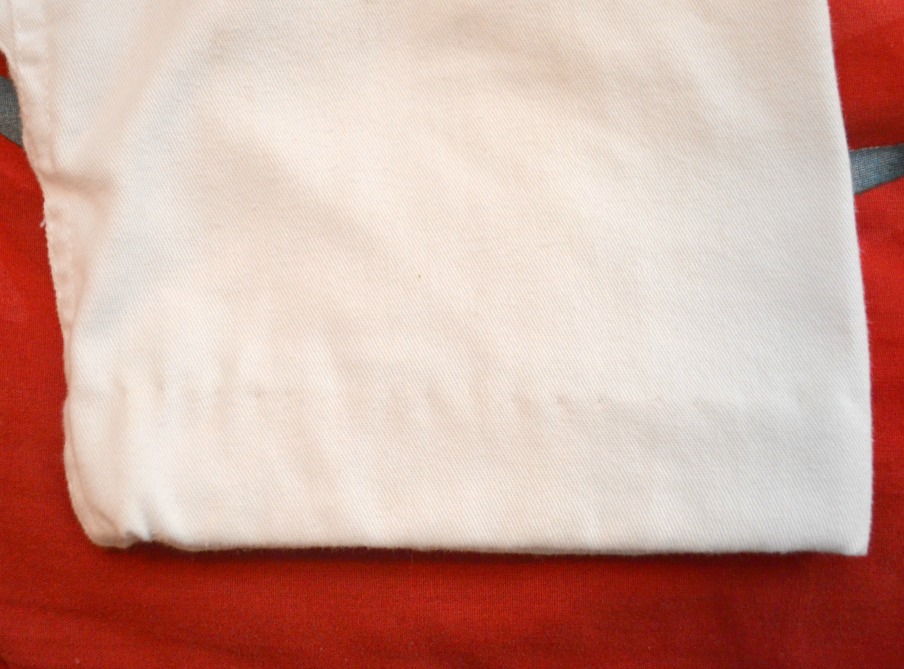
When you’re finished, tie a knot in the thread, cut, and wear!

Ah! So much better!
As a side note, if you’re hemming a pair of jeans or something where you want a visible hem instead, follow the same steps up through Step 5 and then sew a machine hem rather than stitching by hand!
Now you’re ready to hem! If you try it and have any questions, let me know!
Hugs & Glitter,


Wow! Very cool tutorial, Amy! This is a hem that I’ve always thought I was too novice to figure out. Now I know that I can do it!
Great tutorial…you make your mama proud 🙂
Thank you for sharing:), this helped a lot!
We take a different approach, using the original hem. There are tutorials for this. But, we do use this for dress pants. Thanks,
Lorili Design
Thanks Amy, this helped alot
So glad to hear it!