Crochet an Invisible Join
Hey there, One Artsy Mama readers! I was away last month having a baby, but am back with a little crochet tutorial that you might find useful. So let’s get right to it, shall we?
Have you ever crocheted in the round and wondered if there was a way to get rid of that pesky seam where you connect up the beginning and the end of the round? It pretty much screams “hey! This is where my round ends, look at me!” Maybe on large projects it wouldn’t be so noticeable, but if you’re working on a teeny tiny project like I am right now, it’s the difference between success and failure. So I’m here to show you how to finish your round seamlessly with an invisible join!
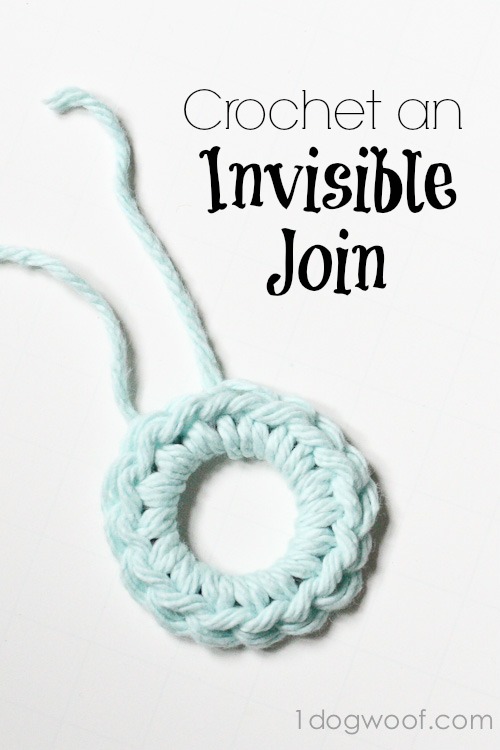
For full instructions on how to do this simple but fabulous trick, head on over to ChiWei’s blog One Dog Woof!

Oh my goodness! I so need to try this! What a fabulous tip!!!
I need to try this too !!!! Thank you !
Be warned, this method adds an additional stitch. If you use the second sc and follow the directions you will maintain your current stitch count.
Hi Debbie, yes you’re right. In this particular project, the number of stitches didn’t matter, but when you are working in a round, you do need to use the second SC in order to maintain the stitch count. Thank you so much for pointing that out!
So, then one has to tie yarn to continue the project?
Yup. That’s why for large projects, this may not be the easiest solution. For stuffed pieces, you can tie a knot and not have to weave in everything, but for things like hats, the weaving of the ends might drive me nuts, at which point I’d live with the visible seam instead. 🙂
I just to say Thank You. its a lifesavor. I’m definitely use this stitch in the near future .
How do i do this and continue on with more rounds? Your directions say to cut the yarn. I want to do this for hats.
BRILLIANT! I hate that stupid seam when I am making hats…thank you!