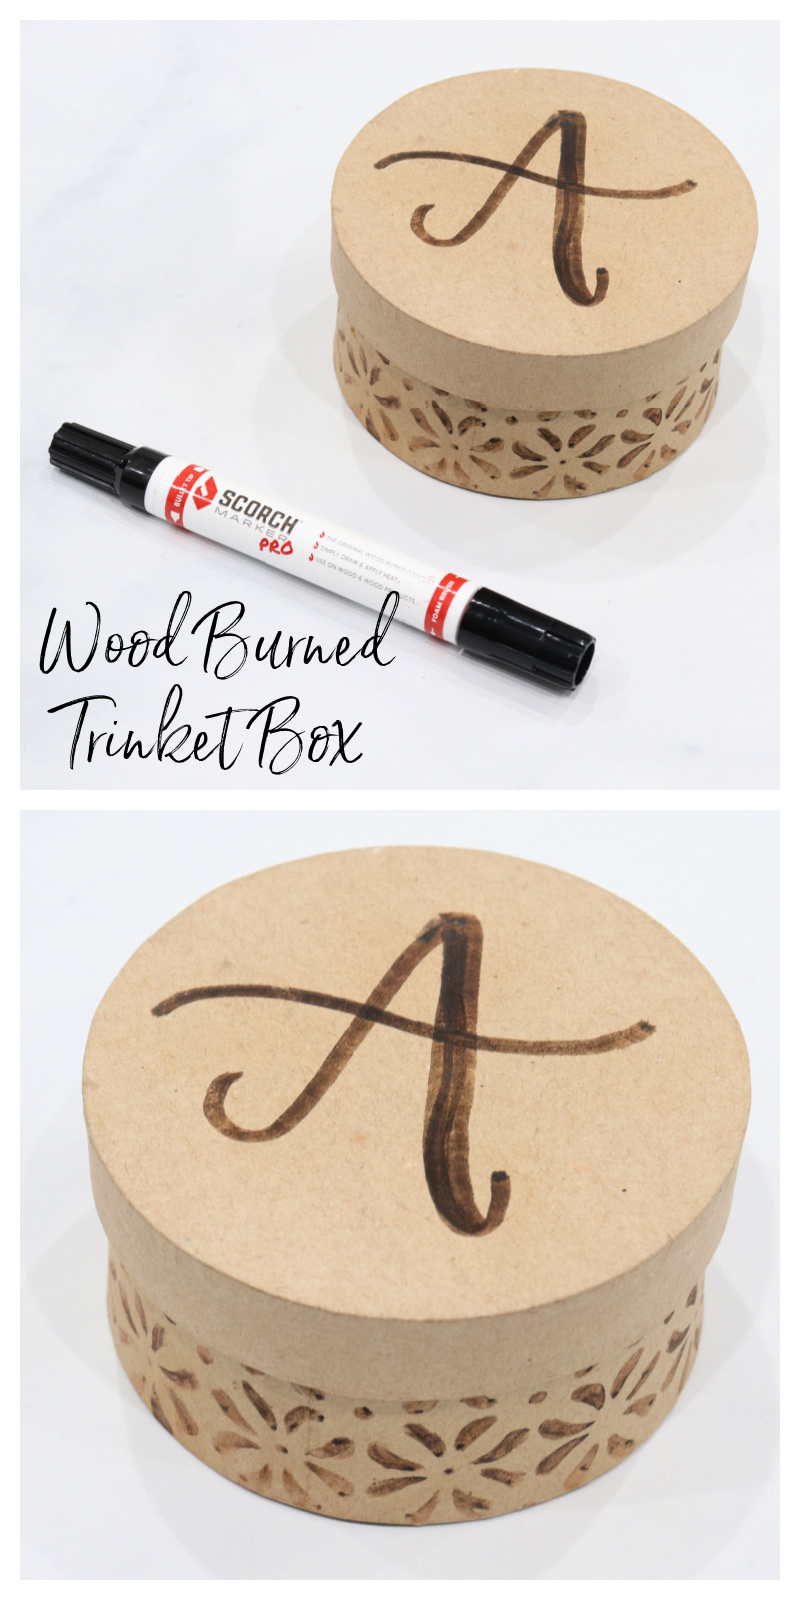
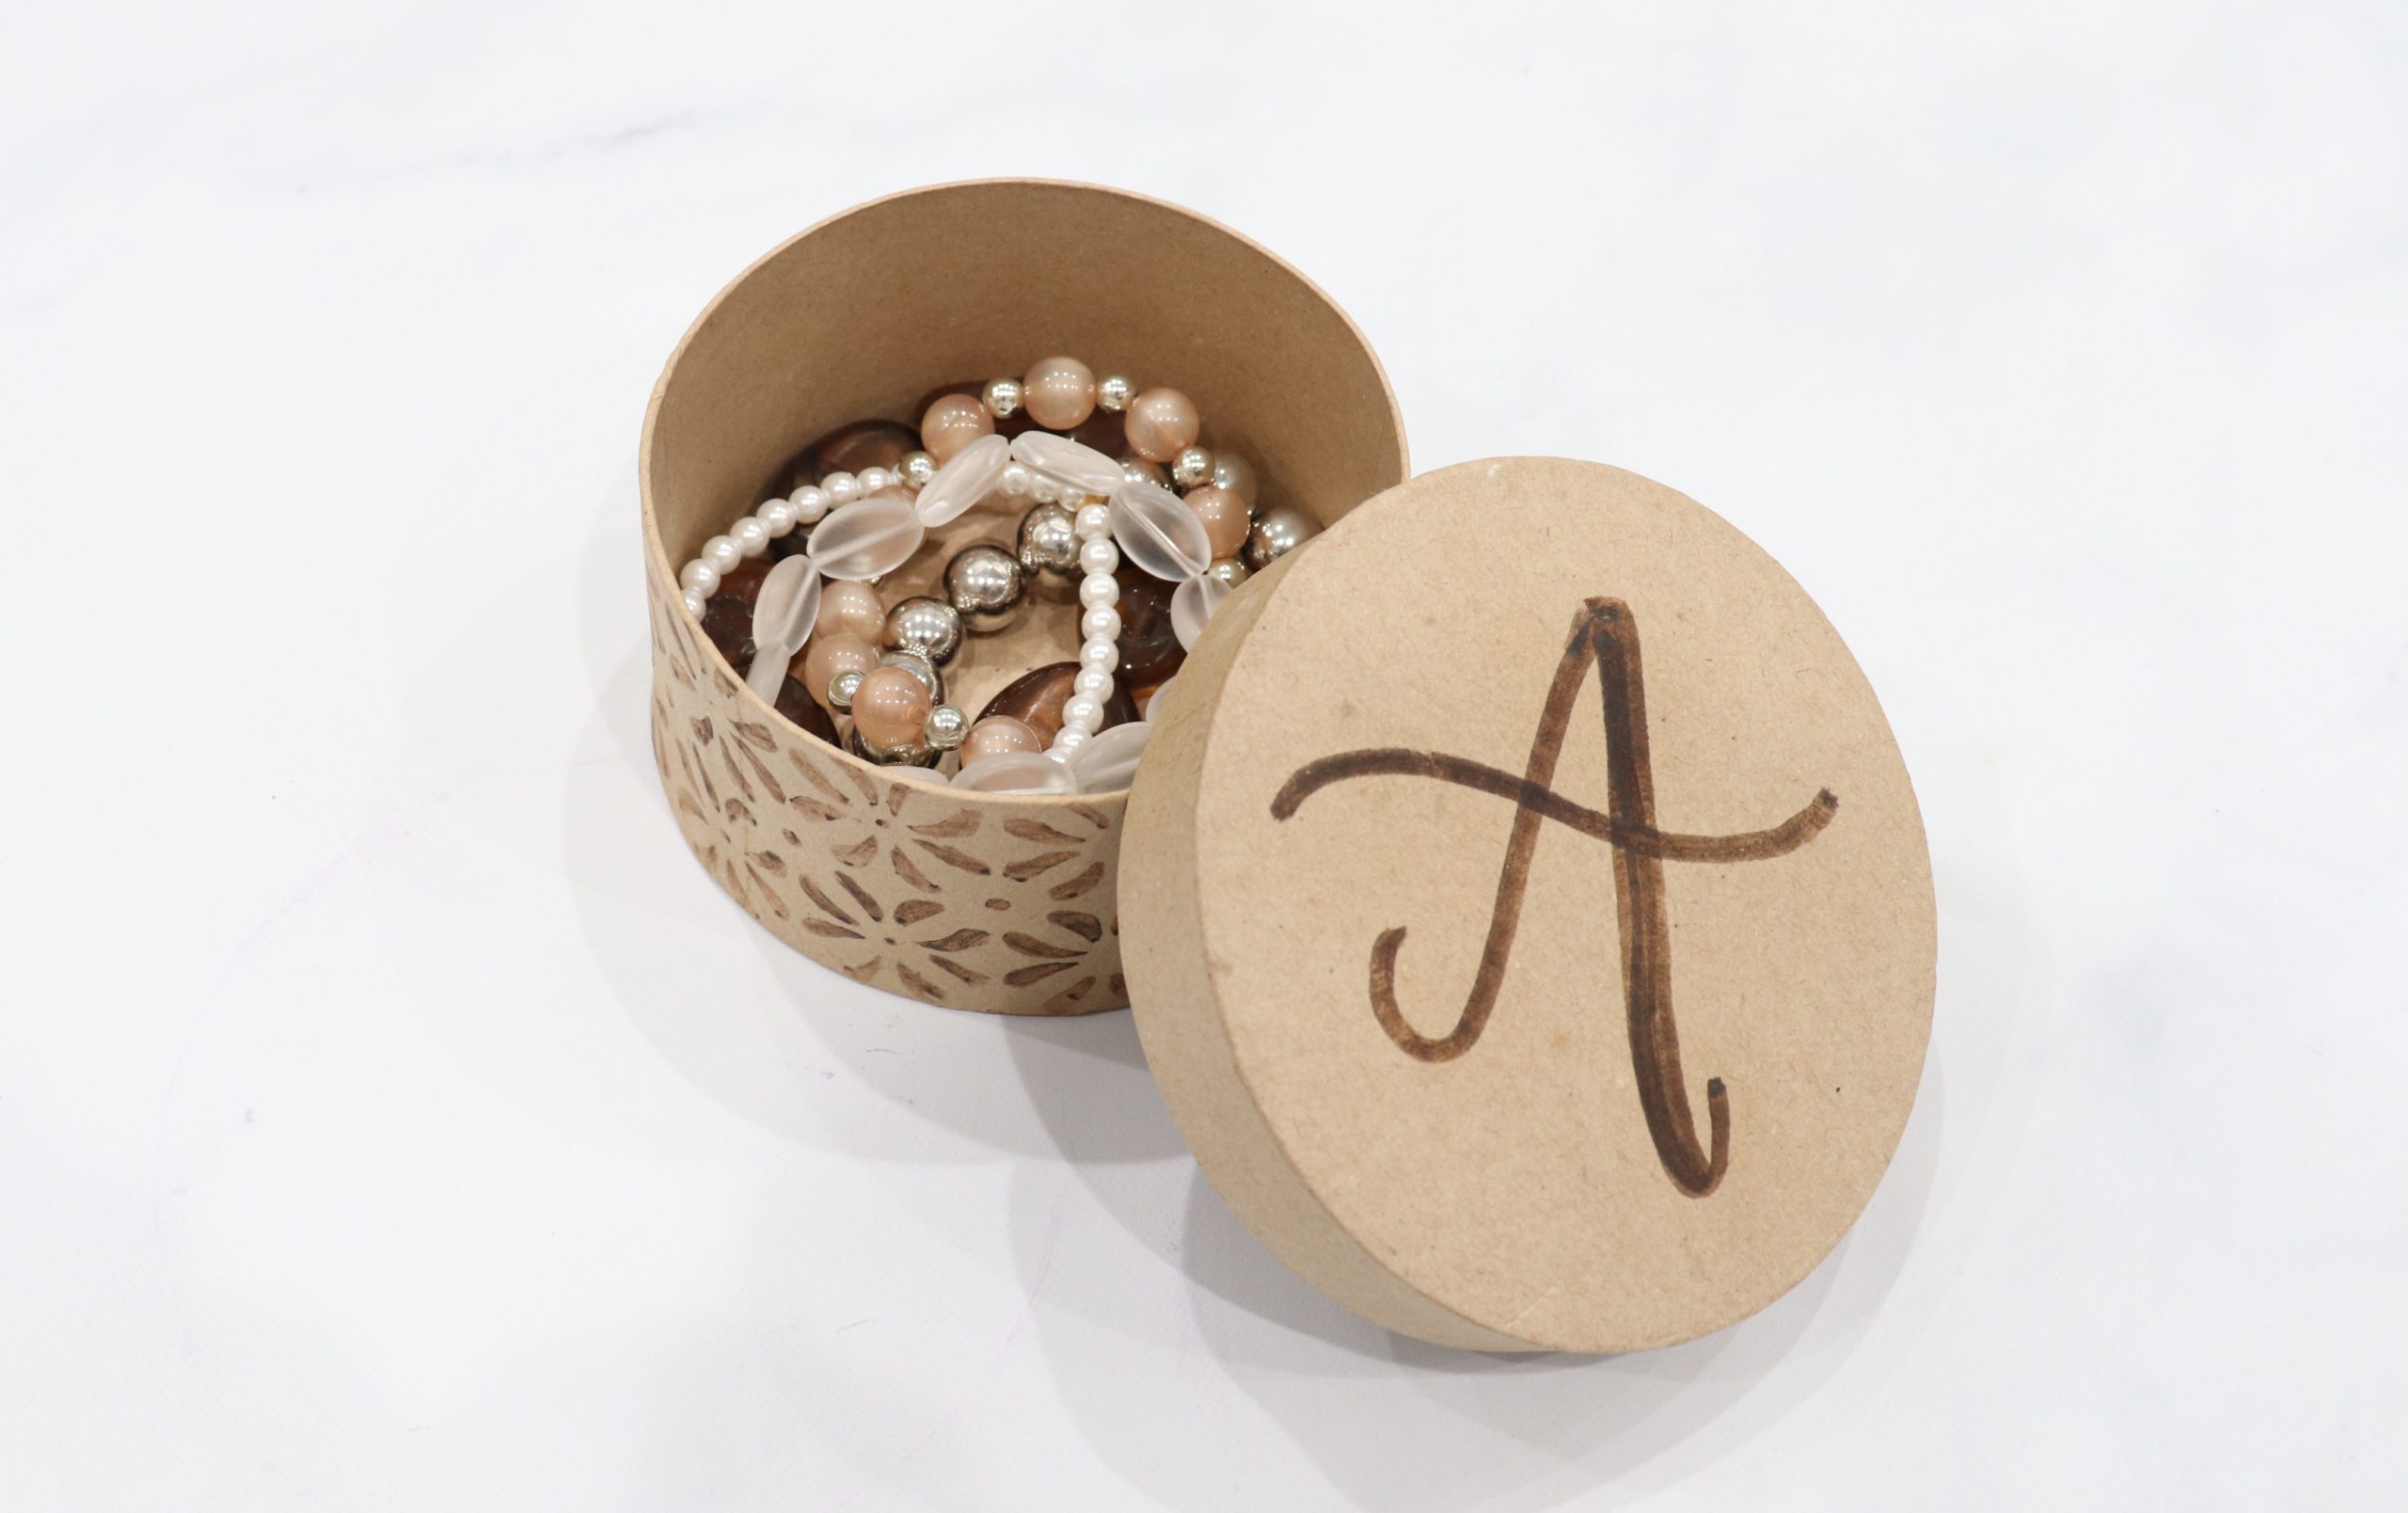
Wood Burned Paper Mache Trinket Box
Thanks to Scorch Marker for sponsoring today’s post; all opinions are my own.
While I love all kinds of creative projects, my number one passion is hand lettering. I especially love hand lettering on all kinds of different surfaces besides paper, which is why I am so excited about my newest crafting tool, the Scorch Marker. This marker allows you to do wood burning with a marker rather than a traditional wood burning tool, which means it’s much easier and safer, plus you have a lot more control. First, I used it on unfinished wood rounds to create some really fun coasters. Then, I heard it also works on paper mache, so I had to give that a try. Here’s how I made a personalized wood burned trinket box (which would make a great Valentine’s Day gift). Take a look…
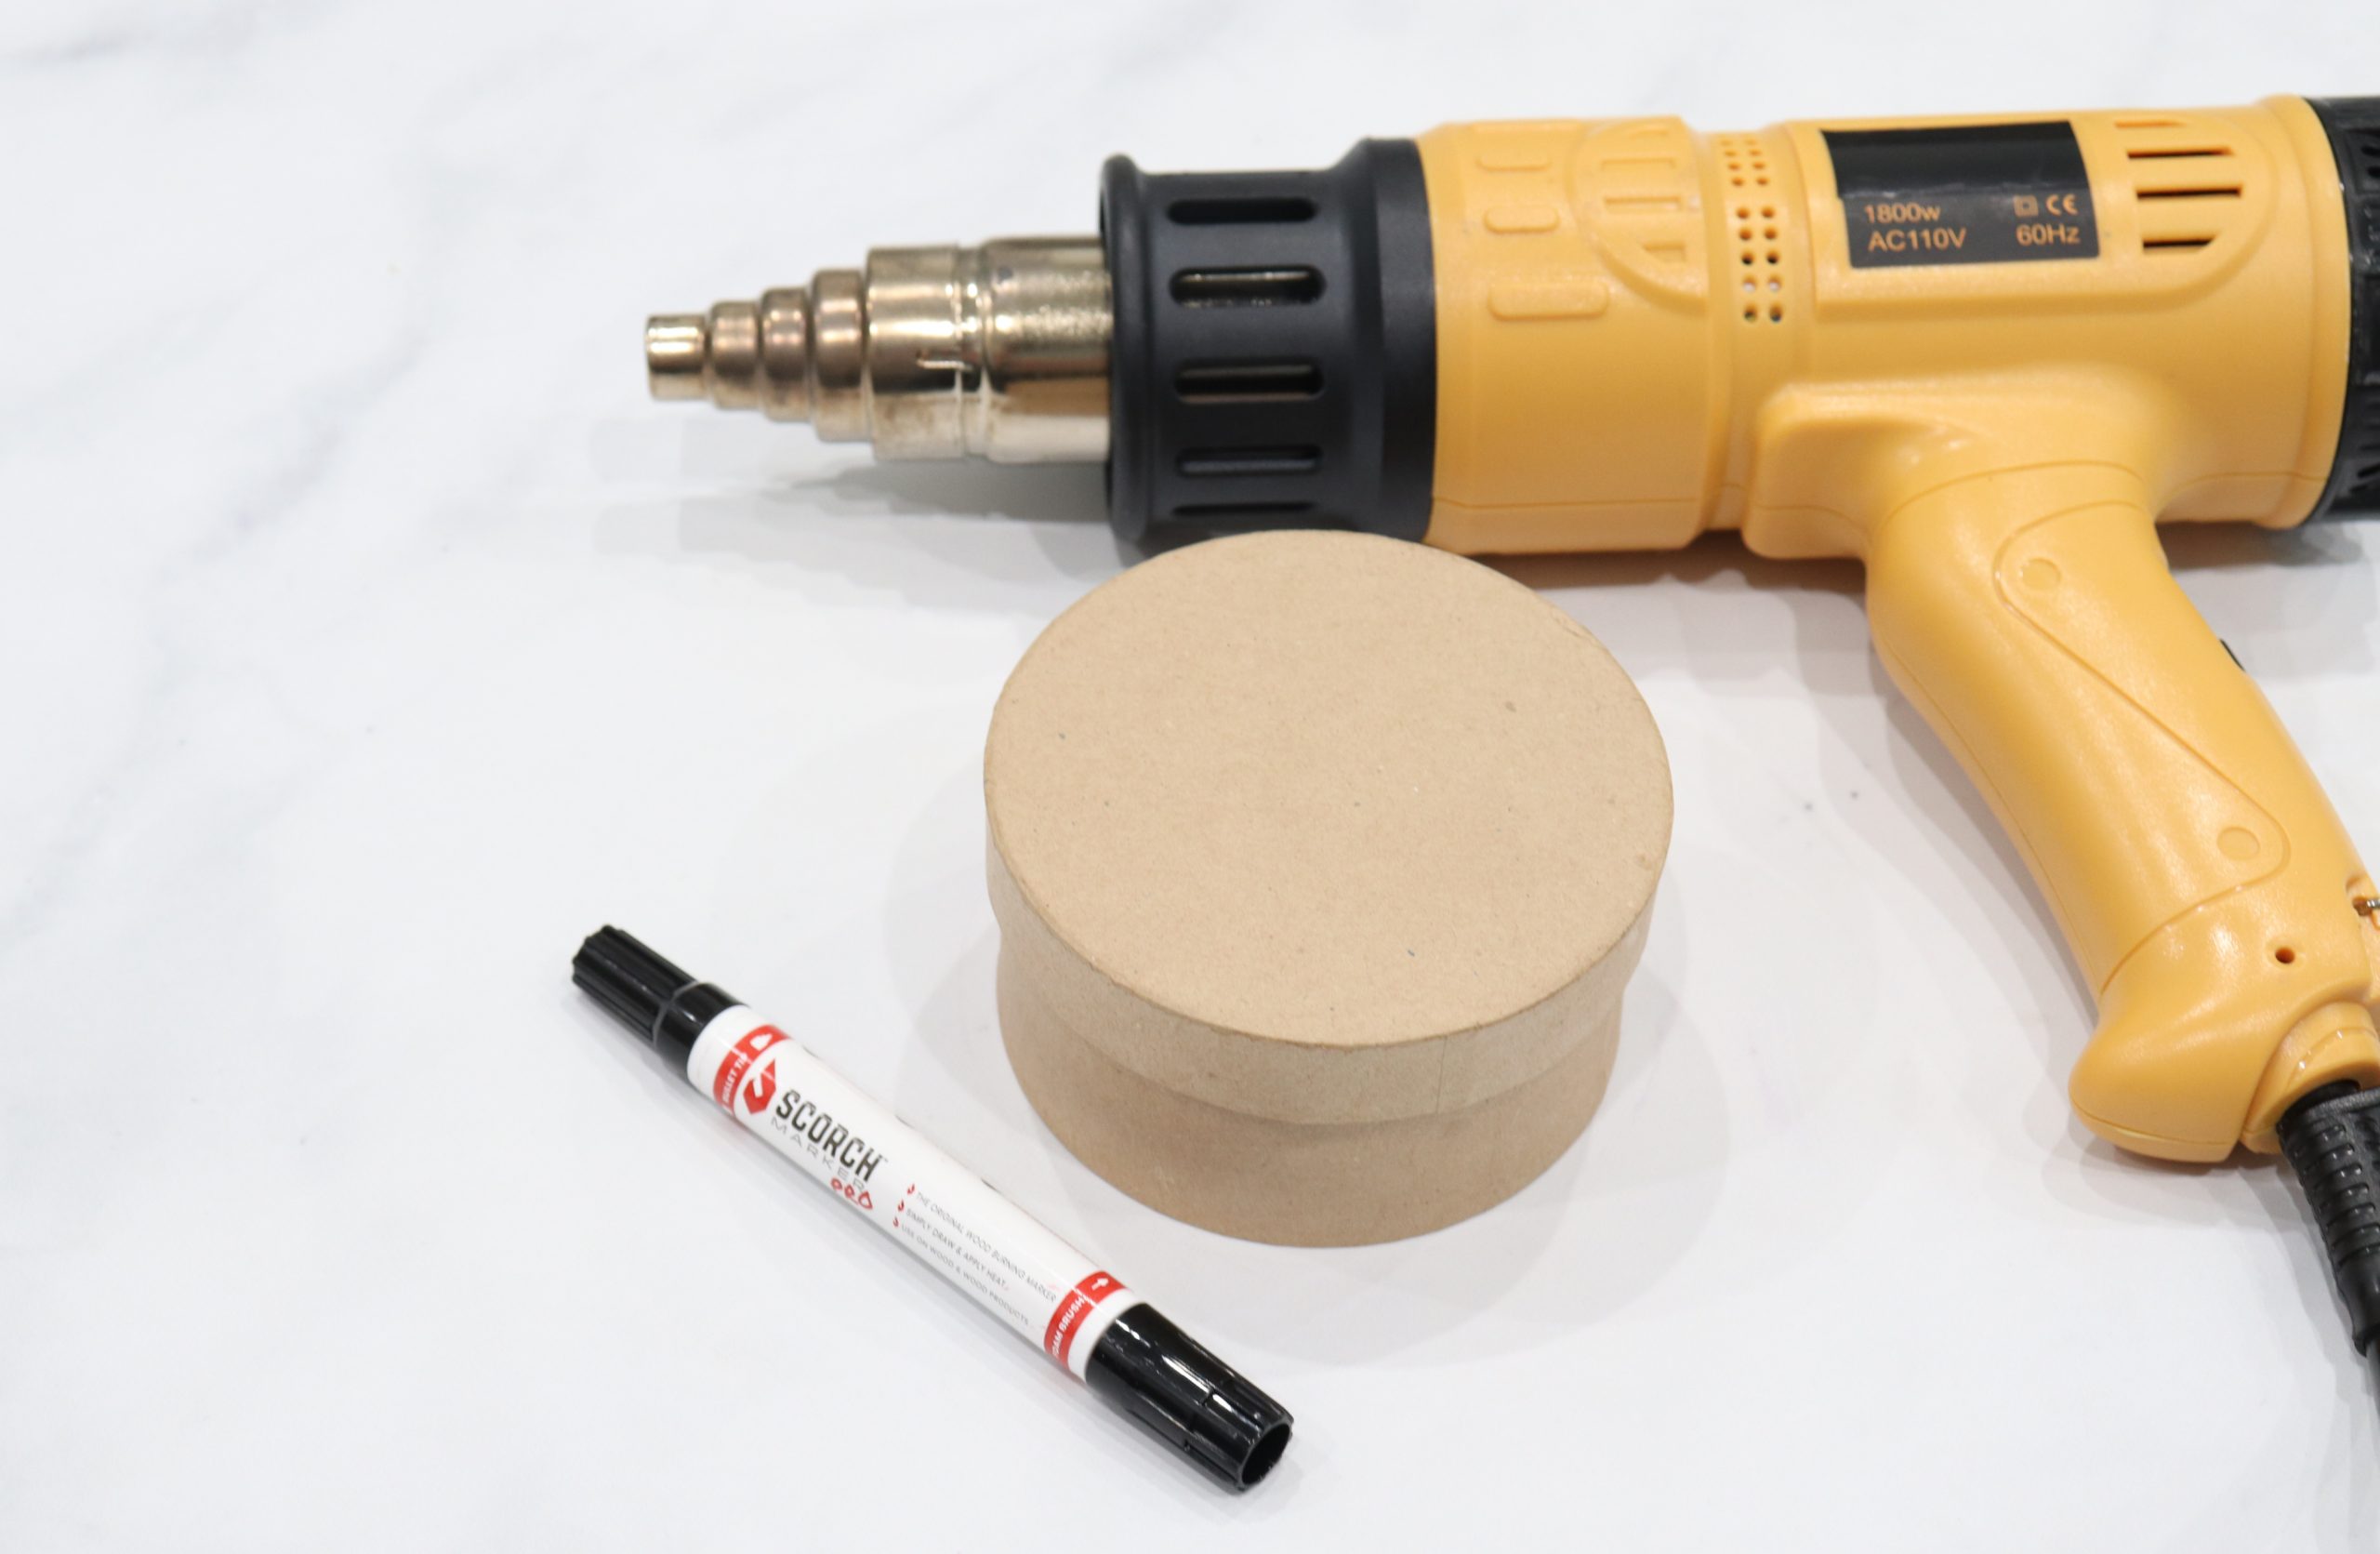
You’ll need:
a heat tool (1000+ watts, or your oven!)
a stencil and some tape
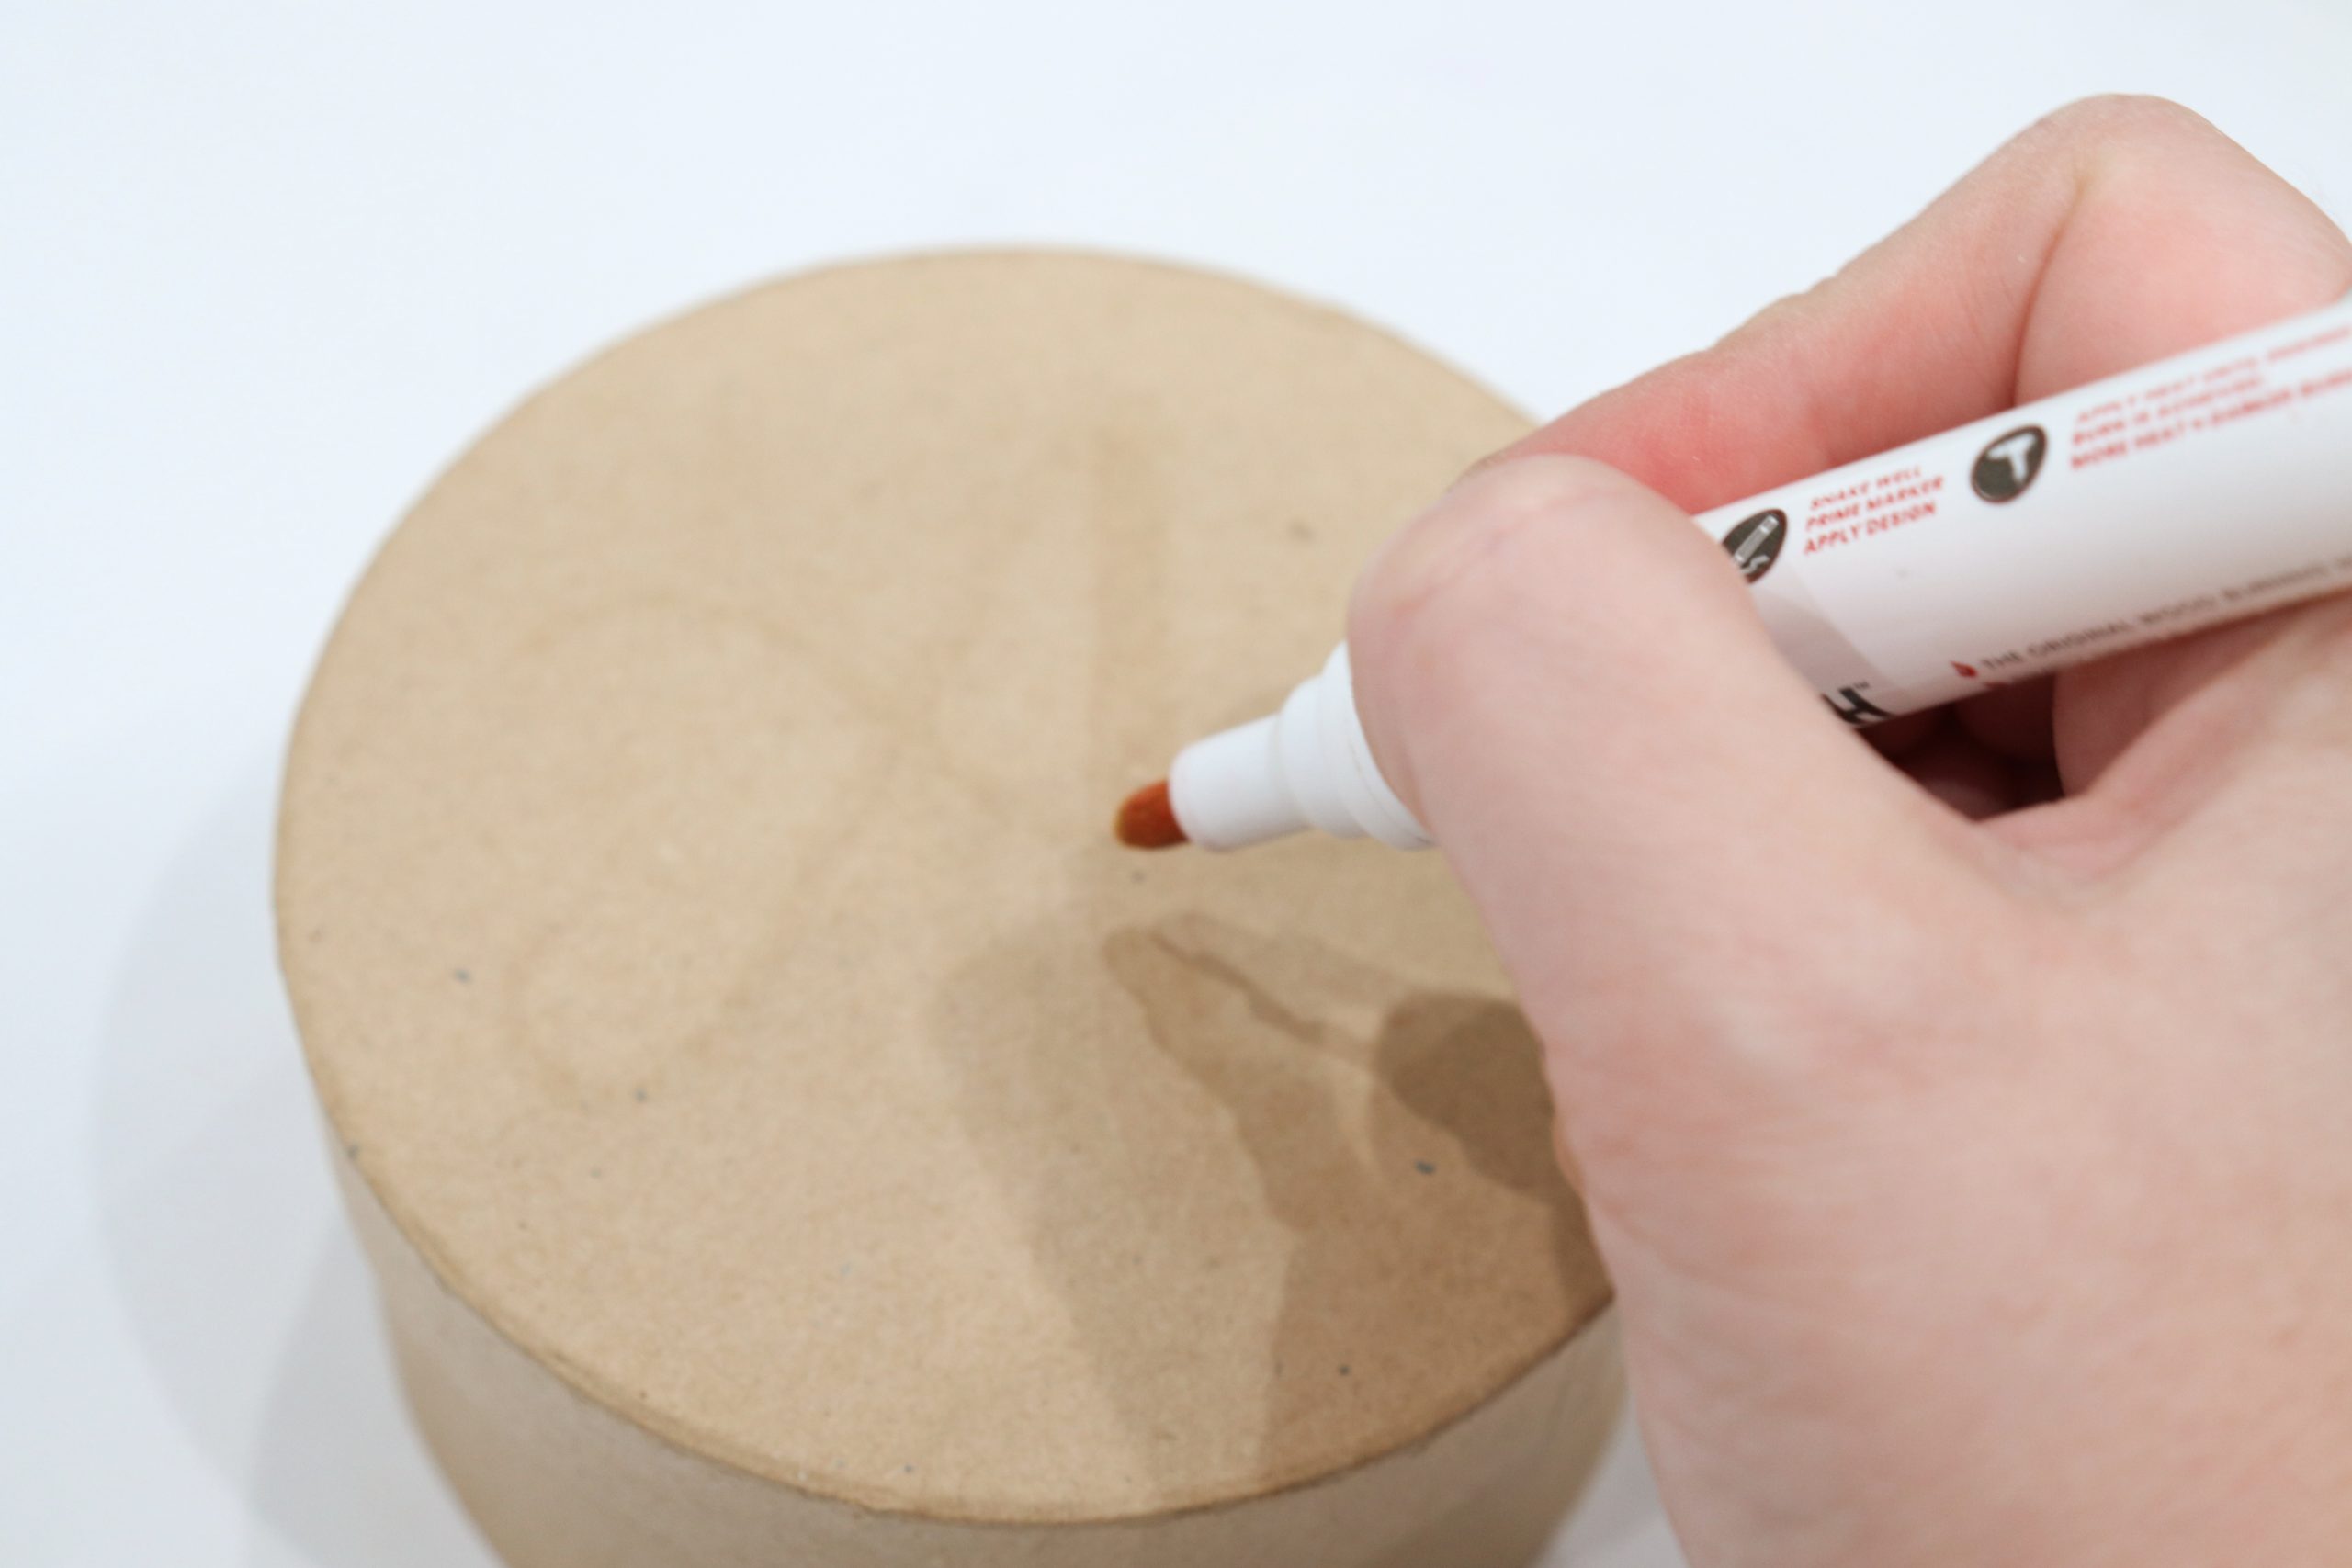
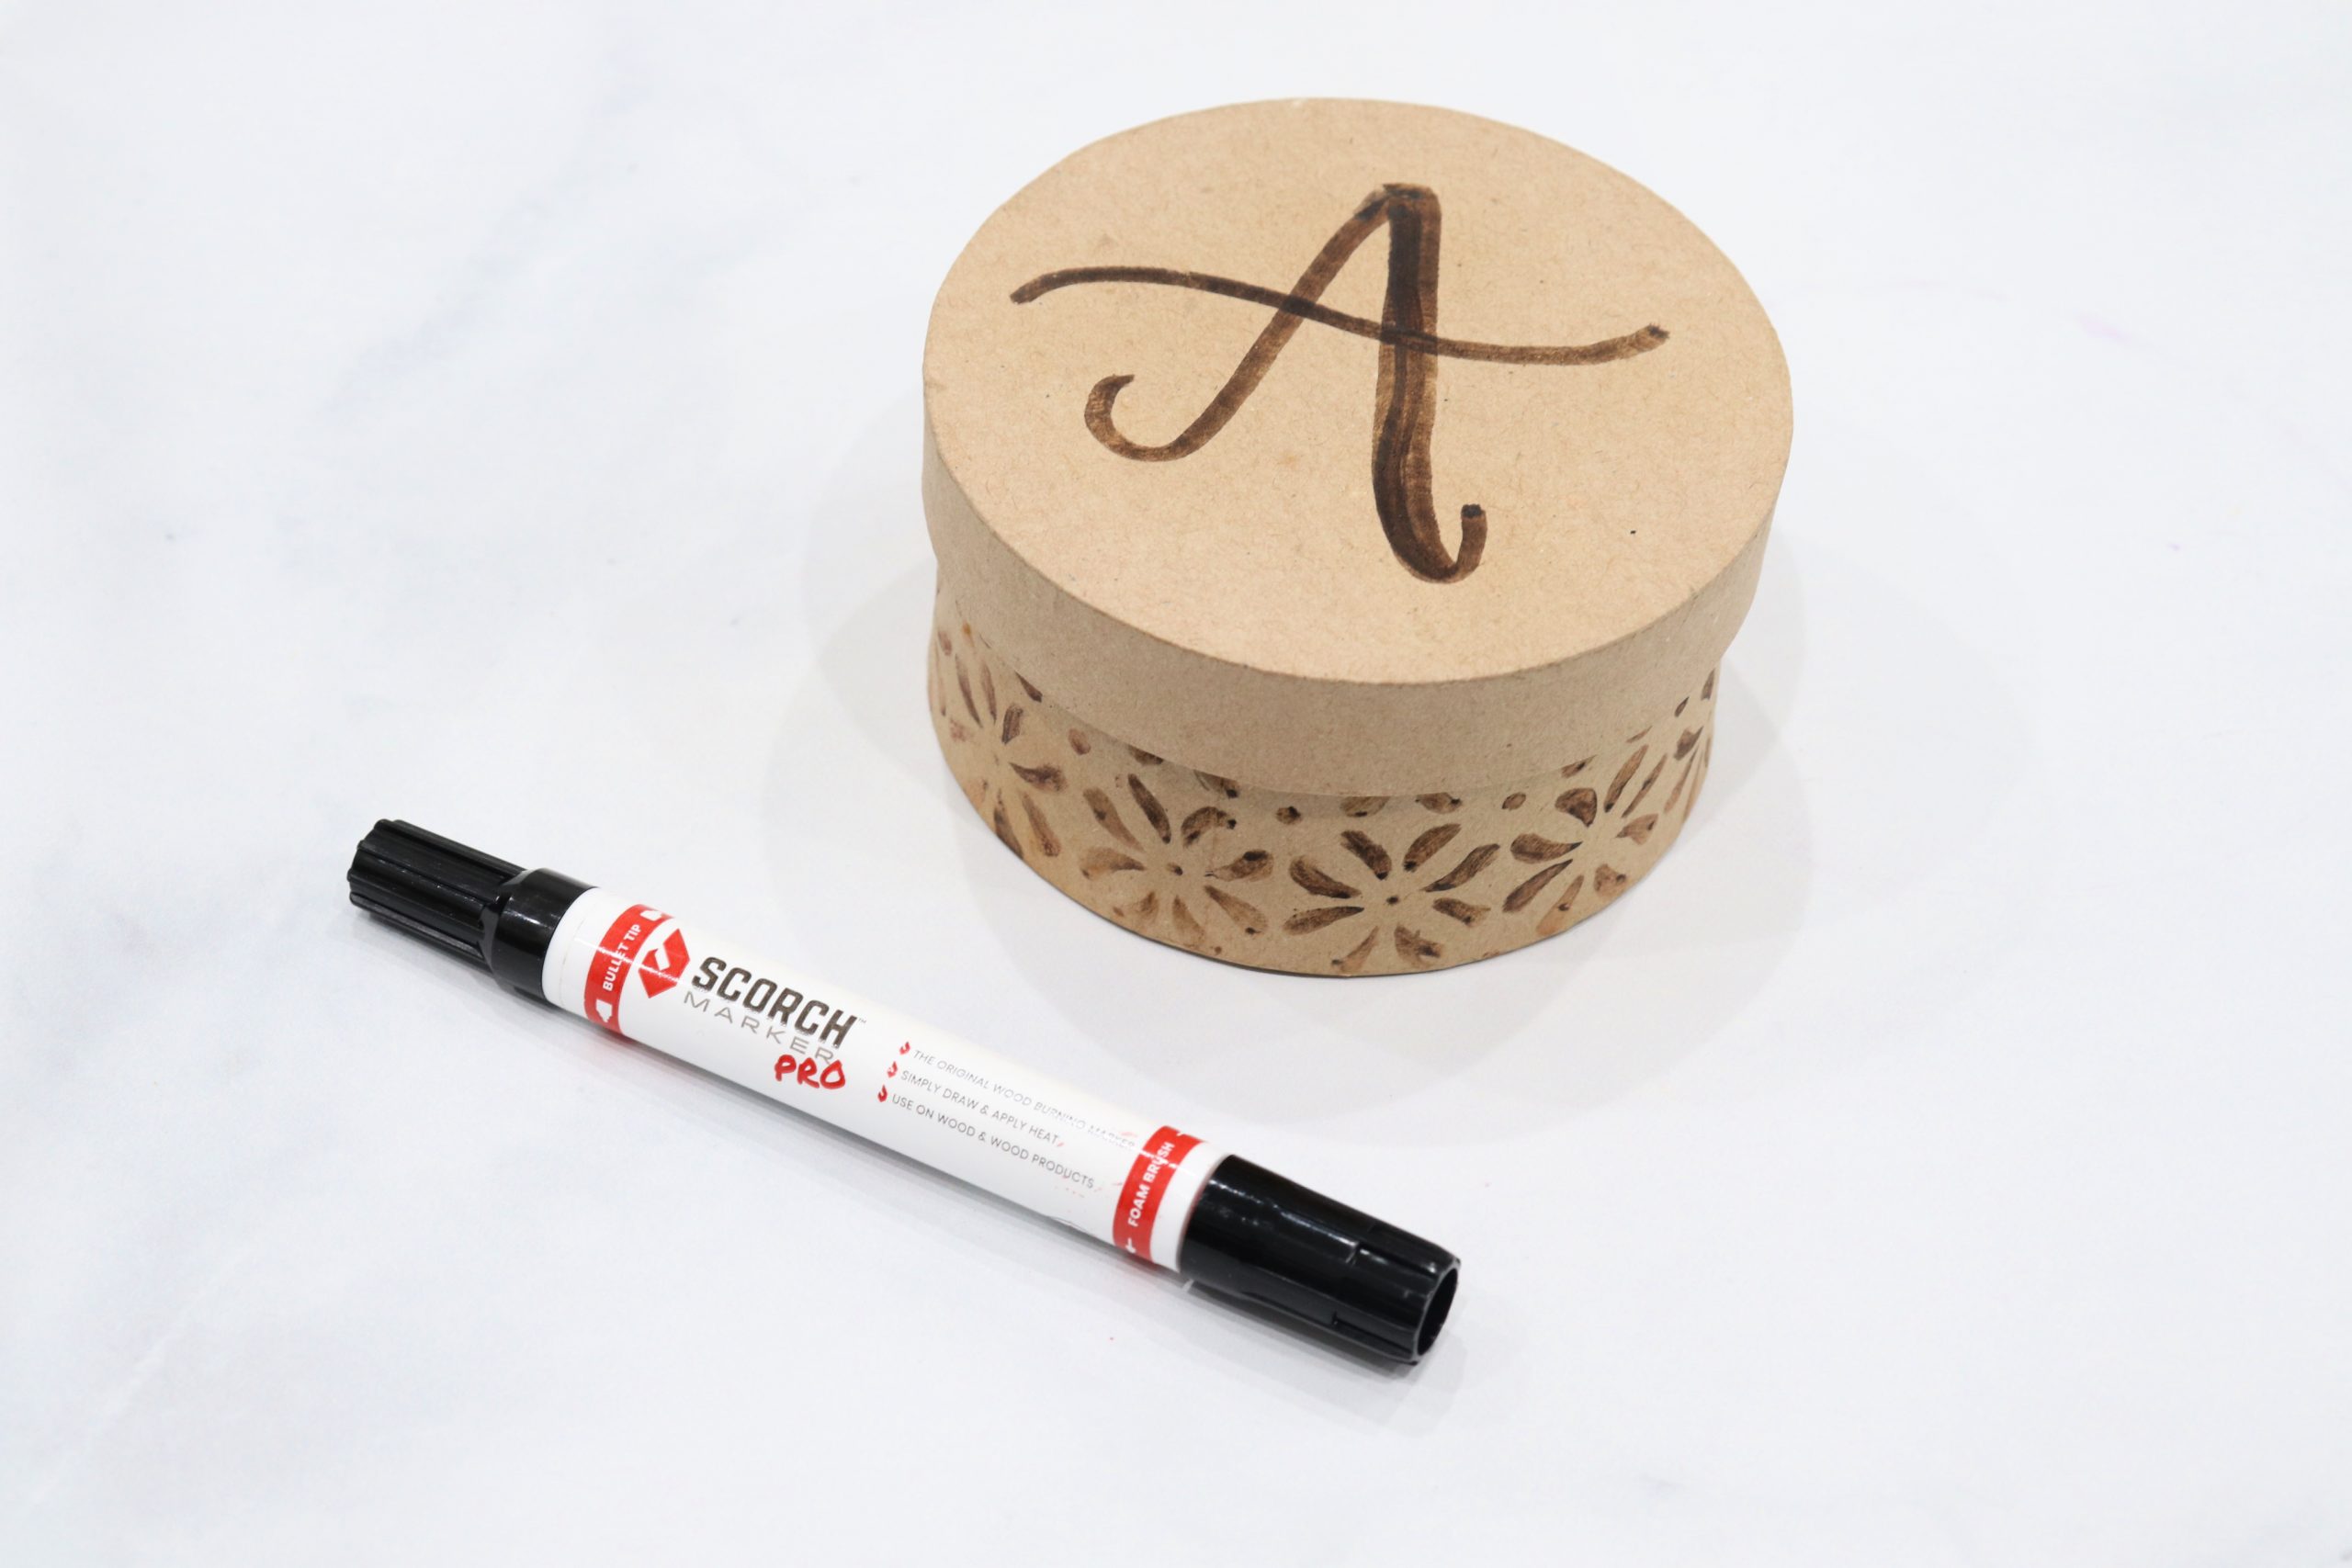
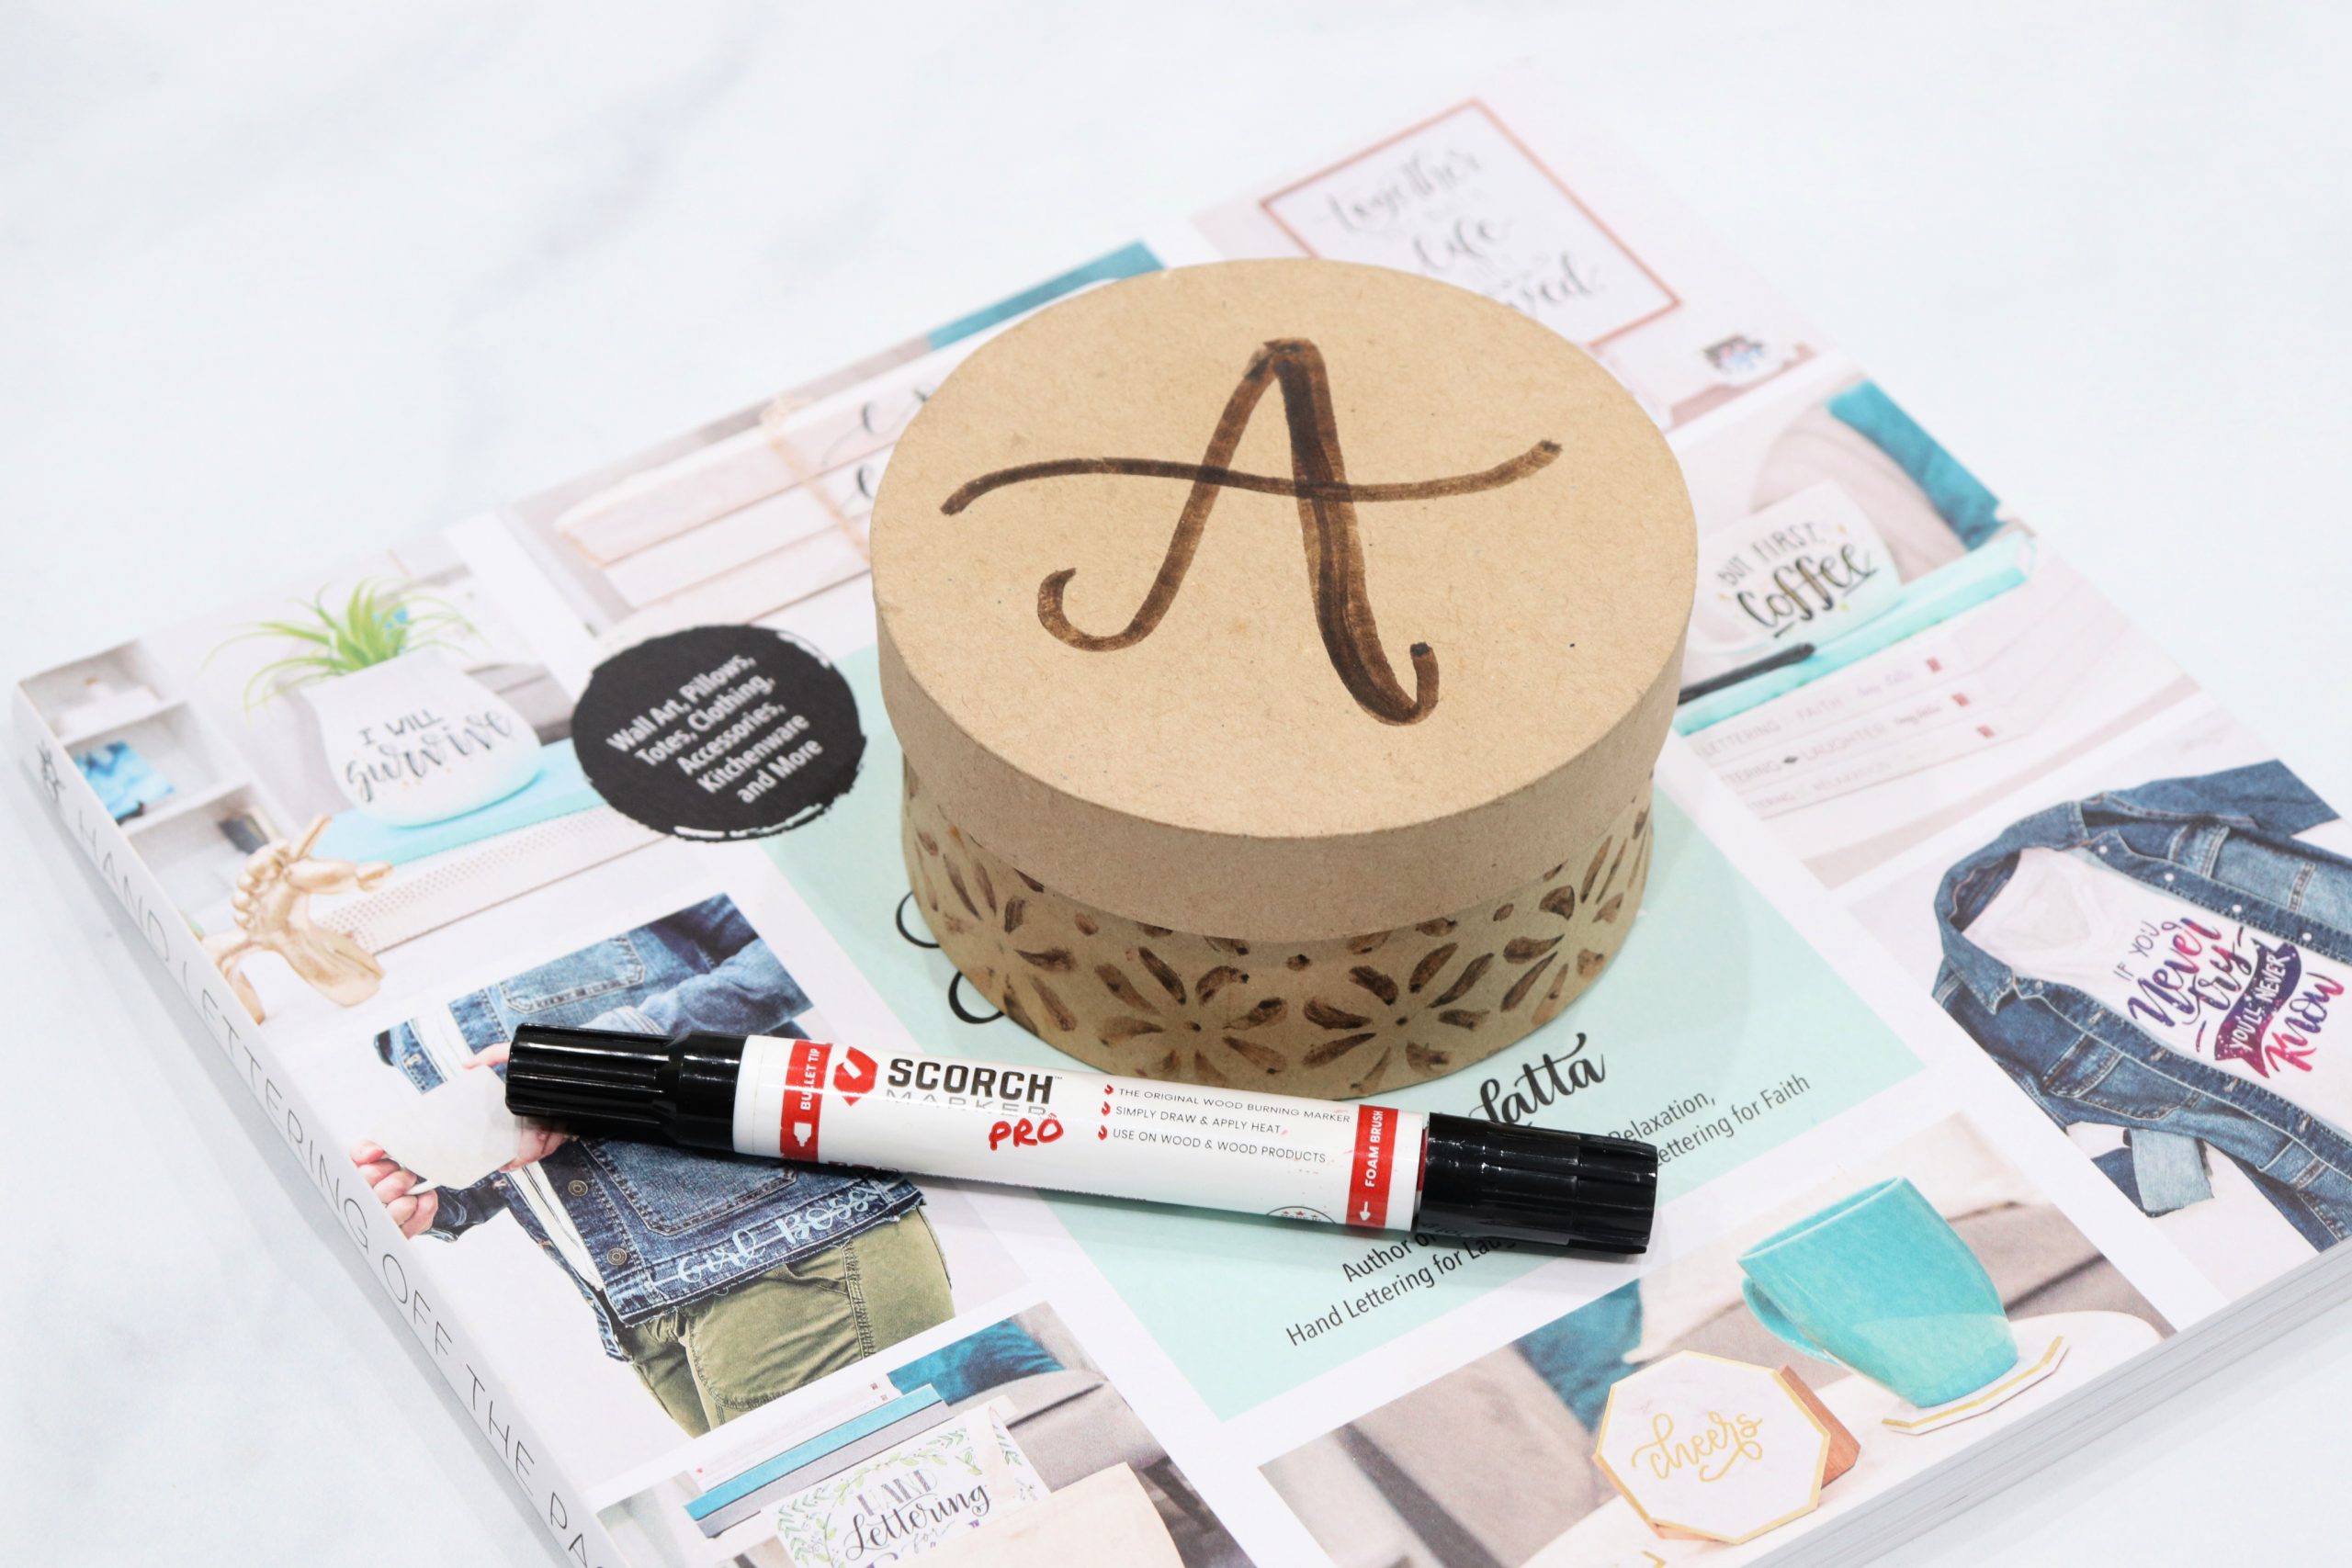
Step 1: Use the Scorch Marker to letter your monogram on the box lid.
I used the Faux Calligraphy technique by writing the letter “A,” then making the downstroke thicker than the rest of the letter. You can learn all about how to do this easy style of lettering in my beginner lettering post!
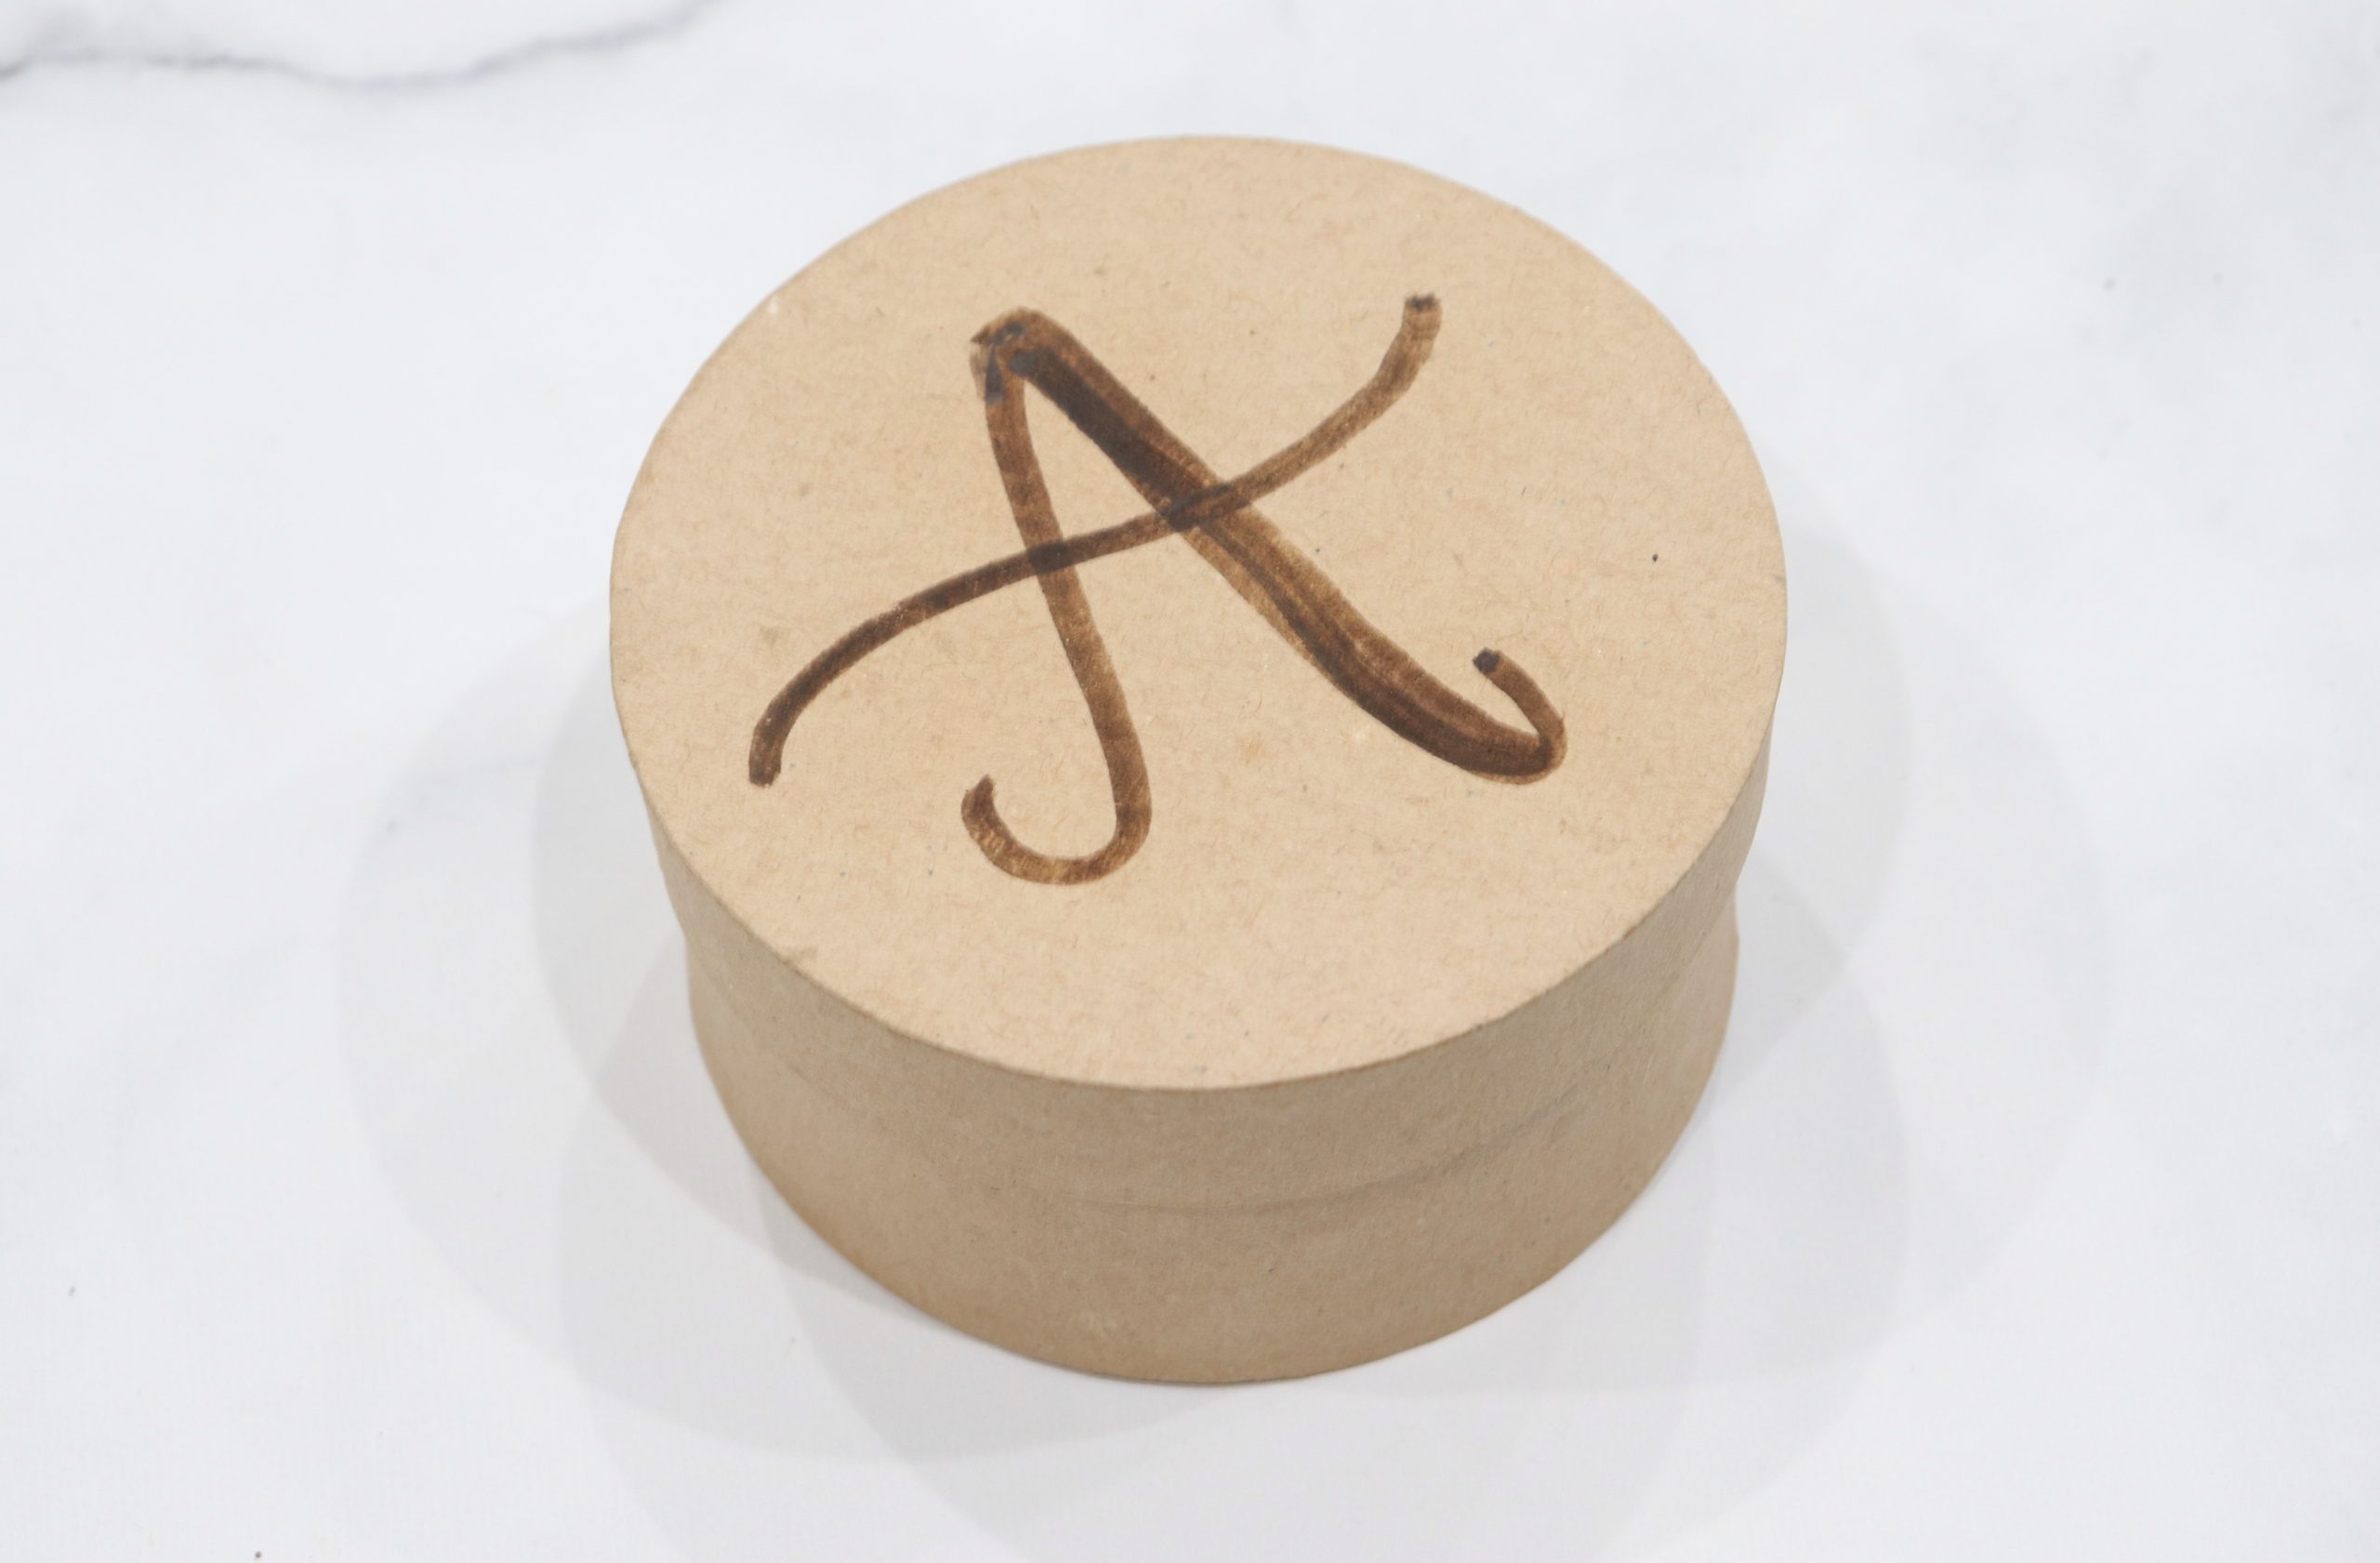
Step 2: Apply heat.
You’ll need a heat tool that is capable of heating to at least 300 degrees. Evenly apply heat, moving the heat source around and keeping it 6″ from the surface of your lid to keep it from burning or discoloring other spots. As the marker reacts to the heat, you’ll see the color of the monogram change. Your design is actually becoming burned into the surface of the paper mache!
If you don’t have a heat tool, you can place the lid in your oven and watch for the color change.
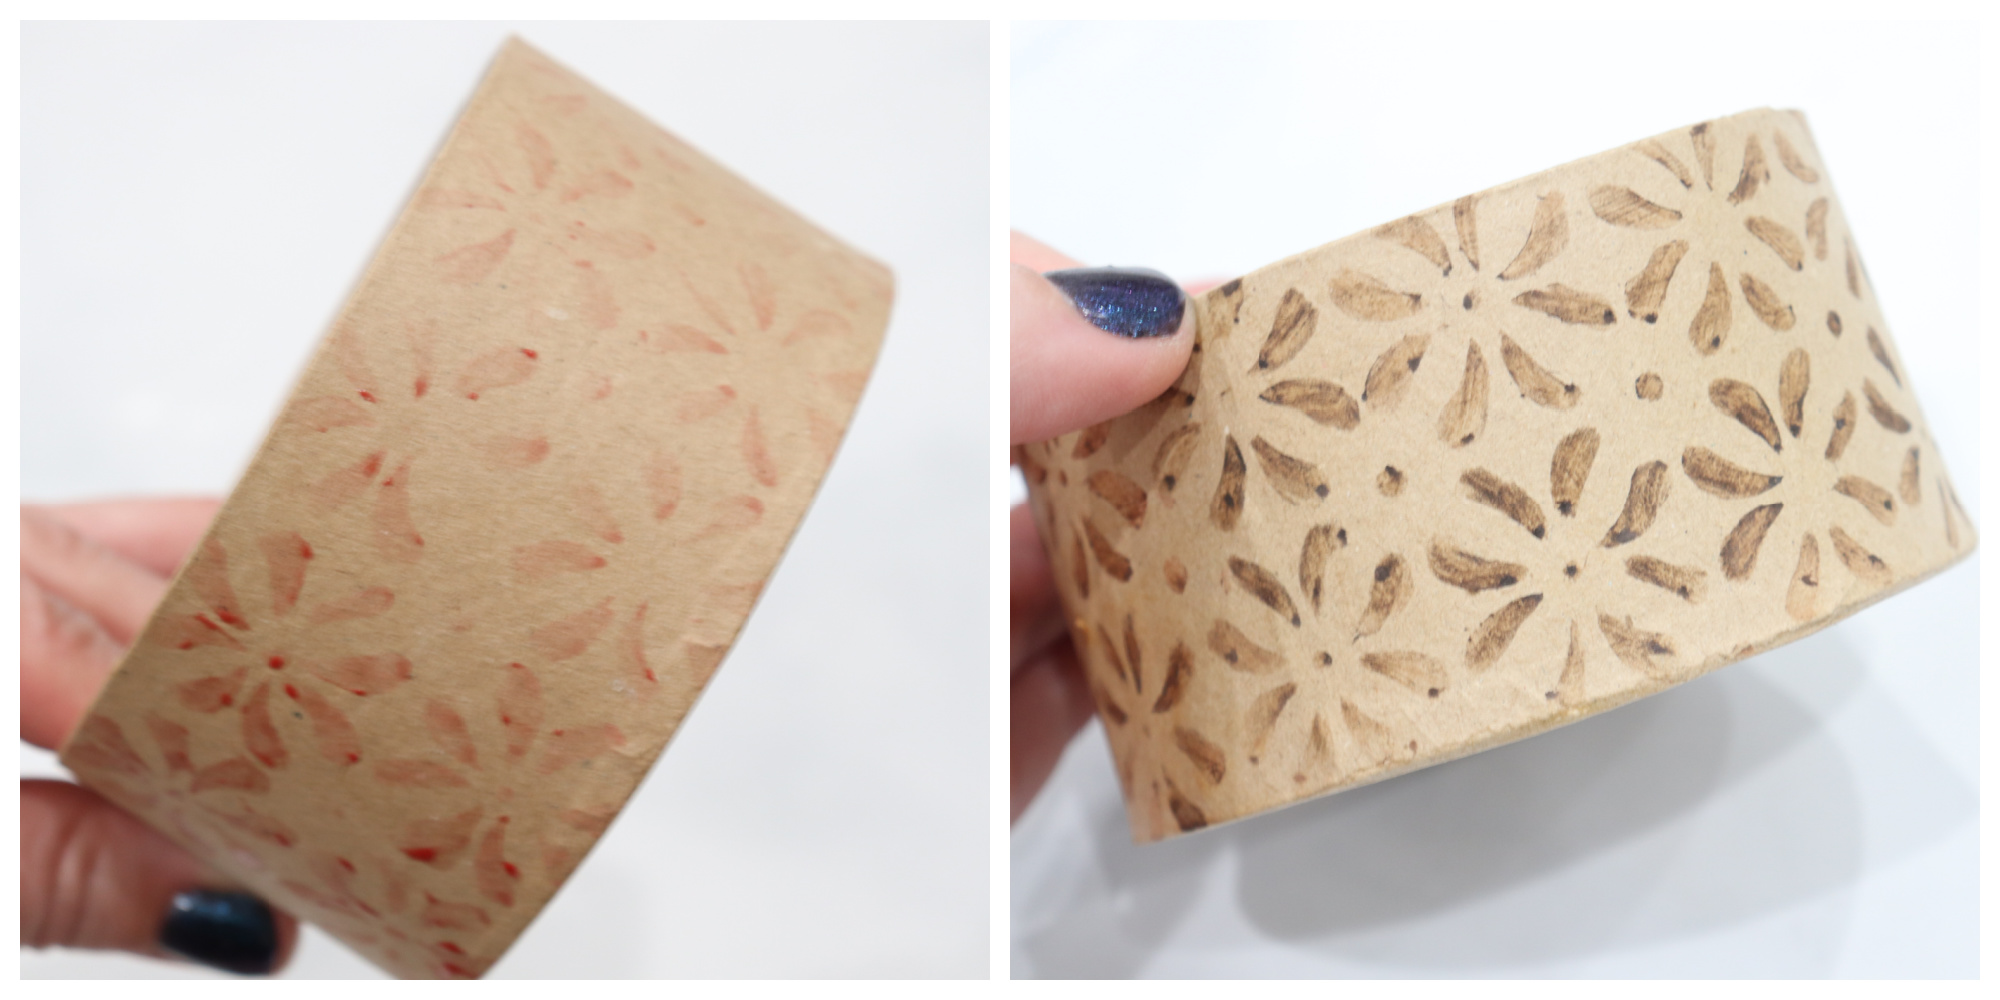
Step 3: Use the Scorch Marker to decorate the sides of the box.
You can draw freehand embellishments if you like, or you can use a stencil. If you opt for a stencil, just tape it to the box, then fill in the open spaces using the marker. Coloring them in with the bullet tip works, or you can also use the tiny sponge brush on the other end of the marker.
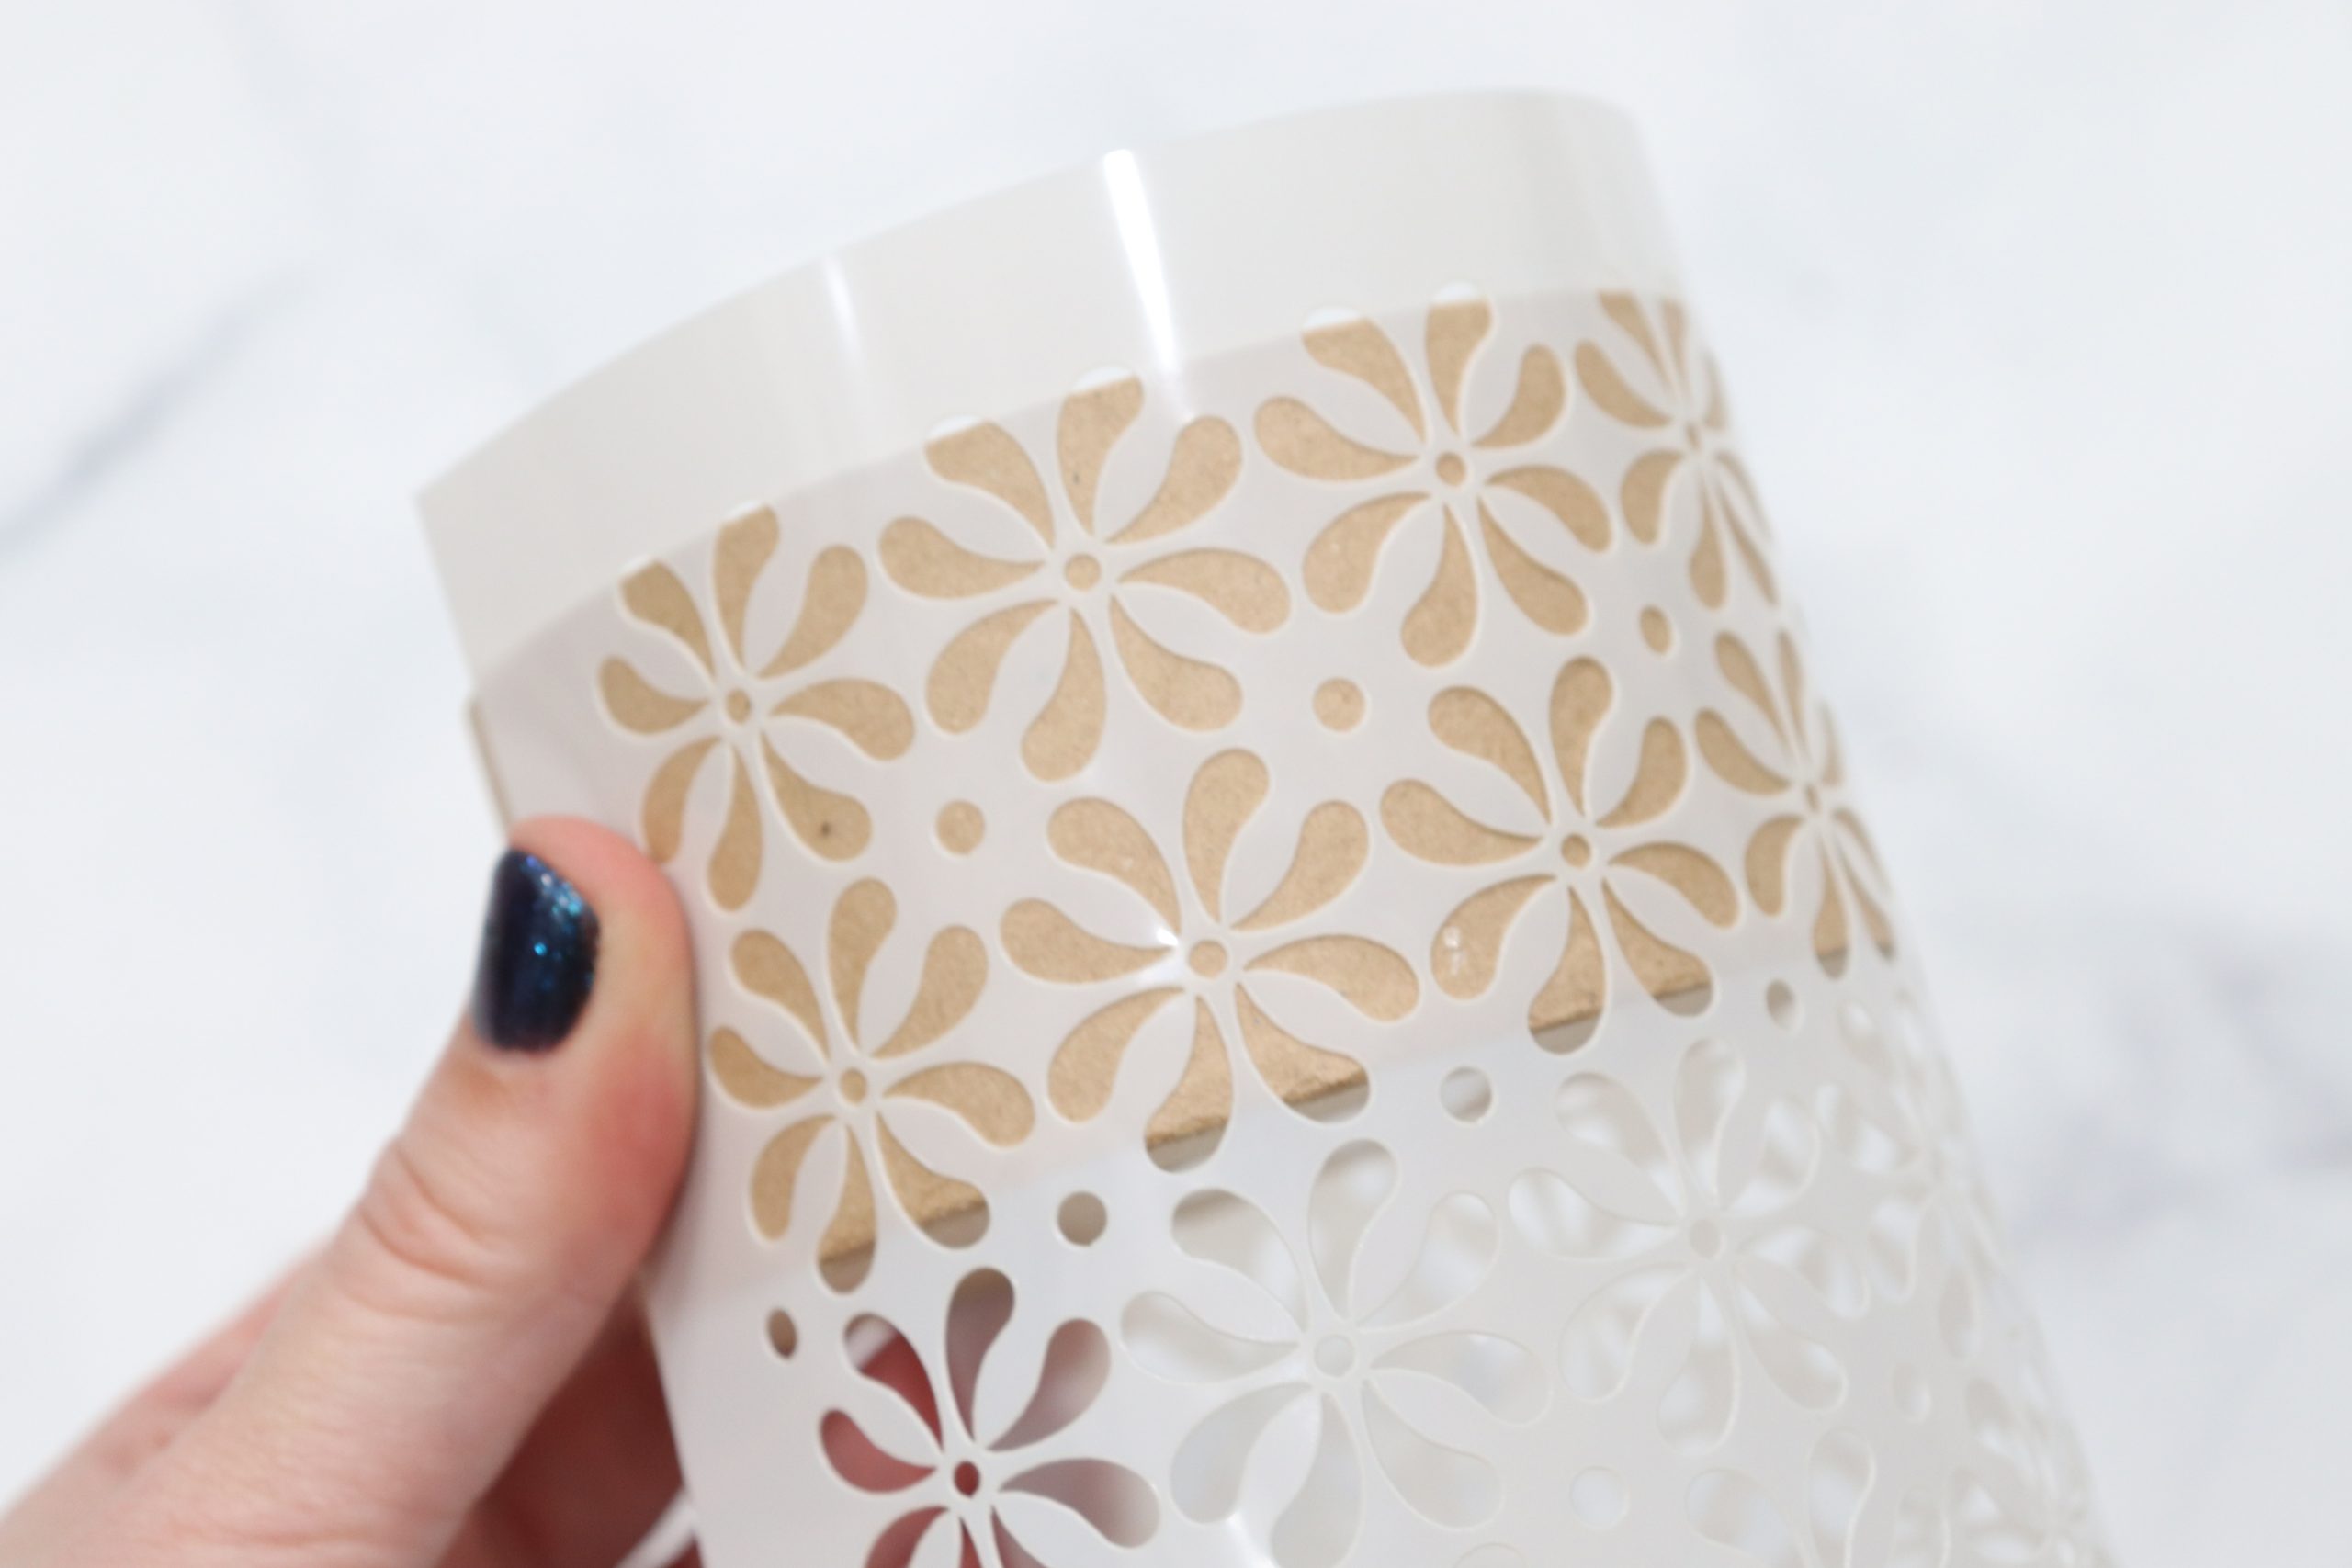
Step 4: Remove the stencil and heat the design.
Once again, the heat will react with the marker, causing the design to burn into the paper mache. The more heat you apply, the darker brown the design will be.
It’s that simple! Now, you have a beautiful, personalized box that can be used for holding trinkets, jewelry, or whatever you like. These boxes also make a great gift, and they’re really inexpensive to create.
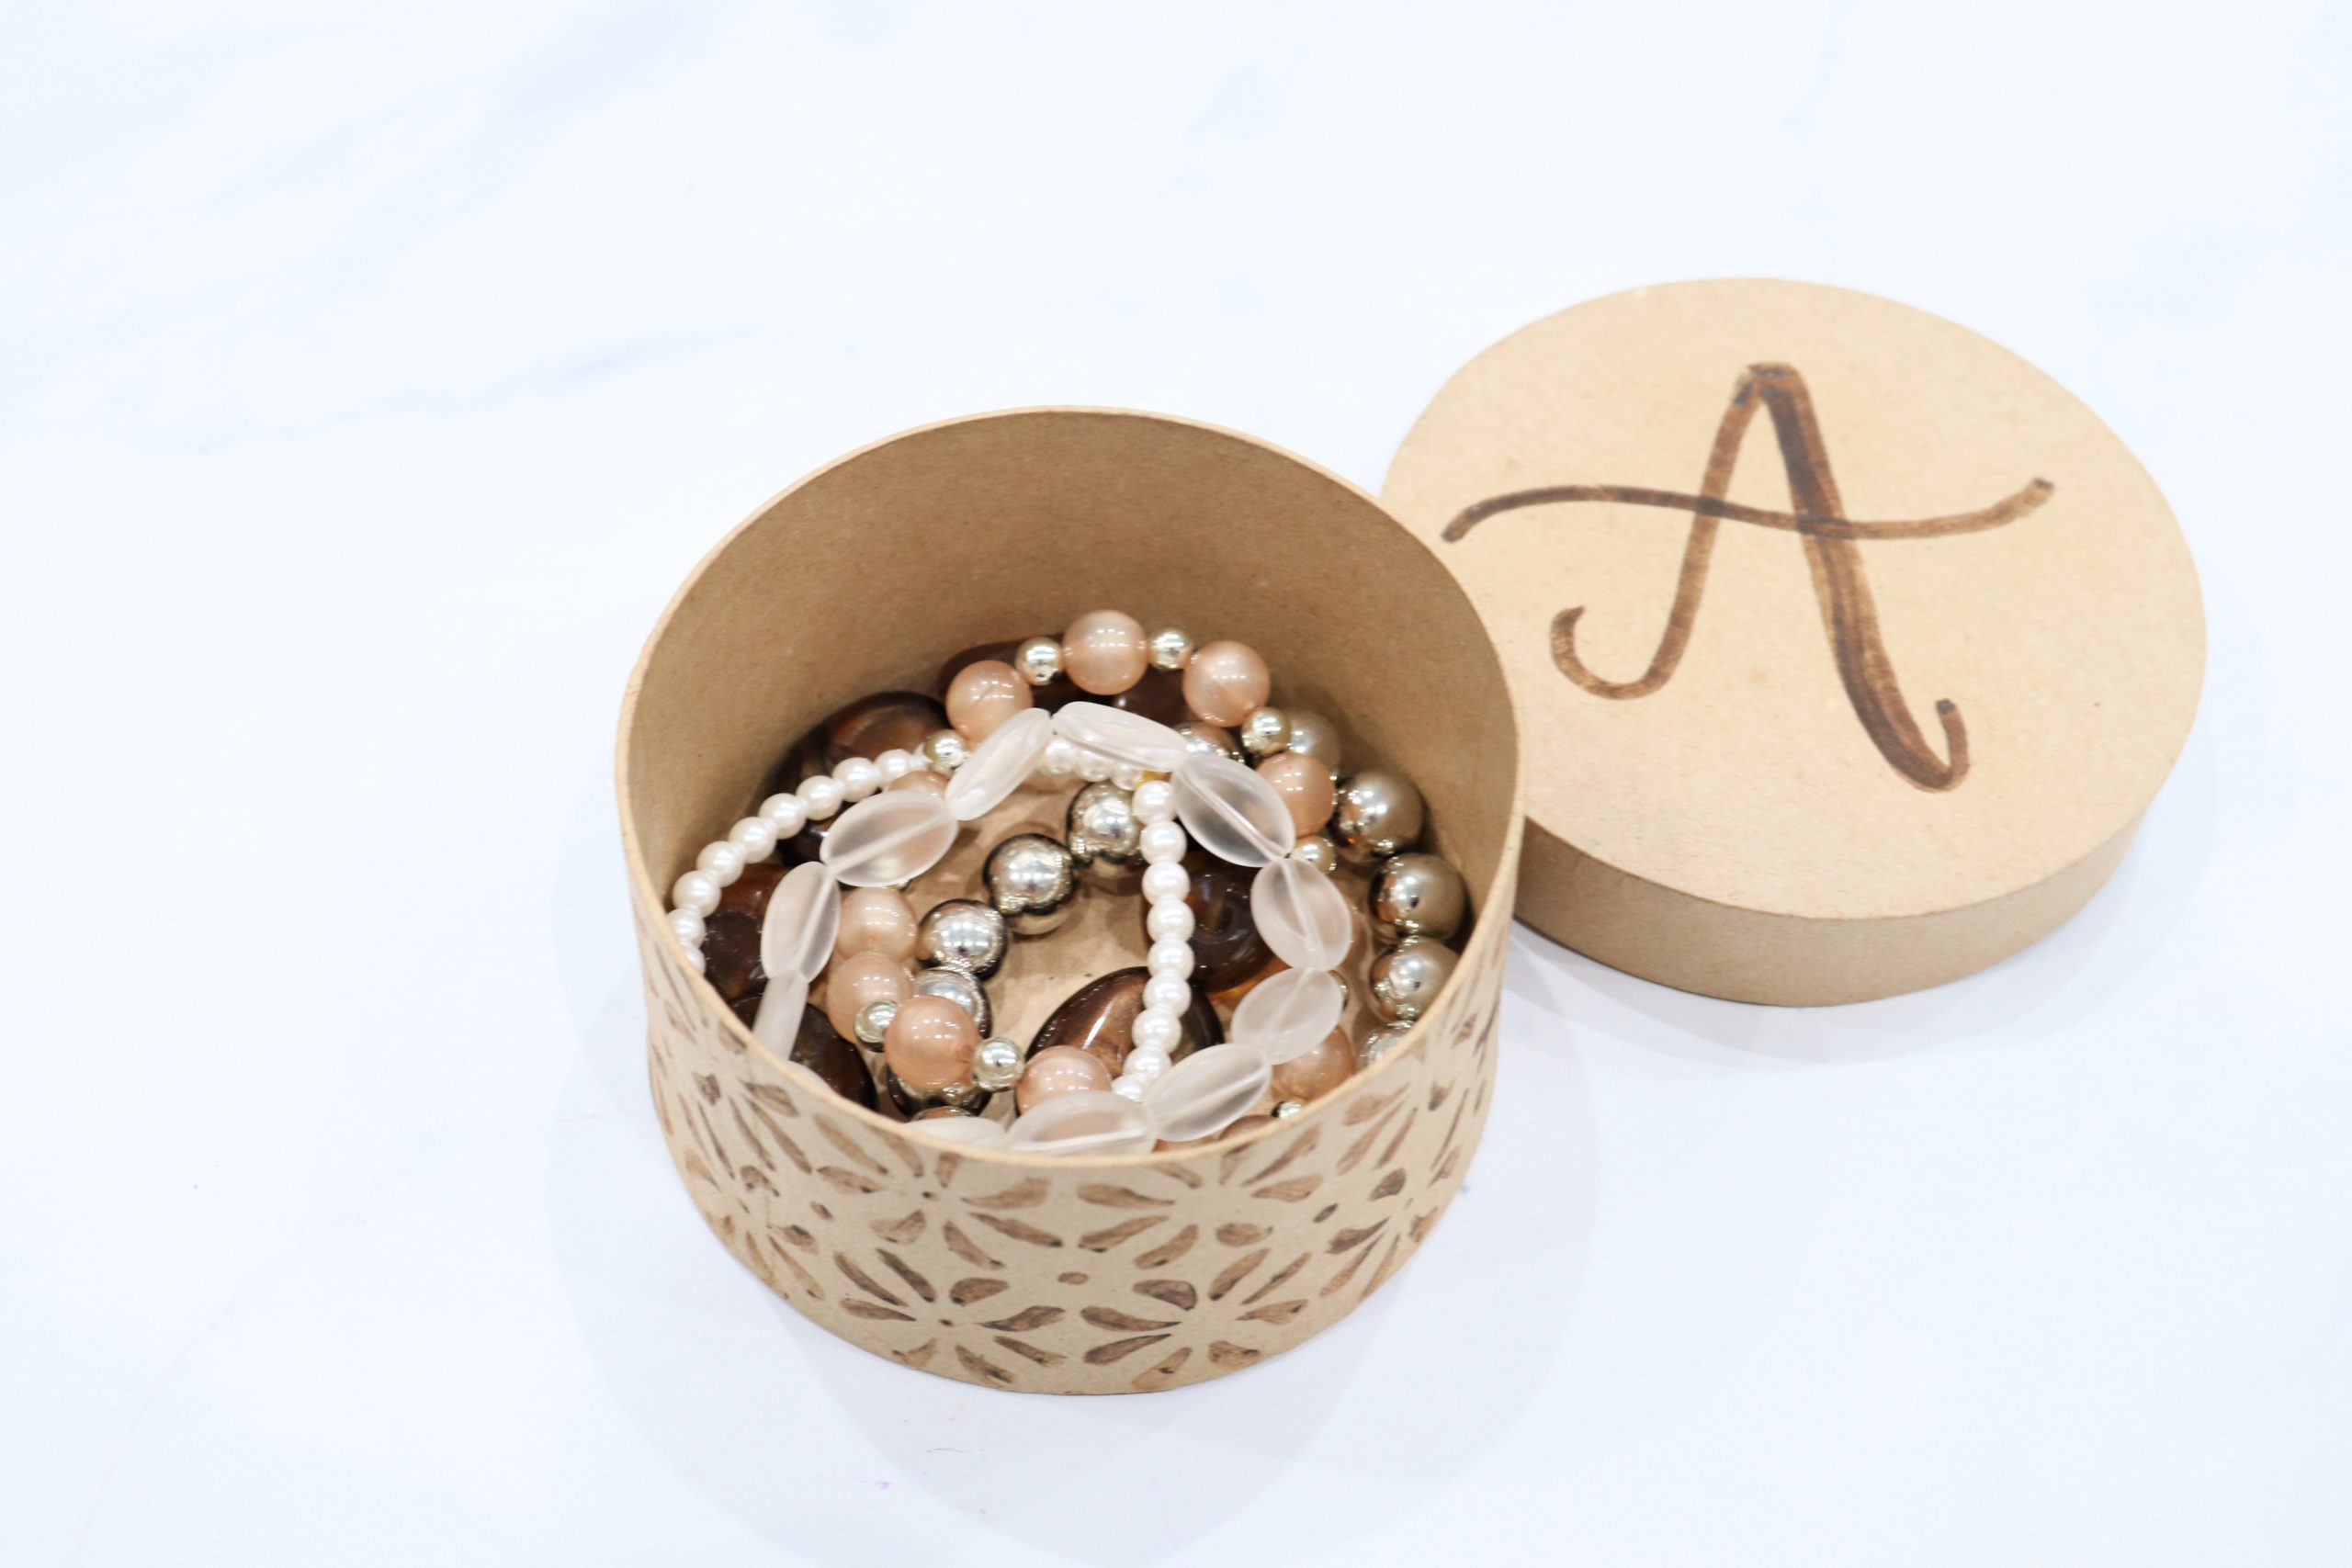
I love the way mine turned out, and I’m looking forward to making more to gift to friends. Just think how fun it would be to fill the box with candy and love notes and give it to your special someone (or your kiddos) for Valentine’s Day!
Isn’t it so much fun to take hand lettering “off the page” and onto all kinds of surfaces? I love how the Scorch Marker allows me to use my lettering for wood burning on surfaces like unfinished wood and paper mache. (It also gets bonus points for being odor-free, non-toxic, and safe for kids to use!) For more info and to order one so you can make projects like this, check out the Scorch Marker website.
And, of course, for 25 more project ideas to take your lettering off of paper and onto all types of fun surfaces, check out my newest book, Hand Lettering Off the Page!
If you try this project, I’d love to see how it turns out. Be sure to share your photos of this, or any of your latest creations, in the Amy Latta & Friends Facebook Group so we can all be inspired. It’s also a great place to ask questions and interact with lots of other creative friends. Hope to see you there.