Knights and Dragons Party: Knight Tunics and Shields
One of my (Erin) favorite details of the party was giving the boys the chance to “look the part” as they completed their knight training. These tunics and shields were a hit, and make great dress up clothes for later!
Materials:
For Both:
-Felt-one for a base color (I chose gray and used around 3-4 yards), and whatever colors you want to use as accents (I chose burgundy and gold and just used individual sheets)
– Ribbon-I chose gray
-Spray Adhesive (I used Scotch Super 77)
-E6000
For the Shield:
-Sewing Pins
-Foam Kick Board (I got mine at the Dollar Tree)
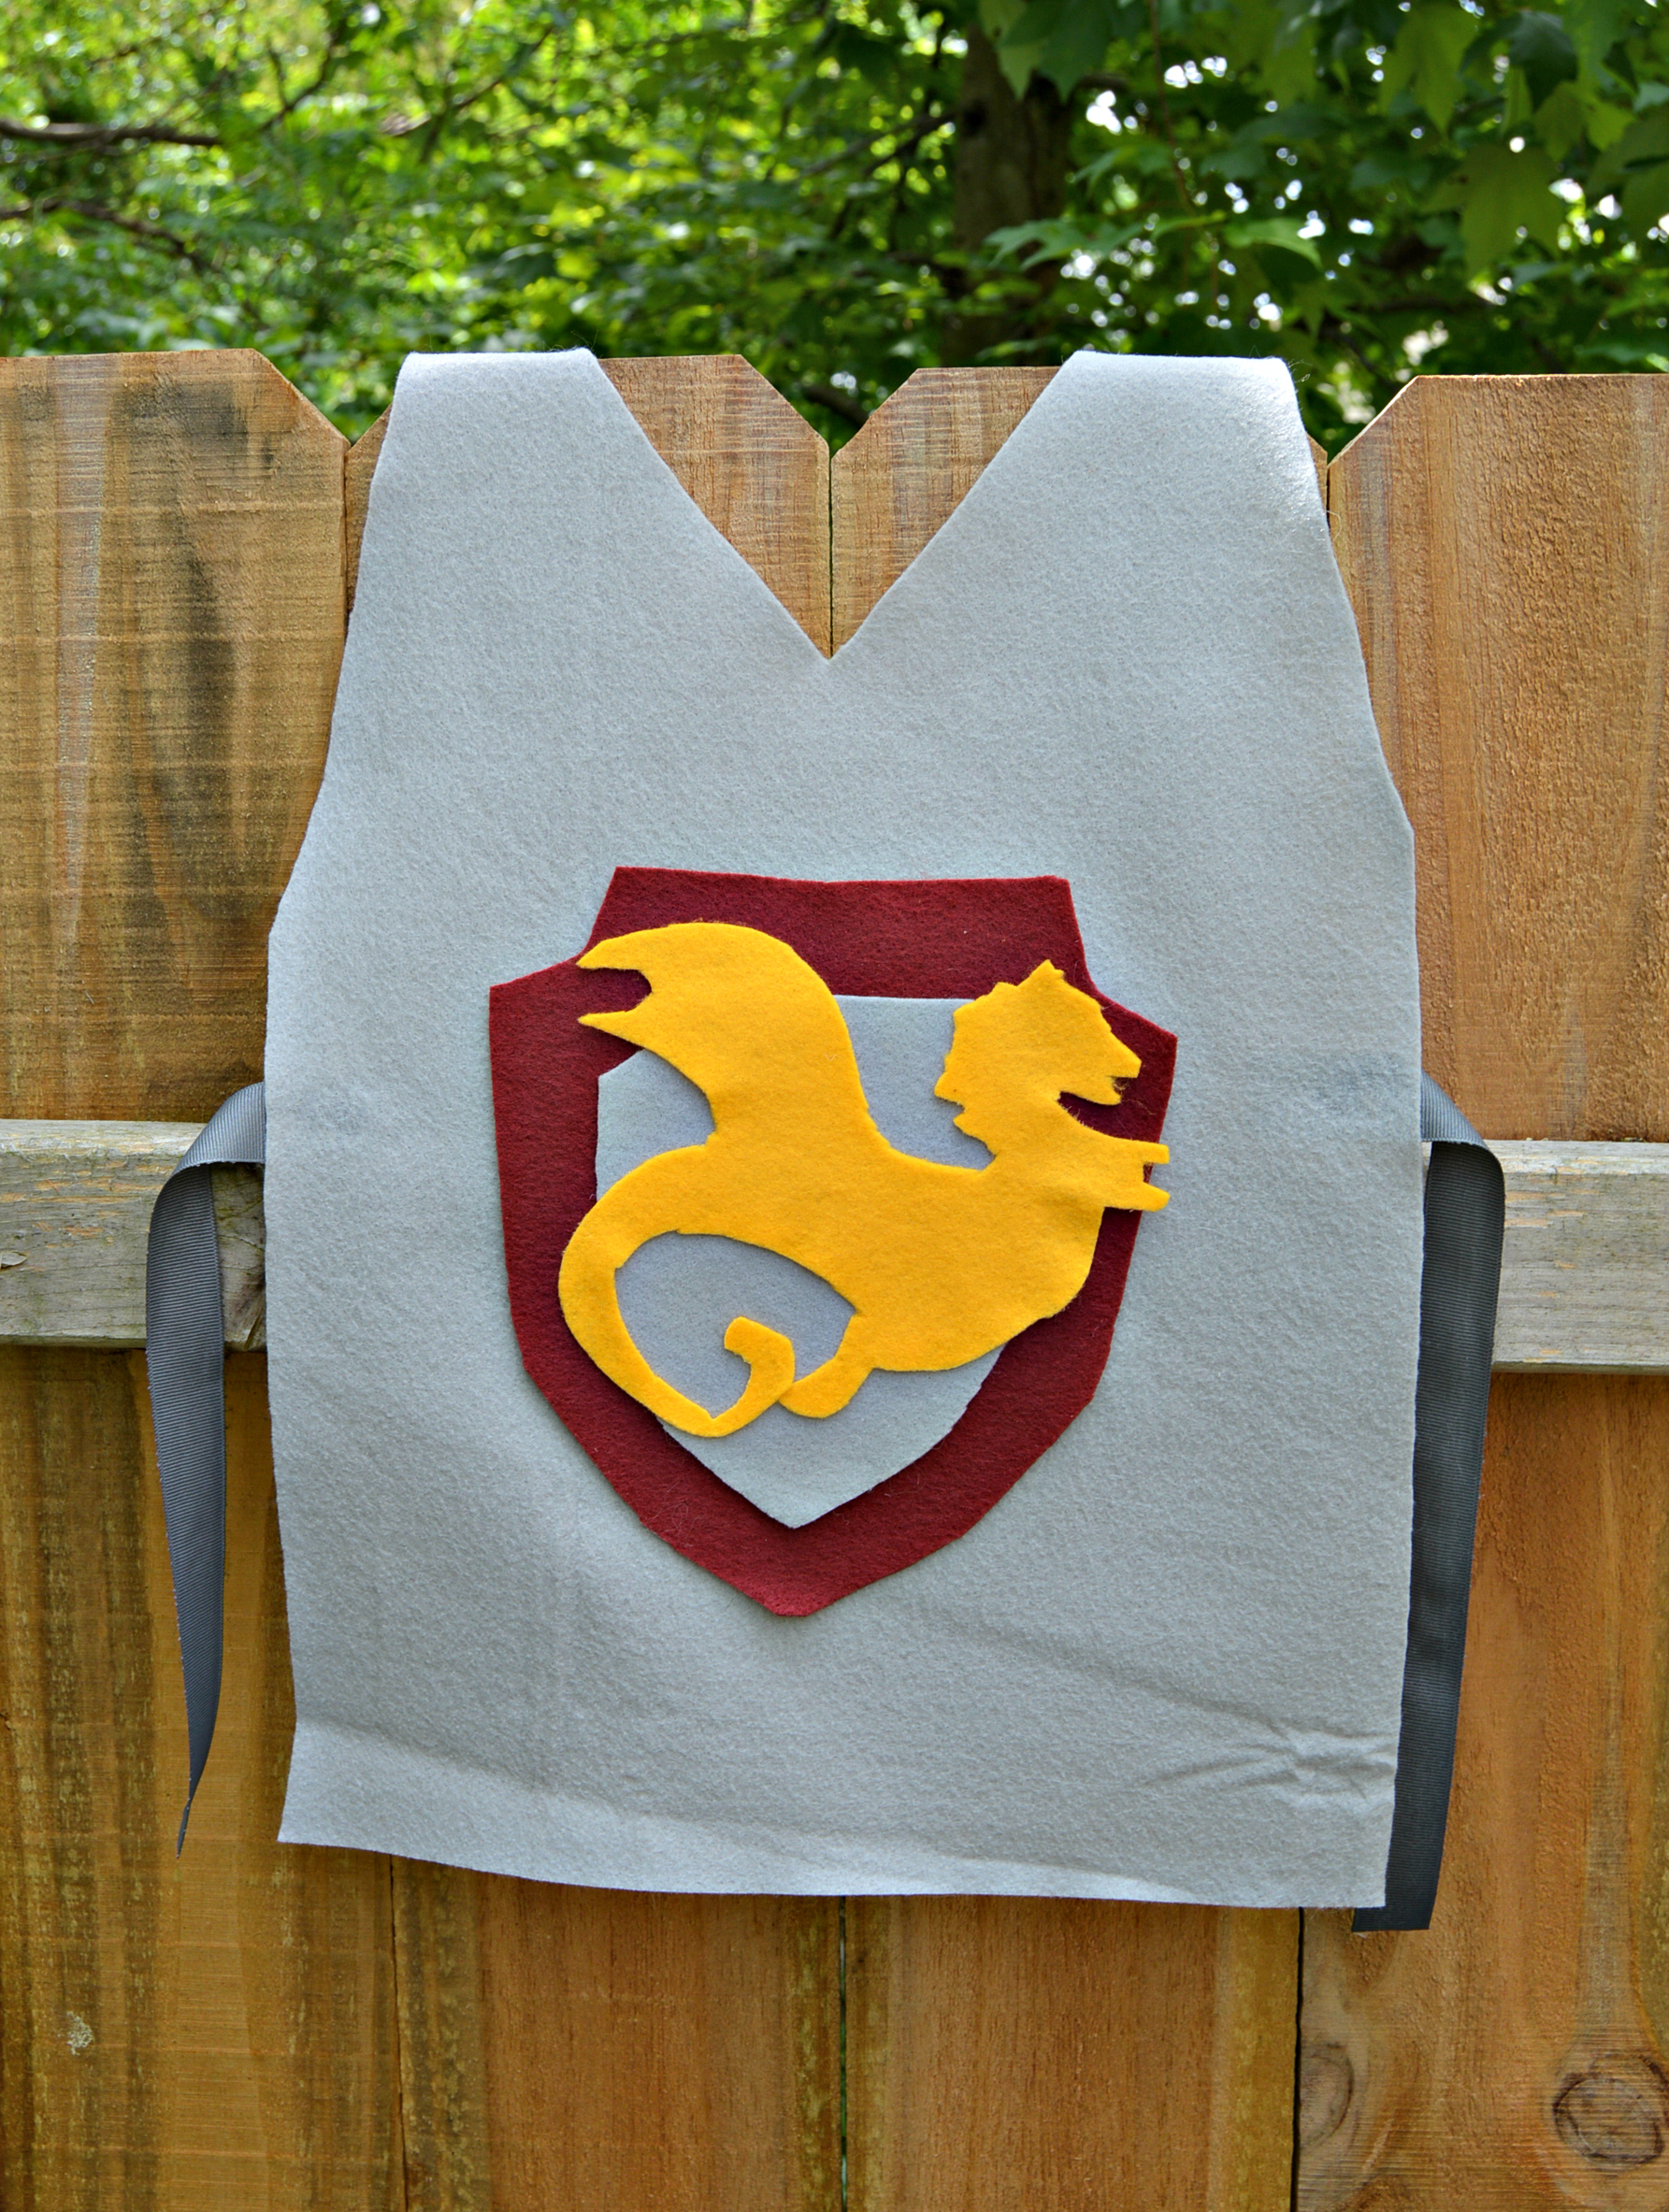
Tunics
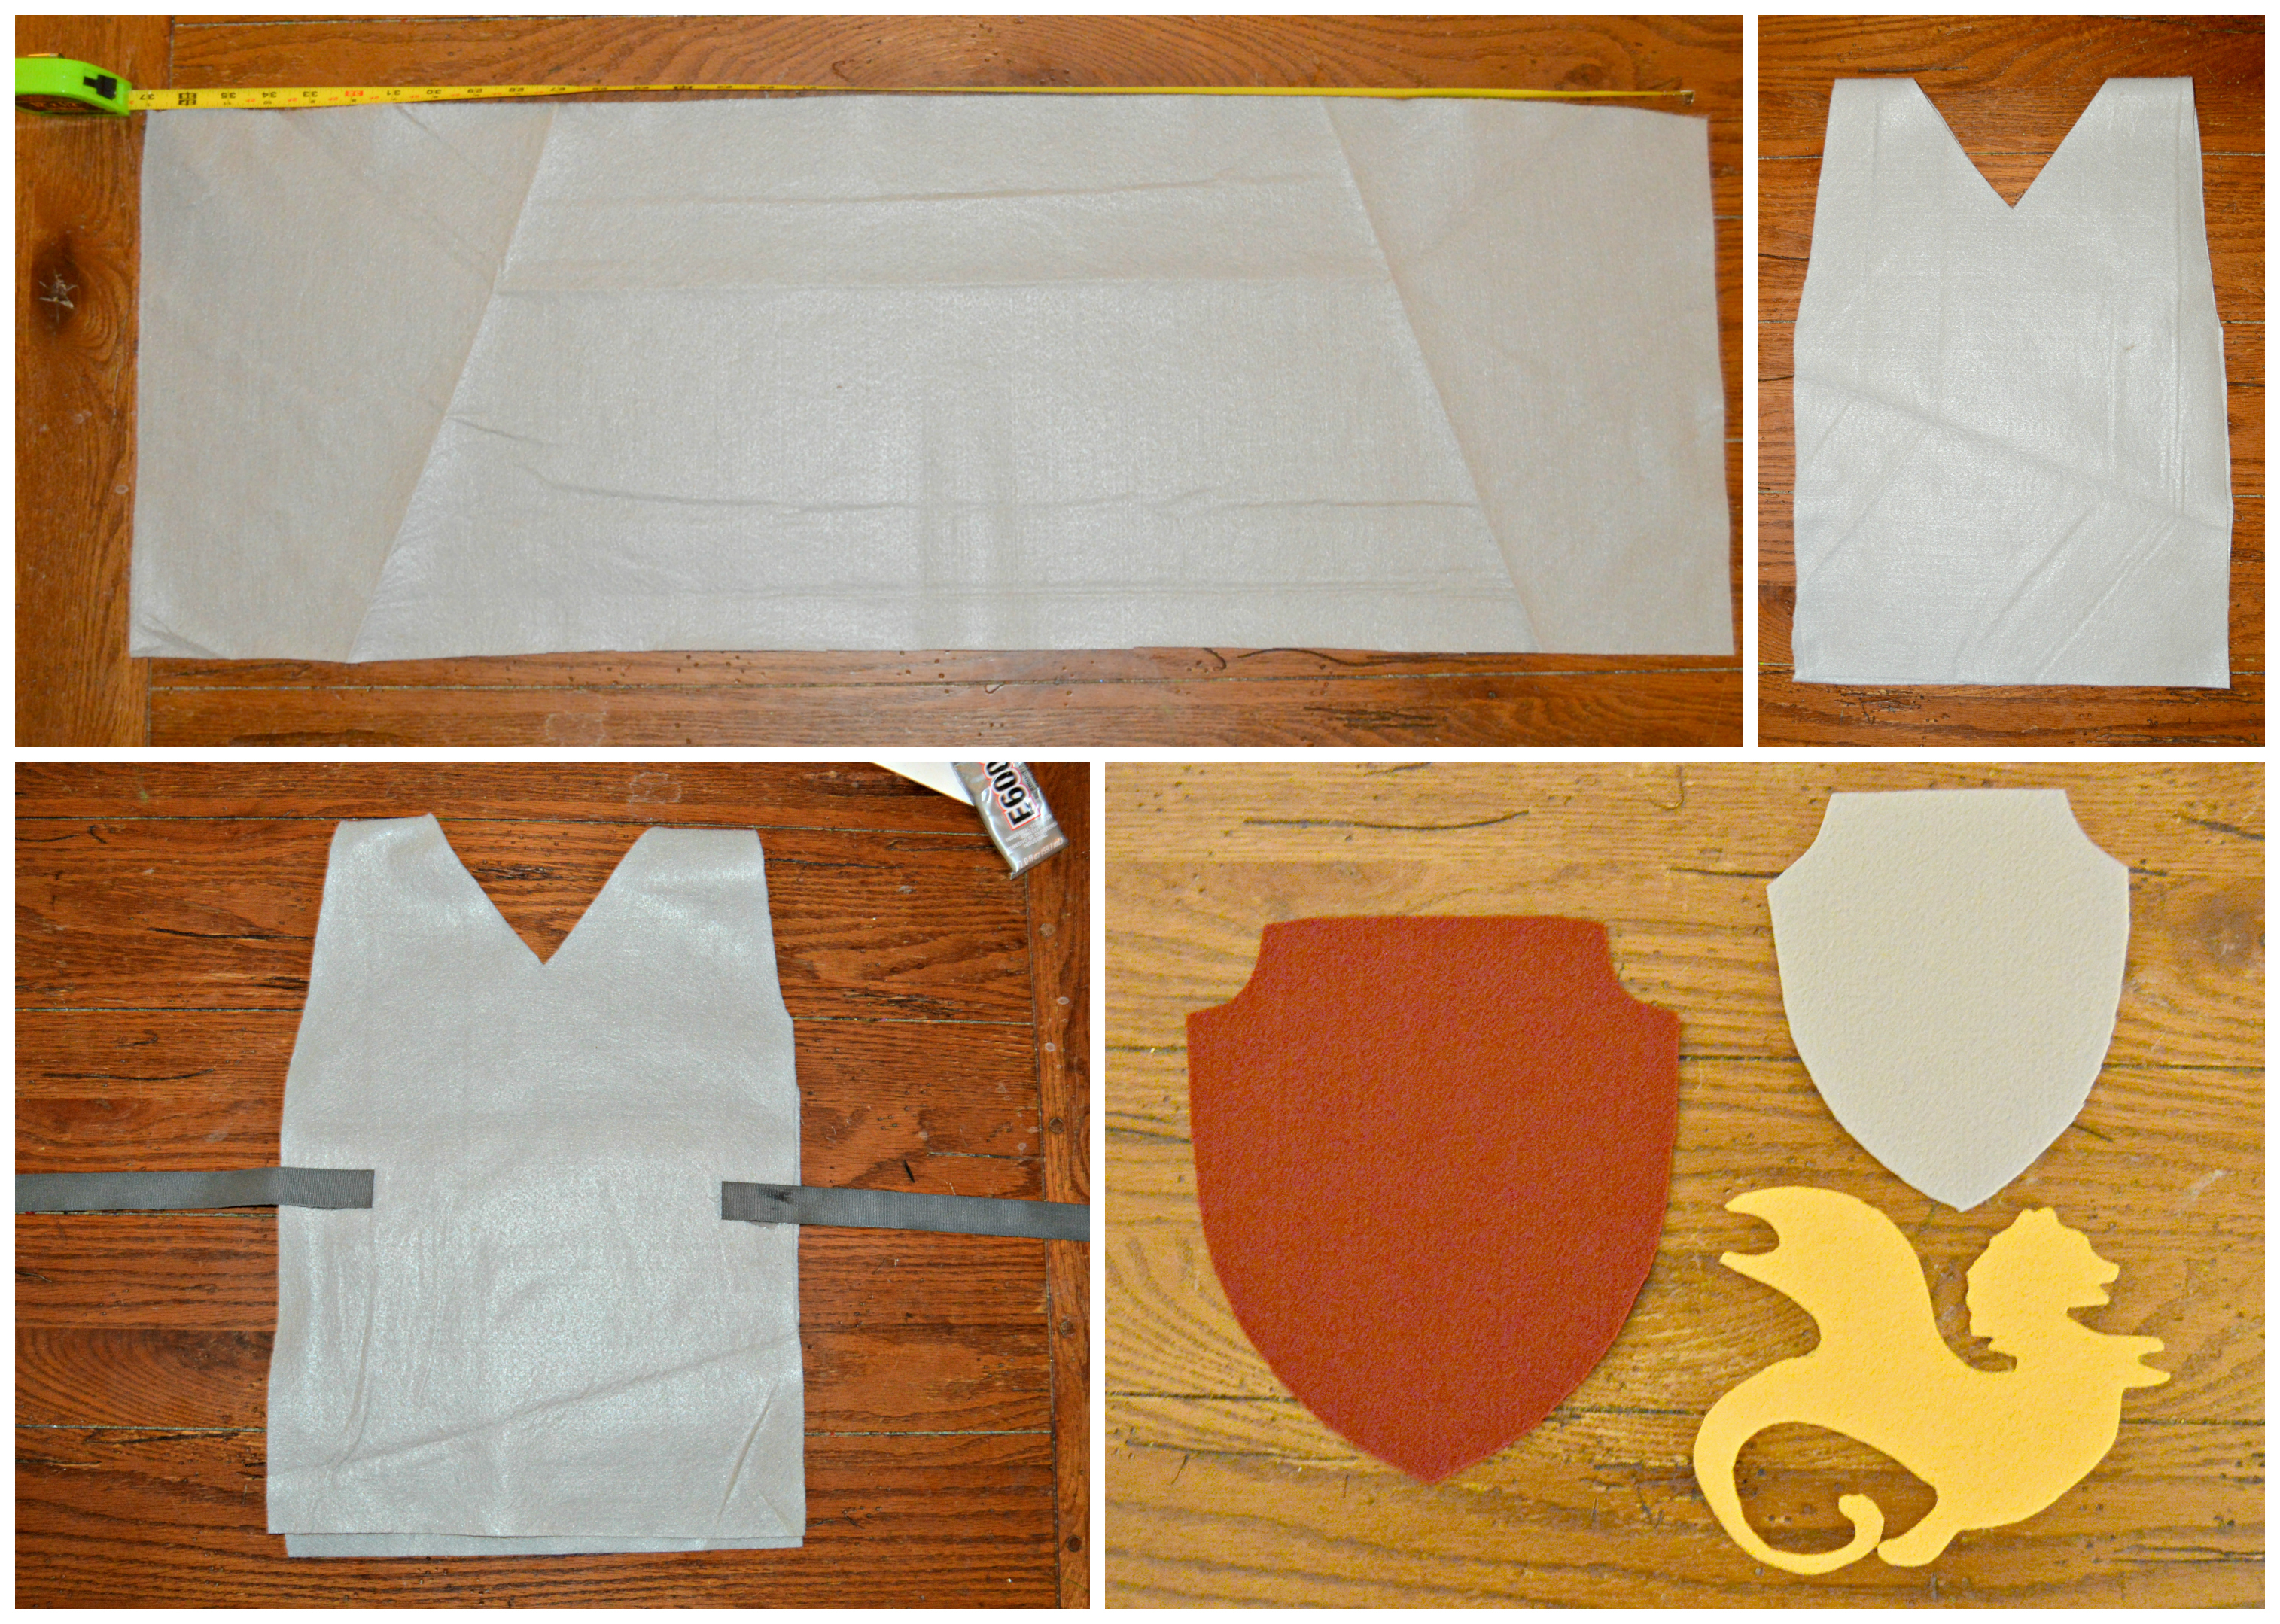
The first thing I tackled were the tunics, mostly because I was able to go off a pattern by Averyboo Arts. It was as simple as cut, cut, cut. I attached the ribbon with E6000 and let that dry overnight. I designed a quick stencil for my emblem (I kept with the dragon theme), and used the spray adhesive to attach the felt pieces to the tunic. I was able to cut these in one evening, and glue during another evening. These came together VERY quickly!
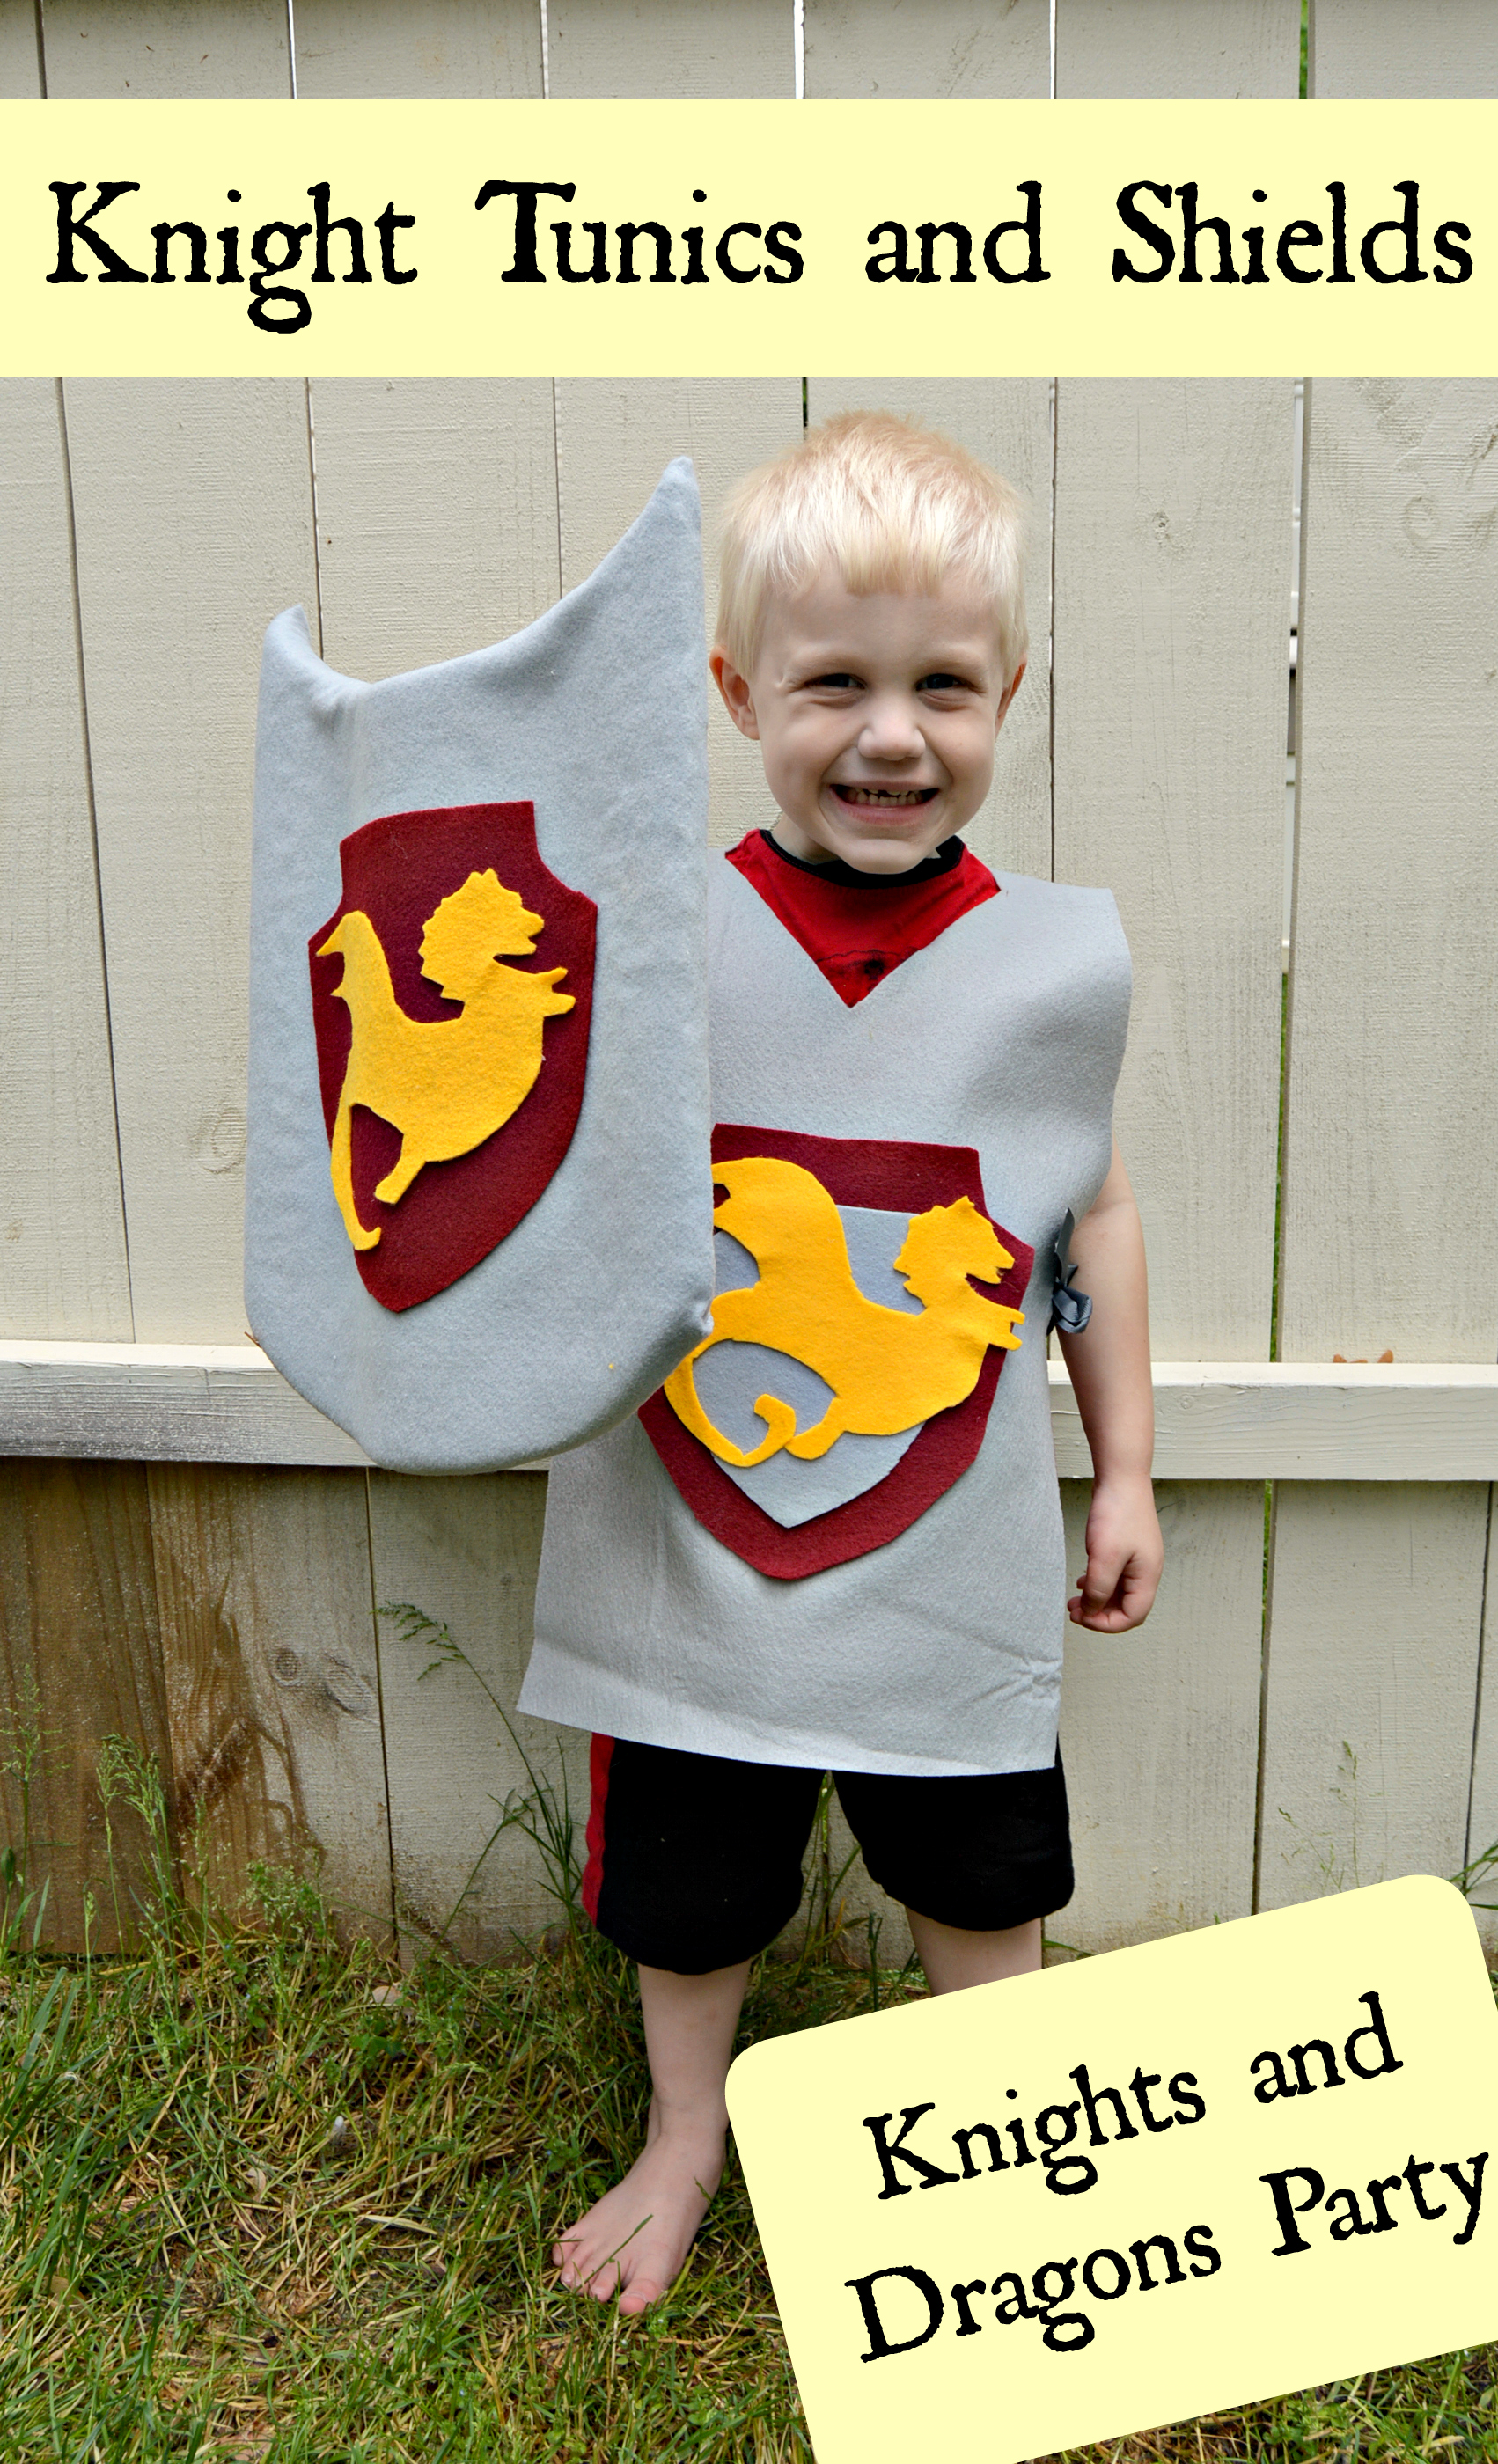
Bam Bam had to model them of course =)

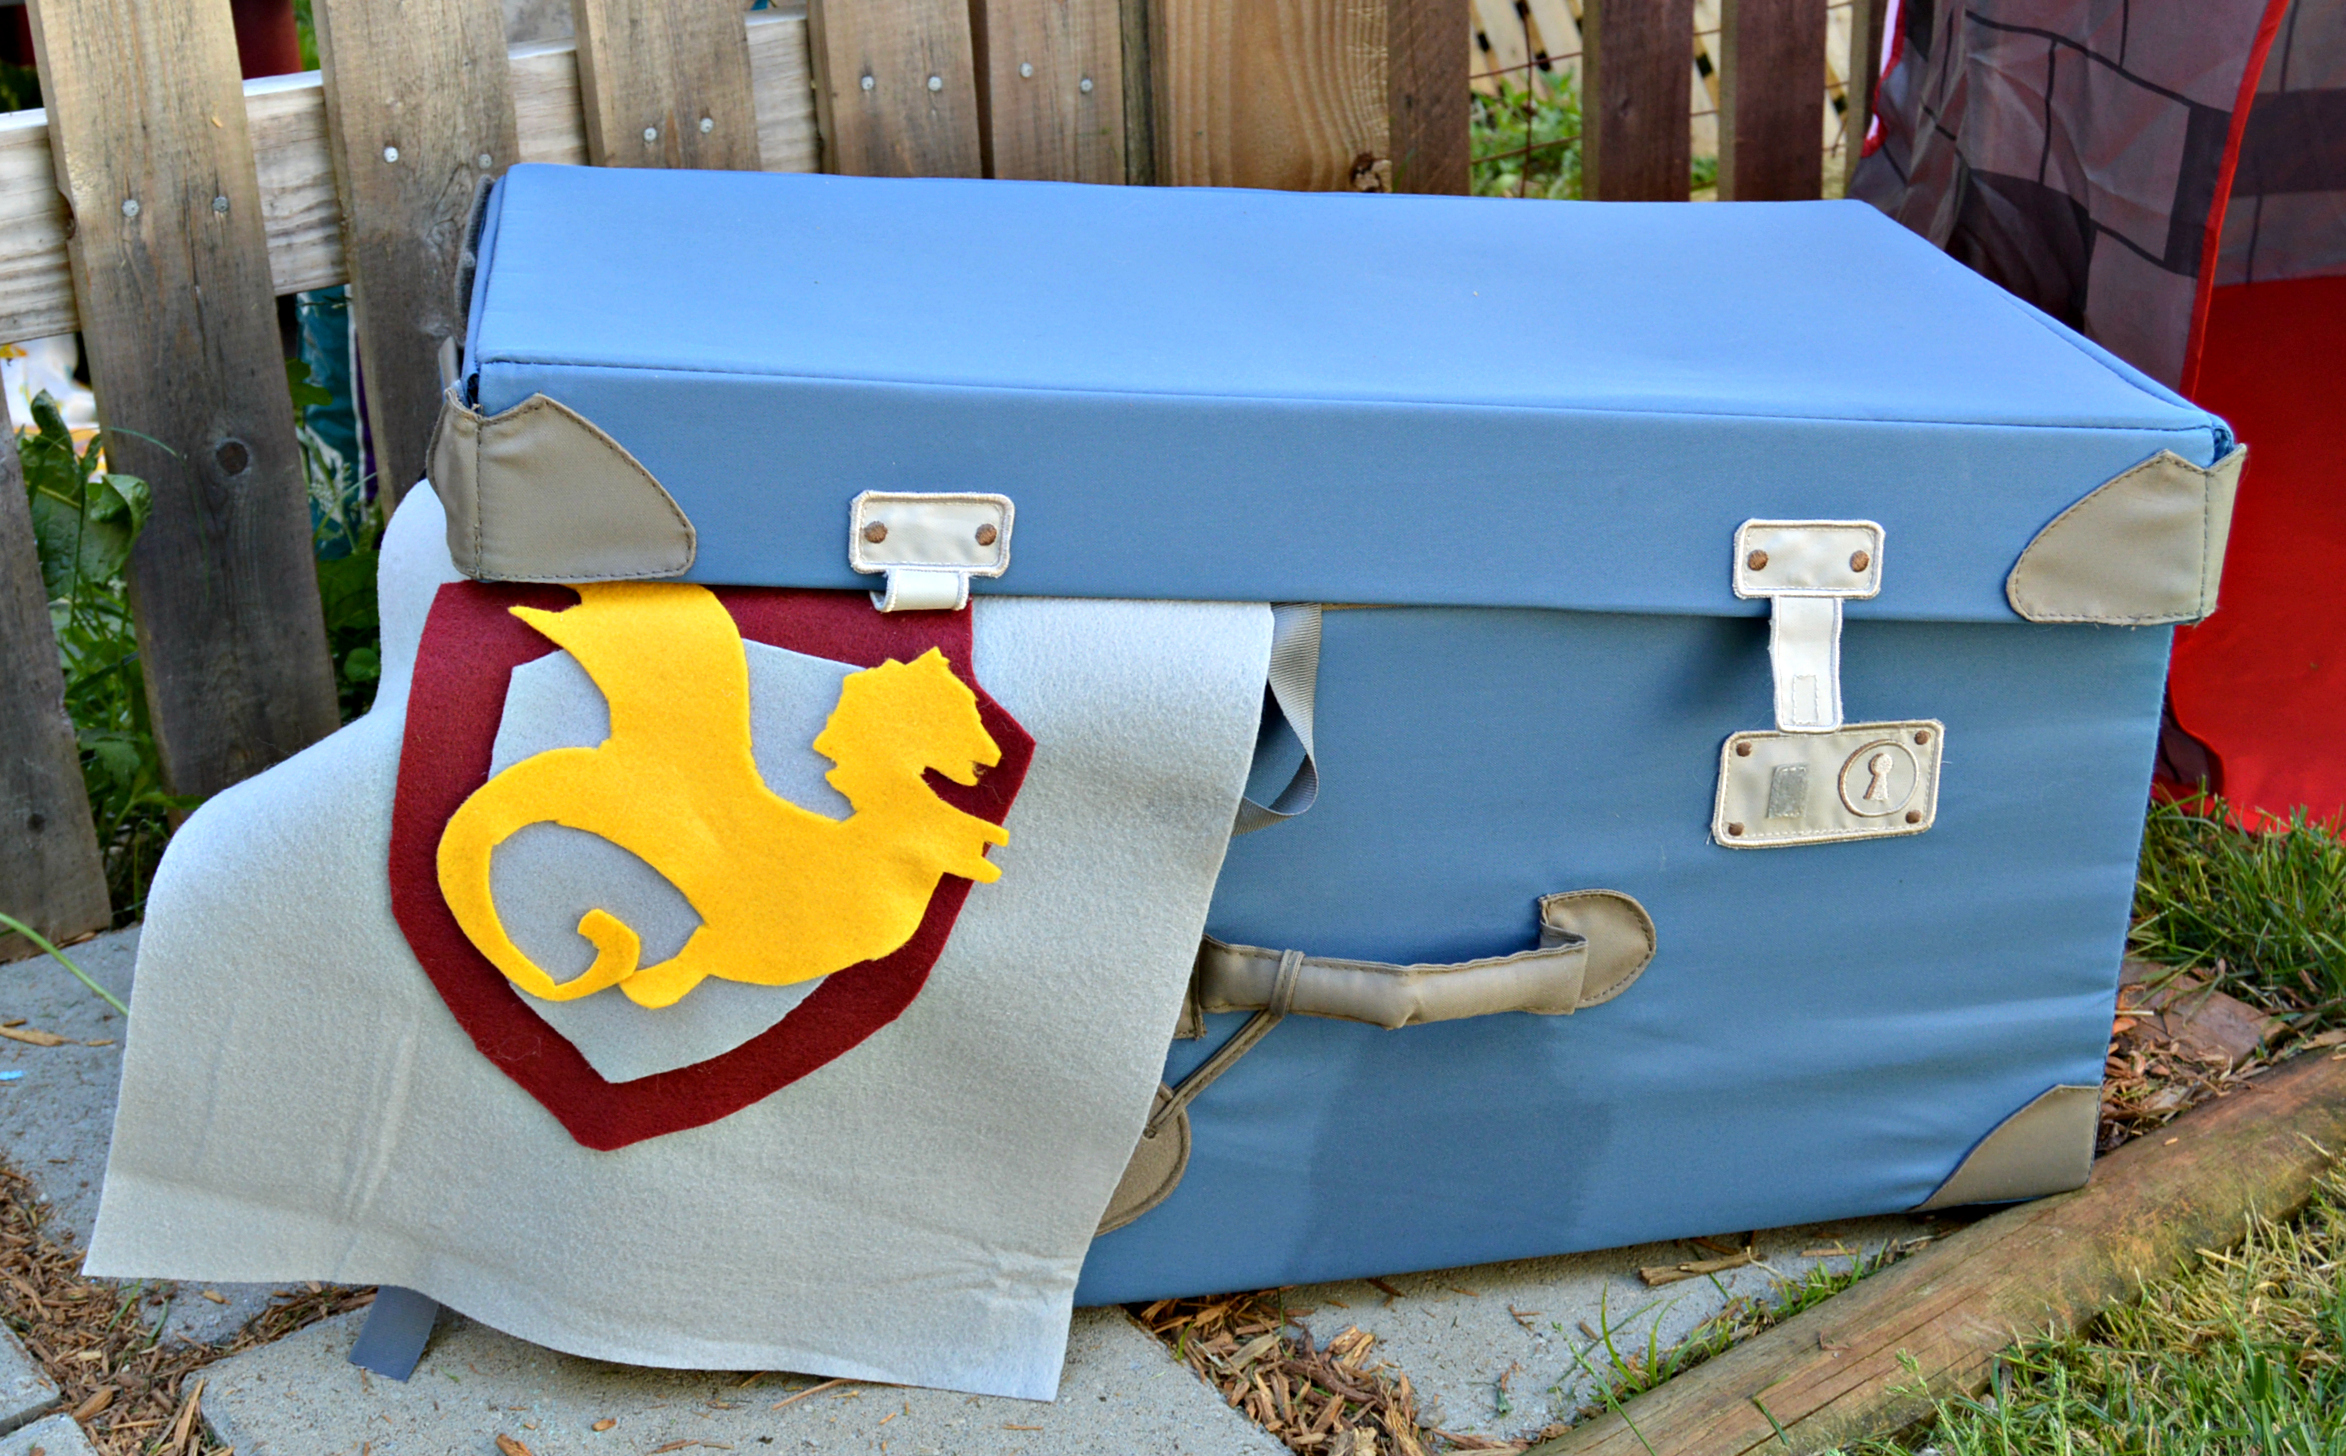
I love that our Ikea trunk was the perfect home for the tunics before the boys came!
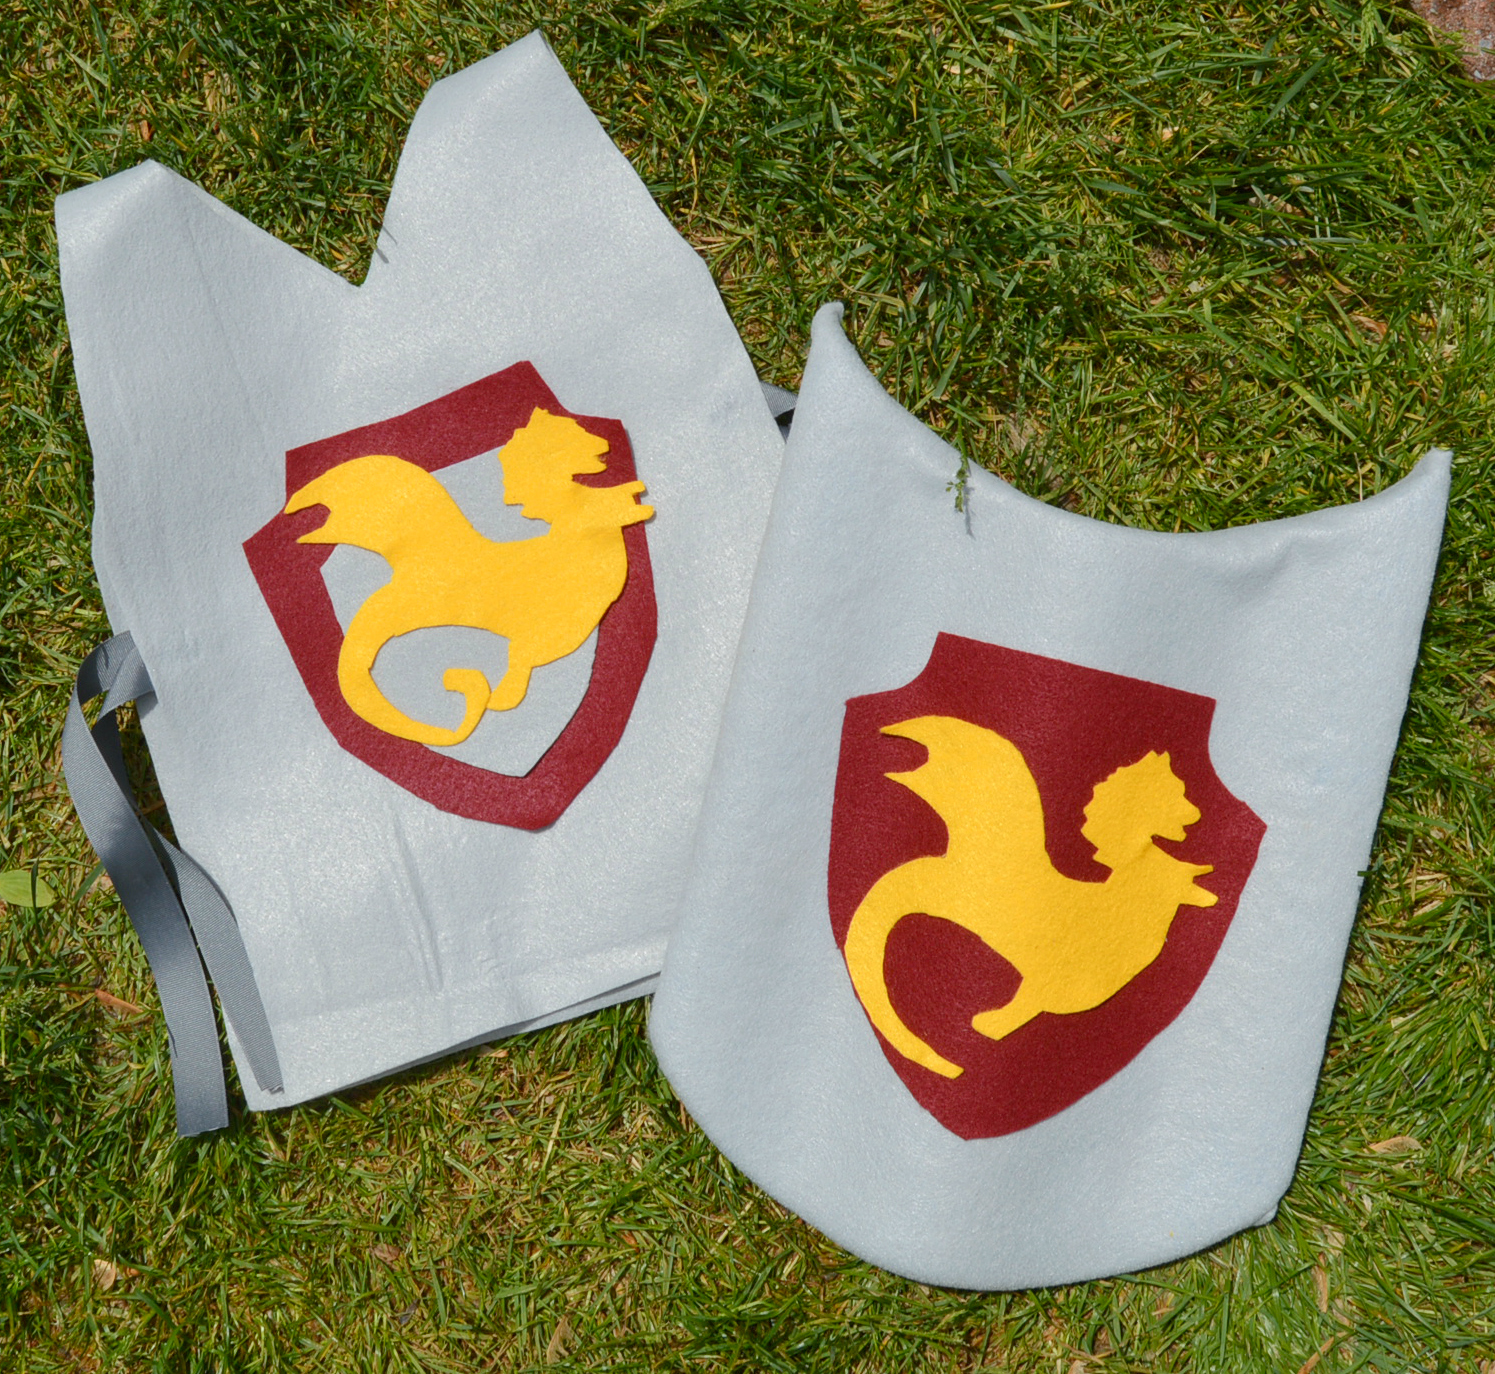
Shields
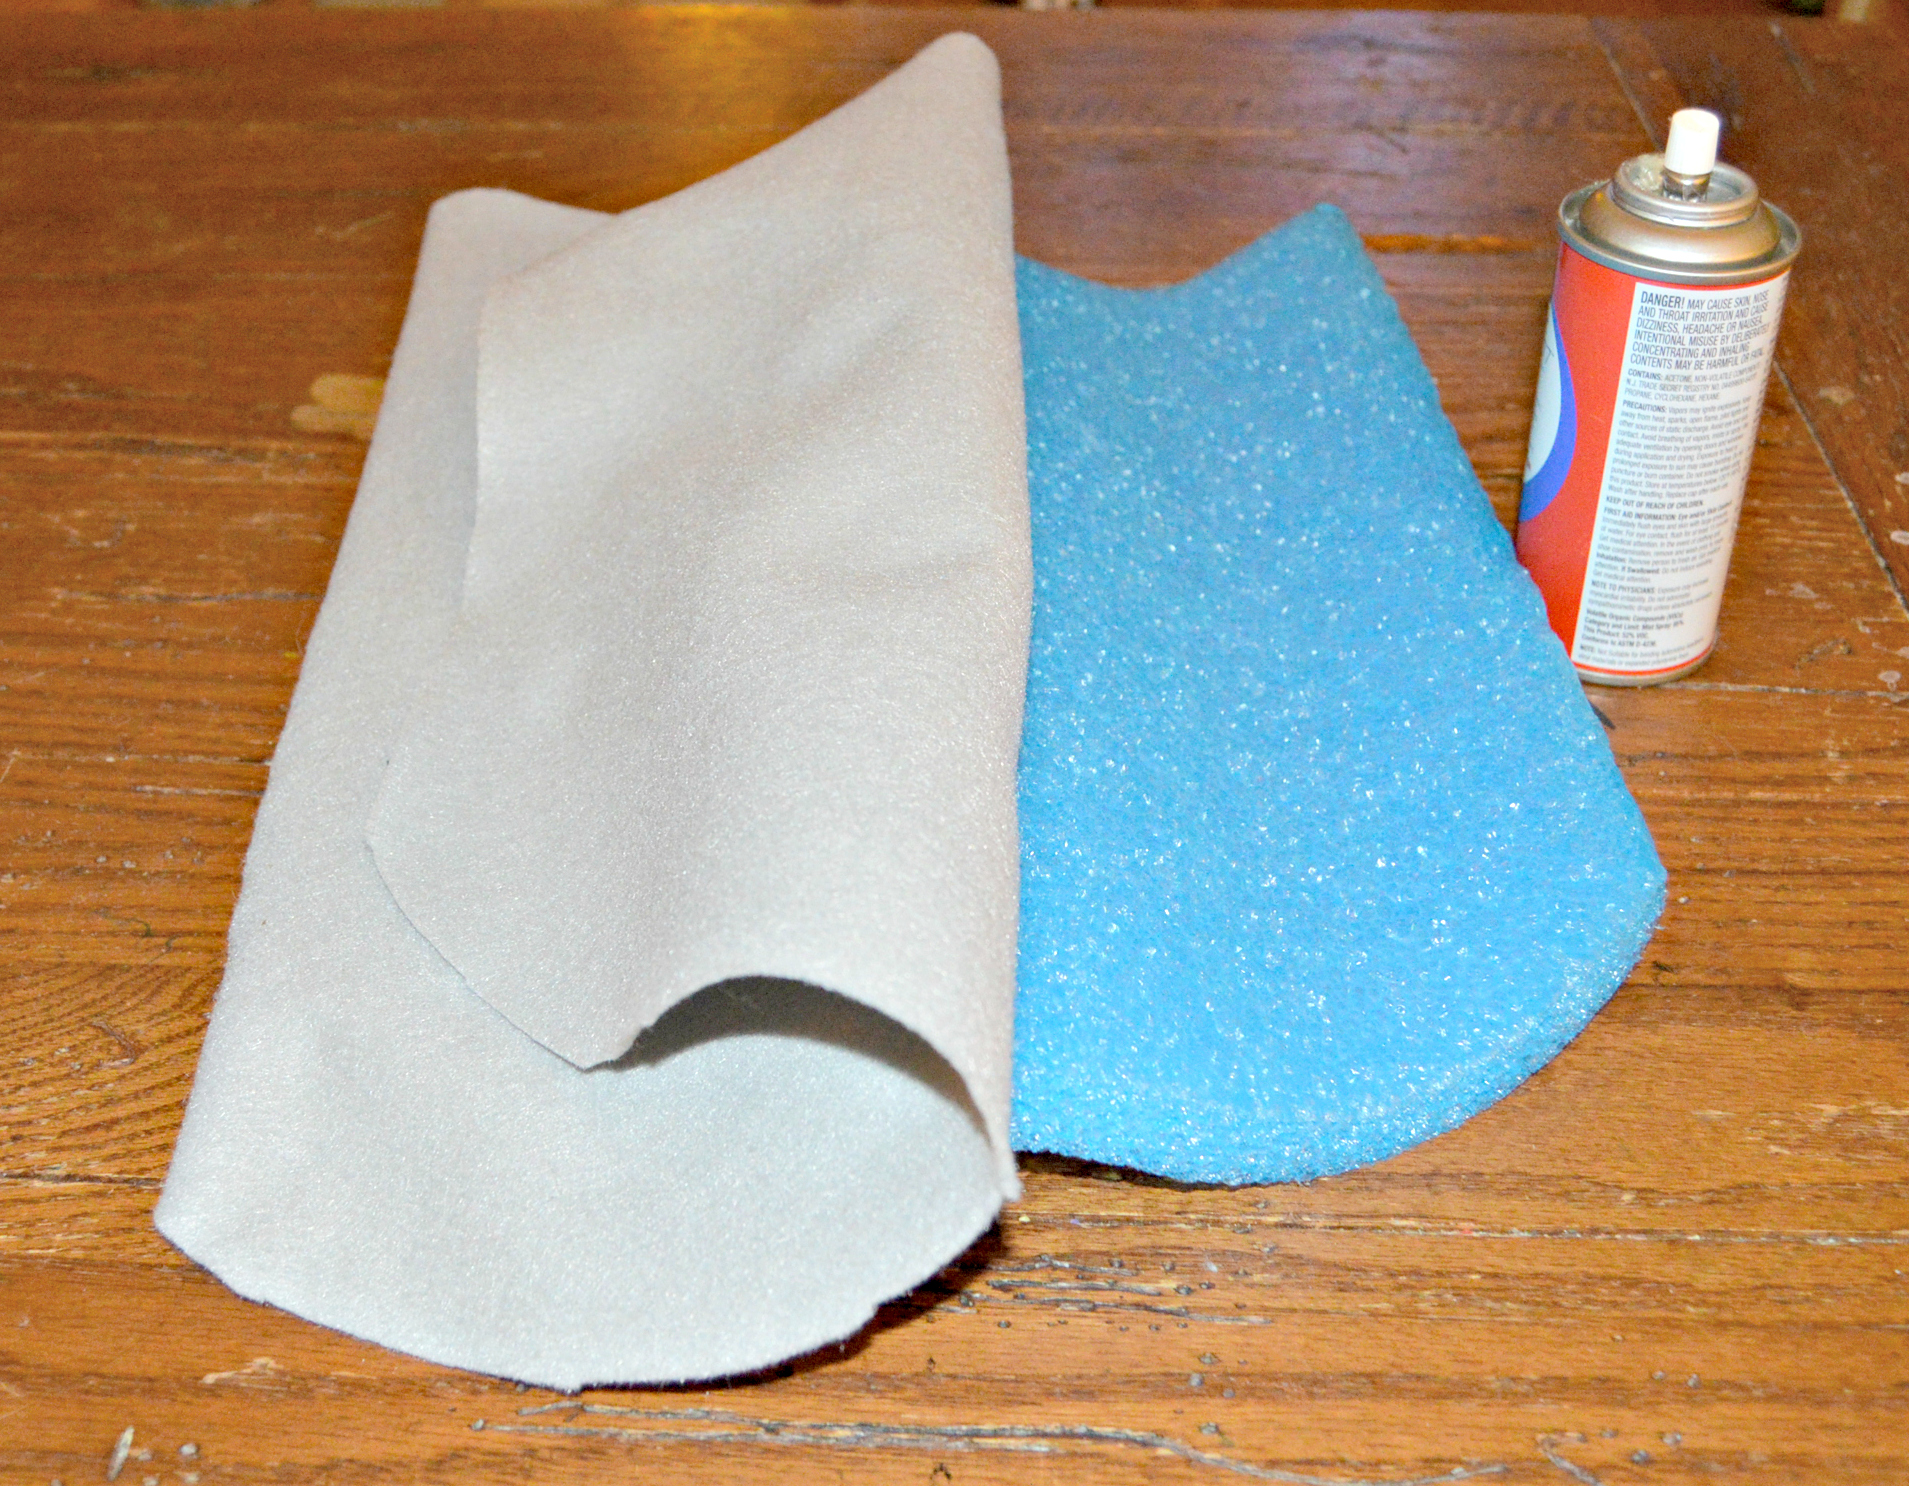
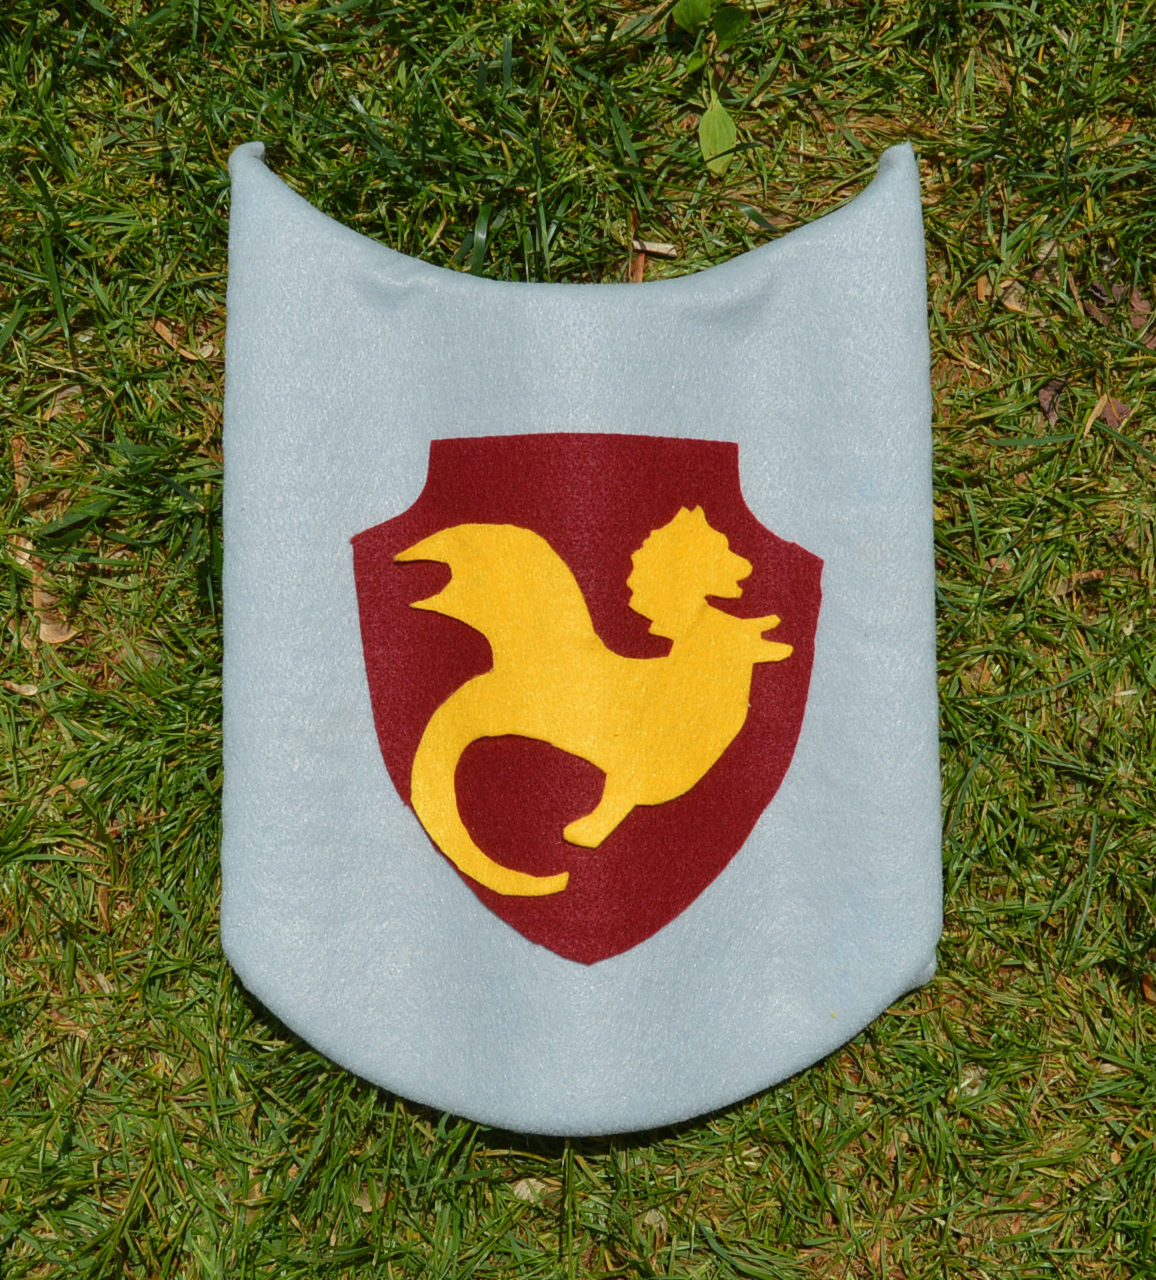
Next up were the shields! This took me a bit to figure out, because I wanted something that might last more then a few seconds (instead of cardboard). I was wandering around our local dollar store, and when I came upon these foam kick boards that already had a shield shape, I knew I had my answer! Here’s how I transformed them into shields!
Step 1: Cut a piece of felt a little larger then the shield form. Pin one edge down to the back of the shield. These boards actually had a a curve in the middle, so I decided I wanted the shield to curve outward, making the side with the indentation the back.

Step 2: Flip the board over and use spray adhesive to affix the felt to the front of the shield. The adhesive worked really well leaving no creases behind. I do advise to have a window open or be in large area, because there are some fumes!
Step 3: Flip the board back over (so you see the back) and start to glue the edges down. I got really good at this after awhile, and all I did was spray a little, fold and press, spray a little, fold and press. If there were edges sticking up, I just stuck a pin in it for a couple of minutes to hold in place while the adhesive did its work.
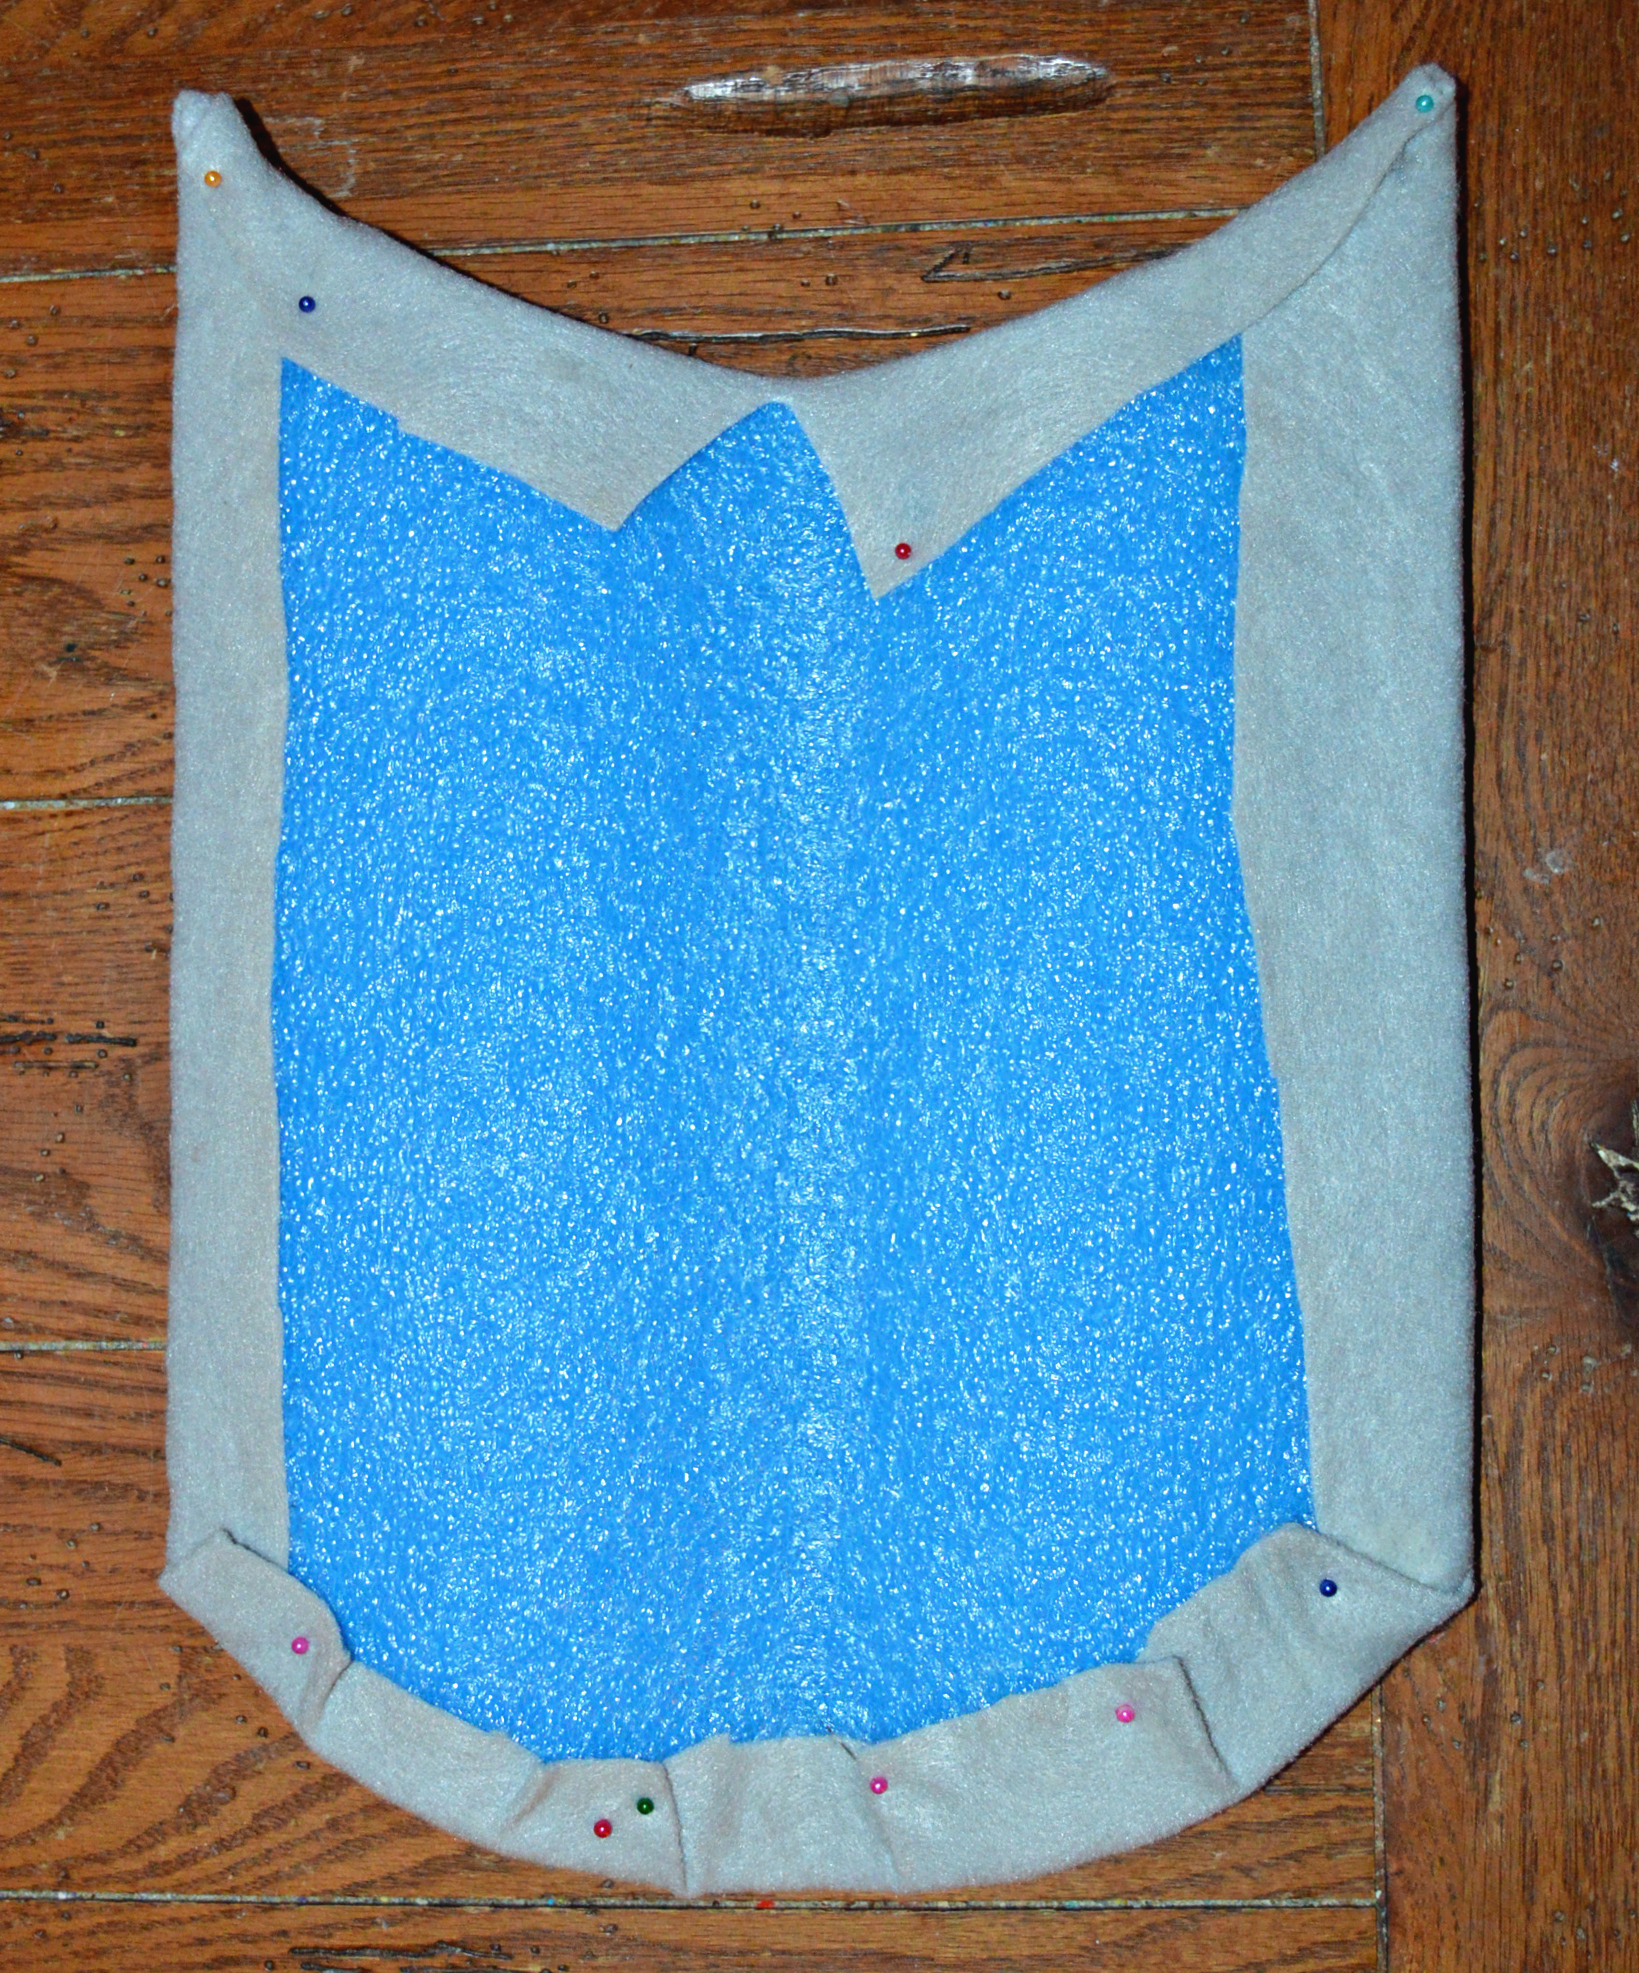
Step 4: Cut out a piece for the back of the shield and glue into place. Not only did this hide the ugly edges, it also gave extra support to hold all the edges in place.
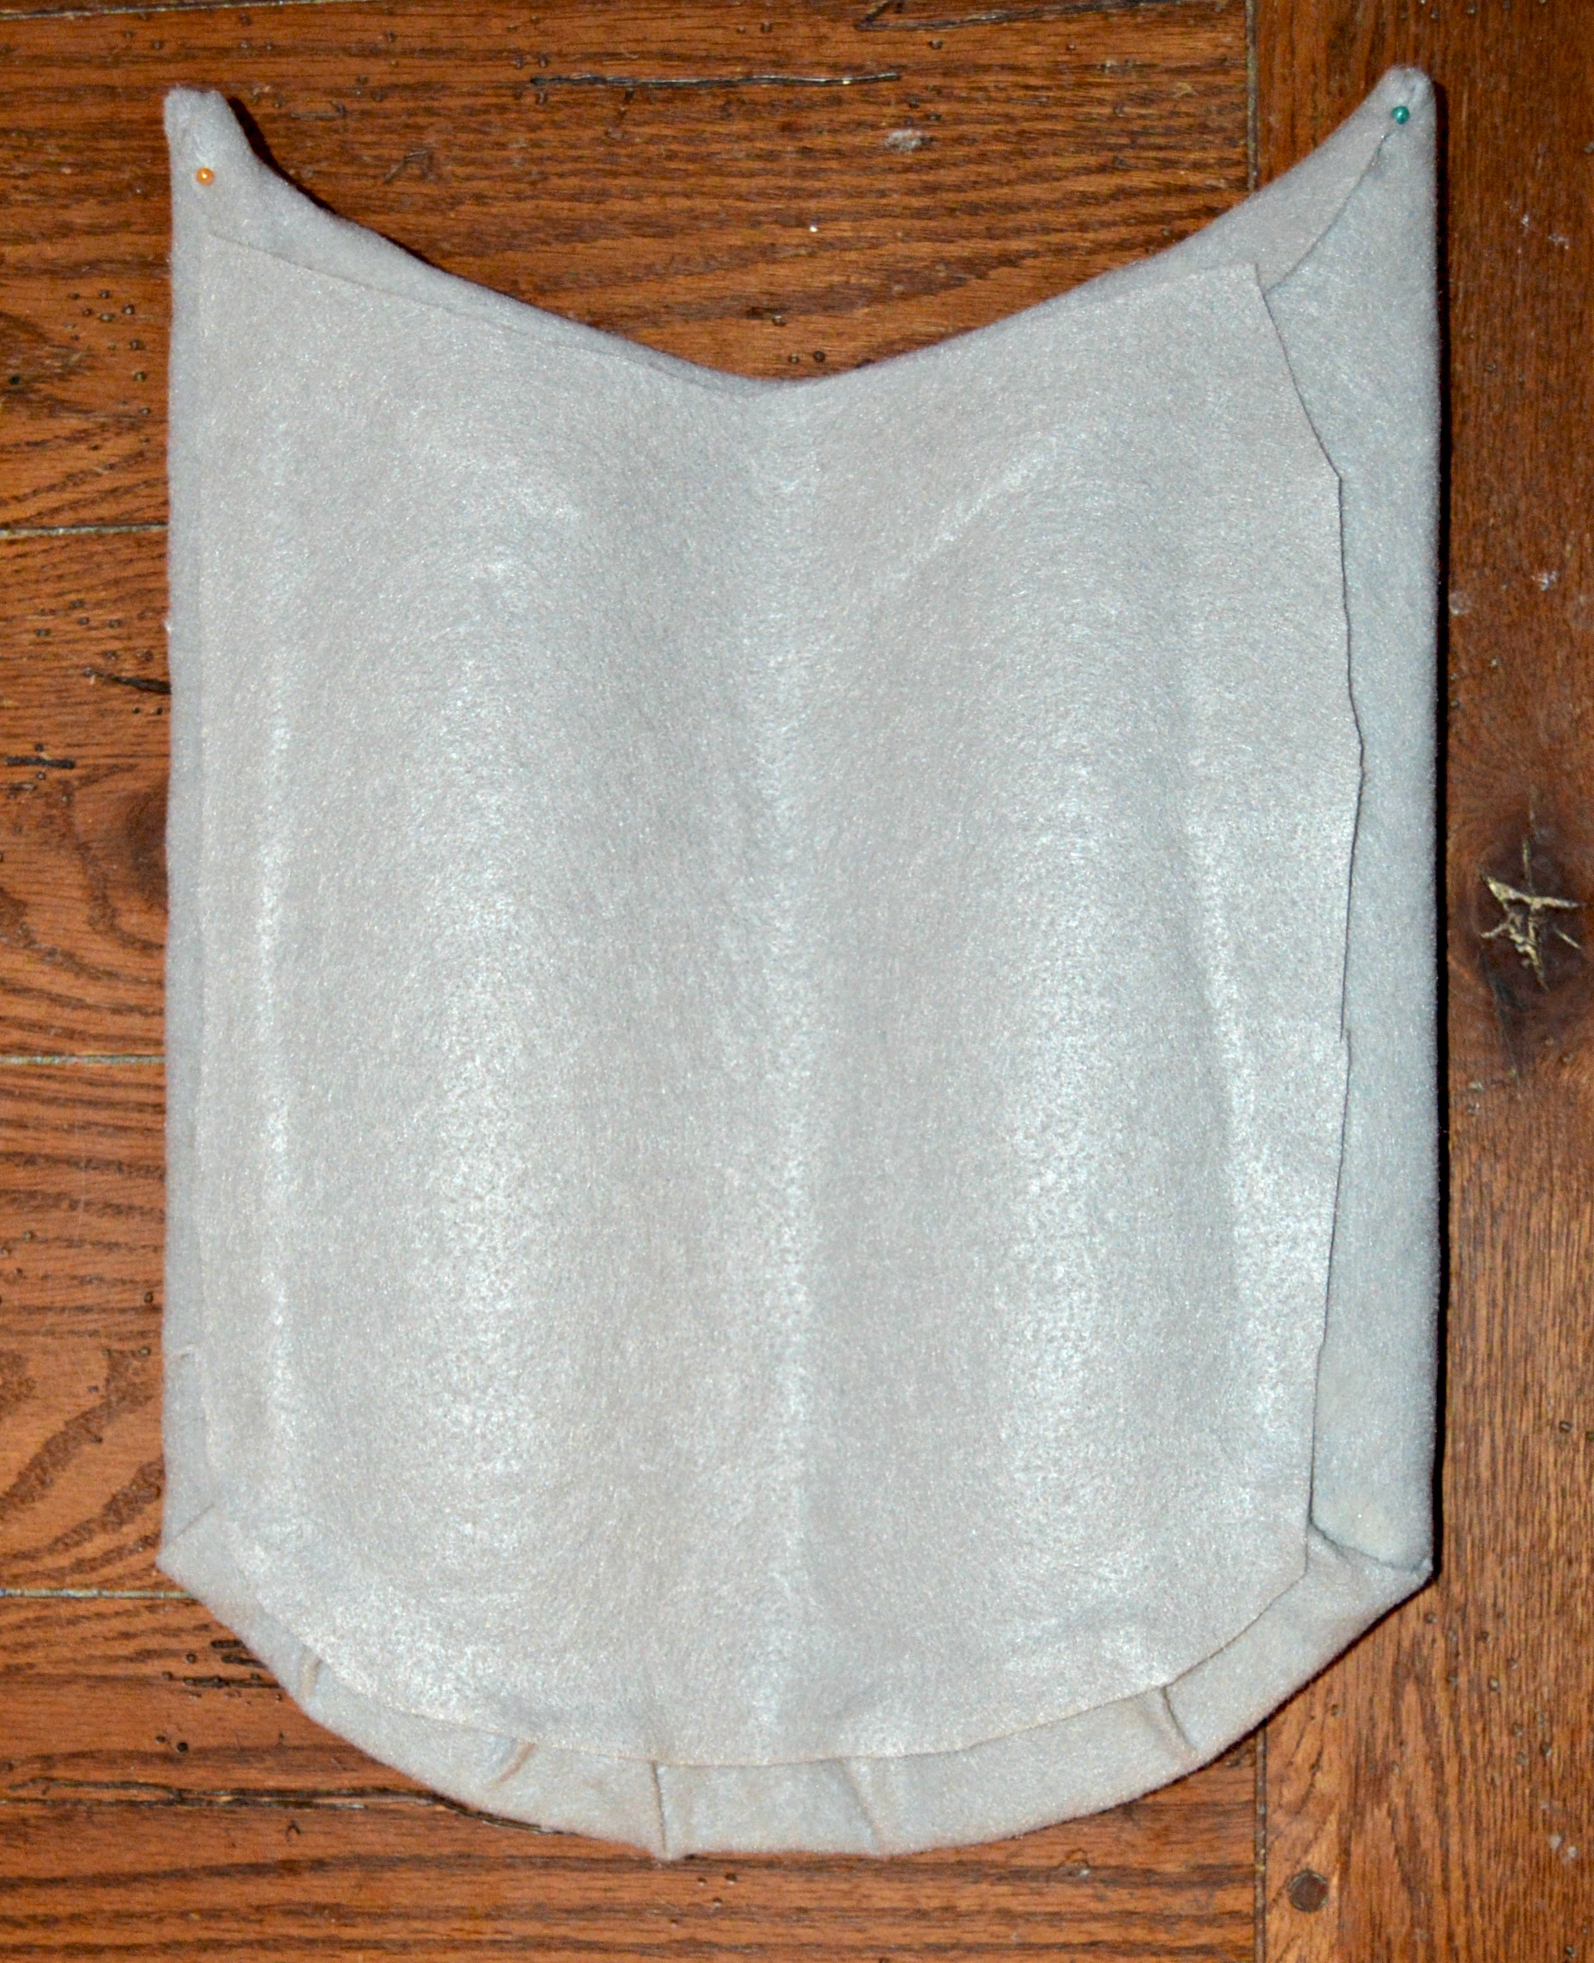
Step 5 : Cut two pieces of ribbon. Glue the ends down with E6000, but leave a “hump” in the middle so their little arms can fit through. Allow this to dry overnight, because the handles will take a beating as the kids put their arms in and out.

Step 6: If you’d like, cut out matching emblem pieces, and use spray adhesive to attach to the front of the shield.
 Here’s Bam Bam in all his knightly glory! The shields worked beautifully with the foam swords and really could take a good hit as the boys dueled!
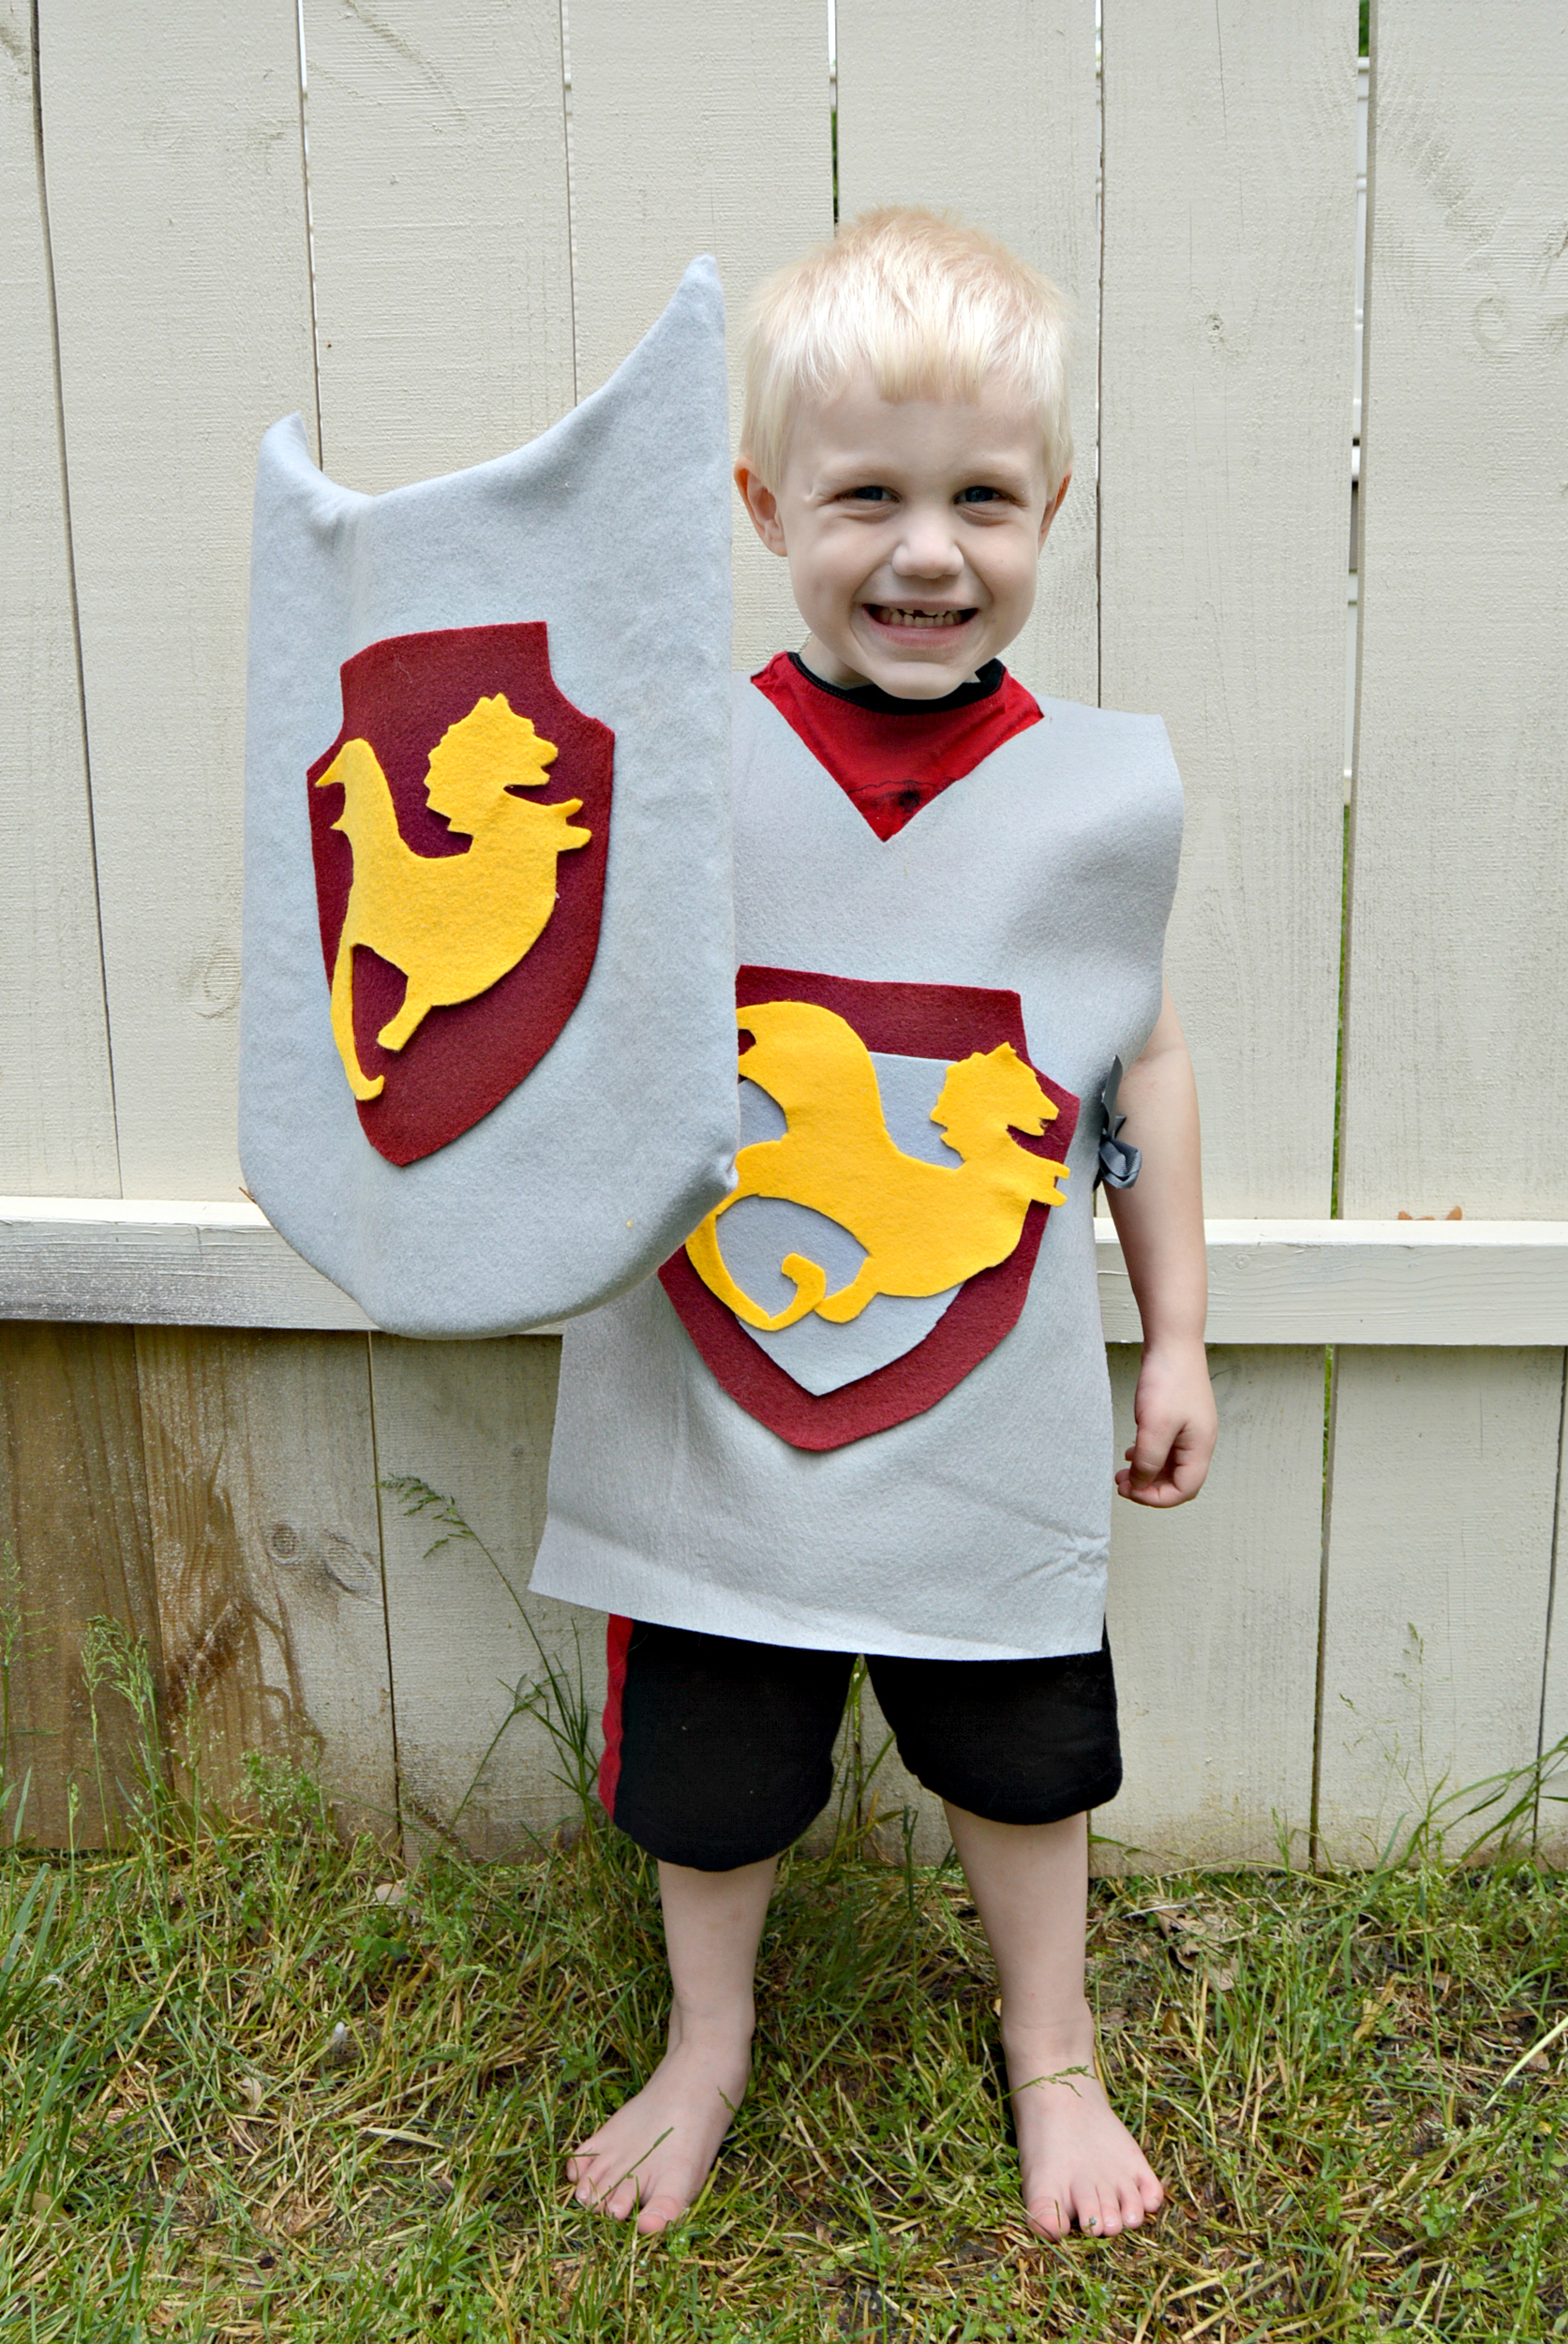
I just love how the swords, shields, and tunics came together to make the boys feel like little knights. I always like when I can give party favors that might last a little longer then a day, and allow for more follow up play at home!