
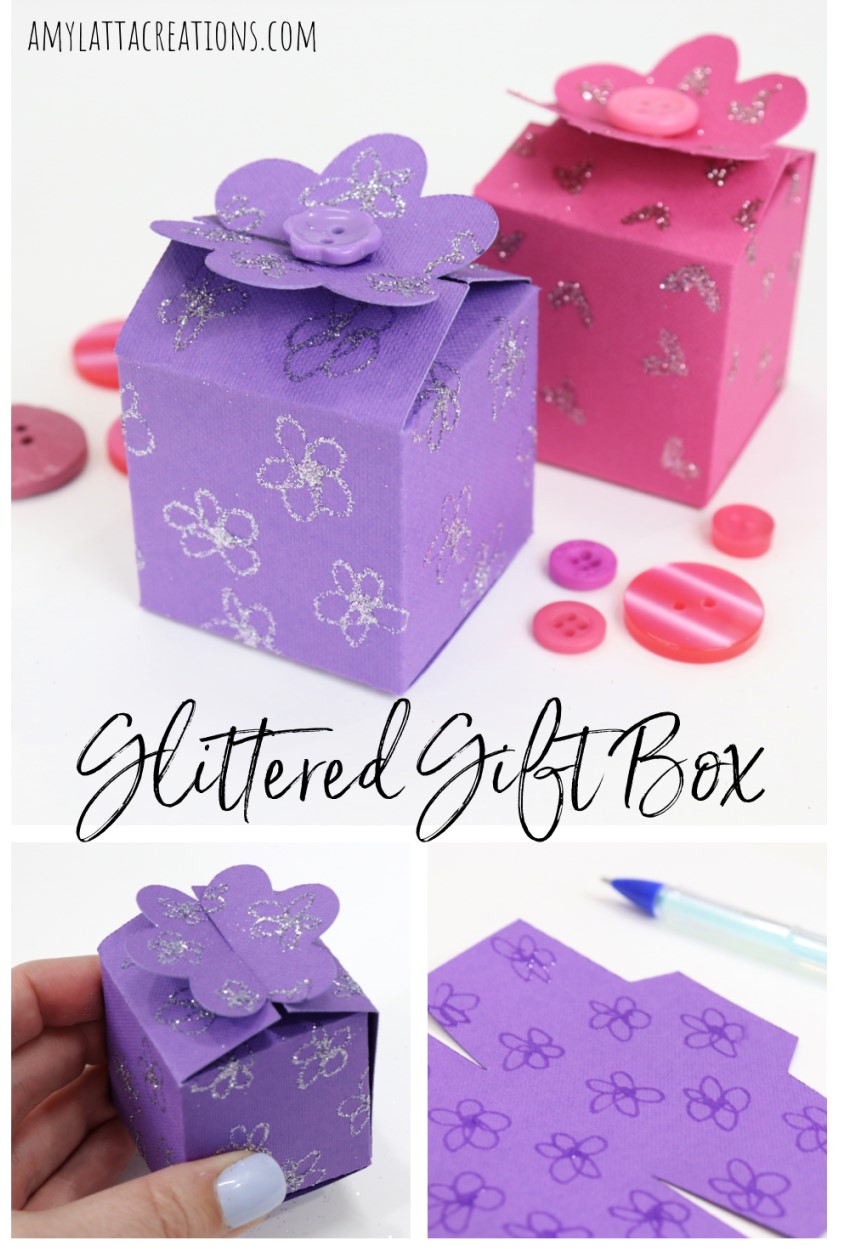
Glittered Gift Box
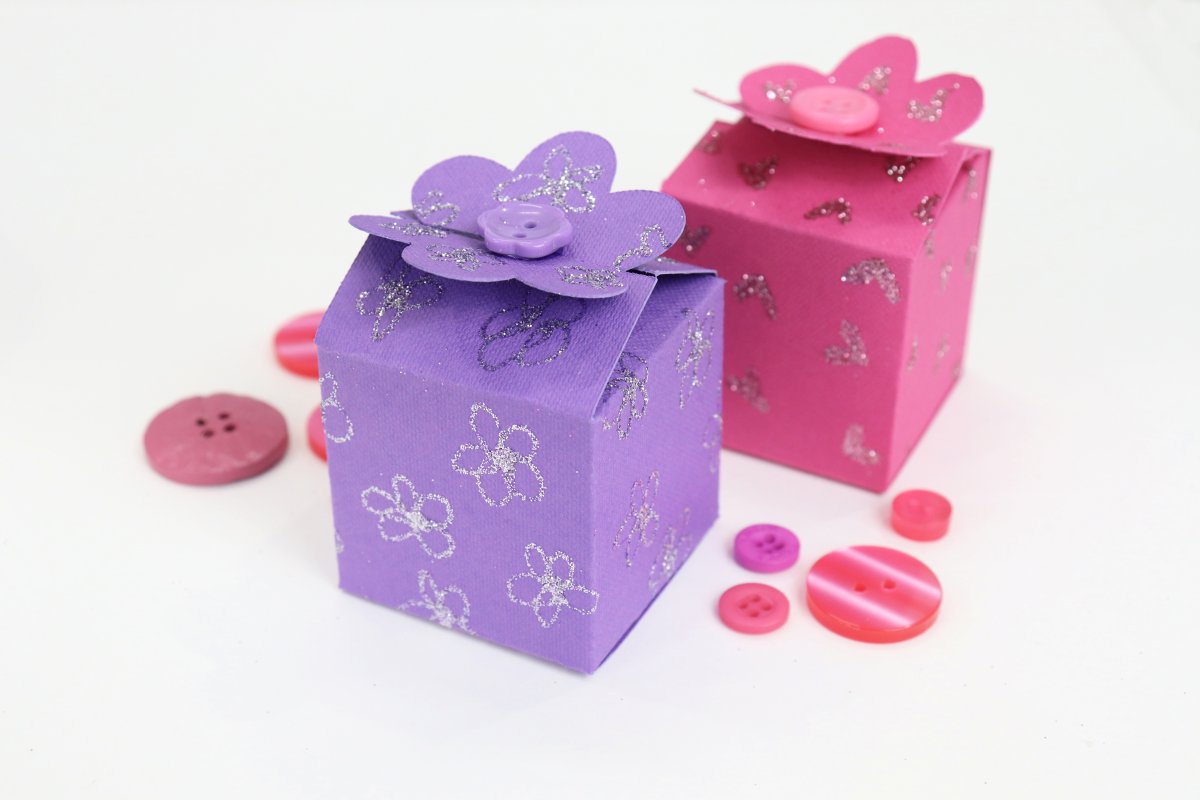
Make someone in your life smile with this cute little DIY Glittered Gift Box, filled with a sweet treat. Mother’s Day and Teacher Appreciation Week are both a great time to give something special, or you can make this for a friend just to show you care.
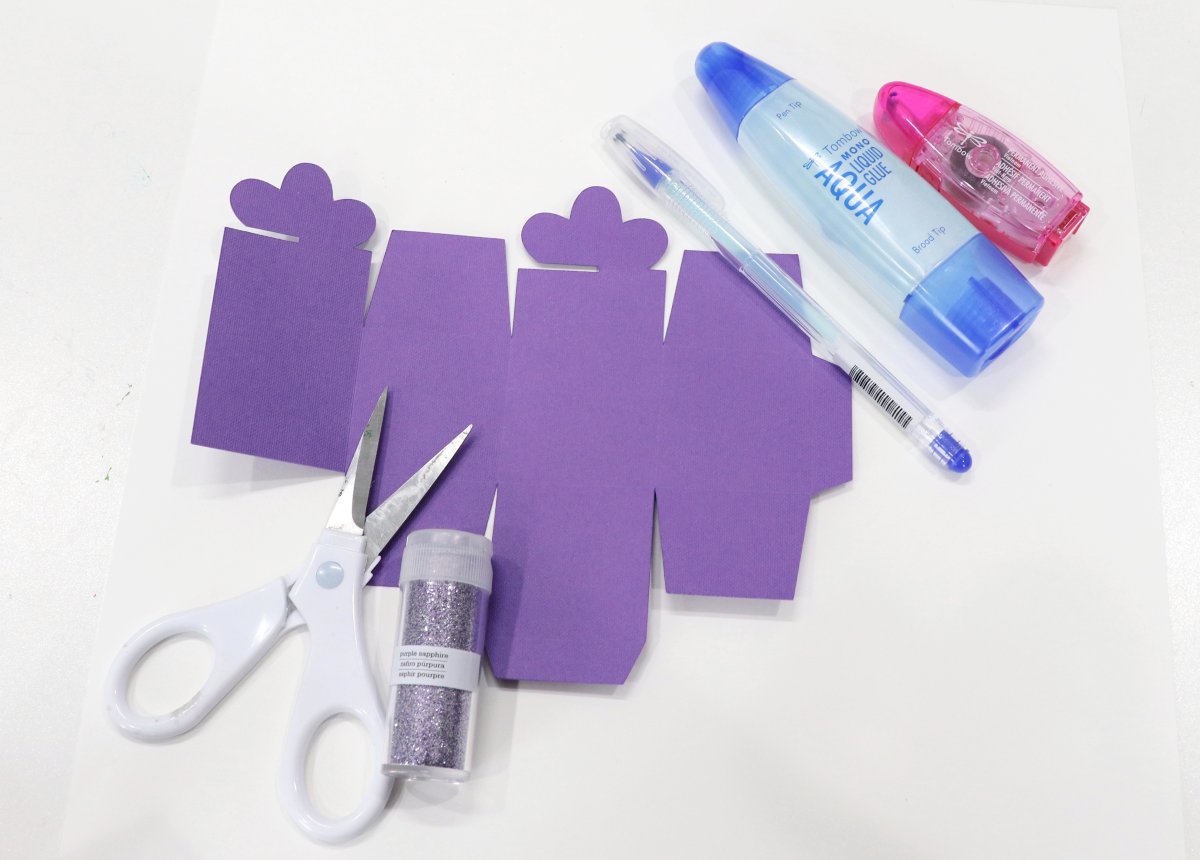
You’ll need:
cardstock
electronic cutting machine or scissors (I used the Cricut Maker 3)
loose glitter
button (optional)
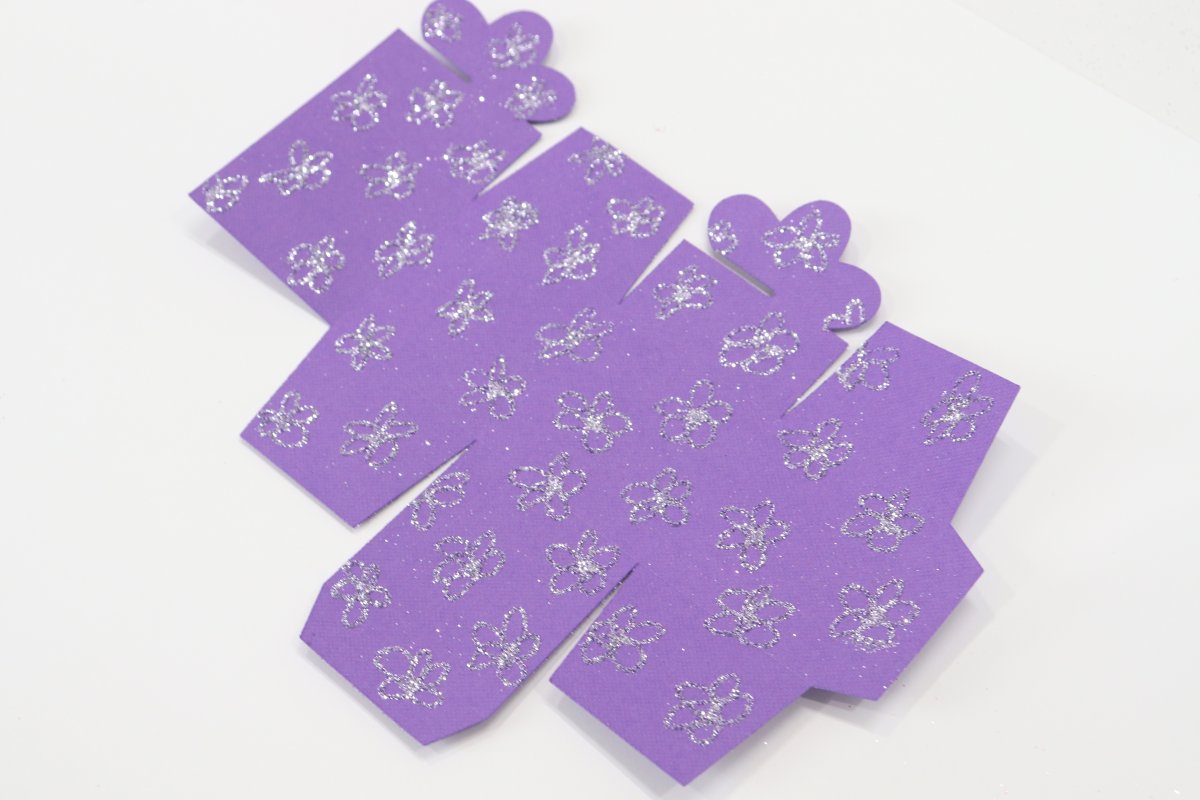
Step 1: Cut and score your box.
I used my Cricut Maker 3 to make this step super-easy! I just chose the box template image #M3F629 in the Cricut Design Space app (also listed as the Button Flower Box Project) and opened it on my canvas. Mine was sized to 7.56″x6″, but you can resize yours however you like. Follow the prompts in the app to load your cardstock into the Cricut and let it work its cutting and scoring magic. You’ll be prompted to insert the scoring blade first, then swap it out for the fine point cutting blade after the scoring is complete.
If you don’t have an electronic cutting machine, here is a similar template you can print out and use as a pattern to cut out your own box with scissors.
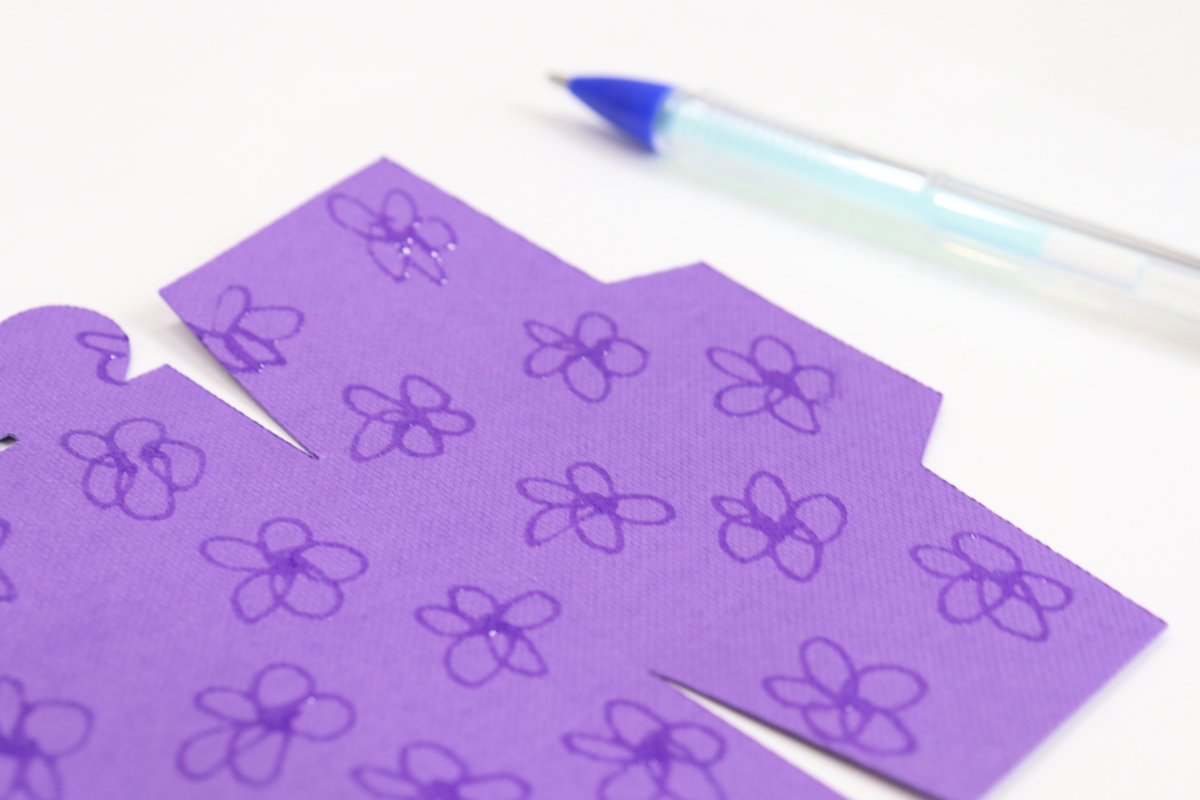
Step 2: Use the Tombow MONO Glue Pen to draw a design.
My favorite thing about the glue pen is that you can use it just like you would any other pen, writing and doodling normally; it’s just glue instead of ink! Draw flowers, hearts, swirls, or an original design.
Step 3: Sprinkle loose glitter on top.
It’s important to do this while the glue is still wet. I did about half of my project at a time just to make sure the glue didn’t dry before I was able to add glitter. I find that the finer your glitter, the better your result will be.
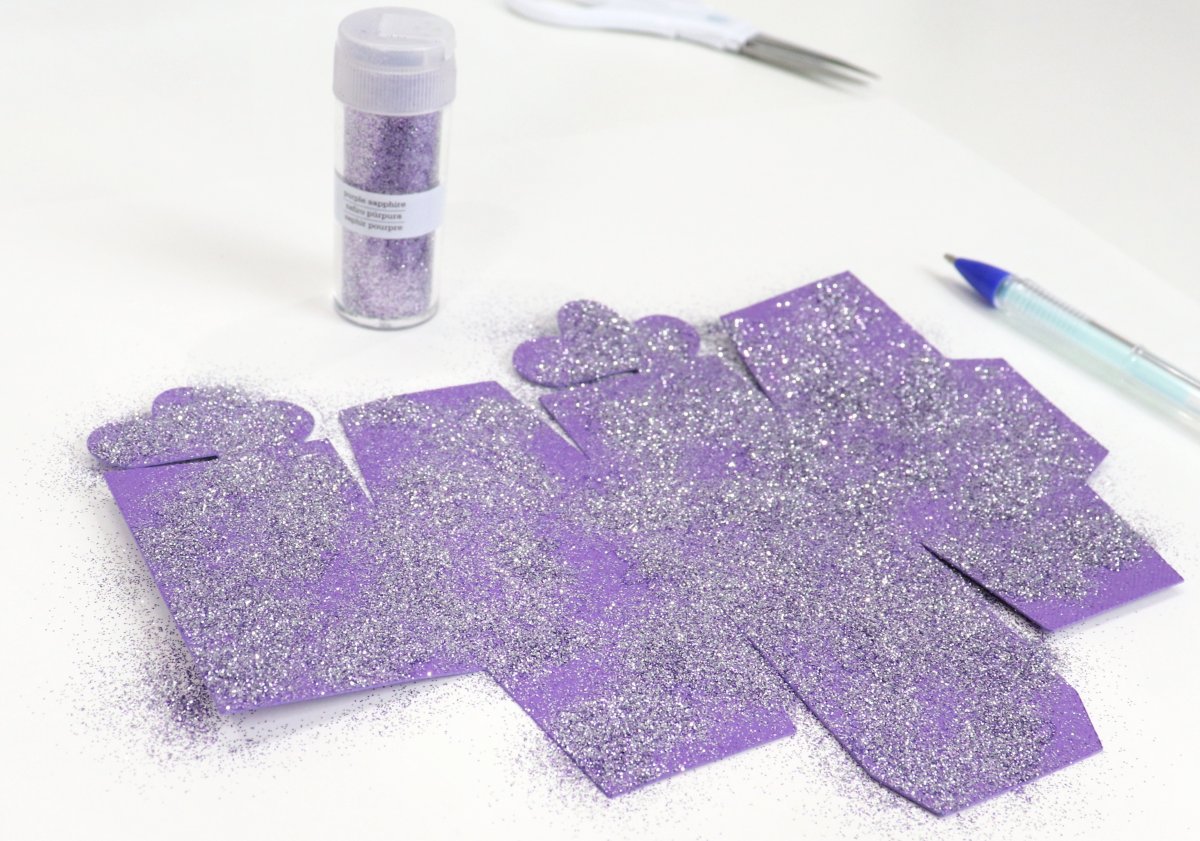
Shake off the excess glitter, and you’ll be left with a sparkly version of the pattern you drew!
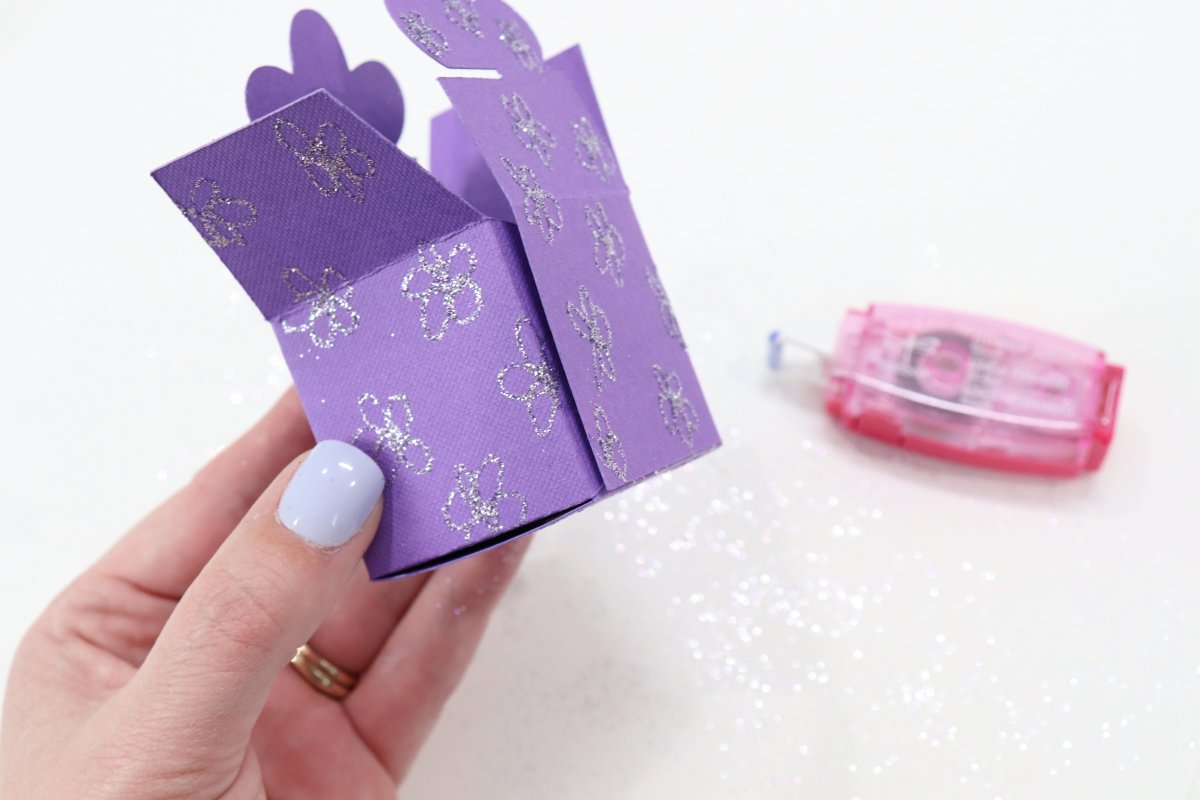
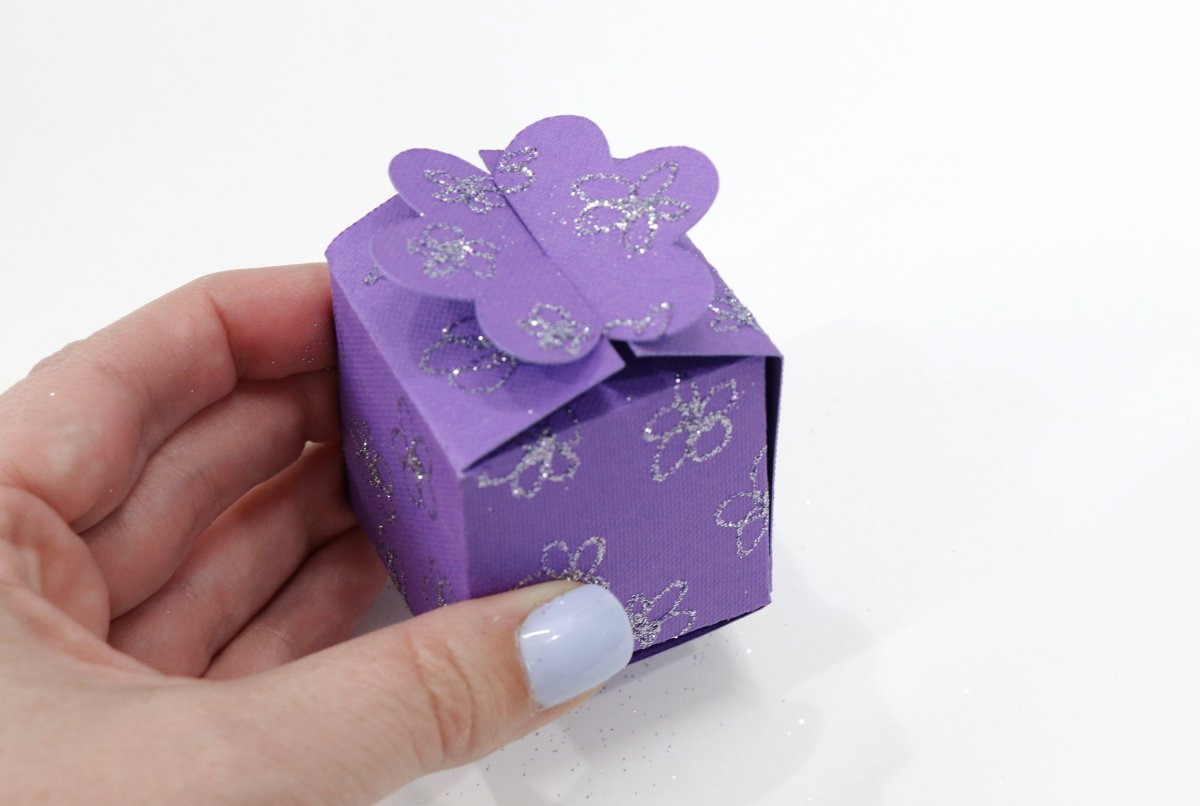
Step 4: Assemble your box.
Fold along the scored lines and adhere the sides of the box together with glue or an adhesive runner (I used the Power Mini Glue Tape).
Step 5: Fill your box!
Add whatever little treats you like to the inside. I filled mine with chocolates, but you could use any variety of candy or small gifts you want. You can stop here and gift your box, or you can continue on to the final step.
I added a coordinating button to the center of my flower on the top of the box using MONO Aqua Liquid Glue.
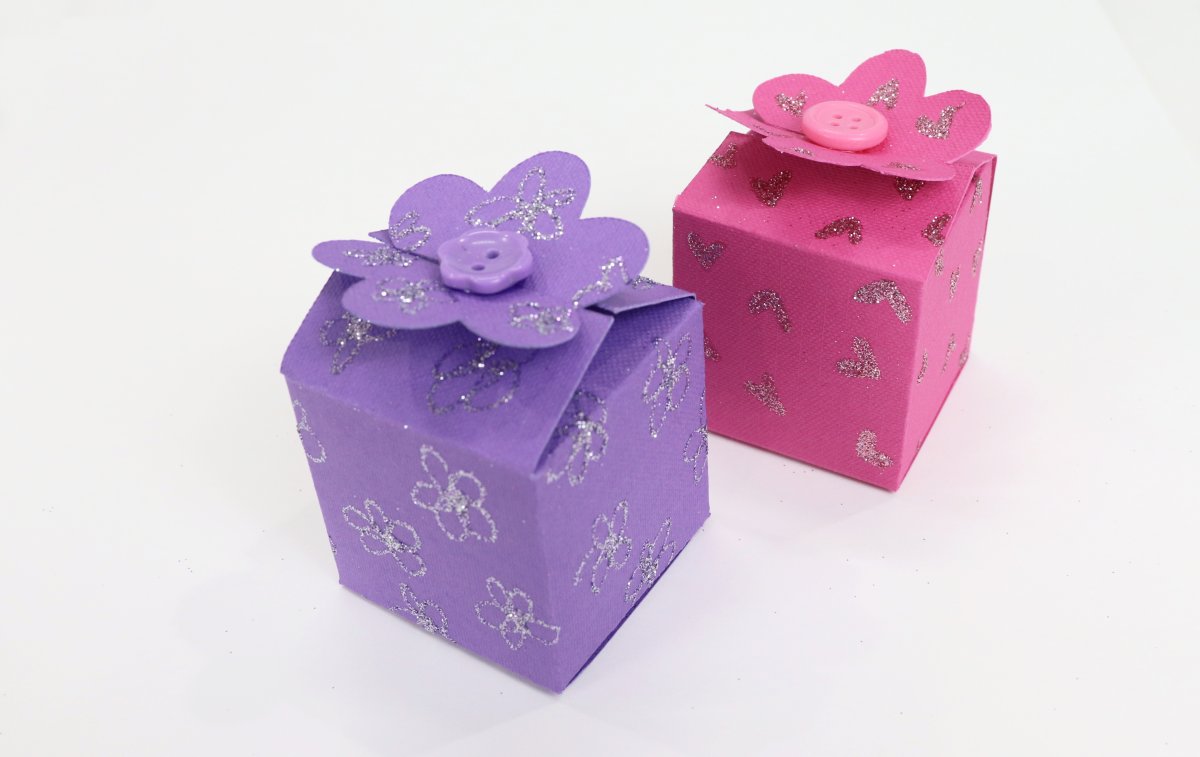
Now, your box is ready to give away and make someone smile! Whether it’s for Mother’s Day, Teacher Appreciation Week, or just to show a friend you’re thinking of them, this little gift will make a big impact. If you create your own, I’d love to see how they turn out! Be sure you’re part of the Amy Latta & Friends Facebook Group so you can share your project photos and we can all inspire each other. See you there!
Those are so cute! I’m definitely making one for Mother’s Day!!
I made one for someone and they loved it!! Great idea.
I love the little gift boxes! they are sooo cute 🙂