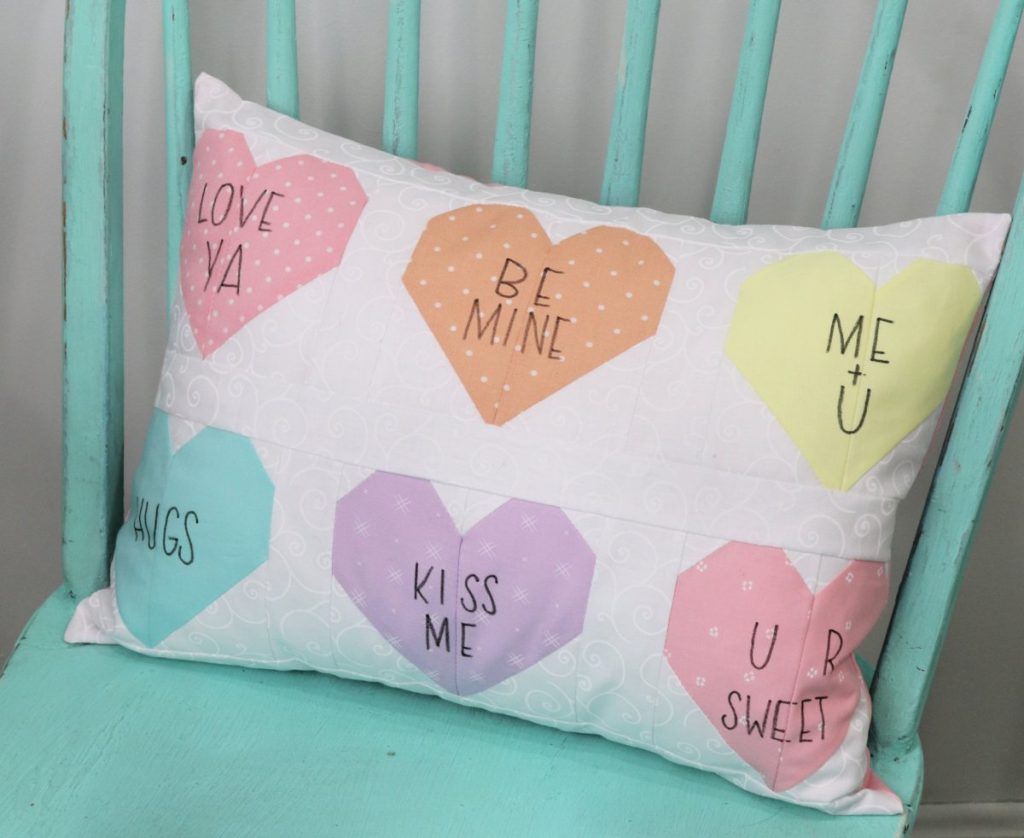
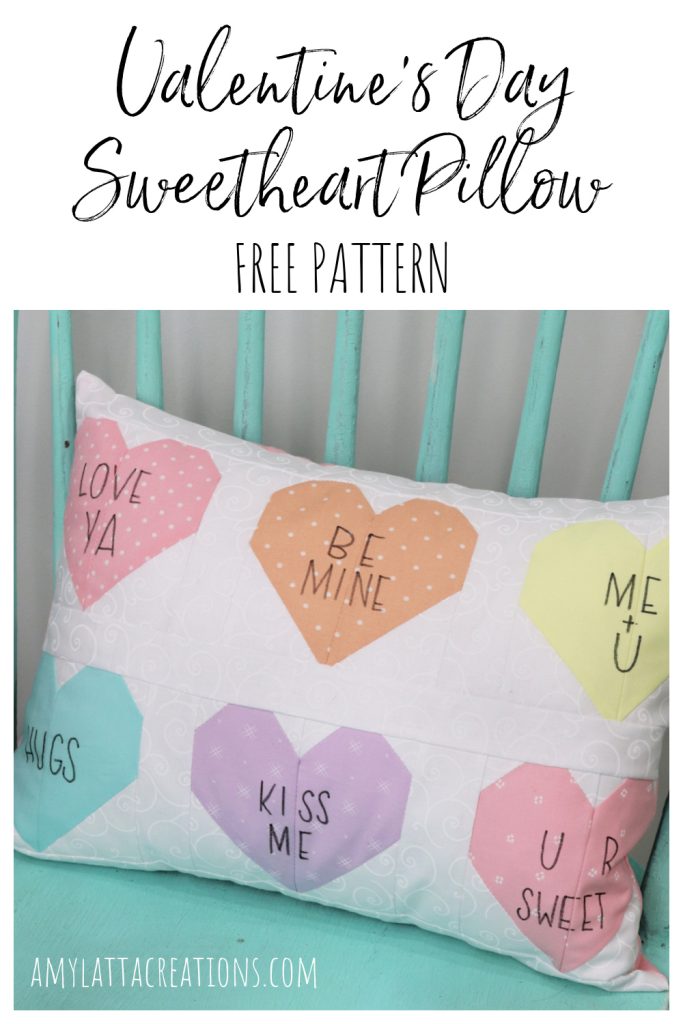
Valentine’s Day Sweethearts Pillow

As the season of love approaches, let’s get crafty with this fun Sweethearts themed Valentine’s Day pillow! Here’s what you’ll need to create it.
Materials
Fabric:
Colored fabric for hearts – 6 charm squares (5″), or jelly roll strips (2 1/2″ wide)
White background fabric – 1/4 yard
Pillow backing fabric – 1/4 yard
Other Supplies:
Poly-fil Premier Ultra Plush Pillow Insert 12″ x 16″
Missouri Star Fabric Markers, black
Sewing machine, thread, scissors, iron and ironing board, rotary cutter and mat
Optional: batting
Cut Fabric as follows:
Colored fabric
2 pieces per heart – 2 1/2″ x 4 1/2″ each (12 total)
White fabric
12 squares – 2 1/2″ x 2 1/2″
24 squares – 1″ x 1″
4 rectangles – 1.5″ x 4 1/2″
3 strips – 1.5″ x 15.5″
Background fabric
2 pieces – 12″ x 9″
All seams are 1/4″ unless otherwise noted.
Full instructions below, plus check out this quick time-lapse video!
Creating your heart blocks (make 6):
Step 1: Start with one of the colored 2.5″ x 4.5″ rectangles. Place a white 2.5″ square on top of it, right sides together, lined up with the bottom section. Sew a diagonal seam that starts in the top left corner of the white square and ends at the bottom right corner. If you like, you can lightly draw a pencil line as a guide, or press a fold in the square so you know where you want to sew.
Step 2. Cut off the excess fabric to the left of the seam, leaving about 1/4.” Fold the rest of the white fabric down and press. You’ll have something that looks like the second image below; a large section of your colored fabric with a white triangle in the bottom left corner.
Step 3: Repeat this basic process using a 1″ white square in the top left corner. This time, sew diagonally from the bottom left to the top right of the white square. Trim the excess, open, and press.
Step 4: Repeat, using a 1″ white square in the top left corner of your colored fabric. Sew diagonally from top left to bottom right, trim, and press. Now you should have something that looks like half a heart.
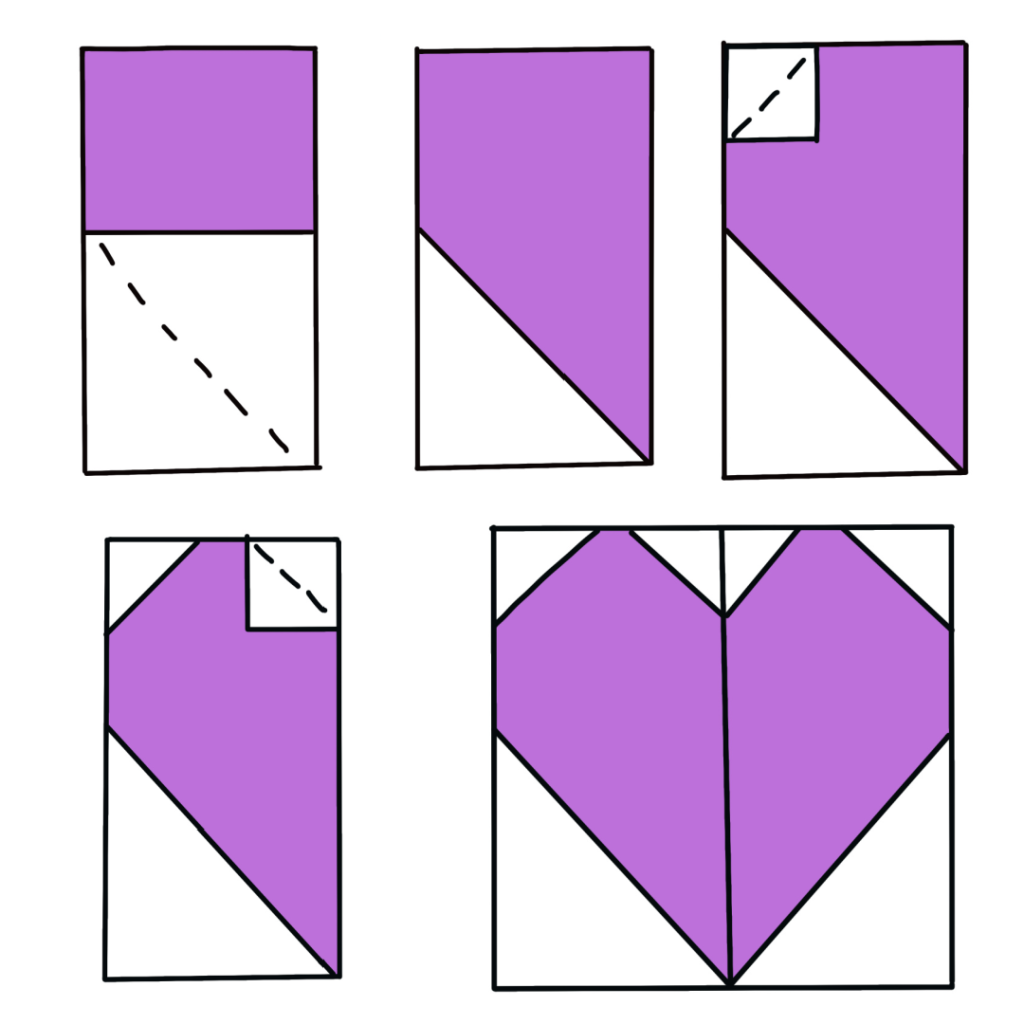
Step 5: Repeat steps 1-4, using the other colored rectangle and sewing your bottom seam in the opposite direction to create the other half of the heart.
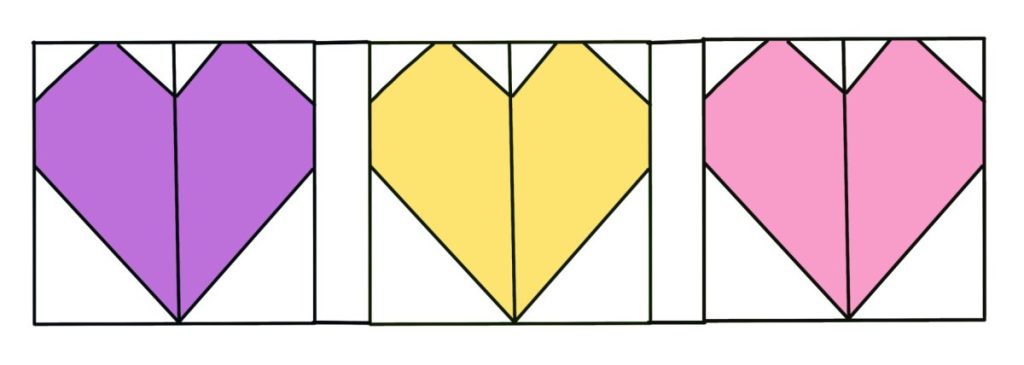
Step 6: Place the two halves of the heart right sides together, pin, and sew a vertical 1/4″ seam to join them. Now, you should have a heart that looks like the last image in the series above.
Repeat this process to create a total of 6 hearts. I used a variety of pastel colors to represent the candy hearts that we associate with Valentine’s Day, but you could also make these red, or any other color combination you like.
Writing on your heart blocks:
Place one of your heart blocks flat on a hard surface, like a clipboard or a piece of cardboard. Use quilt clips to hold it in place while you write. Then, print a message in the center of the heart using the MSQC Fabric Marker. This marker is my favorite, because it doesn’t bleed and is permanent immediately, no heat-setting required. Also, if you need to wash your project, the marker ink will not fade. Here’s a list of some ideas to write on your hearts:
Be Mine, Me + You, U R Sweet, Sweetheart, Love You, Call Me, Text Me, Hugs, Kiss Me, Hug Me, Hot Stuff
Assembling your heart blocks:
Step 1: Arrange your blocks into two rows of three hearts.
Step 2: Sew the first row together, adding white 1.5″ x 4.5″ rectangles in between hearts.
To do this, place the rectangle on top of your first heart and sew a 1/4″ seam down the long side. Open, then place the next heart face down on top, lining up the edge with the edge of the rectangle you just sewed. Sew another 1/4″ seam. Open, add another rectangle, and sew. Finally, add the final heart, face down, and sew.
Repeat this process, sewing the three hearts of the second row together in the same way.
Assembling the pillow front:
Step 1: Sew a 1.5″ x 15.5″ strip to the top of the top row of hearts.
Step 2: Sew a second strip to the bottom of that row.
Step 3: Sew the second row of hearts to that strip.
Step 4: Sew the final strip to the bottom of the second row of hearts.
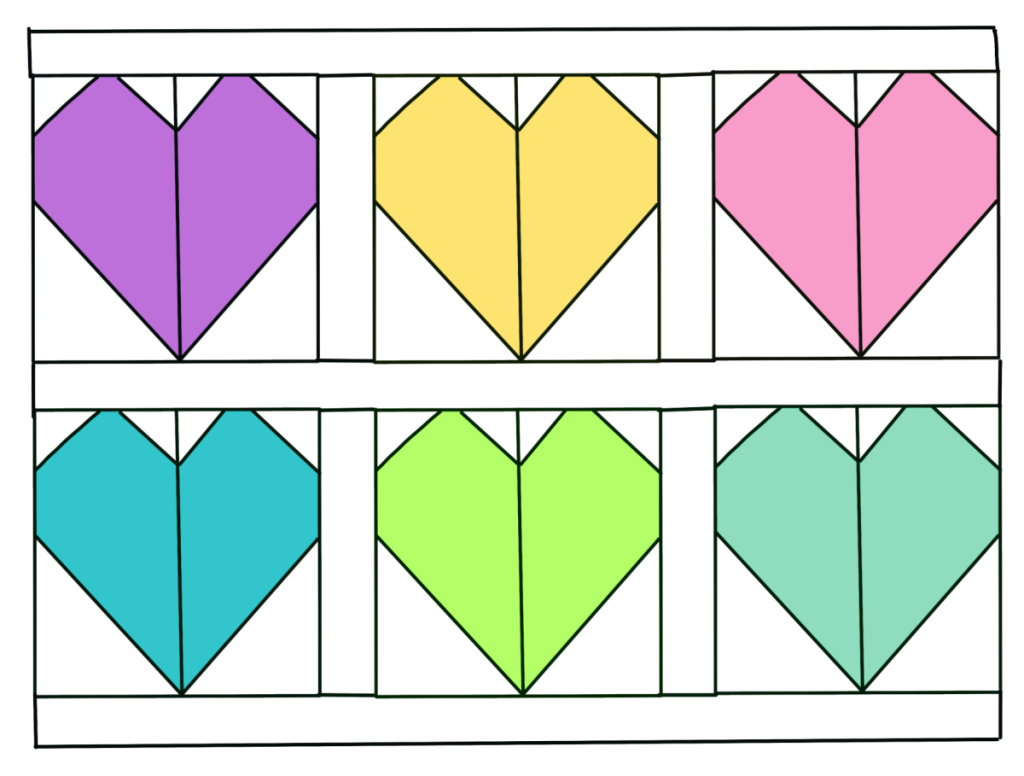
Now you should have a pillow front that has six colored hearts separated by white borders, as shown above.
For this project, I chose not to actually quilt my pillow front, but if you’d like to do so, just pin a piece of batting behind the pillow front and quilt as desired. Then, move on to creating the backing.
Making an envelope pillow backing.
Step 1: Take one of your 12″ x 9″ rectangles and place it right side down on the ironing board. From one of the 9″ edges, fold 1/4″ of the fabric back toward yourself and press it with an iron. Sew a 1/8″ seam to hold this in place. This will give your fabric a finished edge. Repeat for the other 12″ x 9″ rectangle.
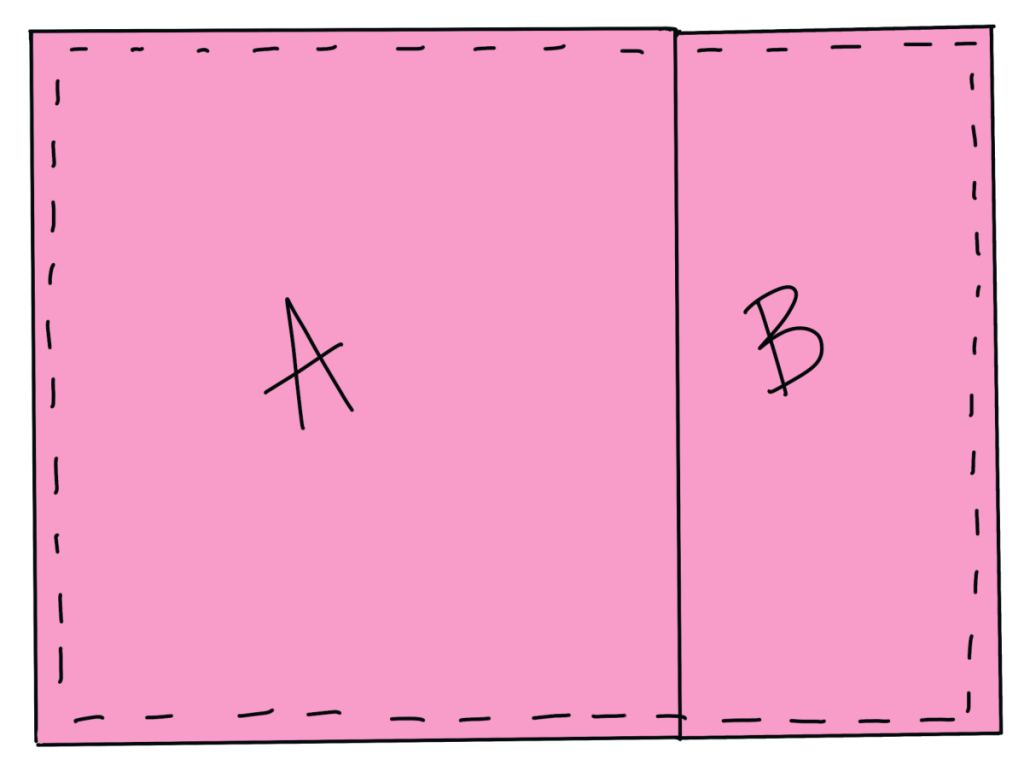
Step 2: Place your pillow front face up, then lay one of your backing rectangles (B) face down on top of it. Make sure the finished edge you just created is pointing toward the center.
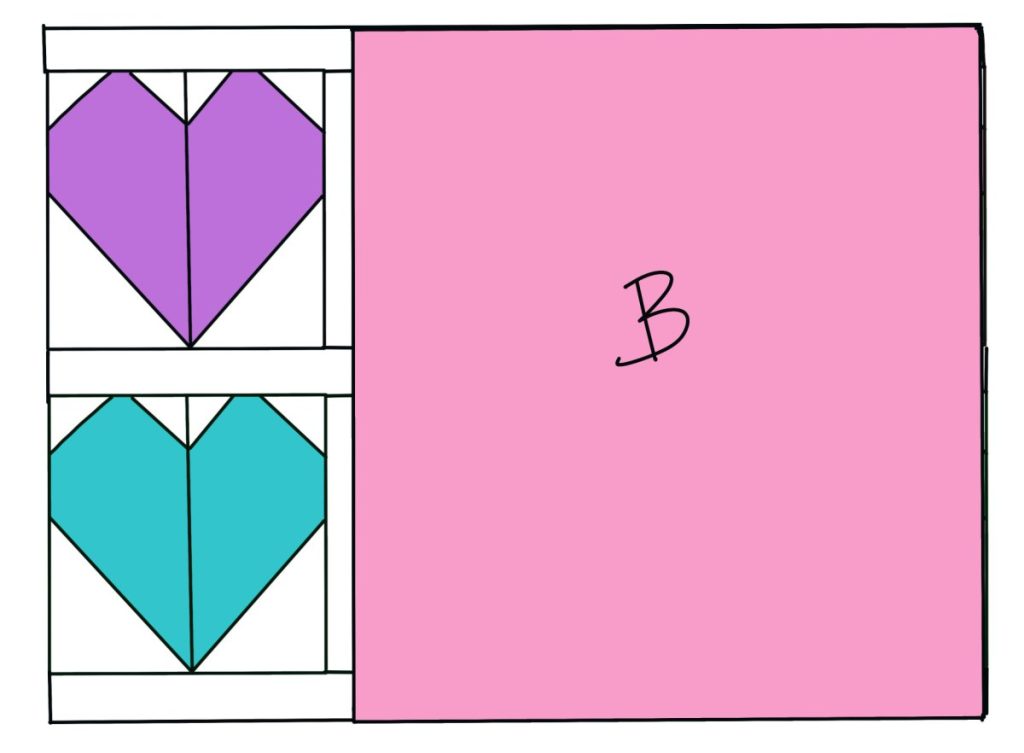
Step 3: Place the other backing rectangle (A) face down on top of the pillow front, partially overlapping piece B. The finished edge should be the one overlapping piece B and forming the envelope opening. Pin in place.
Step 4: Sew a 1/4″ seam around all four outer edges.
Step 5: Using the envelope opening (where the backing pieces overlap), turn the pillow cover right side out and stuff it with your pillow form.
Now you have a sweet and festive Valentine’s Day pillow that makes a great decoration (or gift!). If you try this project, I’d love to see how yours turns out. Make sure you’re part of the Amy Latta & Friends Facebook Group so you can share your project photos for this or anything else you create, and we can all be inspired. See you there!
PS. Check out these other fun Valentine’s Day craft ideas!
And don’t forget to pin this project to save for later or share with a friend!
.
Amy, this quilted pillow is GORGEOUS!
I’d love for you to join us over at the Creatively Crafty Linky Party every Wednesday through Sunday
https://creativelybeth.com/creative-crafts-linky-party/
Followed and Pinned!
Creatively, Beth