Candy Corn Earrings
Fall is officially here, friends, which means it’s time to break out the pumpkins and the…CANDY CORN! Today I have a fun little project for you; some festive earrings made from one of my favorite supplies, Sculpey clay.

I’m going to show you exactly how I made these, so in the materials list, I’ve linked to the specific things you’d need to create your own. Some of those are affiliate links, which means if you purchase those supplies after clicking, it helps support One Artsy Mama and allow me to create more fun jewelry projects for you!
Materials:
– Sculpey Polymer Clay in white, orange, and yellow
– wax paper or foil
– toothpick or clay tool
– baking sheet
– oven
– needle nose pliers and wire cutters
PLUS…
Variation #1:
– silver wire, 20 gauge
– ear wires, kidney shaped

Variation #2:
– ear wires, gold french style
– gold headpins with ball top
– faceted orange beads

The first few steps are the same, no matter which variation you choose.
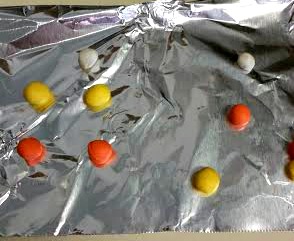
Step 1: Roll two balls of each color clay per pair of earrings you are making.
The yellow ball should be the largest, the orange slightly smaller, and the white the smallest. It helps to place your clay on foil or parchment paper while rolling it to keep it clean and prevent it from sticking to the table and other surfaces.
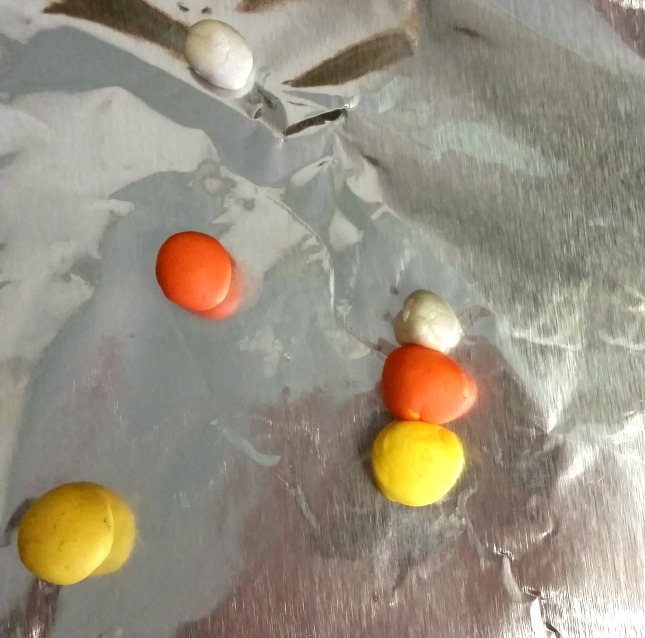
Step 2: Stack the balls on top of one another like a snowman.
The correct order is white, orange, yellow. I almost always mess up my candy corn projects by putting them in the wrong order.
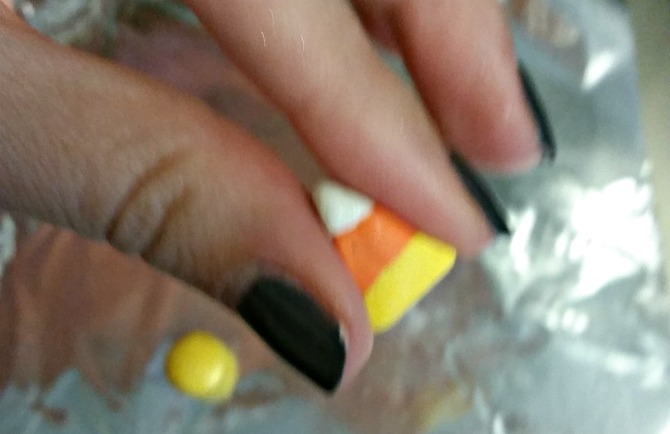
Step 3: Form the snowman into a triangle shape by pushing on/pinching the sides with one hand and pushing up on the bottom with the other.
It takes a little trial and error to get the hang of this part. Sorry the pic is terrible too. You can also press the sides one at a time onto the table to flatten them out nicely.
Step 4: Use a toothpick or tool to poke holes, making these into beads.
If you want to do variation 1, poke your hole from side to side through the white part of the triangle.
For variation 2, poke your hole vertically from top to bottom of the triangle.
Step 5: Bake your clay according to package directions.
Mine took 15 minutes.
Now, to finish them up!
Step 6a: For #1, thread a piece of silver wire through the hole, twist it tightly closed, then form a wire wrapped loop. Slide it onto an ear wire {any kind will do; I used kidney shape, but it really doesn’t make a difference}. I also added some Extra Glitter Mod Podge to seal them, make them glossy, and of course add a bit of sparkle!

Step 6b: For #2, place a bead, then the candy corn piece on a gold headpin and form a simple wire loop. Place on an ear wire.

More variations:
You could very easily turn these into necklaces or even pins {then you wouldn’t have to poke holes, just bake them and glue on a pin back}! Lots of possibilities! They’re inexpensive, they’re easy…even Little Crafter made a few…and they’re hopelessly cute and festive! Will you be making some of your own?


I have no idea what a candy corn is, but these earrings are super cute!
I saw these posted on Facebook and couldn’t wait to read your post how you made them. They are super cute!! I love candy corn!! Thanks for the tutorial!!
These are so adorable!
I truly love how you make every project doable! Thanks! I may even give them a try.