Simple Beading: Wire Loops and Wire Wrapping
Hey, friends! Recently, a number of you expressed interest in a basic tutorial for getting started making your own beaded jewelry. Today, we’re going to be talking about how to make a simple wire loop and a wire wrapped loop. Once you get the hang of that, you can use those beads in earrings, necklaces, or anything else you want! Ready?
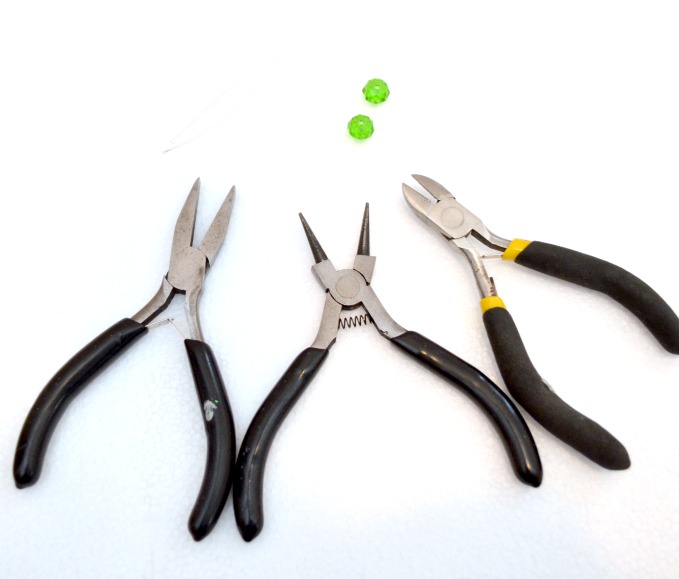
Materials:
– beads of your choice {mine were provided by Wholeport.com}
– needle nose pliers
– wire cutter
– flat nose pliers
– head pins
Simple Wire Loop
Step 1: Place your bead onto the head pin.

Step 2: Hold on to the bead with your non-dominant hand. Use needle nose pliers in your dominant hand to bend the head pin just above the bead at a 90 degree angle.

Step 3: Use wire cutters to trim the wire.

Step 4: Hold the bead in your non-dominant hand and point the end of the wire away from yourself. Grab the end of the wire with your needle nose pliers and roll the wire back toward yourself to form a loop.

That’s how to form a simple wire loop! Honestly, it will be a little tricky the first few times you try. I remember feeling like I was all thumbs when I started out and thinking I’d never get the hang of it! But don’t give up; it’ll get in your muscle memory and you’ll be doing it like it’s second nature in no time!

Wire Wrapped Loop
Here’s the second option, which I actually prefer, wire wrapping. In some ways I feel like this is actually easier than the simple loop. You don’t have to worry about cutting your wire too long or too short, and I think the finished product looks neater and more professional. Either way works, though, and I’ve definitely made plenty of jewelry using both methods!
Steps 1 and 2 are the same as for a simple loop! First, you place your bead on the head pin.
Bend the wire at a 90 degree angle just above the bead, as you normally would.
Now, here’s where things get a little different.
Step 3: While holding the wire with your needle nose pliers {in your non dominant hand}, use your dominant hand to bend it back up and over the top part of your pliers.
 Wrap it all the way around until it forms a full loop.

Step 4: While holding the pliers in your non-dominant hand, grab the end of the wire with your dominant hand and begin wrapping it around itself. The thinner gauge your eye pins are, the easier this is to do. Continue wrapping until you are touching the bead.

Step 5: Trim any excess wire.

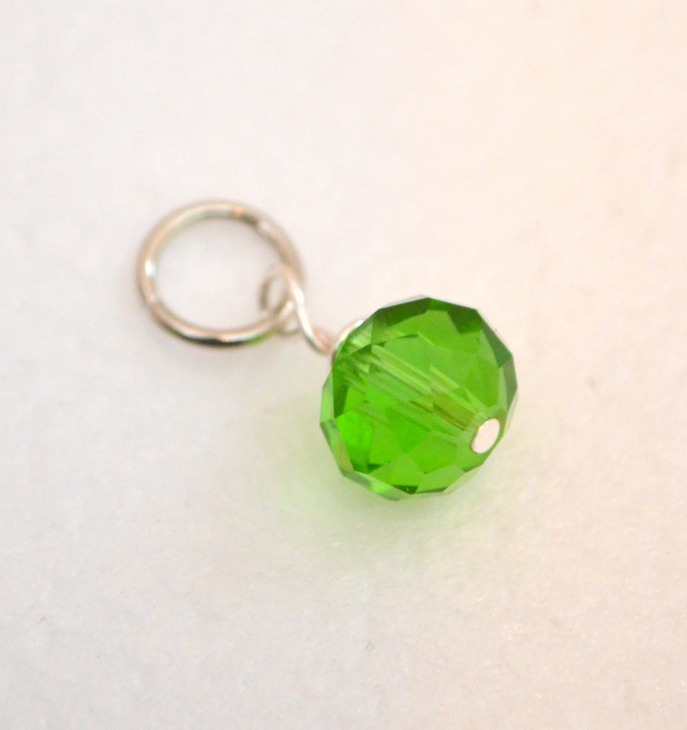
That’s all there is to it! Here’s a look at them side by side; simple wire loop on the left, wire wrapped loop on the right.

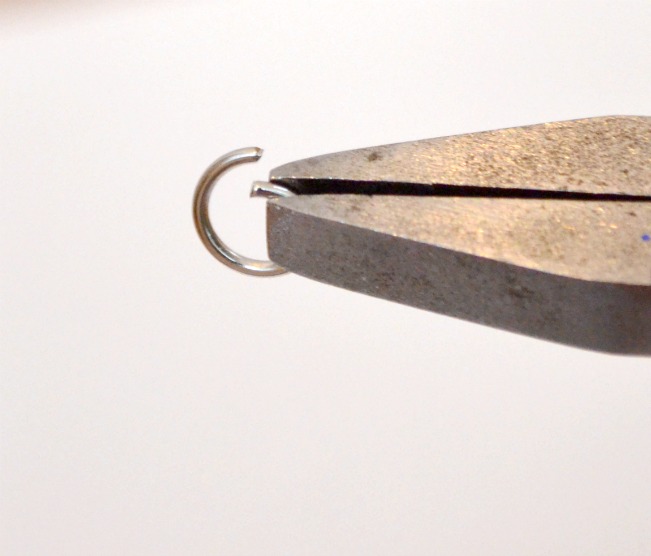
From here, all you need to do is add a jump ring and you’re ready to make beaded earrings, necklace charms, or anything you like! To open a jump ring, I like to hold it with flat nose pliers and twist it open with needle nose pliers. The key is to twist it NOT pull it apart.
Now this bead is ready to be added to an ear wire or a chain! See? Easy peasy!
What do you think?! Honestly doable, right?
Hugs & Glitter,


Well, you certainly make it look easy. 🙂 I just may get into jewelry making yet. Just what I need, another category of supplies….
Thanks so much for sharing this. I do some beading now and then and I always have a hard time with the wire. This is very helpful. Pinning & sharing.
Oh, yay! So glad it was helpful for you!
Great instructions…You make it seem so easy…
Great tutorial, Amy! And I’m with you – I prefer the wire-wrapped look, too.
Great tutorial, Amy! And I’m with you – I prefer the wire-wrapped look, too.
Thank you so much for this. I just got some beads for Christmas and am so excited to use the pins and stuff.
Oh, yay! Have SO much fun!!
That looks so much easier than when I try to bend wire! I will have to keep trying. Thanks for the tips!
Found you over at Tip Junkie
Yes, keep trying! You’ll get it! And once you do, it’ll become second nature! 🙂 So glad you stopped by, Tonya.
Super cute!!! Pinning this to do later!!
What a wonderful idea! I never thought like that. I had made one for me and making the second one for my daughter as she loved them. Thanks for sharing such easy and cool wire-loops ideas!
I am really speechless. What an outstanding idea you have shared. Its look pretty much impressive and easy to make. Thanks for sharing.
Great tutorial…! Really you are so creative. Thank you so much to share your great experience. It’s made easy and looks gorgeous. I made this wire loops and gift my girlfriends. she was very happy to see this loops. Love your post. Good job and keep it up. Thanks for sharing your post.