I have to confess, I was more anxious than usual for Little Crafter to take his afternoon nap today! After getting some new beads yesterday and looking at a few library books about jewelry making, I was ready to try my hand at some projects. I tried to do a bit of work while he was finishing up his lunch, but he got mad at me for not paying enough attention to him and dumped his apple juice on the floor. Twice. So, the rest of my beading waited until now. I focused on earrings today because they’re quicker and easier than anything else, and I had some new ideas. I’ve discovered that my favorite way to make things involves some kind of decorative wire shaping, so that’s what I decided to play with this afternoon. This first pair is a gift for Jess, who got me started on this hobby last Wednesday. She loves blue and I thought they kind of look like a decorative “J.”
[These are the ones I was working on during the apple juice incident…]
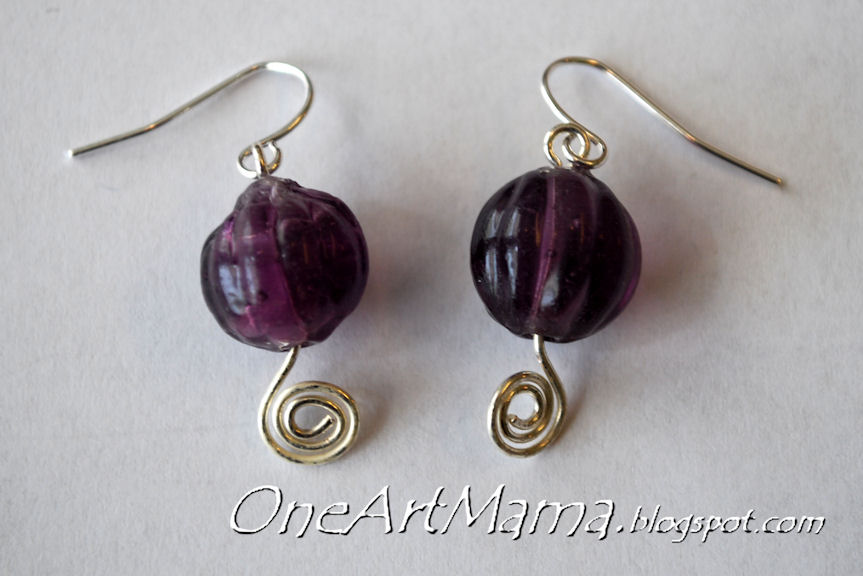
I saw this idea in the book that came with my starter kit; you just make a spiral underneath your bead. I really like the effect.
It also had a variation where you wrap wire around the top of the bead too, which I tried. Can I just say, wow, that’s hard?! I was completely awful at it. One earring turned out better than the other, ironically enough, my first attempt was the better of the two. I was pretty dissatisfied, but I do love those pink beads!
And for this pair, I thought I would try out a different shape.
The absolute hardest thing about doing the wire shaping is getting two earrings to be symmetrical! I saw a tool yesterday at the Potomac Bead Company designed to help with that. It’s a board with lots of holes and pegs that fit into them. You arrange the pegs any way you want, then you wrap your wire around them. I think I “need” one of those for sure.
I would really, really love to hear your comments and suggestions since I’m so new at this!
Hope you have a great day!


Amy,
Those are some really cute earrings!
Cherie
I quite obviously don’t do jewelry making—-so I’m not an expert, but I think they all look great. I love the shape of the last set–very creative.
You could always get a board and drill holes into it, then place cut dowels in the holes. You could do it all for less than $3 if you have the tools to do it.
not sure I should add to your newish addiction but have you been to Beadazzled yet? On Charles Street in Baltimore – website is http://www.beadazzled.net/
Also, another bead store in Columbia called Ambrosia – website is http://www.ambrosiabeadshop.com