Grow Your Blog: Posting Better Photos
Well, friends, I’ve been up to my ears lately in One Crafty Contest {aren’t you excited to see what our contestants are going to come up with for Round 1?!} but I wanted to take some time today to post the newest installment of the Grow Your Blog Series.
Today, we’re going to talk about posting better photos!

When someone visits your blog to read a post, one of the first things he or she will notice is the photos. Especially for those of us who blog about craft projects, home decor, fashion, and/or food, our readers are more interested in seeing what we’re talking about than reading about it. Here are some tips for making your photos the best they can be:
PREPARING TO PHOTOGRAPH:
Pay attention to your background.
Make sure your photo isn’t cluttered with a bunch of unneccessary stuff. Try to photograph your projects on a simple background, like something white, something black, or something wooden.
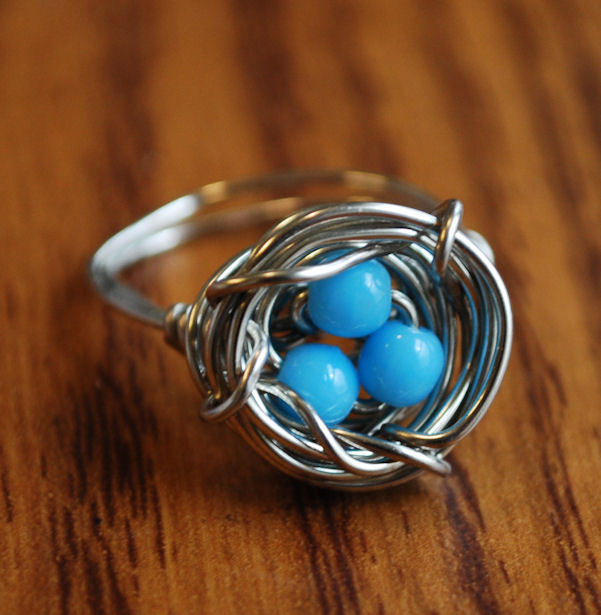
Or, you can also “stage” your project, like this photo from ArteBella Surplus. Here, spoon enhances rather than distracting from the beads, and shows a size reference so that customers know how big they are.

************************************************
WHILE YOU’RE PHOTOGRAPHING
Use natural light whenever possible!
It’s just better. Really.

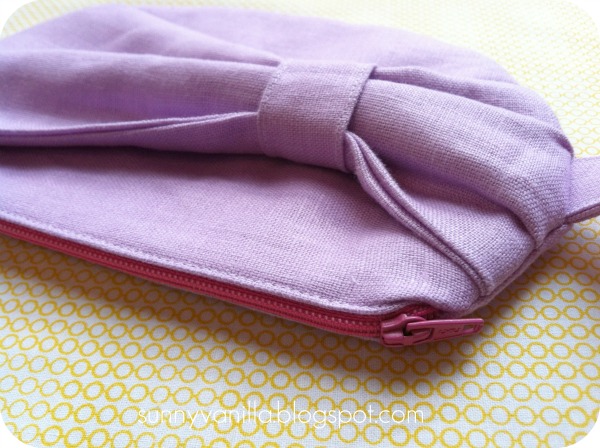
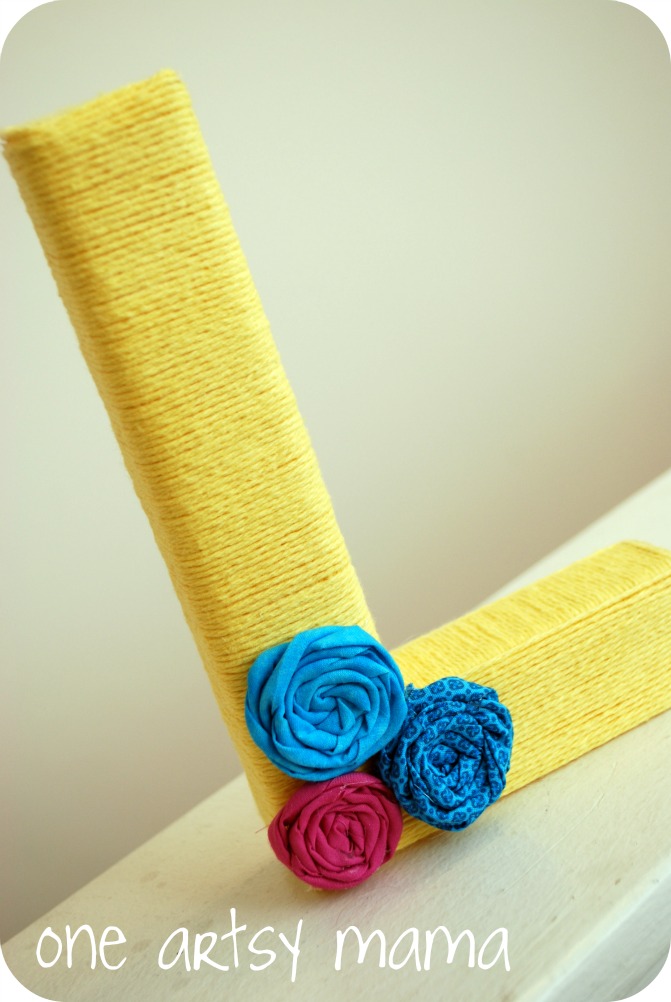
Take multiple shots of your subject, snapping from different angles and heights.
One of the blessings of digital cameras is that we don’t have to pay for photos we don’t use, so snap away! Take fifty pics, then decide which ones are the best. You’ll be surprised how things look from different vantage points, as you can see in these examples from my friend Jen at Sunny Vanilla.

Use your zoom.
Don’t limit yourself to just photos of the entire project, zoom in and capture the details. Trust me, your readers will want to see, especially if they’re going to try and reproduce your project.

******************************************************************
AFTER YOU PHOTOGRAPH
Do some basic editing before you post your photos.
You don’t have to be an editing pro to enhance and improve your photos. All you need is access to some basic editing software, which you can find on the web, like PicMonkey, or purchase, like CameraBag, Corel Paint Shop Pro, or Adobe Photo Shop. These are a few of the things I routinely do before any photo goes into a post.
Crop your picture to emphasize your subject goes a long way. Trim out anything that isn’t necessary.
Brighten photos that are too dark.


Resize photos so they don’t take forever to load. Mine are usually resized to around 600 x 800 pixels. Then, when you post them, choose the large or x-large option so that your readers can really see them!
Add a Watermark
In today’s digital world, it’s very easy for someone to grab your photos right off your blog, Pinterest, or Facebook for whatever purpose they want. I’ve done this plenty of times when I’ve featured projects, always being sure to give credit to the original source. However, there are folks out there who {either unintentionally or not} will repost your photos without giving you the credit and link-back you deserve. I’ve actually heard awful stories from other bloggers, like Allison from House of Hepworths, about people stealing their images and writing up posts about them as if they had created the project personally. One way to combat this is by putting a watermark on your photos. All you have to do is use the text feature in any photo editing software, type your blog name, and place it somewhere on the photo. You can change the color and/or fade it so it has the appearance you want. That way, no matter where the photo ends up, it always has your name on it.

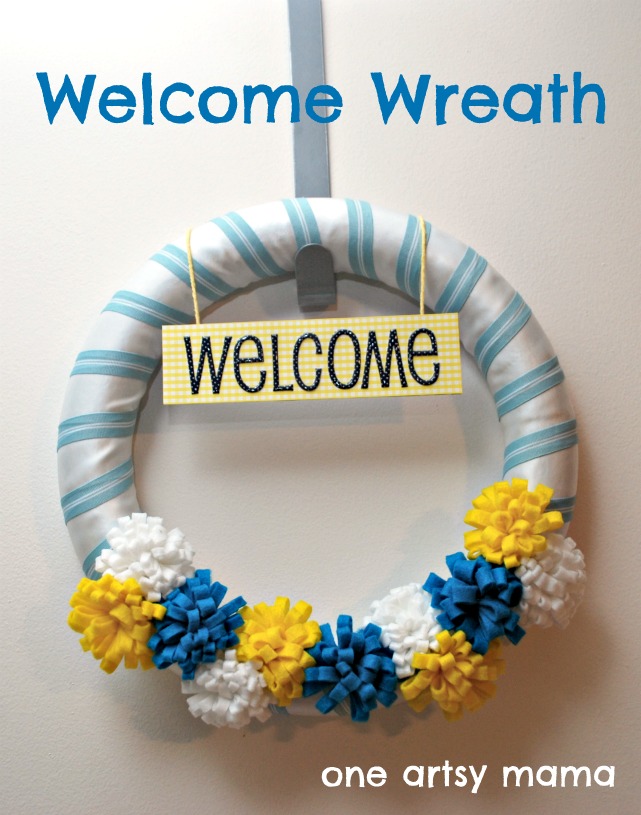
Consider adding text.
You probably don’t want to write on every photo you post, but if you’re writing about a craft or recipe, it can be helpful to include a title on one of your main images. That way, if someone pins it, they {and everyone else} can see exactly what it is. We’ve all seen examples where people didn’t bother to write a description on Pinterest or wrote something like “for Bobby’s room” that has nothing to do with what the thing is, and then a bunch of people just repin it.
**********************************************************************
I wanted to include so much more in this post, like how to equip yourself with a good camera, accessories, and photo software, but I just plain ran out of room and the post was waaaaay too long. So, I split it up and tomorrow you can come back and read about those things.
Don’t miss it; there’s going to be a giveaway for FIVE free liscences to the new CameraBag editing software as well as a link to win a Canon 5D Mk III {aka a really nice camera}.
As always, I welcome your feedback and questions about anything you read here. Talk to me!
Till then, Happy Photographing!


This is Great information! I snap like crazy and then weed out! Awesome suggestions here- Perfect Amy! Can’t wait to see your next post!!
Great post Amy!! I have been meaning to ask you about the flash you use. In some of your self photos you have a large flash. Do you mind telling me what kind it is? Also do you find it makes a difference in your in-door shots? I have been thinking of getting an extra flash. If you are going to answer these questions in your post tomorrow I can wait until then.:)
I really love this series you have! Thanks for the photography tips!
What a helpful post…So nice of you to share your ideas.
Great series and great photo tips.
Great tips! I’m loving this series!
Thanks for the inspiration!
Kate
thank you for the tips, new to all this, i must visit some older posts it seems.Thanx for sharing..
Thanks for the tips. I never thought of just lightening up the photo.
Great tips. The photographs in a blog really can draw you in. Honing these skills is definitely what can take you to the next level.
You are the kind of friend every blogger needs. Thanks for sharing your tips. I have never used a watermark before but will consider it next post. Thanks again
Becky
Amy- I’m loving this series, thank you! I can never get too many tips, especially photography ones:)
Jessica
stayathomeista.com
I just found u through FCC and I am so excited I have been wanting to learn about all this stuff I saved all your pages to my files so I could study through them this week thank you for sharing
Great idea… I think I need a better camera!
http://naptimeshopper.blogspot.com
Thanks so much for sharing at our party this week, Amy. Great tips.
Great tips. Thanks so much for passing along you experience. Jodi@ http://www.meaningfulmama.com
These are great tips. I’d love for you to link this up to Titus 2 Tuesday on Cornerstone Confessions tomorrow.
Clicking over from a Pinch of Joy.
Kathy
Thank you for the great tips. There’s always room for improvement!
I think one of my biggest mistakes re photography, is my impatience and the need to take photos as soon as I’ve finished a project, usually late at night. Thanks for sharing these tips, Amy…