This year, I started something really exciting; an
in-real-life crafting group! We call ourselves the Crafty Ladies, and we meet one afternoon a month to have some creative girl time together. We decide on a project, I purchase most of the supplies, and then they reimburse me when they show up to craft! In January, we had our first meeting and created
decorative wooden blocks. We decided that the theme for February’s event would be decorating flowerpots and wooden eggs for Spring.
Before the ladies came over, I decided to try out a few techniques so I could help to inspire and teach them.
One of the experiments was Little Crafter’s
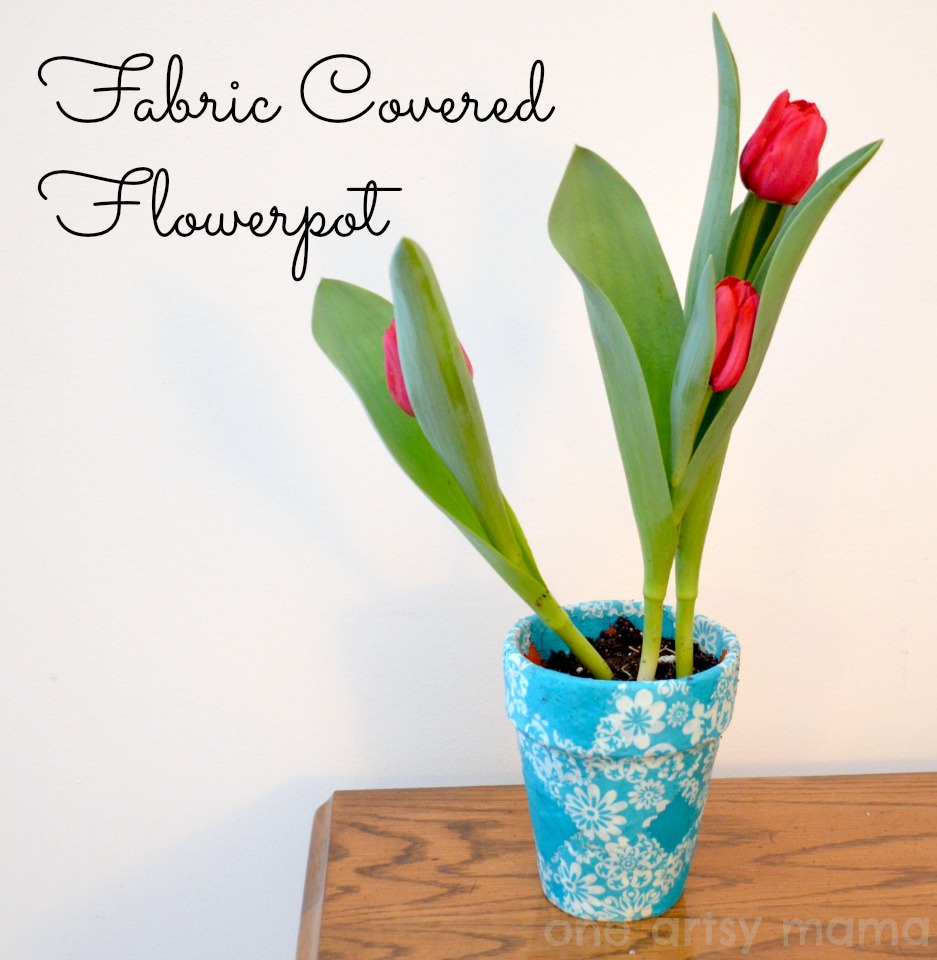
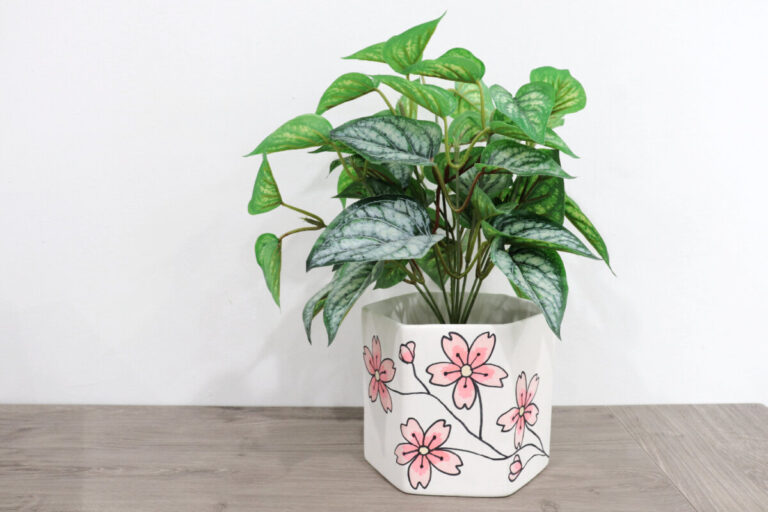
Paint Drip pot, which is so fun and easy! The other idea I tried out was covering a pot with fabric and Mod Podge. Here’s the basic technique I used {and later shared with the girls}!
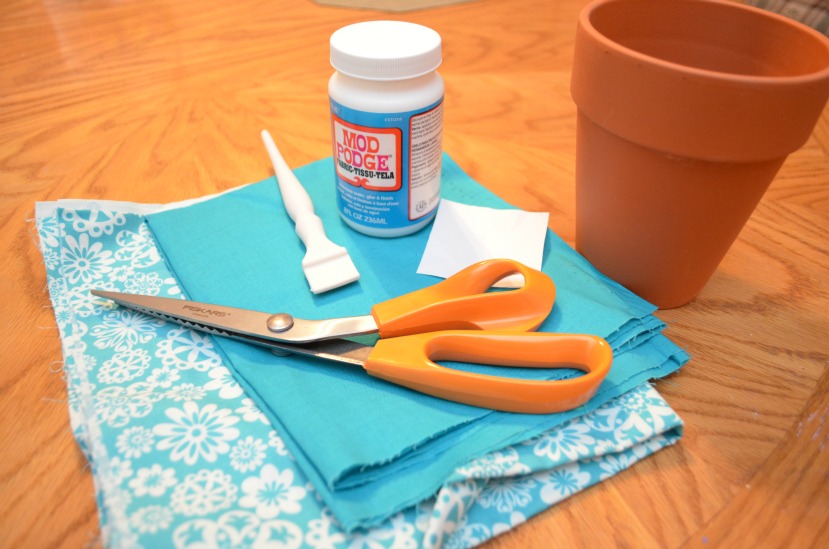
Materials:
– fabric {you can use all one fabric, or you can use two or more coordinating ones}
– pinking shears
– paintbrush or paint spatula
– terracotta pot
– Mod Podge: Fabric formula
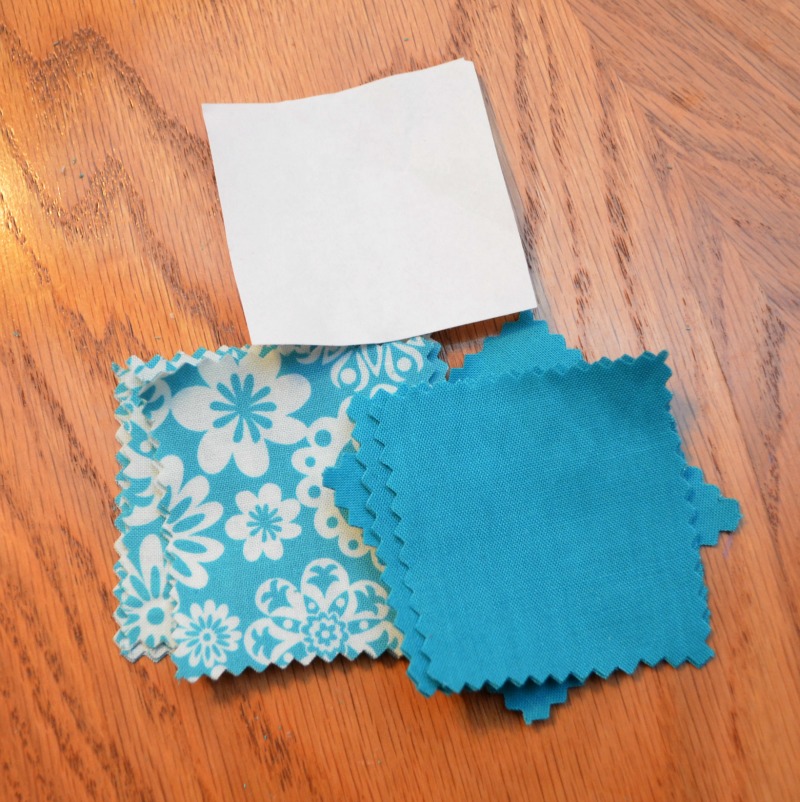
Step 1: Cut your fabric into small squares {about 1 1/2″}.
Depending on the size of your pot, cut as many squares as you think you might need. If you need to cut more later, you always can.
Step 2: Begin Mod Podging your squares onto the pot. First apply Mod Podge directly to the pot. Then, place your fabric on top of it.
Make sure to cover the entire surface, as well as folding it down to cover the bottom and go over the rim of the top.
Step 3: Cover the entire surface of the pot with a nice coat of Fabric Mod Podge to seal it. Let dry completely.
Step 4: Add a plant! Once your pot is dry, you can plant anything you like in it. I chose tulip bulbs. Just a note: do your planting outside. Otherwise you can end up with a dining room table and floor that are literally covered in dirt…or so I would think…not that I know or anything…{ahem, cough}.
Next week, I’ll be sharing a post where you’ll get to see how my friends’ fabric covered flowerpots turned out. All but one of the nine ladies decided to go with this technique {the other painted hers a pretty shade of green}. I’ll also show you the decorative eggs. You’re going to love what they created!
Hugs & Glitter,


I want a crafting group! That sounds like so much fun. And I love this project. Pinning now!
Decoupage is the best. What a cheerful springy pot you made!
hugs x
Crystelle
http://www.crystelleboutique.com
I want a crafting group too!! What fun:)
It has been my dream for a few years now to have a Crafty Ladies group, but I can never get enough ladies to join me! Love your project.
It has been my dream for YEARS to have a Crafty Ladies group. You are so lucky!!! Love the project and ideas.
I love it!! This is so cute!!
So cute, Amy! 🙂
Amy, I love how you used your pinking shears to cut out squares to mod podge. Your flower pot is cute! Thanks so much for sharing at March Madness