Tissue Paper Cherry Blossoms: Organized 31
Hi there, friends! Today, my friend Susan is here to share a quick tutorial with you for making some DIY Cherry Blossoms to decorate your house. Since the ones outside aren’t blooming yet, and probably won’t be for Easter, here’s a way we can still have some pretty flowers to look at as we celebrate! Here’s Susan…

Hi, I’m Susan from Organized 31. I’ve been working with Amy in her Blog Mentoring Program since January and I’m so excited to be here at One Artsy Mama.
I love reading about the projects Amy does with her Little Crafter. I miss those days. My little crafters have grown into a Medium Crafter and 2 Grande Crafters. I was thrilled when my Medium Crafter agreed to sit down and do a craft project with me! I remember doing this same project when I was in 2nd grade in Hawai’i. I can’t remember my dog’s name some days, but I can remember how much I enjoyed this project and how beautifully it turned out.
So come take a walk down memory craft lane with me and my Medium Crafter.
Supplies:
Twigs – Take a nature walk with your crafter and find twigs as big or small as you like. The ones we used are about 24-30 inches long. Look for branches with interesting shapes.
Tissue Paper – I just raided my gift wrapping supplies. Choose white, light pink, darker pink and green tissue paper. This is the perfect time to repurpose that crumpled tissue paper you’ve been inexplicably holding onto.
White school glue or glue dots – We used both. White glue would be easier for little crafters so they don’t have to fight with the unbelievably sticky glue dots.
Pencil – Find a new one, more importanly one that has not had its eraser used yet.
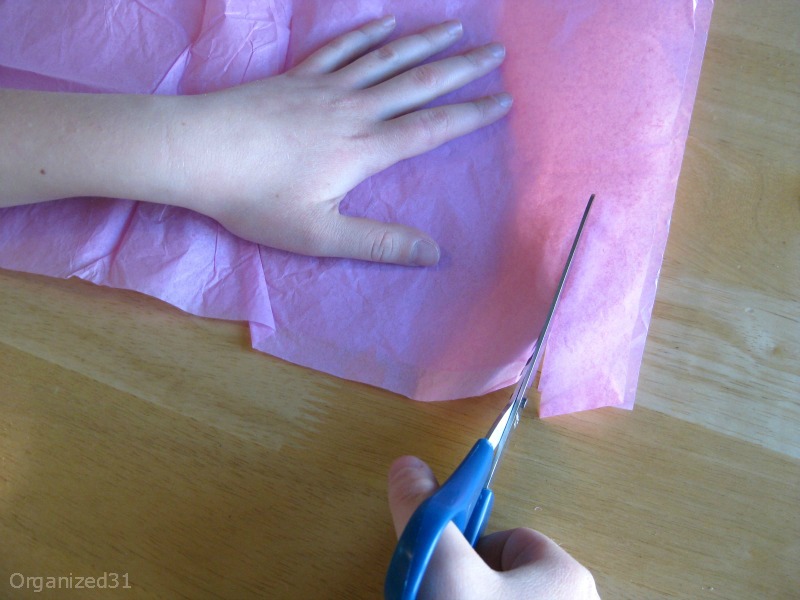
Cut your tissue paper into strips approximately 1 inch wide. My Medium Crafter helped me with the cutting, but depending on your little crafter’s cutting skills, you may need to do this step. You don’t have to be precise here. The beauty of this project is that nature isn’t precise so you don’t have to be either. Whew.
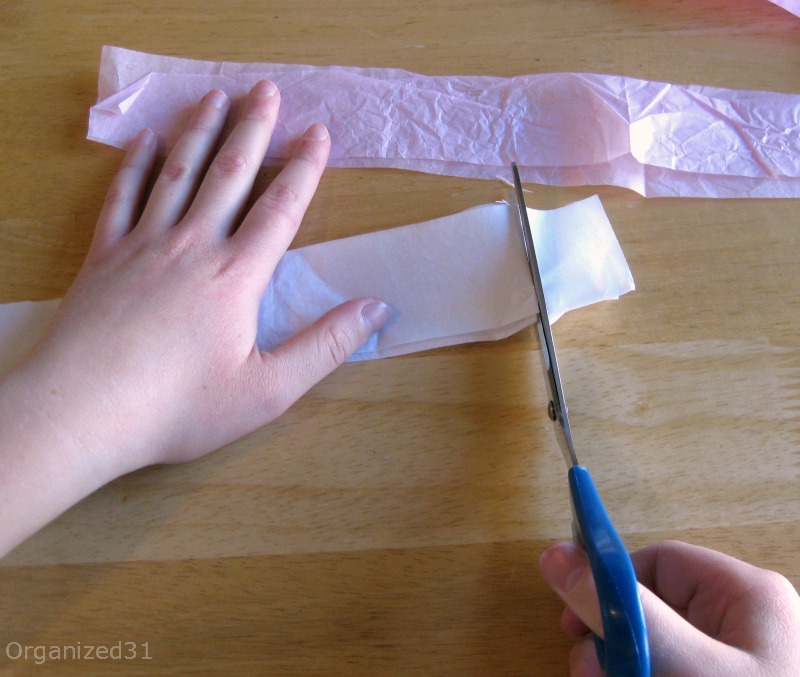
Then cut the strips into 1 inch squares. Your little crafter could help with this step and gain some great practice in cutting with scissors. It’s easy for little hands to make these short cuts. And again, perfection is not necessary.

If you choose to use green tissue paper to accent your blossoms, cut the green paper into 1 inch strips and then the strips into 1/2 inch pieces. You can also use oddly shaped pieces that are approximately this size.

Stack 2 pieces of paper on top of each other, rotating the top piece so 8 points show. This is the perfect time for your crafter’s creativity to come into play. You can make your stacks with 2 papers that are the same color or you can mix and match different colors.
I prefer the mixed stacks because the variations in color make an interesting effect in the blossom. The single-colored blossoms have a bolder color and the 2-colored blossoms have a more subtle effect. Play with the colors and find what you like best.
Stick to stacks of 2 pieces of paper for a more delicate looking blossom.
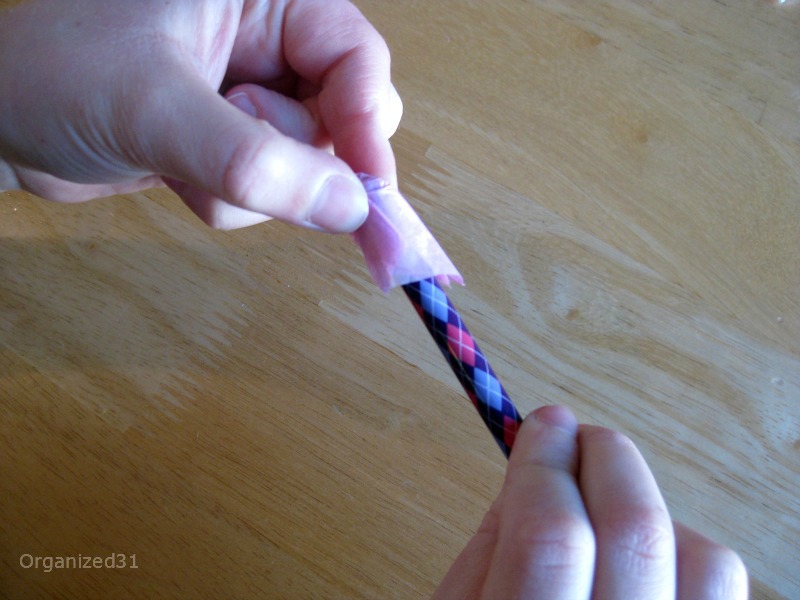
Place the eraser end of the pencil down in the center of a paper stack. Pick up the papers and twist them around the eraser.
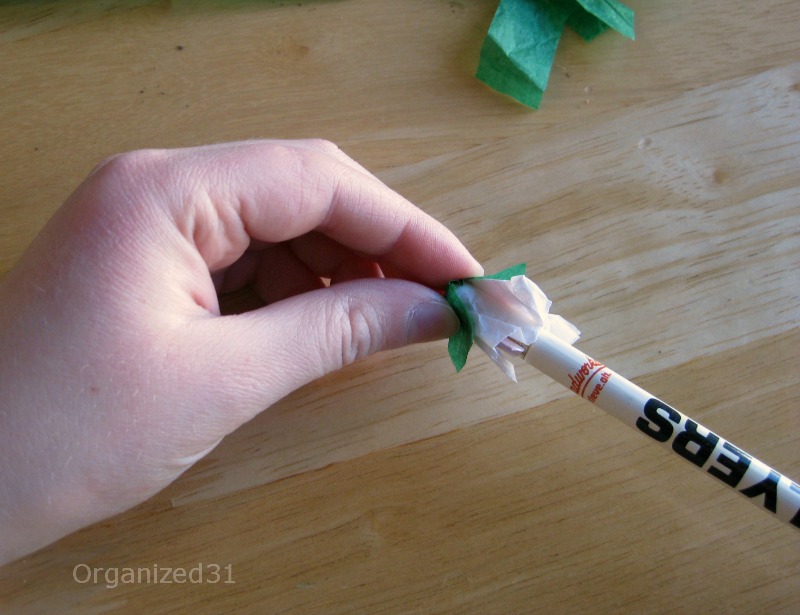
If you want to add the green accent, add it after you’ve twisted the stack of papers.
Notice that my 10-year old male Medium Crafter wanted to change the “girly” purple pencil out for the hockey pencil once we got going. He wanted to go back and reshoot all the pictures, but Mama Crafter said, “Nope.”
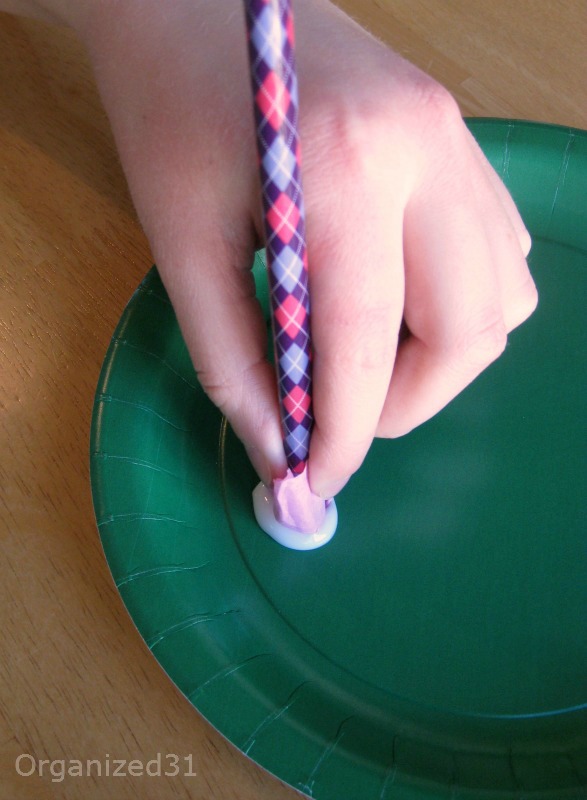
Dip the paper, still twisted on the pencil, into the white glue. You just want to get the glue on the flat part of the paper (the end of the eraser) not up on the sides of the paper. The glue holds the pieces of paper together so be sure to do this even if you’re going to use glue dots to adhere the paper to the branch.
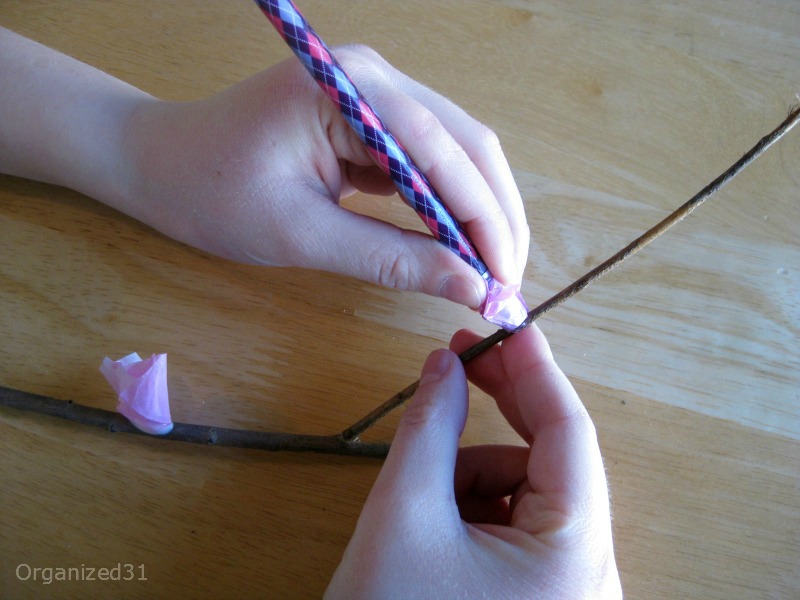
While the glue is still wet, support the back of the branch and press the paper to the branch. Slip the pencil out of the paper and there you have your cherry blossom.
The blossom on the left was adhered with while glue and the one on the right using a glue dot. We found that the cherry blossoms stuck equally well with either the glue or the glue dot. It’s your preference. You have to wait a little bit for the white glue to dry, so glue dots are better for us impatient crafters.
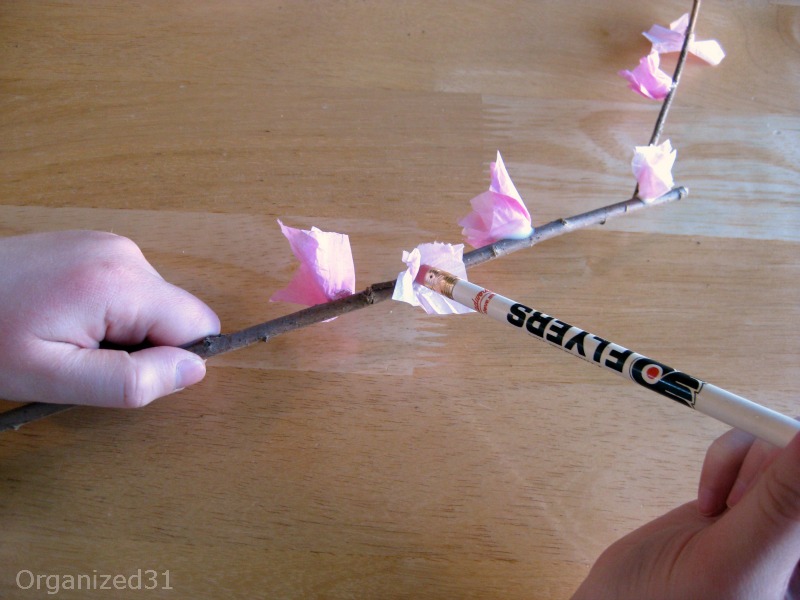
To add some variety, it looks nice to mix in some blossoms made from a single square of paper.

Medium Crafter told me several times how much fun he was having (he was skeptical before we started) and how much he liked how the branches turned out. That’s quite the compliment coming from a 10-year old boy.
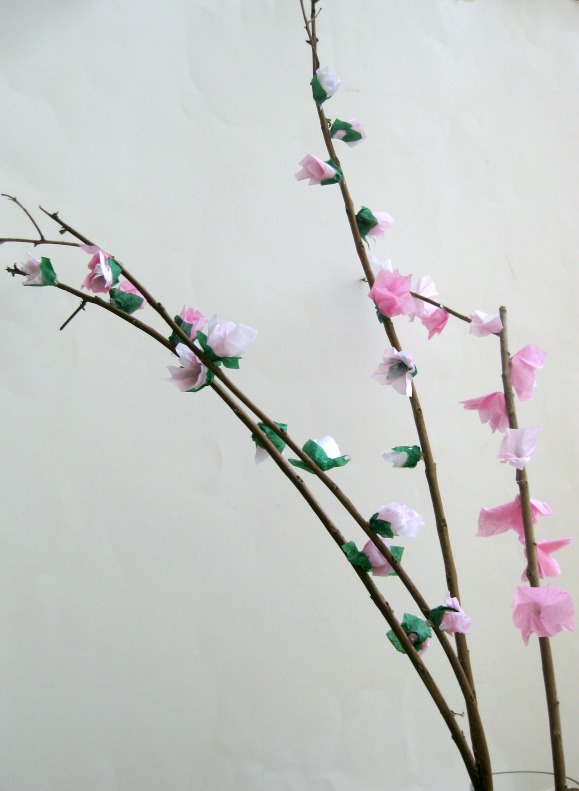
My 2 teenage Grande Crafters even complimented us on our project when they got home from school. Impressive coming from 2 teenage girls! One of my Grande Crafters preferred the blossoms without the green accent and the other preferred the blossoms with the green. Medium Crafter and I prefer the simple blossoms without the green. But you should try both and see what you and your crafter prefer.


Lovely Cherry Blossoms, such a beautiful quick craft!
This is so pretty!!