Getting Gawked: How to get your projects accepted to exclusive submission sites

Almost every afternoon, I get an email in my inbox that makes me hold my breath in anticipation. The sender? Craftgawker. The message? Well, it could go one of two ways. On a good day, it brings a smile to my face as it tells me “Your post entitled “Latest Fabulous Thing I Crafted” has been published…” At that point, I stop reading and start anticipating the pageviews that are about to come rolling in. Or, it could say something like this, “Unfortunately, your post titled “My latest really cool project here” was not accepted. Primary reason: Who even cares.” My heart sinks. Rejection. It stinks.
Raise your hand if you’ve been there.
If you’re a blogger yourself, chances are you’ve figured out the reality that the best sources of traffic for most of us these days are Pinterest and submission sites. If you’re unfamiliar with submission sites, let me fill you in. They’re curated web pages where you go and submit your projects in the hopes that you’ll be accepted. If so, the thumbnail photo, a brief description {written by you}, and link to your project will be shown on the page where it will be exposed to tons of viewers and drive lots of visitors your way. The plus side of this is that you can get great results for little effort; it’s much easier than linking up at fifty parties a day! But the downside is that some of these sites can be incredibly exclusive and hard to get accepted to. It’s no fun getting rejection after rejection, right? That doesn’t help anyone.
Over the past year, I’ve learned some “best practices” for taking photos that are more likely to get accepted on submission sites. Today, I want to share them with you in the hopes that it will help you and your projects get the attention you deserve!
1. Always photograph with a square image in mind.
Almost every submission site standardizes their photos to be square images. You can upload any kind of image you want, but the site will trim it to square proportions. So, when you’re taking your photos, remember to get some that can be trimmed squarely and still show off your whole project. This is huge for me, because I tend to like taking vertical closeup shots of my project, like this:

Which is great for Pinterest and for on my blog itself, right? But the trouble is, when a submission site wants to make it a square, look what happens. Womp, womp… FAIL!
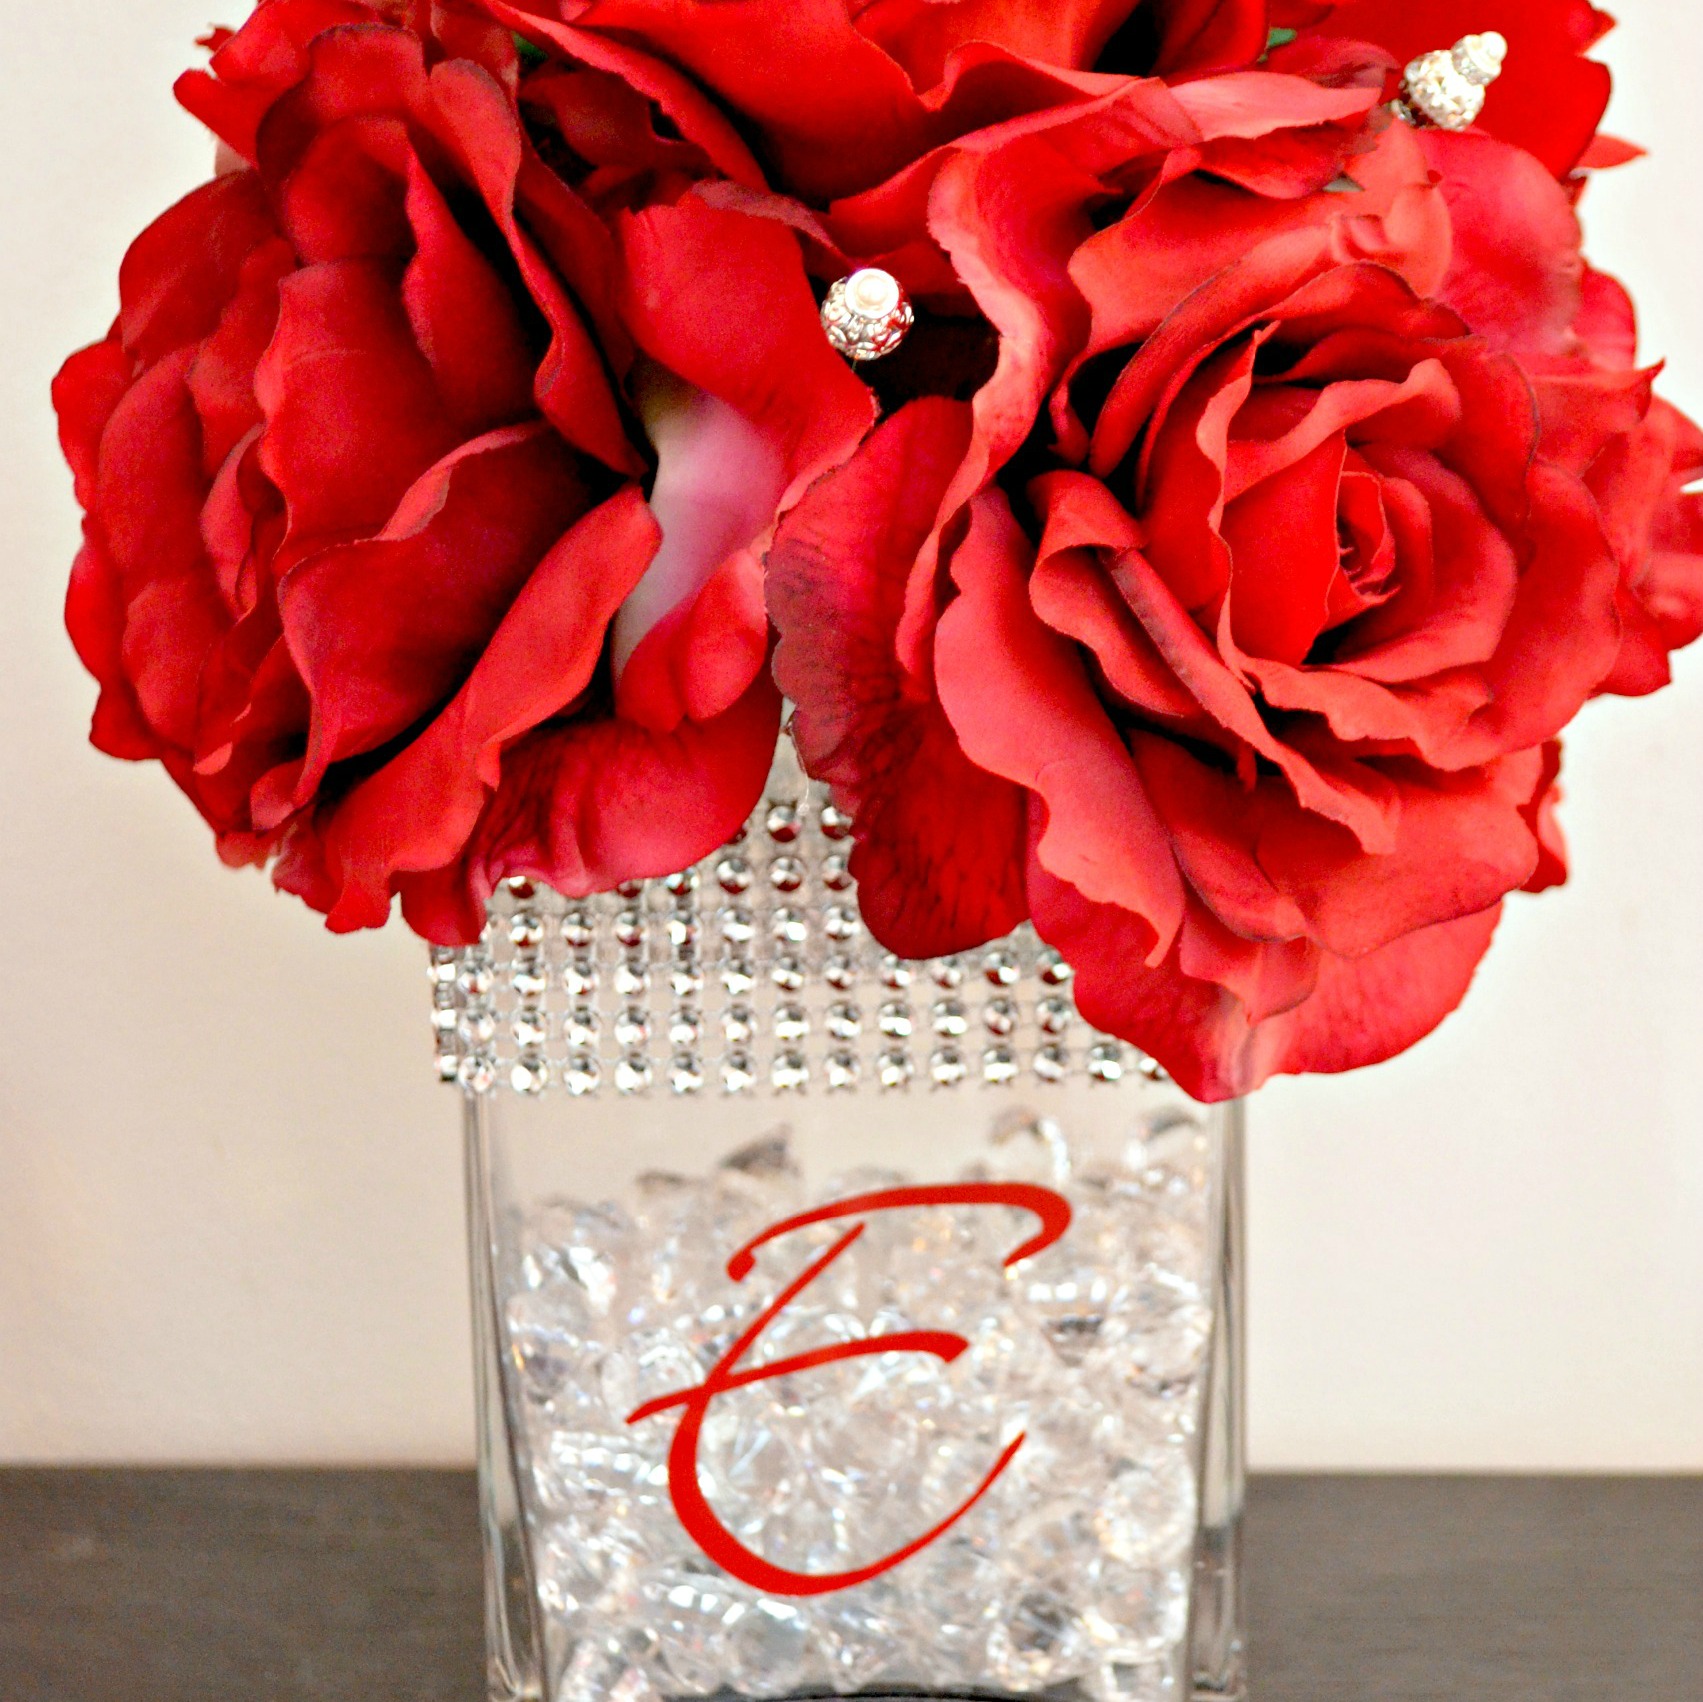 This is pretty much guaranteed to get you the following message, “Unfortunately your post titled “Wedding Bling Centerpiece” has been declined. Primary reason: “Cropped too close.” Sigh. After getting a few of those messages, I started actually thinking in terms of squares when I take my photos. I still take my closeups, but I also always remember to zoom out and get a wide shot so that I know I can go in and turn it into a thumbnail image later. I’ve also started making a “just for the gawkers” image when I do my photo editing. The first thing I do is crop the image to a square and resize it to about 900×900 pixels. Then, when I upload it, I already know how it’s going to look.
2. Photograph your projects on a solid background or carefully staged with props. {Get rid of clutter!!!}
If you want to be featured on one of these submission sites, don’t even think about submitting a photo that isn’t clean and neat. I tend to be an impatient crafter/photographer, which means when I started out, I had photos like this:
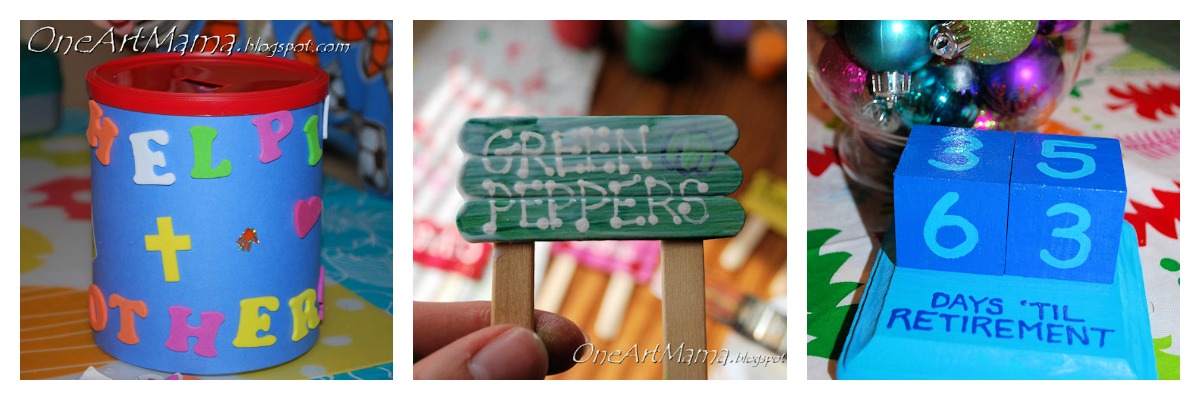
I know. It makes me shudder too. The photos are totally cluttered with background stuff…busy tablecloths, craft supplies, my son’s arm…aack! No way these are getting featured anywhere. Now when I do my beauty shots, I use either a white background, a black background, or something very carefully staged to enhance rather than distract from the project. A simple way to do this is to invest in a cheap tri-fold posterboard. Most of my white background photos are taken with that. My black background photos are either taken on my coffee table or with the help of some black cardstock. It’s inexpensive and easy to make this little change, and it goes a long way!

3. Make sure you remove all text from your photos.
I know many of us like to watermark our photos to protect them from being stolen by not-so-nice websites that want all the credit for great creations without doing the work of creating. That’s totally fine! Just make sure when you edit your photos to save one version with watermark and one without so that you can submit a text free version to these types of sites. They will not accept anything with text or watermarks. Period.

4. Use photo editing software to adjust your color balance and exposure.
The most common reason for rejection I personally get has to do with my lighting and/or exposure. Make sure you check your color balance first. Certain places I photograph tend to give a warm cast to my photos rather than the true colors of what I’m photographing. Fix that! Sometimes it may mean reshooting, as it did in this particular example, but sometimes you can play with the color temperatures enough to get that nice true white balance.

Exposure is the other huge deal. These sites don’t like dark photos. I mean, who really does? Right? So, my philosophy is brighten it and then make it a little brighter still. The one on the left got rejected. The one on the right got accepted. Big surprise. Be careful not to overexpose in the process, though!

5. Take your photos straight on, no artistic angles.
It’s become somewhat popular in the photography world to take artistic shots of people and things from various angles. Like so:

Whether you personally love or hate it, the relevant factor here today is that the submission sites HATE it. They want simple, straightforward photos. No angles, no alternate views, nothing creative or “artistic” about the photo itself. My advice here is KISS: Keep it Simple, Sister. You’re taking a pic of the cupcake? Do this instead.

I cannot even tell you how many rejections I’ve gotten with the primary reason being “awkward angle.” Ugh. I hate that. Like this. Apparently the one on the left was awkward. I don’t know. All I know is that now when I take my photos, I literally get down at eye level with my project and always take several photos absolutely straight on. You should too.

5. When all else fails, add a cute kid.
Apparently the powers that be really like cute children. Or they know that the average viewer likes cute children. So if I’m having trouble getting a photo accepted, like this one of my beach ball pillow {which apparently is at an awkward angle?}, I submit one with Little Crafter photobombing. I’ve only ever had ONE photo with LC rejected. One. That’s huge. I guess it makes sense, I mean just look at him!! How can you reject that? You can’t. Period.

6. Try, Try Again
You will get rejected. I promise. Want some stats to make you feel better about your own submission site track record? Here’s my record at CraftGawker. I have 97 projects accepted and {wait for it, wait for it…} 257 rejections! But you know what? I keep trying. Because when I get one accepted, the traffic is off the hook. It’s seriously worth it to try again, especially if it’s a project you’re really proud of and you think has the potential to go viral. Sometimes it means re-editing your photo by playing with cropping, color balance, exposure, sharpness, etc. Sometimes it means retaking a photo with a better background or in better lighting. Sometimes I have absolutely no freaking idea what the issue is but I just keep submitting in the hopes of wearing them down eventually. One time I literally submitted at least 10 photos of a beaded bookmark project. I edited, re-shot, and kept on submitting until they finally FINALLY took the largest one you see in the collage below.

Over time, I’ve incorporated these tips and instead of getting 10 rejections for every acceptance now, I’m about 2 acceptances for every 1 rejection. I like that.
So what do you think? Are you ready to tackle these monsters? Here is a reference list of submission sites for you to try out.
Craftgawker: accepts DIY projects, tutorials, crafts, home decor
Dwellinggawker: accepts posts about home improvement, interior decorating, room makeovers
Foodgawker: accepts food and recipe posts {doesn’t have to be original; they took my cupcakes which were a box mix}
Weddinggawker: accepts wedding-related posts
Stylegawker: accepts posts about fashion, style, manicures, jewelry
LooksiSquare.com: accepts all types of DIY posts
LooksiBite.com: accepts recipes and food
Fun Family Crafts: accepts anything child-related
Taste Spotting: accepts food and recipe posts
Just a note: Looksi and Fun Family Crafts are far less exclusive than the others listed here; if you follow these tips, you’re pretty much guaranteed to get accepted there.
What do you say? I’d love to hear if these tips help you get some features!
Hugs & Glitter,


Great tips! I’ve had a several posts accepted (and several more rejected!) and I go through spurts..I’ll submit regularly for 2 weeks, then forget about it. I should be more consistent!
Good luck, Steph! It’s totally worth the traffic, isn’t it?!
Great tips! I’ve never attempted to send anything to submission sites because I know how picky that they can be. These ideas are definitely something I will look into in the future and maybe give it a whirl. Thanks for sharing!
Great tips. I wish I had read them before my first gawker submissions. It would have saved some heartache. I do think the rules are a little different at the food sites, they seem a little tougher to break into, but I keep trying….
Good luck! I know more about the craft/DIY ones than the food ones, just because that’s my niche, but I do know that even within the gawkers they can be inconsistent. I’ve had the same exact submission accepted by stylegawker and rejected by craftgawker and vice versa.
This is fantastic. I honestly didn’t know there were even submission sites like these so I just bookmarked this link! http://talenttoplay.blogspot.com
Found you via Pinterest today. Love this article. It was a huge help to me, as I haven’t been very successful on any gawk site….I thought it was just me. Haha! Nice to read and I just tried a few of your tips….we will see! 🙂 I’m a new follower!!! Thanks for sharing!
Pam @ The Patriotic Pam
Good luck, Pam! Let me know how it goes! Glad to have you following along now!
so…moral of the story is I need to get me a cute kid. 🙂
This is a great list! Thank you! I’ve had some decent success over at CraftGossip(dot)com (just replace (dot) with a period). They take all types of things from tutorials to crafts to scrapbooking! I wish I could find some bigger name “exclusive” scrapbook sites =( maybe I’ll just have to start adding “real” crafts to my site lol!
Oh, yes, CraftGossip is a great place to submit too. I submit my jewelry there sometimes. Some of my things don’t fit into one of their categories, but otherwise I like it lots!
Hi! Thanks for writing this, but we just wanted to comment on a few things. It’s not true that you have to photograph on a white background to be accepted on craftgawker. Uncluttered and simple is a good idea in general, as you said, but any attractive background will work. I also wouldn’t recommend blowing out whites. We’re just looking for proper exposure, overexposure can also get a photo declined. And lastly, you don’t have to shoot a photo head on to avoid being declined for awkward angle. We just want to avoid images where the subject appears distorted or unbalanced. You’re beach ball pillow probably shouldn’t have been declined for awkward angle. It was more of a background issue. The photo of the little boy holding the pillow is much more dynamic and interesting! Thanks for submitting!
Thanks for taking the time to read and comment, Maria. I did mention that a black background or careful staging will work just as well as a white background; I think a lot of people have the misconception that everything needs to be white, but sometimes that’s not the best way to show off your project, right? I added a little note in there to be careful not to overexpose; thanks for the suggestion. In my experience, pretty much everything that isn’t head on gets the awkward angle comment, but perhaps that’s just my pictures. It’s just the best advice I can give based on my experience. I appreciate having your feedback, and I know my readers will too!
Amy, this post was so helpful. I never knew this all. You did a fantastic job of providing information along with amazing pictures to illustrate everything. I can’t wait to use all of your advice and expertise!!! I’ll let you know how it goes!
Debbie
Thanks so much, Debbie! Can’t wait to hear about your successes!
Amy, this is seriously THE BEST advice. Thank you for writing this post and sharing your DOs & DONTs. I have never submitted a project to a site like this but realize that I probably should (after I take more time making my pictures & posts more professional.
Great tips, Amy!
Thanks again for your help and tips. I submitted a couple of photos yesterday and on got accepted on http://foodsibite.com! Nice little excitement for the day.
Would you beleive I didn’t even know about gawked?? Im registered now!
GREAt tips!! thanks so much for sharing!
hey amy, wondering what specifically you adjust to get the white balance right? I seem to have trouble with this one… do you use picmonkey or photoshop? I have elements… but am not sure what to adjust beyond the basics… ;o)
I loved this post! I have never tried submission sites so I’m excited to use your tips and try it out!
Rachel, you definitely should! And considering the types of things you often post, you should head straight over to FunFamilyCrafts.com and start submitting everything you’ve got!!
Excellent tips! Thank you! As you’ve said before, we as bloggers are supposed to be professional photographers, too, so we have to do all this extra work to get “gawked”, but the traffic is most definitely worth it. 🙂
Thank you so much for sharing! I’m trying to grow my blog and actually never heard of this.
Good luck! I hope you have success!
Great post! Thank you so much for the great information. I am going to implement it and get gawked soon! 🙂 Blessings! Pinned and Tweeted!
So glad you found it helpful! Good luck getting “gawked”!
I just realized that I’ve pinned at least 4 of your blog tips in the last hour after searching for tips on pintrest…you have such fabulous information! As a new blogger, I really appreciate candid, helpful advice. Thank you!
That makes my day! Thanks so much for letting me know, Alyssa! So glad you are finding the posts helpful.
Hi Amy,
We thought this could be useful to you, and other craftgawker submitters. The editors put together this gawkerverse submission guide about how submissions are evaluated. Hope it helps!
http://craftgawker.com/faqs/#faq6
Dear Amy,
i cant thank you enough..this info has really helped me… im strating my fashion blog very soon and have been tying to understand the ABCs of blogging…. thank you so much.. i had no clue abt submissions and how awesome that can be to increase traffic on my blog…
God Bless..
cheers
Jas sagu
Thanks for the awesome tips! I’ve been submitting to all these sites (except for LooksiBite – thanks for that suggestions) and more. Foodgawker and Tastespotting definitely seem to be the most difficult to get into (even compared to the other Gawker sites), but try, try again, right? 😉
Glad you stopped by, Ginnie! I hope the tips help you! And yes, keep on trying!
Amy, this was amazing. I got my first post on CraftGawker thanks to your tips!! Great post, thank you.
YAAAY! I am so excited to hear that! Congrats; hope it brings you lots of views and you continue to have success!
Thank you for the tips! I have yet to submit anything to any of these sites because my fear of rejection is too strong. 🙂 I will have to try these tips and see how I do!
Such a great post and list! Something I’ve been trying to figure out and I will definitely put these to use!
Good luck, Britney!
Thanks for those tips Amy! I’ll certainly be using them in the future as I’m new to these platforms.