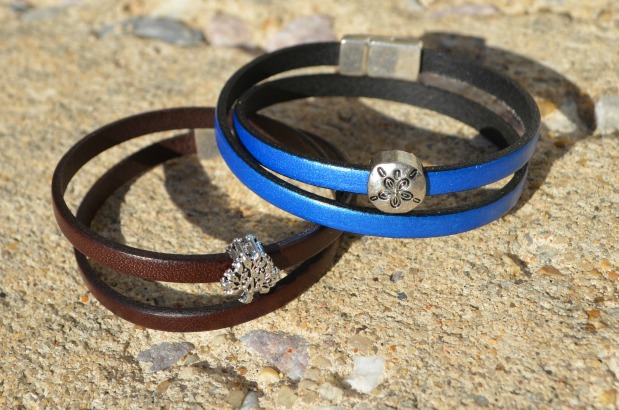
Crystal Heart Charm Bracelet
Friends, I think I have an addiction. I can’t stop making pretty things with these expandable charm bracelets! The good news is that since I can really only wear so many, my friends are making out like bandits. The bad news is that Erin says you all will get sick of them and she refuses to catalog any more on the jewelry page. 😉 Either way, I couldn’t resist showing you my latest creation, a birthday gift for my good buddy Sarah.

Materials:
Some of the links below are affiliate links, meaning that if you click through and make a purchase, you’re helping to support this blog!
– Gold Finish Expandable Wire Bracelet
– Gold Heart Stamping Blank
– Flat back Swarovski Crystal
– Jump Rings
– Headpin with Ball Top
– Bead of your choice
– Juniper Lowercase Alphabet Metal Stamps
– Black Permanent Marker
– ImpressArt Metal Stamping Hammer
– Steel Stamping Block
– Texture Hammer
– Jewelry Polishing Cloth
– Super Glue or Jewelry Glue
– Needle Nose Pliers
Step 1: Stamp and texturize the heart. If you’re new to metal stamping, you can find a full photo tutorial with step-by-step instructions for how to get started here. All I did this time was stamp the initials of Sarah’s three children along the side of the heart. Then, I used the texture hammer to distress the heart and give it a worn antiqued look. I colored in the initials with permanent marker and removed the excess with a polishing cloth.

Step 2: Add a flat back Swarovski crystal! Recently, even though I was unable to attend the CHA show this year, I received a fun box of goodies that included some very sparkly things from Prima Bead. Among them were these pretty little flat backed crystals. I just used super glue to attach one to the left side of the heart, and voila! Instant bling!
Step 3: Place a jump ring on the heart charm and add it to the bracelet. Remember to always twist the ends of a jump ring to open and close it rather than pulling them apart.
Step 4: Thread your bead onto a head pin and make a wire loop. Attach it to the bracelet with a jump ring. If you’re new to beading and have no idea how to make a wire loop, you’ll want to check out my Beading 101 post for step-by-step instructions…I promise it’s easy!

I’m loving how it turned out, and based on Sarah’s reaction, she is too! It was especially fun watching her notice her kids’ initials on the heart. What do you think of adding the flat-backed crystal? I really like the extra bit of bling it adds, and I think I’ll be doing that a lot more in the future!