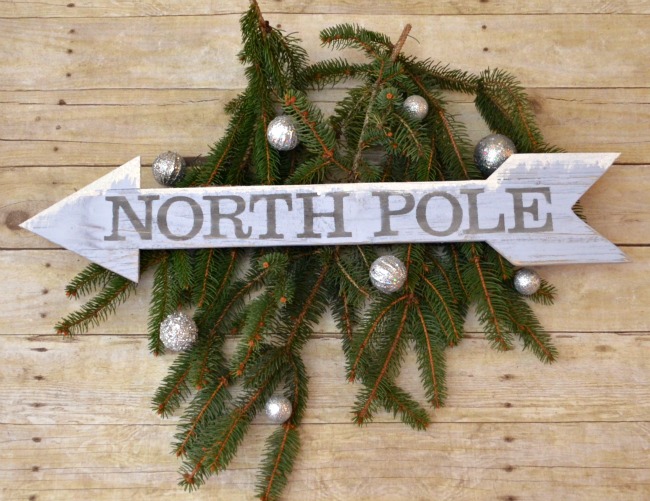
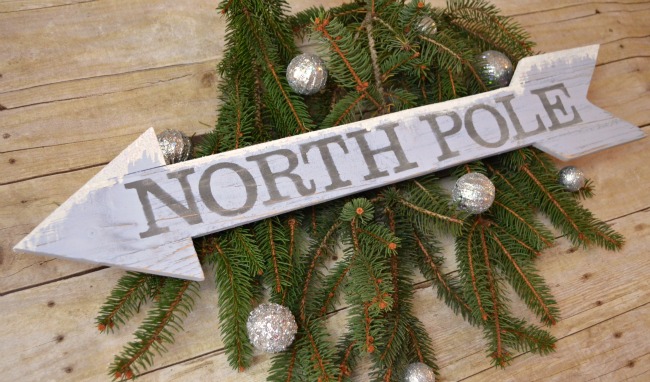
North Pole Arrow Sign
Thanks to Krylon for sponsoring today’s post. All opinions are honestly my own.
Friends, can you feel the excitement? Thanksgiving is just a little more than three weeks away {for those of us in America} and there are only seven weeks until Christmas! It’s the time of year when I just love decorating our home and making fun, festive projects to share. Today, I want to show you one of my latest creations. Arrows are still hugely popular, so I wanted to incorporate one into our holiday decor. I wanted to be able to display it through New Year’s and beyond, though, so instead of using Christmas colors, I opted to go with more of a “Winter Wonderland” theme. Here’s how I did it and you can too…
North Pole Arrow Sign
Materials:
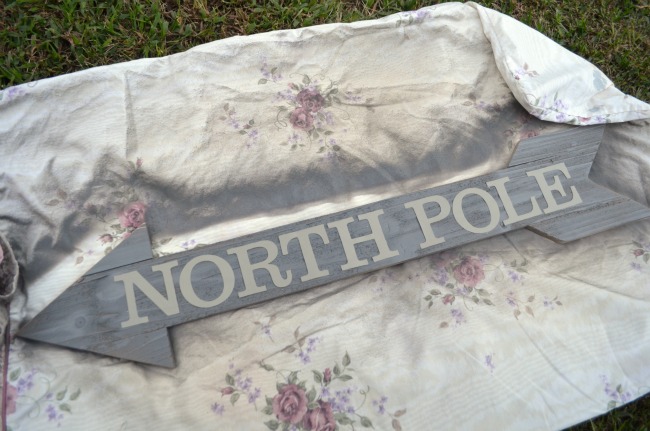
Wooden Arrow {I found mine at Michaels}
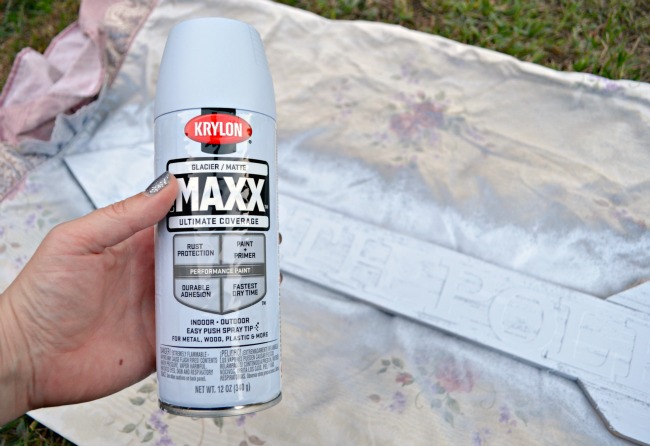
Krylon COVERMAXX Matte Deep Gray
Krylon COVERMAXX Matte Glacier
Sand Paper or Power Sander
White Chalky Finish Paint
Glitter
Adhesive Letter Stencils
Paint brush
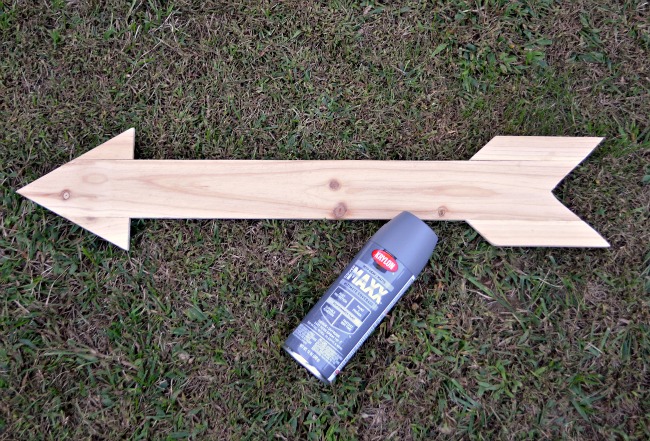
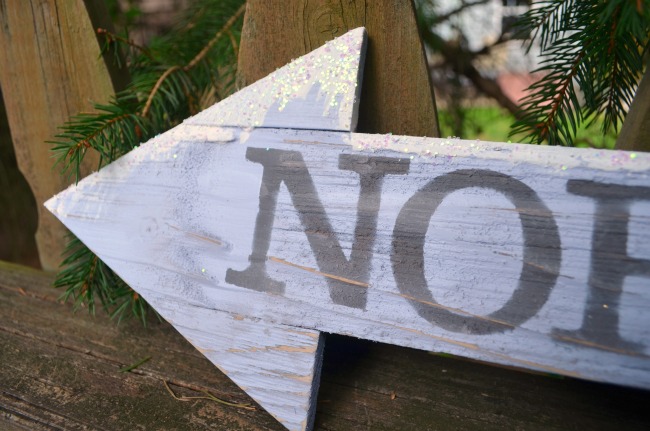
Step 1: Spray your entire arrow with Matte Deep Gray.
This will be the part that shows through as letters and when you do some distressing.
Step 2: Place your letter stencils on the arrow.
Make sure you rub them firmly onto the wood so they adhere well and keep the next coat of paint from going underneath.
Step 3: Spray the entire arrow with Glacier COVERMAXX.
Let it dry completely and then give it another coat to make sure it totally covers the gray. I’ve learned that when you spray paint, it’s always best to do a few light, even coats rather than trying to over-saturate your project all at once.
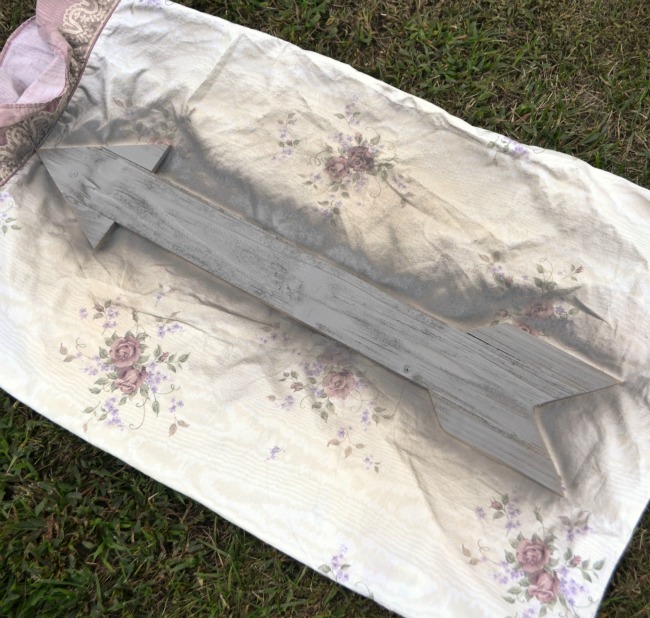
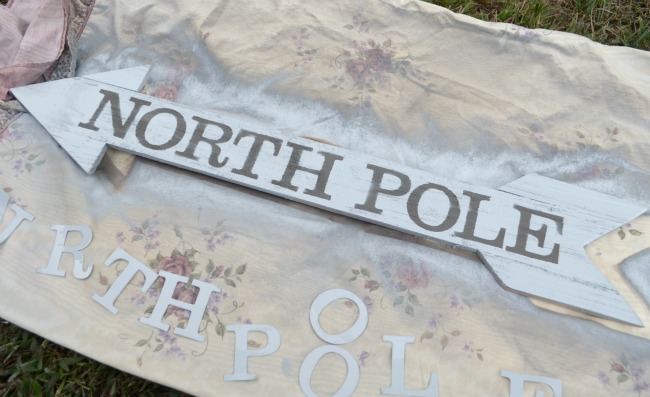
Step 4: Remove the letter stencils.
Now you should be left with a Glacier arrow and Deep Grey words!
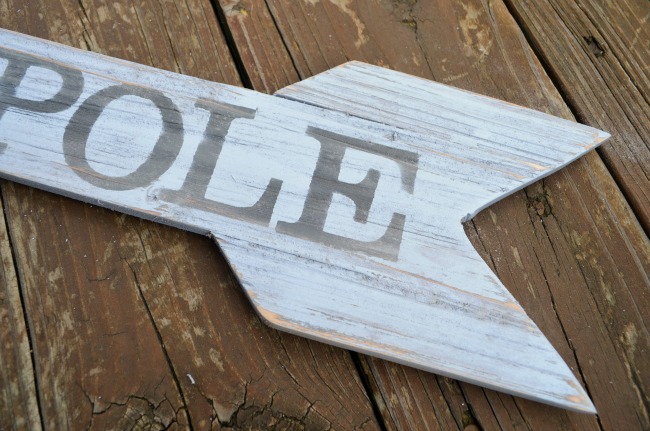
Step 5: Sand and distress.
This is the key to the shabby chic/farmhouse look we all love so much. For this step, I used my RYOBI ONE+ 18-Volt Corner Cat Sander. I went around all the edges, then made a few runs over the entire surface. This removes just enough of the paint to give your project an aged look. You can do as much or as little distressing as suits your personal taste. I wanted to be able to see some Deep Gray and some of the original wood through the Glacier paint.
If you want to stop here, you can, or you can finish it off with a little “snow” effect. To do this, I applied some white chalk paint to a sponge brush and dabbed it along the top edge of my arrow. Then, while the paint was still wet, I sprinkled coarse glitter on top.
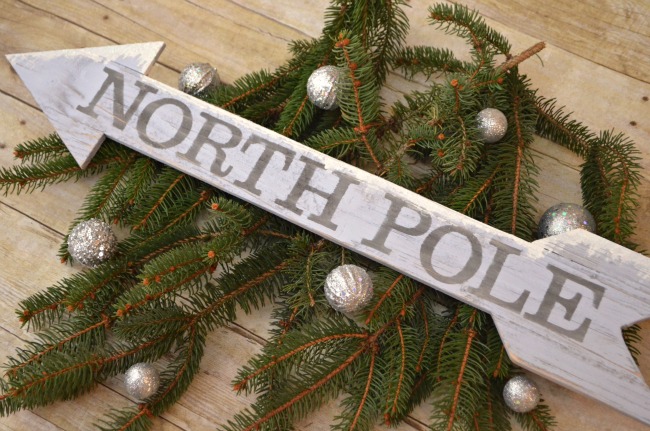
Your arrow is ready to display! Mine has a piece of rustic string on it that I can use to hang it on a wall or door, or it would look super-cute propped up on a mantel. I’m not entirely sure where I’m going to put it just yet {hubby won’t let me put the decorations out for another couple of weeks} but I can’t wait to have it on display soon.
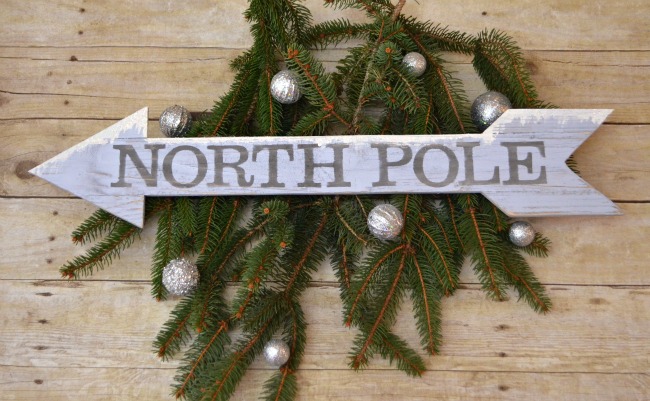
What do you think? Is this something that would fit in with your winter decor? If so, it was really inexpensive and simple to make; go for it!


Cute! I love the snow effect!