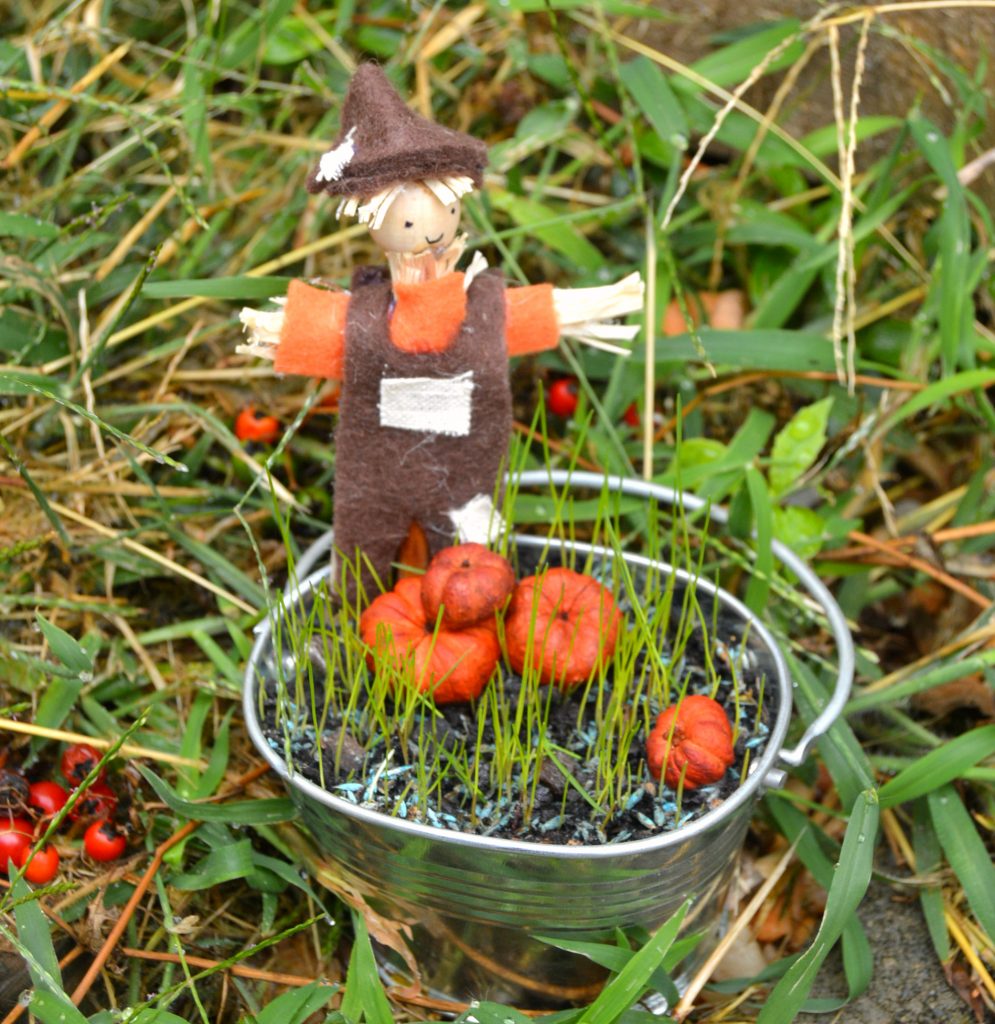
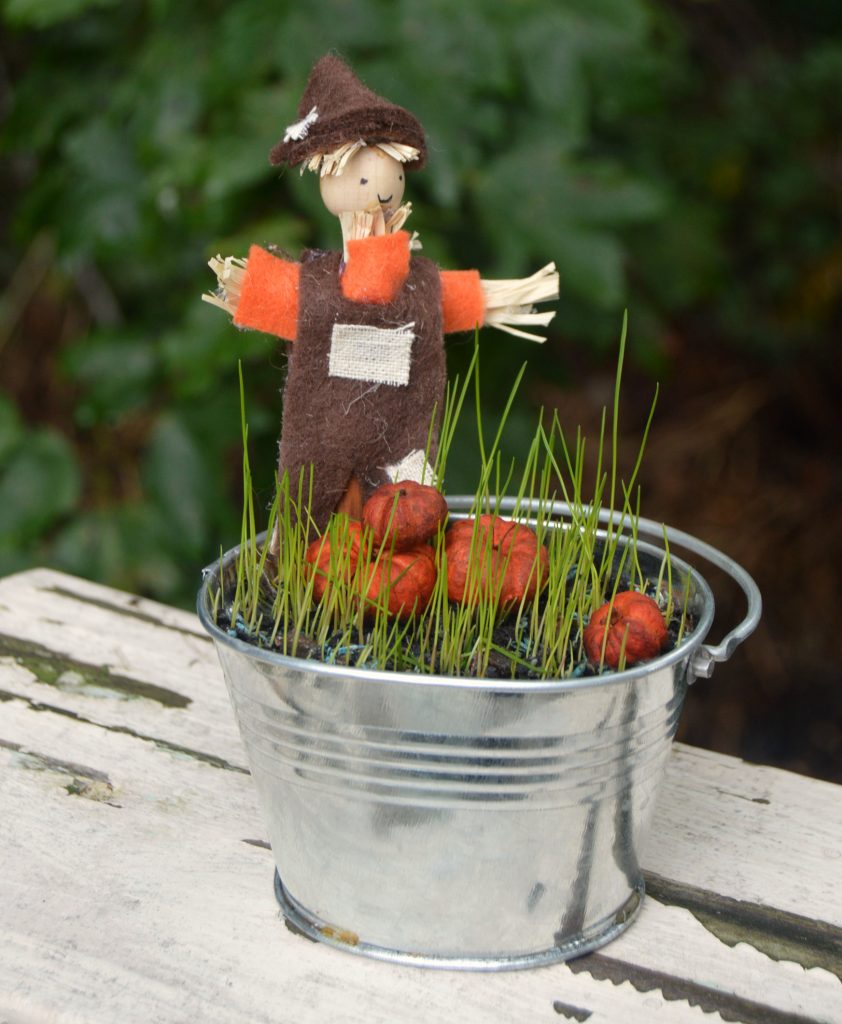
Mini Pumpkin Patch

Fall is in the air, and it’s one of my (Erin) most favorite times to craft. This season is so inspiring! With his big brothers in school, Squishy is now home alone with me (besides Baby Sister), and we’ve been doing a lot of fun things. Squish loves to watch things grow, and I wanted to give him a chance to help me make a fun seasonal decoration that incorporated his love for pumpkins and scarecrows.
Materials:
-Container
-Grass Seed
-Potting Soil
-Thin Wooden Dowels
-Small Wooden Doll Head
-Bits of Fabric (Felt, Burlap, Etc.)
-Straw or Raffia
-Hot Glue
-Mini Pumpkins (We used dried putka pods)
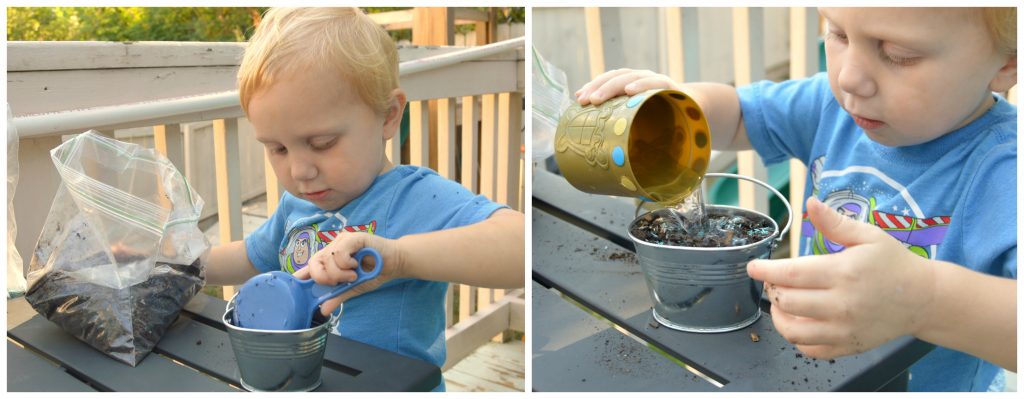
Step 1: Plant your grass!
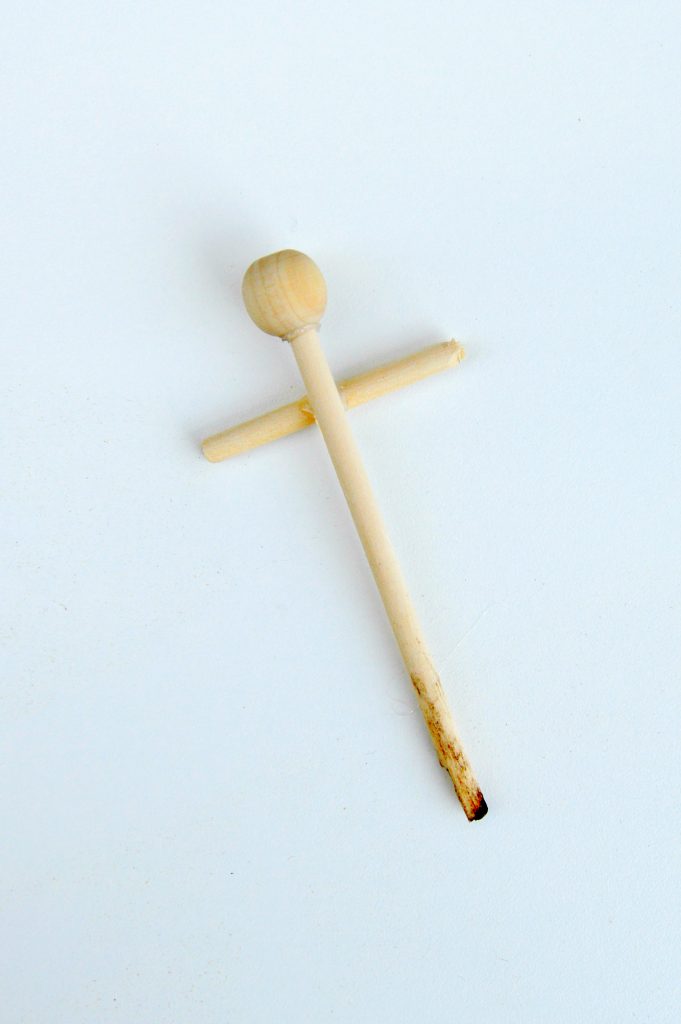
Step 2: Glue wooden dowels and wooden doll head together. I had stuck the dowel in the dirt first to measure how tall I wanted it.
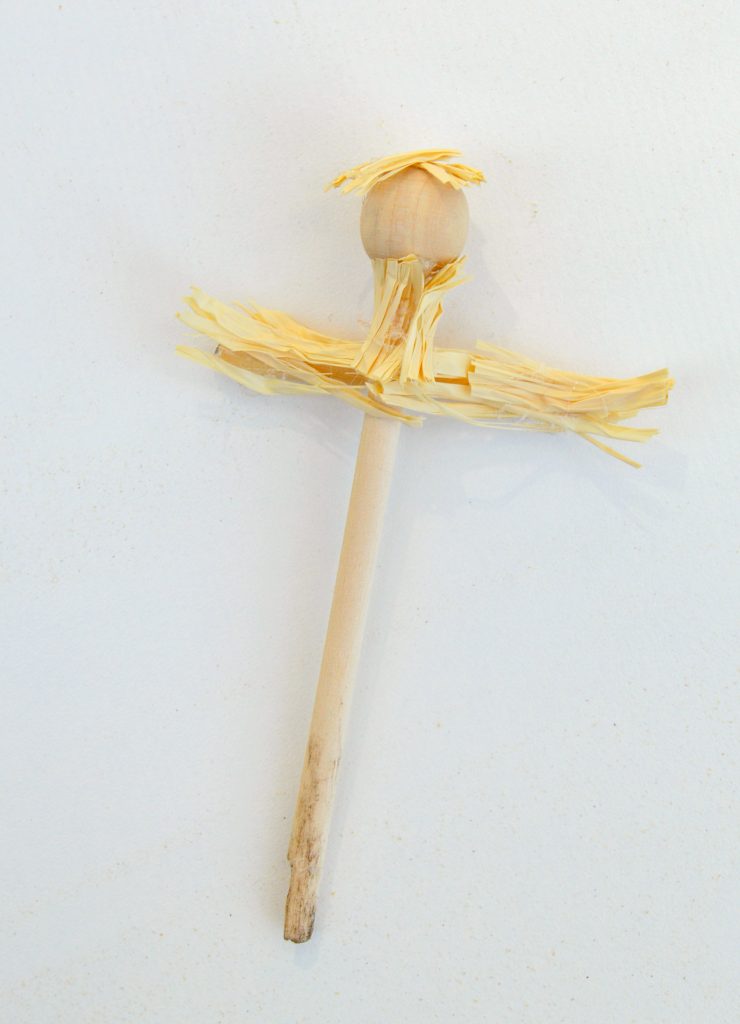
Step 3: Glue on Straw/Raffia.
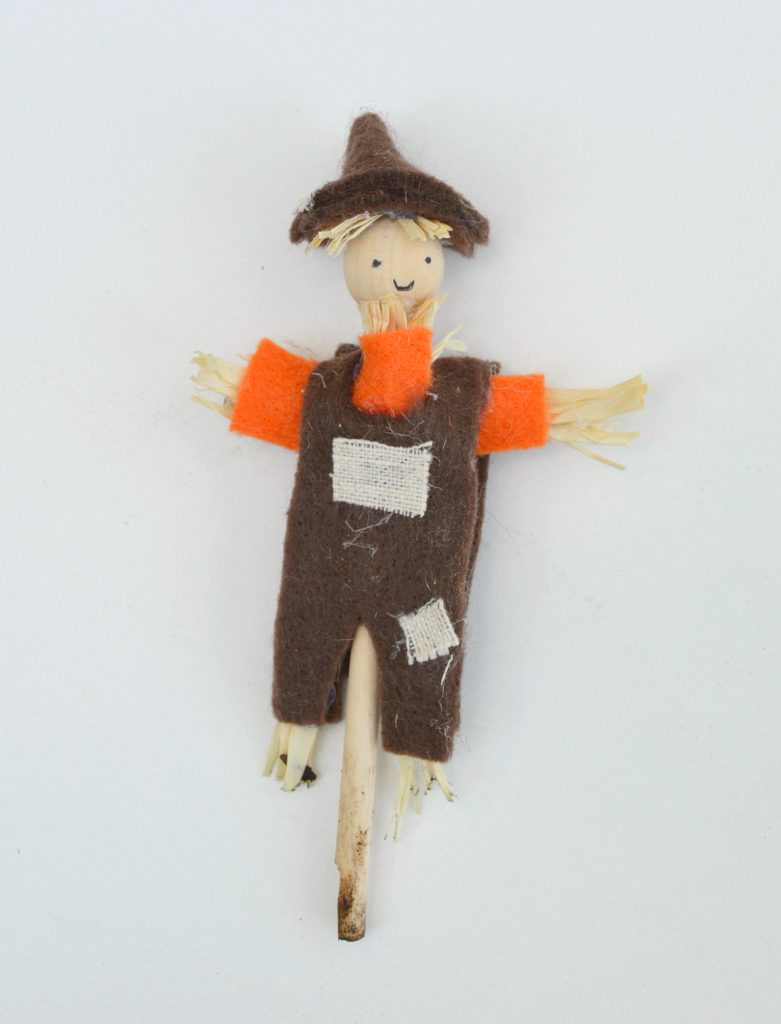
Step 4: Cut out and glue on clothing. I just free-handed the clothes (because a scarecrow isn’t perfect either!) and made sure to glue some straw along the bottom of the pants legs. Squish wanted a “happy scarecrow”, so I made sure to give our scarecrow a smile too!
Step 5: Add pumpkins, and watch your patch grow! Squish was quite particular about his pumpkin placement.
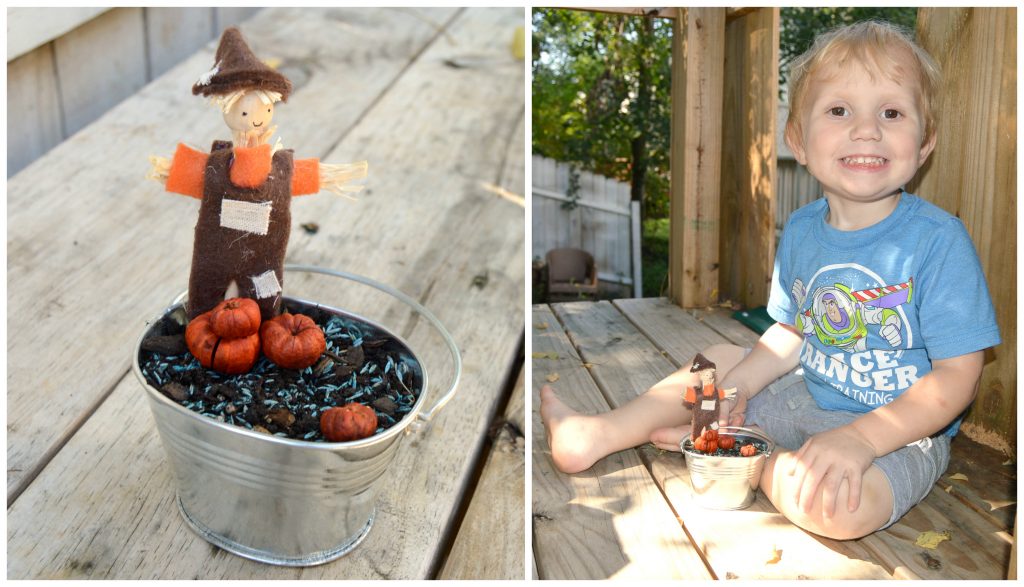
Over the next week, Squish watered and checked on his “field” and made sure his scarecrow was “still happy”. After several days, the grass started to poke through, around the pumpkins, and Squish was over the moon!
Do you have little ones in your life that might like this simple project? Older kids could easily make their own scarecrows (without hot glue), and you could plant a variety of things! Happy Fall!