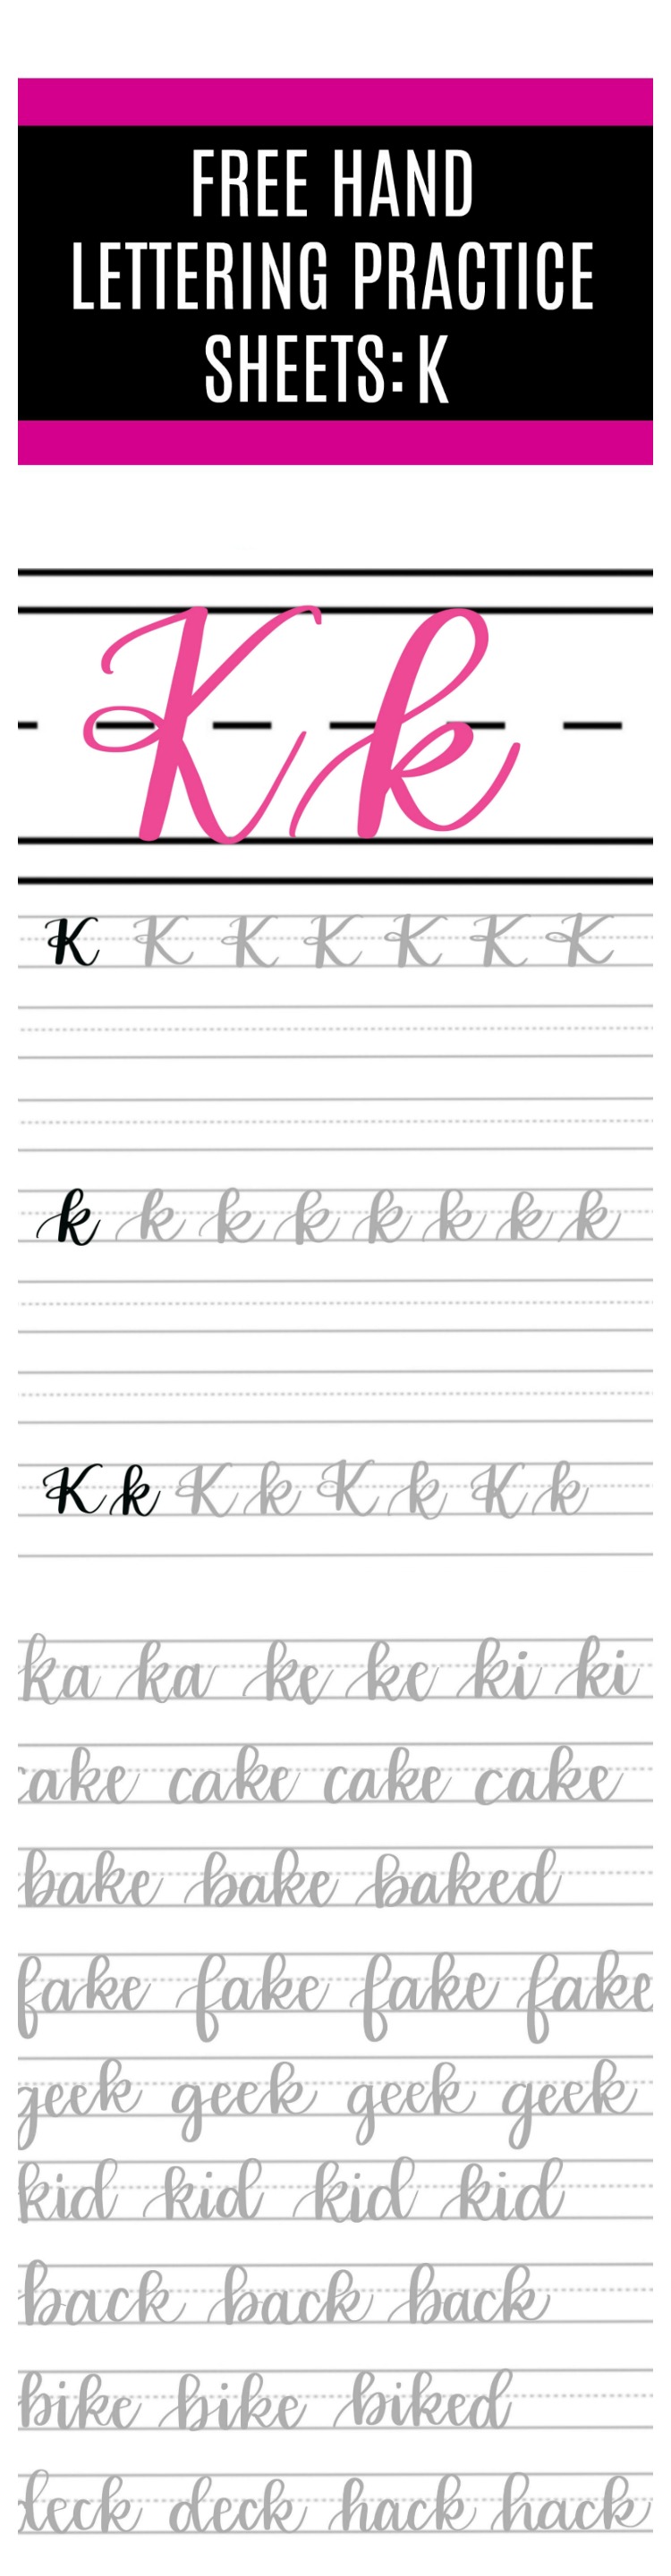
Free Hand Lettering Practice Sheets: K
I have a confession to make. Of all the letters in the alphabet, K is my least favorite when it comes to brush lettering. Maybe it’s because pretty much the entire uppercase letter is composed of downstrokes, which makes it hard to get good contrast. Maybe it’s because I had a hard time finding a form of it that looked “pretty” to me. Whatever the reason, I always find it to be a challenge. Today, I hope to give you some good guidelines for creating this tricky little letter.
If you’re new to hand lettering, the first place you’ll want to start is by practicing basic brush strokes with a brush pen to get the feel of making contrasting thick and thin lines. If you’re well into your lettering journey, let’s take a look at this letter that can cause trouble for even the most experienced artists.
DRAWING A CAPITAL BRUSH SCRIPT K
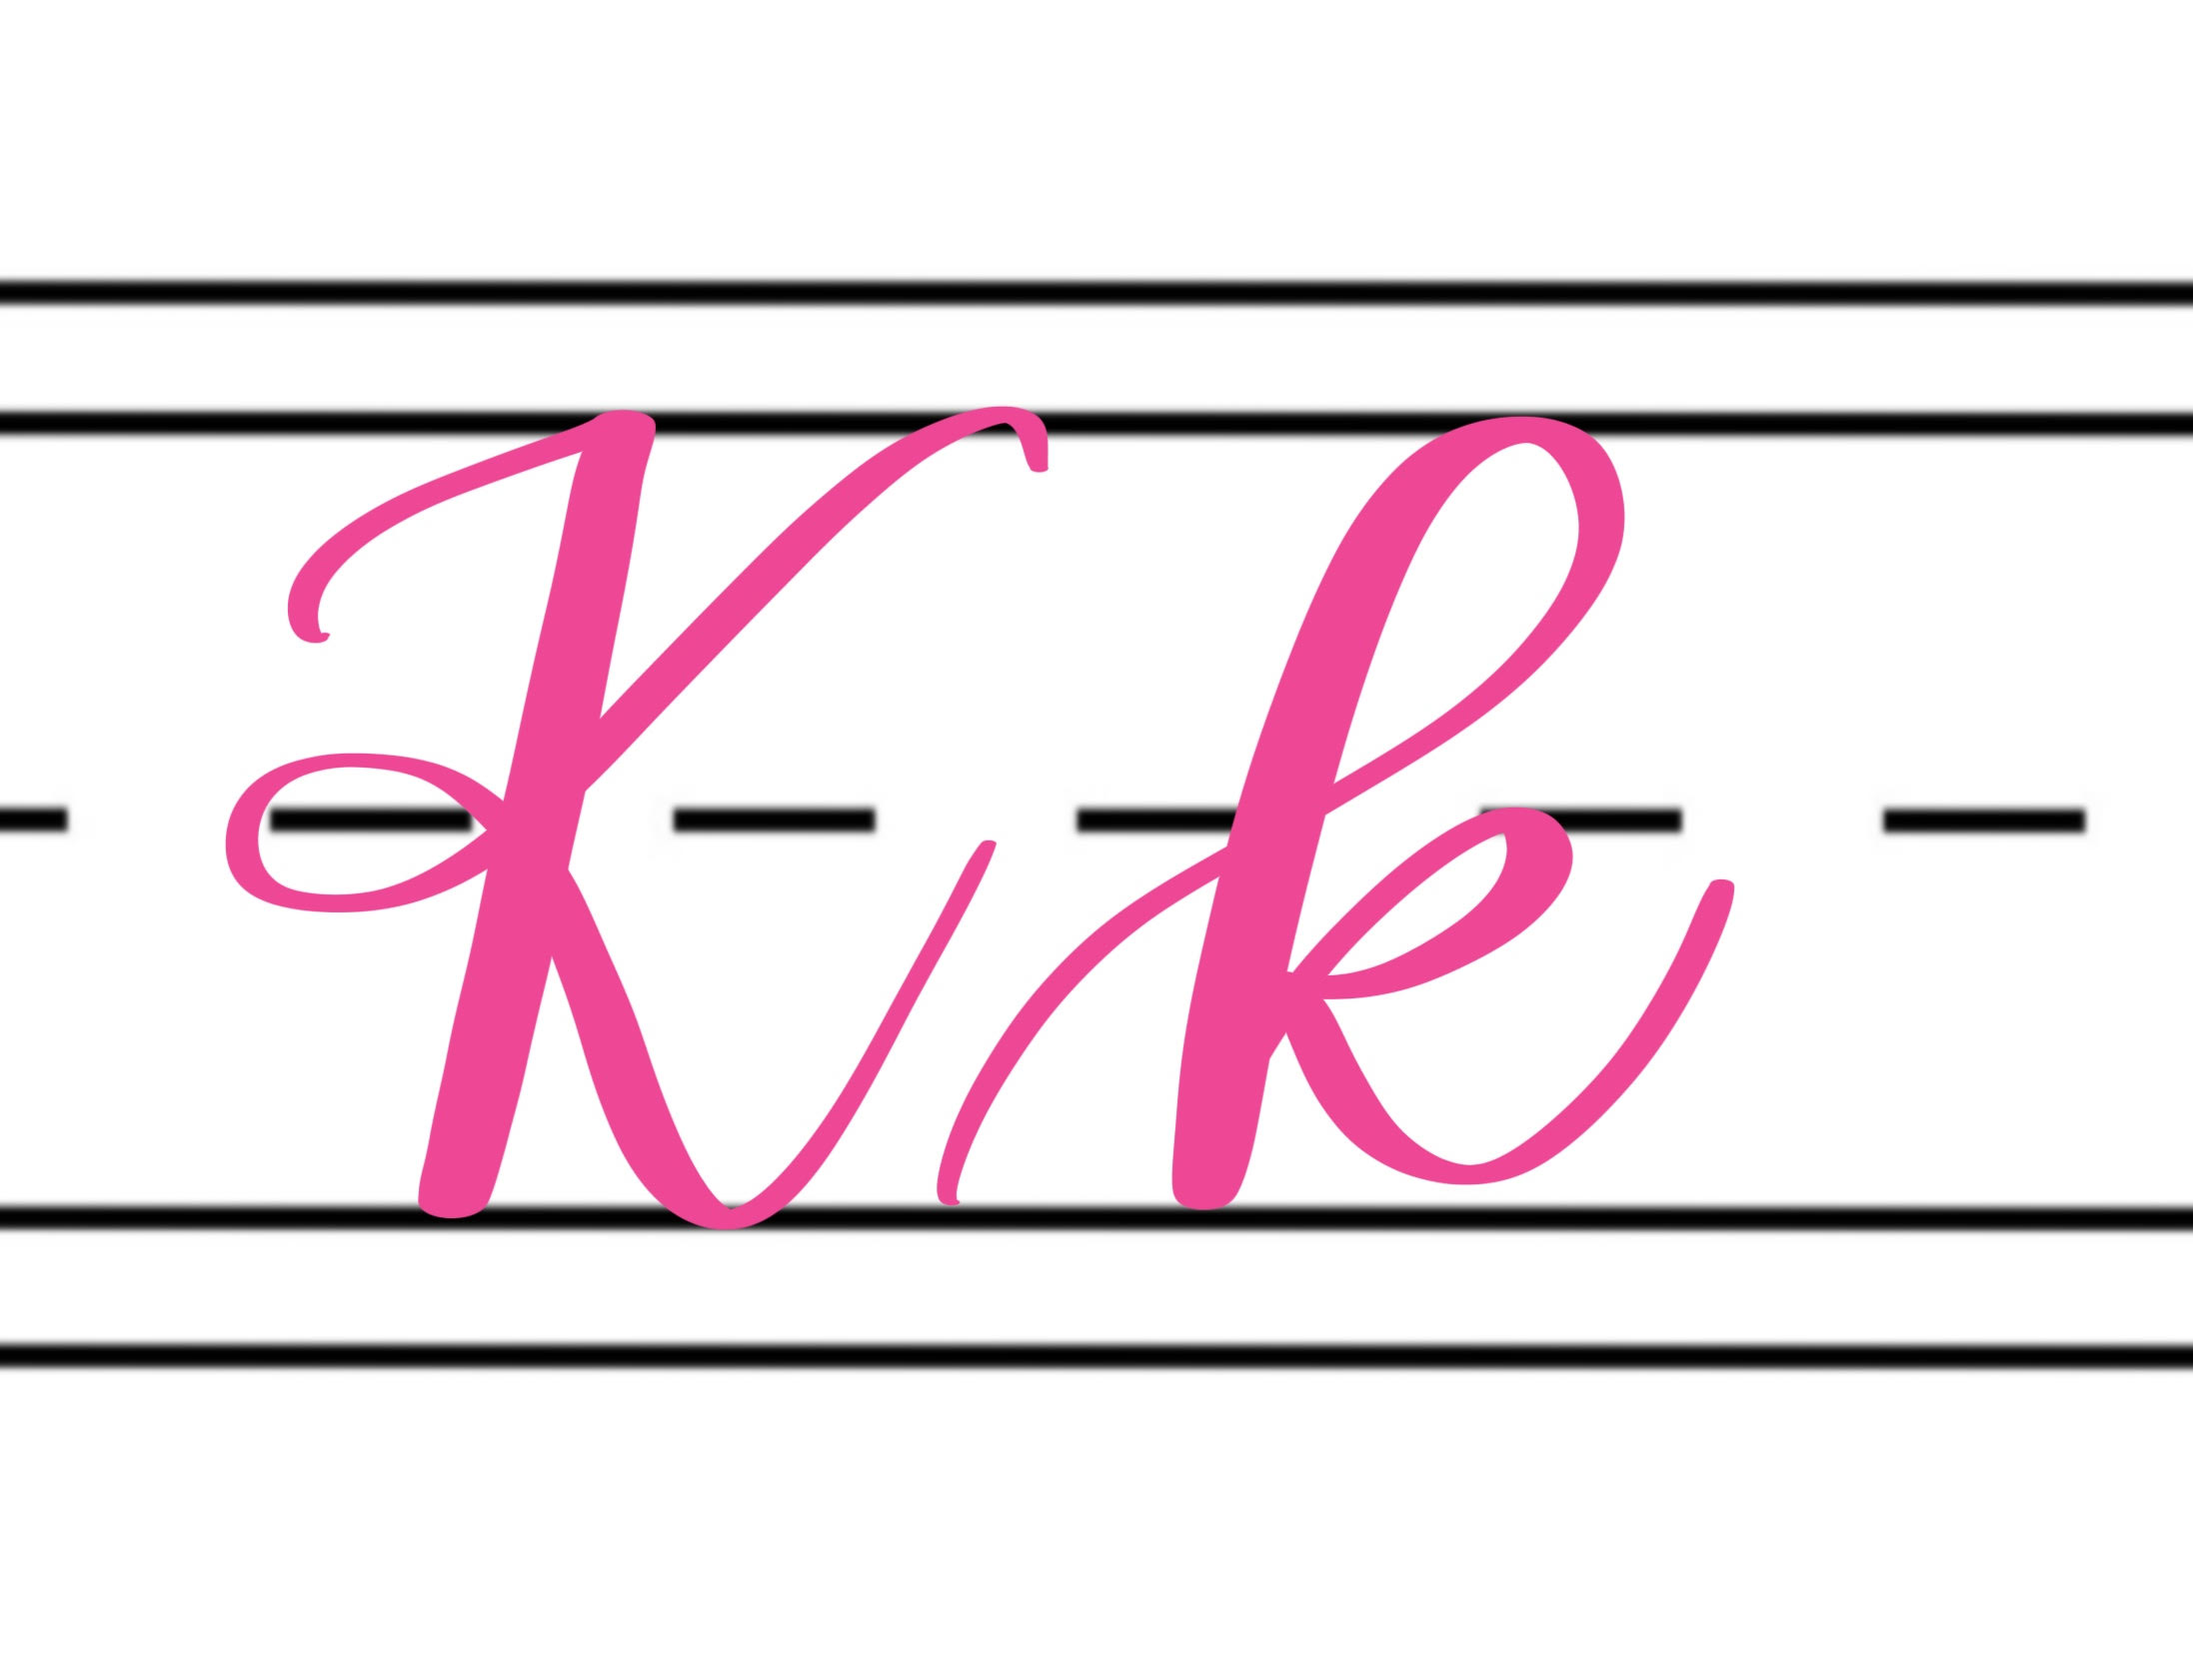
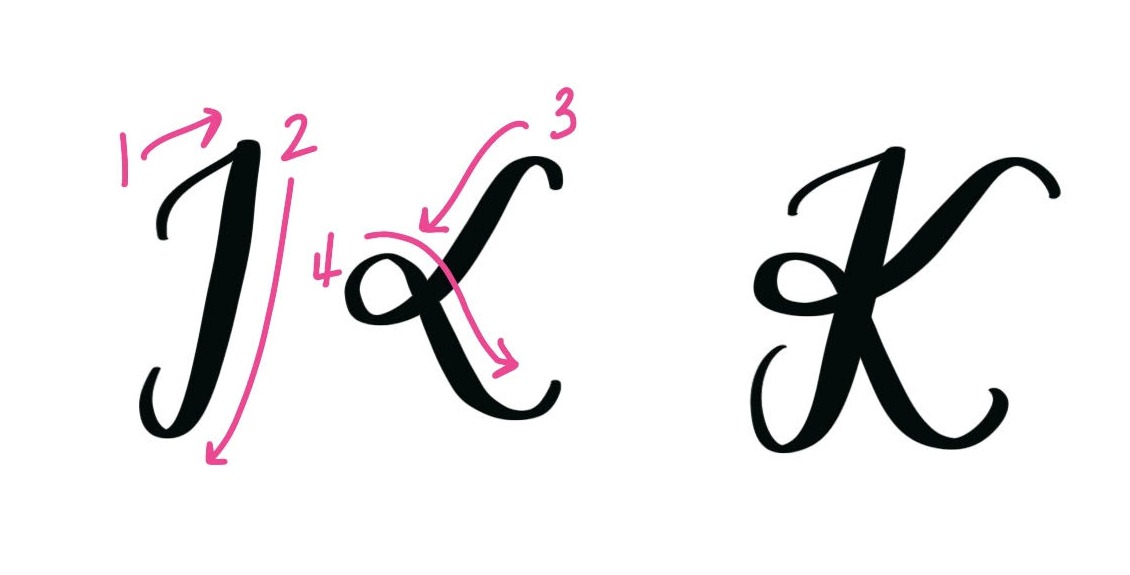
The trick to the capital “K” is adding enough curves and embellishments to keep the letter from being nothing but downstrokes. On the left, I start with an upstroke, followed by a downstroke that curls up to the left at the end. On the right, I form a looping shape with a slight curl on each end. It actually bears a lot of resemblance to the L we’ll be learning next. These curling upstrokes allow for some thinner parts of the letter to provide contrast. On the practice sheet, you’ll have some space to get familiar with these shapes before putting them together.
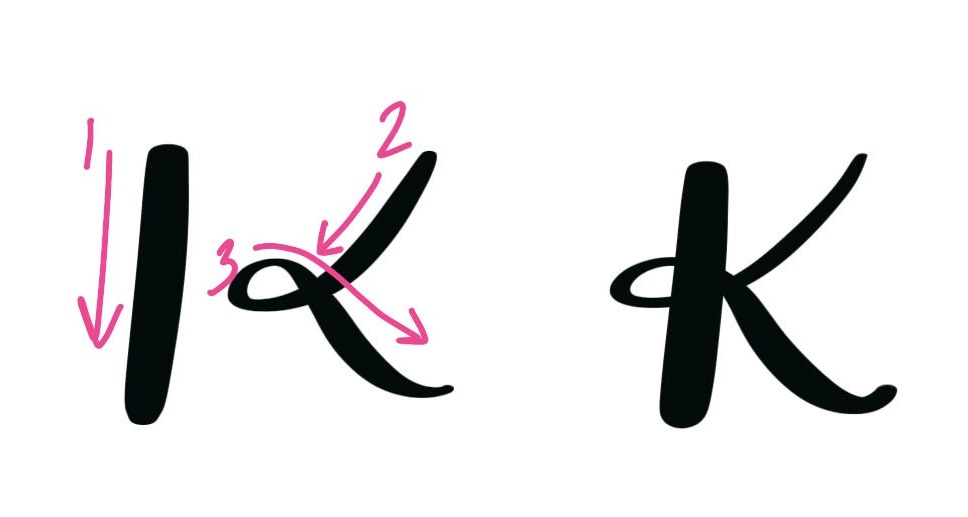
Here’s a slightly simpler version of the uppercase K; the left side is a simple, straight downstroke. On the right, we’ll still form a loop, but with less curls on the ends. In order to keep some contrast, I kept the first downstroke on the right slightly thinner than the others. Otherwise, the whole letter would just look bold.
DRAWING A LOWERCASE BRUSH SCRIPT K
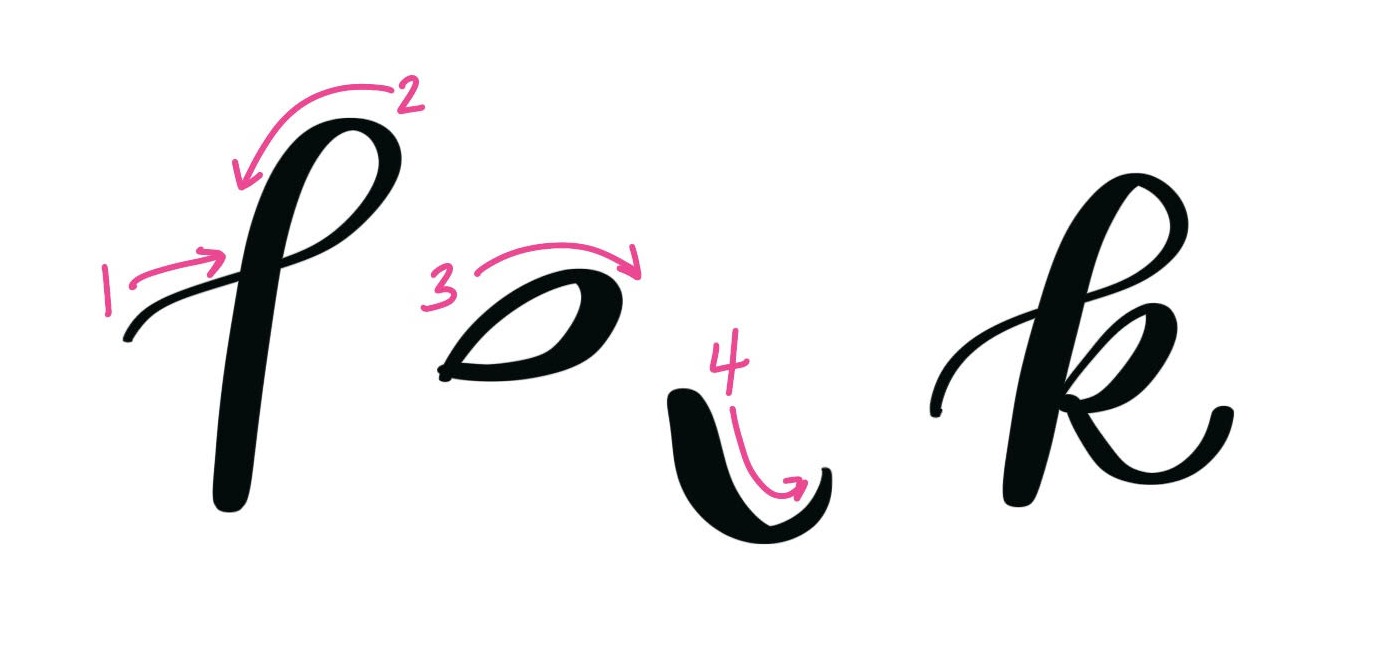
The lowercase “k” begins with a looping downstroke just like the one we use to form the start of our “b,” “f,” and “h.” On the right side, we’ll form a shape similar to an oval and finish off with a downstroke that curls up at the end. Put it all together and we get a pretty little letter. Once you get comfortable with the individual shapes, try joining them without picking up your pen.
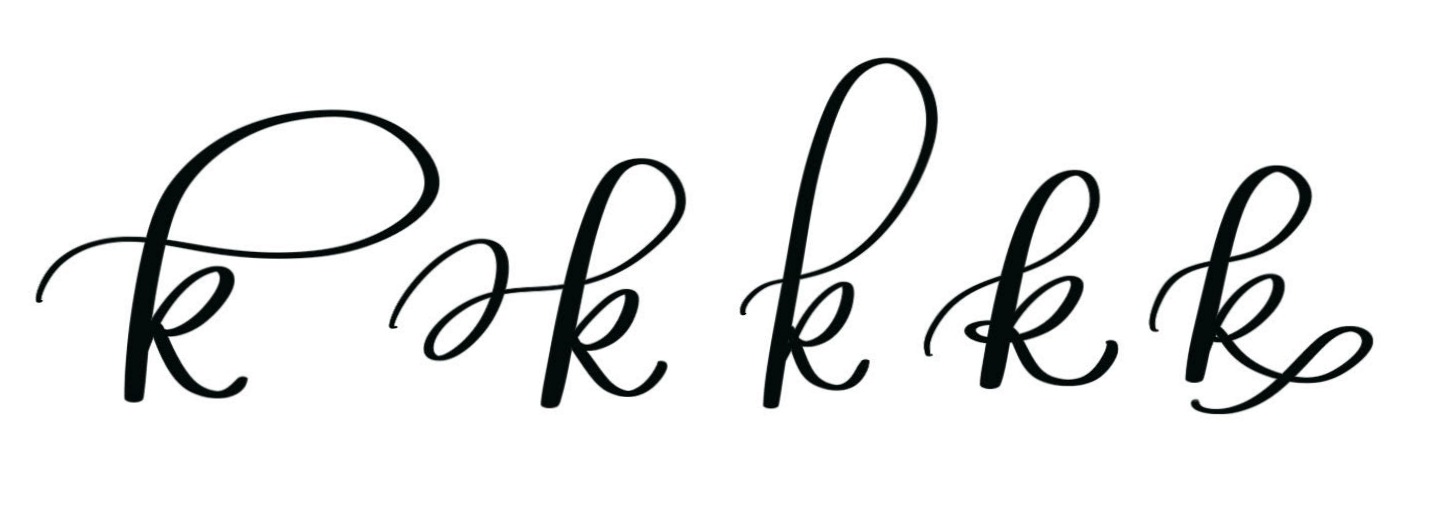
Like our other letters with ascenders, the “k” gives us plenty of options for adding some extra flourishes. Check out the examples below for inspiration. Feel free to experiment and try out your own ideas for embellishments as well!
I’ve created three practice pages for you to use to help you master this tricky little letter! The first one focuses on basic strokes and the capital/lowercase K. The second will help you get more comfortable with some of the flourishes you can use to embellish it, and the third will help you connect the lowercase “k” to the other letters we’ve learned so far. To use these practice sheets, just click the link below and download them to your device, then either print them or upload them to Procreate or your favorite lettering software. You are welcome to use them as often as you like for your own personal practice.
DOWNLOAD THE FREE PRACTICE PAGES HERE

PS. Don’t miss the rest of the series!
Practice: A Practice: B Practice: C
Practice: D Practice: E Practice: F
Practice: G Practice: H Practice: I
Practice: J Practice: K Practice: L
Practice: M Practice: N Practice: O
Practice: P Practice: Q Practice: R
Practice: S Practice: T Practice: U
Practice: V Practice: W Practice: X
As you practice, I’d love to see your progress. Share your photos in our Amy Latta & Friends Facebook group or on Instagram.