DIY Cards with Cricut Joy
This is a sponsored post written by me on behalf of Cricut. All opinions are 100% mine.
I don’t know about you, friend, but I have a new group of heroes. My friend Kim, who works at Johns Hopkins Children’s Center, my friend Jess, a PA at our local hospital, my friend Stephanie, a post-partum nurse at GBMC, my friend Lisa, who manages an assisted living facility…and the list goes on. The doctors, nurses, PAs, lab techs, and those in elder care all over the world are on the front lines of this health crisis, and they risk their own safety every day. There’s no way to really put into words how grateful I am for those who make these personal sacrifices for the sake of others, but I’m determined to try. With the help of my Cricut Joy, I’m making DIY Thank You cards to let these health care workers know how much they are appreciated. It’s so quick and easy to do; if you’d like to join me, here’s how to make some of your own.
You’ll need:
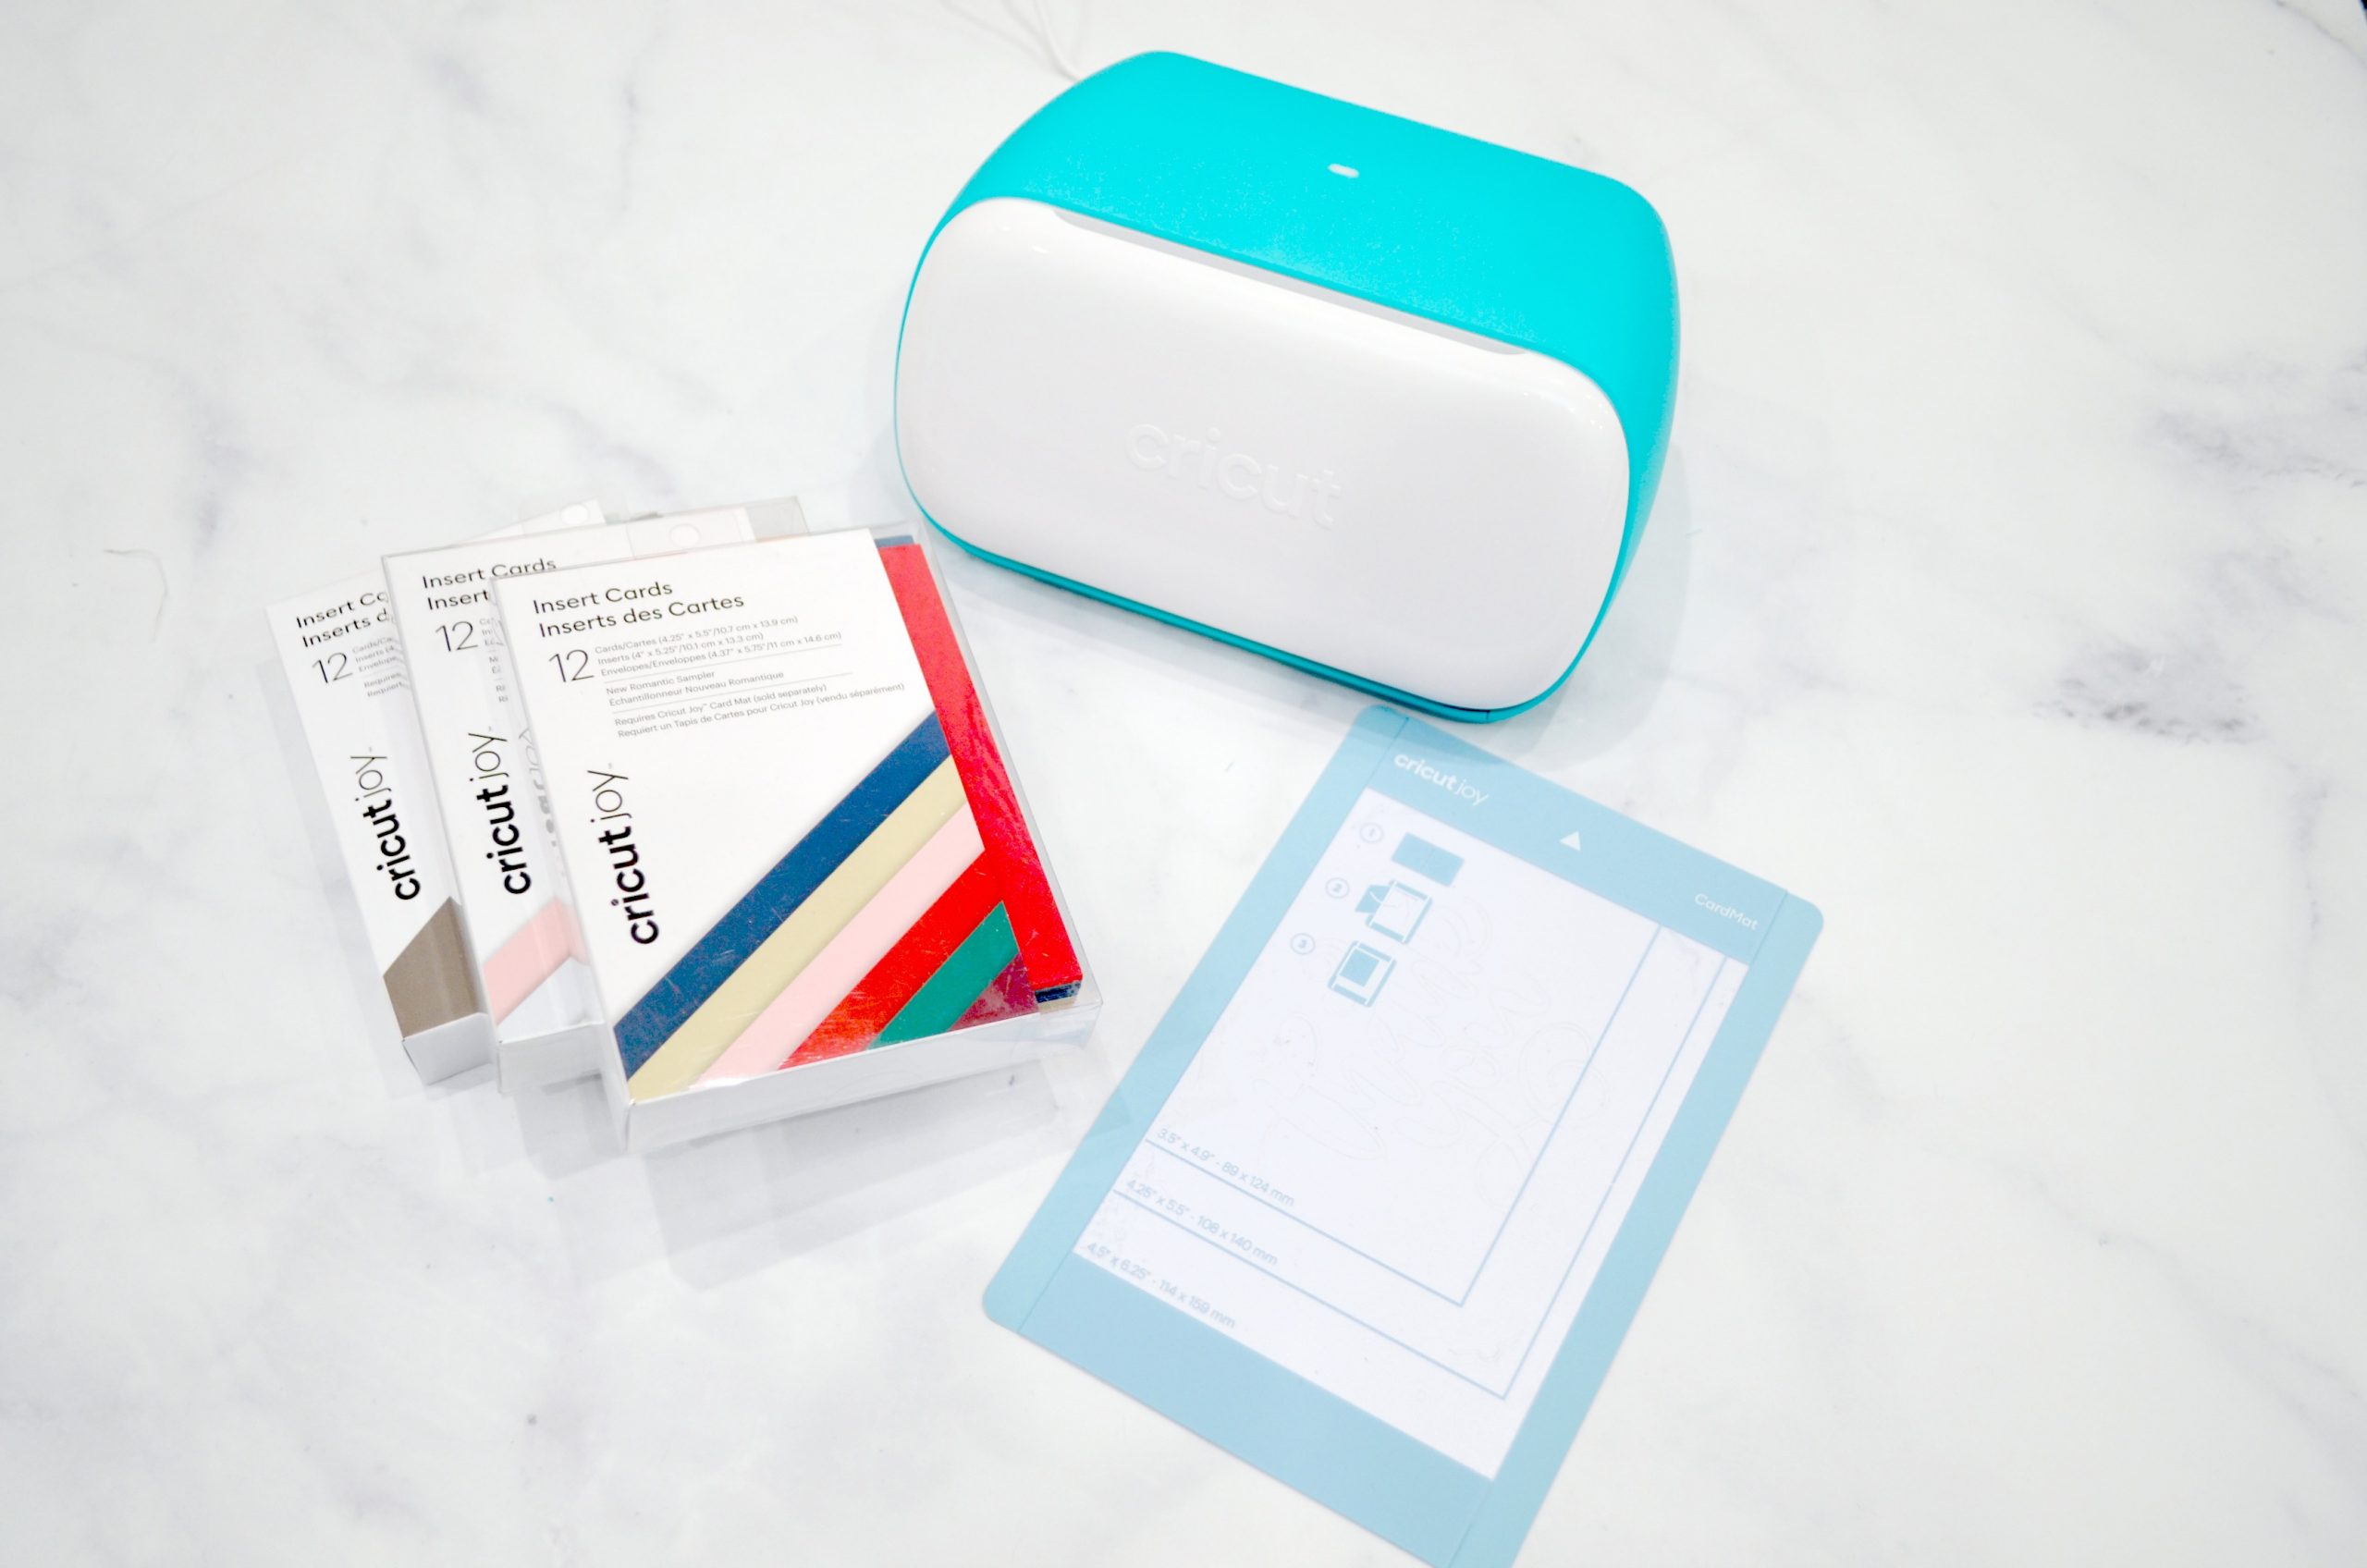
Cricut Joy Insert Cards (I used Gray/Silver Holographic and the Macarons Sampler)
Step 1: Choose your design.
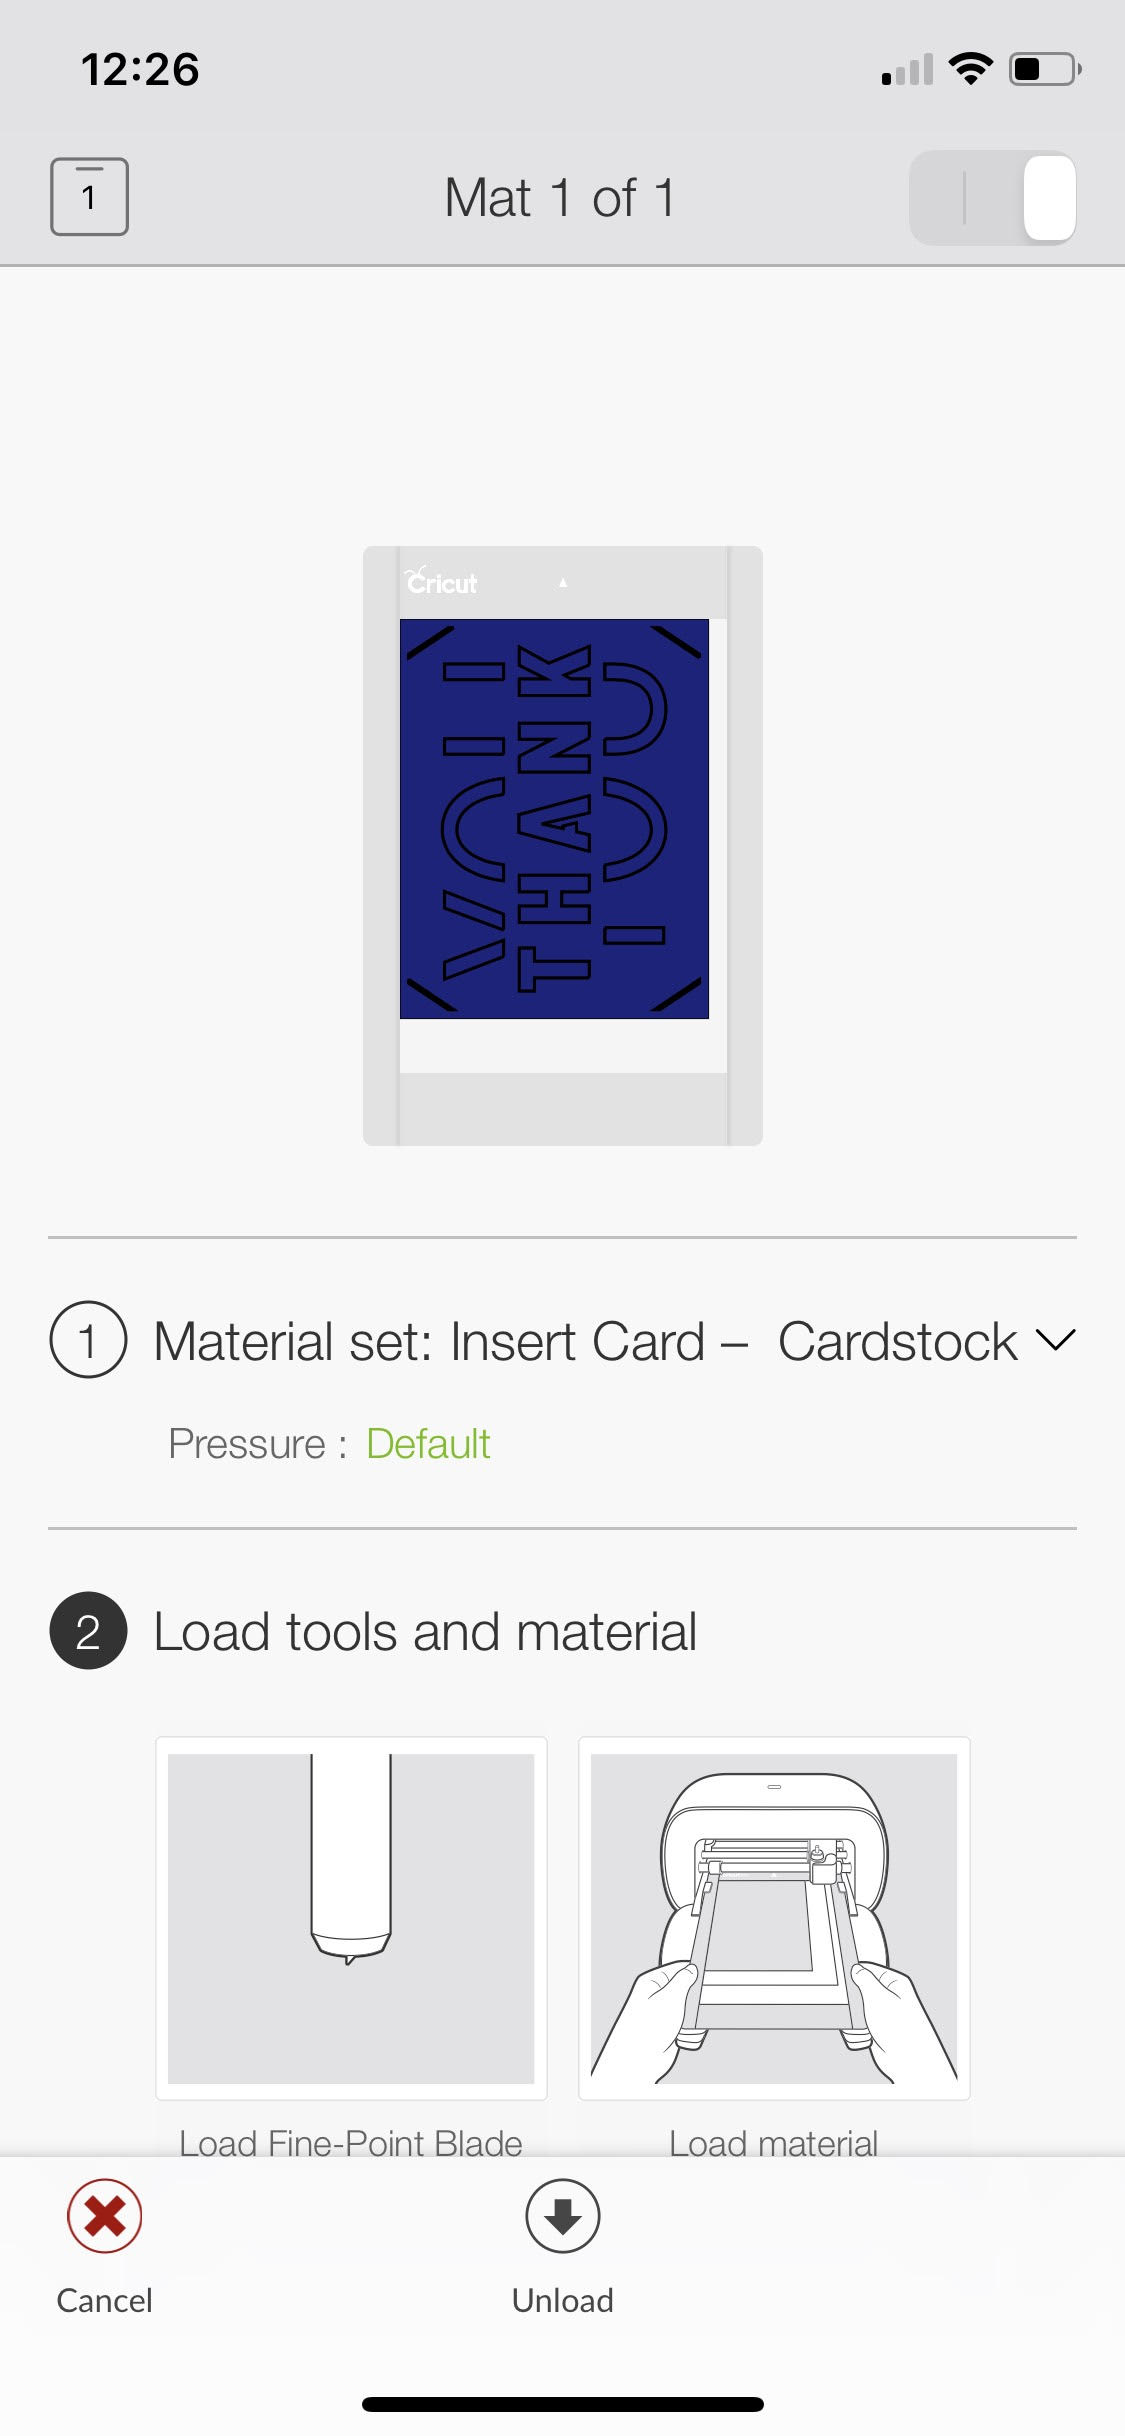
The Design Space software has a variety of images that are specially designed just for these special Insert Cards. Choose your favorite and click, “Make it!”
Step 2: Send the design to your Cricut Joy.
Follow the prompts to choose the material (Insert Card), then you’ll be asked to load your material.
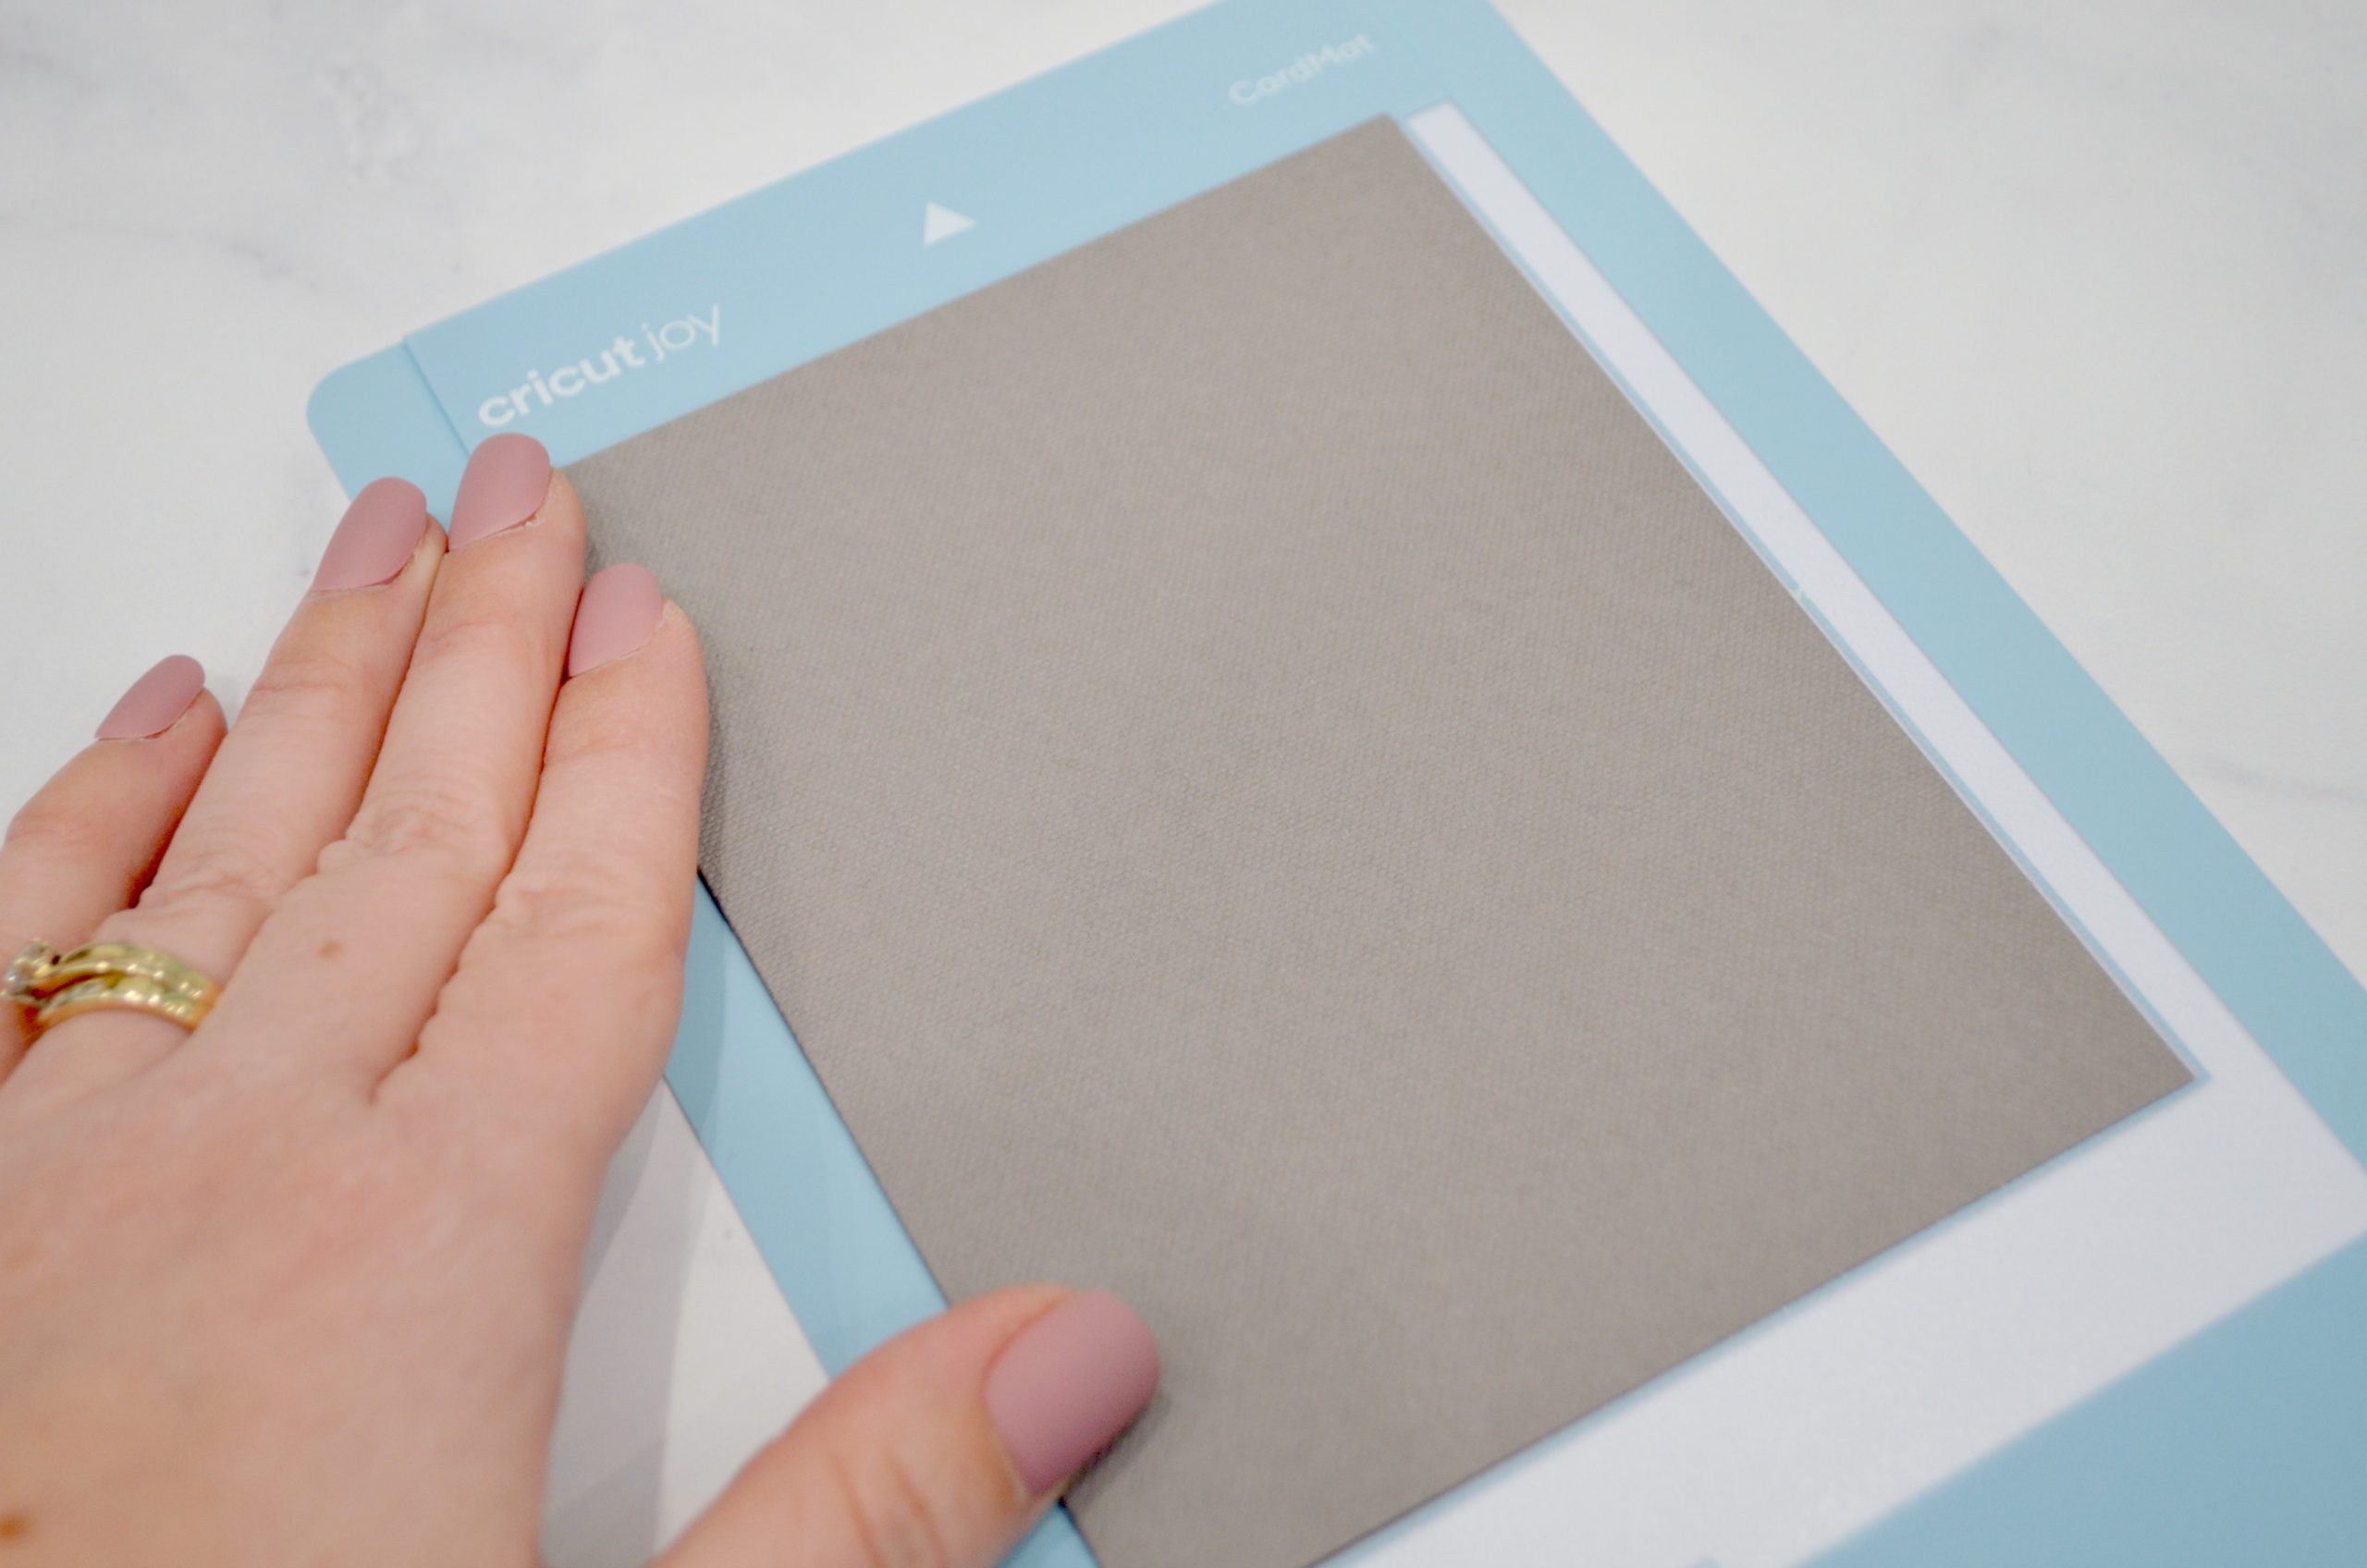
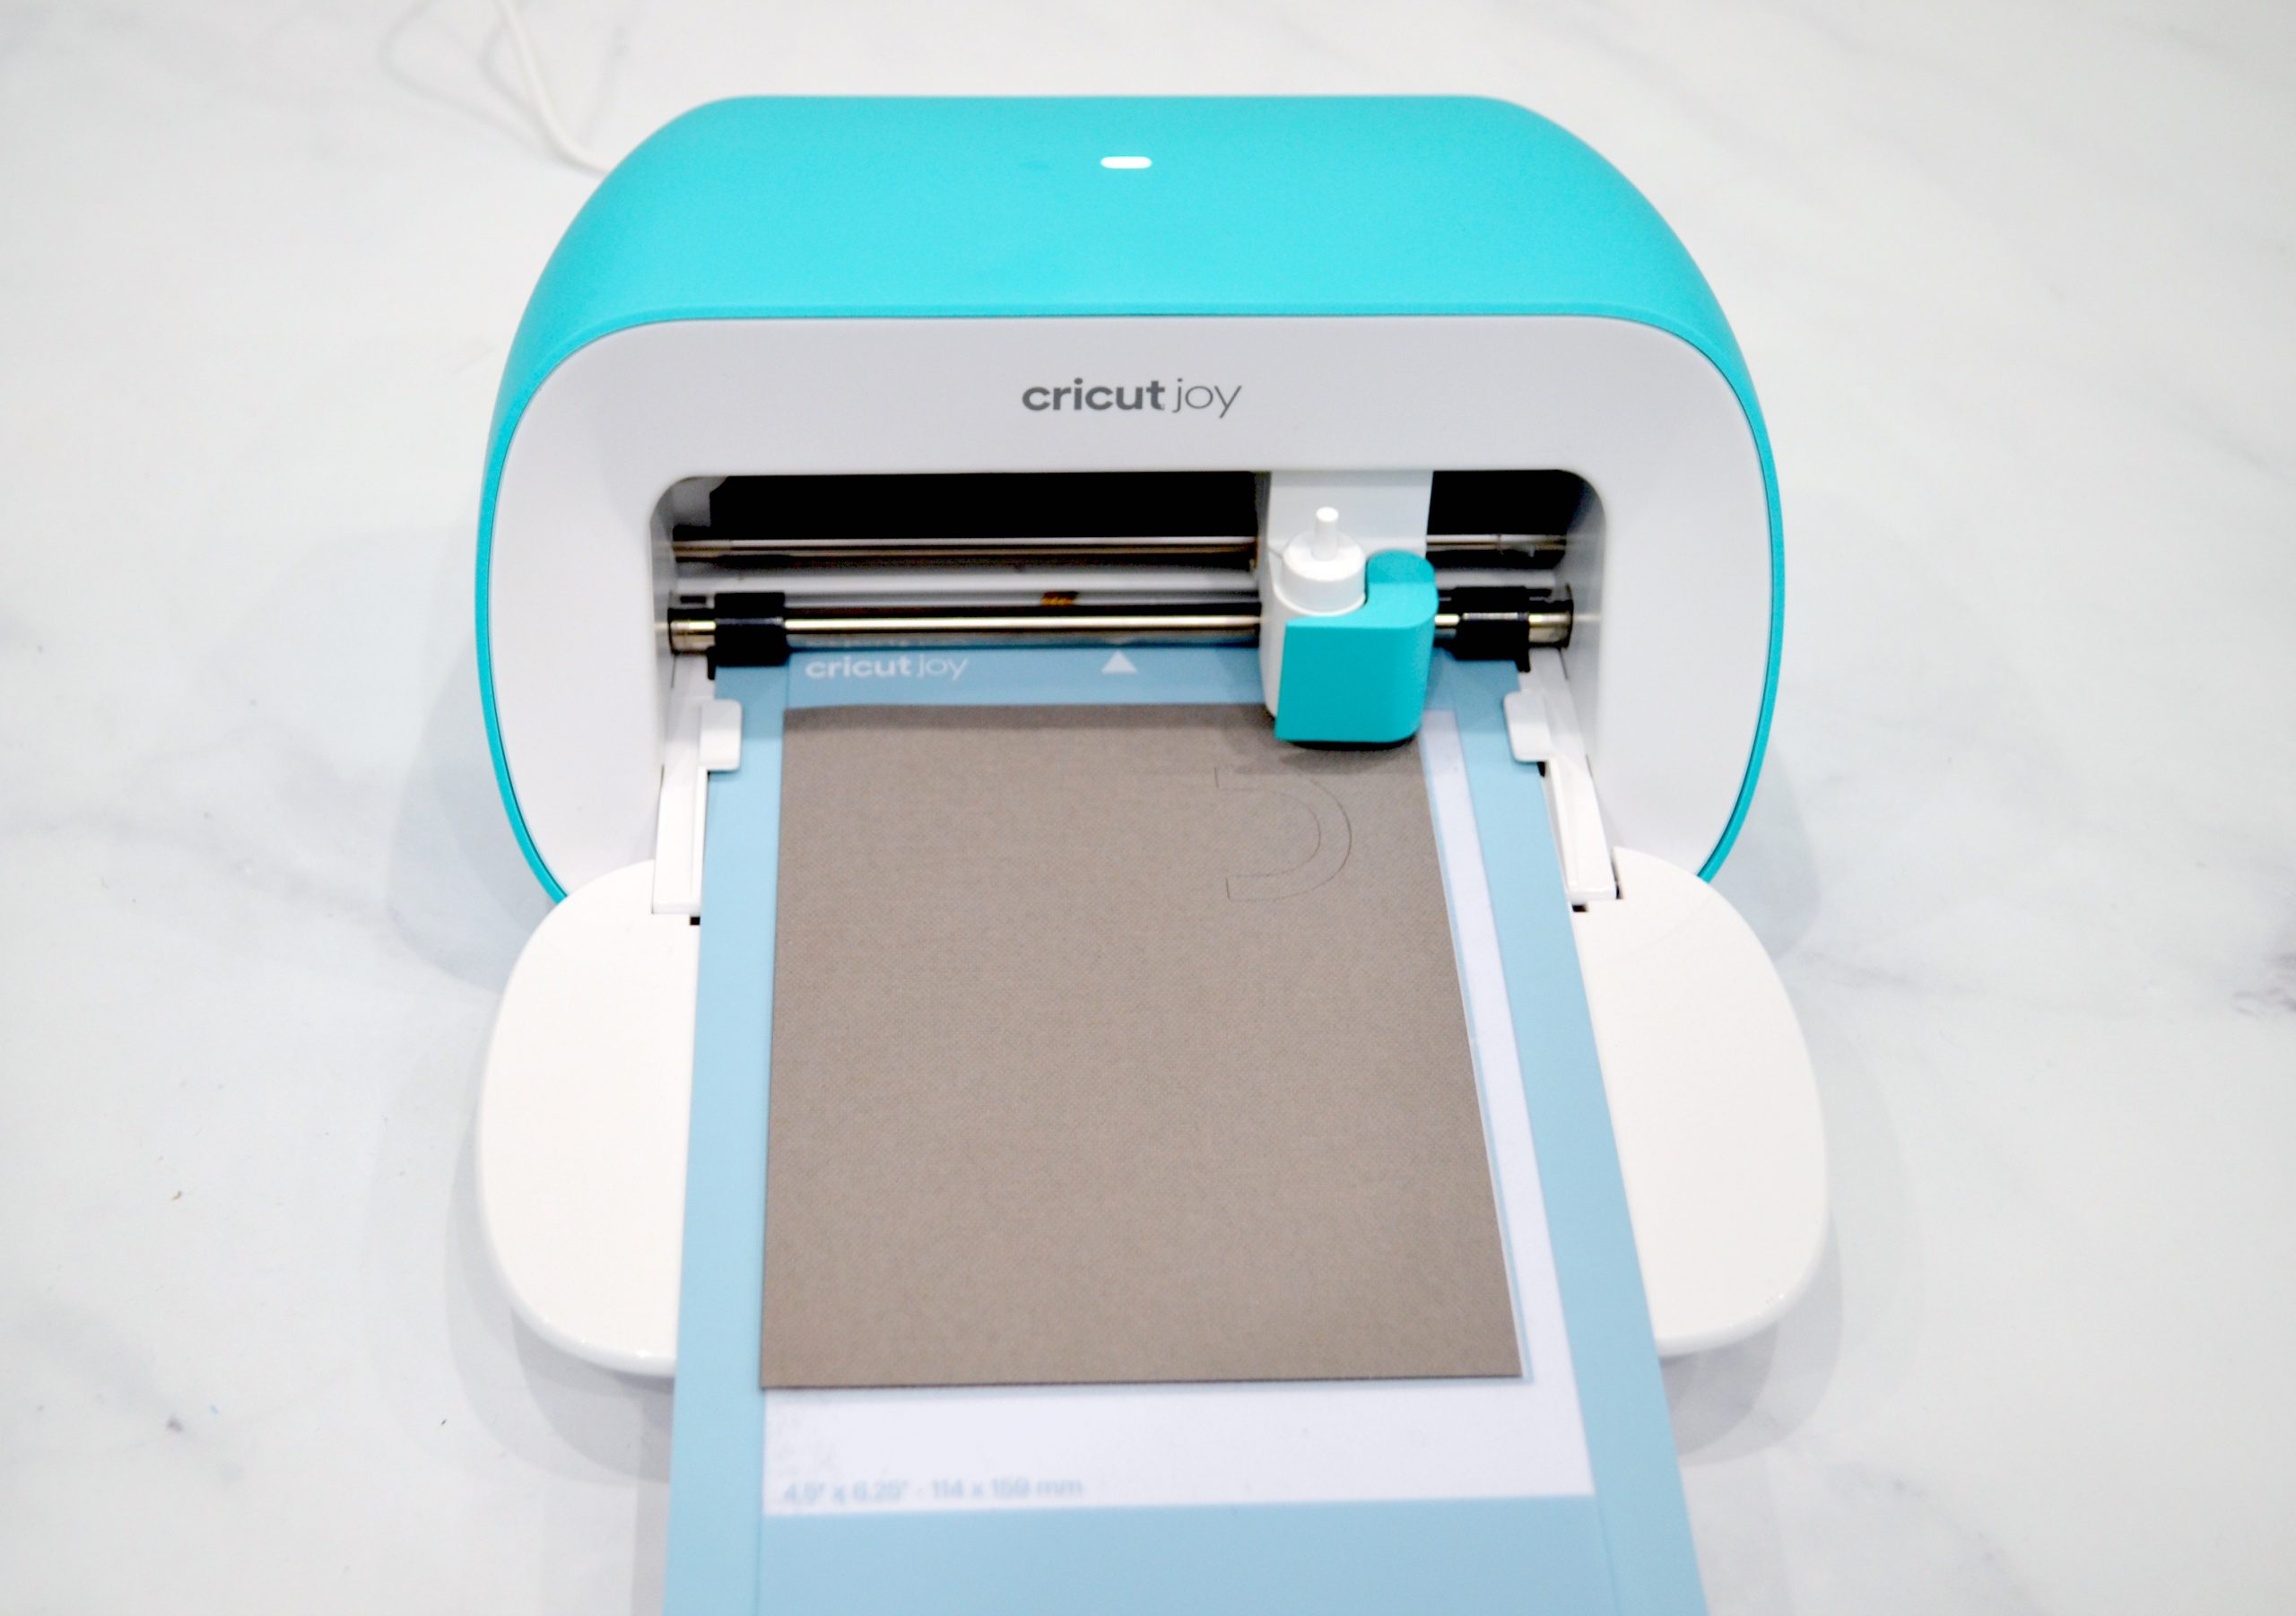
Step 3: Place your card on the cutting mat and load the machine.
The card mat features a clear adhesive strip in the center that lifts up, allowing you to slide the back of the card underneath, while sticking the top of the card to the mat. This lets the machine cut only the card front, not through both layers.
Step 4: Press “go” and let the Cricut Joy work its magic.
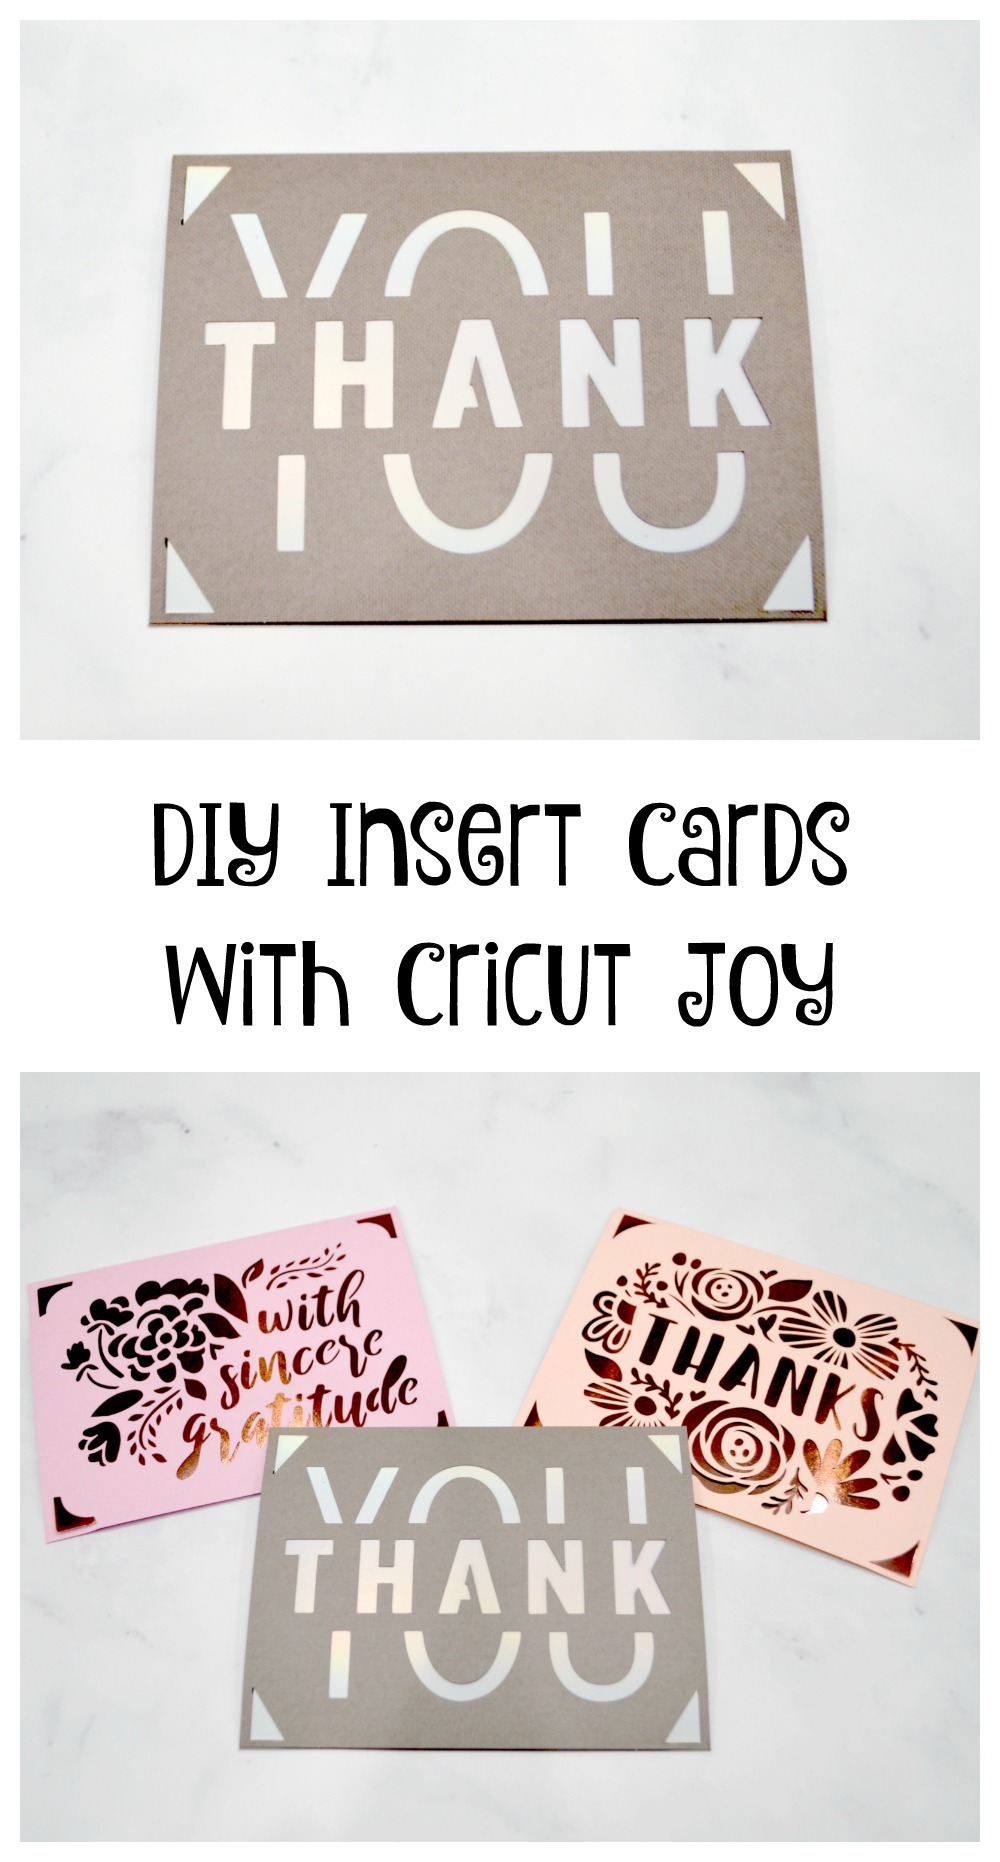
When it’s finished, you’ll be prompted to unload the machine, and you’ll have something like this; a card front with the design precisely cut.
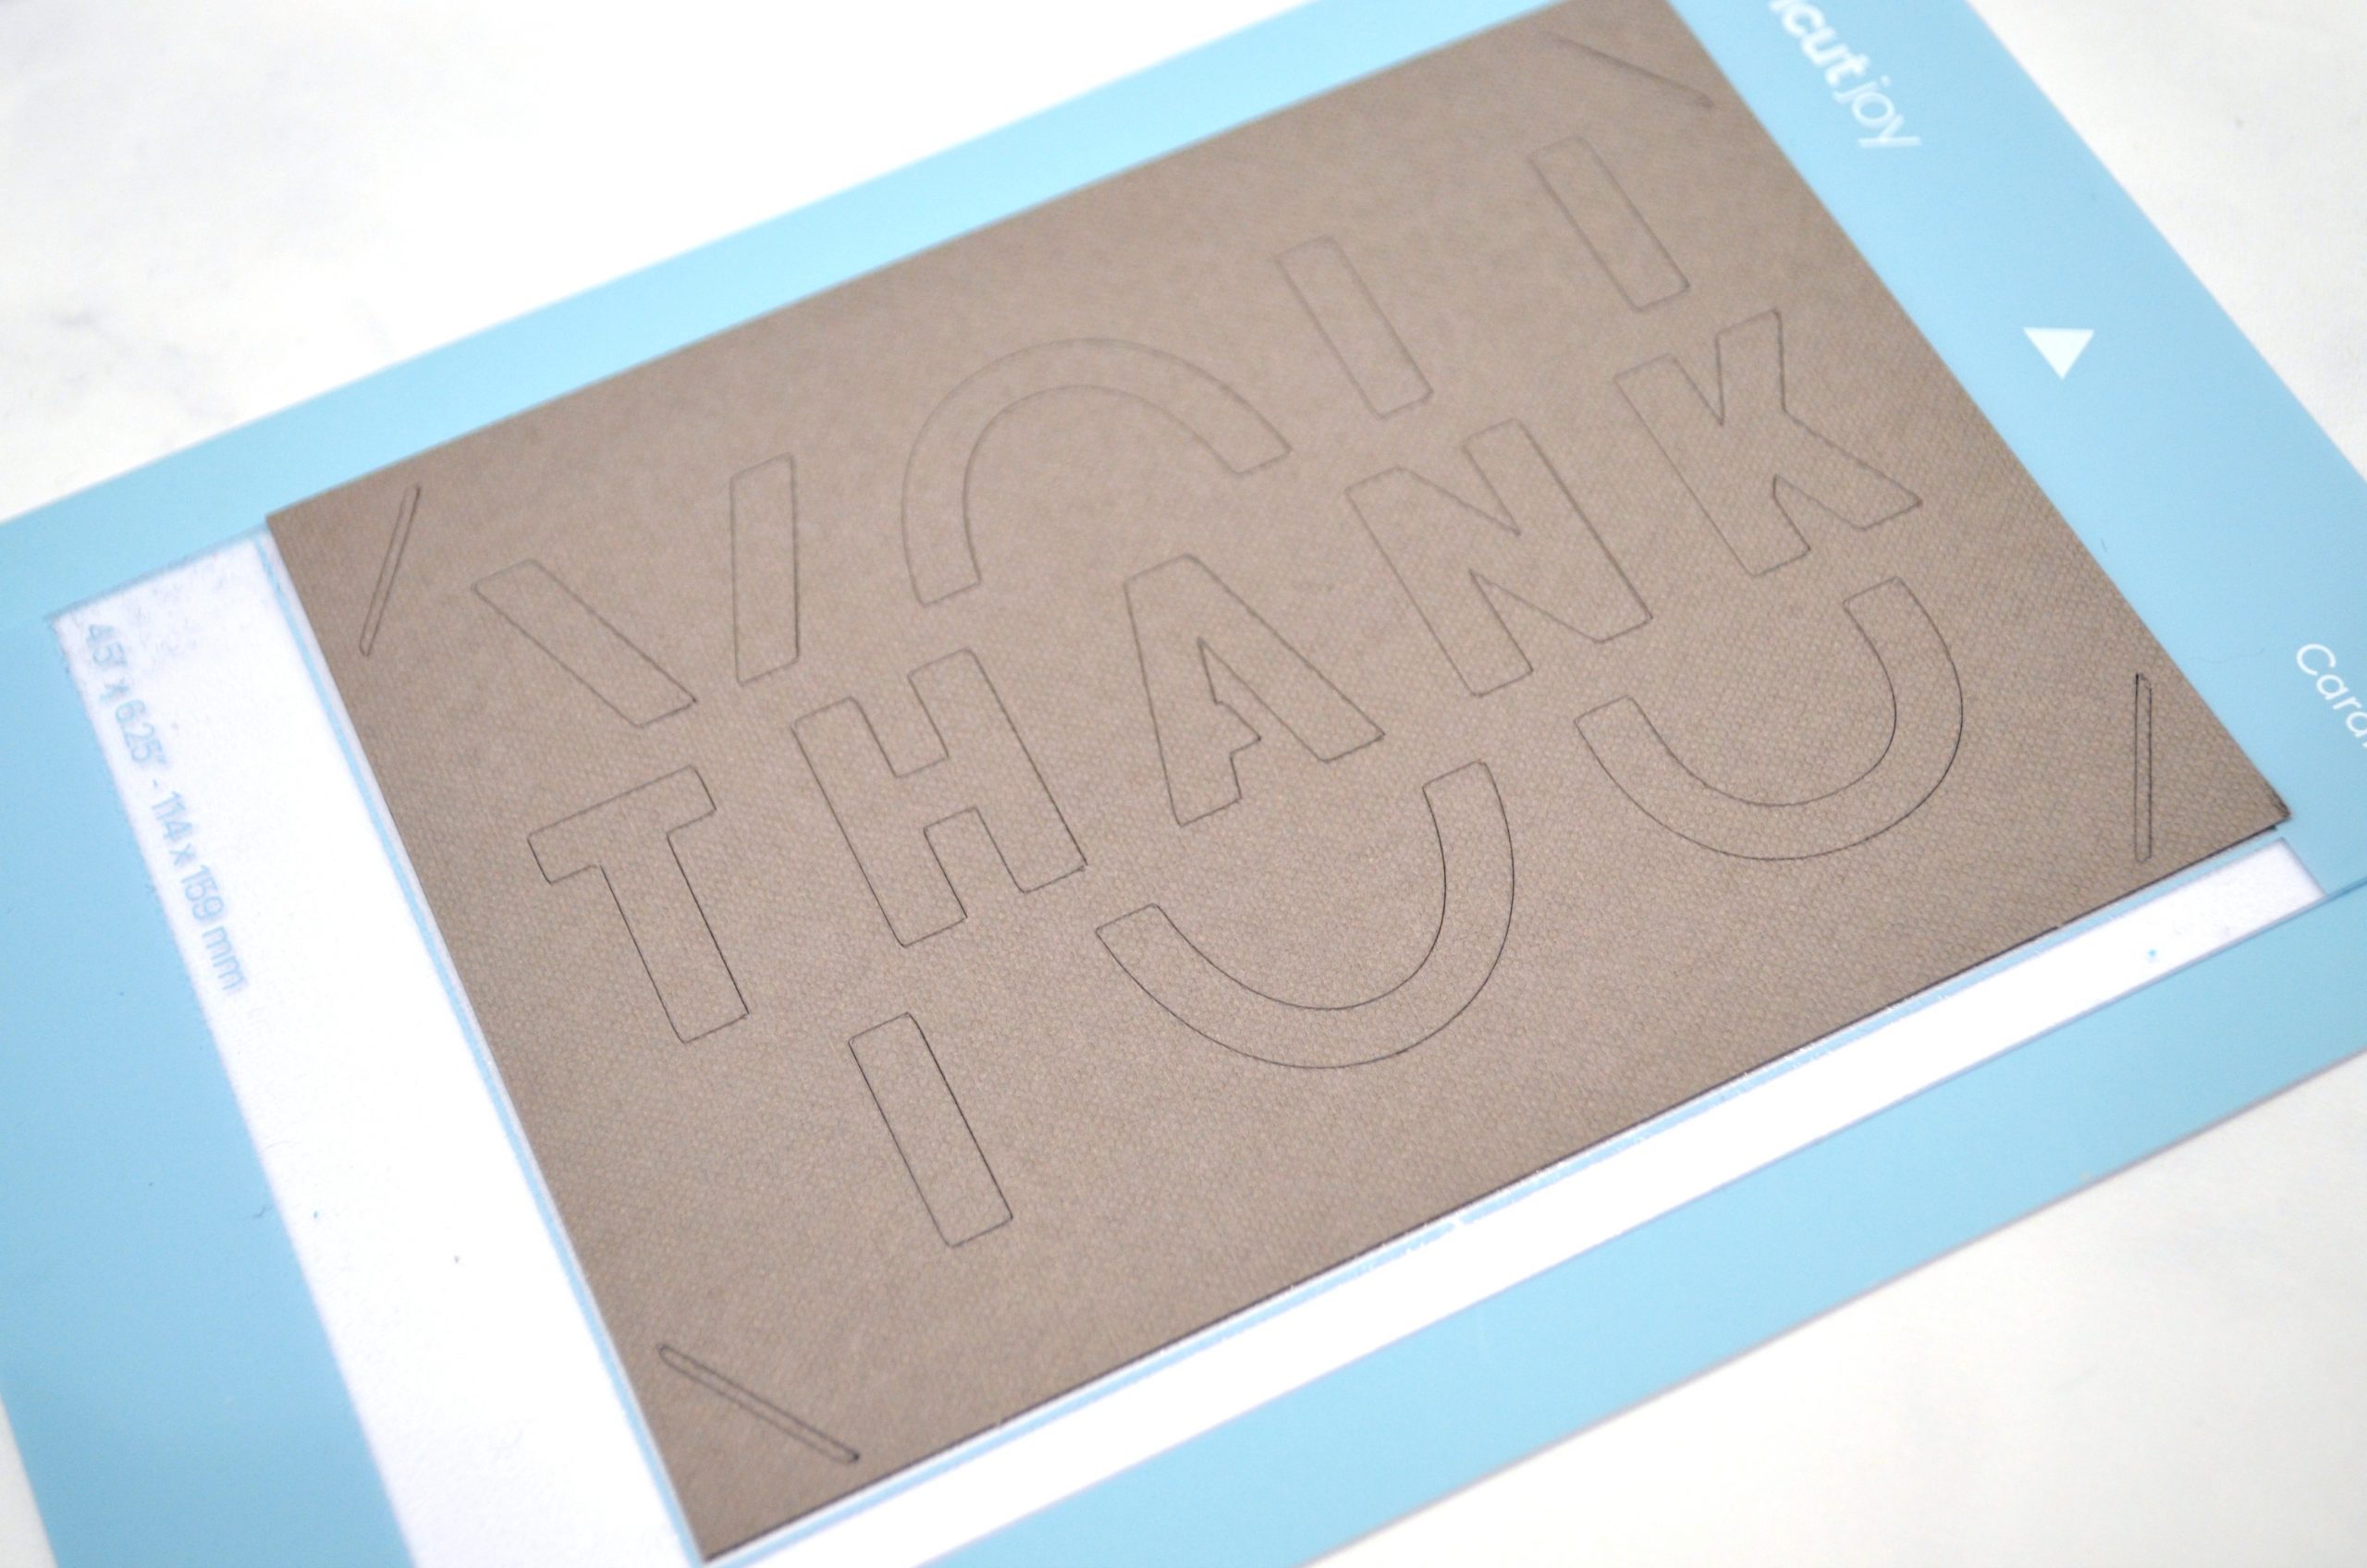
Step 5: Carefully peel the card front away from the adhesive mat.
The cut pieces of cardstock will remain on the mat, while the rest of the card peels away. Use your fingernail or a Cricut scraper tool to remove them from the sticky surface so your mat is ready to cut the next card.
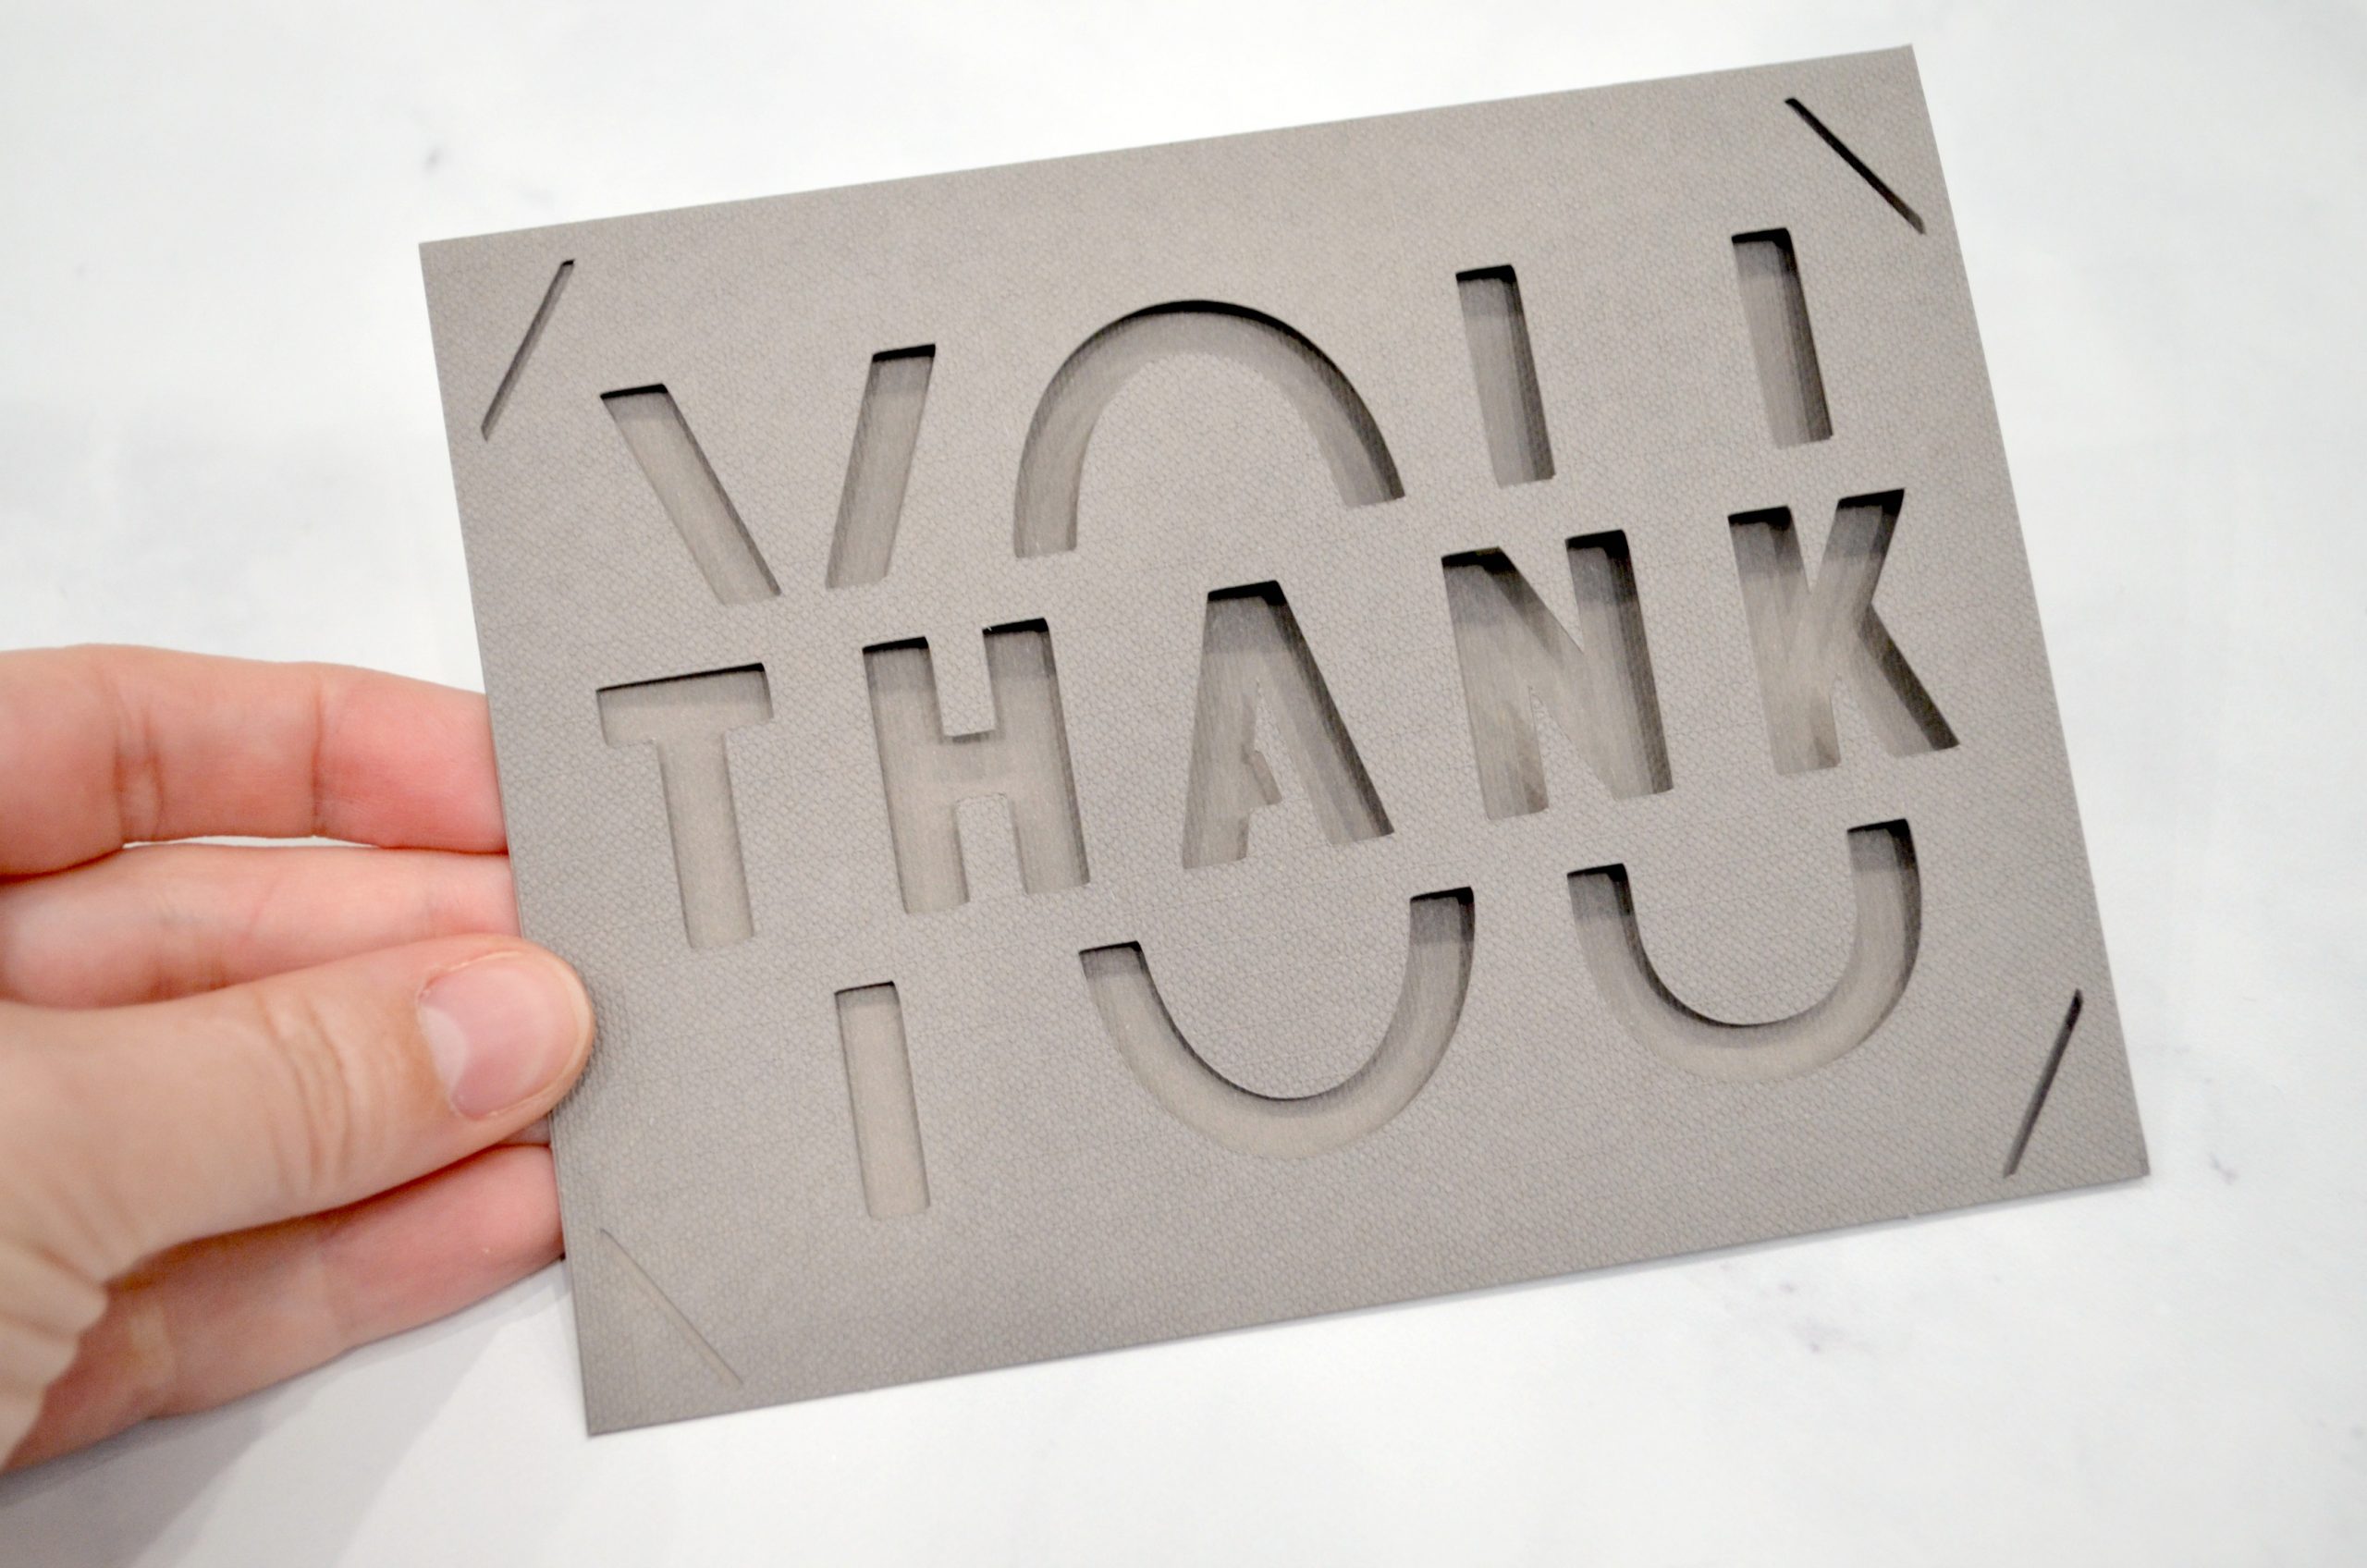
Step 6: Slide your insert behind the front of the card, tucking it through the corner slits to hold it in place.
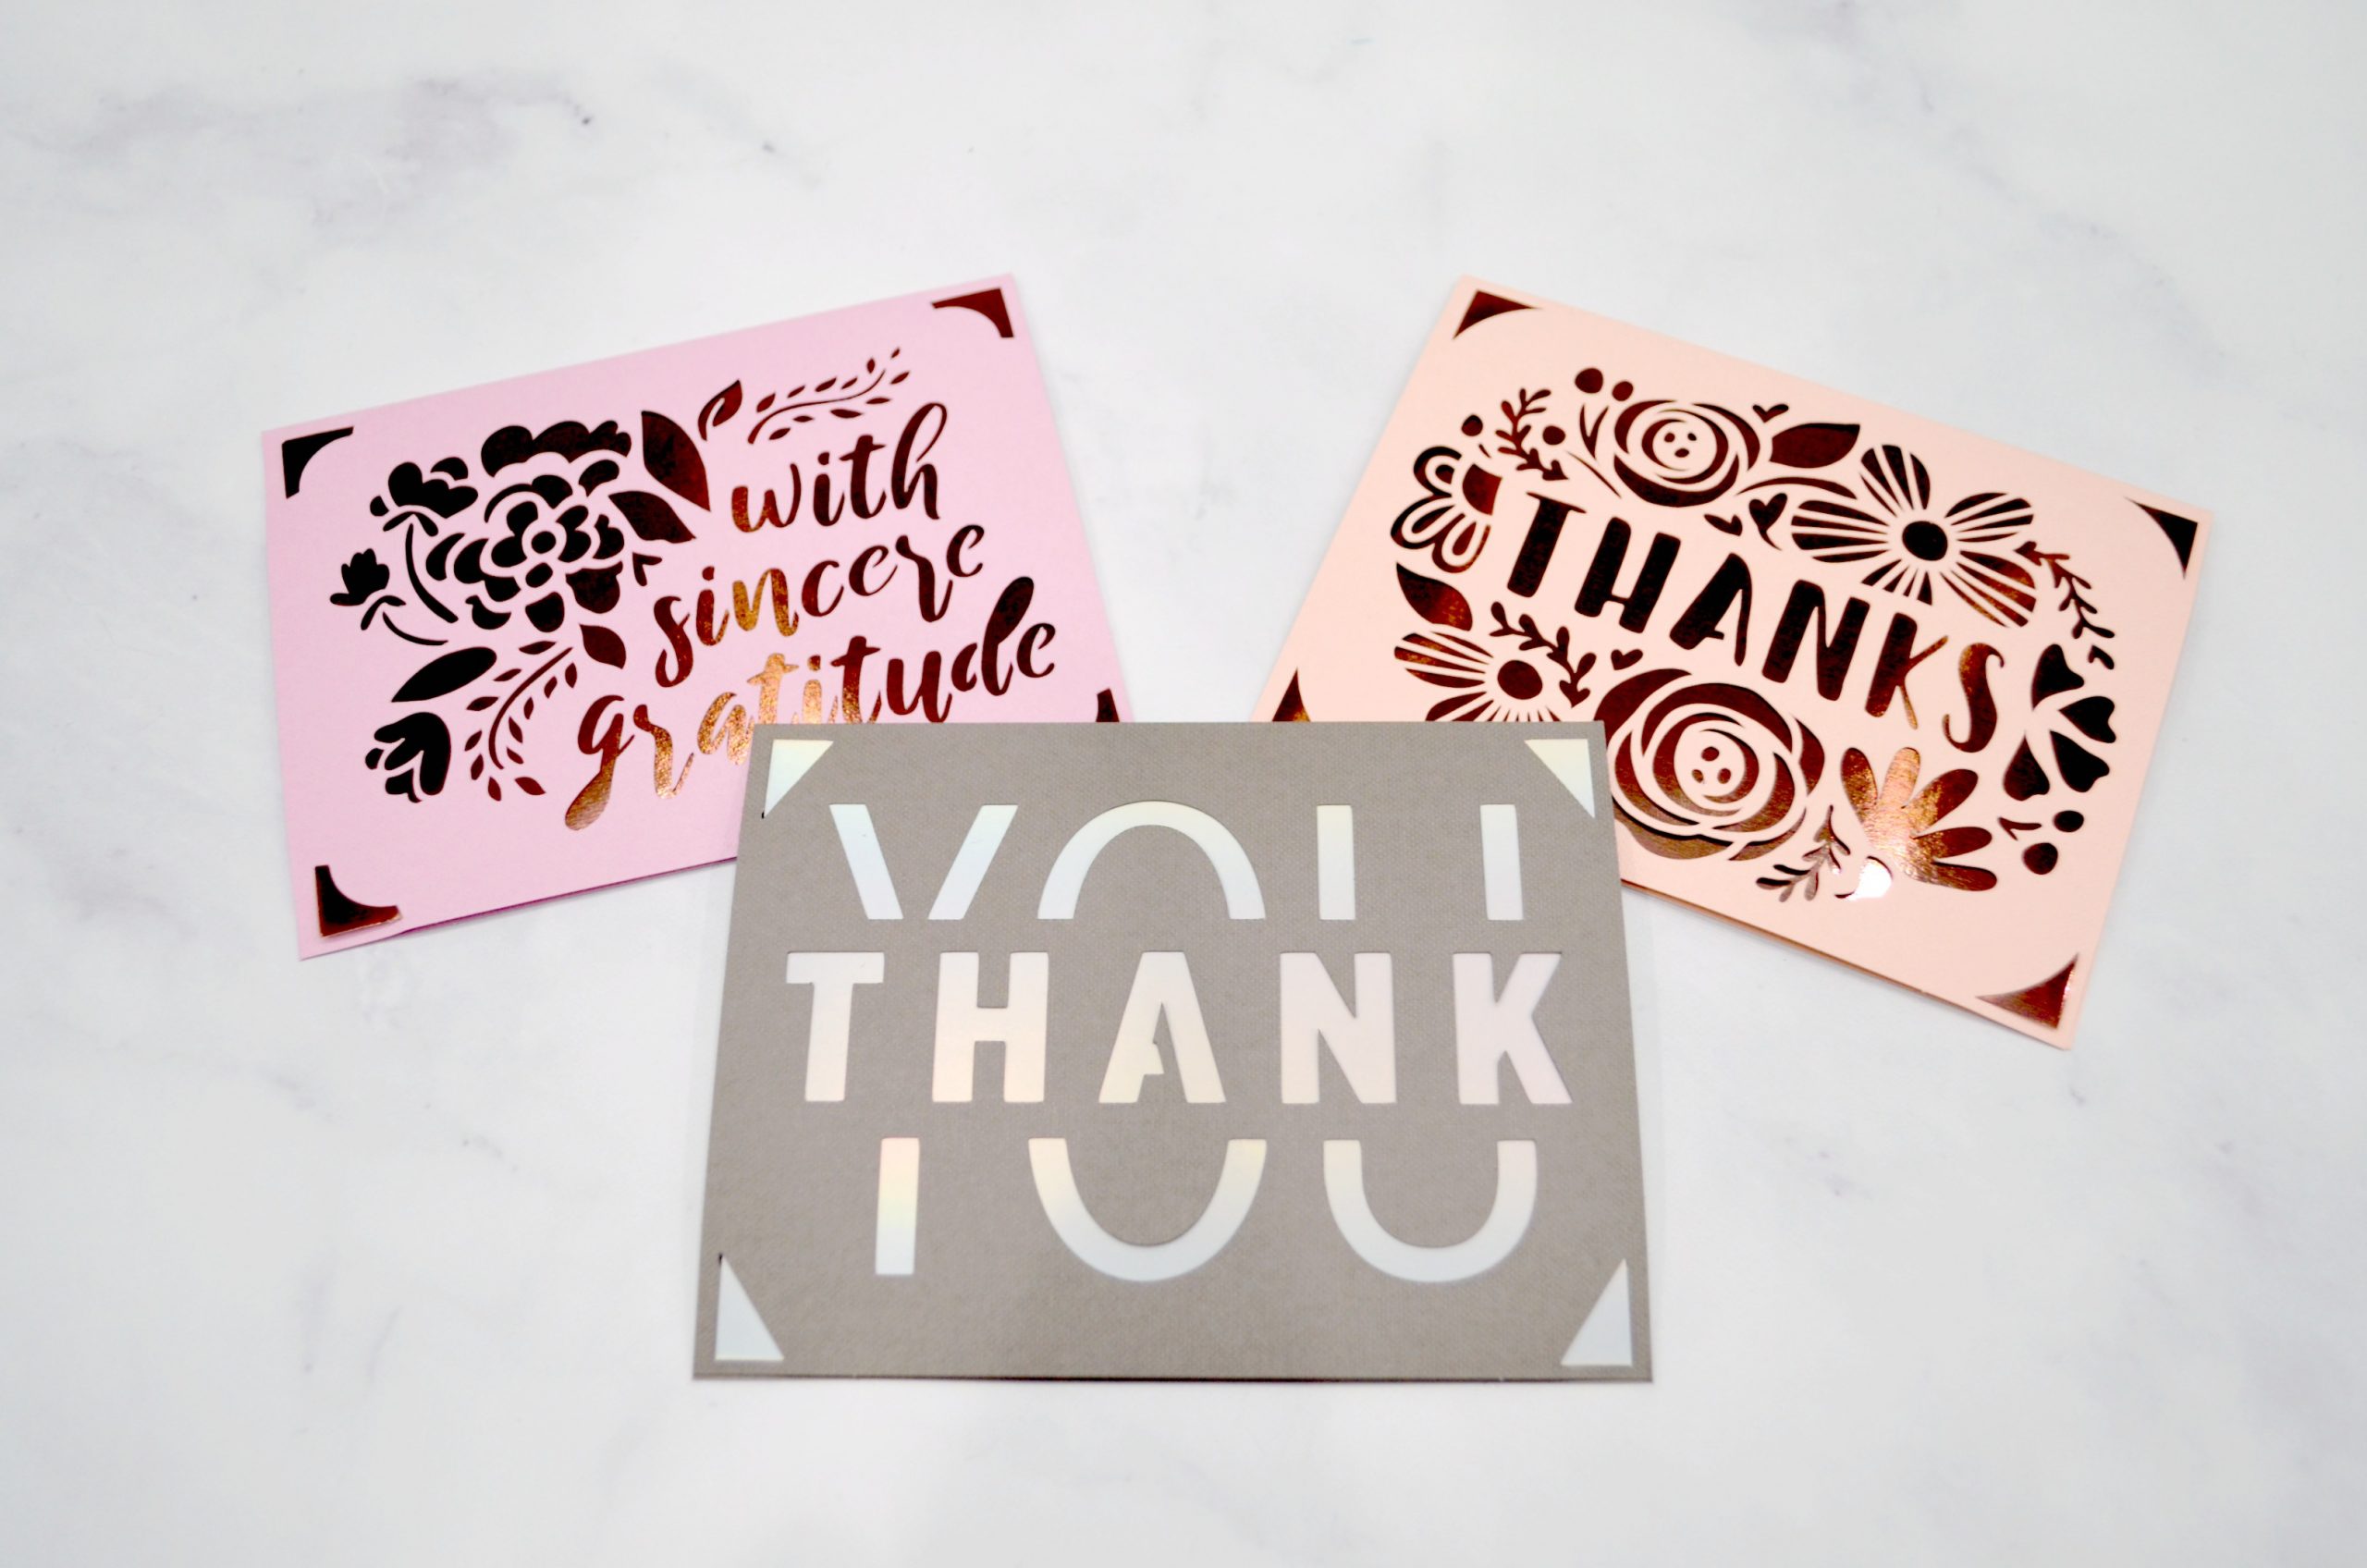
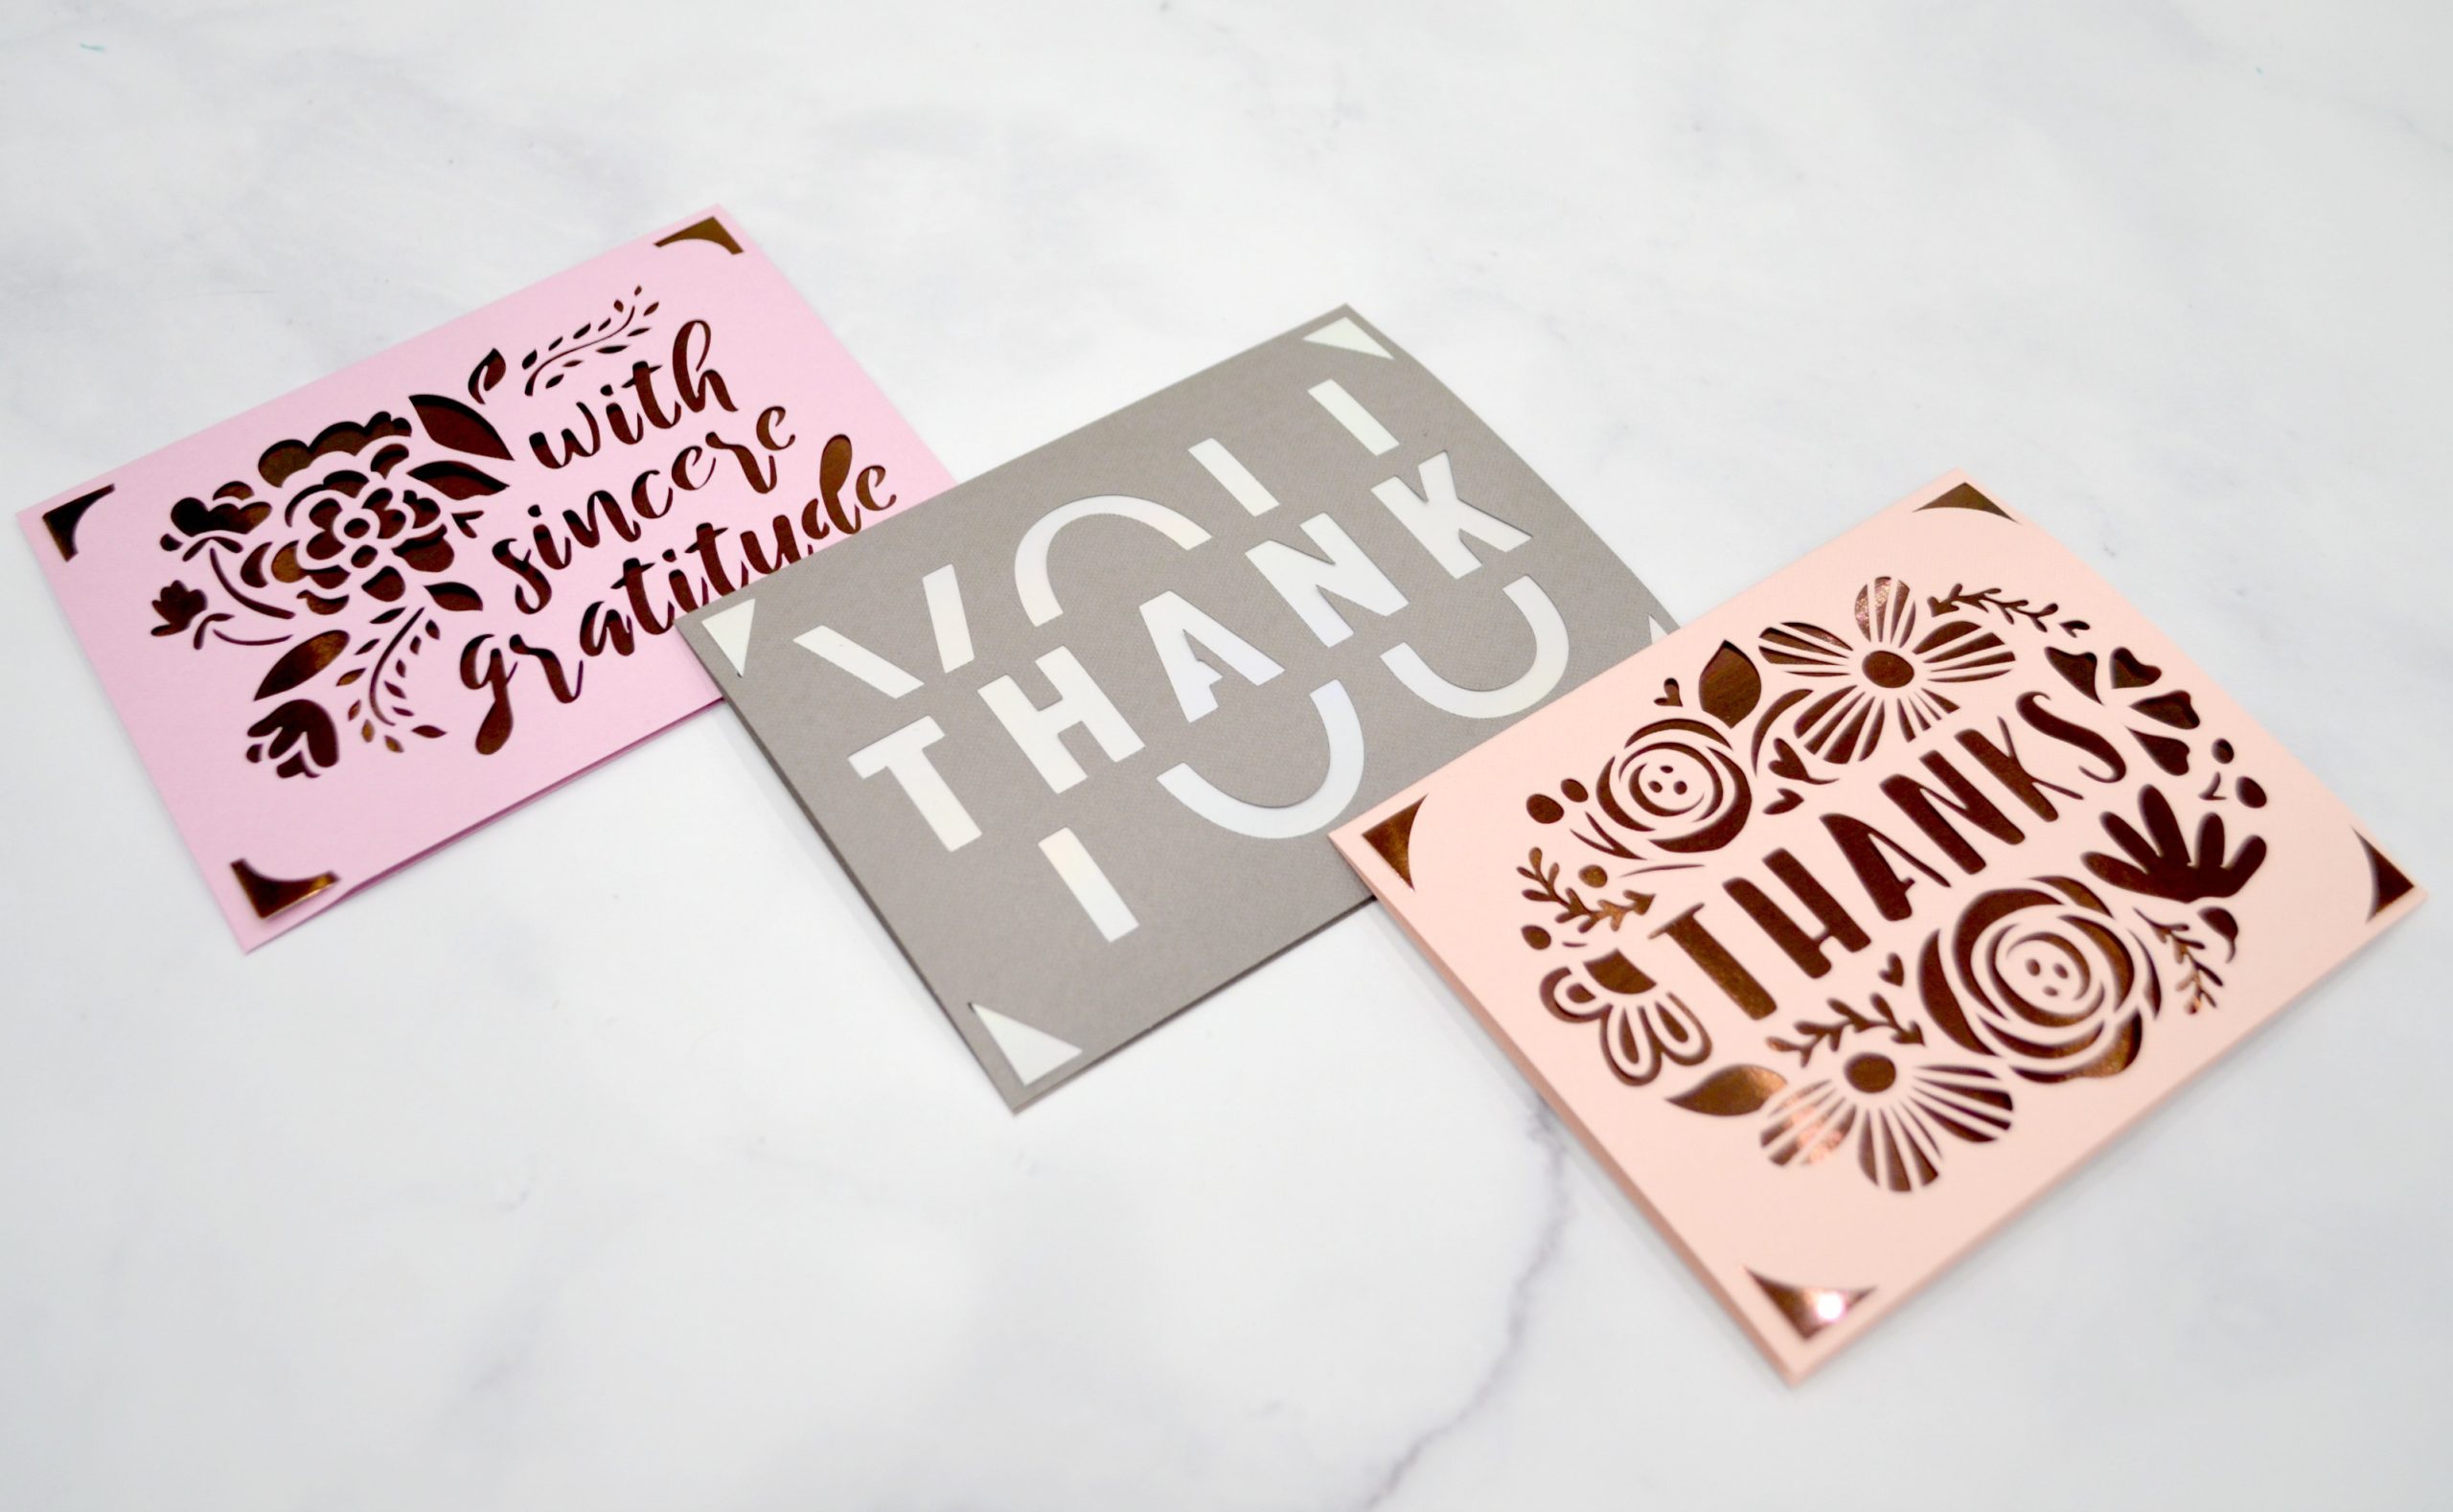
This will create a gorgeous dual colored design. There’s a great variety of Insert Card color packs to choose from. My favorites are the ones where the inserts are holographic or shiny, but all of them have fun combinations that really pop! Here are three of the different thank you card designs I’ve cut so far. I’m having a really hard time choosing a favorite!
The only thing left to do is write a heartfelt message of gratitude and encouragement in your card and give it away! Even if you don’t personally know any health care workers, a general thank you note sent to your local hospital would mean the world to those on the front lines of this crisis. You can also easily adapt these, creating “thinking of you” and encouragement cards to send to nursing home residents and others who are isolated from their families at this time. Sometimes the smallest acts of kindness make the biggest difference in how someone else feels! Let’s use our creativity and our Cricut to help spread some cheer where it’s needed most! If you make some cards, I’d love to see; be sure to share your photos in the Amy Latta & Friends Facebook group. See you there.

What fonts do you use that don’t cut out the center of letters?
The card designs are actually full designs created in Design Space intended just for use with the Insert Cards. You can certainly create your own designs, but when I’ve tried to do that, I run into the same issue you mentioned where the centers of the letters come out. You can glue those on top of the insert, though, if there’s something custom you really want to make.