DIY Holiday Pillow & Giveaway
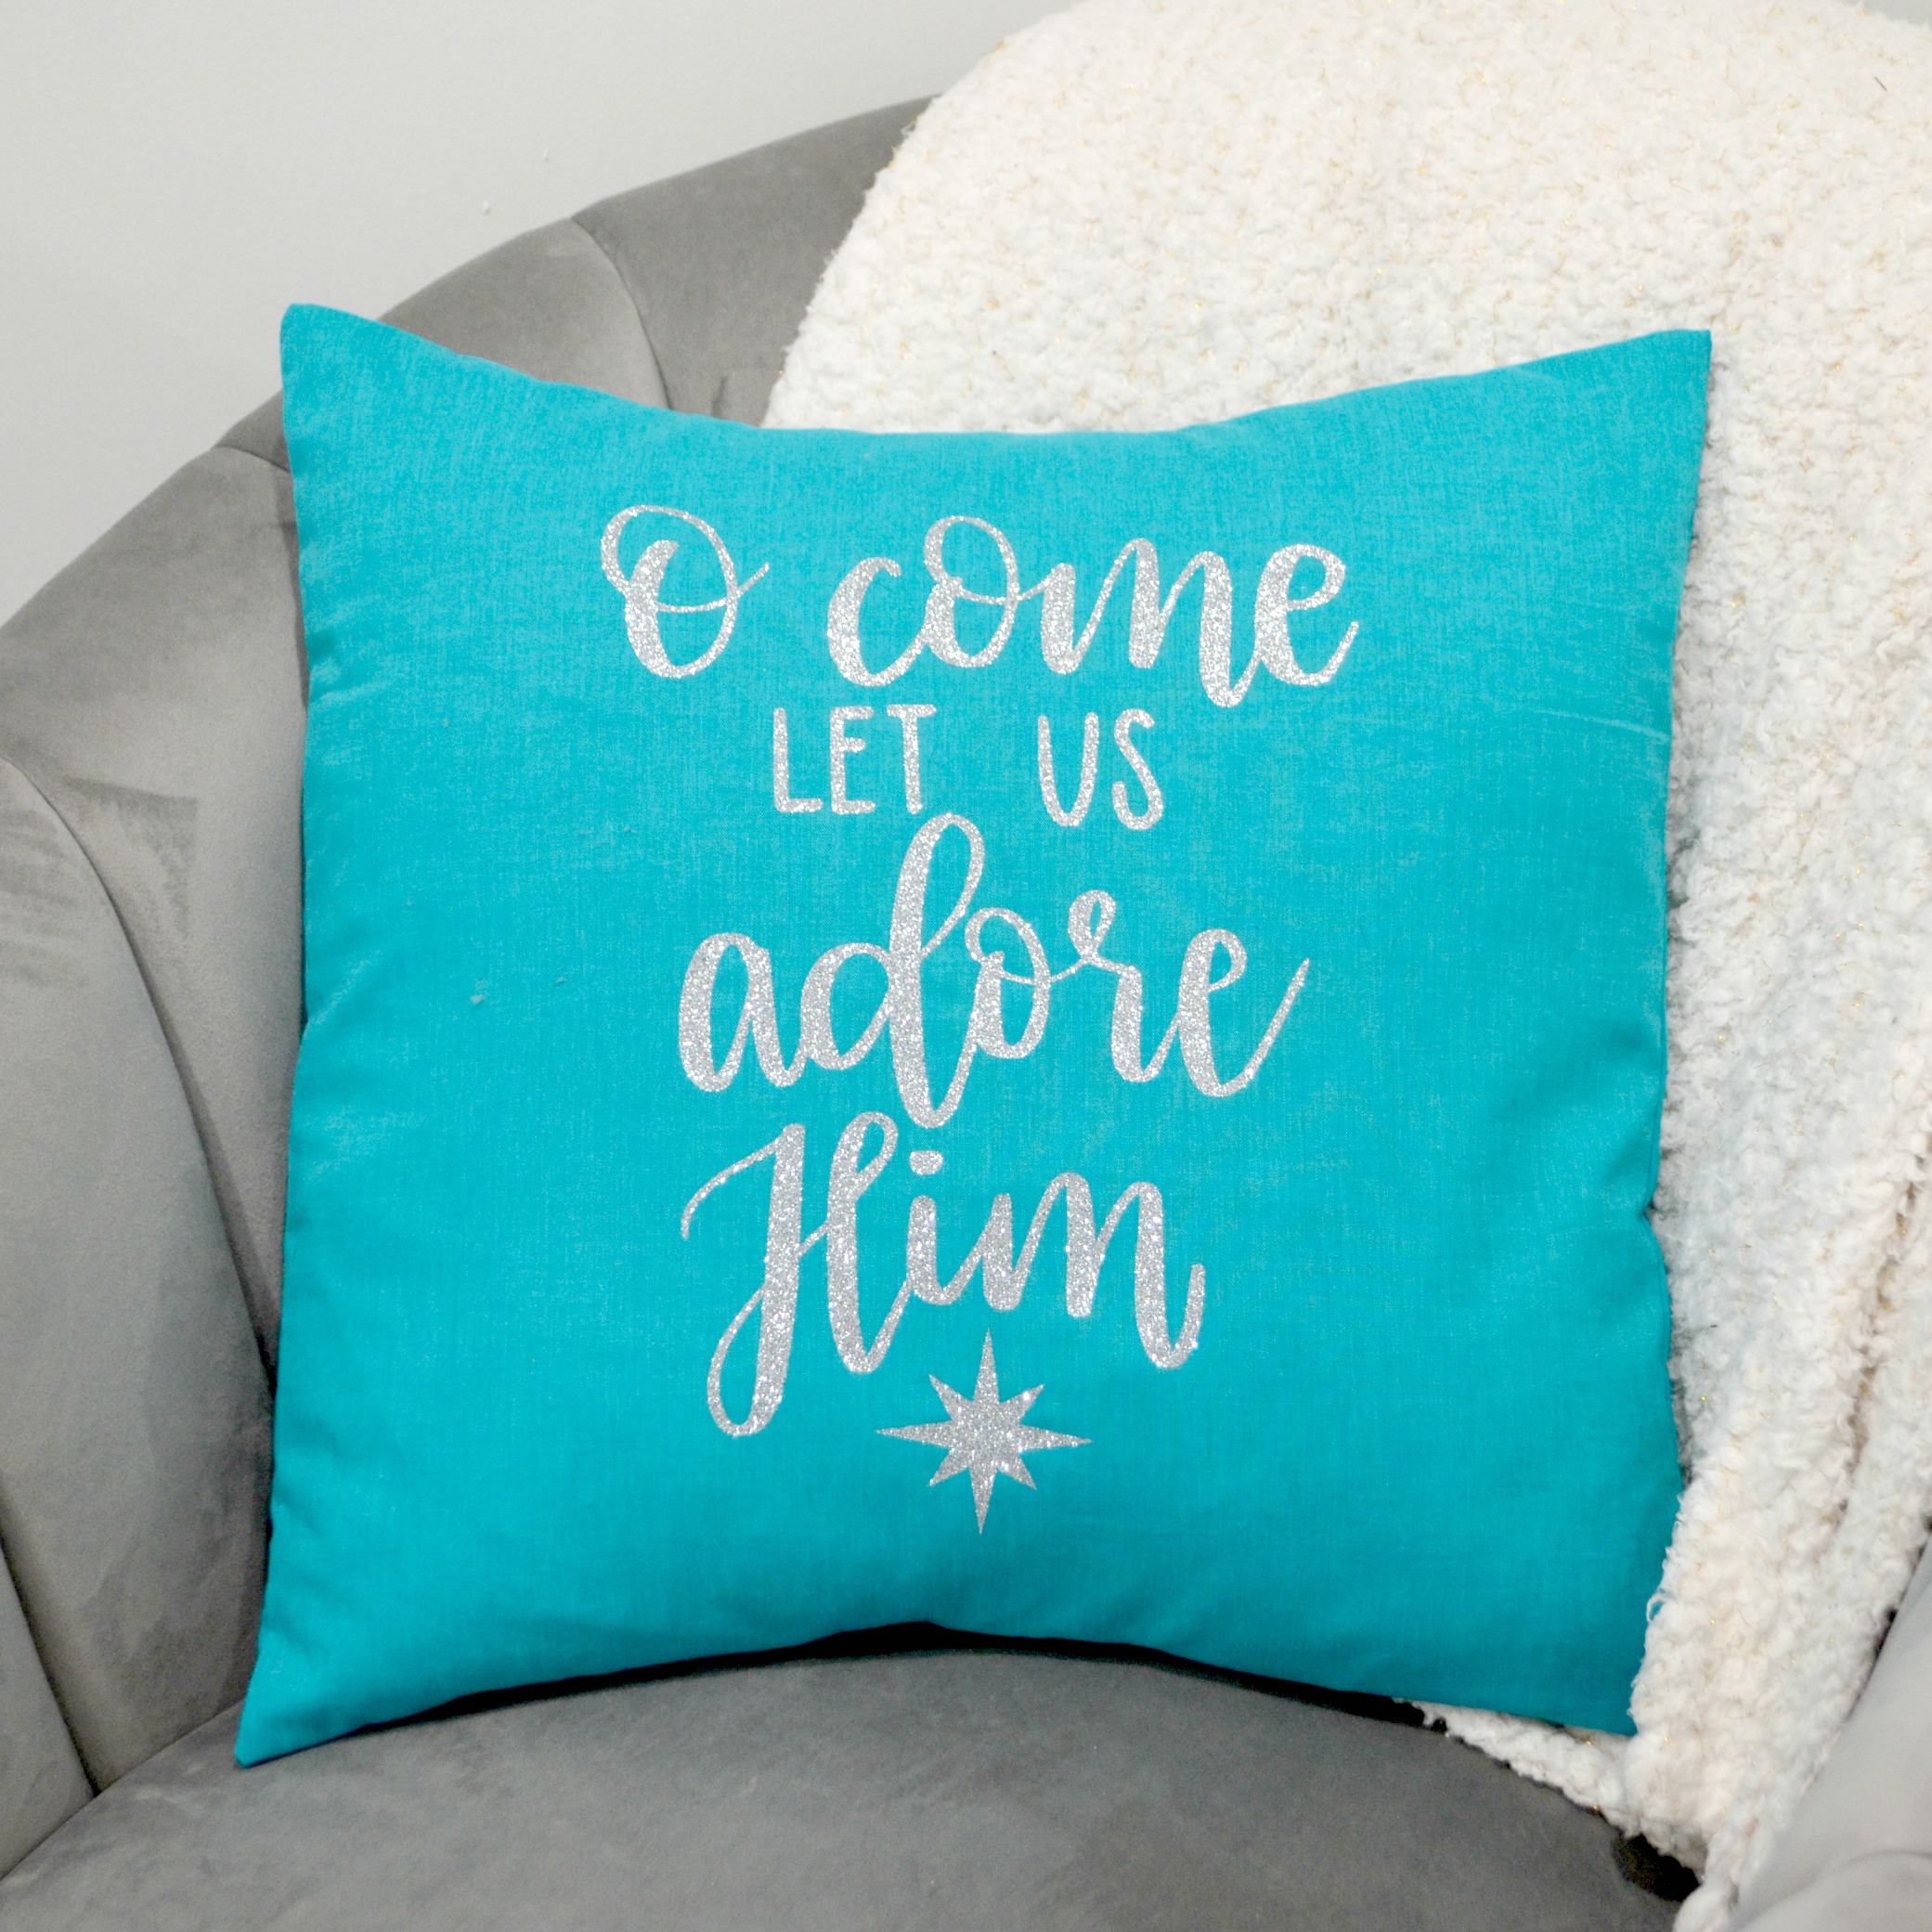
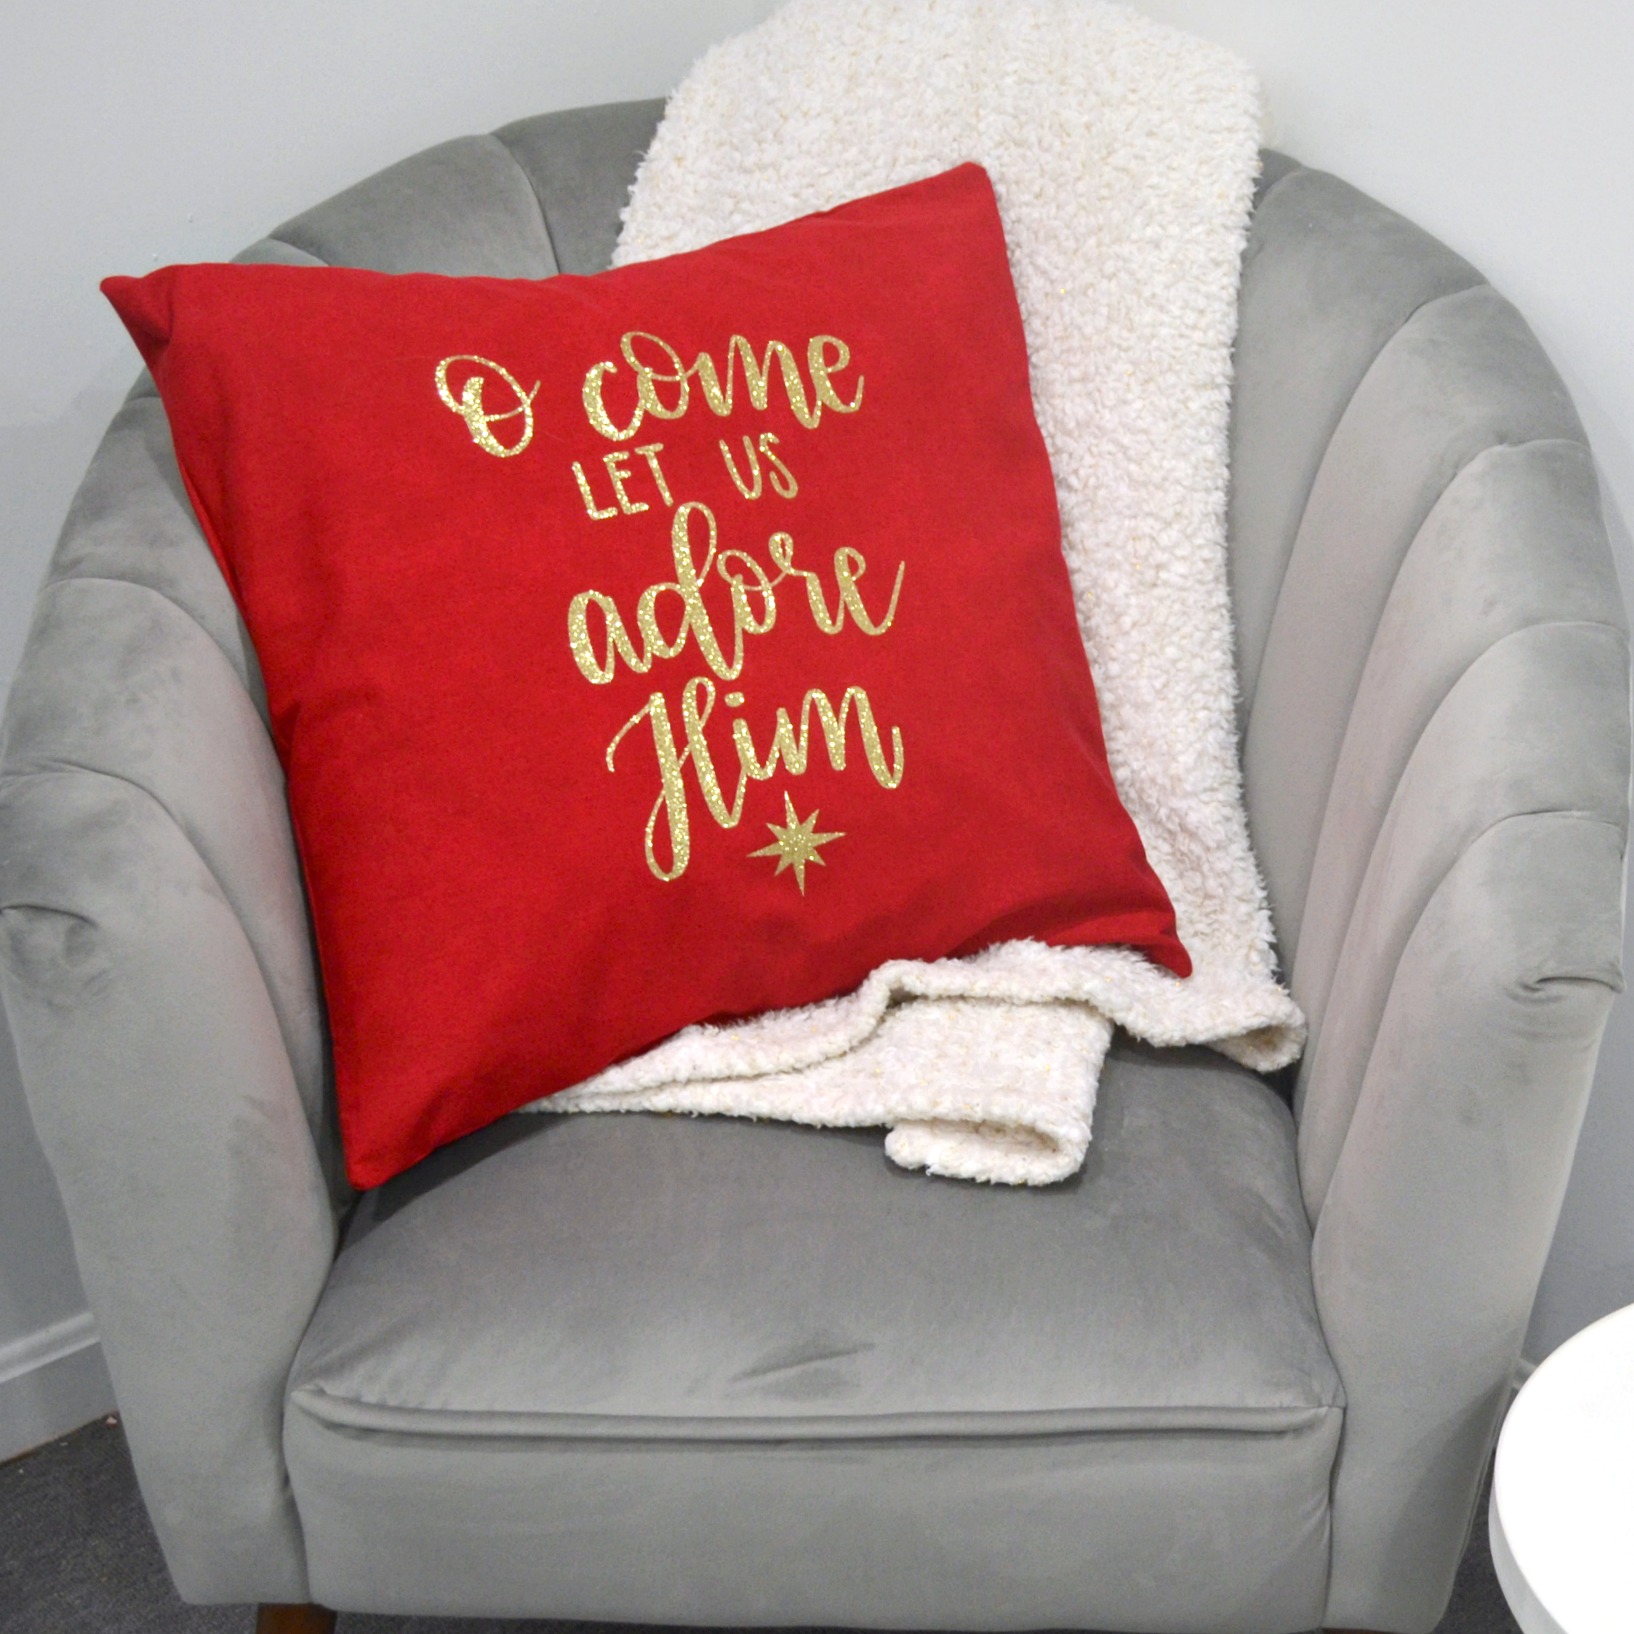
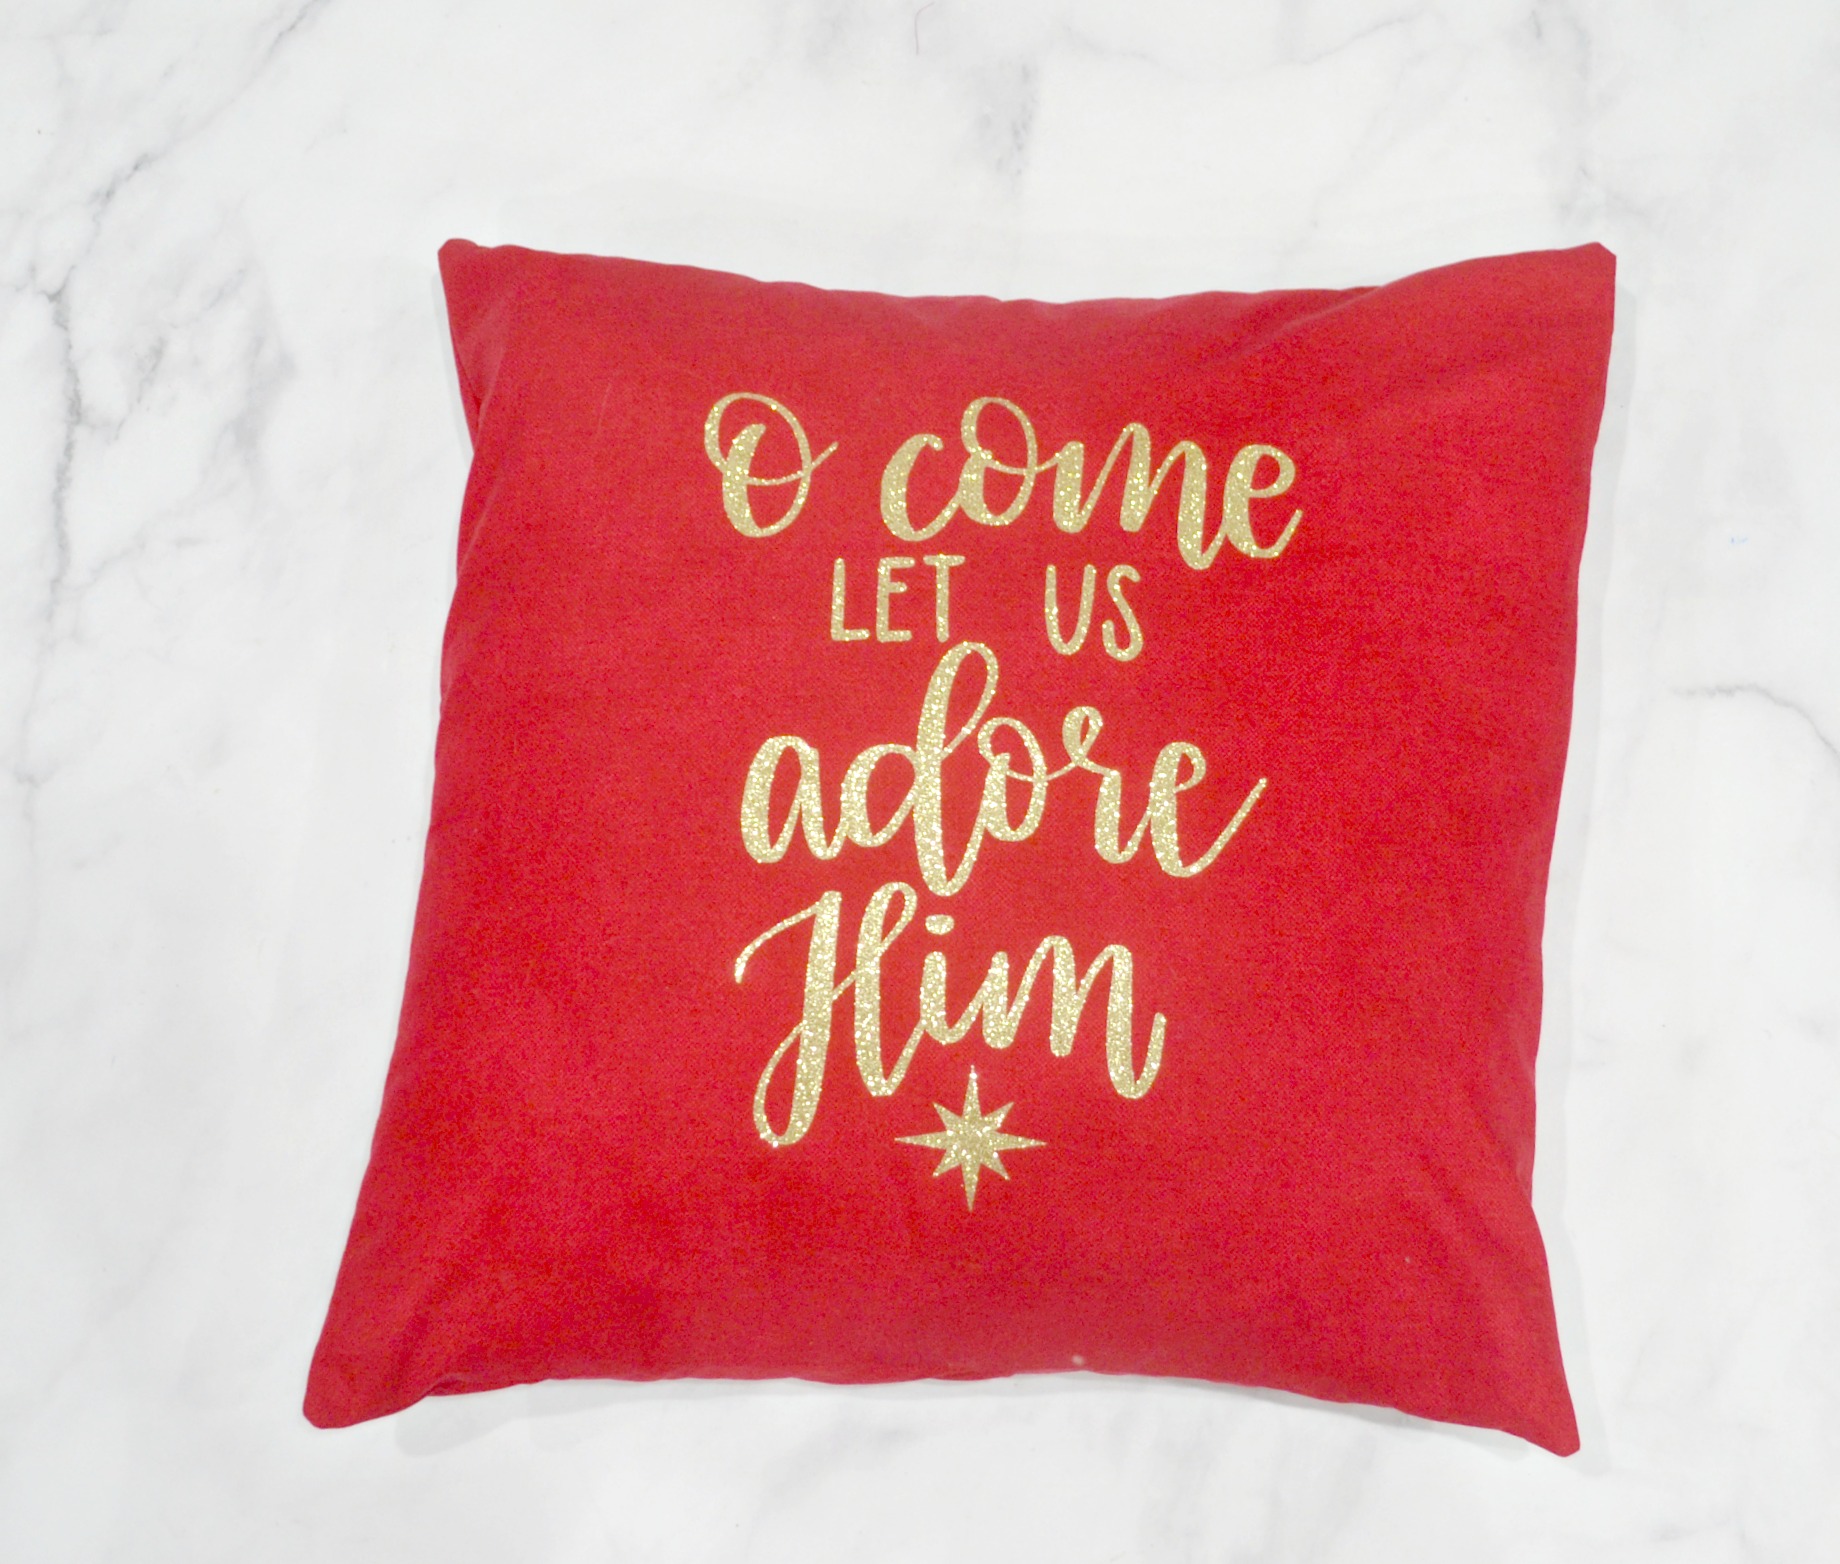
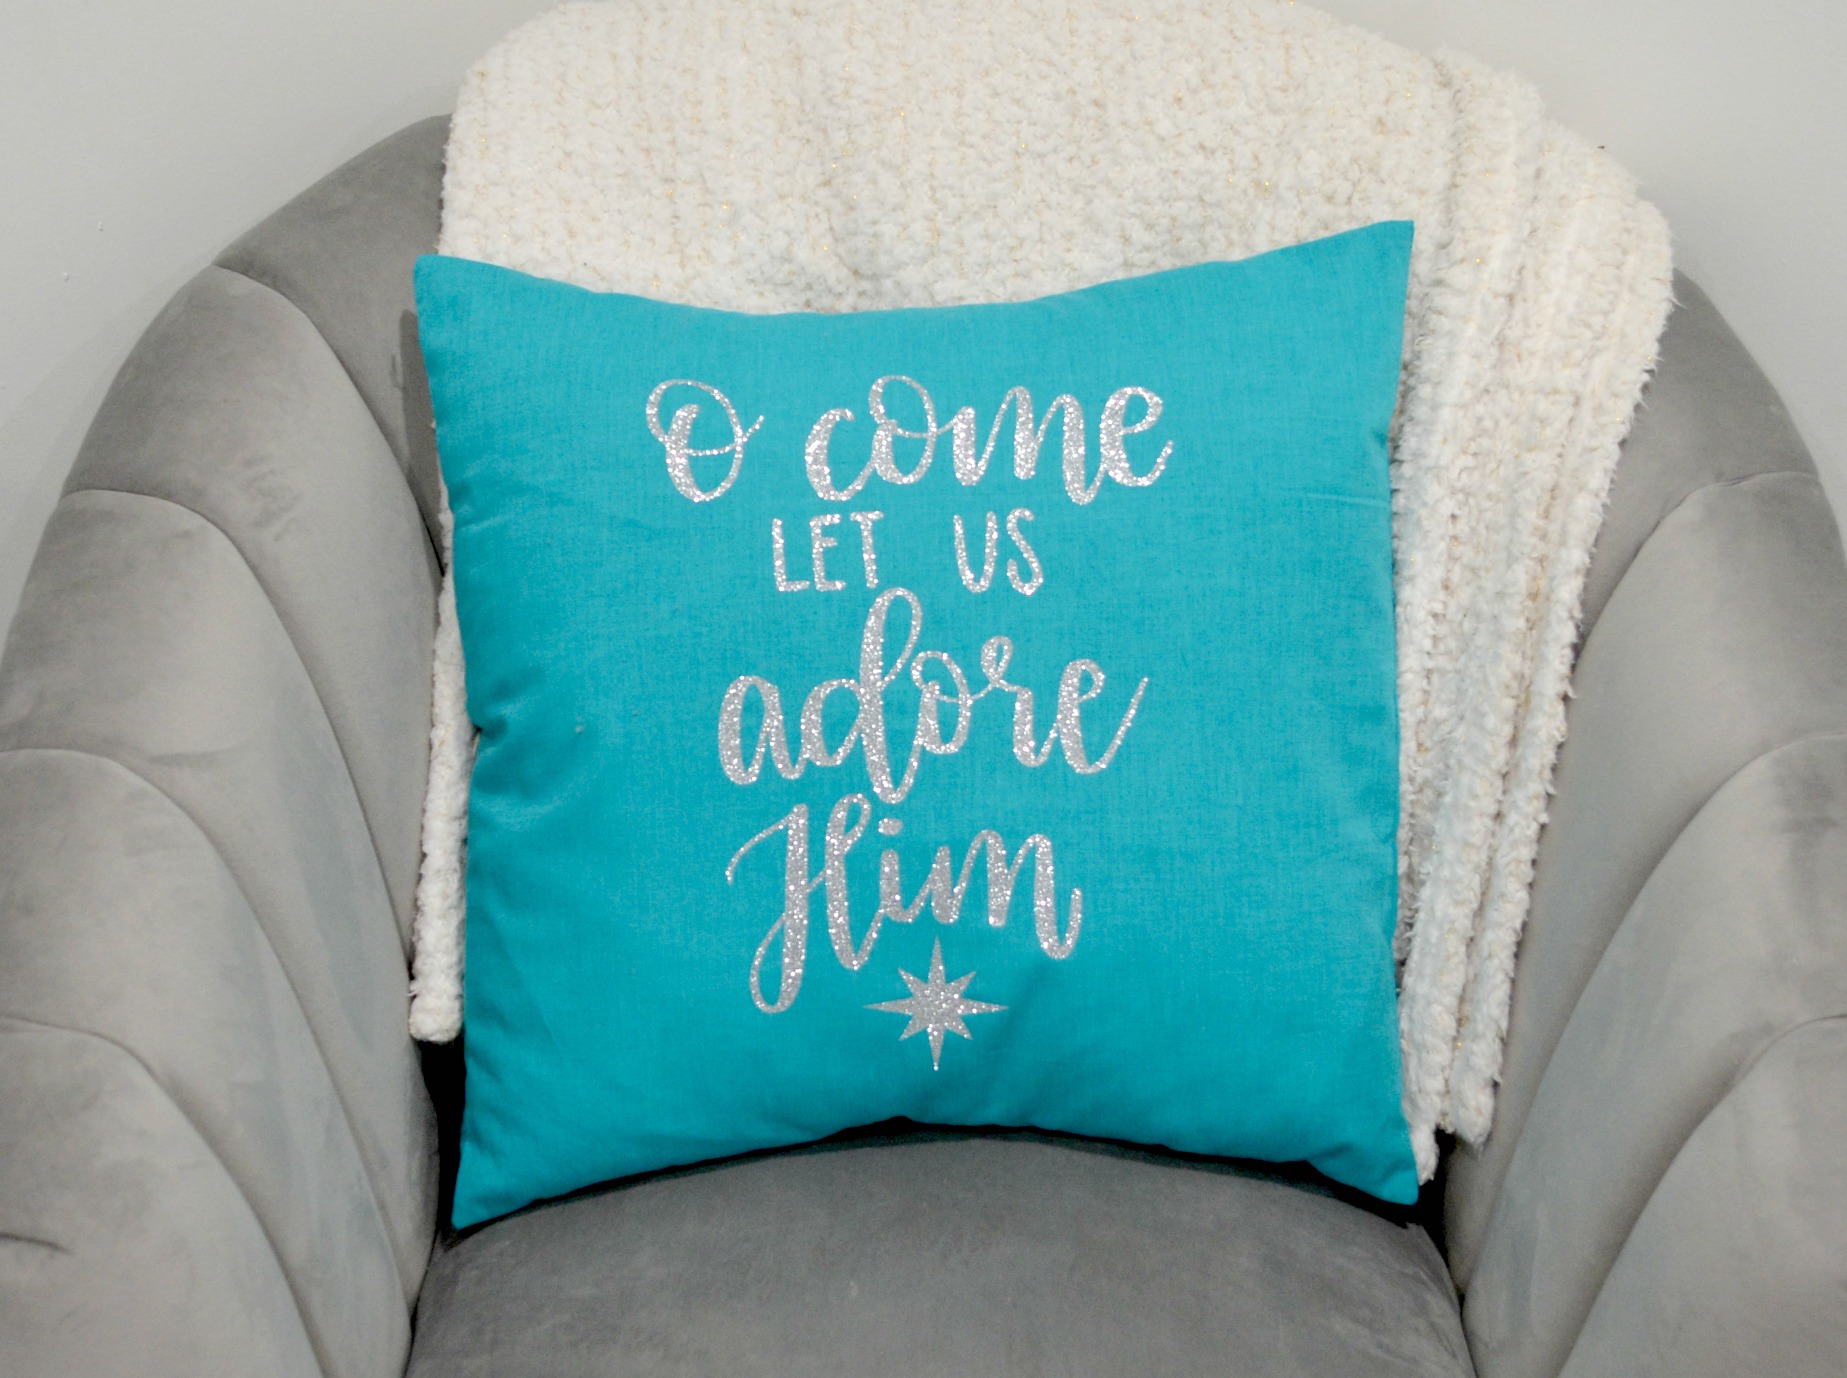
Christmas is my favorite time of year, and I love to go all-out when it comes to decorating our home. So, when I was invited to join the Fairfield World Pillow Party and create my own holiday pillows, I couldn’t resist! I personalized mine with a hand lettered design (of course), and I actually made two different versions; a teal and silver to go with my downstairs decor and a red/gold to match what I do on the main level! Here’s a full tutorial for how to create your own, along with a free cut file of my lettered design.

Holiday Pillow Materials:
2/3 yard of your chosen fabric
Fairfield World 20″ pillow insert
Sewing machine and coordinating thread
Scissors
Cricut Glitter Iron-On Vinyl, Gold or Silver
Cricut Light or Standard Grip Machine Mat
Cricut EasyPress 2 and EasyPress Mat (or towel)
Creating Your Holiday Pillow: Part 1
Step 1: Cut your fabric into three pieces; one 21″ square and two pieces measuring 21″x 12.”
The square will be the front, and the other two pieces will overlap each other in the back to create an opening where the pillow form can be inserted and removed.
Step 2: Open your lettered design in Cricut Design Space and cut it from Glitter Iron-On Vinyl.
Set your machine for cutting Iron-On Vinyl, and make sure mirroring is turned on. Place the vinyl on your cutting mat with the shiny side down. Load the mat into your machine, then follow the prompts to start the cutting process. Because this design is a large one, I cut it in two parts. I cut the words first, as large as I could get them to be on the 12 x 12 mat. Then, I went back and cut a small star shape from the Cricut Design Library to finish the design at the bottom.
DOWNLOAD THE CUT FILE HERE
Step 3: Weed the vinyl.
This means using your fingers and/or tools like tweezers to remove all the parts of the design that you don’t want on your pillow. Peel those pieces off from the shiny backing, leaving only the words.
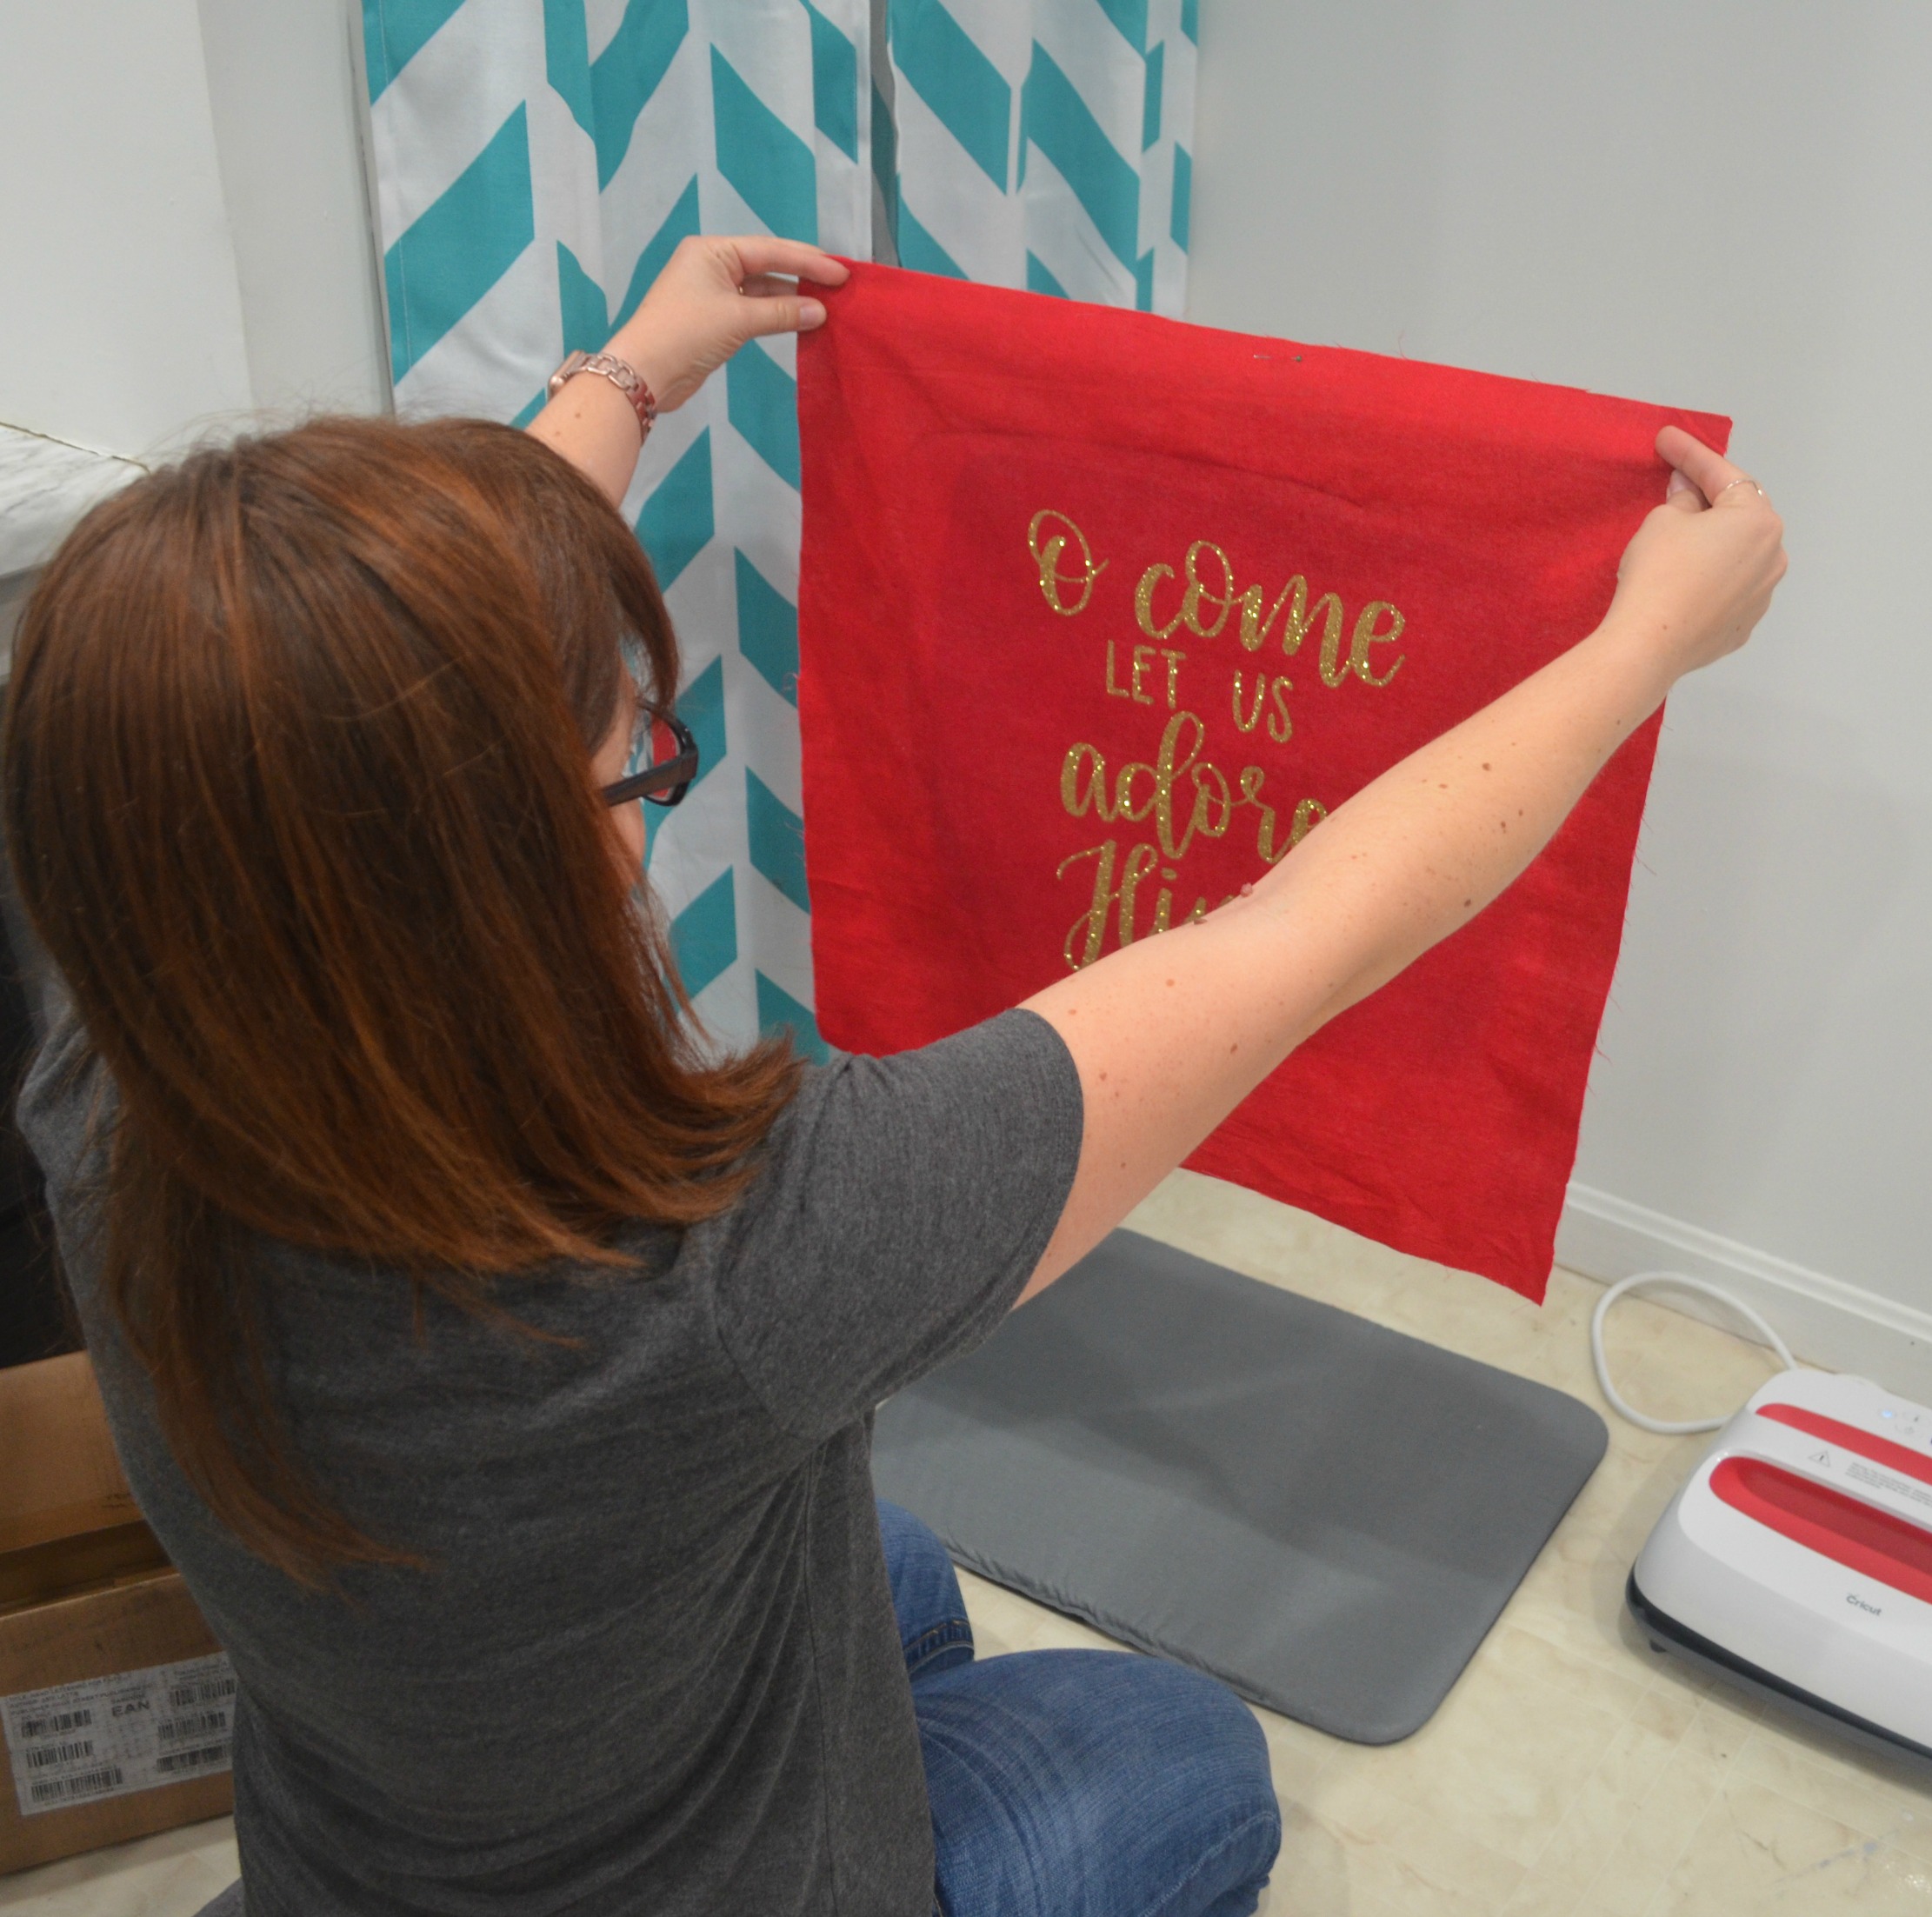
Step 4: Adhere the vinyl to the pillow front using heat.
Heat your EasyPress or iron to the temperature recommended in the Cricut Heat Guide for the type of fabric you are using. Then, preheat your pillow front by pressing it lightly for 5-10 seconds. Place your design in the center of the pillow front and press it for 30 seconds. Finally, flip the fabric over and press from the back side for another 15 seconds.
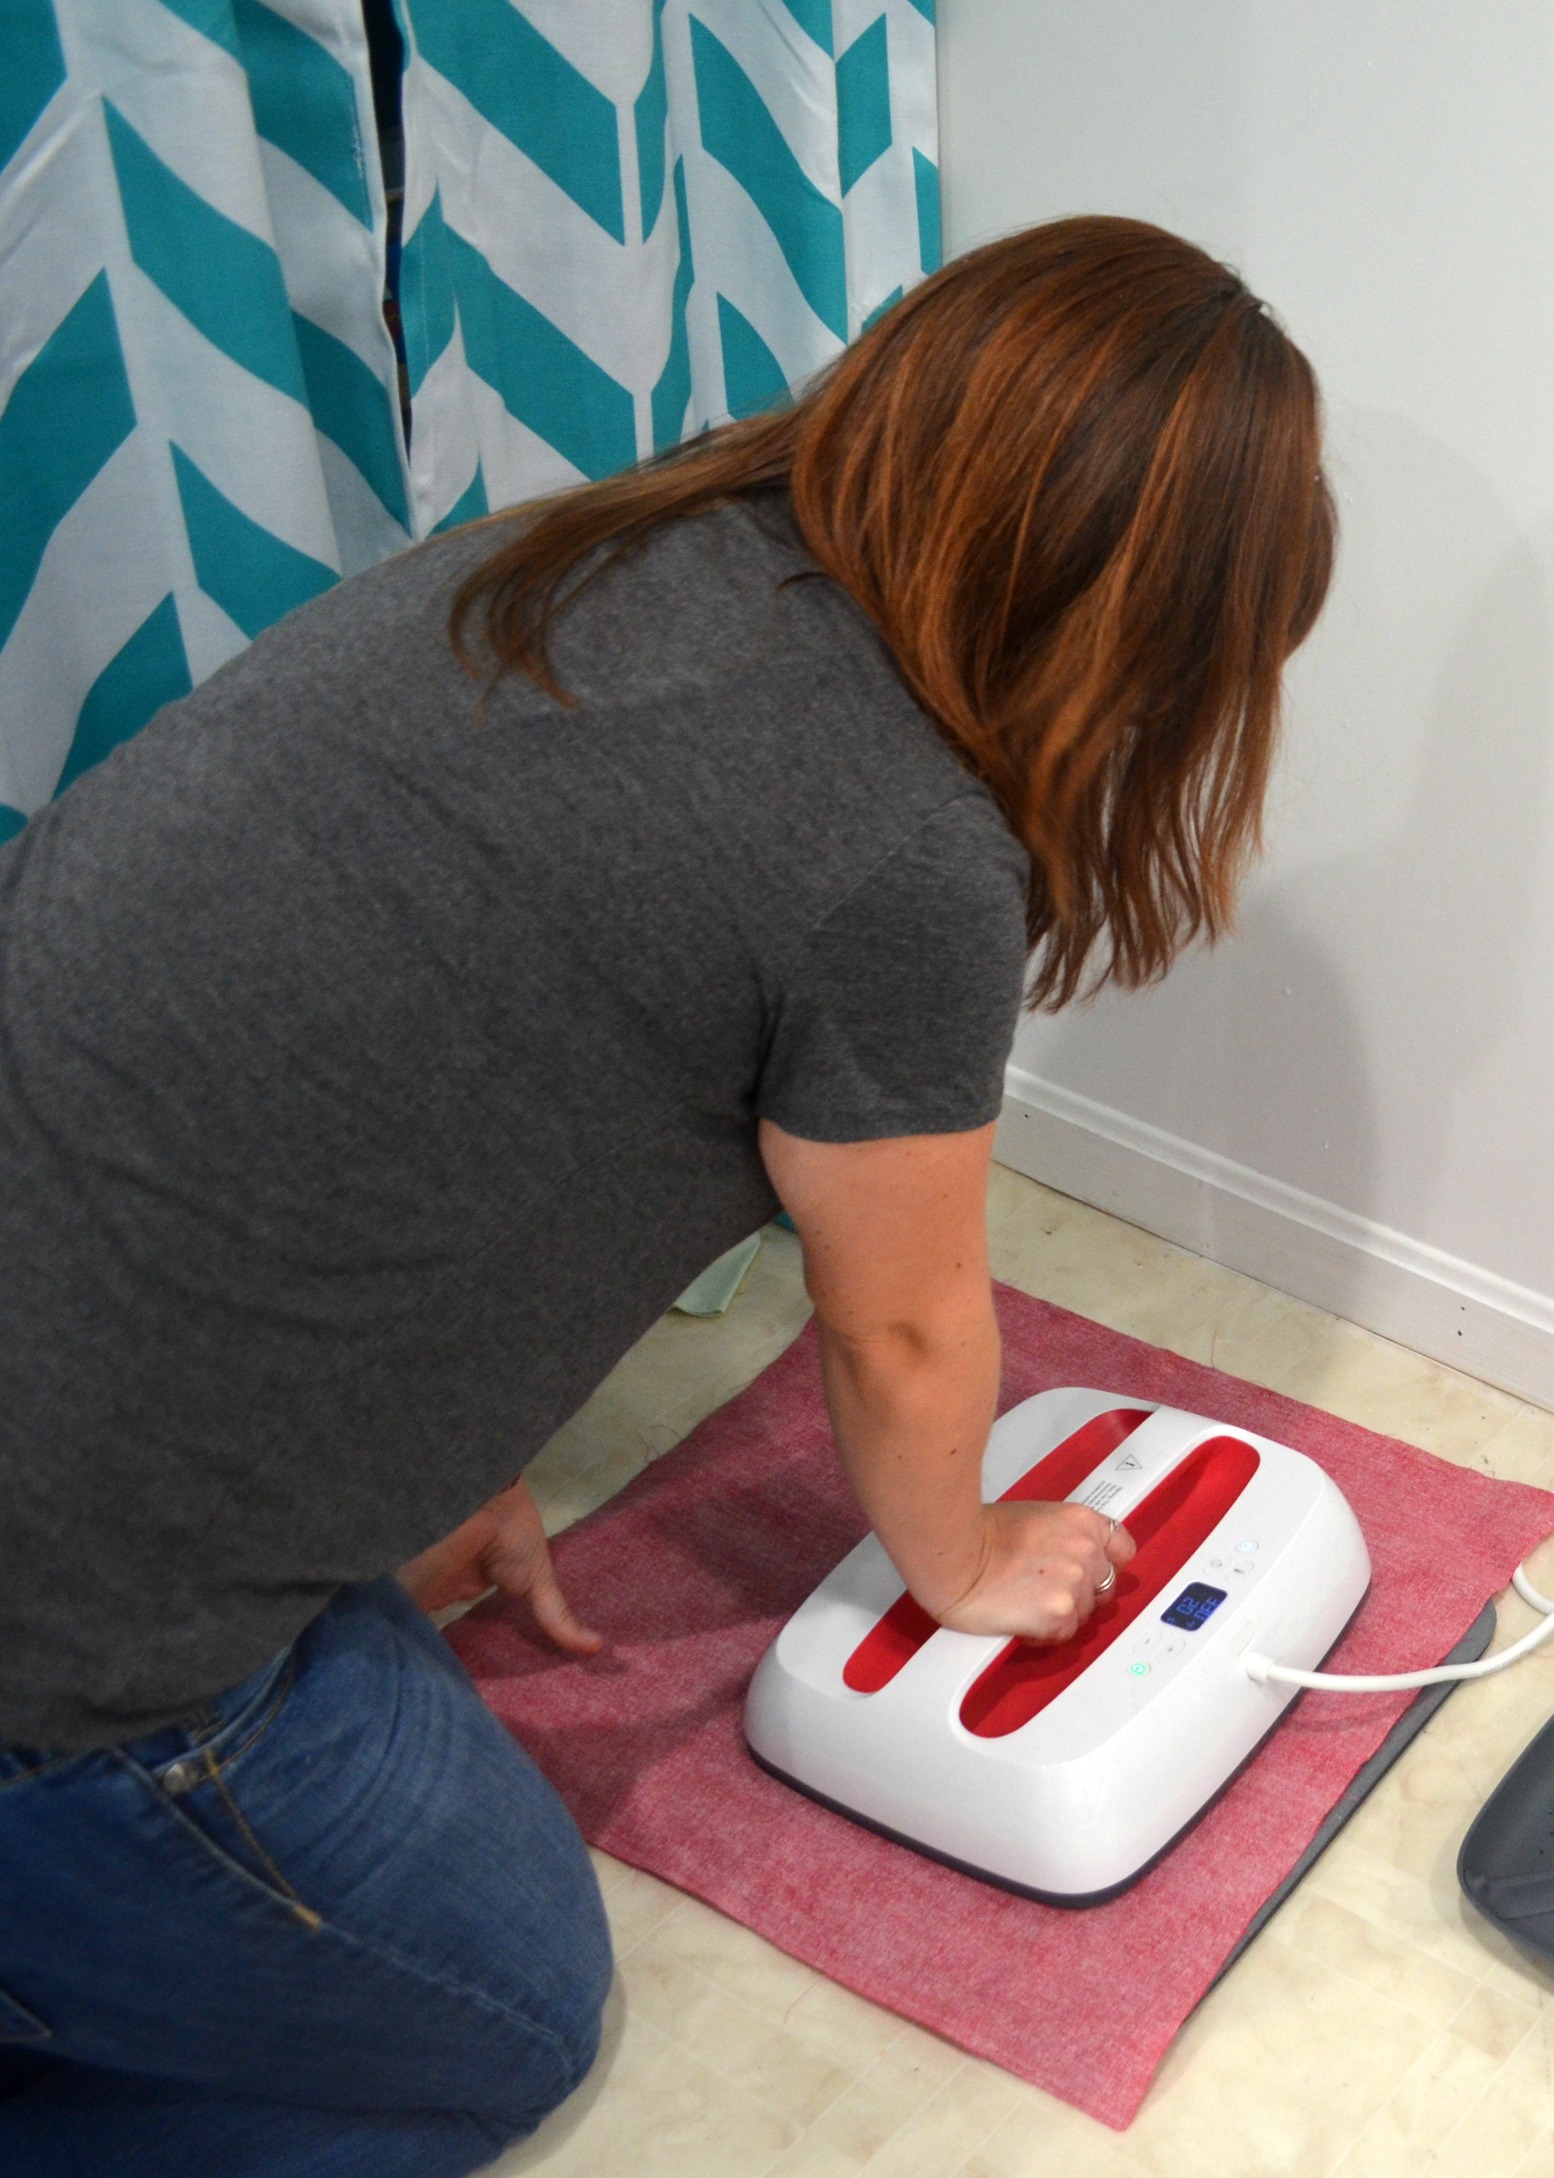
Gently peel the plastic back and your vinyl words should be left on the pillow front.
Creating Your Holiday Pillow: Part 2
Now it’s time to turn our pieces of fabric into a pillow cover.
Step 1: Sew a narrow hem on one of the 21″ sides of each 12″x 21″ piece.
You want to leave as much fabric as possible for the overlapping flap, so just turn the edge under a tiny bit and sew it in place.
Step 2: Pin the front and back pieces together as shown below.
First, you’ll place the pillow front right side up. Then, line up the back pieces with the right sides down so that the raw edges line up with those of the pillow front. The hemmed edges should overlap each other in the center.
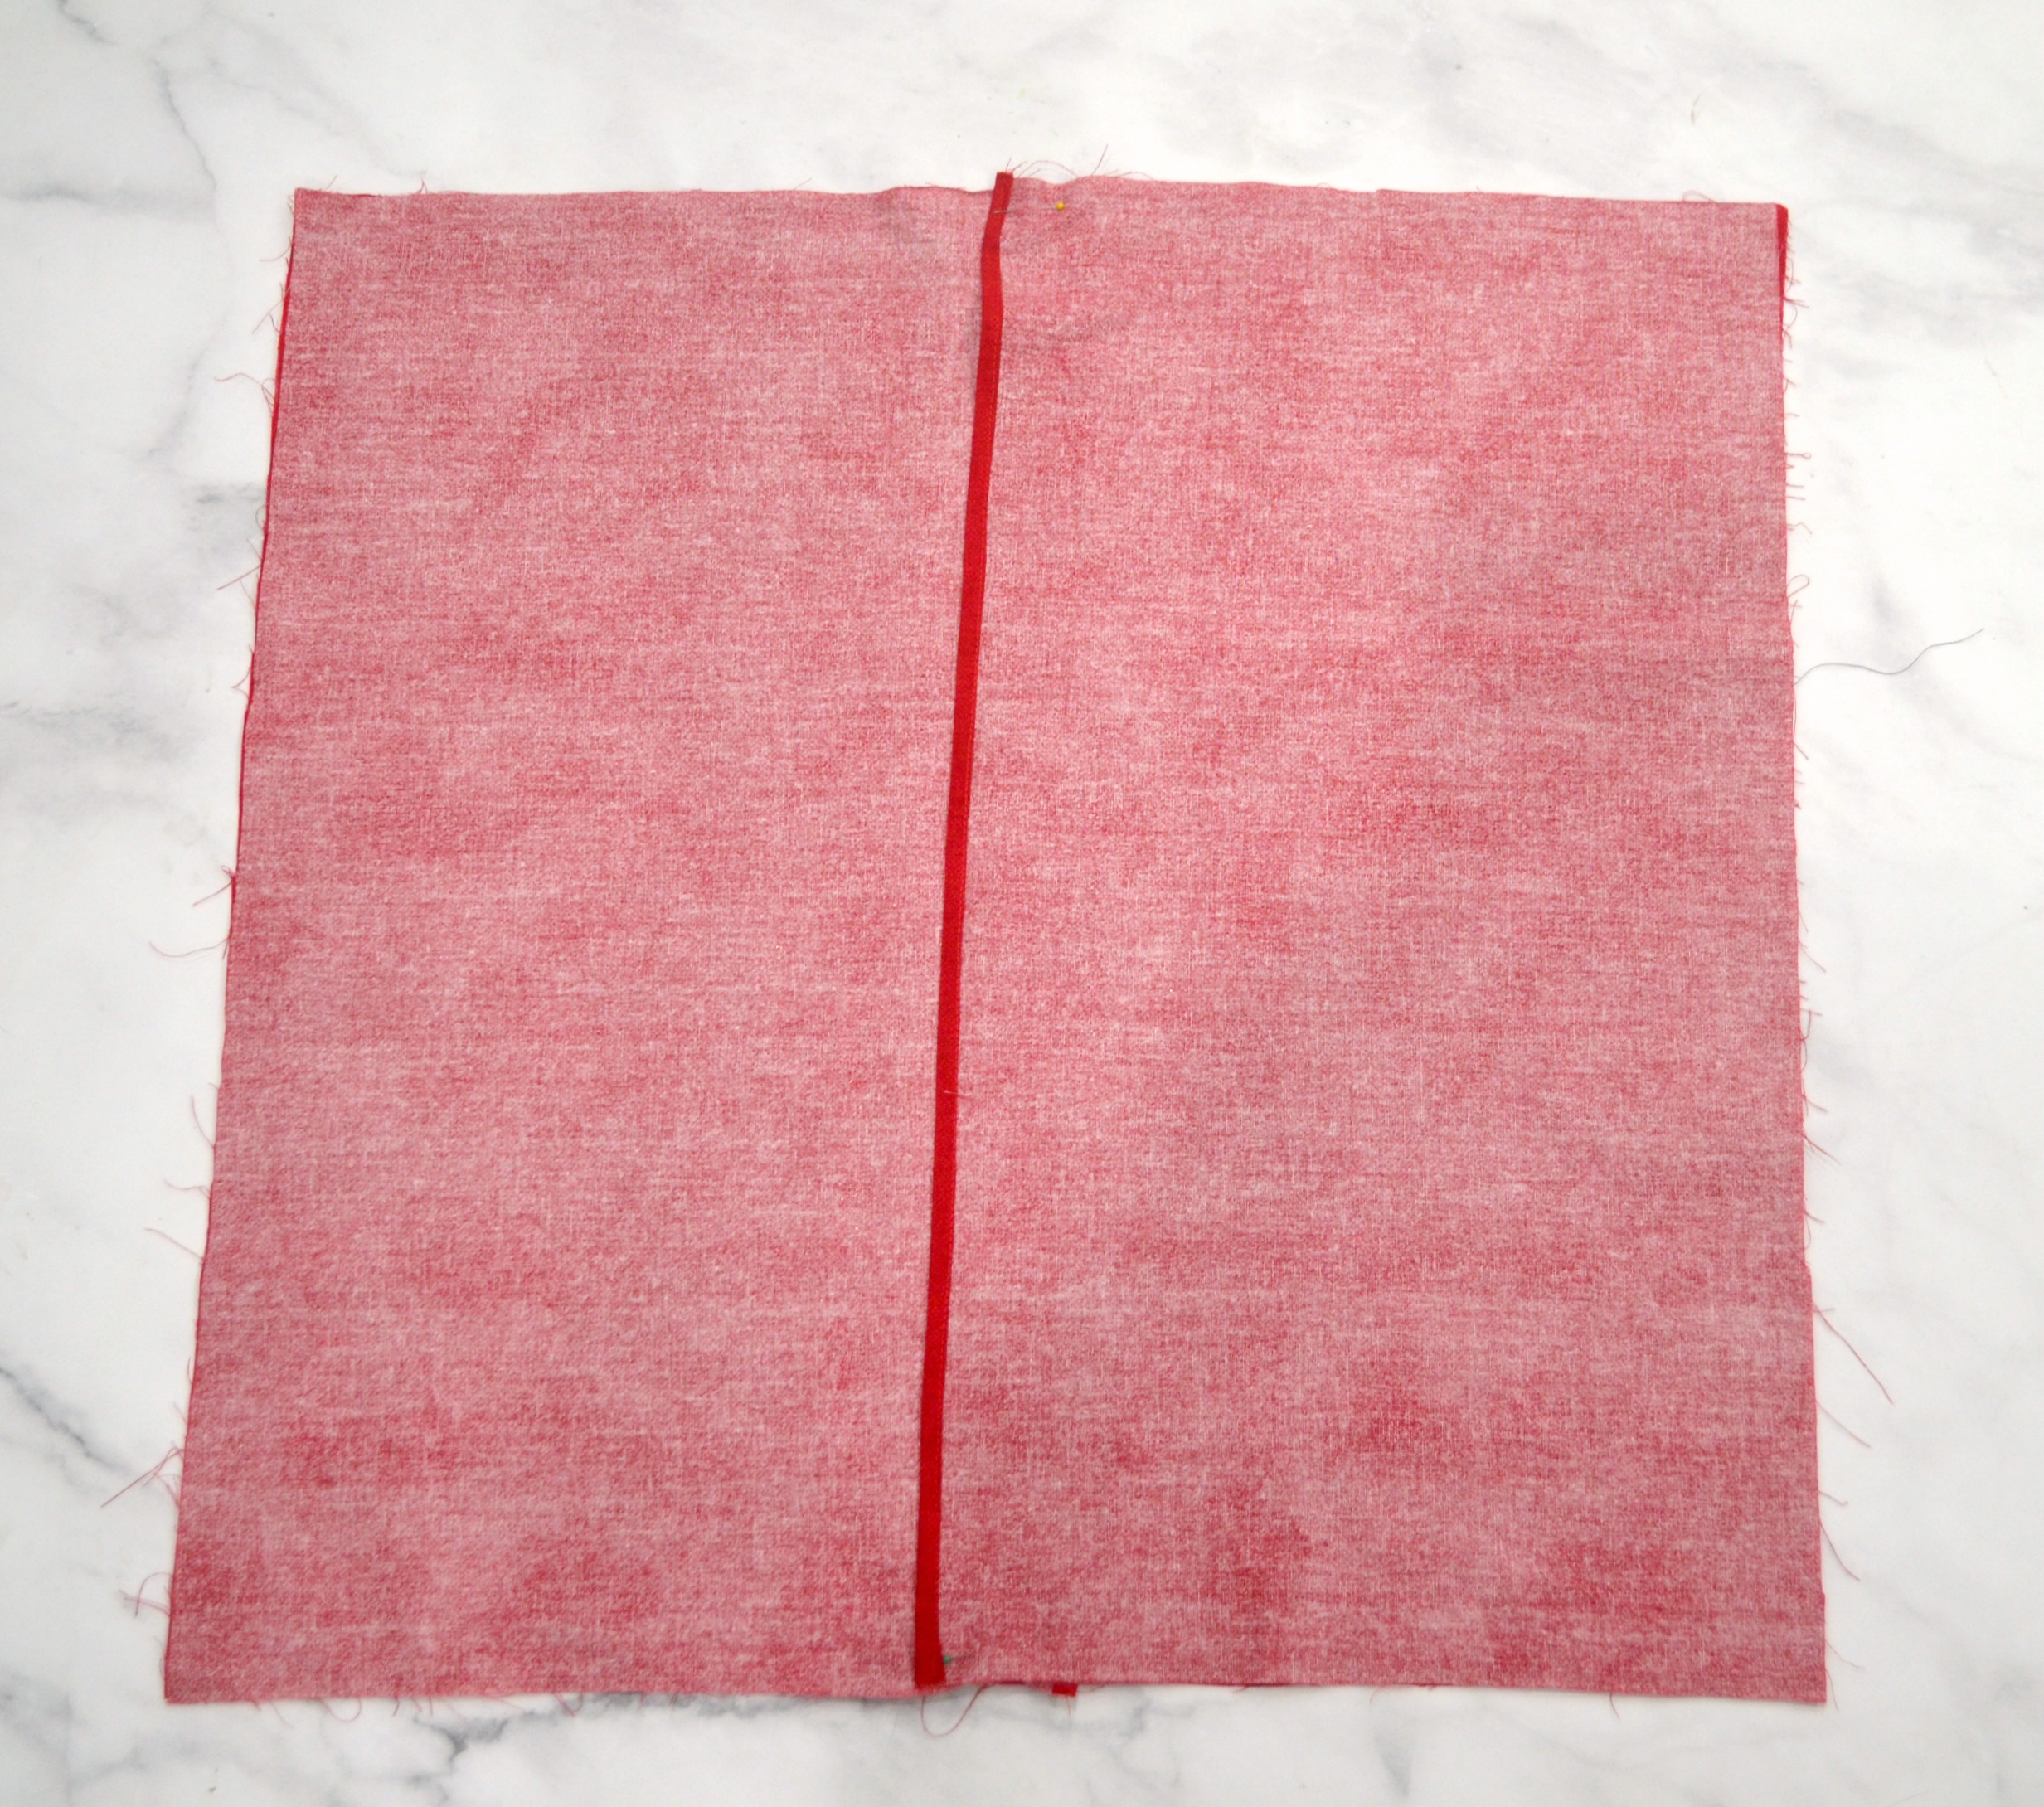
Step 3: Sew a 1/2″ seam all the way around the edges of the square. Then, turn the pillow cover right side out.
The front will have your design, and the back should have overlapping flaps, as shown in the photo below.
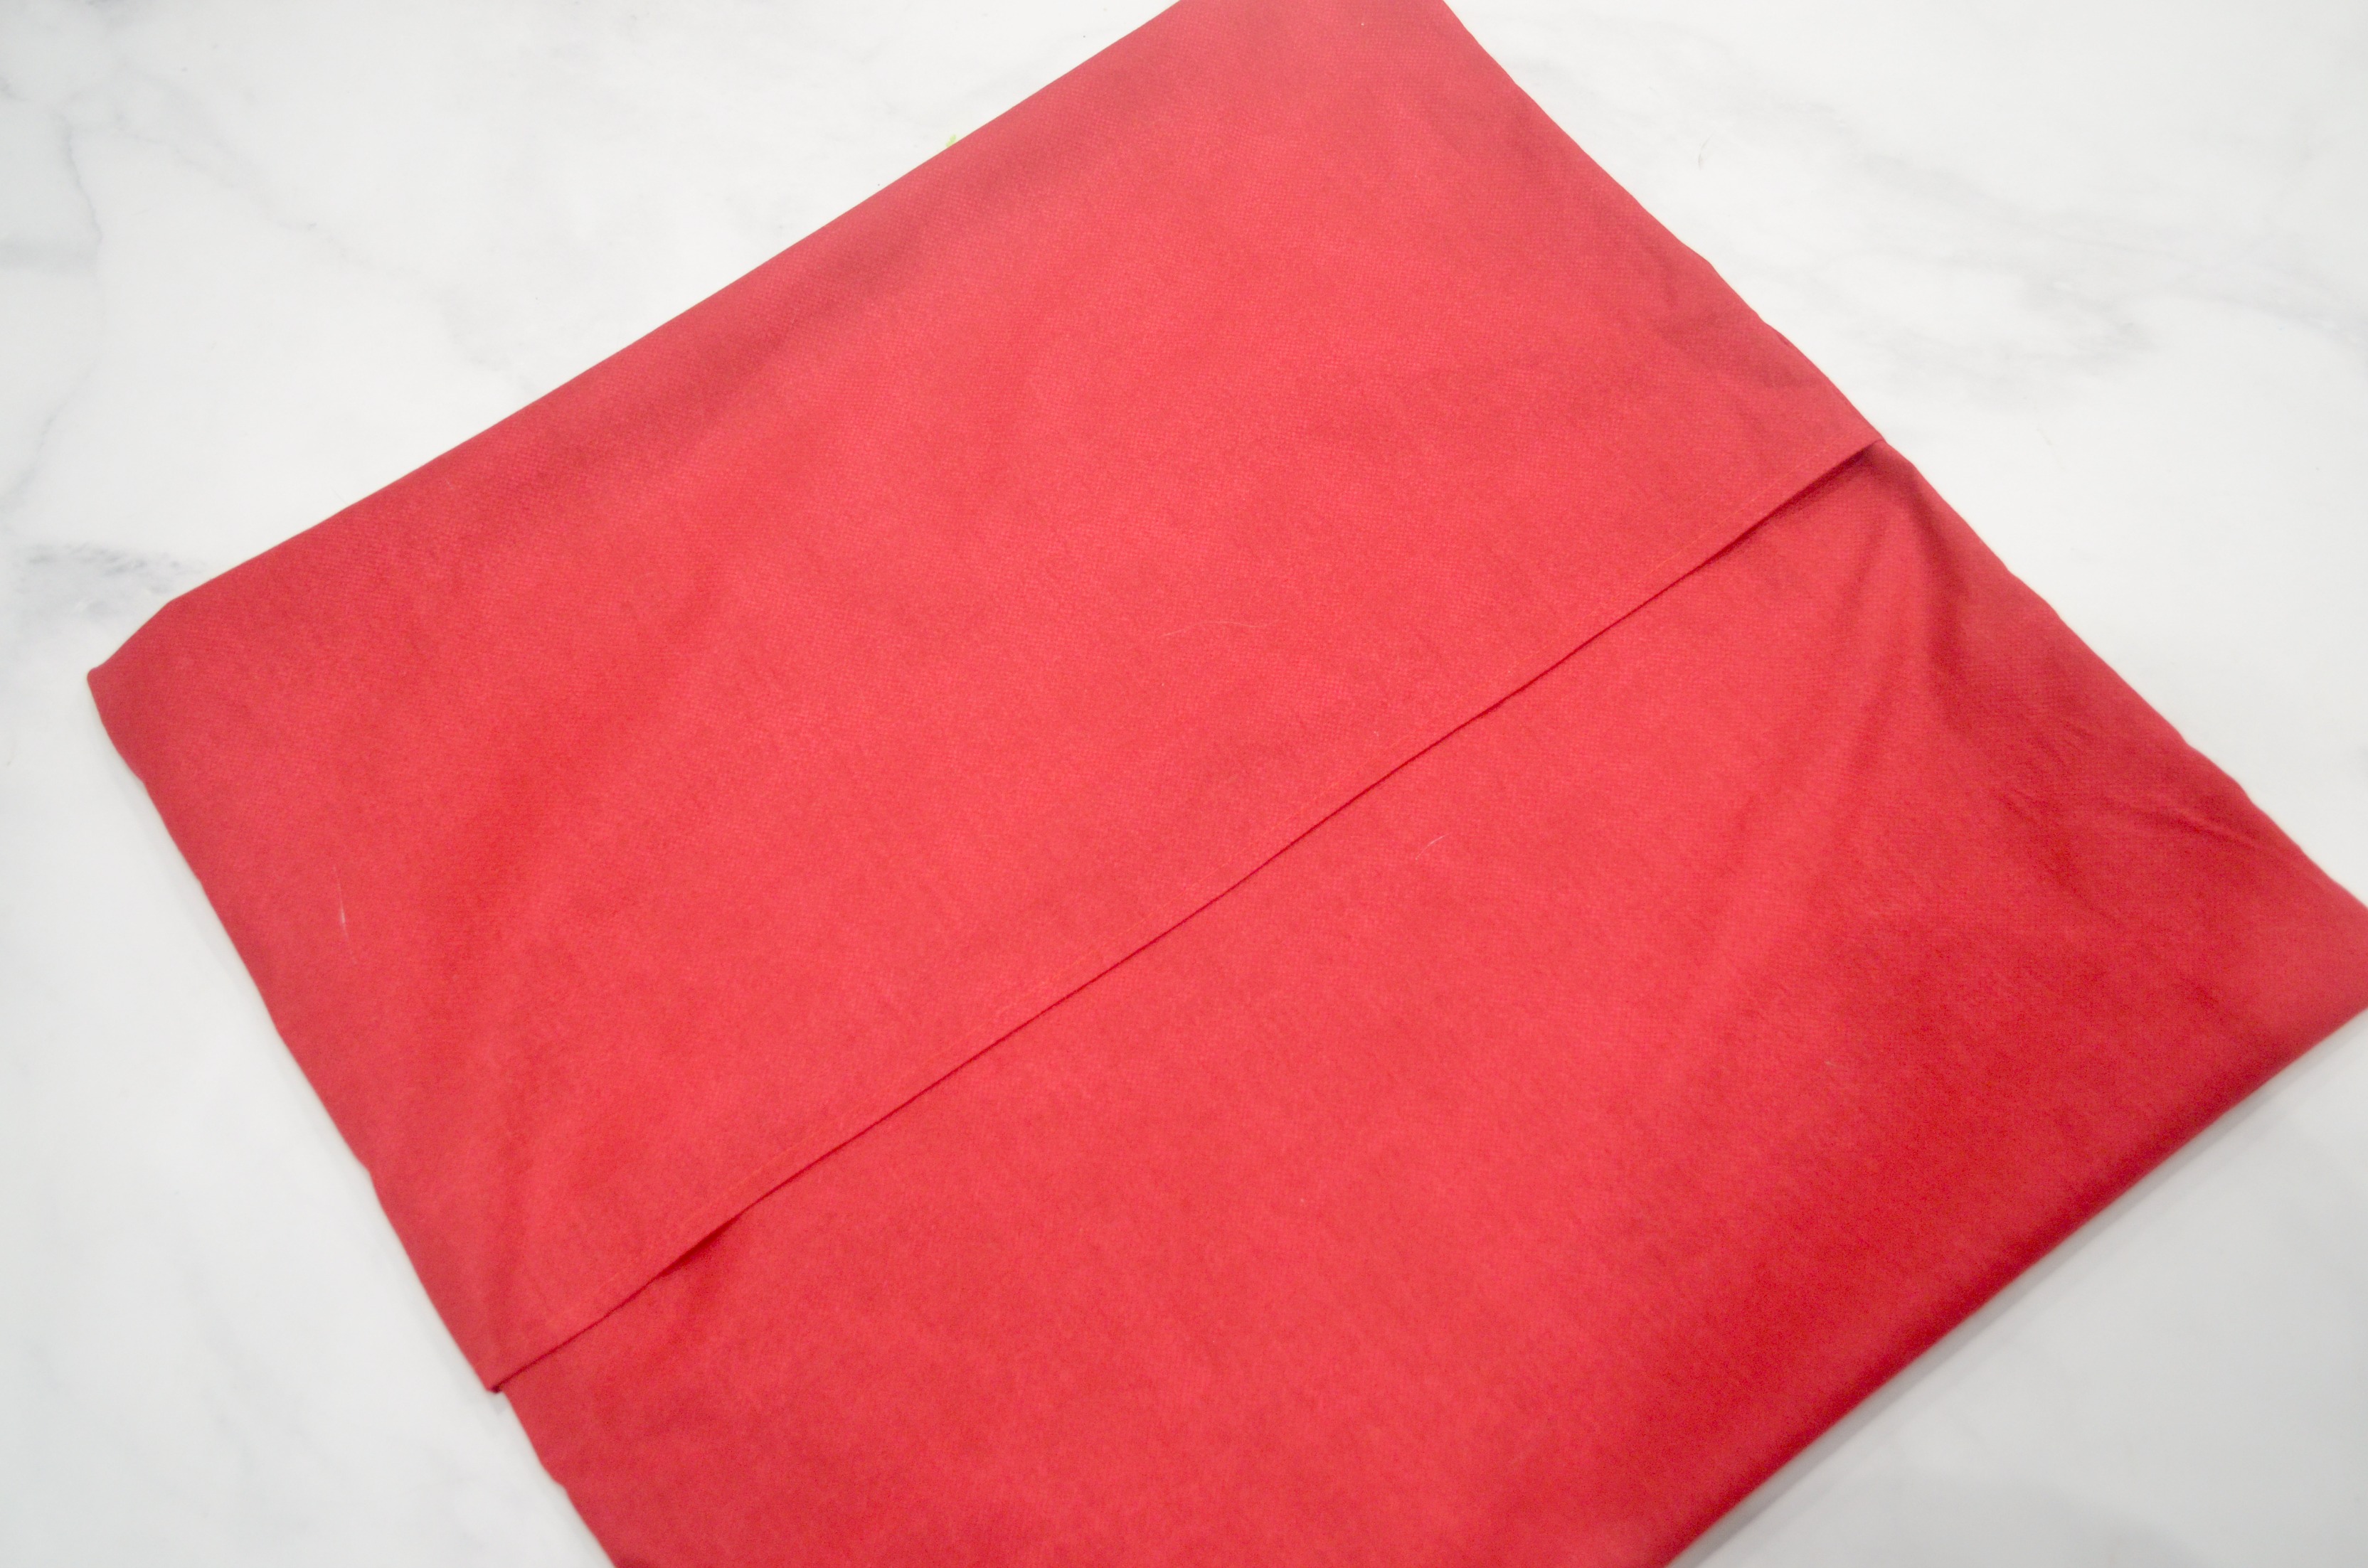
That’s all there is to it! Your cover is ready to be used. Just insert the pillow through the opening in the back and overlap the flaps to close the cover.
I absolutely love how these turned out and I can’t wait to see them mixed in with the rest of my decor. How early is too early to put up a Christmas tree, anyway? Not asking for a friend…
What do you think? Would you like to have a pillow like this in your home this holiday season? Don’t forget to grab the cut file, then make the project your own by choosing your favorite fabric and vinyl combination.
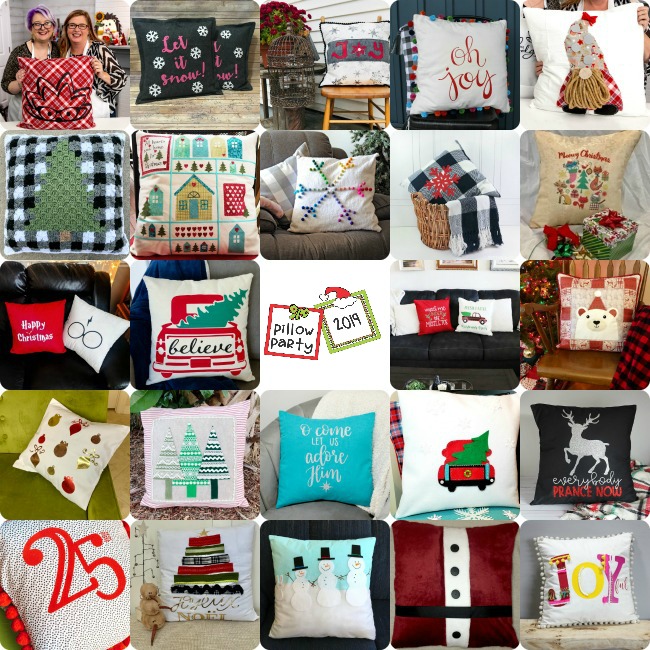
For more information, be sure to check out all 25 amazing handmade holiday pillows in the Fairfield World Pillow Party!
Before you go, we have a fantastic giveaway for you…an opportunity to win a $100 gift card to Michaels and 10 lbs of PolyFil! Use the Rafflecopter widget below to enter the contest; good luck!


Beautiful!!