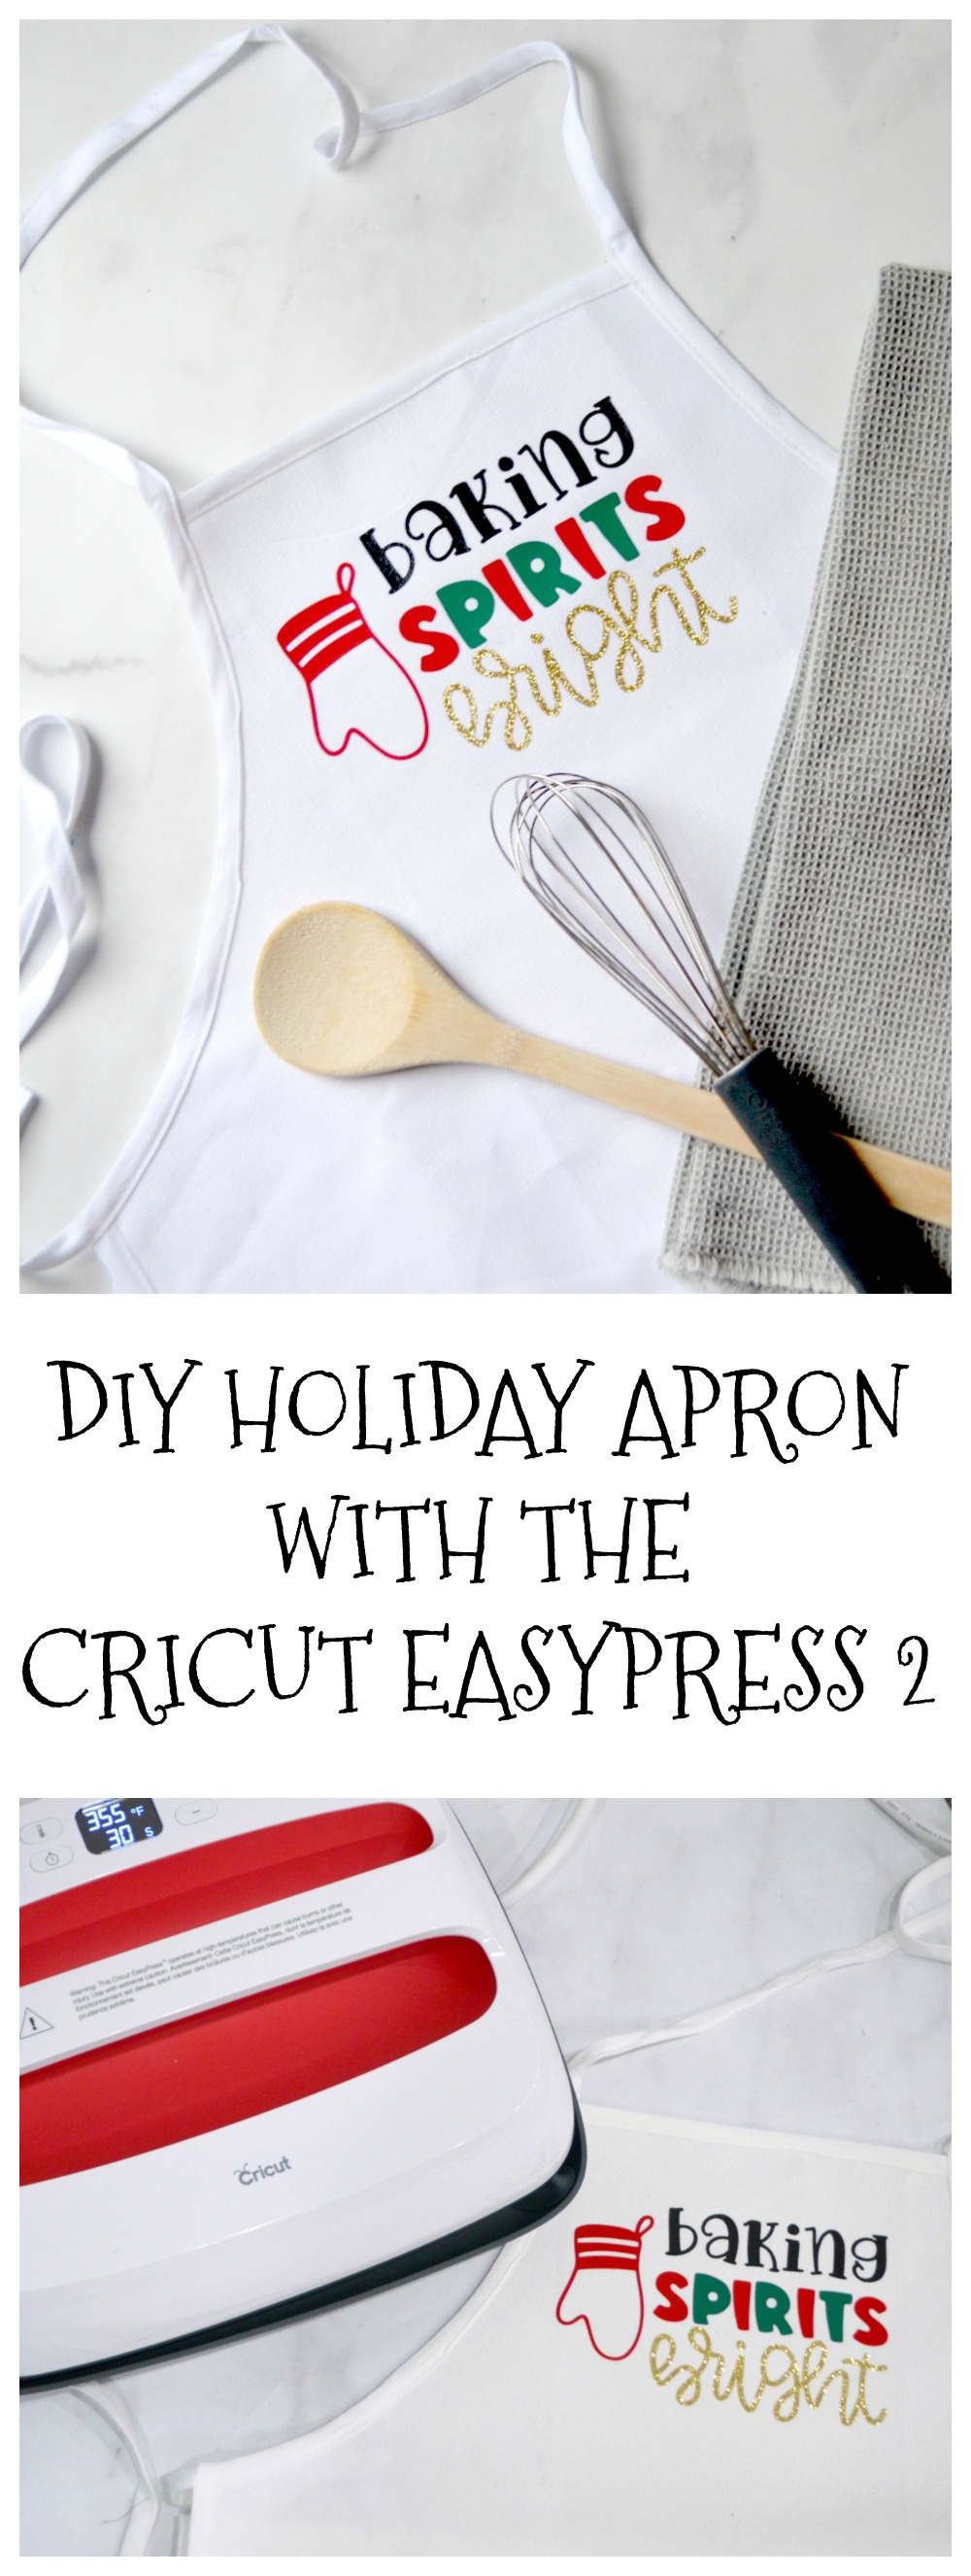
DIY Holiday Apron with the Cricut EasyPress 2
This is a sponsored conversation written by me on behalf of Cricut. The opinions and text are all mine.
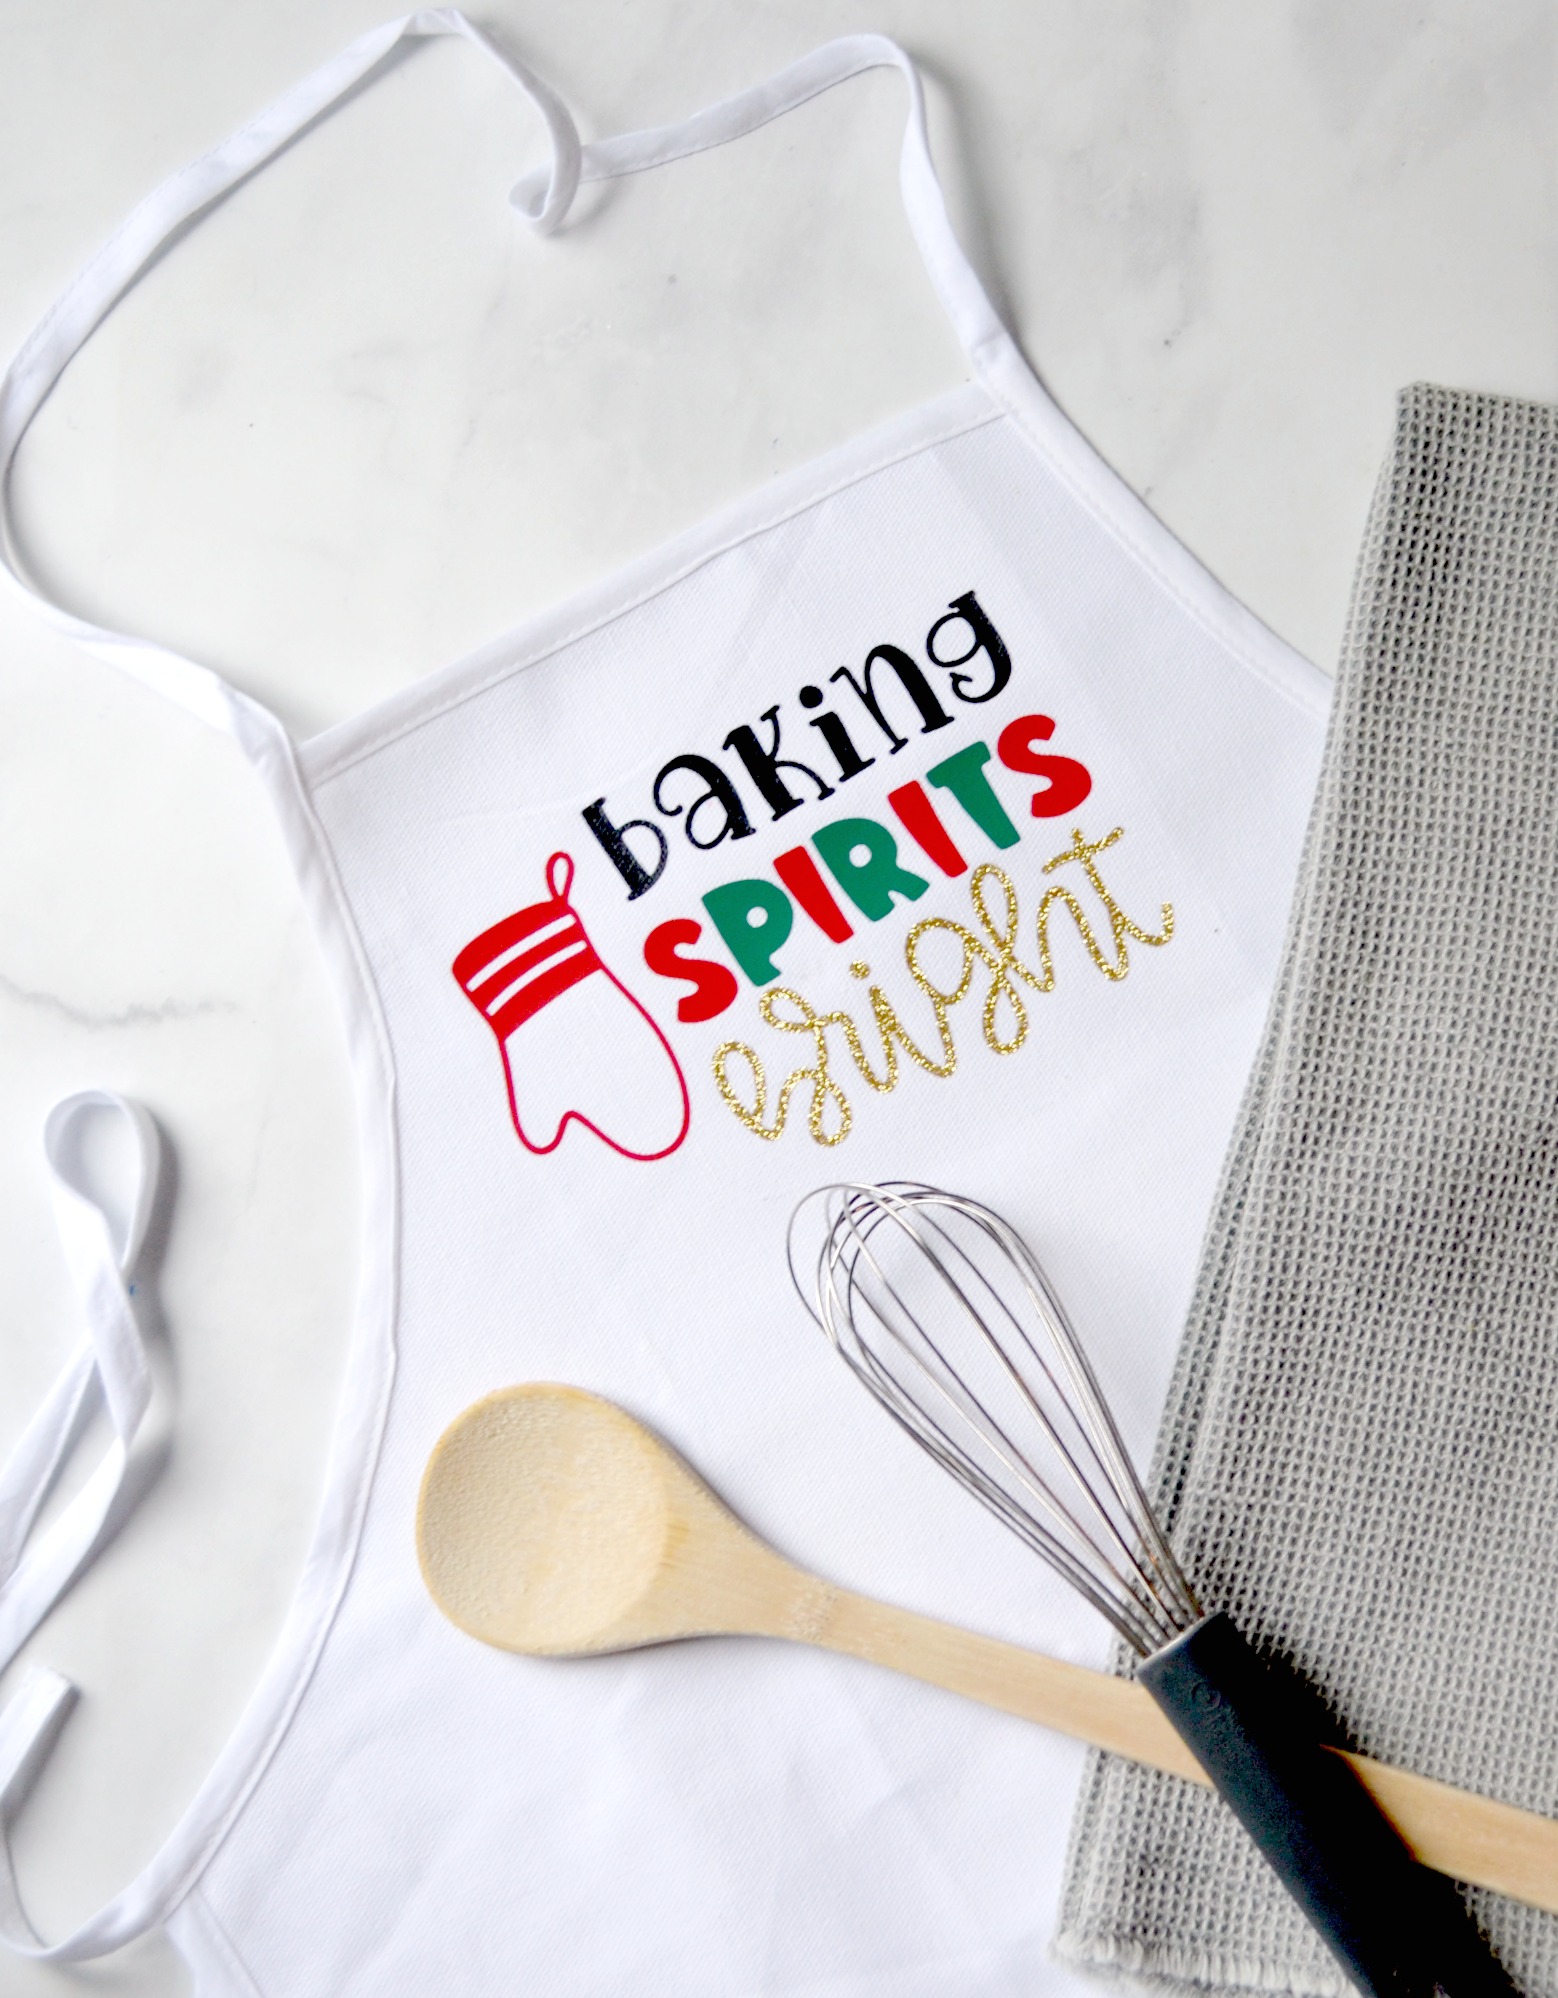
Ever since I got my Cricut Explore Air 2 last month, I’ve been amazed by how easy it is to make all kinds of projects, and I’m especially excited about creating unique DIY gifts this holiday season! The Cricut EasyPress 2 allows me to create all kinds of personalized items using heat transfer, like this fun and festive DIY Holiday Apron I made for my son. He absolutely loves to bake, so I thought it would be perfect for him to wear while making cookies, pies, and other holiday treats. Here’s how you can make DIY Holiday Aprons too, for yourself or for the bakers in your life.
DIY Holiday Apron Materials:
Blank apron
Cricut Explore Air 2 (or other Cricut machine)
Cricut Design Space
Cricut Cutting Mat
Cricut Everyday Iron-On Vinyl (I chose 4 different colors: red, black, green, and gold glitter)
Cricut EasyPress 2
Cricut EasyPress Mat
Scissors
Optional: Weeding tools
Making your DIY Holiday Apron
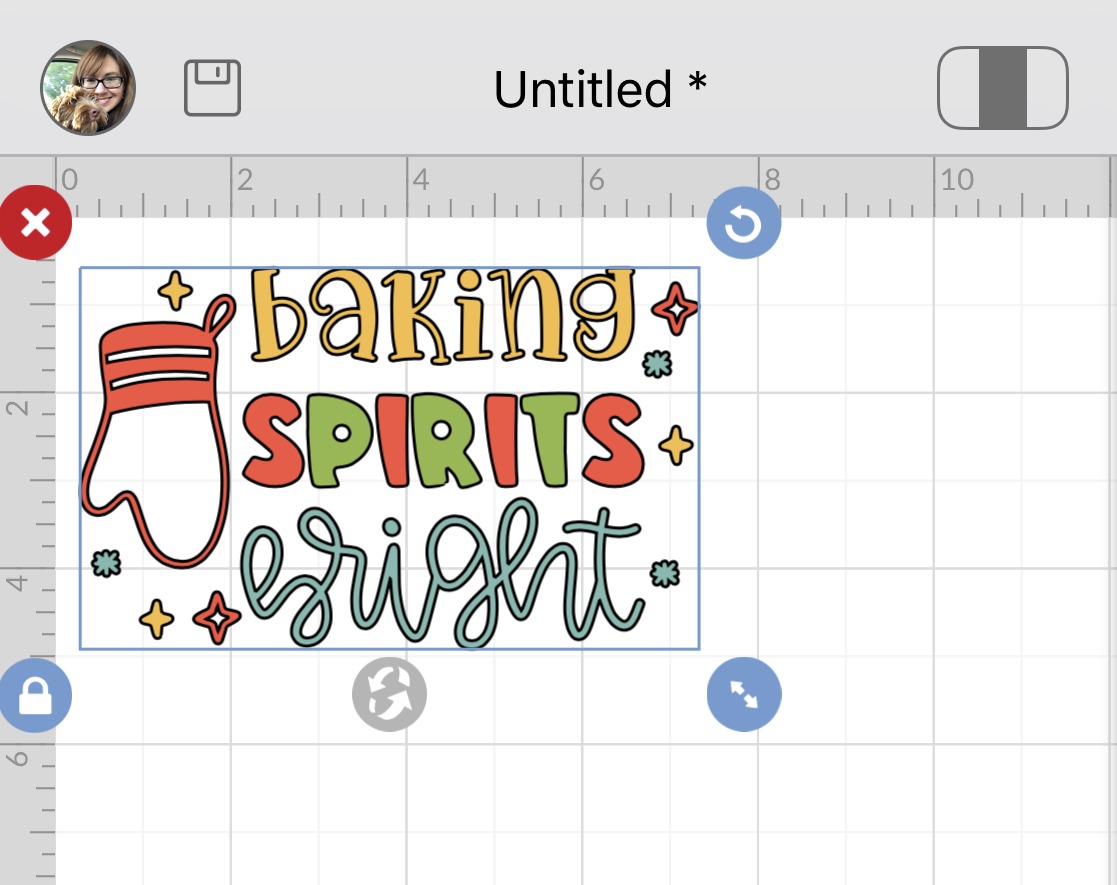
Step 1: Choose your design from the Cricut image library in Design Space.
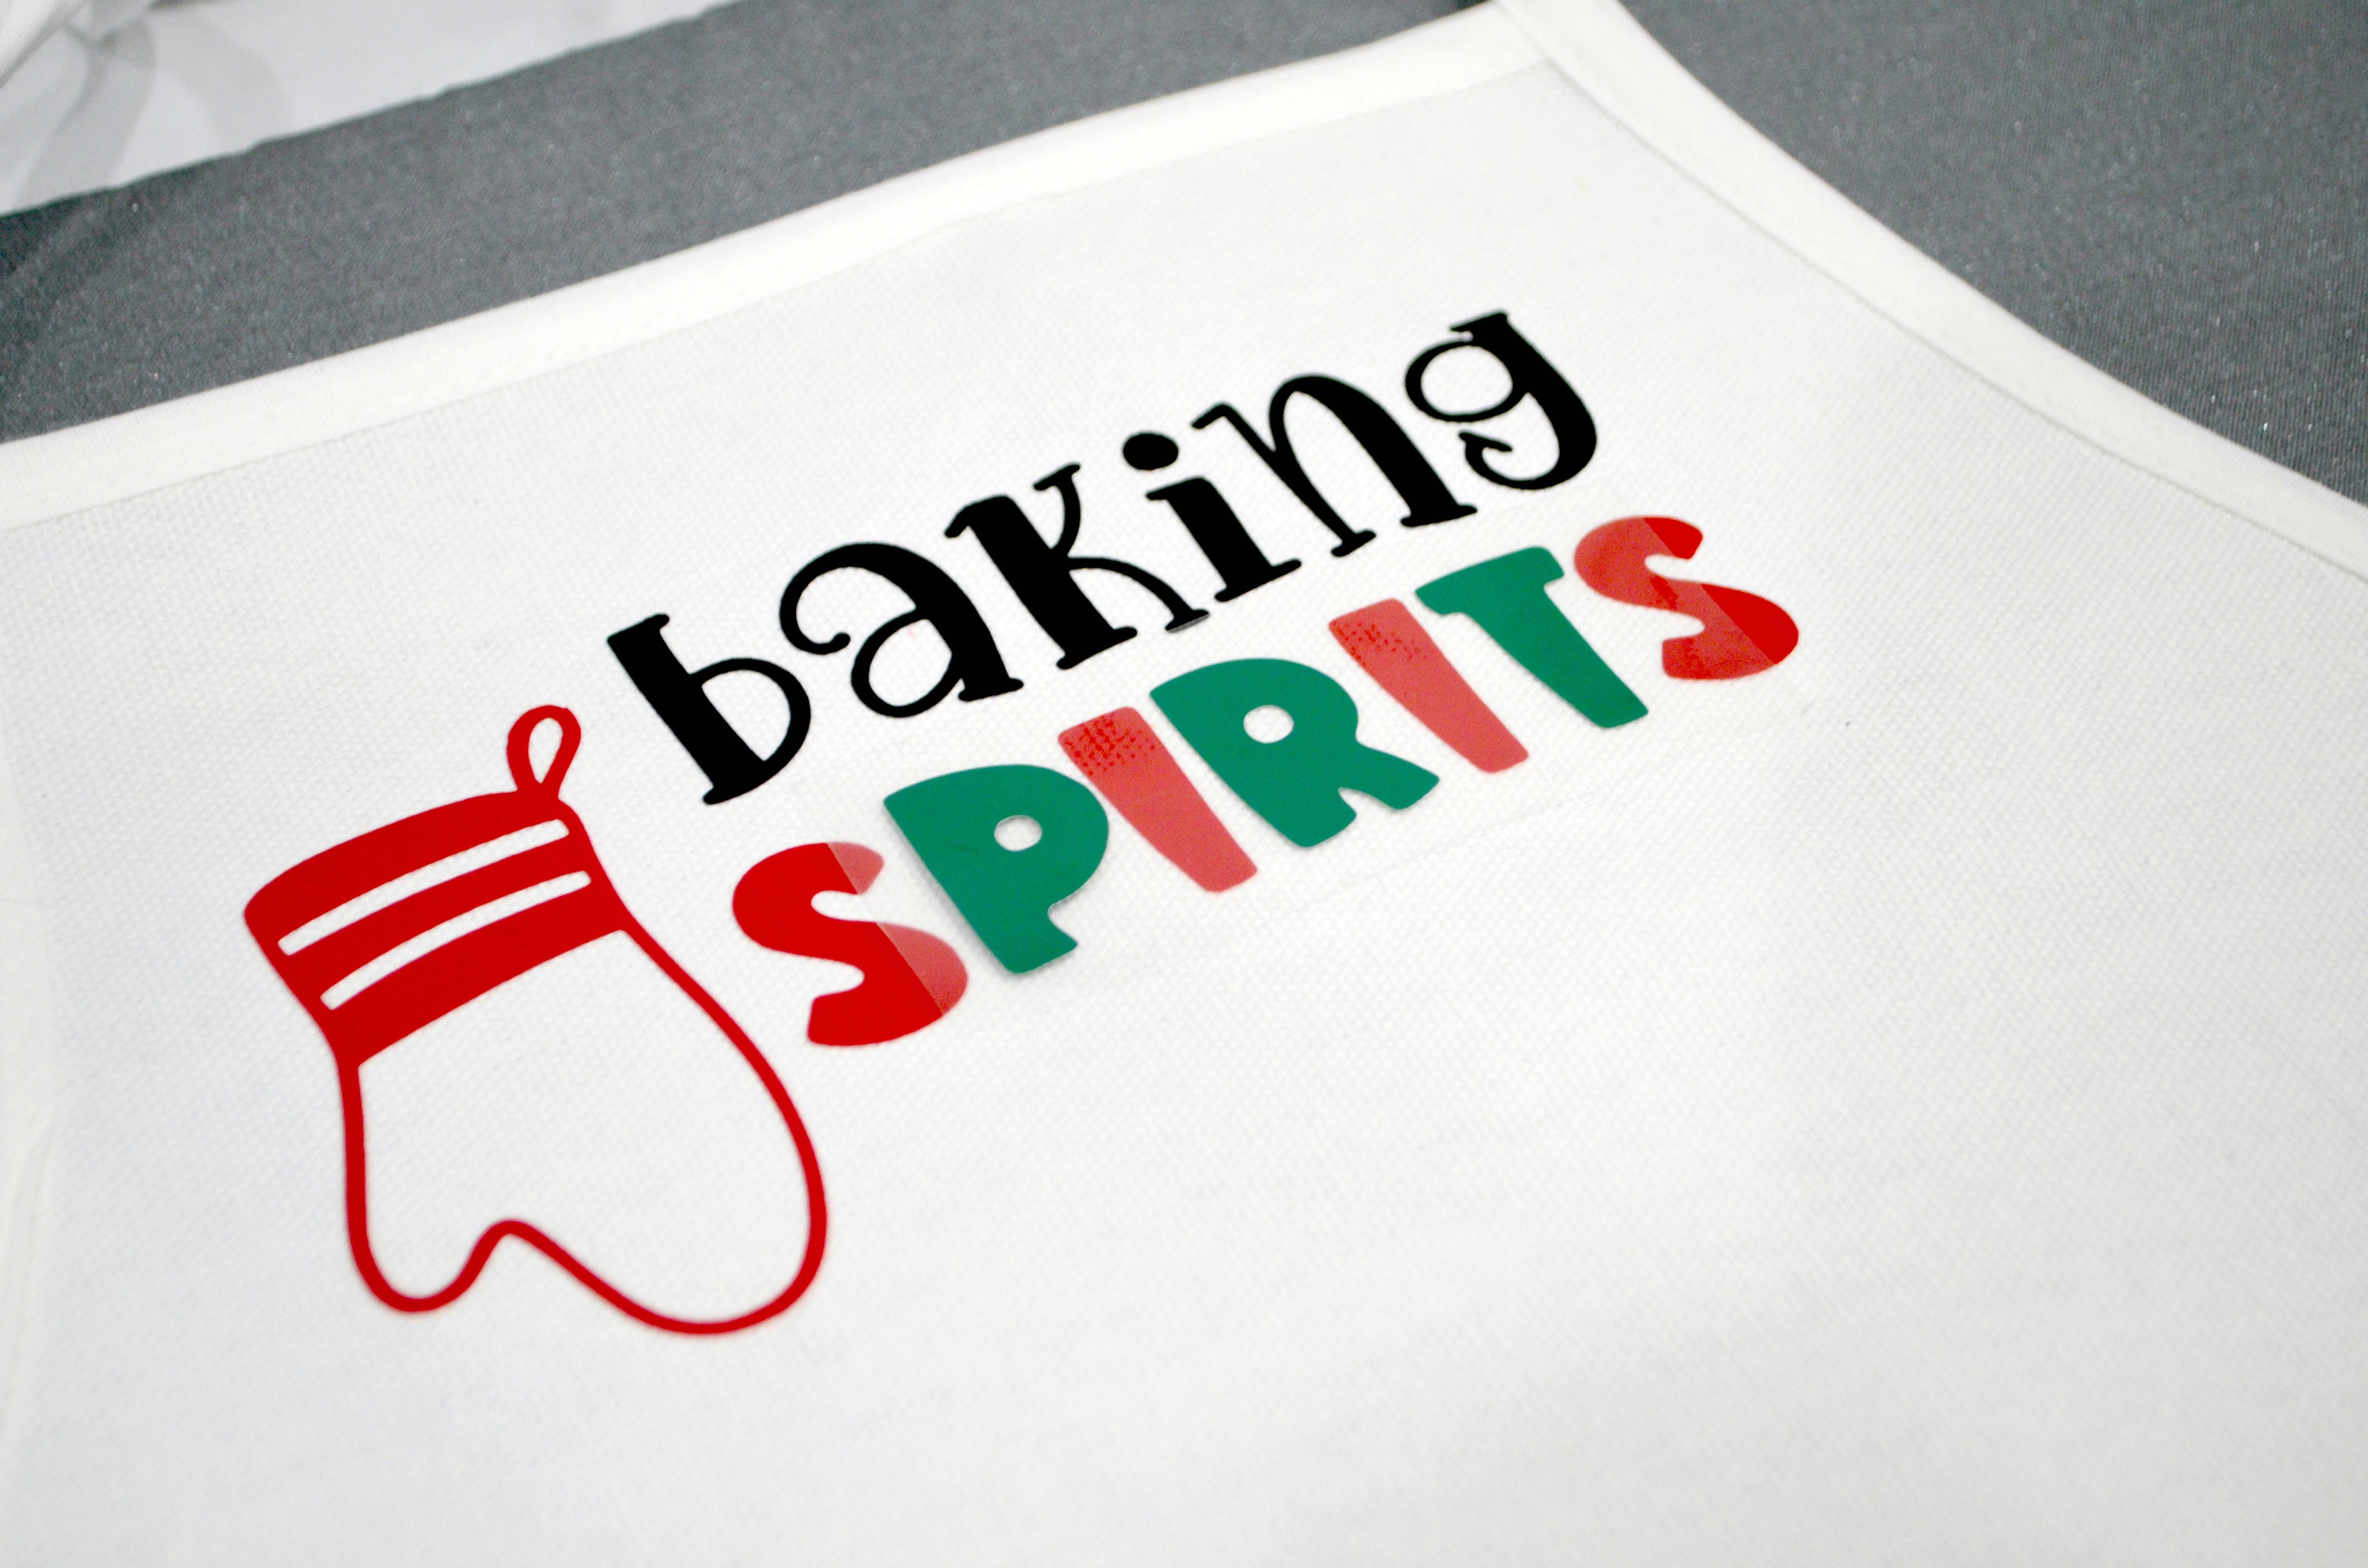
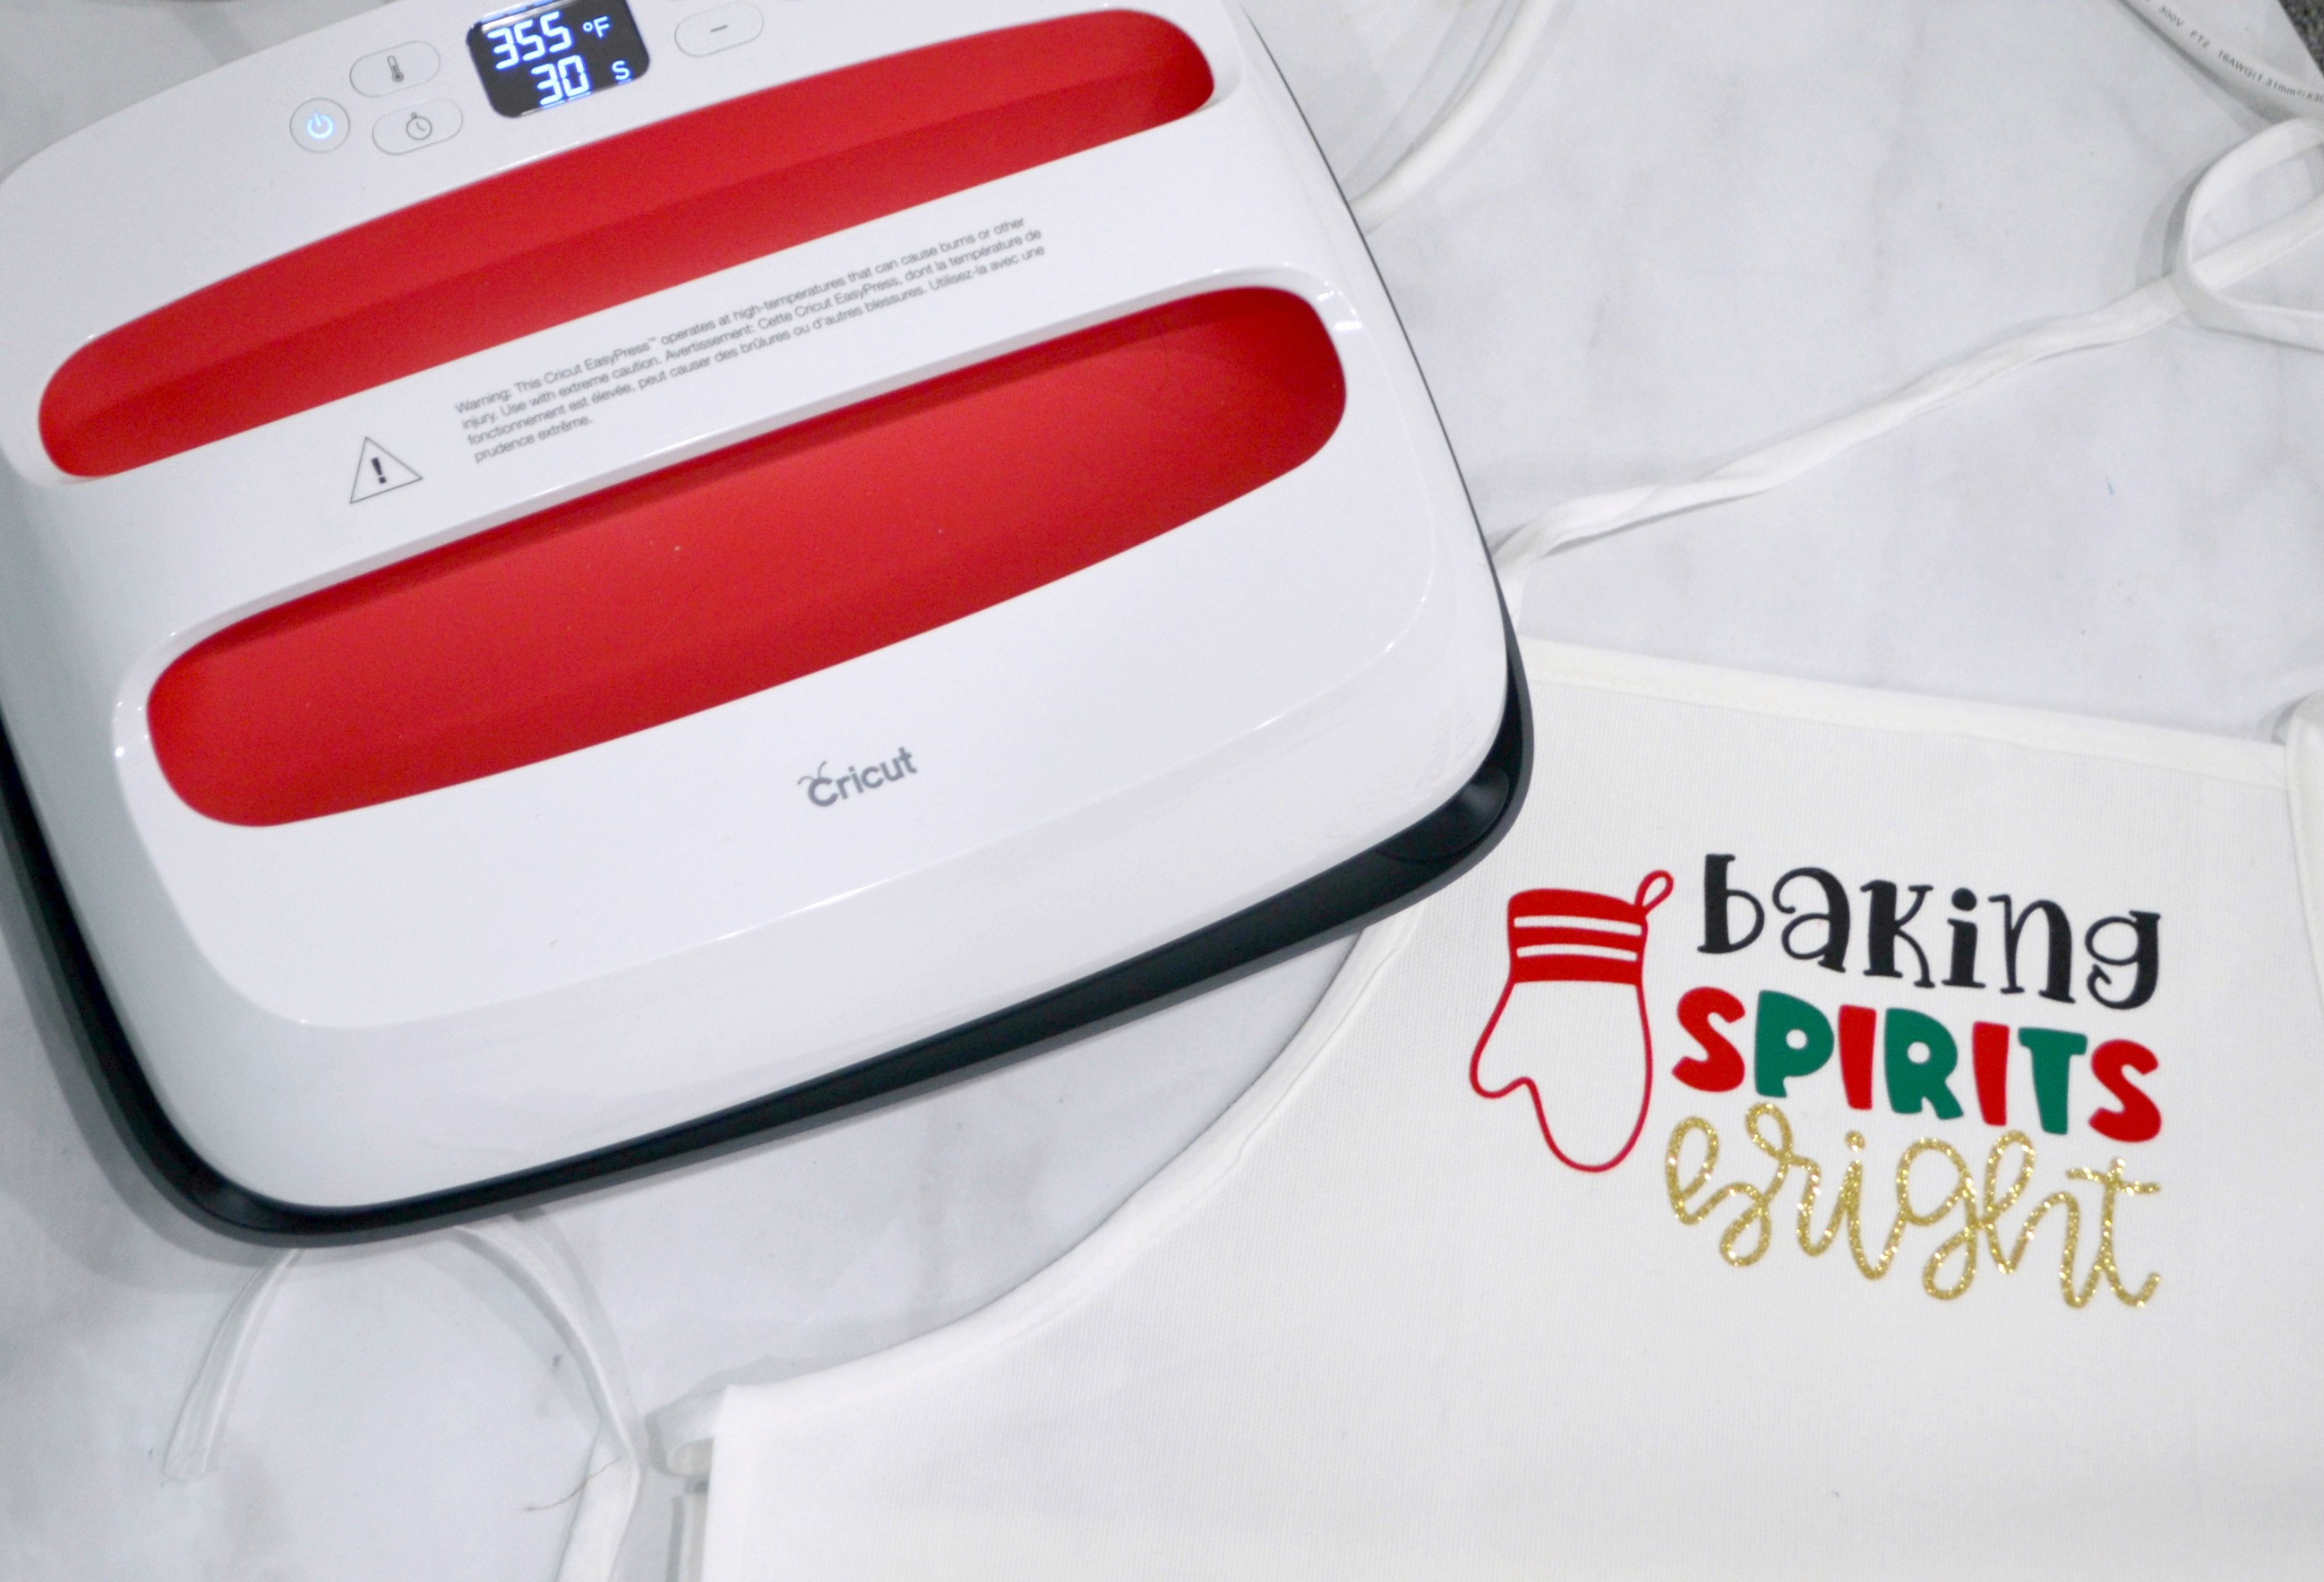
I picked this cute, festive one: “baking spirits bright.” Insert it onto your canvas and resize to fit your apron. A good size for mine was 7″ wide.
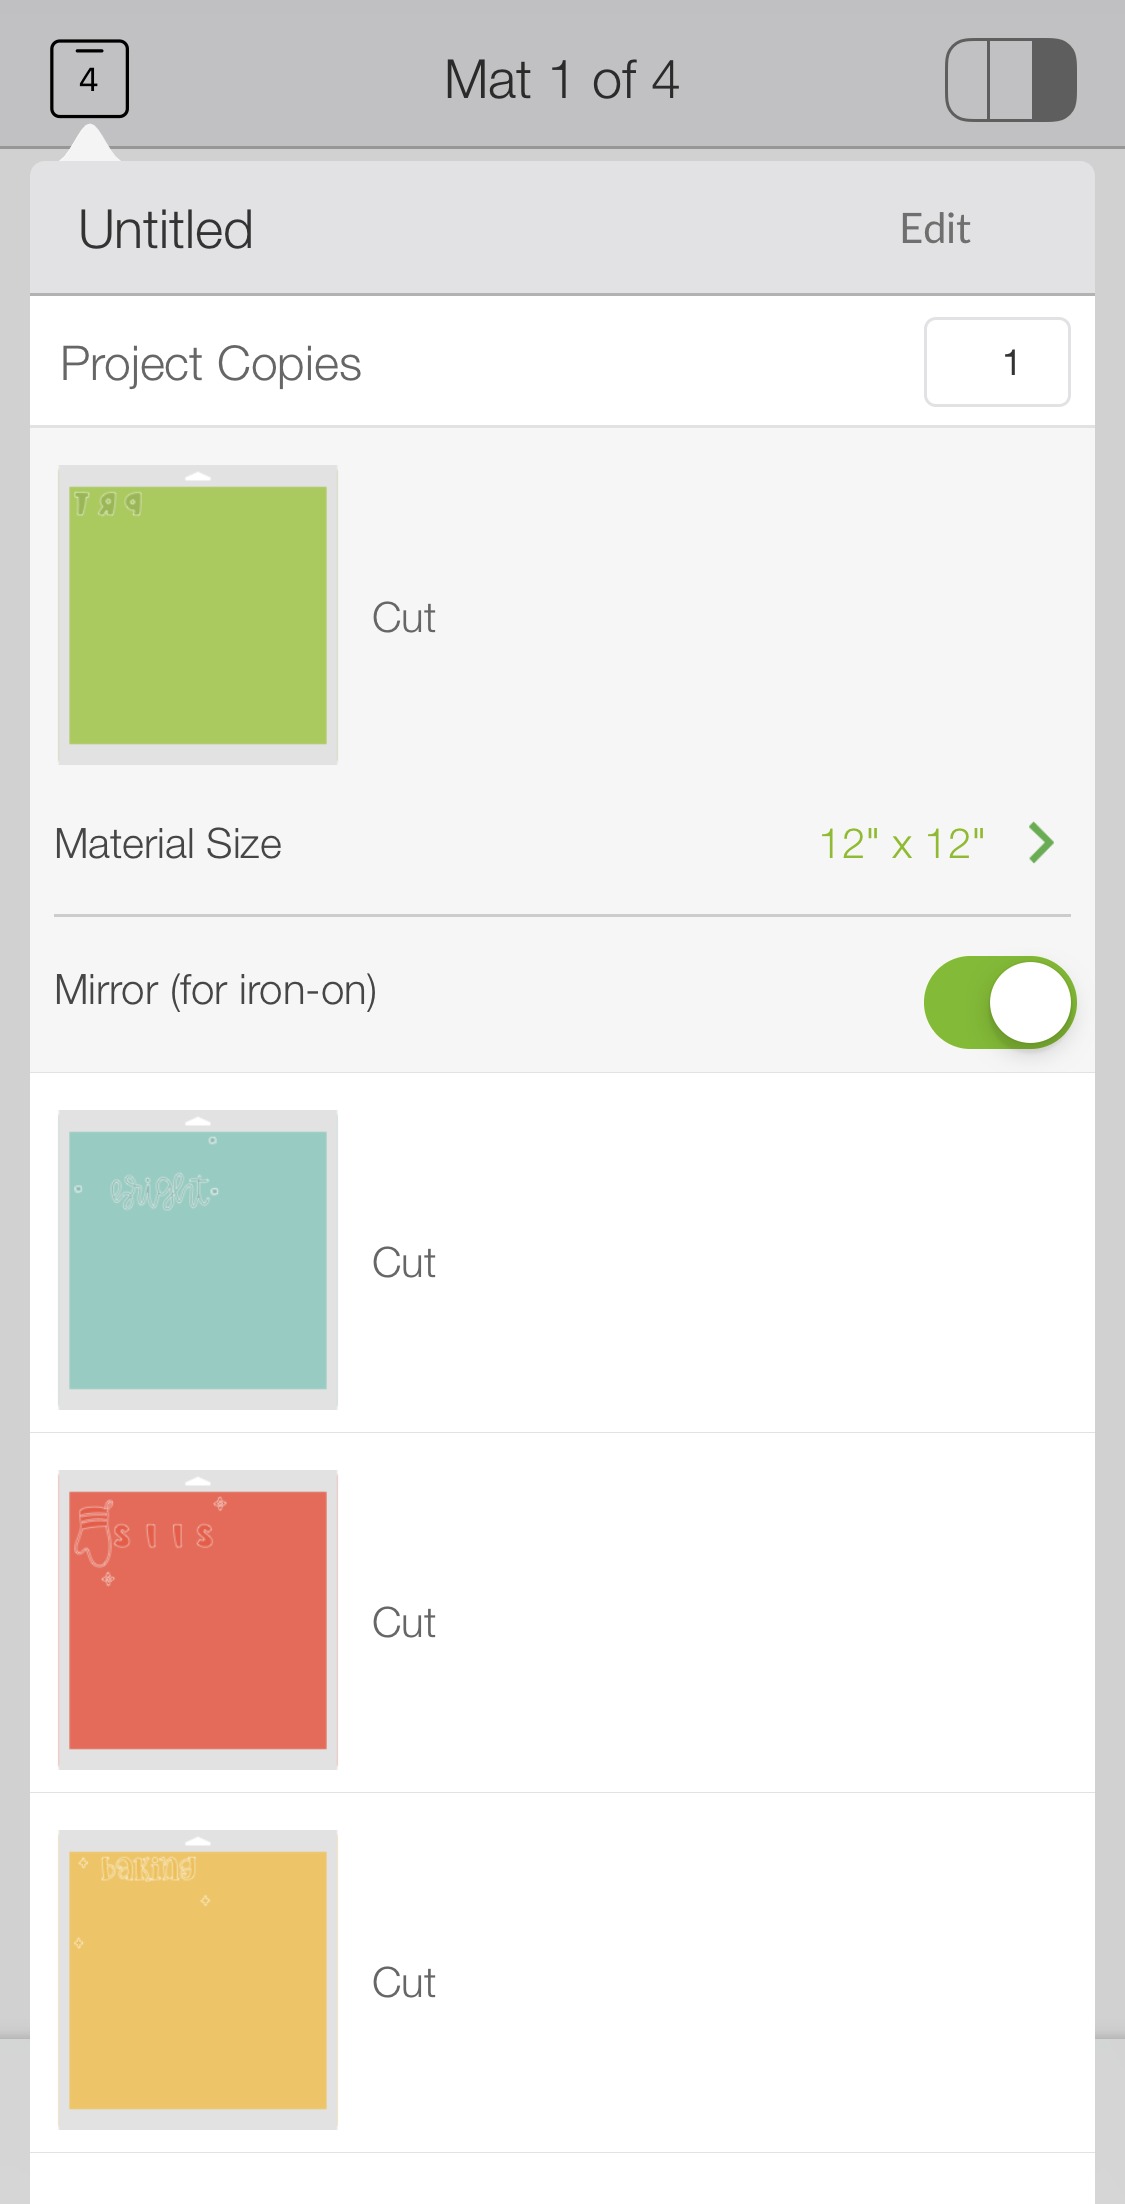
Step 2: Cut your image from heat transfer vinyl.
Cricut Design Center has an awesome feature to help you create multi-colored designs like this one. When you send your file to the machine, it will break the design down into separate mats; one for each color! Here, you can see how it broke my image into four mats. I used red and green for the parts they suggested, then swapped black for the yellow and gold glitter for the teal. Just place the first color of vinyl on your mat, shiny side down, load it into the machine, and let it cut. Then change your vinyl to the next color and repeat until all mats are finished. Don’t forget to turn on the mirror option so your images are facing the right direction when you attach them to the apron.
Step 3: Weed and position the first part of your design.
Weeding is simply peeling all the extra vinyl from its clear backing that isn’t part of your image. You can do this with your hand or using some of Cricut’s helpful tools. Place your apron on top of an EasyPress Mat or a folded towel. Preheat the spot where your vinyl will go by gently applying the Cricut EasyPress to the area for 5-10 seconds. Then, position the vinyl exactly where you want it. I started with my red and black pieces.
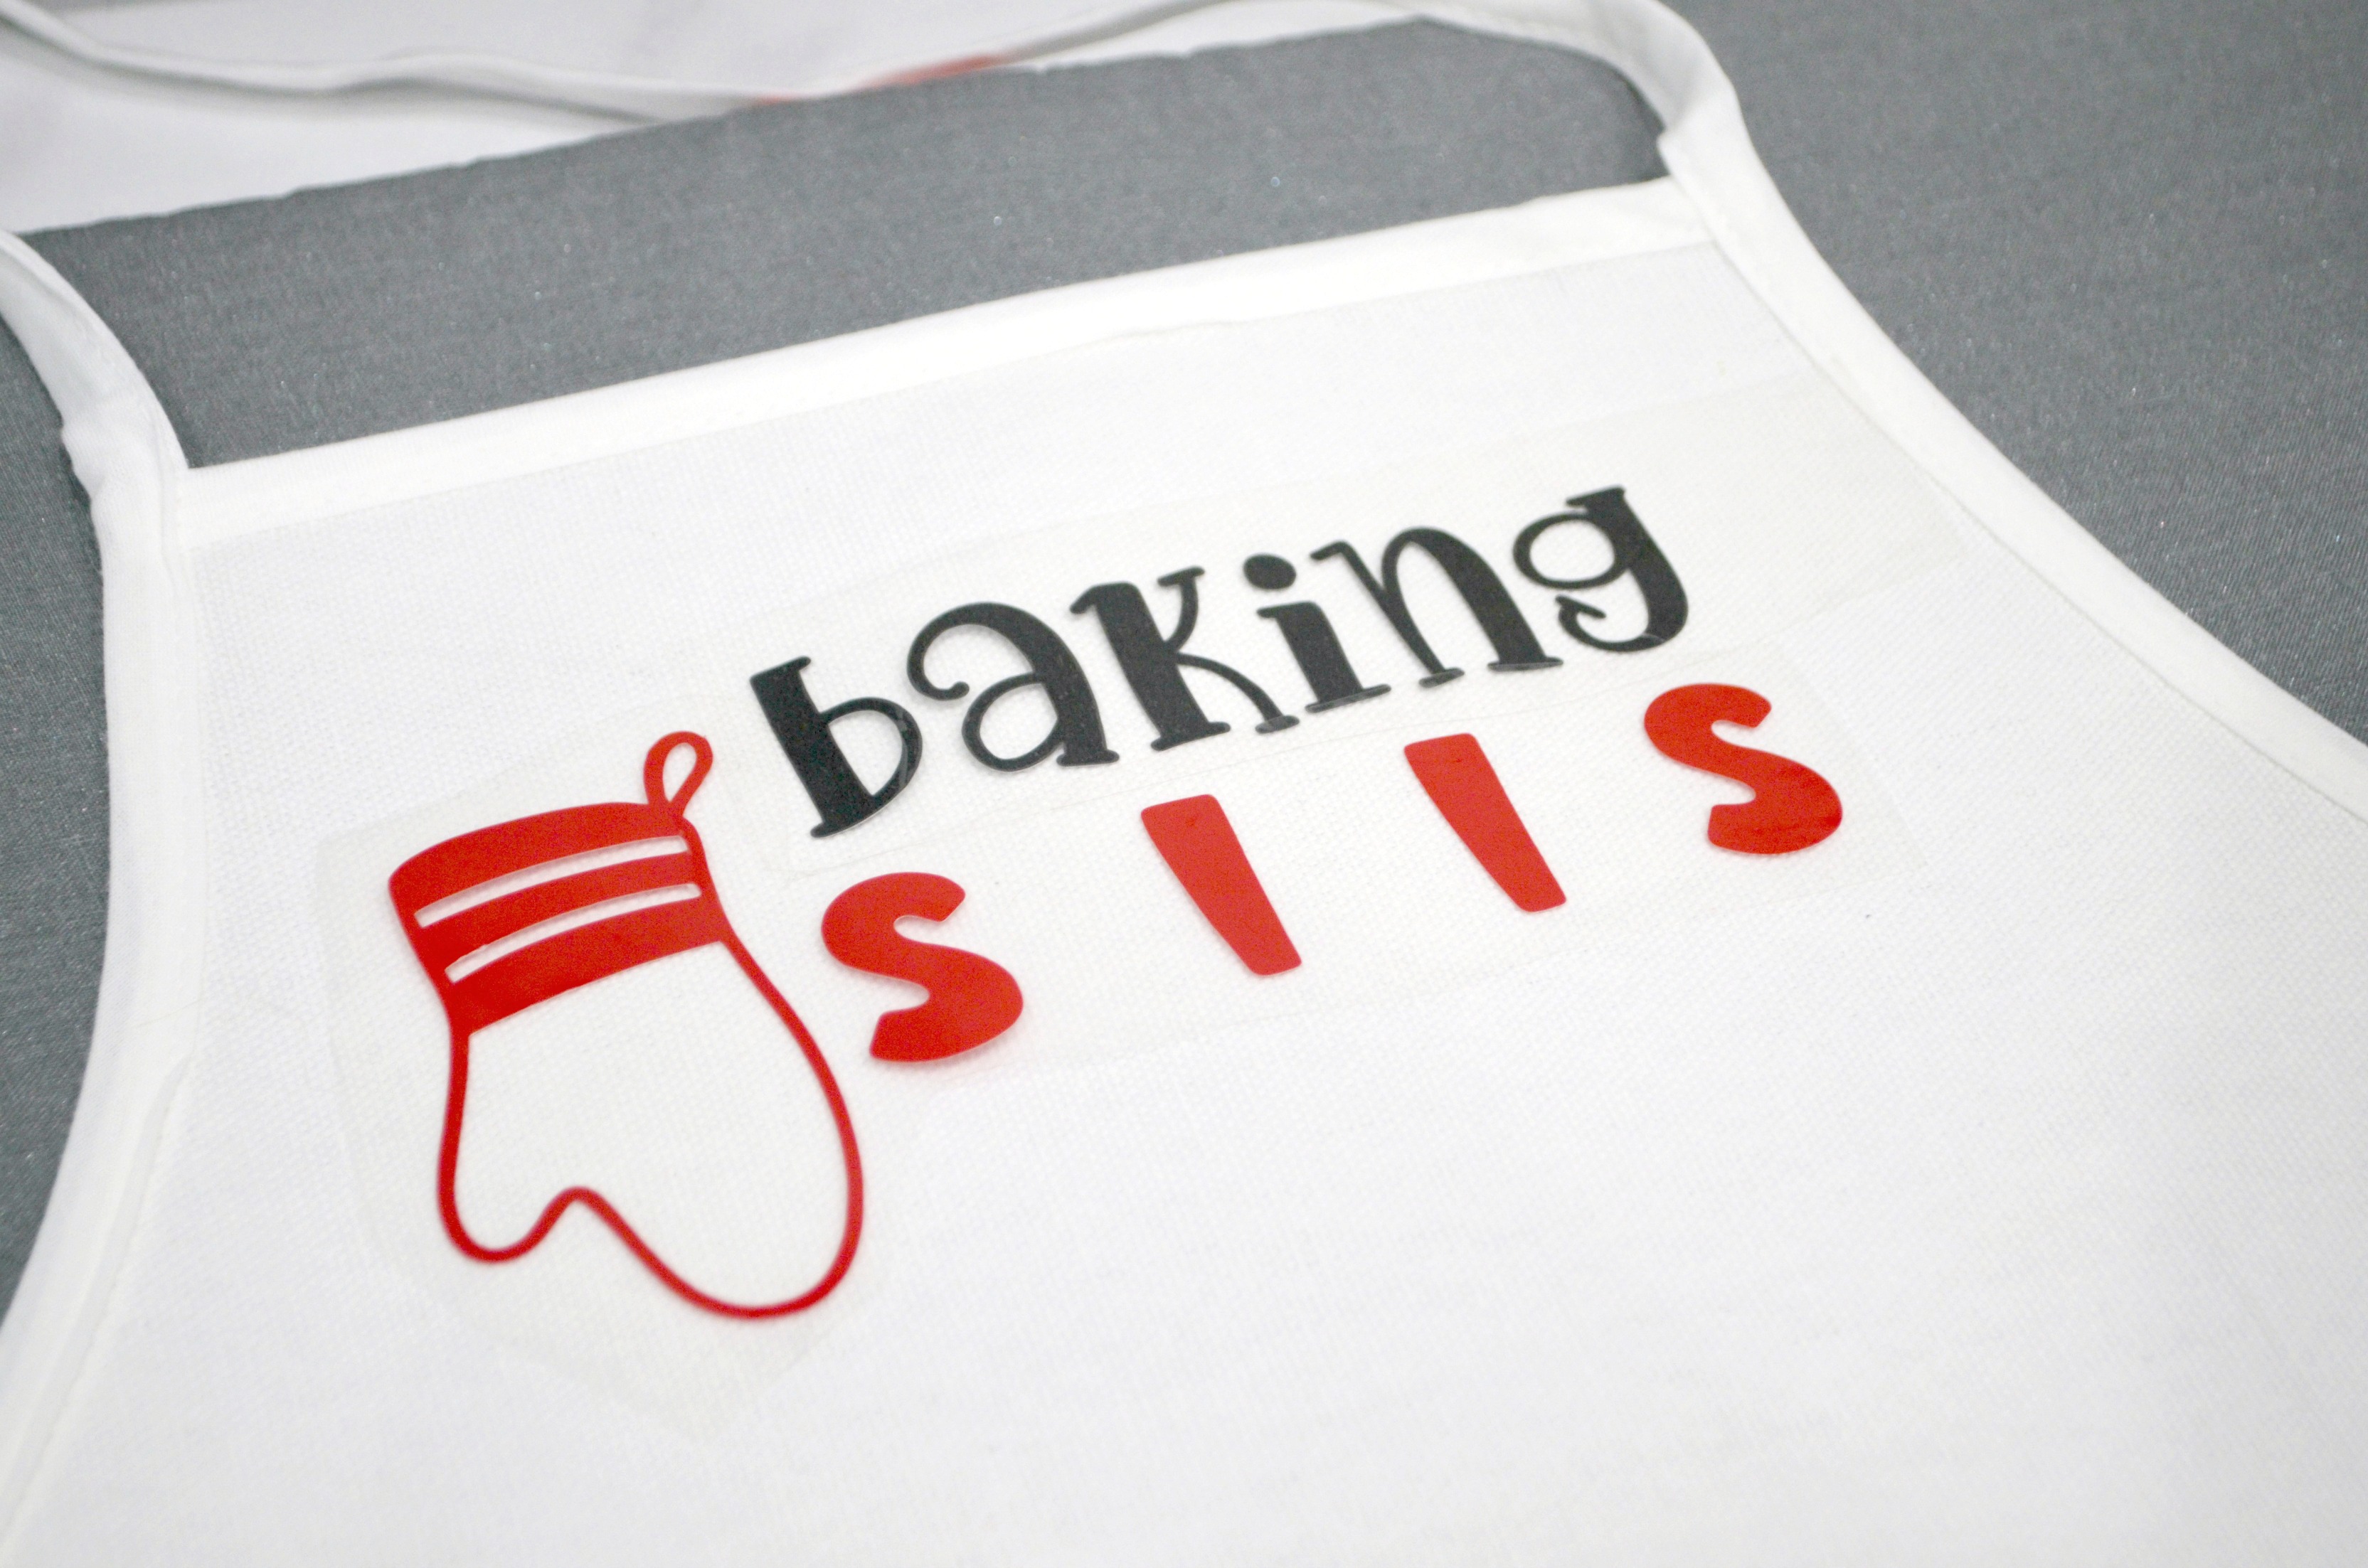
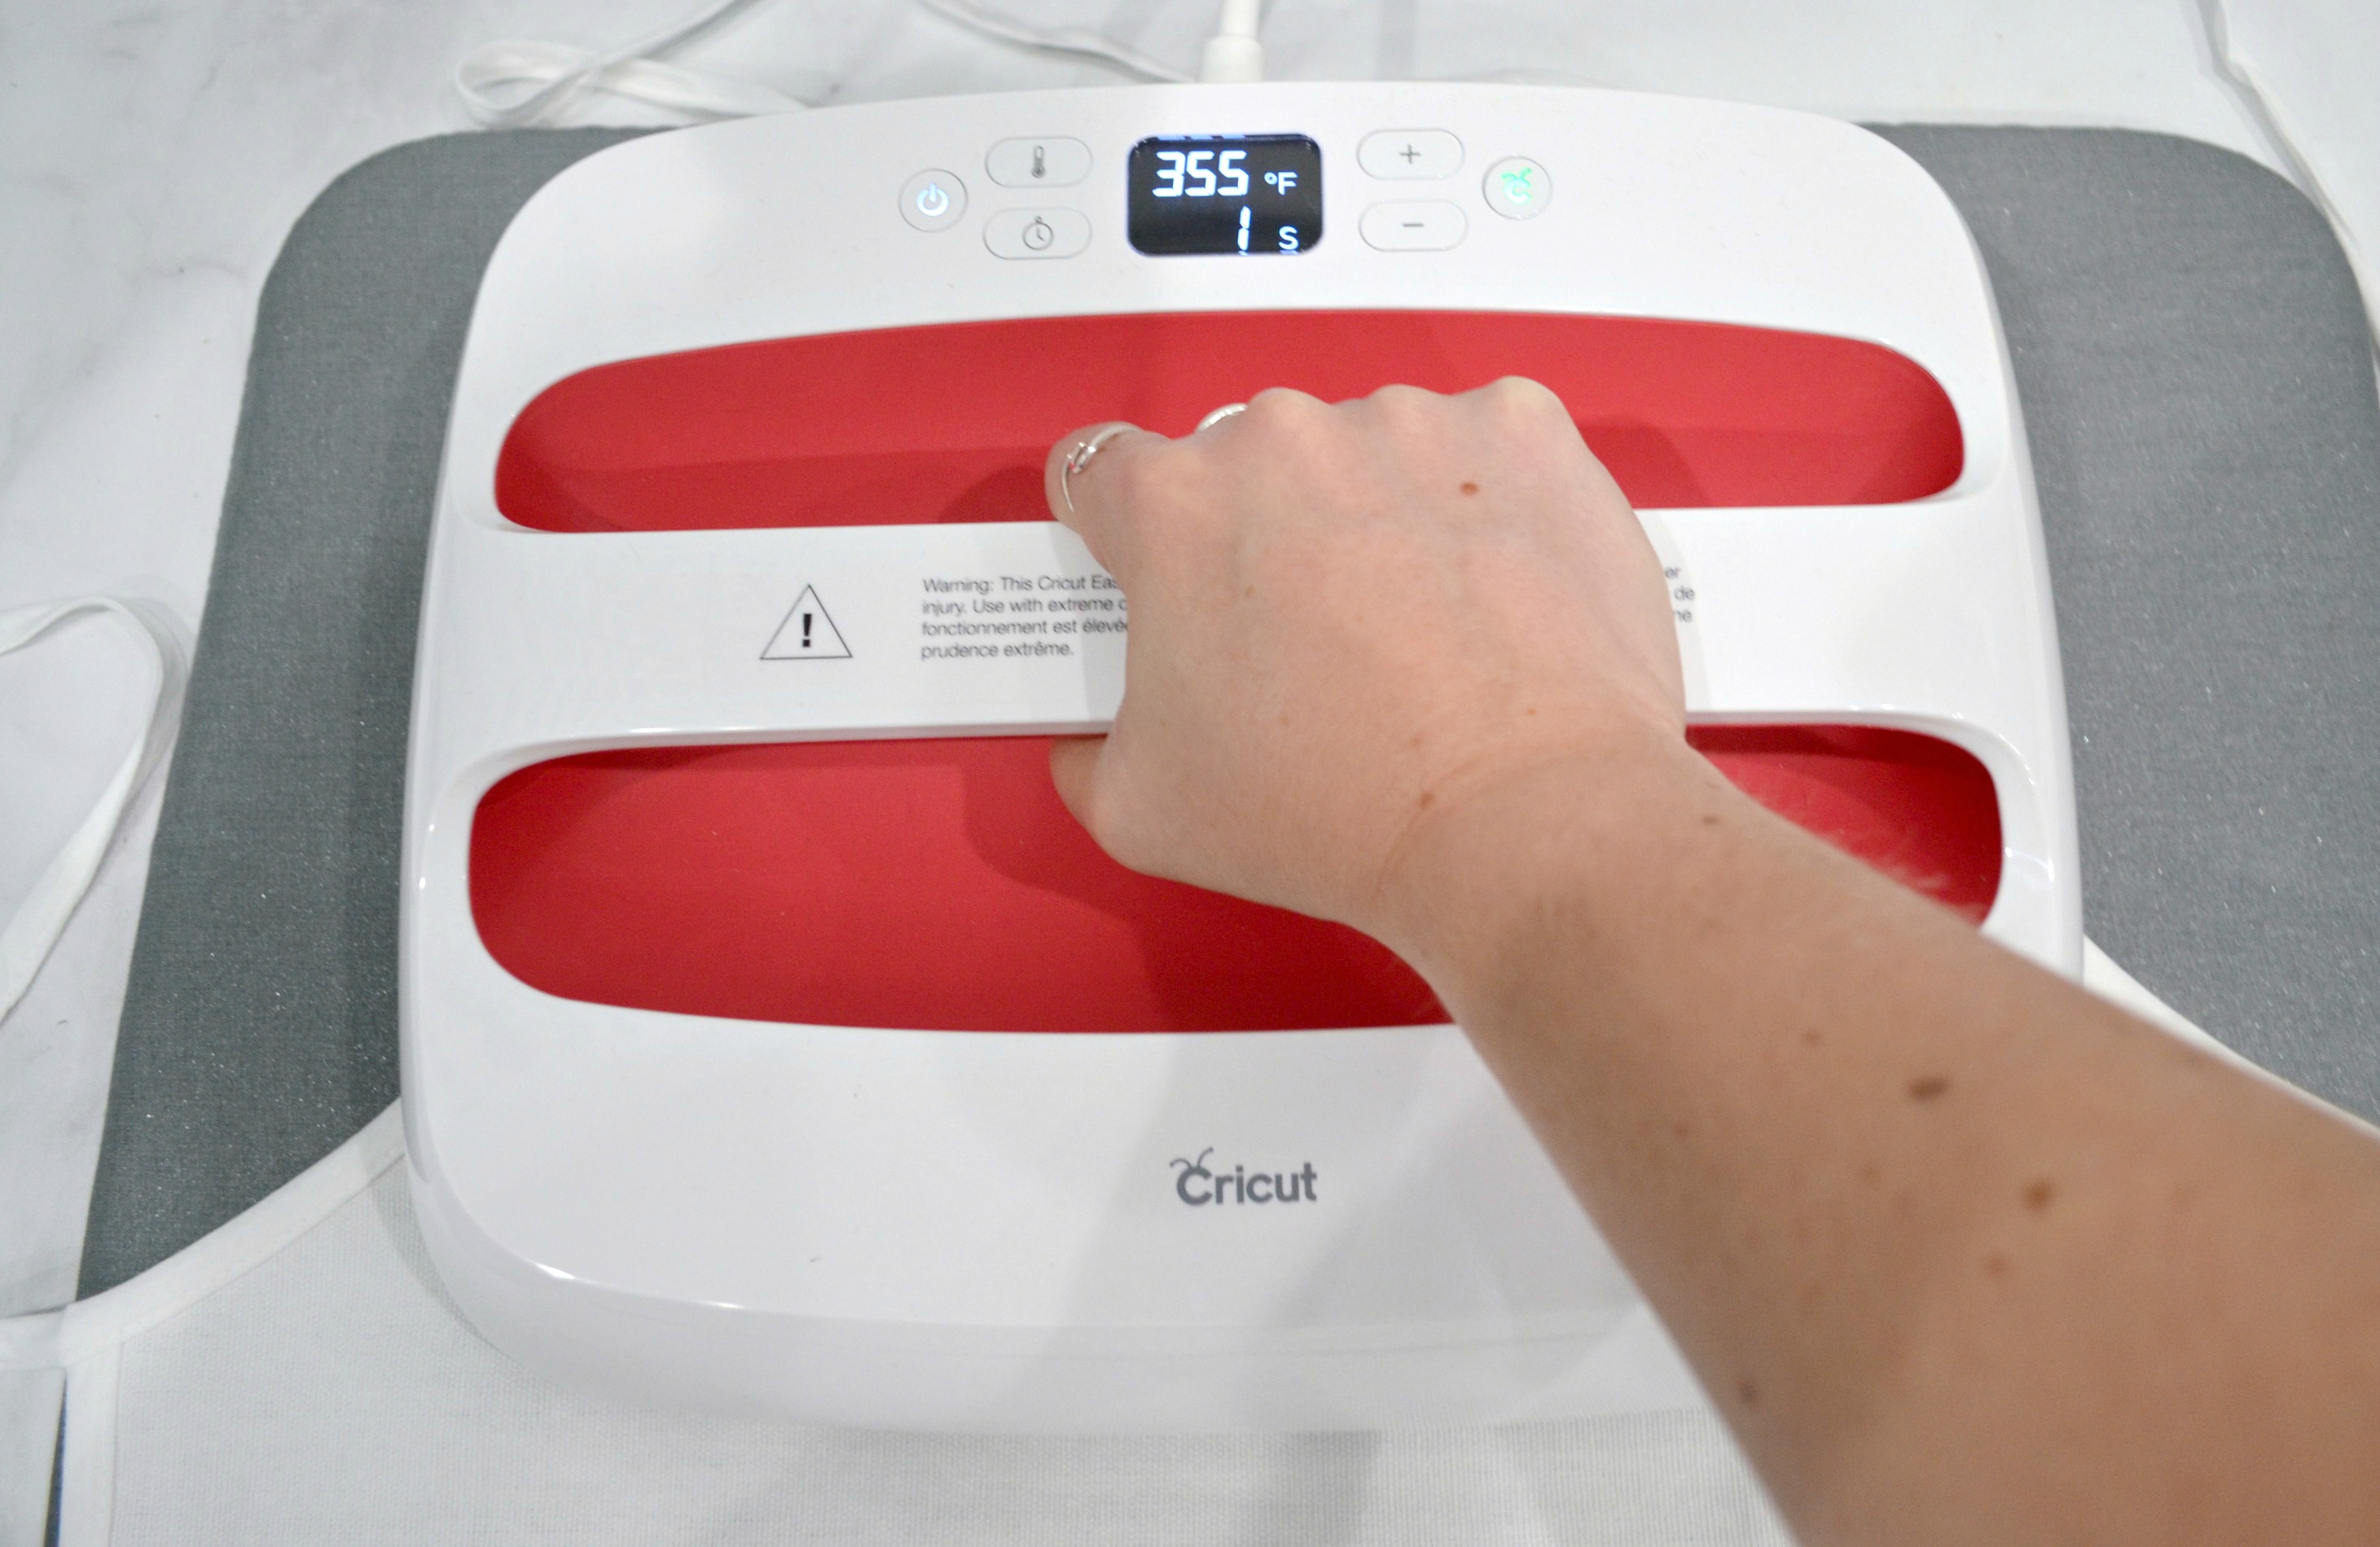
Step 4: Place the EasyPress on top of the vinyl. Apply light pressure as the timer counts down to zero.
Before starting, check out the handy Cricut Heat Guide for the recommended temperature and time settings for your project. Enter those settings, then once the machine is preheated, you’re ready to go. To start the timer, just press the button on the far right with the Cricut logo.
The Cricut EasyPress 2 has an advanced heat-plate design with edge-to-edge, even heat for professional quality transfers.
Step 5: Replace the EasyPress on its base, then gently peel the clear plastic from the design.
The insulated EasyPress Safety Base protects your work surface, and the auto shutoff feature turns it off after 10 minutes of inactivity. At this point, the plastic should peel away from your project easily, leaving the vinyl adhered to the apron.
Step 6: Repeat steps 4 and 5 with the other pieces of your design until the whole thing is adhered.
I did the green letters next, then finished with the gold glitter word, “bright.” Make sure to always cover the entire design, either with leftover scraps of the clear plastic or with a Teflon sheet when applying the EasyPress, or the vinyl you’ve already adhered will stick to the heated metal surface.
Step 7: Flip the apron over and apply the EasyPress to the back of the project for 15 seconds.
This just helps finalize the project and make sure all vinyl is completely adhered.
My EasyPress 2 is the largest one available: 12″x 10.” You can also choose from three other sizes: 9″x 9,” 6″x 7,” or the brand new Cricut Mini, “1.92”x 3.25.” I chose this one because it’s large enough for just about any project I can think of, including men’s size t-shirts, but the Mini is on my wish list so I can easily decorate hats, shoes, and other small, hard-to-reach surfaces.
Now your apron is ready to use or to give as a gift for the holiday season! What do you think? Is this something that would be a perfect addition to your holiday baking traditions?

Be sure to check out my other festive project ideas, and to Pin this idea to share with a friend!

Where did you get the apron? I am told to only use Cricut blanks but cannot find one that is an apron.
I got the apron at Walmart. The Cricut blanks are important for the Infusible Ink, but you can put heat transfer vinyl on just about anything and everything!!