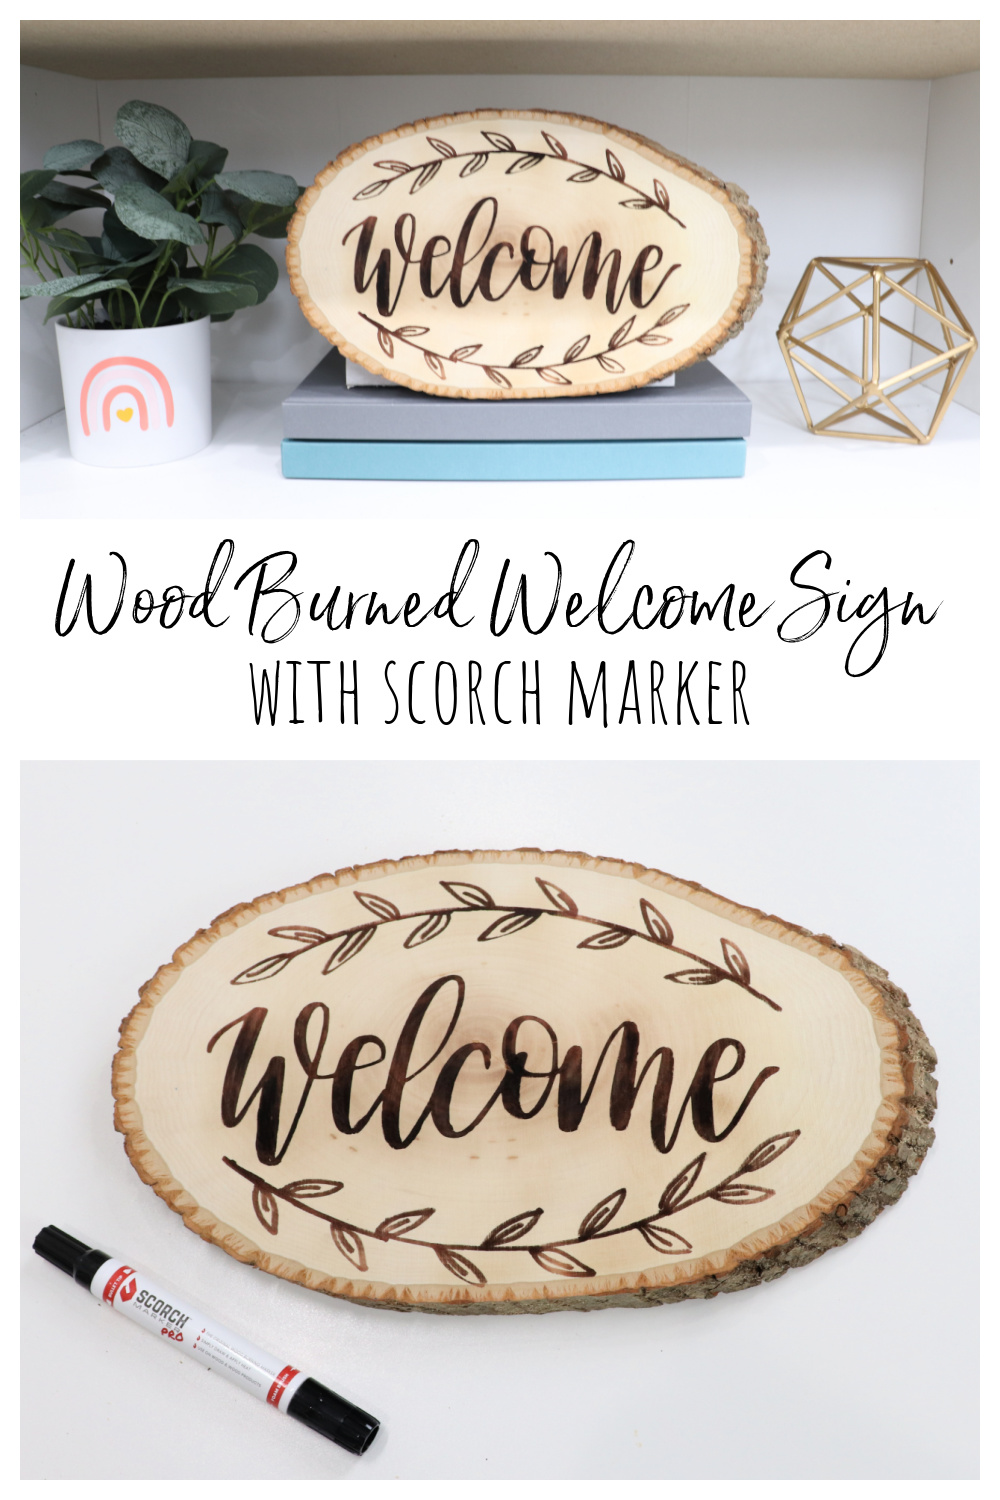
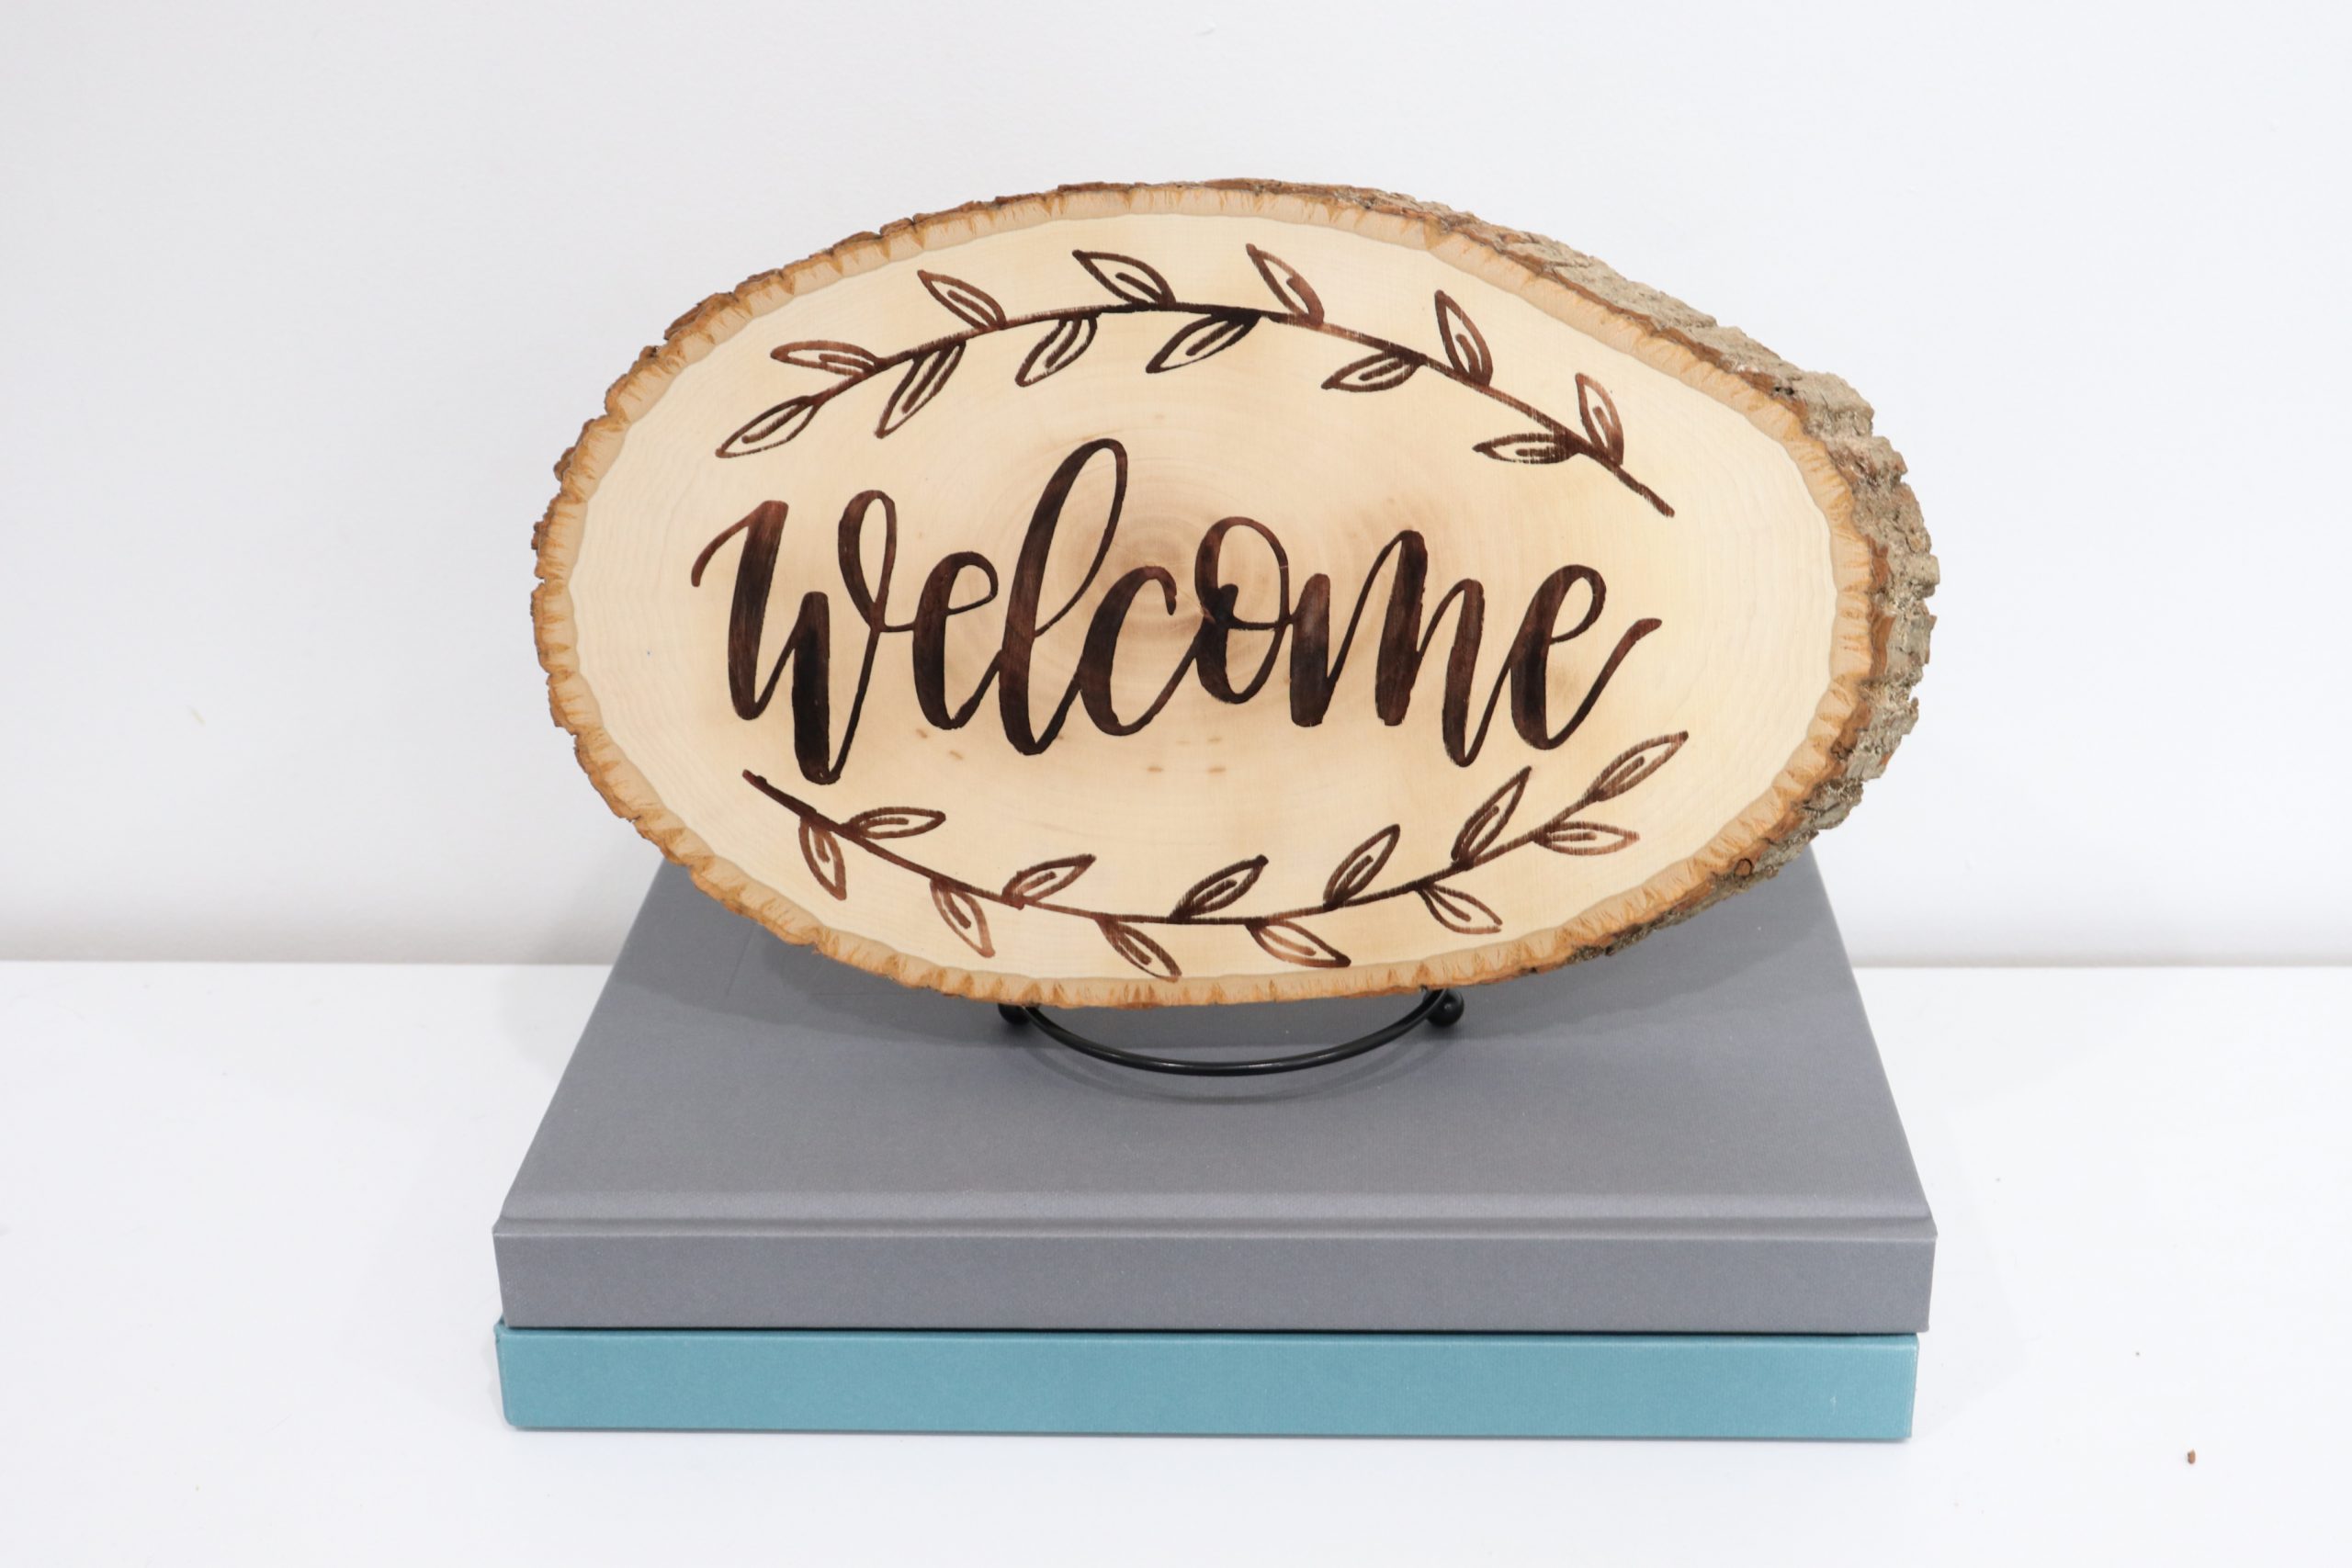
Wood Burned Welcome Sign with Scorch Marker
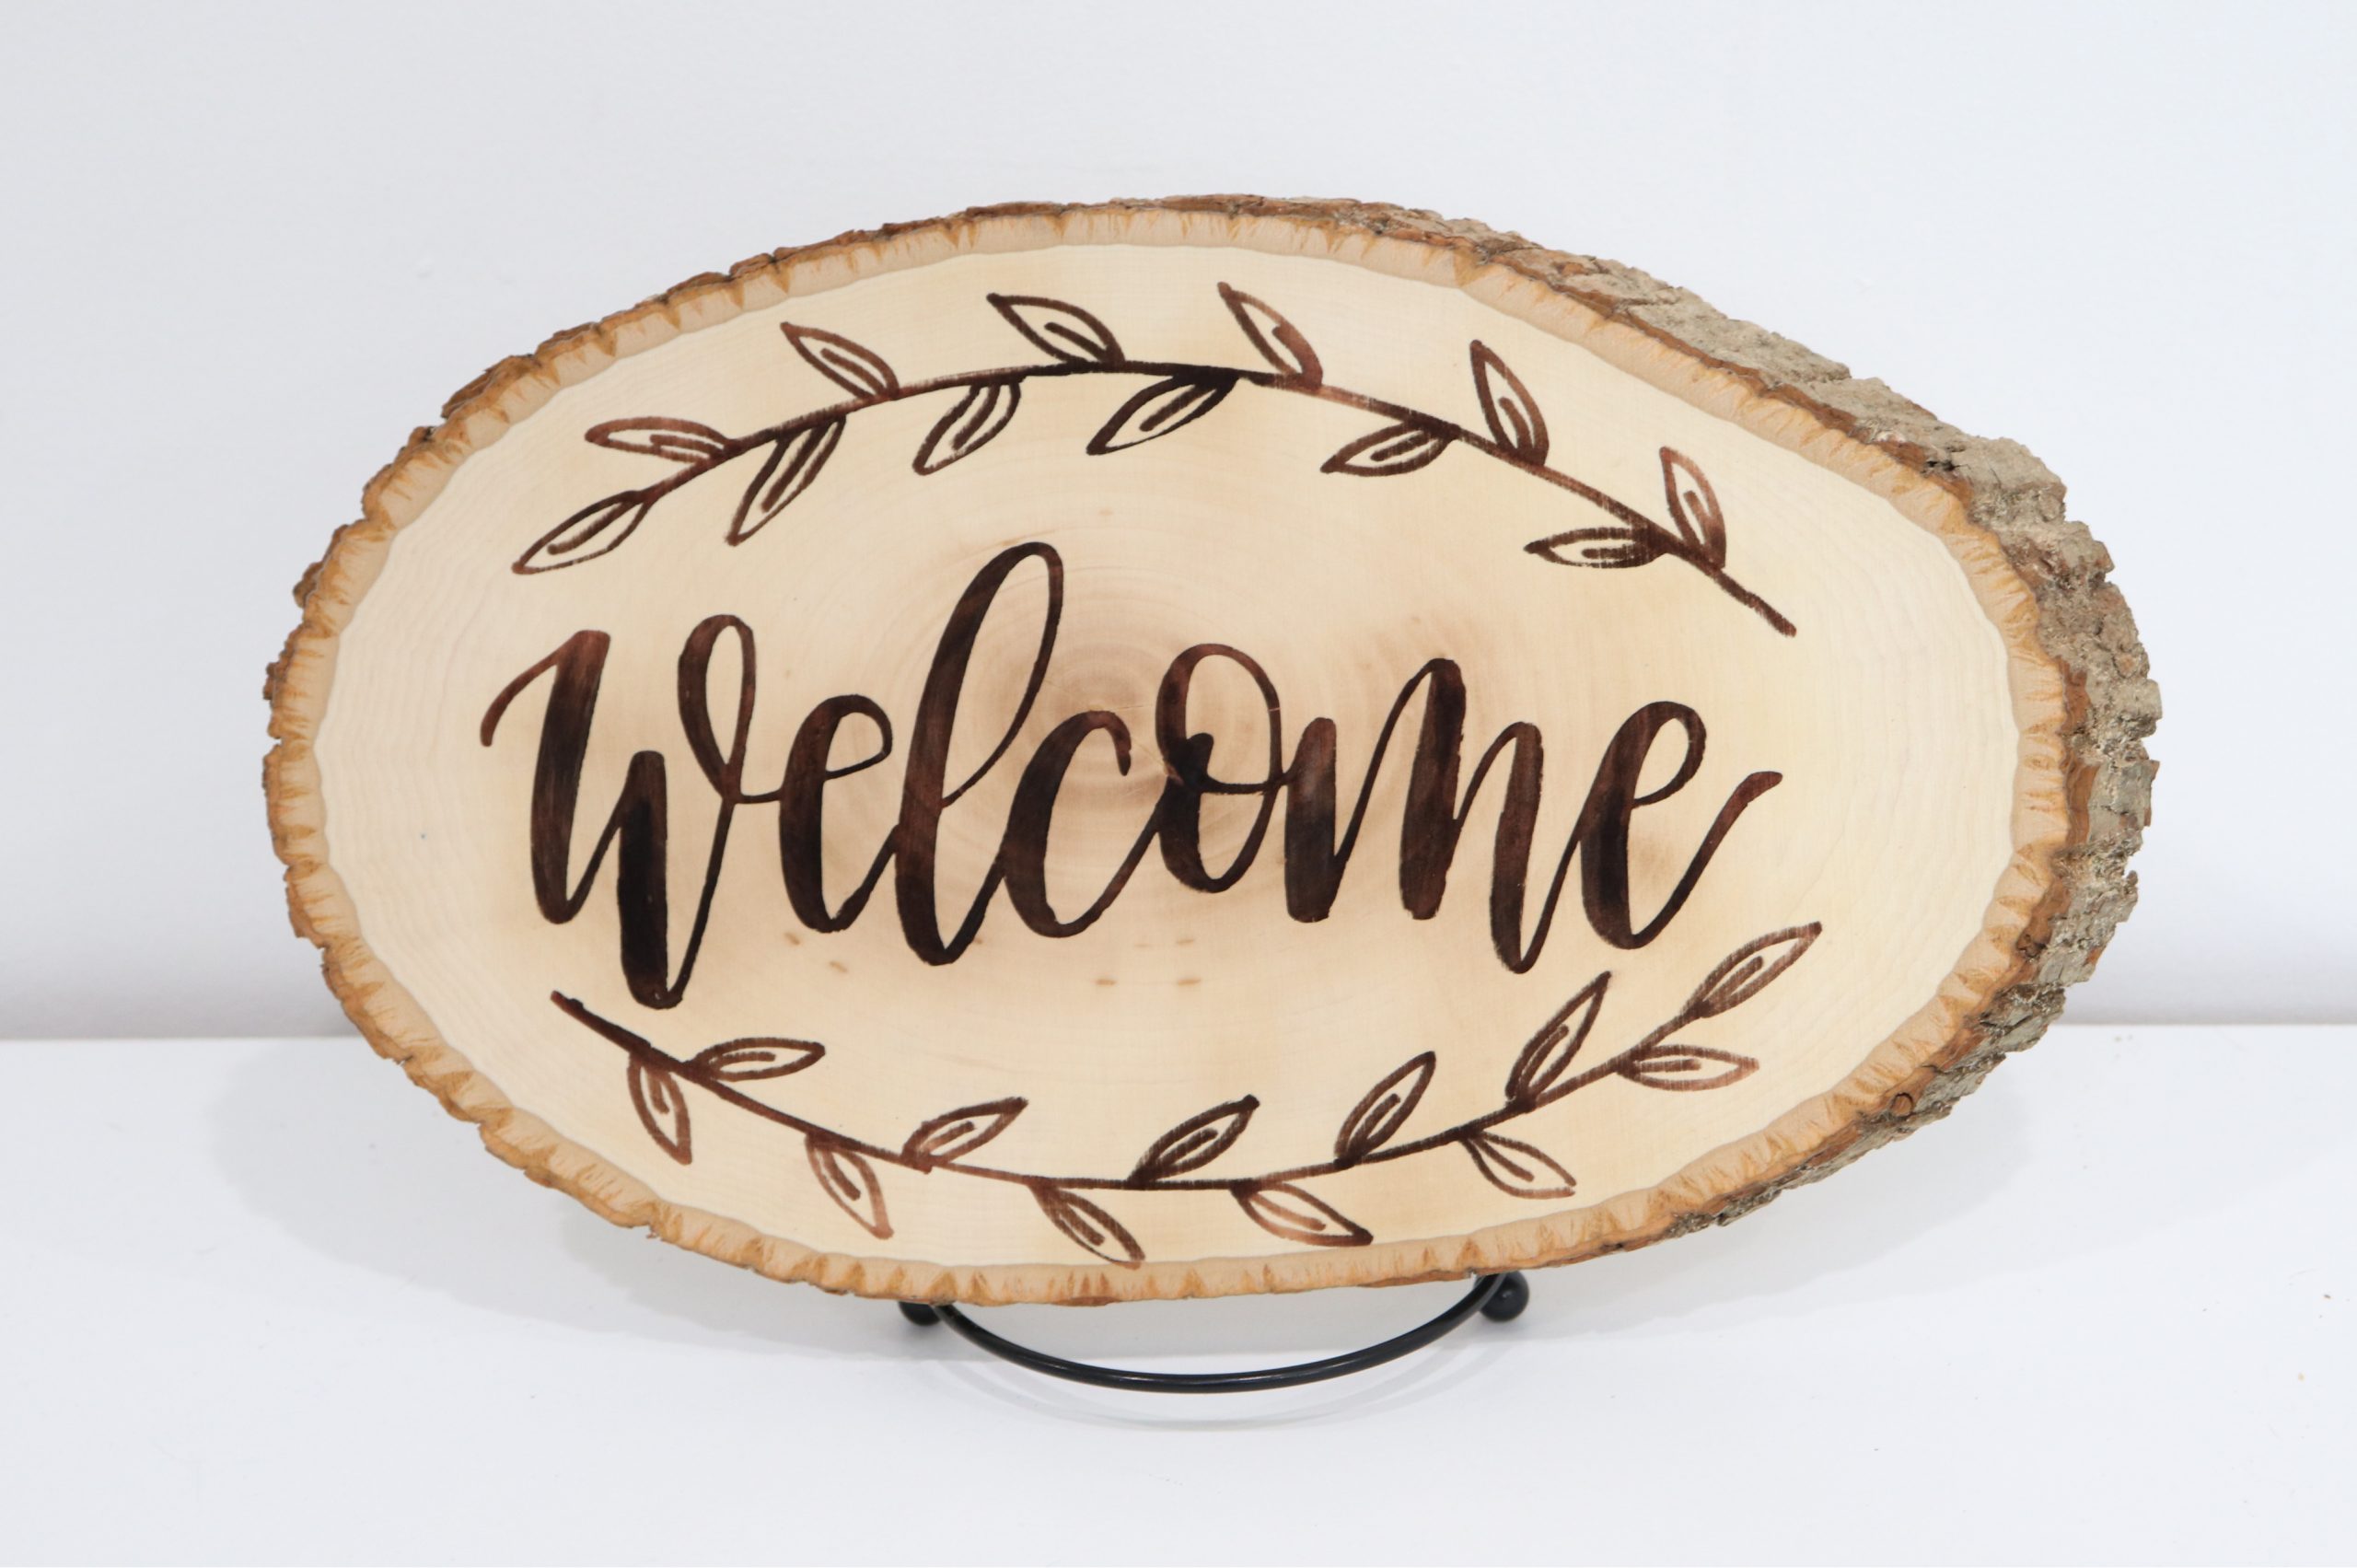
Friends, if you haven’t heard me talk about the Scorch Marker yet, I need to introduce you to my latest crafting obsession! I attempted wood burning multiple times over the years, and it always resulted in frustration and failure. I couldn’t manage to get the various tools to do what I wanted them to do. Now, the Scorch Marker allows me to draw, write, letter, and stencil anything I want, then the ink reacts to heat, permanently burning my marks into the wood (or paper mache, or leather, etc). Take a look at how I used it, along with a new series of stencils I designed, to create this farmhouse style “welcome” sign. The video below has a full step by step tutorial, then you can scroll down for a written version of the instructions too!
You’ll need:
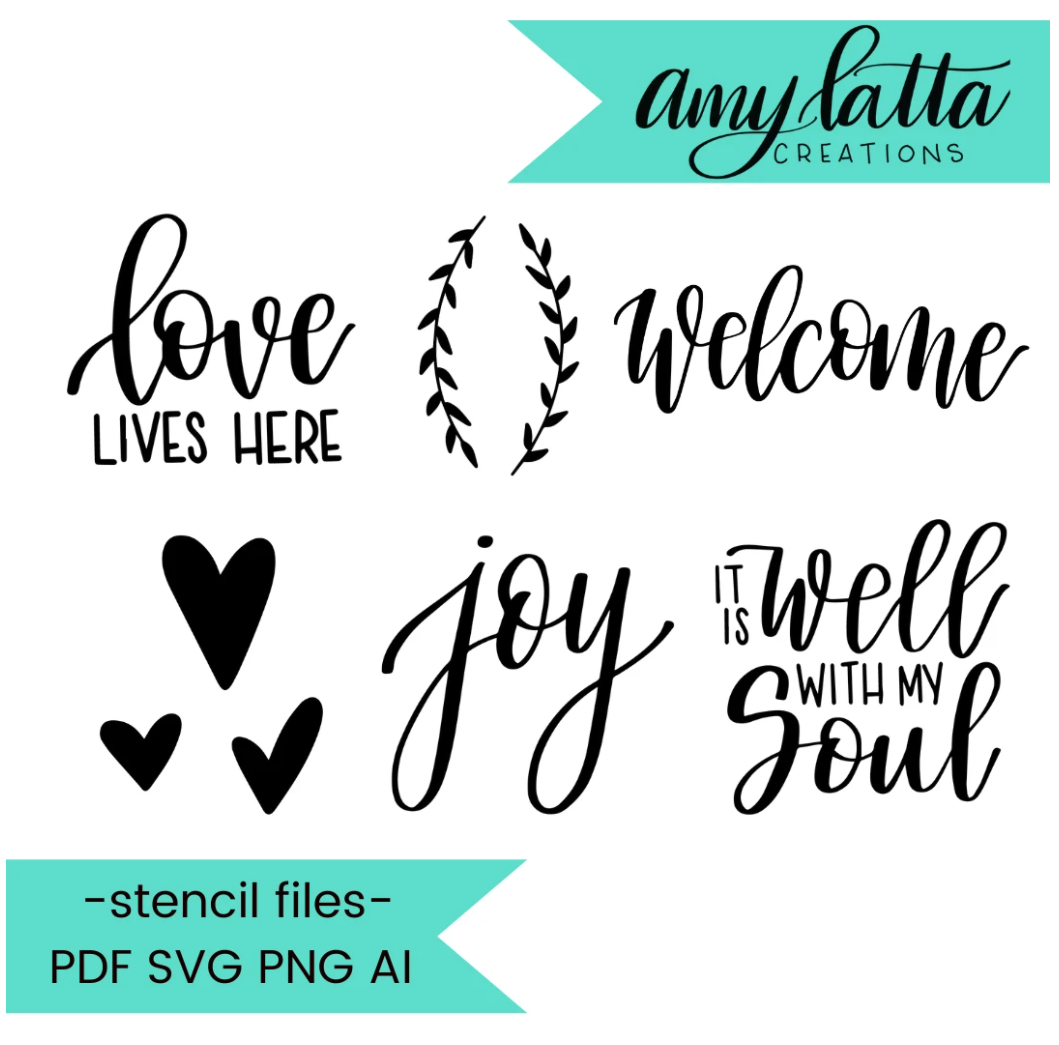
Amy Latta Heart & Home Stencil Images
Cricut or other electronic cutting machine
removable vinyl, any color
scissors
Heat tool (must be 1000+ watts of power/300+ degrees F)
Step 1: Download & create your stencil.
Your first step will be to download the images from the Scorch Marker website. Then, choose the one(s) you want to use and upload them into the Cricut Design Space software. I used “welcome” and the curving vines. Use the software to size the images to fit your wood round, then send them to a cutting machine loaded with removable vinyl.
Once your stencils are cut, you’ll weed them by removing the words or images (which feels like the opposite of what you typically do when making a vinyl design). All you’ll have left is the negative image, which becomes your stencil.
Step 2: Use transfer tape to apply the stencil to the wood round.
Make sure to firmly press the vinyl down onto the wood so that your ink can’t bleed underneath. For full instructions on how to do this step, check out the video at the top of the post.
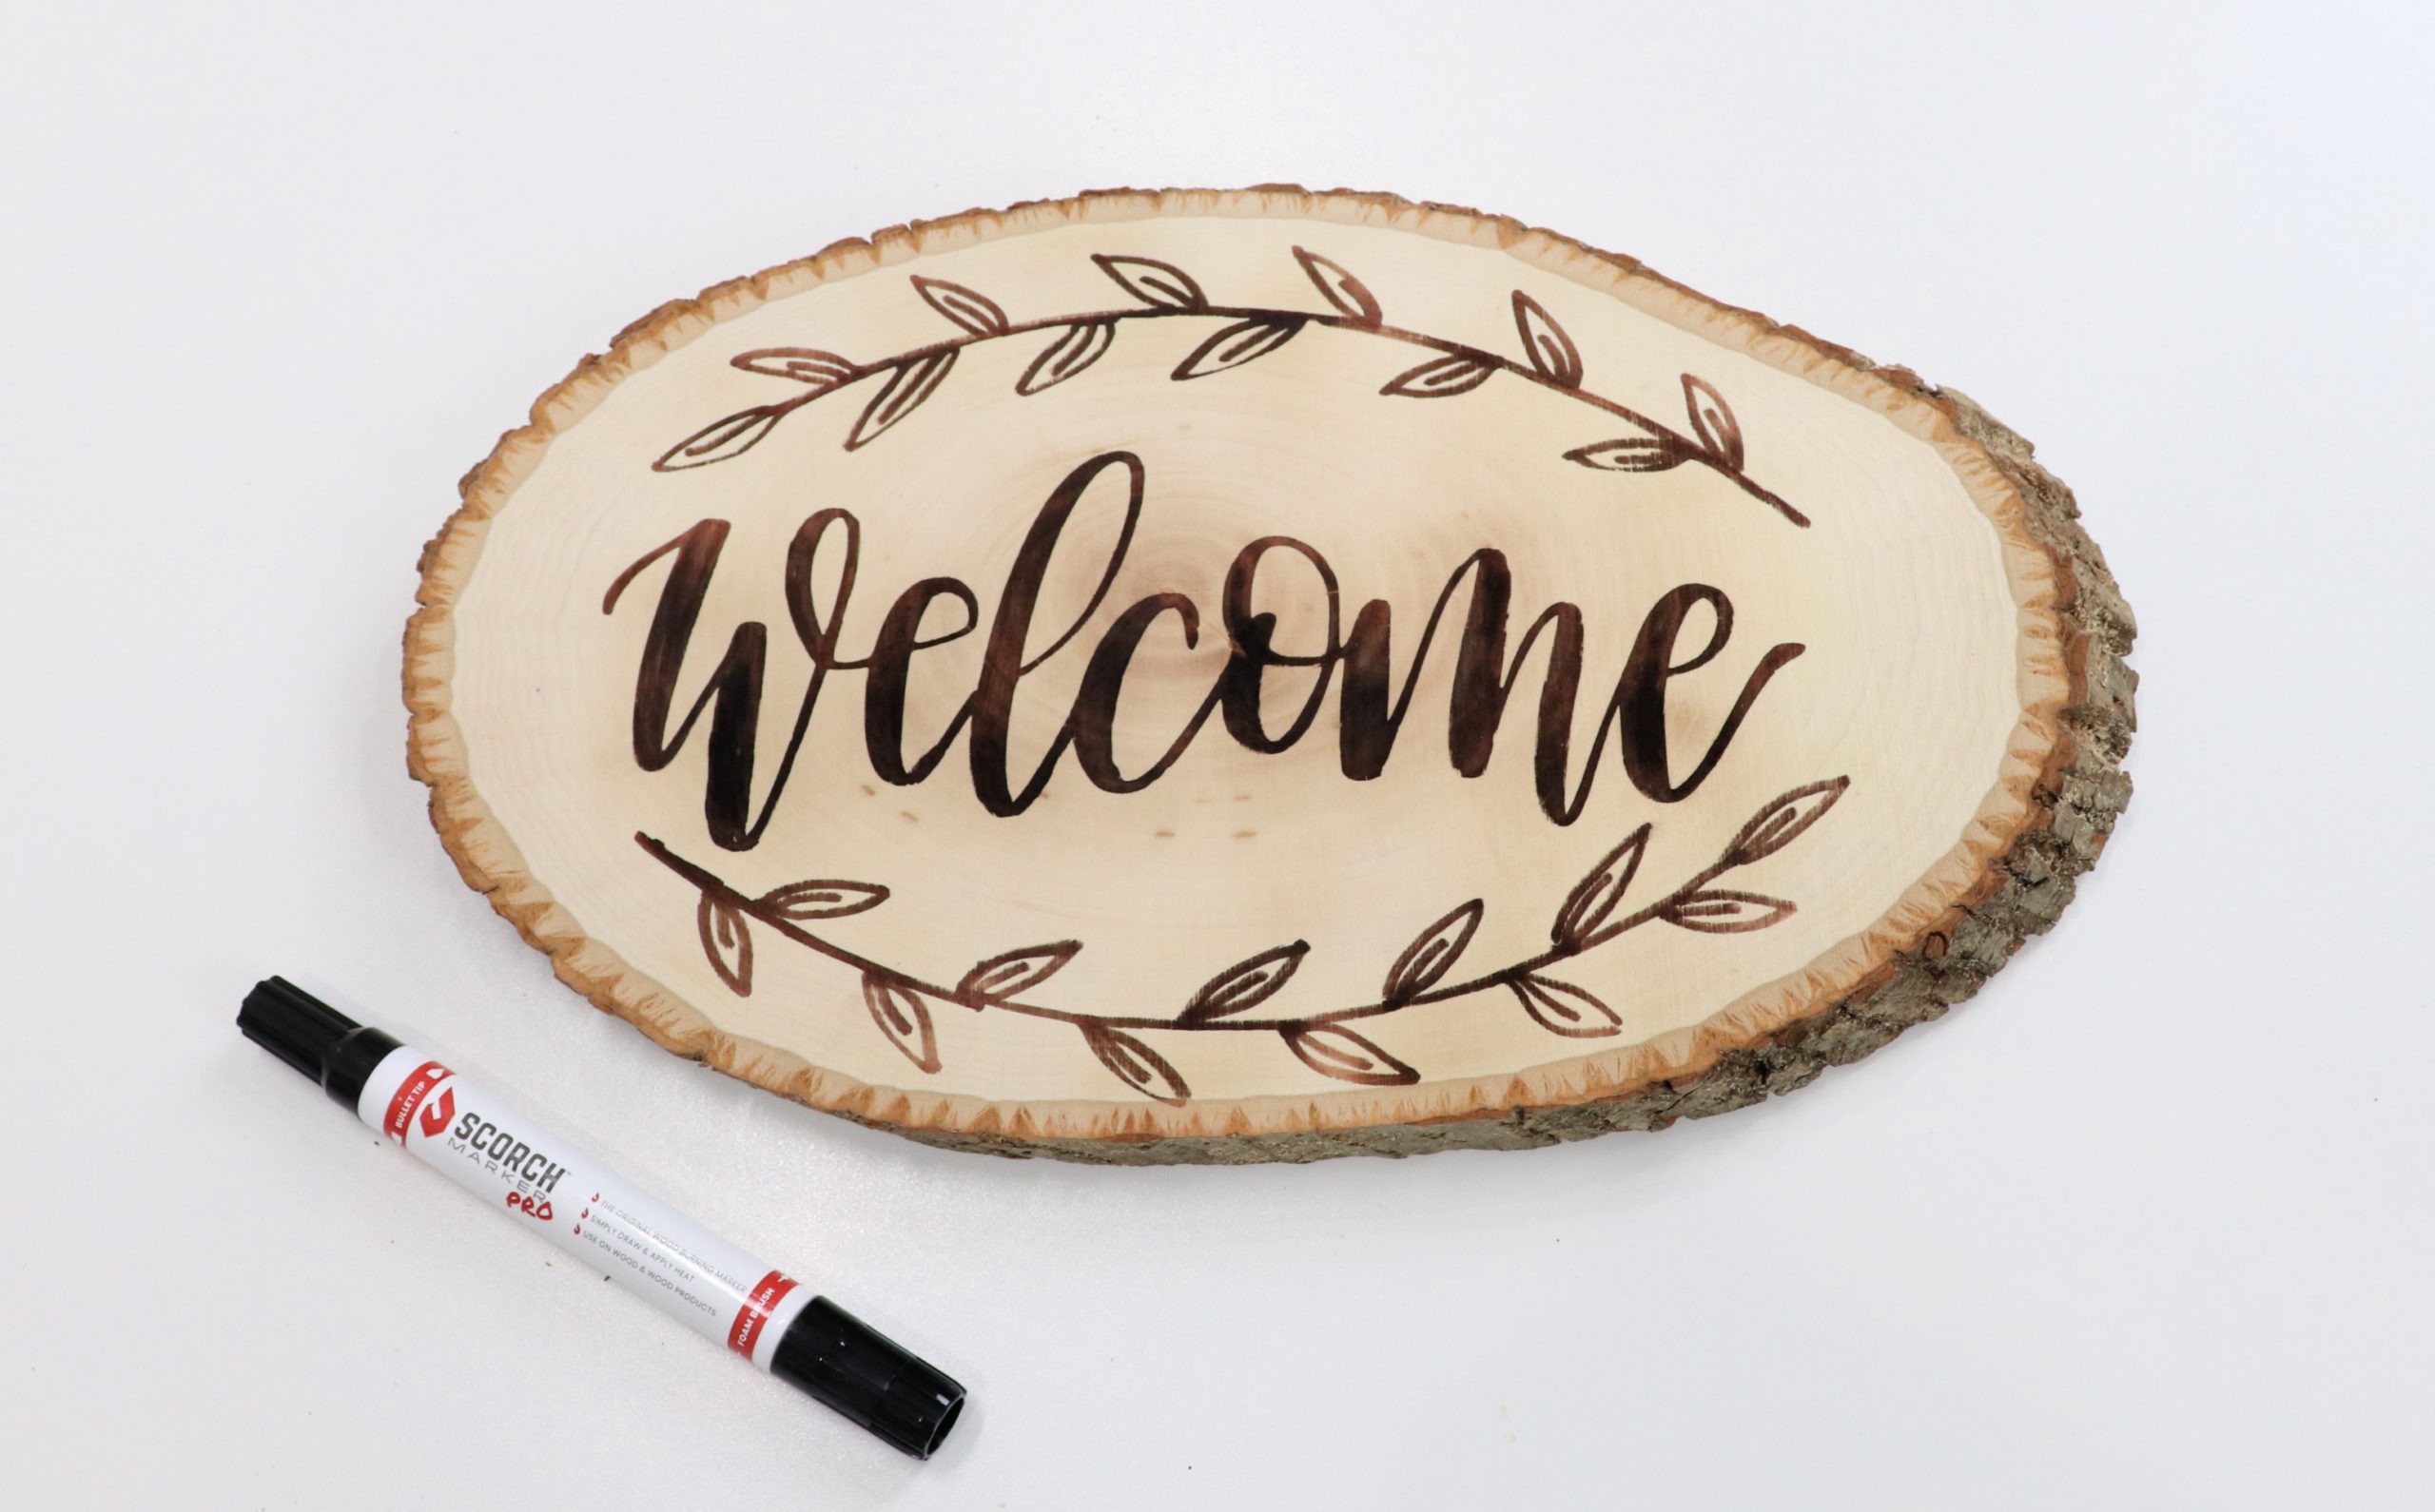
Step 3: Fill in the stencil area with the Scorch Marker.
You can use either end; the bullet tip, or the end with the small sponge. Personally, I prefer using the bullet tip. To make my leaves more decorative, rather than coloring them in completely, I traced the outline of each leaf, then drew a line through the center. This gives them the effect of having been drawn onto the wood rather than stenciled.
PS. Save 10% on the Scorch Marker and any other purchase on the website with the code AMY67492.
Step 4: Remove the vinyl and apply heat to the stenciled area.
You’ll want to keep your heat gun about 6″ from the wood surface and move it around as you apply the heat. You’ll see the marker ink change color right before your eyes as it reacts with the heat and burns your design into the wood. The more heat you apply, the darker the burn will become. Once your design is burned, your sign is ready to display!
I hope you have as much fun with these stencils as I did creating them. I’d love to see what you create; be sure to share your project photos in the Amy Latta & Friends Facebook Group so we can all be inspired. See you there!