Beaded Stacking Bracelets
As many of you know, I’ve been working hard on designing the “Honestly Me” bag with the folks at Galian Handbags. Throughout this process of creating and communicating the initial design, I’ve been corresponding almost constantly with one particular person at the company, Gina. She has been absolutely fabulous to work with {even though she’s been asking me to make a new decision every five minutes, haha}! I’ve been wanting to do a little something to show her how much I appreciate her hard work to help make the “Honestly Me” bag a reality, so when I found out that her favorite color is blue and she loves stacking bracelets, I knew just what to do. Take a look…

TIME REQUIRED: 30 minutes
DIFFICULTY LEVEL: easy
SPECIAL TOOLS: basic jewelry tools
SPECIAL SKILLS: none

Before I give you the list of supplies, I just want to note that you definitely don’t need the exact same beads and charms that I used! The best part about making your own jewelry is that it can be customized to your personal style and taste…so grab any color, shape, and size beads you love and go for it! I’ve linked to many of the specific supplies I used just in case you really love something and want to find it for yourself, but don’t feel limited by this list. Let your own inner designer come out to play!
Materials:
{Many of my supplies were provided by sponsors including GoodyBeads.com, ConsumerCrafts.com, and Wholeport.com. All opinions are honestly my own.}
– Bracelet Memory Wire
– 6mm Royal Blue Miracle Beads
– 6mm Aqua Miracle Beads
– 4mm Aqua Miracle Beads
– Small silver beads
– 8mm Dark Blue Faceted Crystal Beads
– Made with love charm
– Silver Star charms
– Memory Wire Cutters
– Crimp Tubes
– 3mm Silver Memory Wire End Caps
– Needle nose and Flat nose pliers
– 4mm jump rings
– Jewelry Glue

For the first two bracelets, I kept things super simple.
Step 1: Cut a piece of memory wire {this is much easier if you use memory wire cutters because this wire is really strong}.
Step 2: String 22 of the 6mm miracle beads. Then add a small silver bead on each end {I didn’t do that on the royal blue one, but I found that it helps hold the beads in place better}.
Step 3: Add a crimp bead next to each end bead and squeeze with a crimping tool or pliers.

Step 4: Place a small charm on a 4mm jump ring and add to your memory wire.
Step 5: Glue an end cap to each end of your wire.
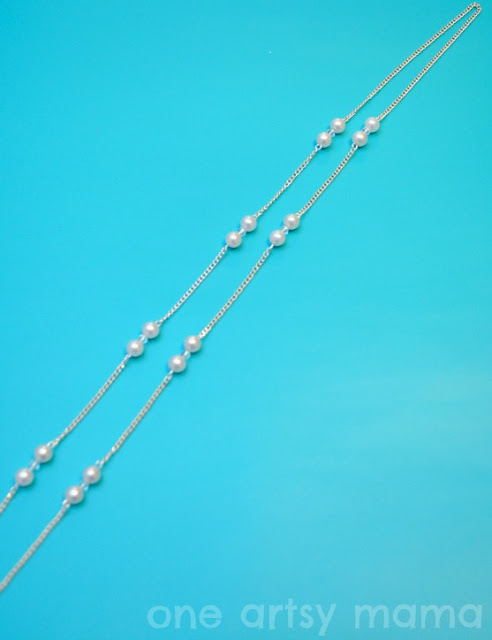
That’s all there is to it! I absolutely love the way Miracle Beads reflect the light…they seem to glow from within in a way that photos don’t totally capture.

For the third bracelet, I wanted to bring the two colors together, so I alternated 4mm Aqua Miracle Beads with some dark blue crystal beads I had in my stash. I followed the same steps for this one that I did for the other two, just changed the beads and the pattern.

I really like each one separately, but I love the look of all three stacked together. They compliment each other so well. And they look so nice on my arm…the hardest part is going to be giving them away!

Gina, I hope you love them! Meanwhile, I’m thinking I may need to order some other colors to make a few sets for myself. What color combo would you make?


I love them! Orange and teal of course.
I love the bracelets!!! I’d love to make hot pink and turquoise. Pinned 🙂
These bracelets are gorgeous, Amy! I also just stopped by Kluster and WOW! I love your design and it’s so awesome to see your name with a link to your blog in the description! You must be on cloud 9! 🙂