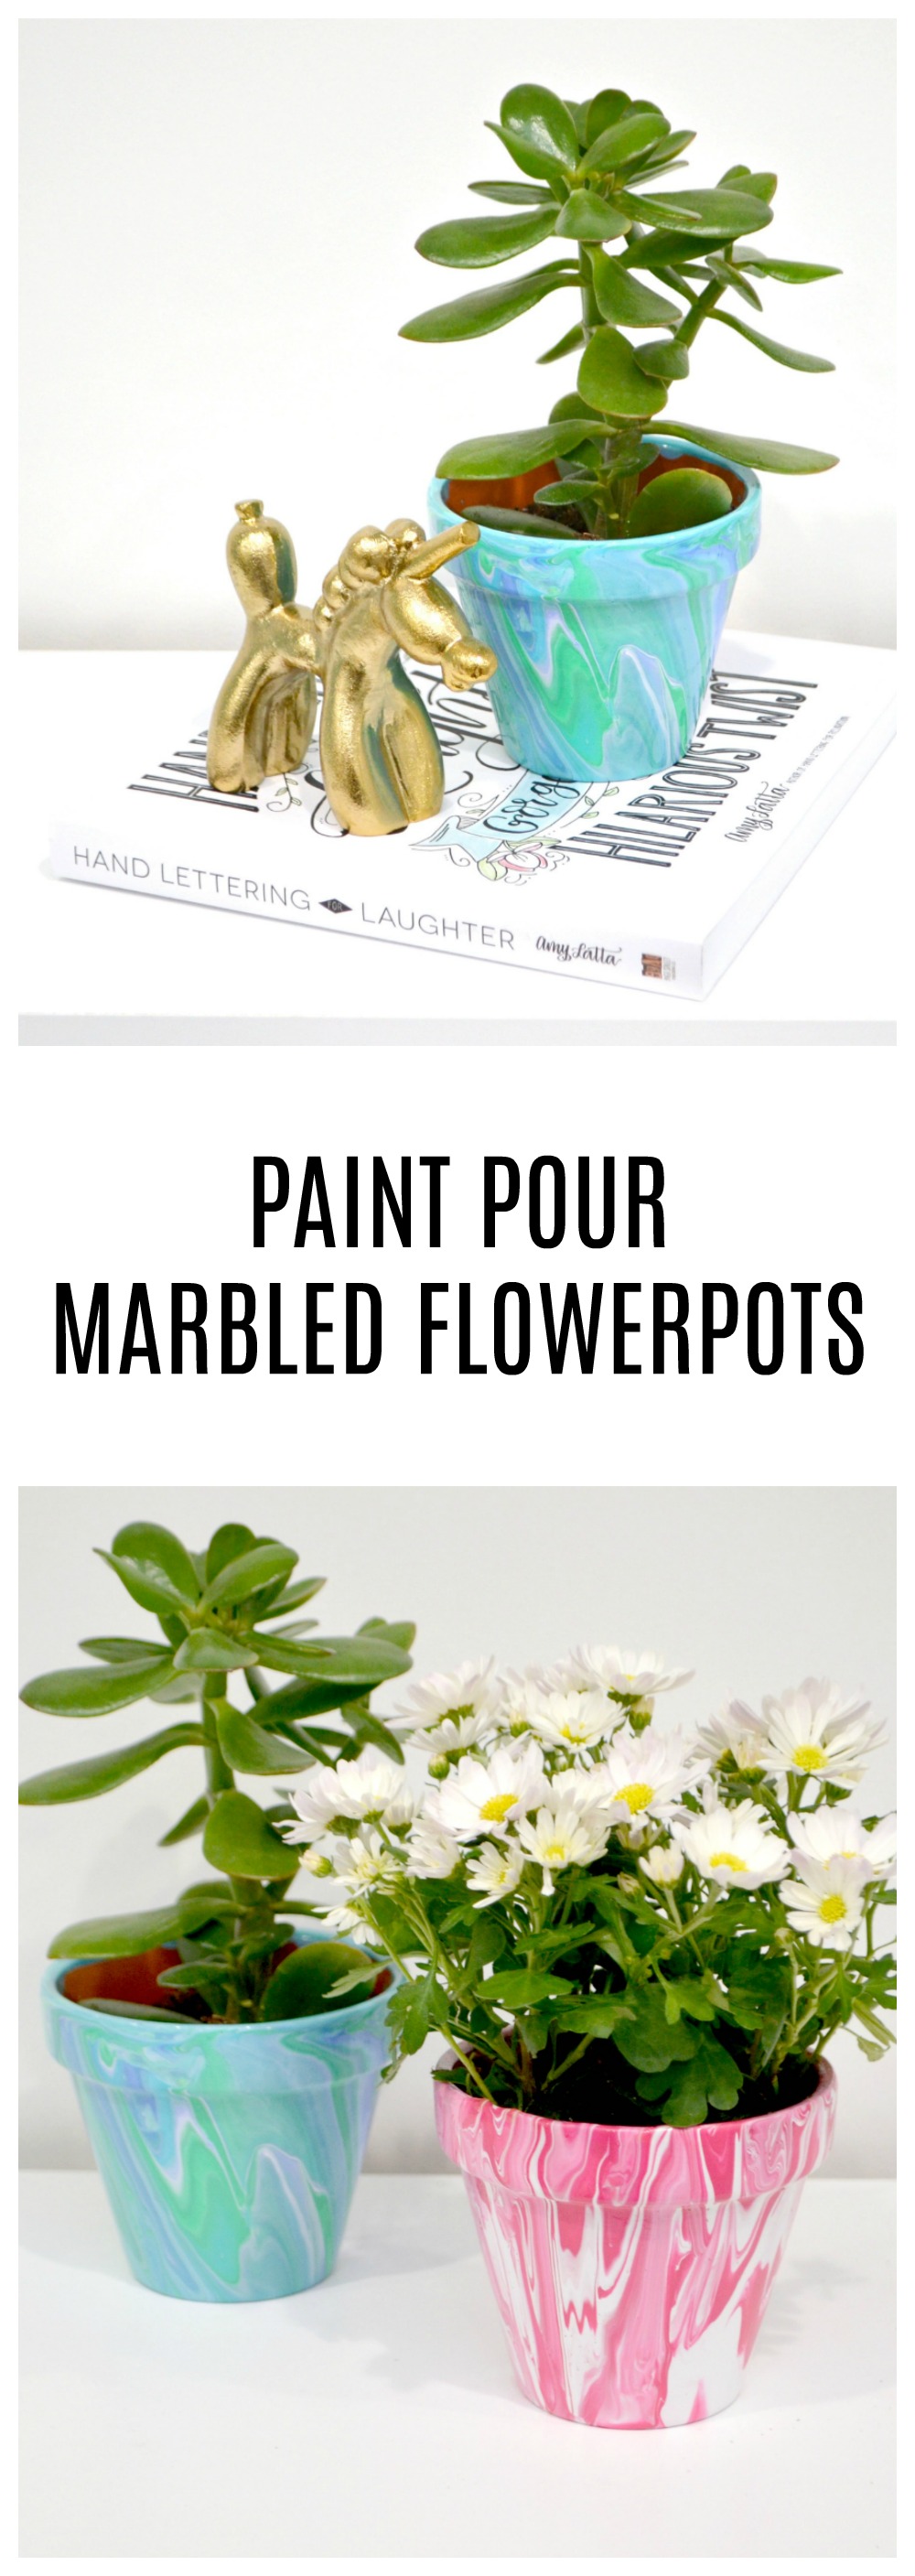
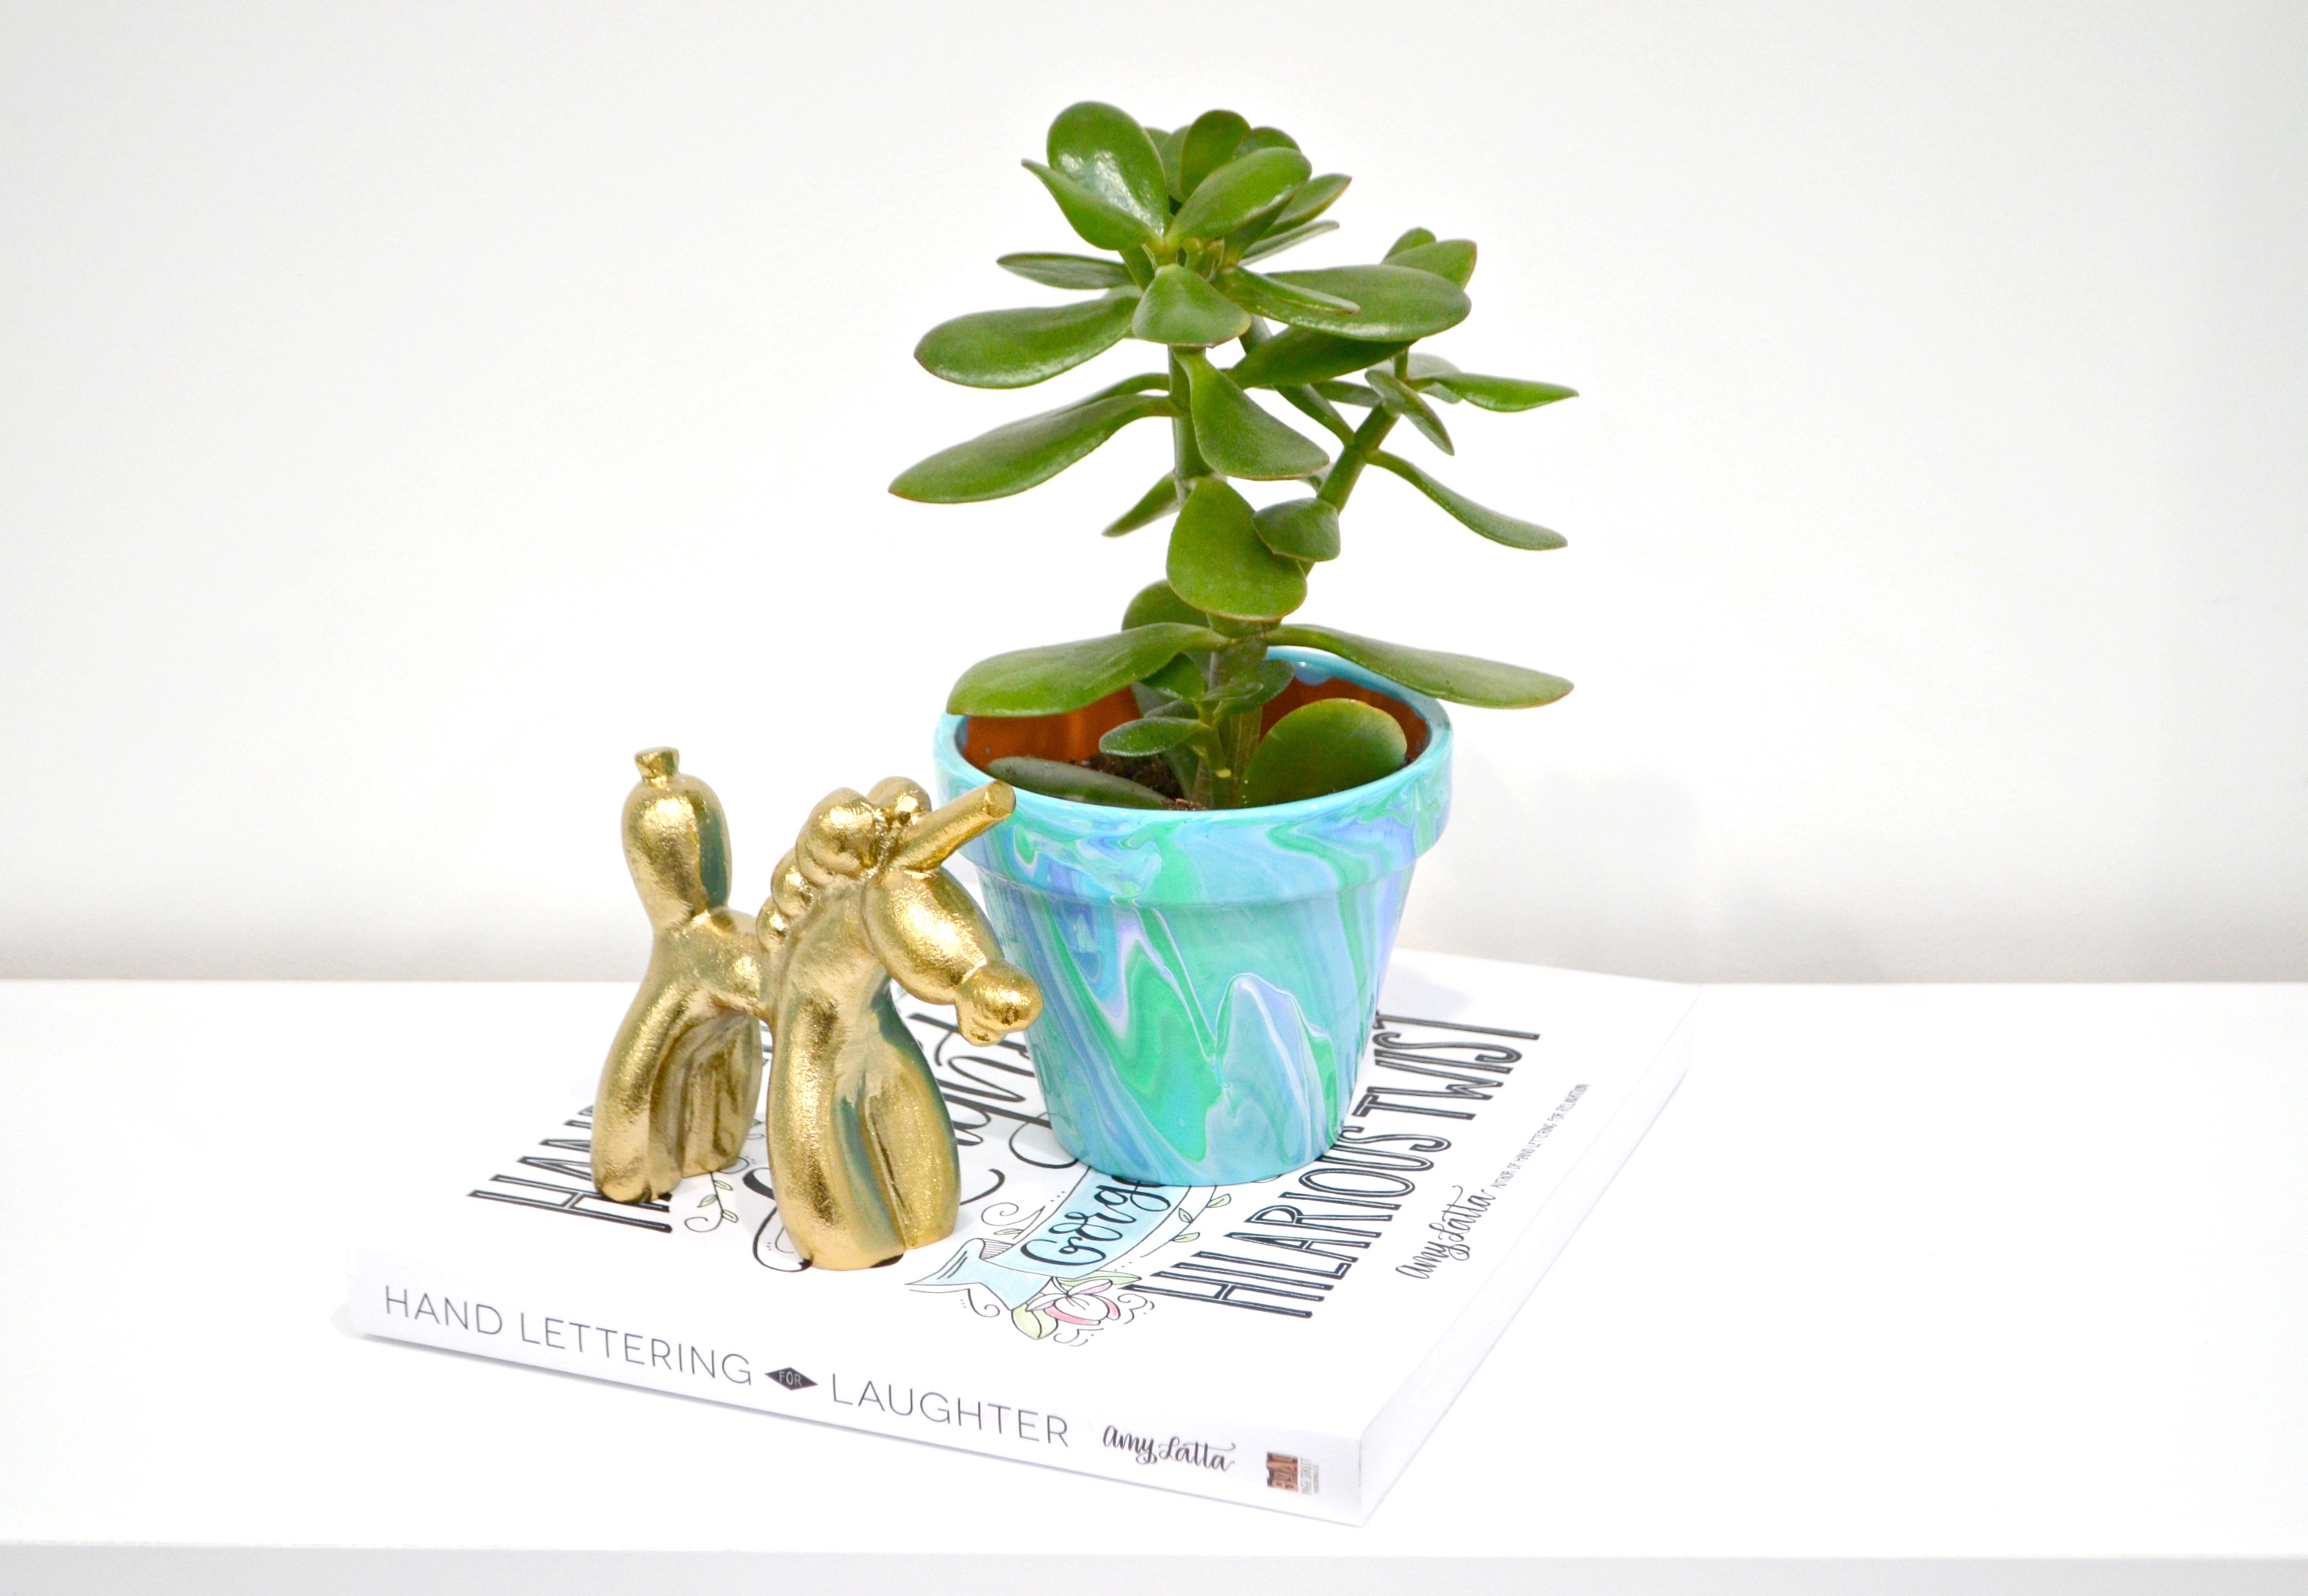
Paint Pour Marbled Flowerpots
Spring is the perfect time to decorate the outside and inside of your home with flowers! Today, I want to show you how easy it is to create colorful marbled flowerpots using a simple paint pouring technique I think you’re going to love. Take a look.
Paint Pour Marbled Flowerpots
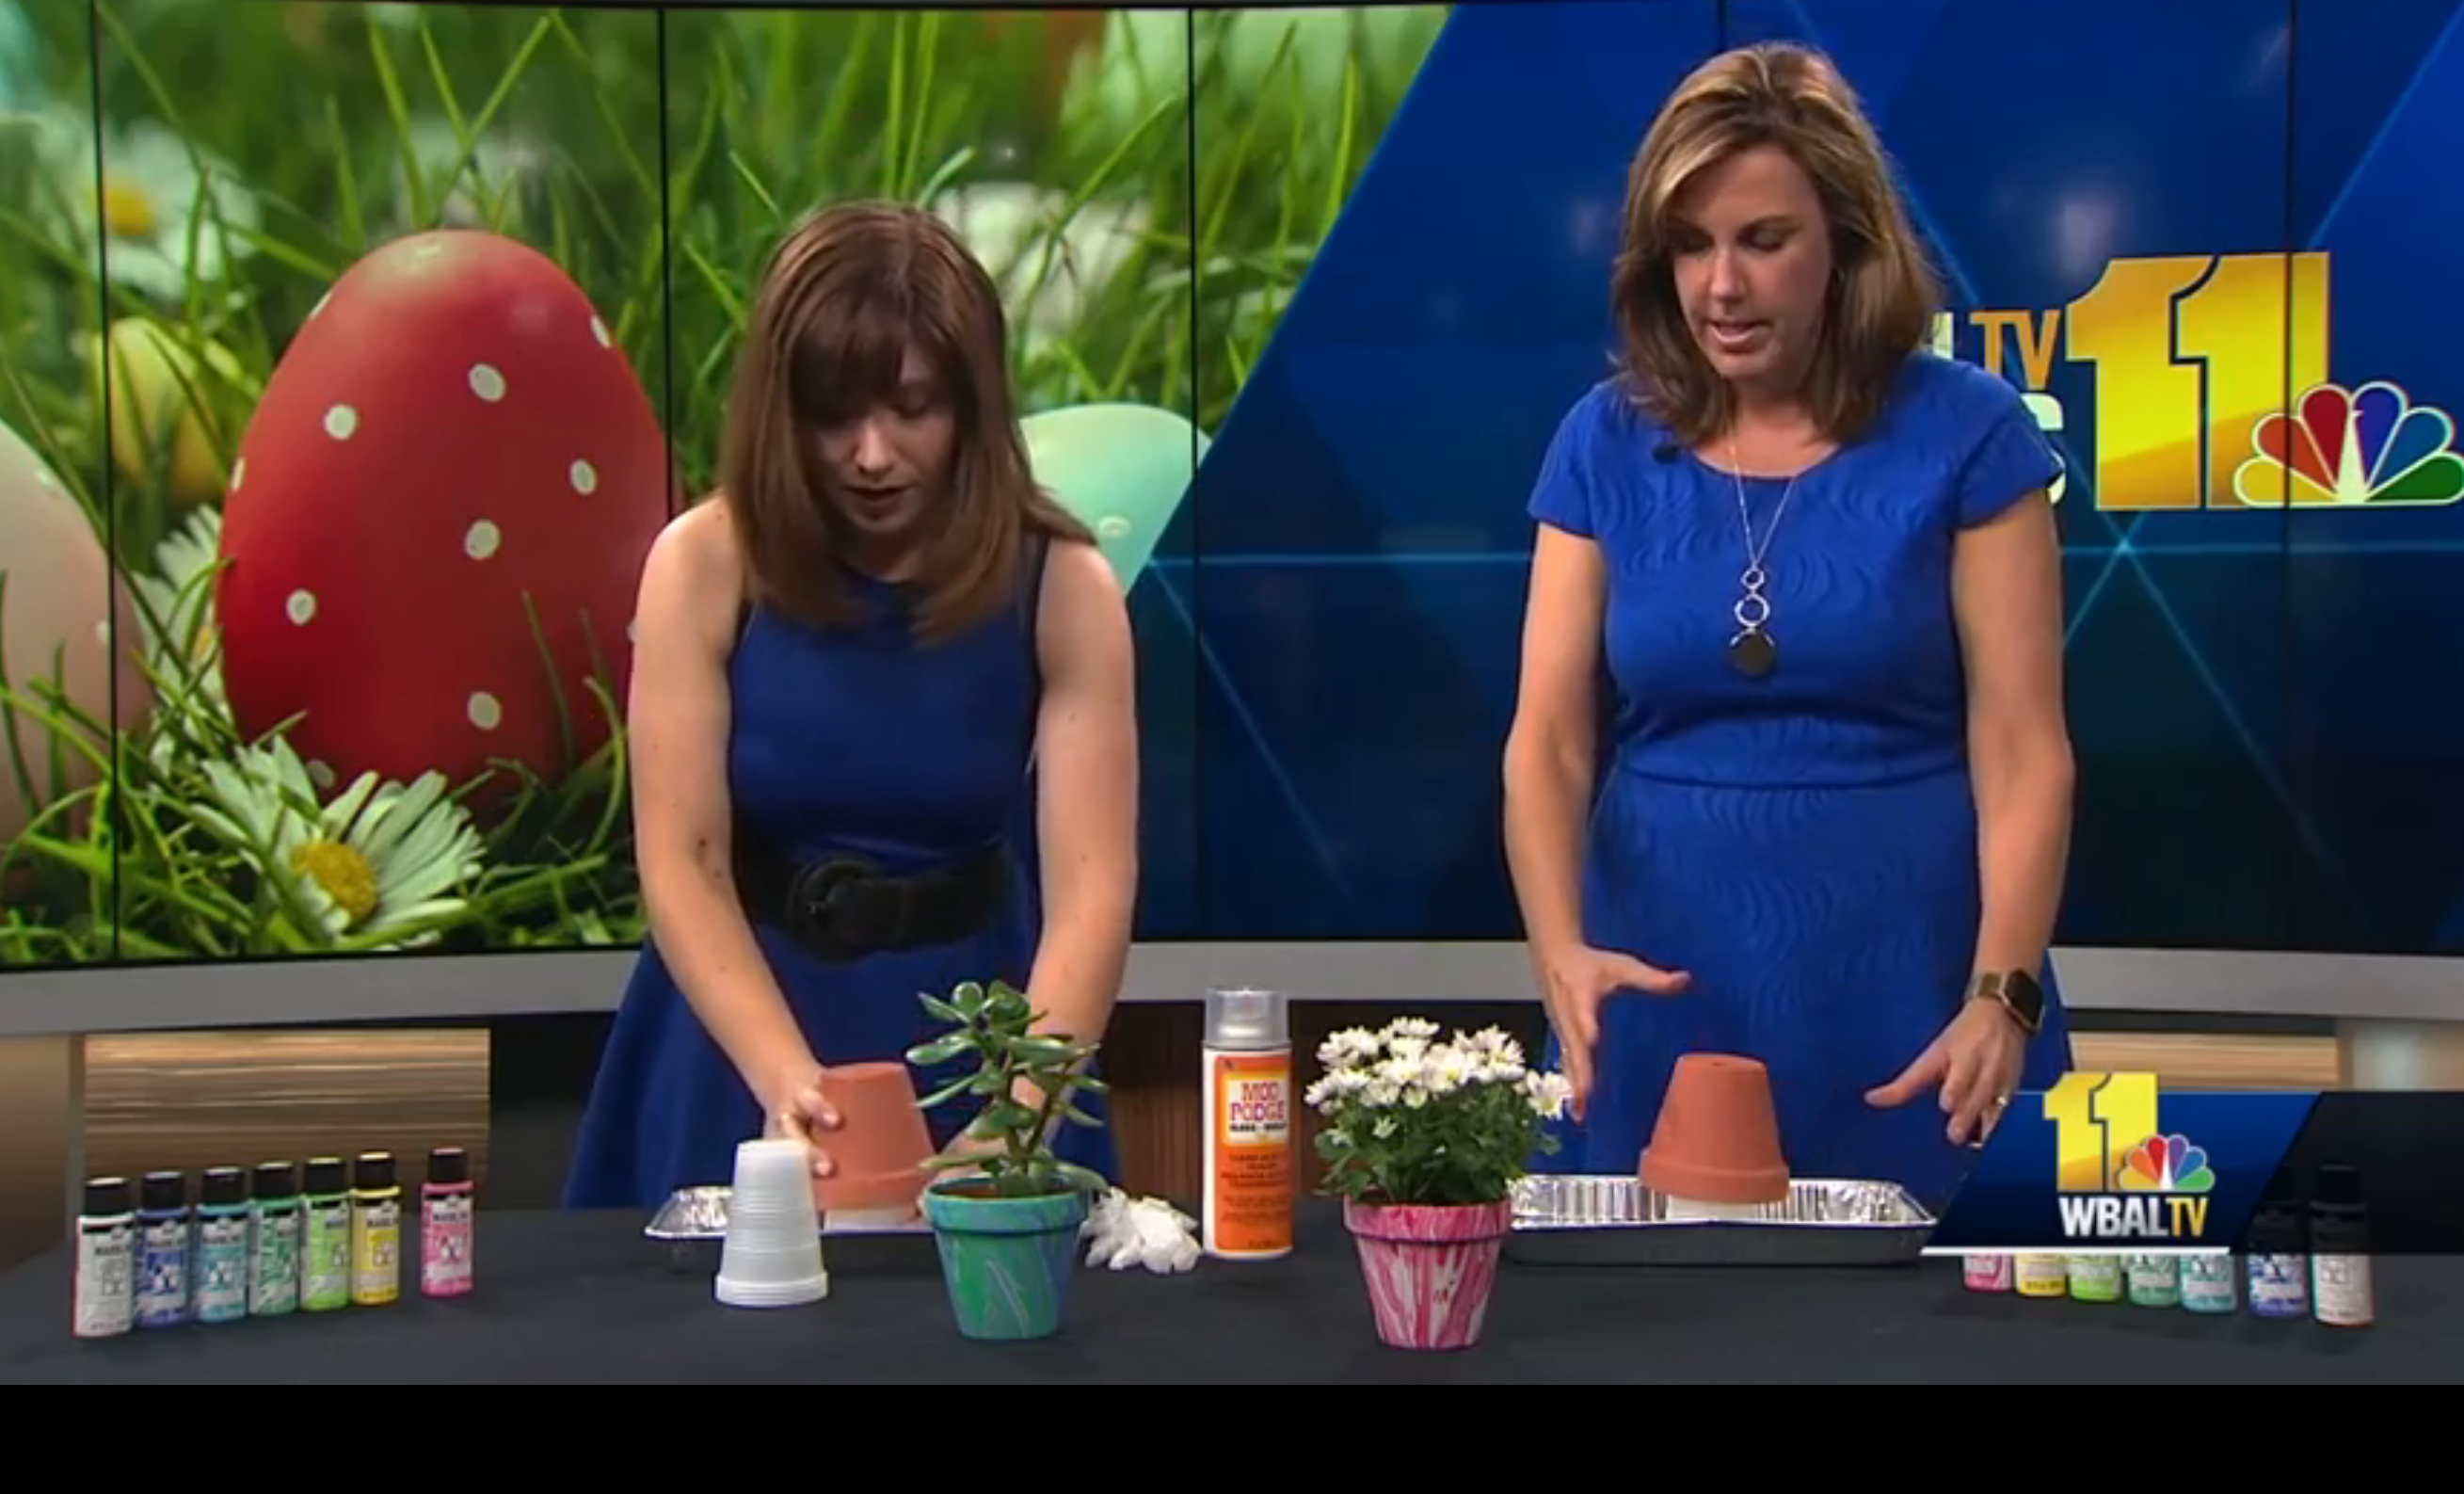
CLICK HERE TO WATCH ME MAKE THESE LIVE ON WBAL11 NEWS!
Marbled Flowerpots Materials:
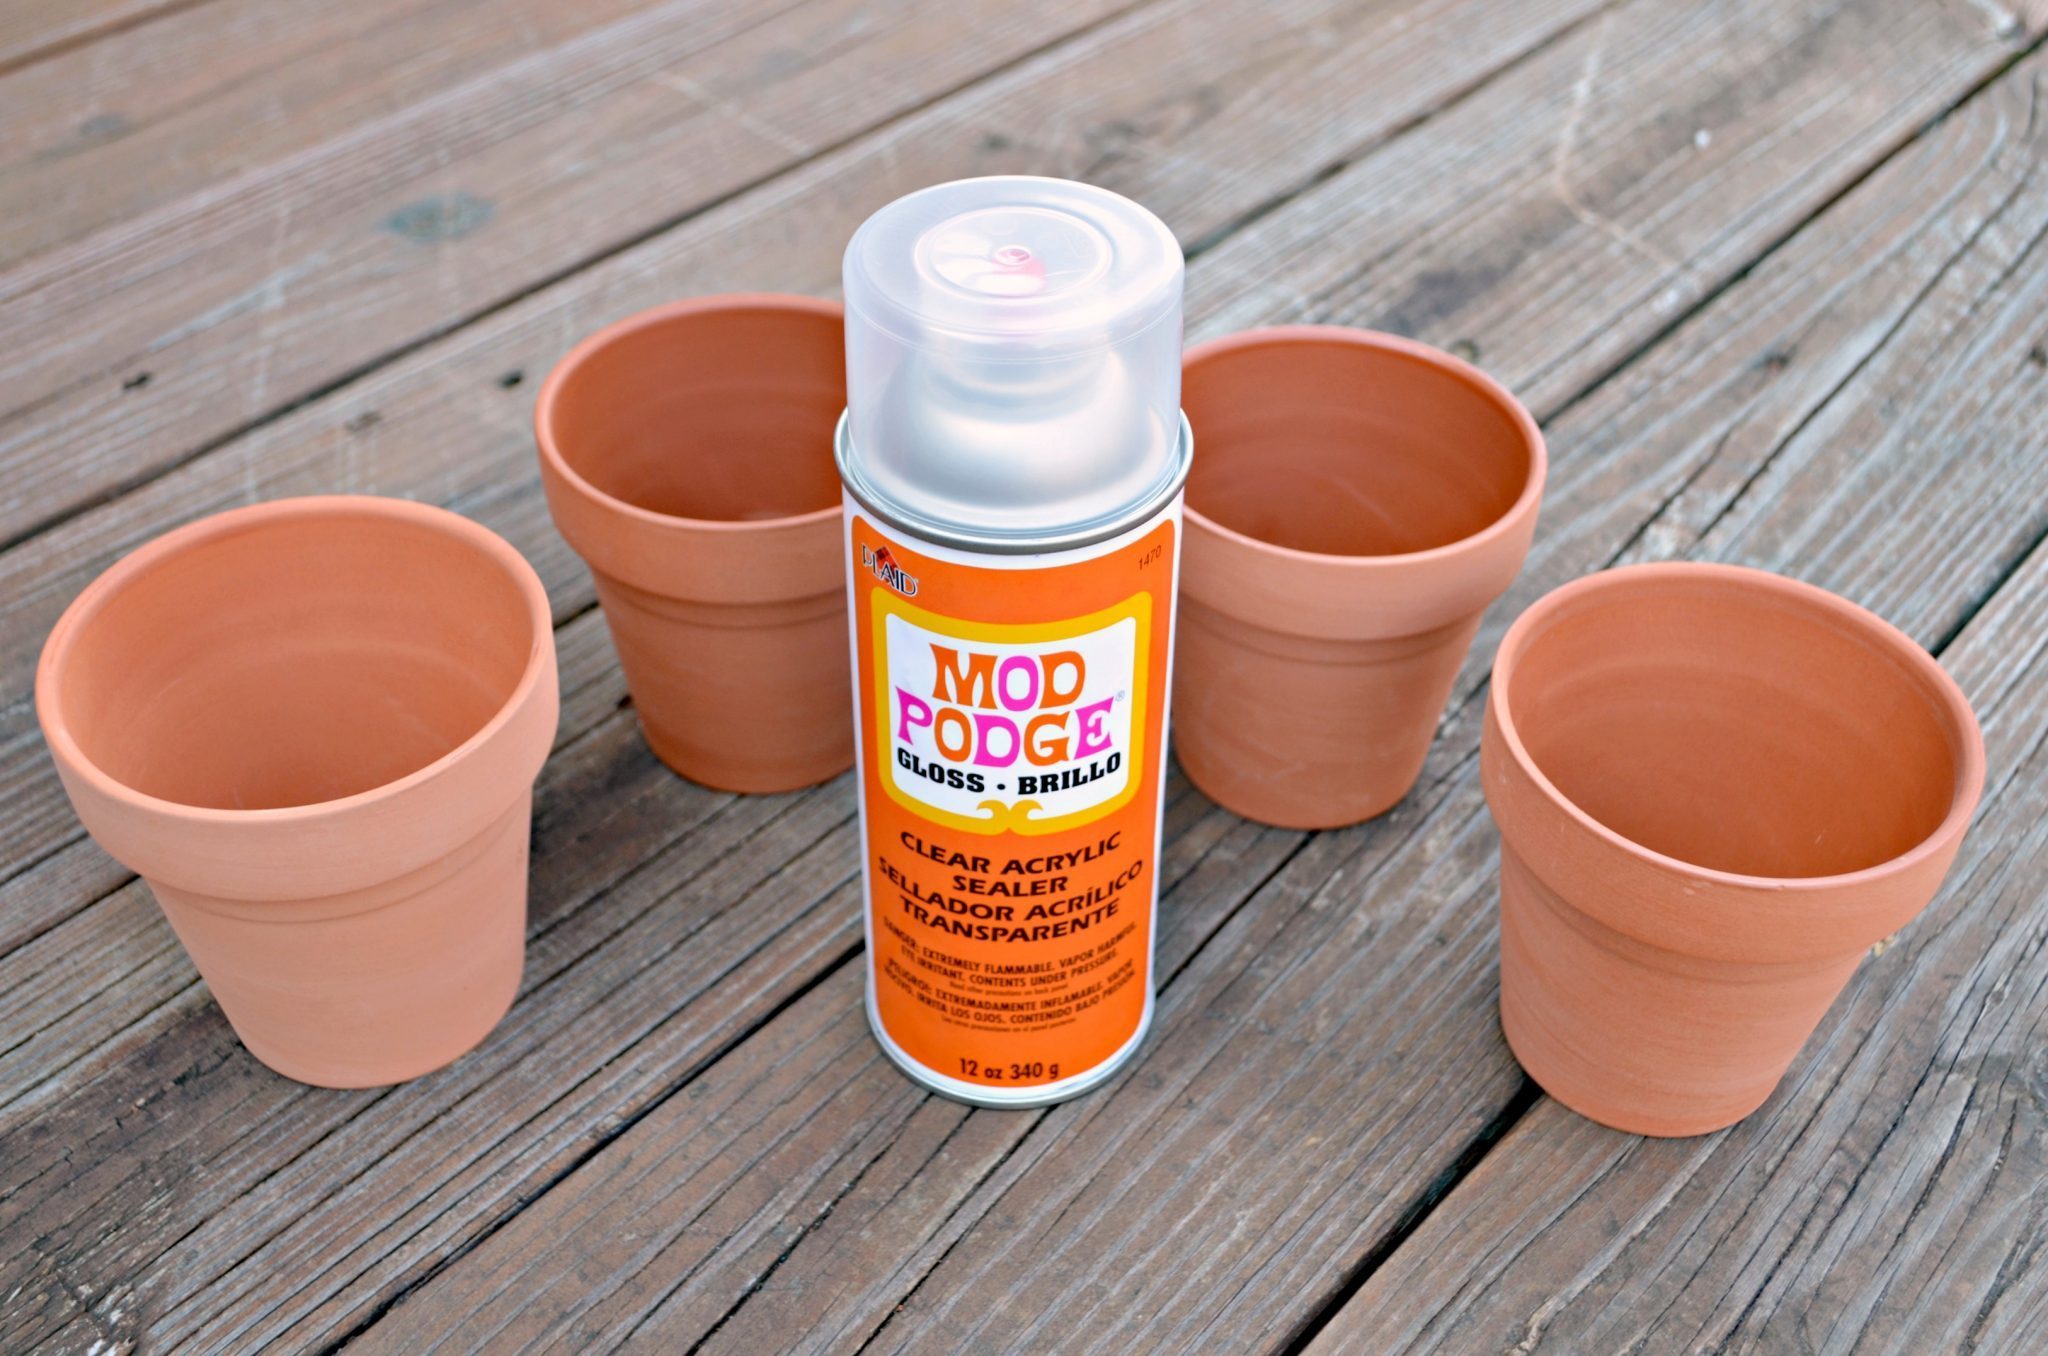
Terracotta Flowerpot{s}
Mod Podge Clear Gloss Acrylic Sealer
Disposable Gloves
Tray or disposable baking pan
Plastic cups
Making Marbled Flowerpots:
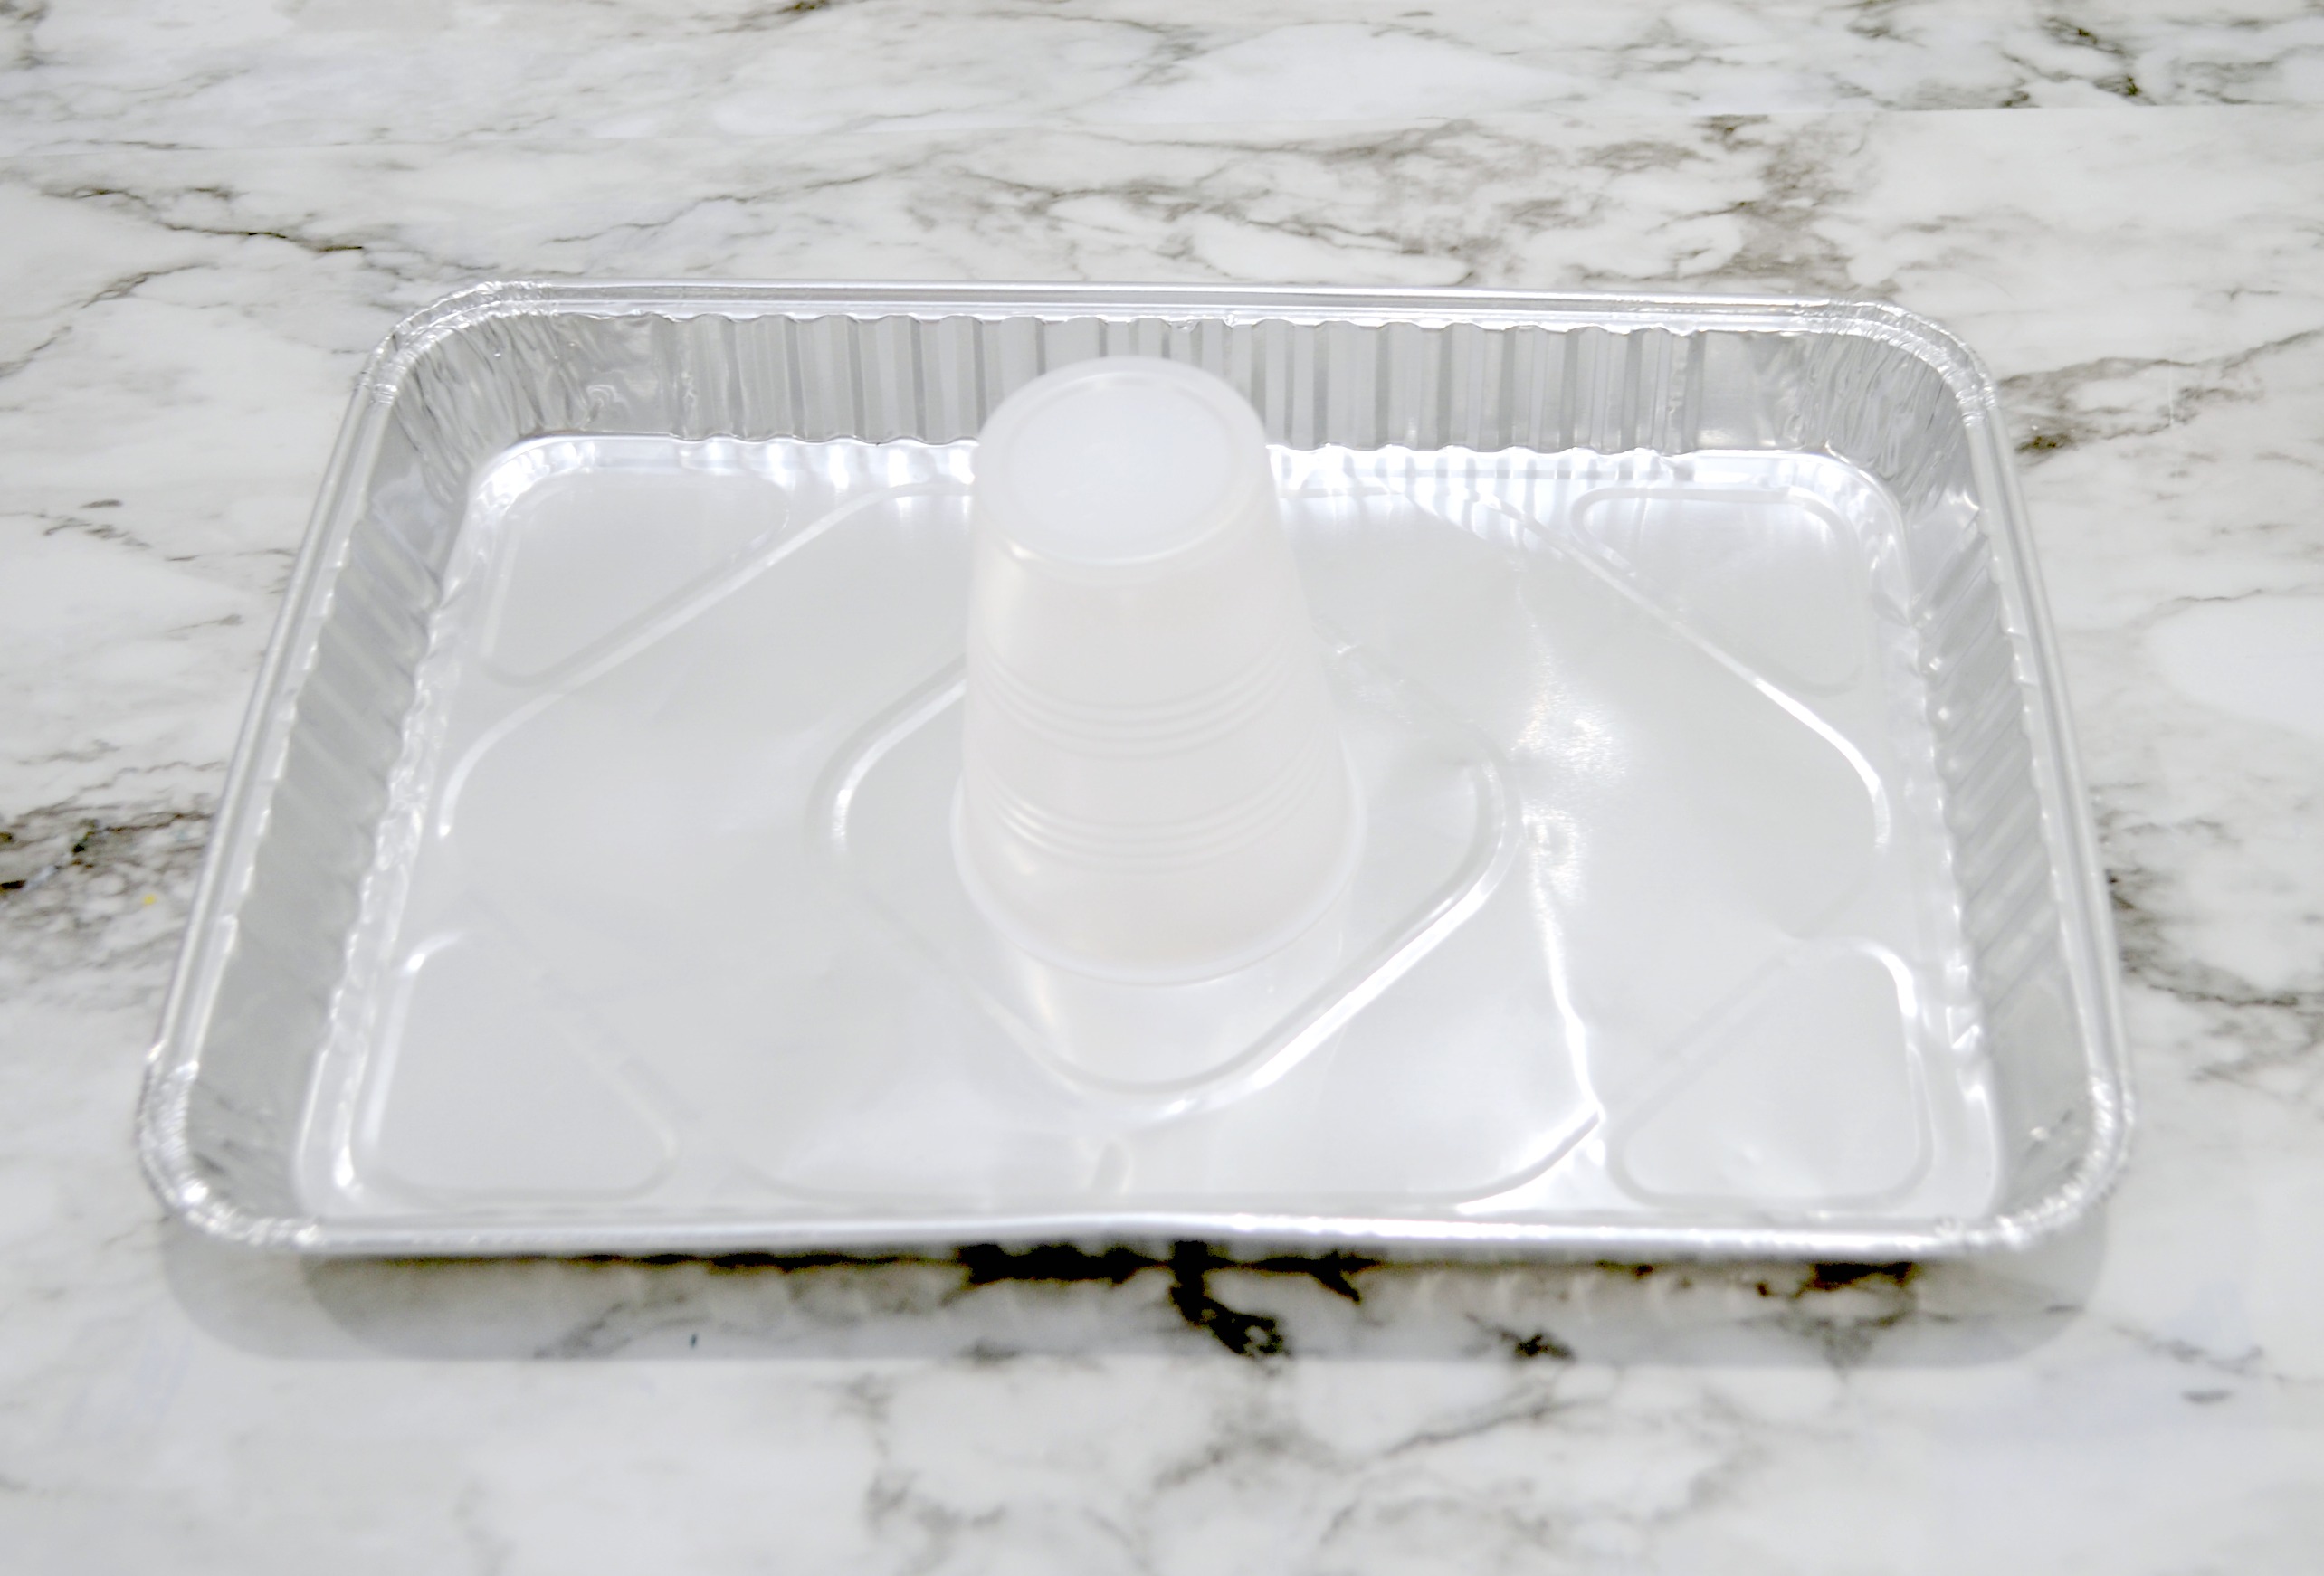
Step 1: Prepare your work surface and put on your gloves.
This is an incredibly easy project, but it’s also a messy one. After all, if it isn’t messy, it isn’t fun, right? To keep everything contained and allow for simple cleanup, I recommend placing a tray or a disposable baking pan on your work surface. Then, place an upside down cup in the center so you can sit your upside down flowerpot on top. This setup lets the paint cover the surface of the pot completely, including the top rim, with the excess dripping down into the pan.
If you don’t like using disposable materials, you can use regular trays, cups, and gloves, but keep in mind that afterward, they’ll need to be reused for craft projects only, not food prep.
Step 2: Spray the inside of the pot with a clear acrylic sealer.
This is a very important step, because if you don’t seal the inside, moisture and water from your plant can seep through the walls of the pot and blister the finish. I’ve had many flowerpots get ruined over the years because I didn’t know this trick. Make sure your pot is clean and dry before applying sealer.
Step 3: Squeeze 2-4 colors of FolkArt Marbling Paint into a cup.
Unlike regular acrylic paint, this marbling paint is specially formulated with a marbling medium added in so that the colors keep their original hue even when they’re layered and mixed together. You’ll want to avoid shaking the paint bottle, because that can create bubbles. Just squeeze the paint directly into the cup, layering the colors on top of one another until the cup is about half full.
Step 4: Pour the contents of the cup onto the pot.
As the paint starts to flow, you’ll want to pick up the pot and gently turn/tilt it to make sure the entire surface gets covered. If you have bare spots, you can repeat the process and pour a bit more paint on those areas.
Step 5: Let the paint dry completely.
Before it’s sealed, this paint WILL stick to things like countertops, tables, etc. even when it seems dry to the touch, so it’s best to keep it suspended over the tray for 24 hours then move directly to the sealing step.
Step 6: Spray with a coat of Mod Podge Clear Gloss Acrylic Sealer.
Once the sealer is dry, your flowerpot is ready to use!
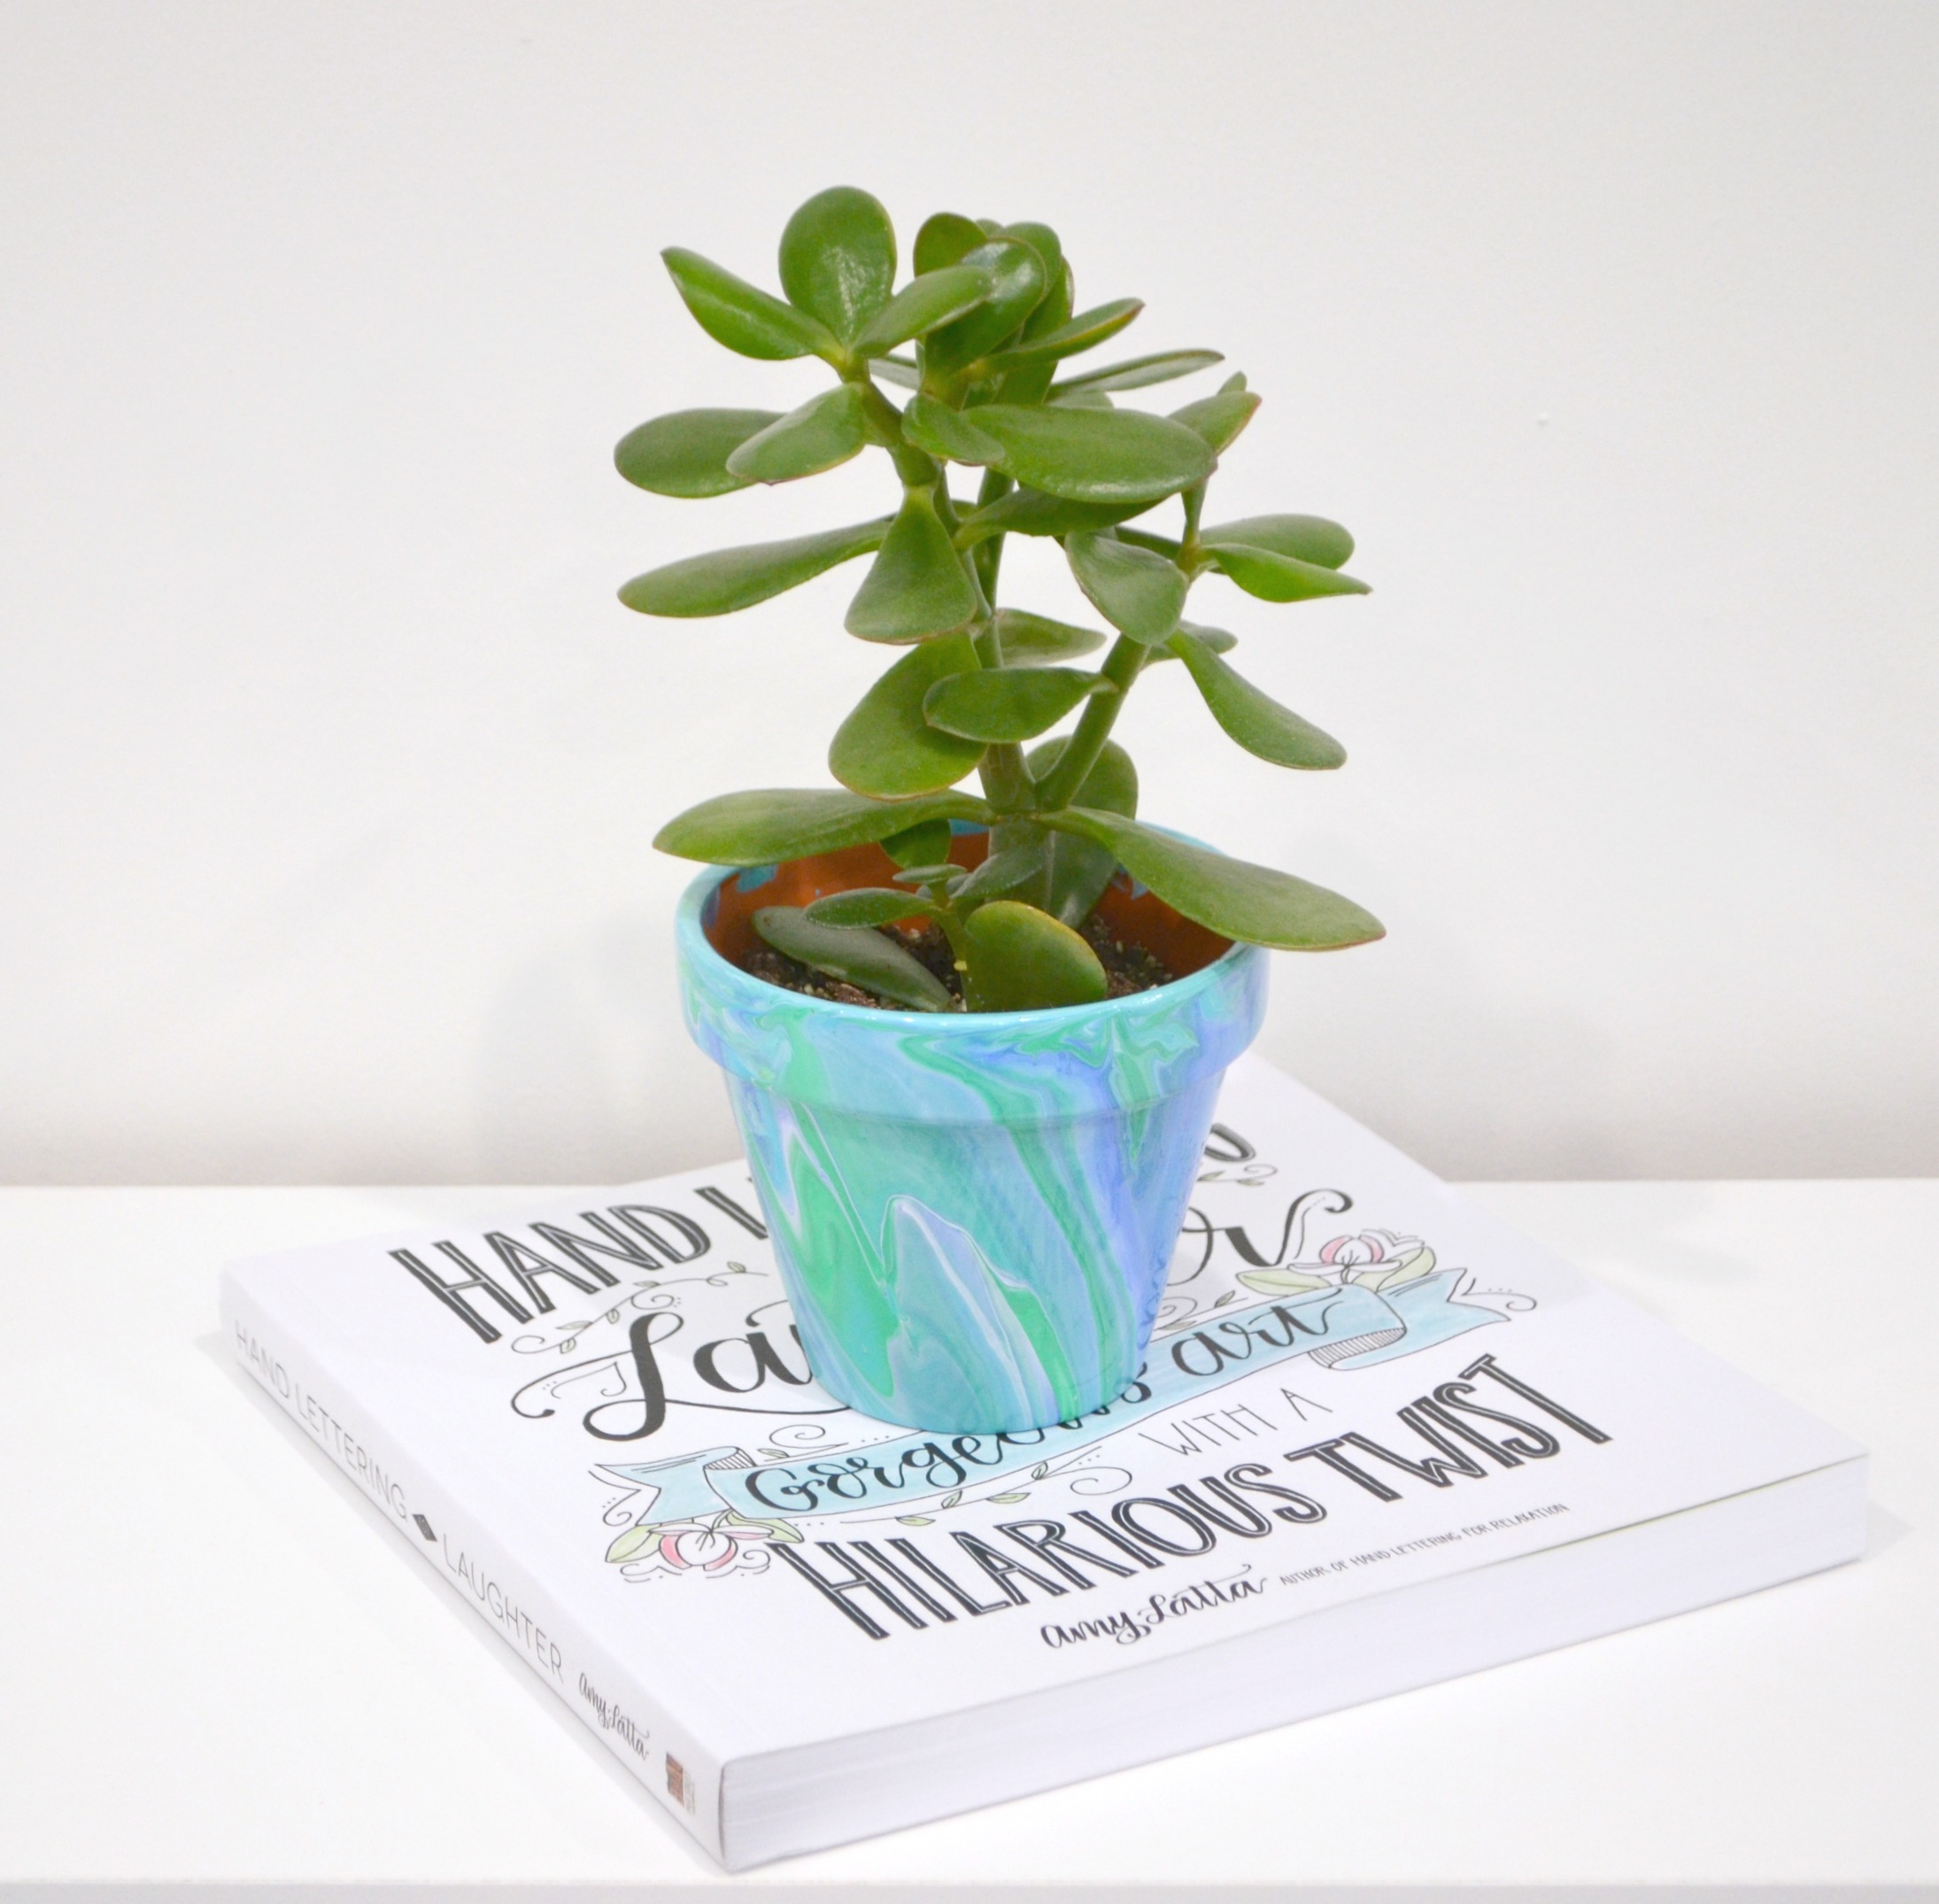
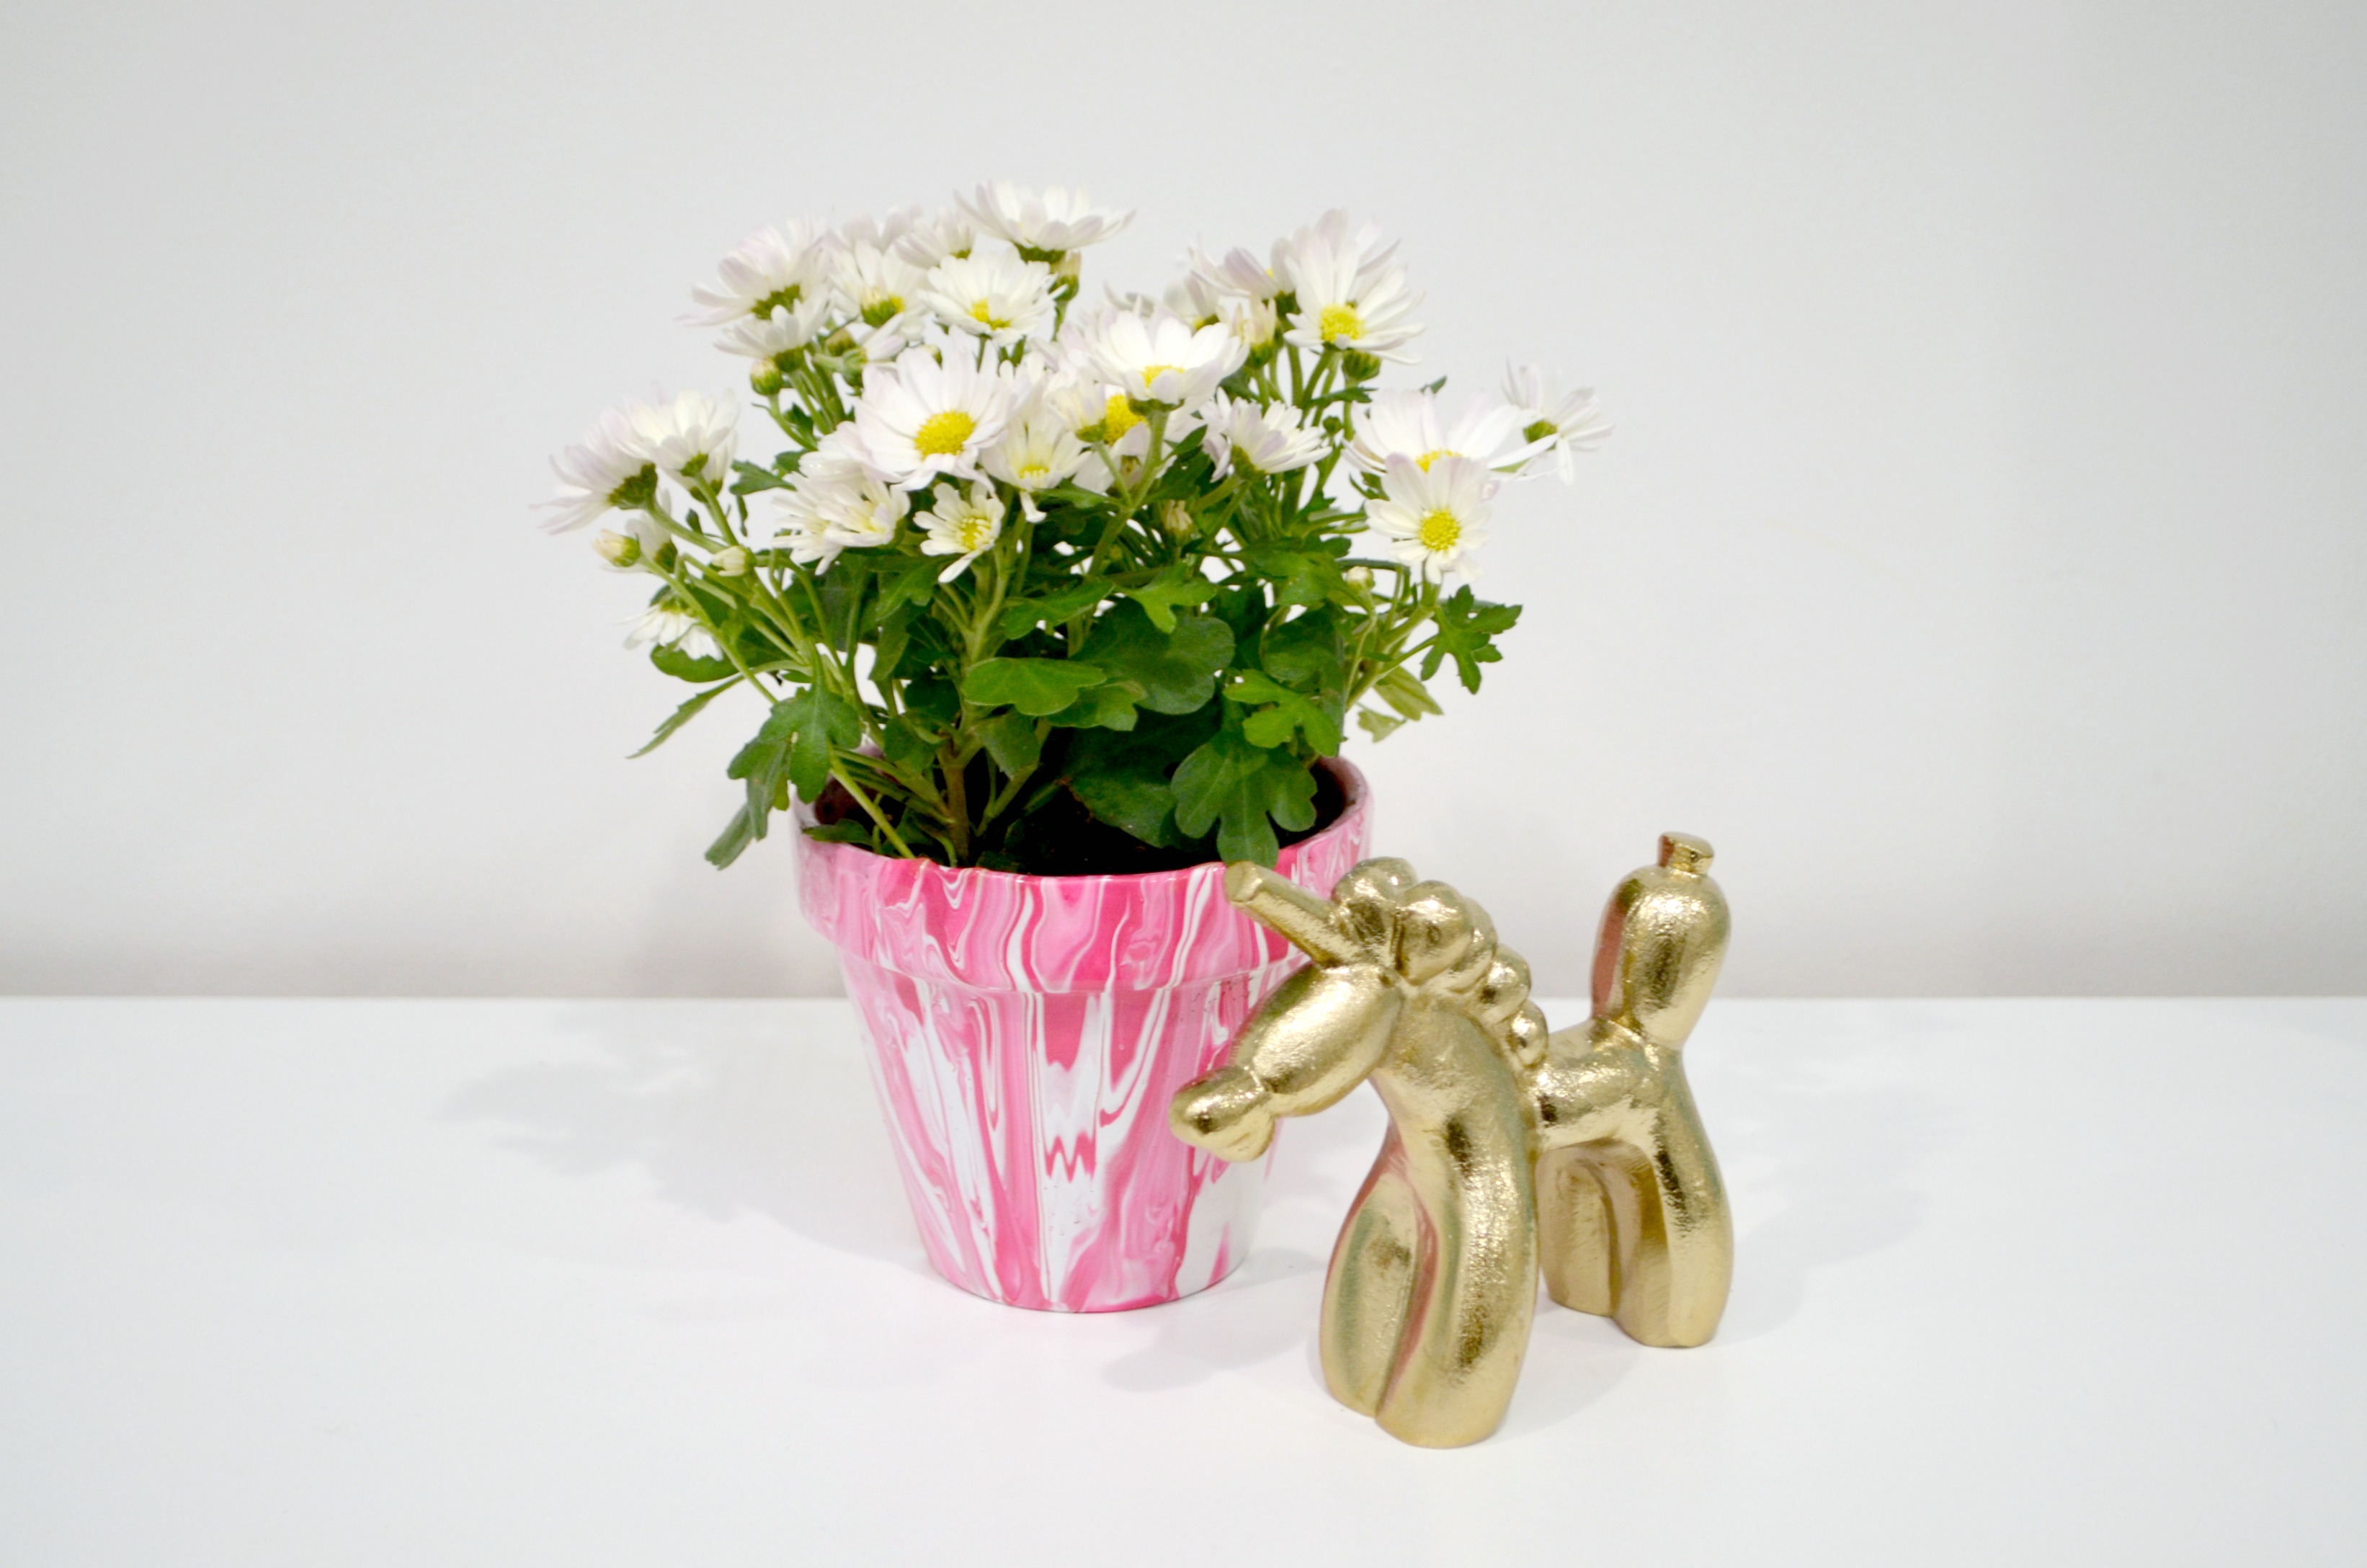
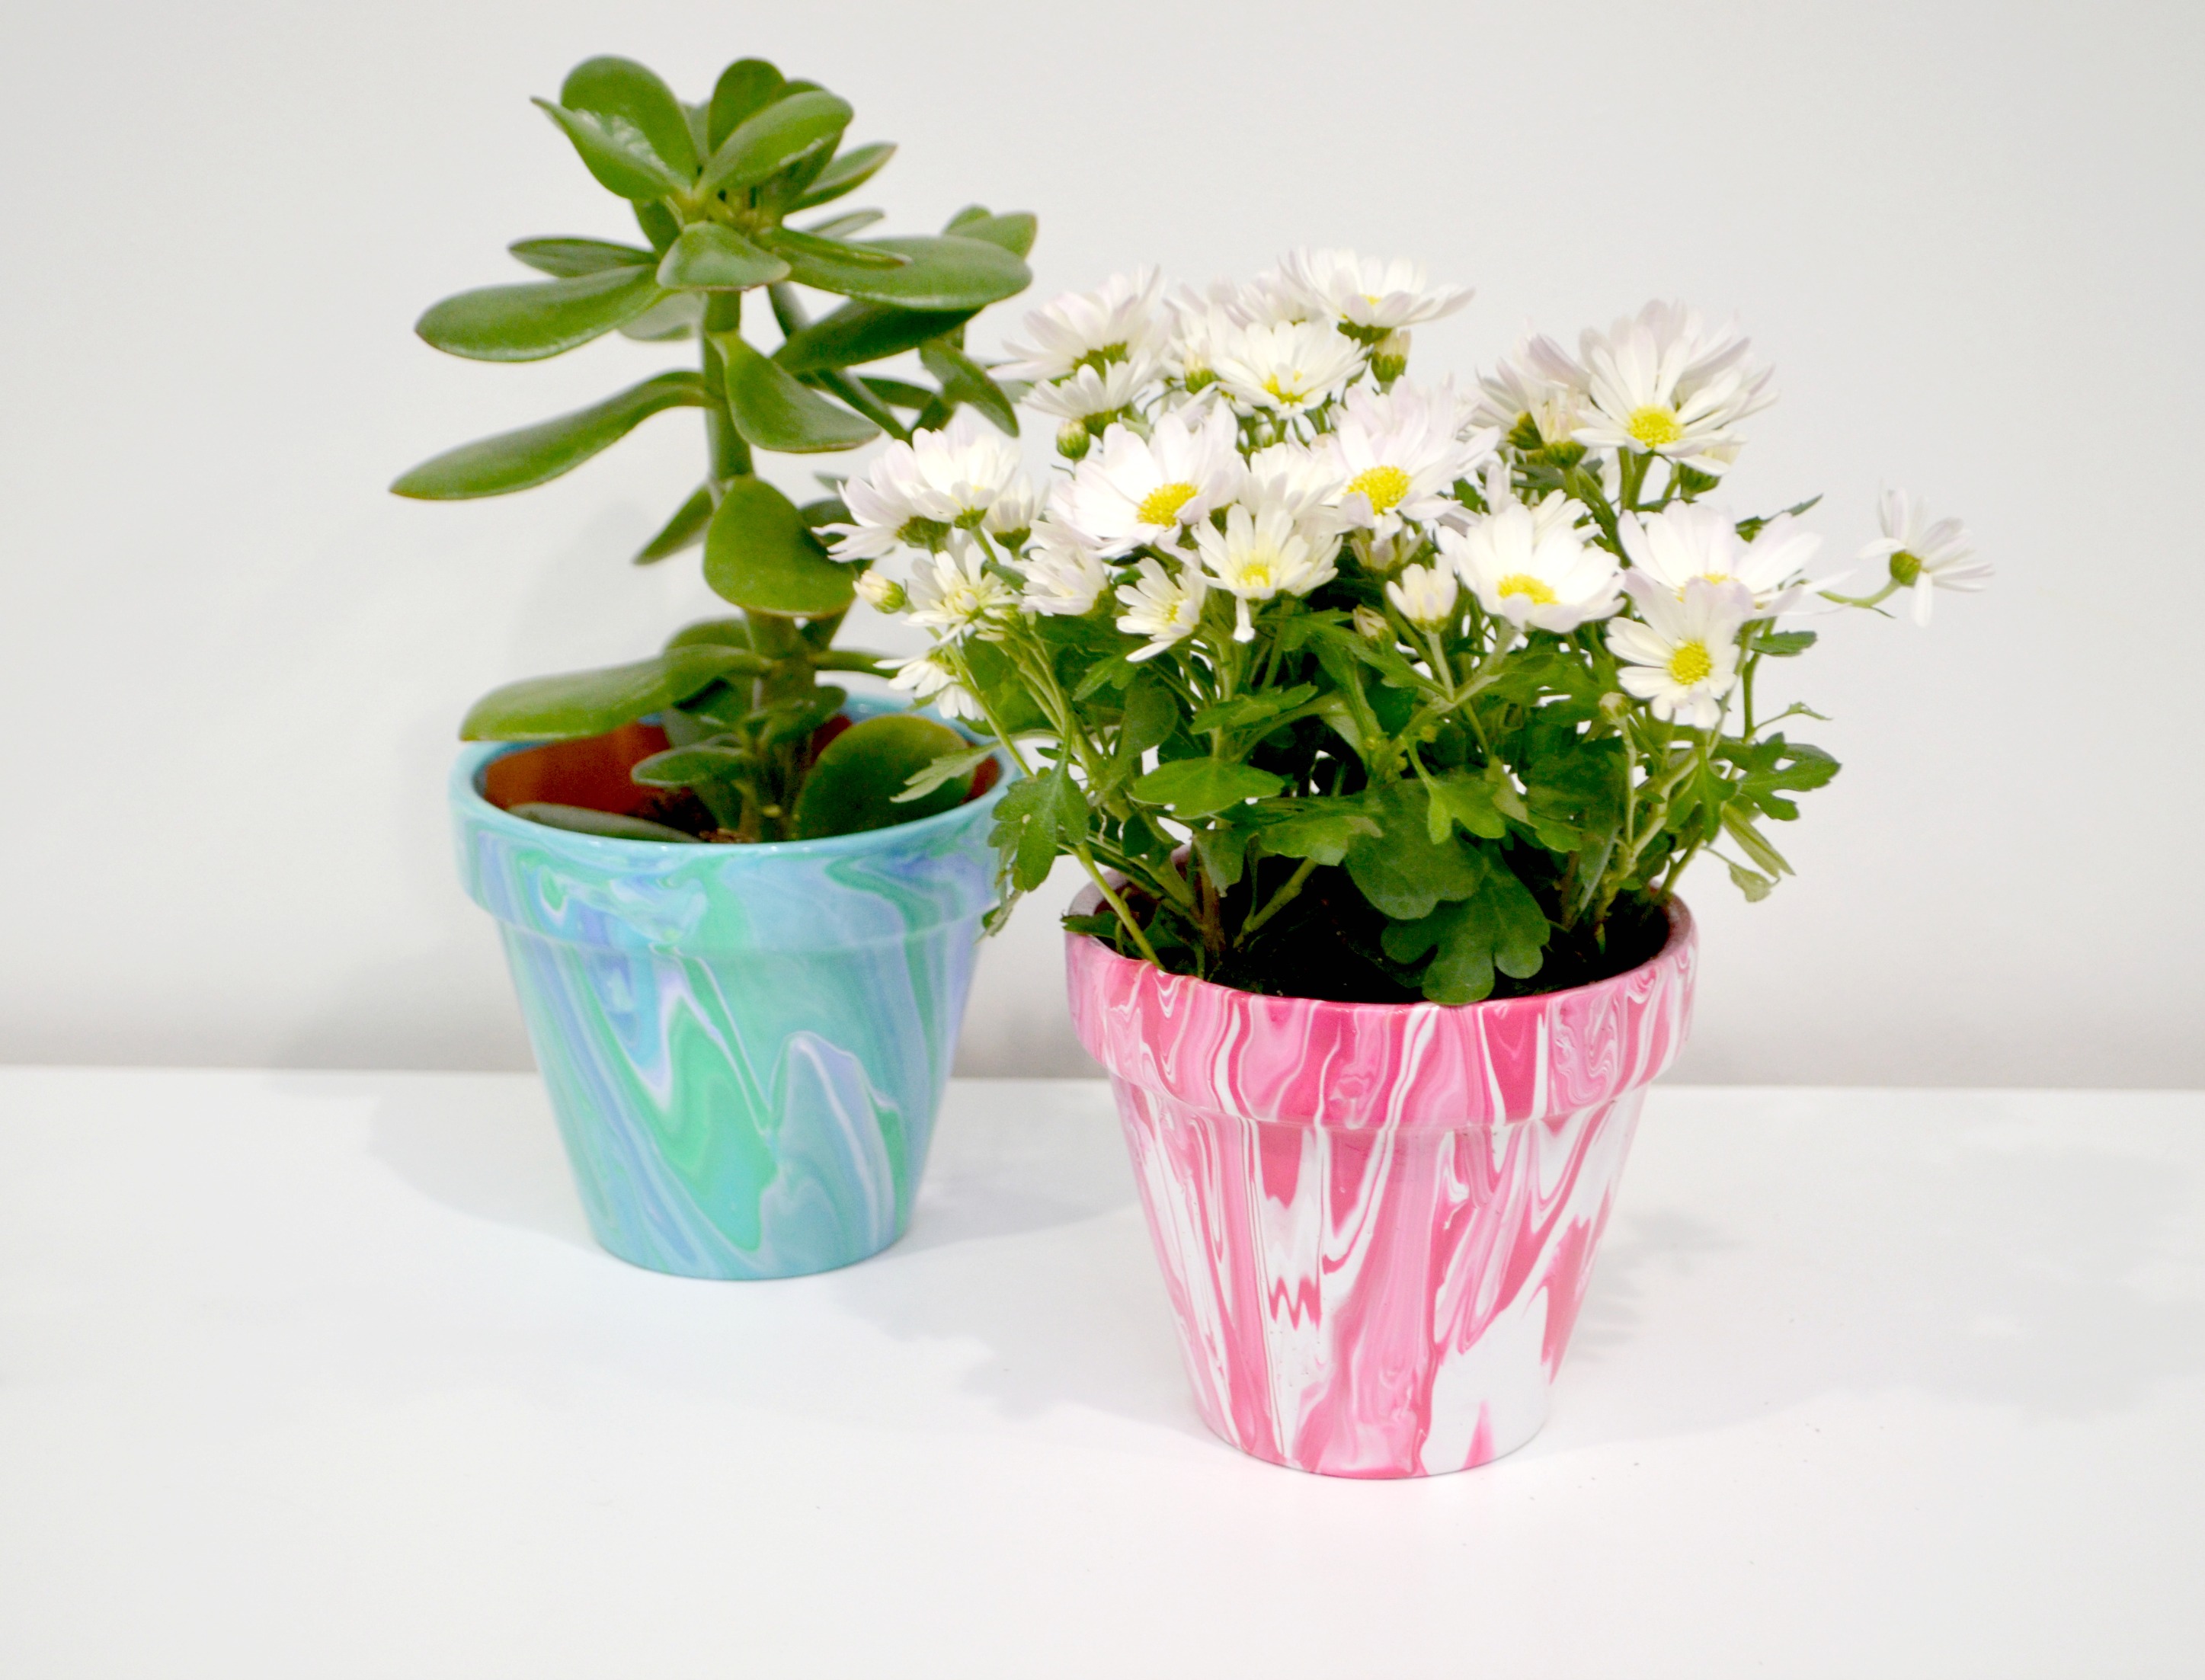
You can plant any kind of flowers inside, including cheerful spring blooms and hearty succulents.
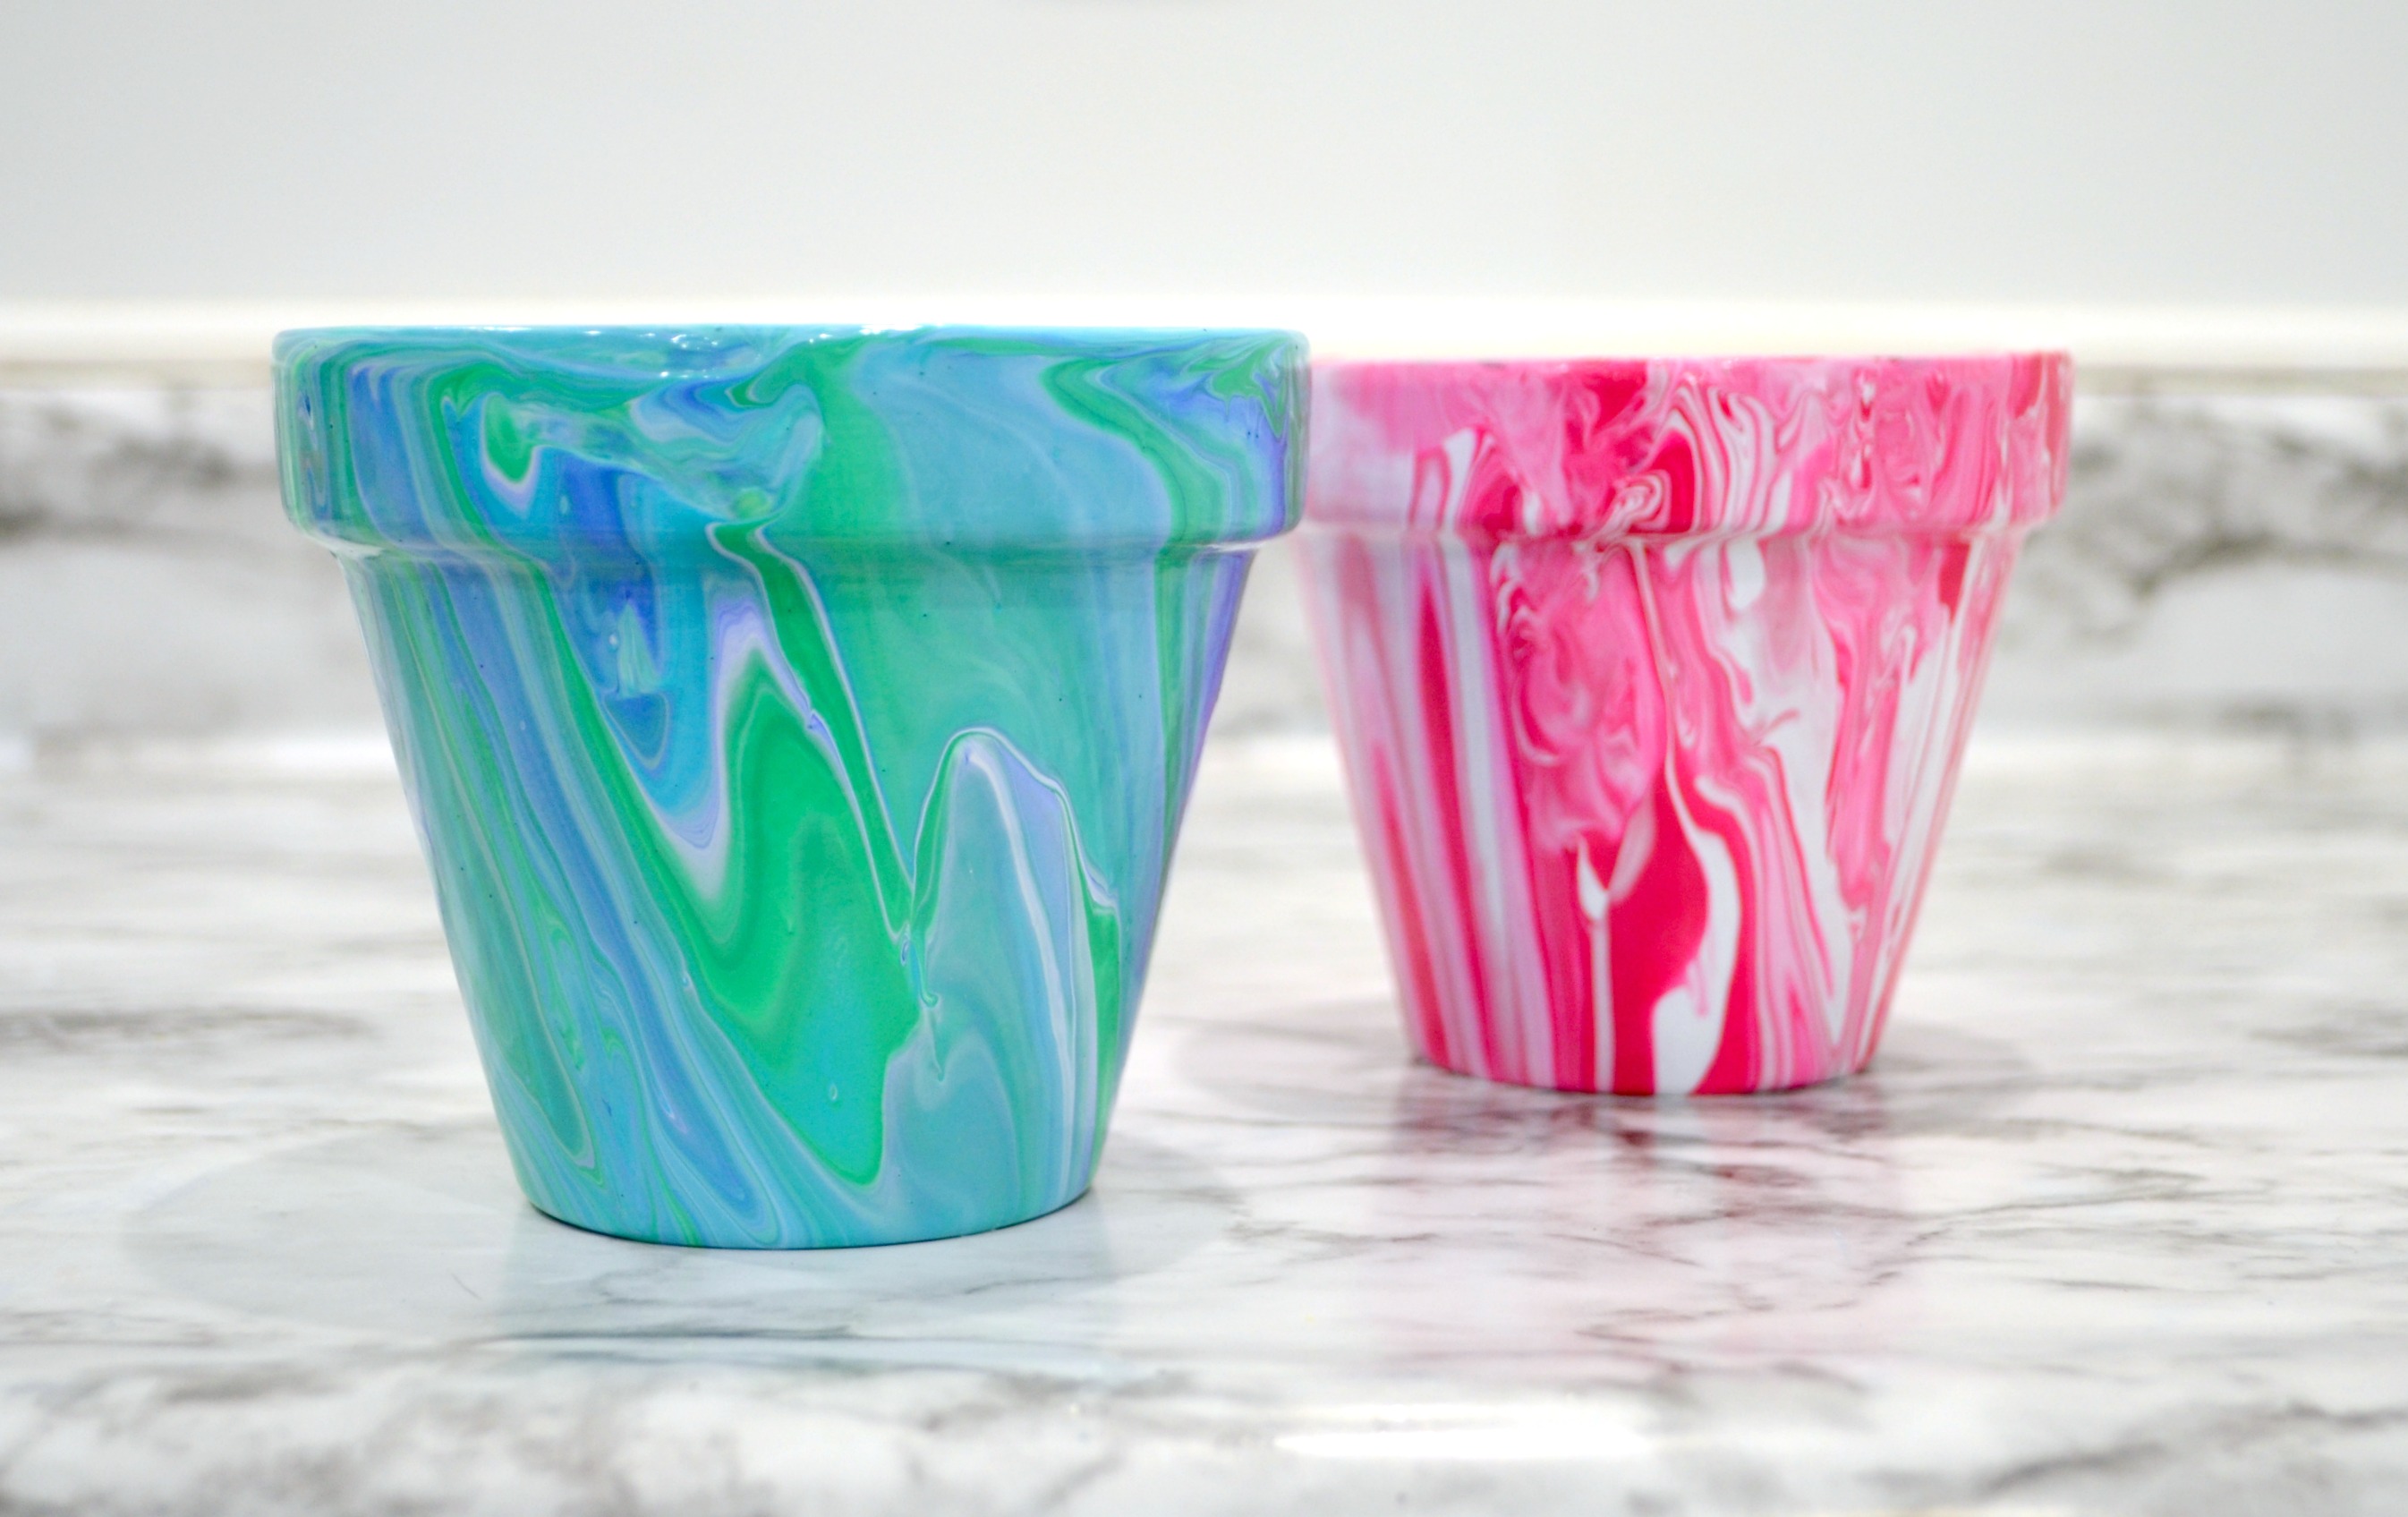
One of my favorite things about this project is that you get a totally unique result every time. It’s also fun to play around with different color combinations and see how they turn out. For one of my pots, I used blue, white, green, and teal, which created a gorgeous beachy feel.
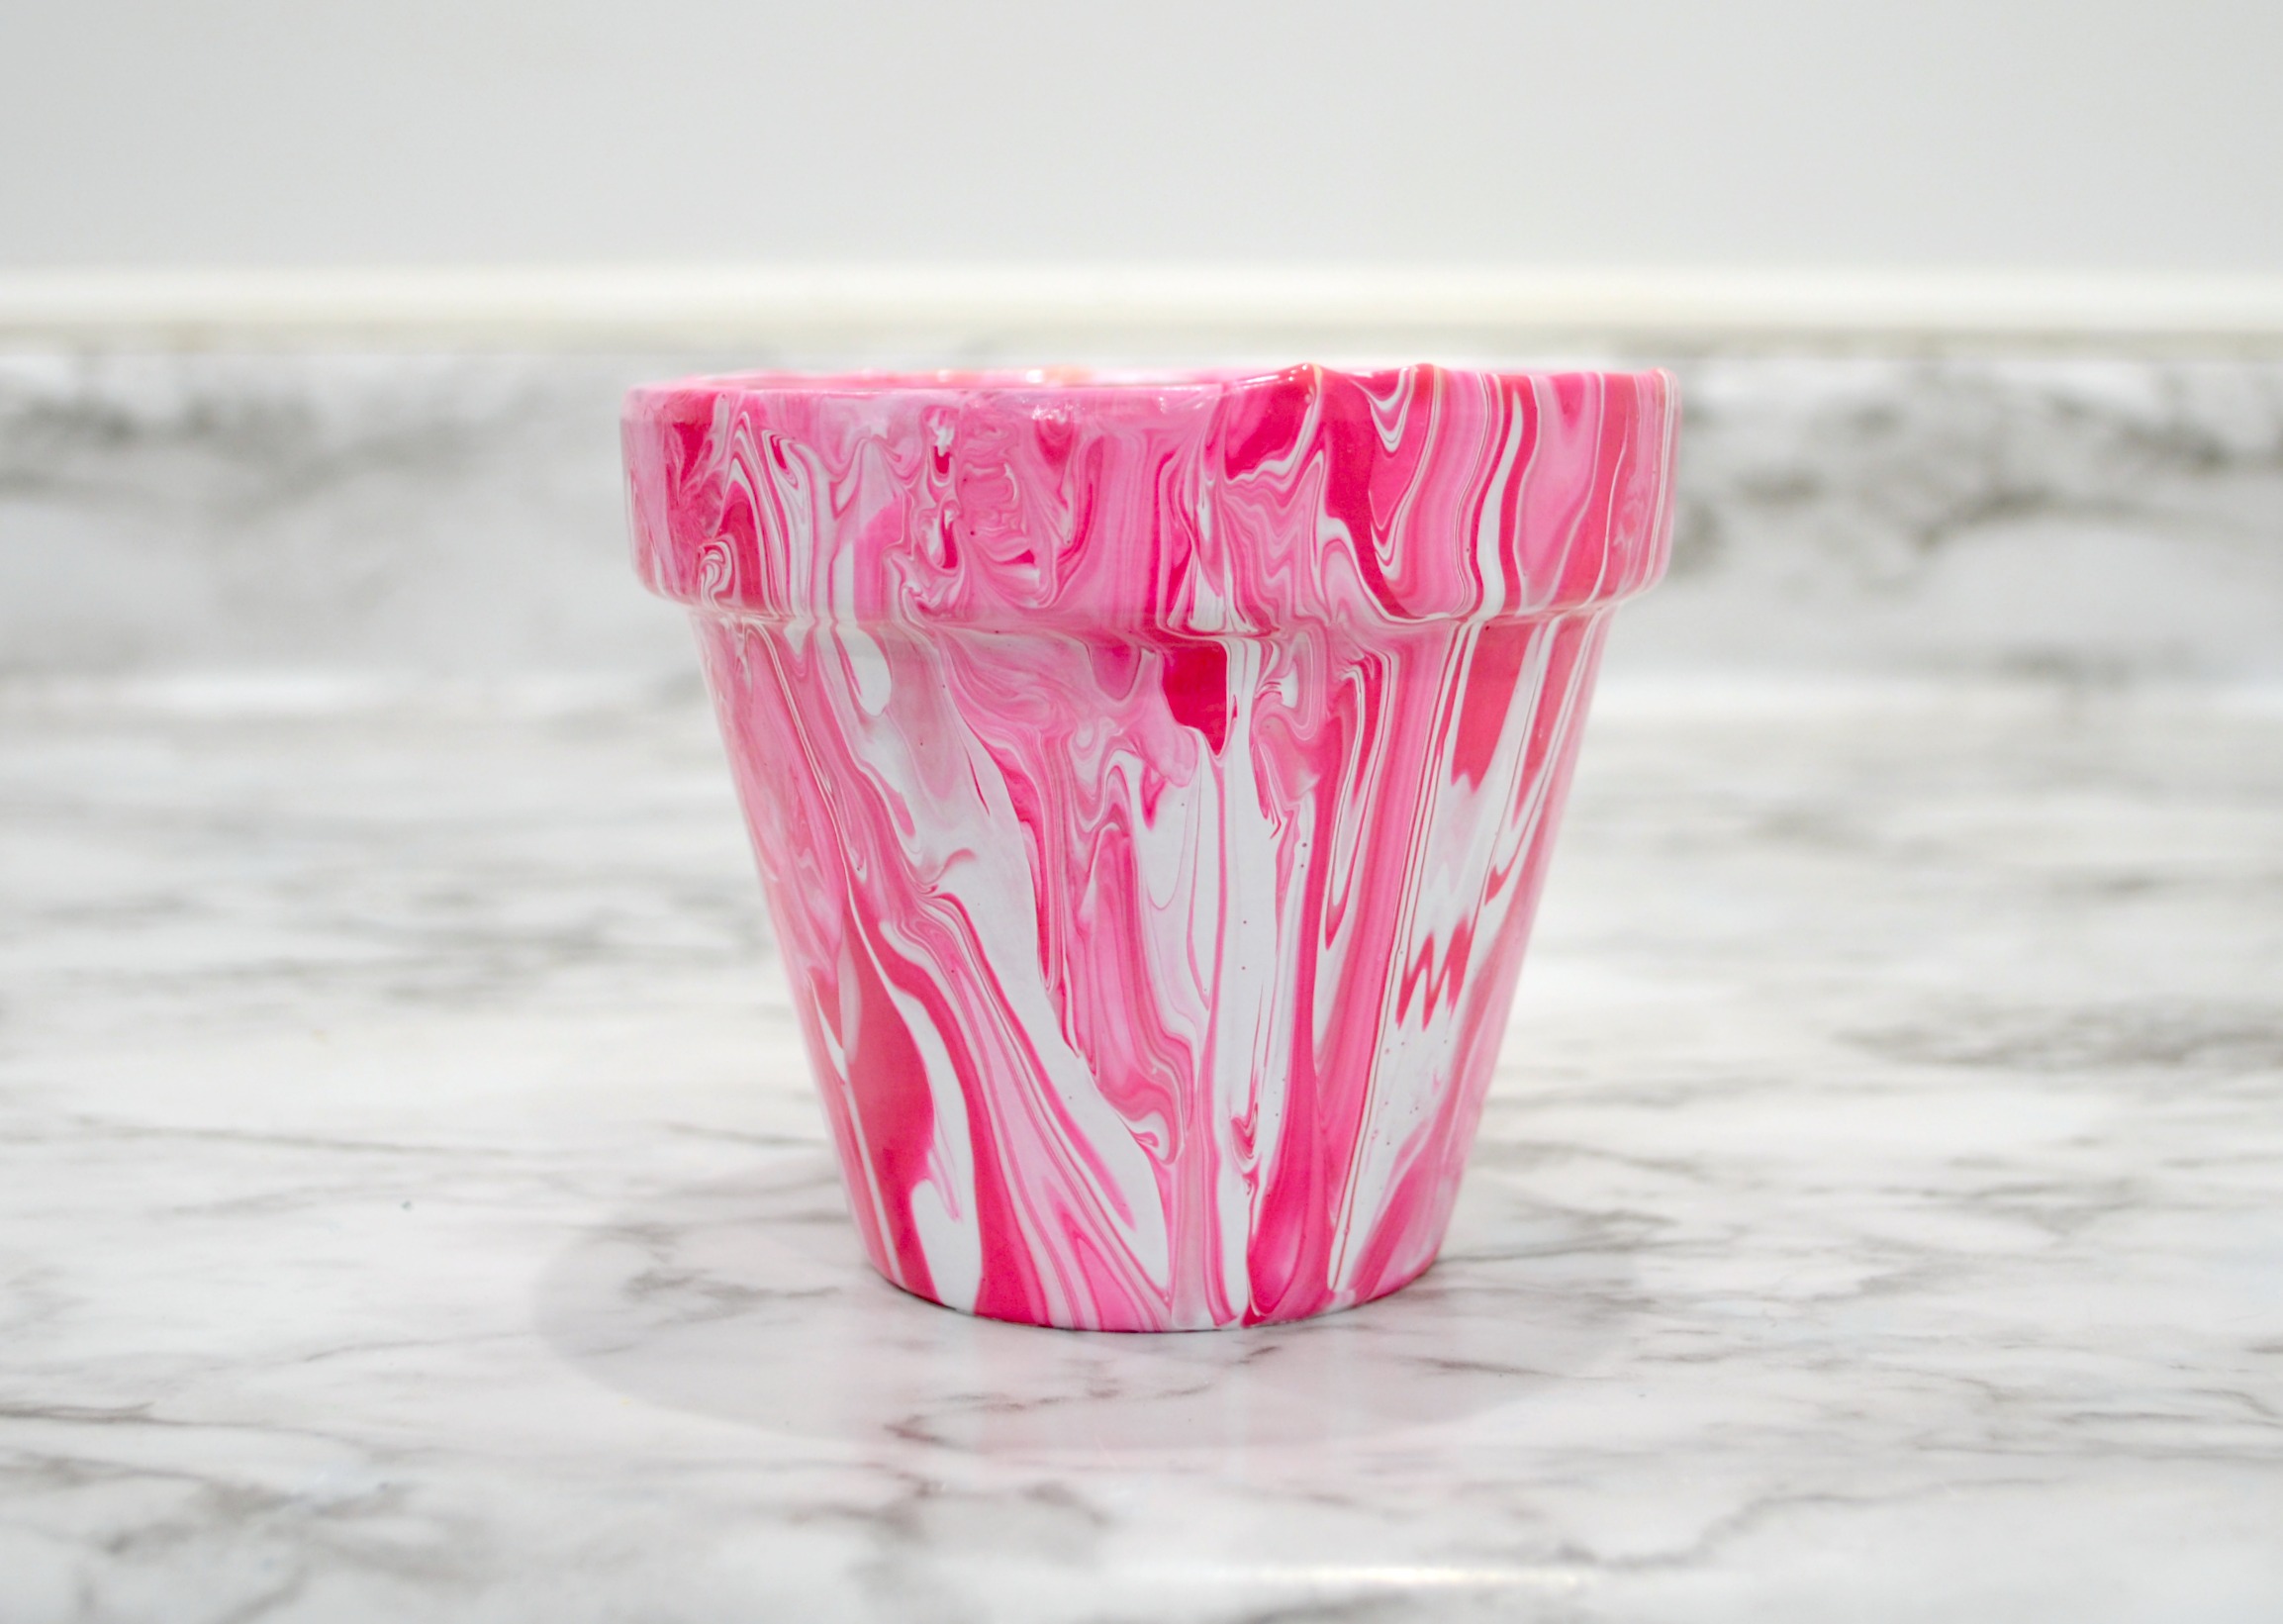
For the other, I only used two colors, pink and white, and I love how vibrant and cheerful it looks!
There’s no special skills or art expertise required, and even the youngest of crafters can join in the fun. Kids love messy projects, and this one lets them feel like they created something really professional looking. What do you think? What color combinations would you love to try?
Like this project idea? Be sure to put a Pin on it! Sharing is caring!