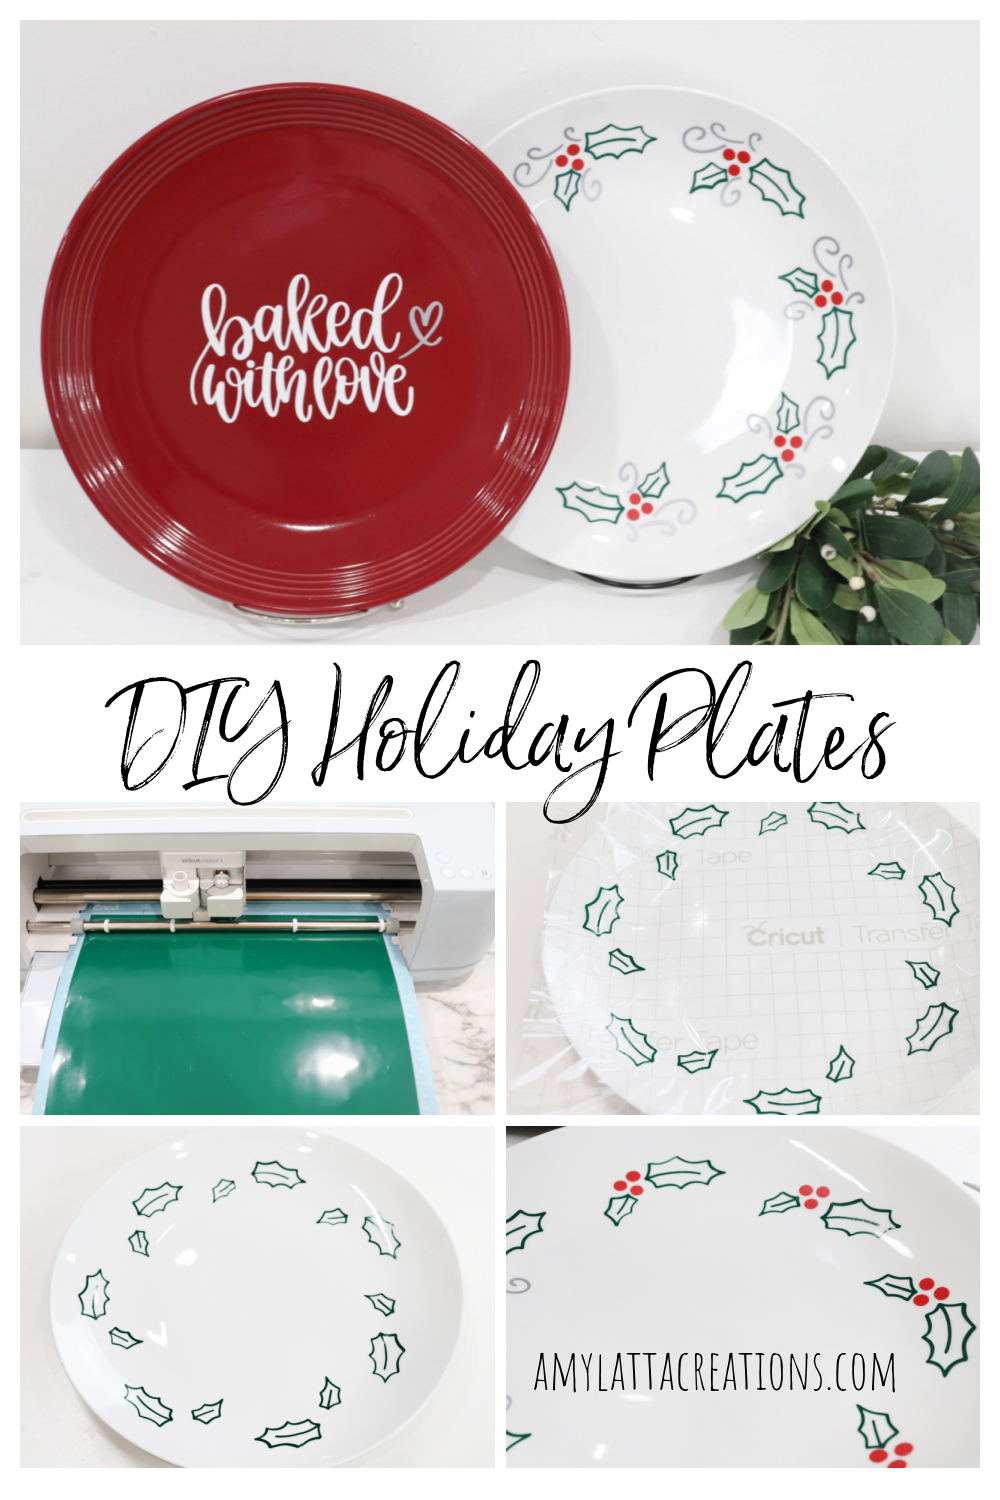
DIY Christmas Cookie Plates
One of our family’s favorite Christmas traditions is the Great Cookie Giveaway. We, along with several other families, all bake cookies, then get together for what seems like a typical cookie exchange. All the kinds of cookies are spread out around the table, and we load up plates with a variety of everything. The catch, though, is that we don’t take them home to enjoy. Instead, we team up and head out into the community to give them away. We share these cookies (along with thank-you cards) to folks in our town, including the volunteer firefighters, the police, the nursing home staff, the Boy Scouts working at the Christmas Tree Lot, the bell ringer in front of Walmart, and the teenagers working drive thru at our local restaurants. We also visit those we know are sick or shut in to give them some holiday cheer. It’s such a simple way to spread joy, and I like to take it a step farther by personalizing the cookie plates. Then, every time they see and re-use the plate, they are reminded that someone cares.
Whether you are doing a Cookie Giveaway, preparing for a traditional cookie exchange, or thinking about your family’s holiday tablescape, here’s an easy way to transform a plain plate into something special.
You’ll need:
Cricut electronic cutting machine (I used the Maker 3, but you can also use the Joy or Explore)
Permanent Vinyl (your choice of colors; I used White, Forest Green, Tomato Red, & Silver)
Burnishing tool (optional)
Scissors
Solid colored plate(s)
Personalizing Your Plate
Step 1: Choose a design & prepare it in Design Space.
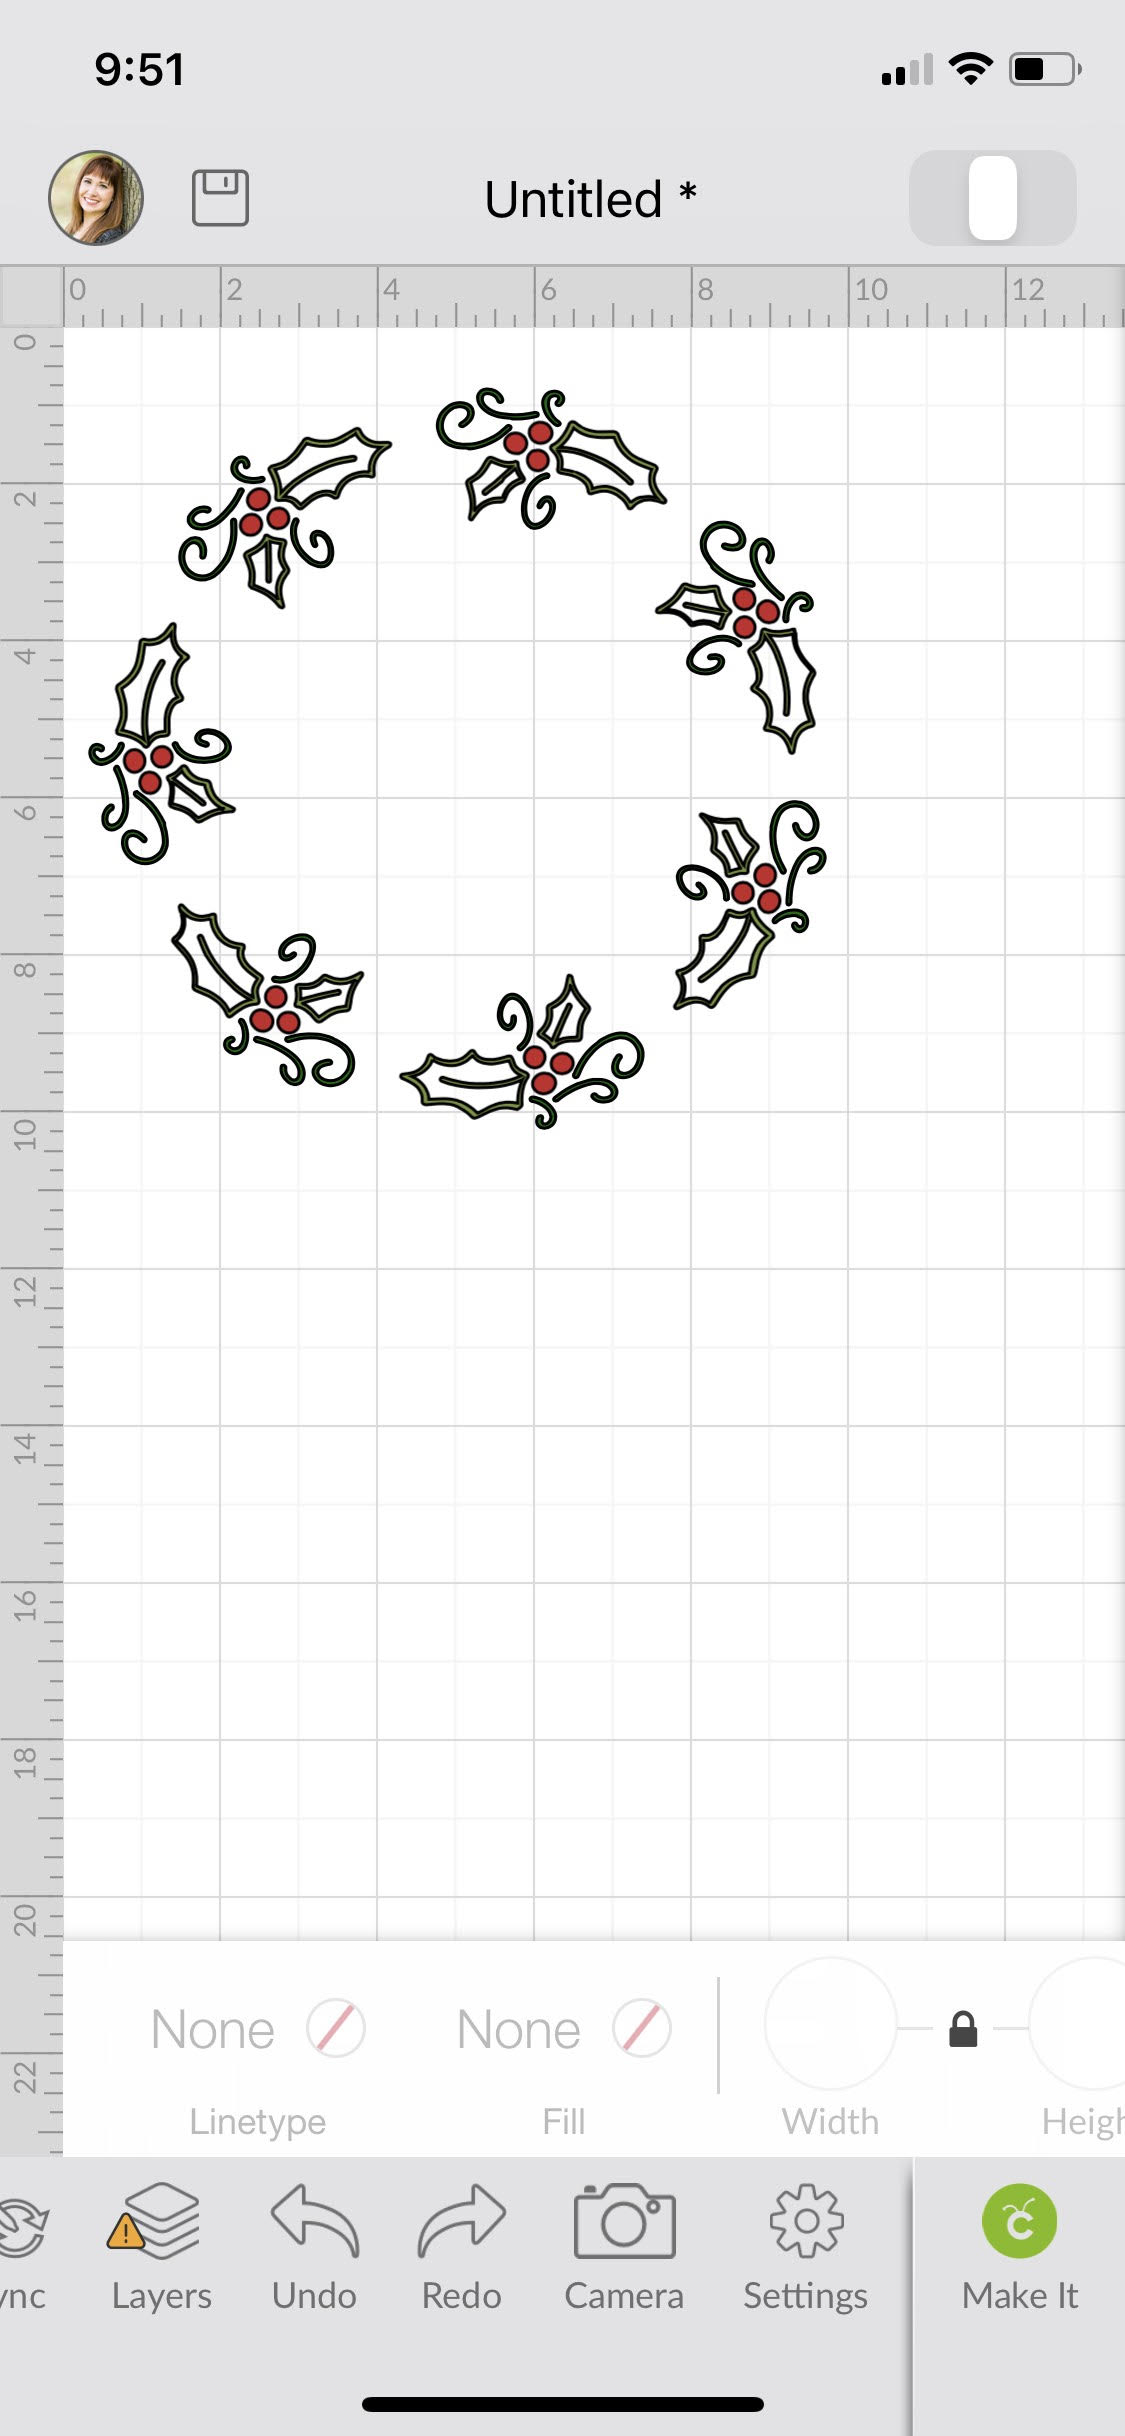
Cricut’s app, Design Space is loaded with all kinds of holiday images and phrases to choose from. Browse them all, or search by a word or image type you have in mind. Once you find what you like, insert it onto your canvas and size it to fit your plate. Then, select “Make It!”
(The image I used for this plate is “Holly Berry Wreath #M8B37055)
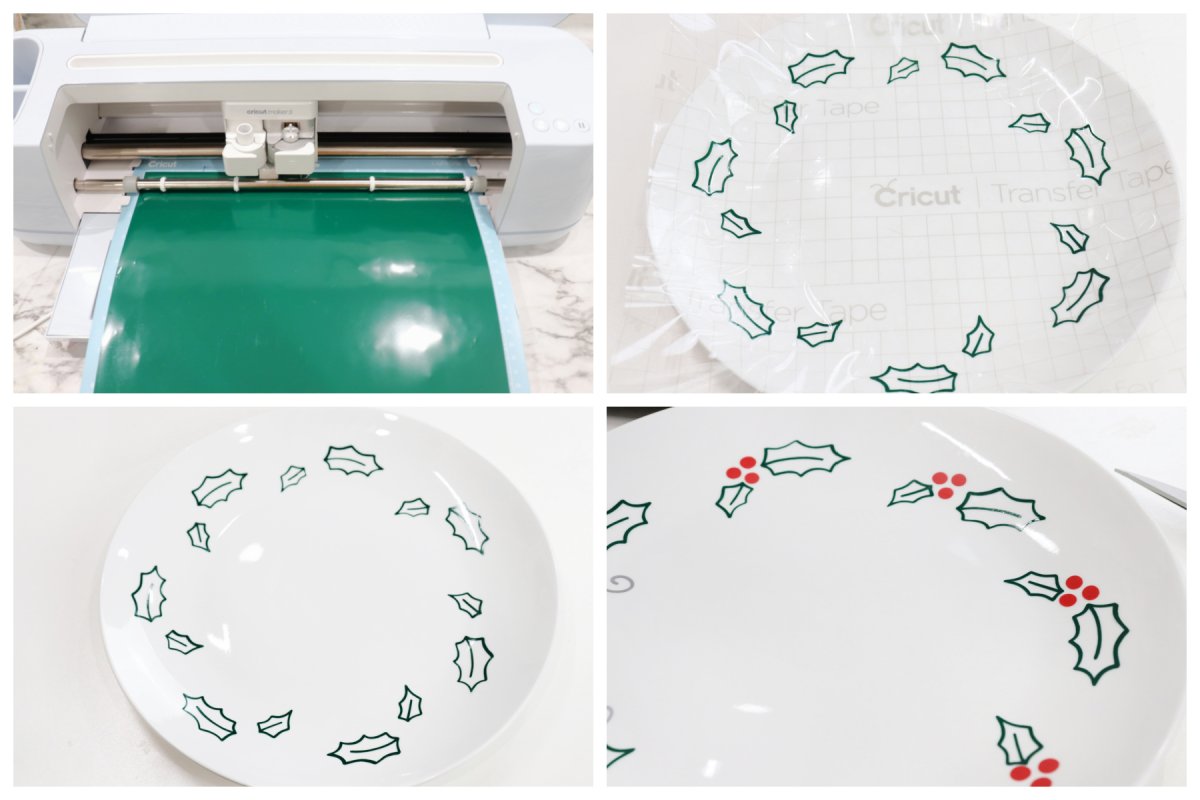
Step 2: Follow the prompts to load vinyl into your machine and let the Cricut work its cutting magic.
For a multi-color design like this one, the software will automatically sort the cuts into the different colors of vinyl. It will prompt you to load the first color, make those cuts, then prompt you to load the second color, and so on until all the layers are cut.
Step 3: Weed your vinyl.
That means peeling away everything that is not part of your design.
Step 4: Apply Transfer Tape.
Place a sheet of clear adhesive transfer paper on top of your weeded design and rub firmly. Pull the transfer paper up and the design should peel away from its backing. This allows you to move the vinyl to your plate while keeping the spacing of each leaf, berry, etc. exactly the same.
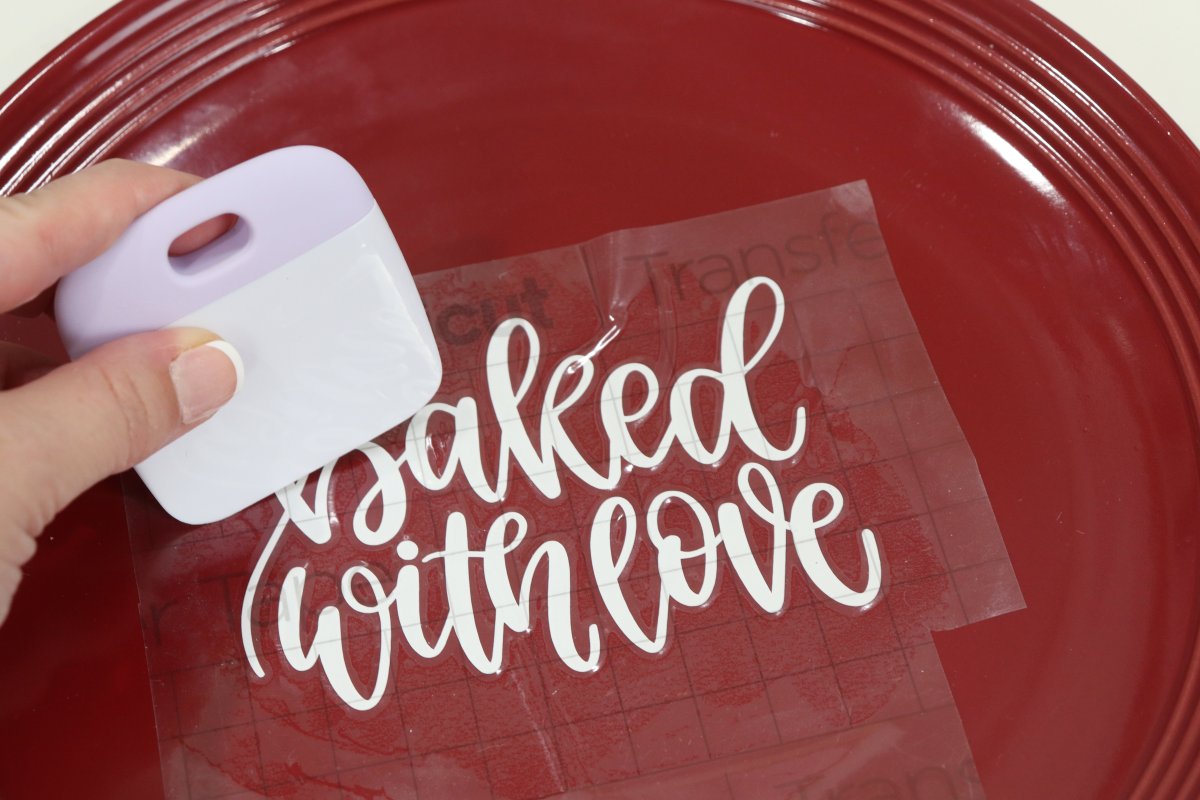
Step 5: Place your design on the plate.
Use a burnishing tool or other firm (but not sharp!) object to rub the vinyl areas. This will help them adhere to the plate. Then, gently peel away the transfer paper, leaving the vinyl on the plate.
Repeat this process for all the layers of the design until your plate is complete!
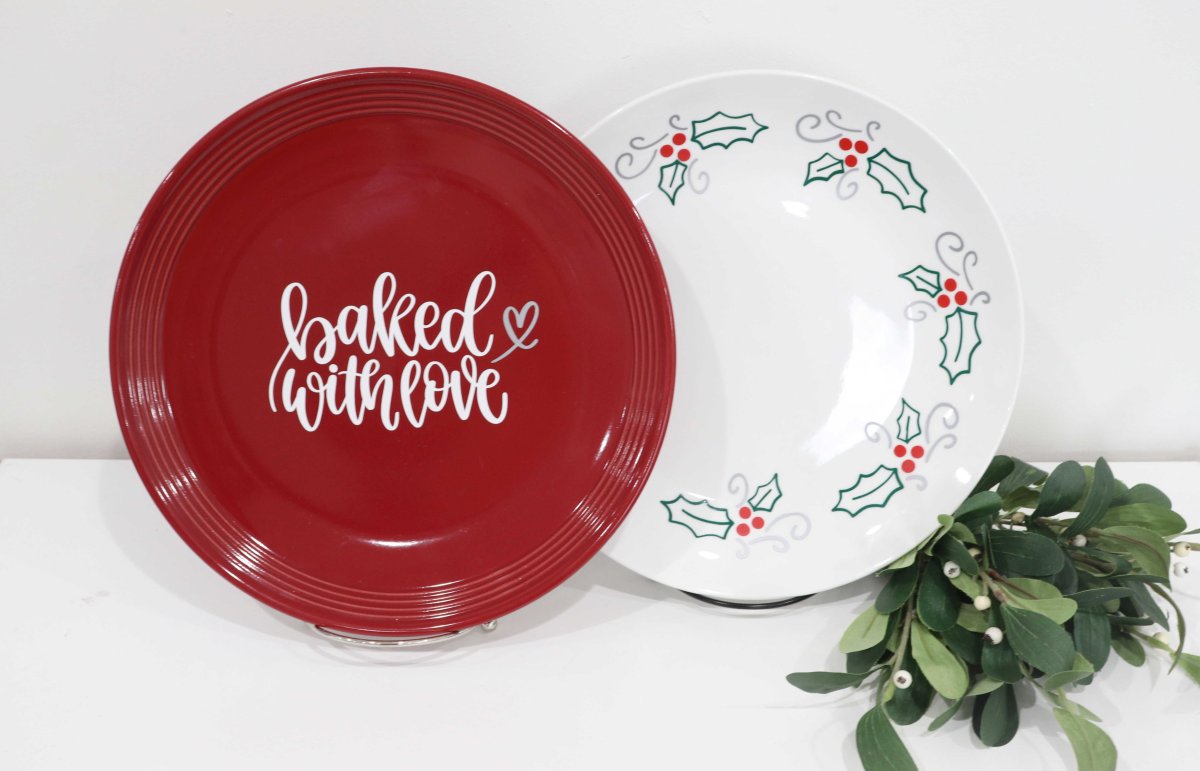
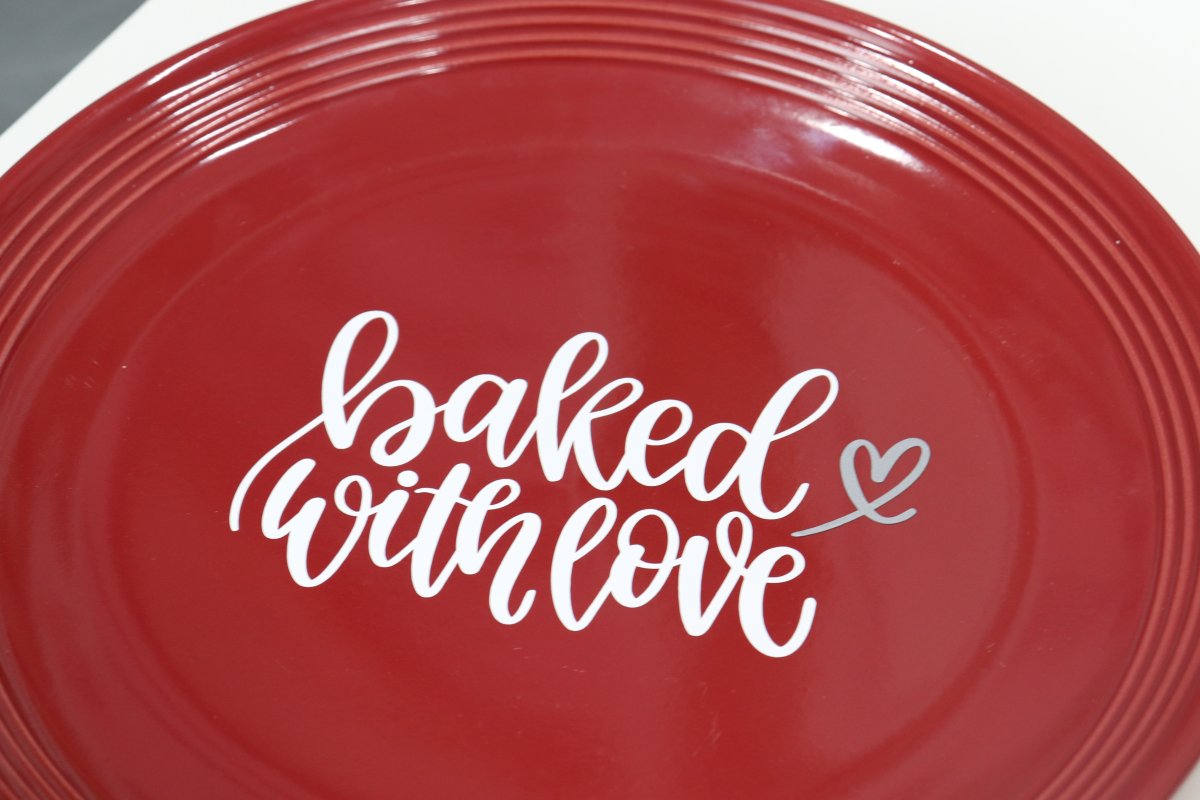
Simple, one-color designs like this “baked with love” phrase will take only a few minutes to transfer, while multi-layered images will take a bit more time and effort.
You can personalize the center of the plate, the border, or both! The best part is that unlike when you use permanent markers to draw on plates and mugs, this is a food-safe option. You can actually eat off of your plates with no worries. I recommend hand-washing, but I’ve also been known to put this permanent vinyl through the dishwasher in a pinch and it turned out okay.
This is such a simple way to add a special message or a festive touch to an otherwise plain plate, and you can also follow the exact same process to personalize a mug, a tray, a bowl, or any other tableware. If you try this project, I’d love to see what you create! Be sure to join the Amy Latta & Friends Facebook Group and share your project photos so we can all be inspired. Hope to see you there!
Check out my other holiday DIY ideas here; scroll down to Thanksgiving and Christmas and there are tons of projects for the whole family.