Marbled Sculpey Cabochon Pendant
Friends, it has been seriously busy around the Artsy House these past few weeks. Between the end of the school year, performing in a local production of the Sound of Music and choreographing a children’s Summer Music Camp, I’ve had more things to do than time to do them. The unfortunate side effect of all the busy-ness is that it had been way too long since I’d created anything…which eventually makes me feel grumpy and sad. So, Wednesday afternoon, Little Crafter and I pulled out some clay and decided to have some fun. Here’s one of the things we created.

TIME REQUIRED: 10 min to make, 30 min to bake
SKILL LEVEL: easy/beginner
SPECIAL TOOLS/SKILLS: Sculpey cabochon mold
Materials:
Thanks to our friends at Sculpey Polyform for providing the clay and molds we used!
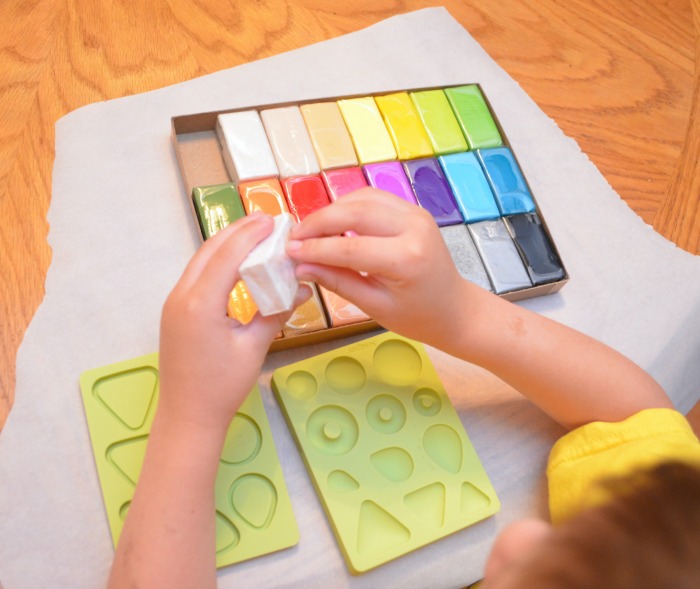
– Sculpey Cabochon Mold
– Sculpey Polyform Clay {we used the Premo! Sculpey 24 Color Sampler Pack}
– parchment paper
– baking sheet
– oven
– jewelry bail and necklace chain
– super glue
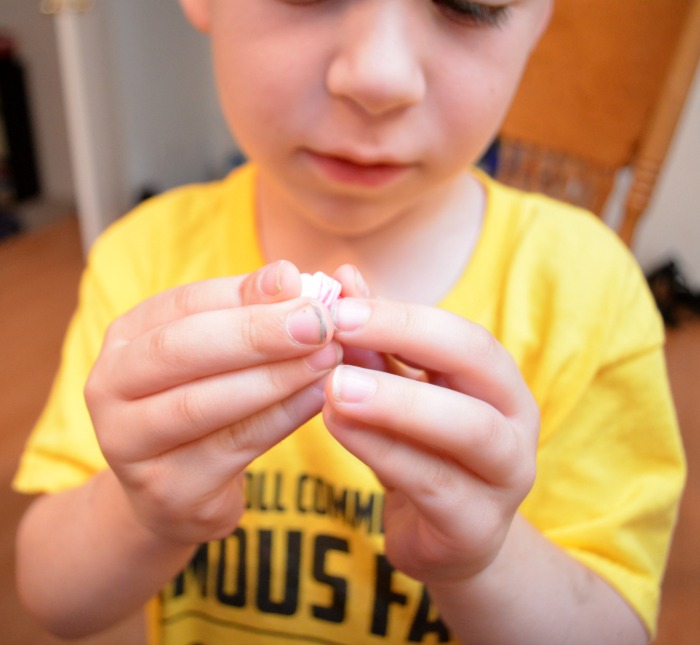
Step 1: Choose the colors for your pendant and mix them together. Little Crafter loved this part. The pendant featured in this post is a mixture of Purple and Fucshia. We did lots of different color combinations, many of which I’ll be showing you in upcoming posts. You can thoroughly mix colors to create a new color, or you can mix them just enough to create a design like we did with the Purple and Fuchsia.
Step 2: Place your clay into the cabochon molds. You can see a sneak peek of some of our other pretty creations here! Make sure that you press firmly to totally fill the mold. You can level off the back with a knife to make sure it’s flat.

Step 3: Bake according to package directions. You just place the mold right on the baking sheet and put the whole thing in the oven. For the Premo, you bake at 275 for 30 minutes per 1/4″ thickness. I baked my tray for half an hour.
Step 4: Once the mold is cool, pop out your cabochons and glue them onto bails. Add a chain, and your necklace is ready to go!

It was seriously SO easy to do…Little Crafter made several of the cabochons all by himself…and I’m loving the way they turned out! Be sure to come back soon to see more of our finished products!

Until then, happy creating!

Aww…I love that this is a jewelry project even the little ones can help with!
This is so fun and CUTE! I have never used this medium before but looks super fun! Amy, is there a product that you would recommend to “coat” the baked clay in to give it a glossy effect?
Love it…Great color
I love the swirled colors! It’s so unique- you won’t find that in Target 🙂
Oh how cute and easy. Perfect summer boredom buster for my daughter.
so pretty! I love how shinny it is! I played with scupley clay for hours when I was a teenager… It was awesome!!
I’ve been hooked on clay this week too! Love how these turned out, I have to pick up one of those molds!
I’ve seriously got to get my hands on this clay!! So cool and love how it turned out!
Love the molds you used! What a great way to introduce kids to polymer clay!
I love the marbling a lot – looks so good!
Really pretty Amy! Those molds look awesome!
So pretty! Love the marbling effect!
This looks great. I have some clay and a small oven, but I haven’t done much with either.
I’d love to have you visit my very first give-away if you have time. Have a blessed week.
So cute, and a great project for kids!
I love mine. I receive many compliments each time I wear it. Love telling people my Grandson helped to make it. 🙂