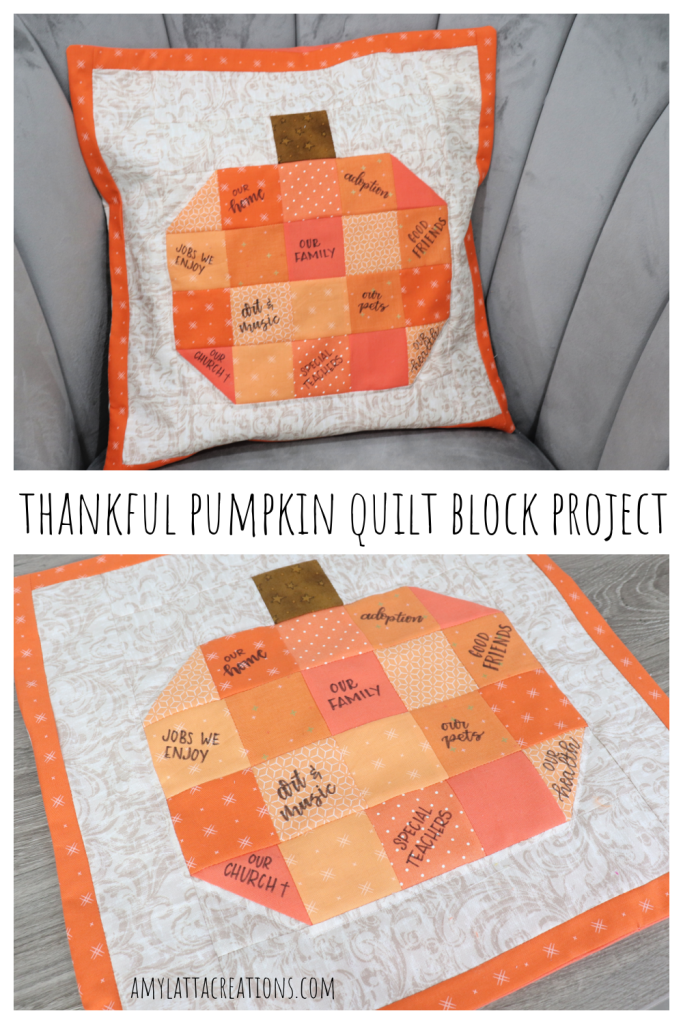
Thankful Pumpkin Quilt Block Project
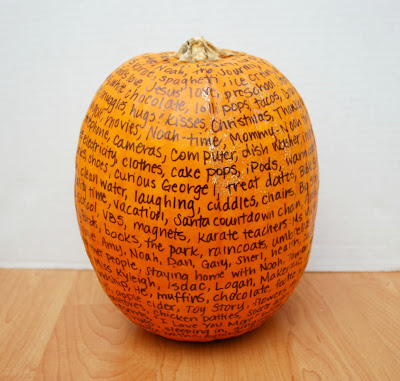
Ten years ago, I created a little project called the Thankful Pumpkin to help our family focus on gratitude. We simply took a permanent marker and covered a pumpkin by writing down the many blessings in our lives. Much to my surprise, the idea went viral (even the Today show did an article about it!), and I absolutely love the idea that so many families and groups all over the country now include this in their November traditions!
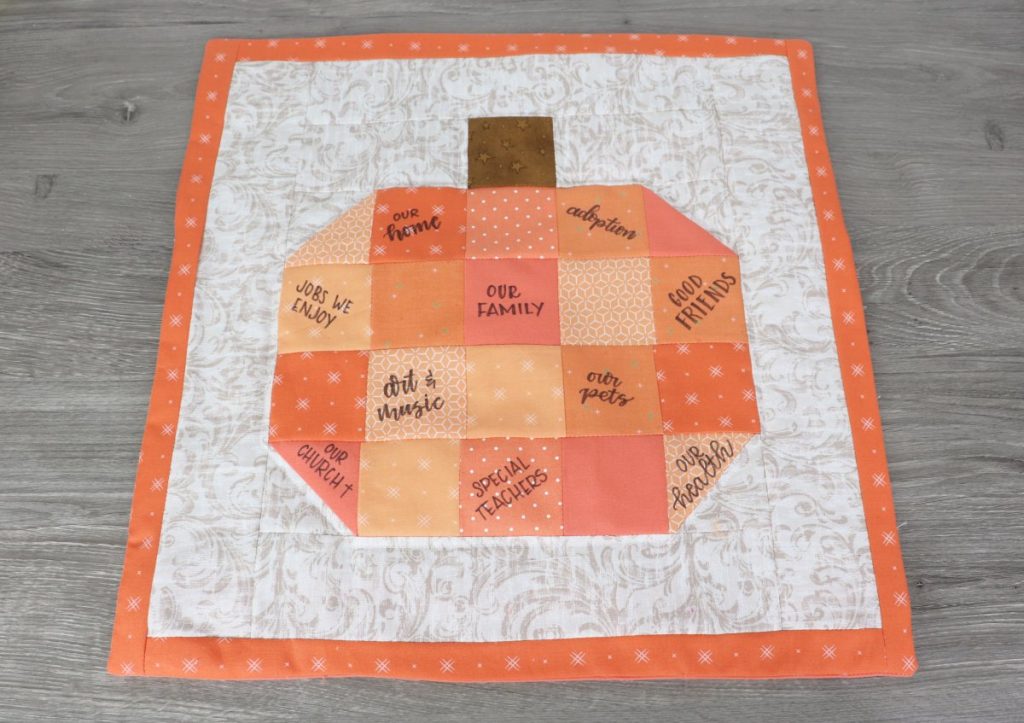
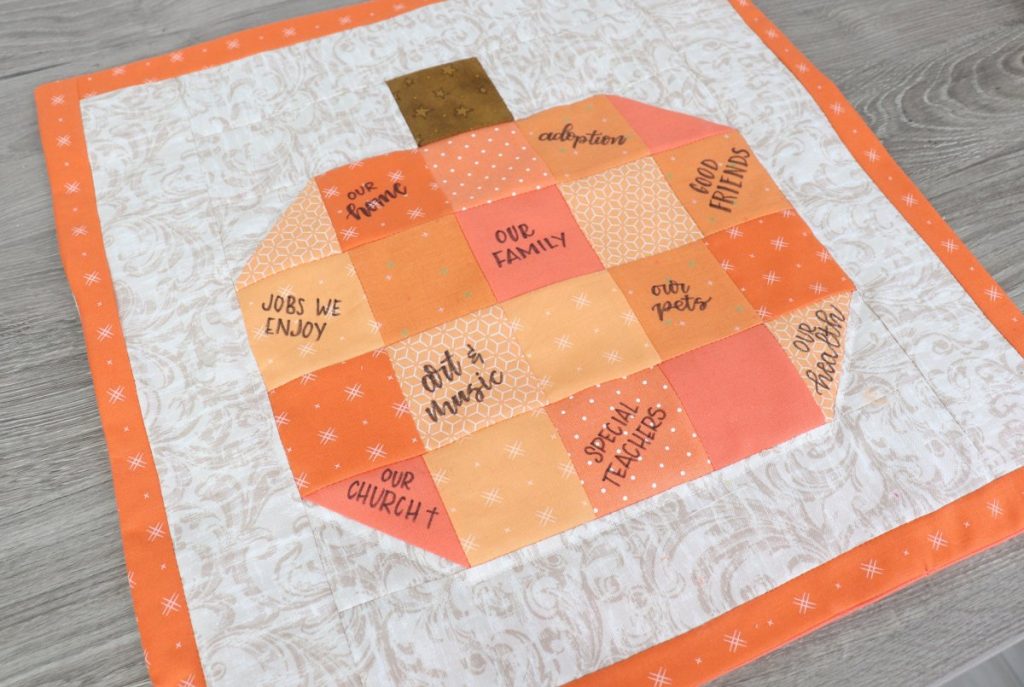
This year, I decided to adapt the basic idea of our Thankful Pumpkin and create one made from fabric. It starts with a basic pumpkin quilt block, then you use a fabric marker to write down things you’re grateful for on the patchwork squares. Then, it can be turned into a wall hanging or a pillow cover that your family can treasure forever.
Here’s how to create your own Thankful Pumpkin Quilt Block Project.
You’ll need:
assorted orange fabrics (this is a great scrap buster! I used 3-4 squares each of 7 different fabrics.)
scrap of brown fabric (2.5″ square)
neutral solid or print fabric
low loft batting
Cutting:
20 orange squares (2.5″ x 2.5″)
1 brown square (2.5″ x 2.5″)
4 beige squares (2.5″ x 2.5″)
2 beige rectangles (2.5″ x 4.5″)
2 beige strips (2.5″ x 10.5″)
2 beige strips (2.5″ x 14.5″)
Border/Binding (2.5″ x width of fabric for wall hanging OR 2 rectangles (2″ x 14.5″) and 2 rectangles (2″ x 16″))
Backing (14.5″ square for wall hanging OR two 16.5″ x 9″ for pillow)
Finished block measures 14.5″ x 14.5″ before adding binding/border.
Mine is 16″ square with the border added.
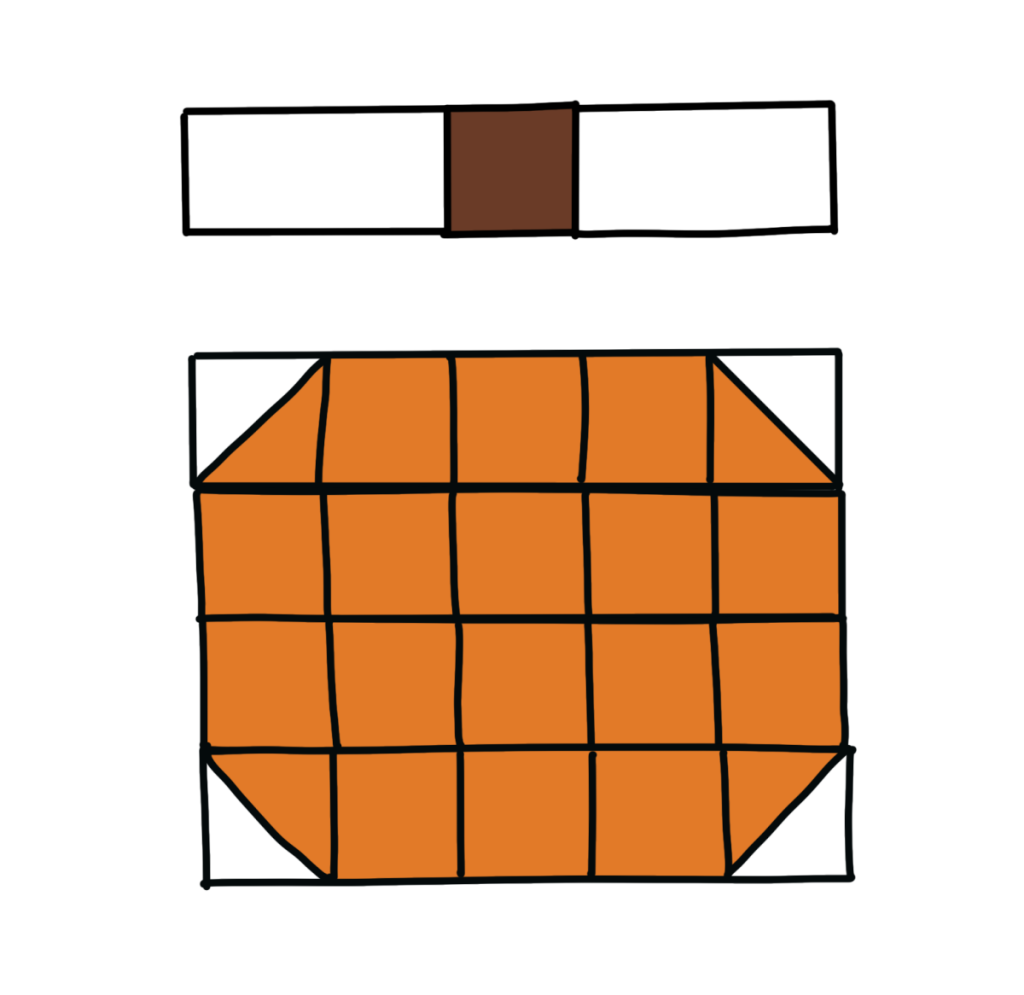
1. Lay out your orange squares in four rows of five to form the pumpkin.
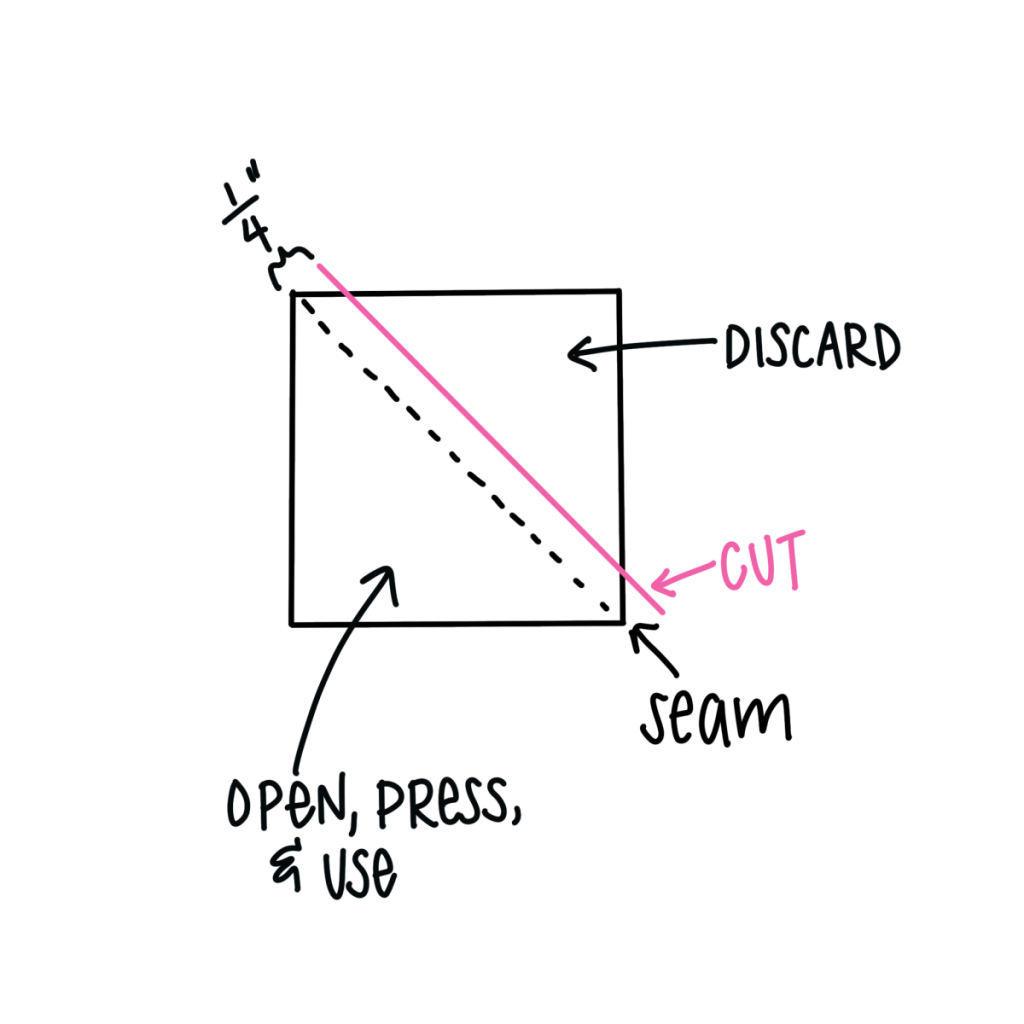
2. Form triangle squares for the corners.
To do this, place the orange corner square and a beige square on top of each other with right (front) sides together. Sew a diagonal line from one top corner to the opposite bottom corner. Cut off the excess on one side of the seam, leaving 1/4″ of fabric. Open the square and press. Now, you’ll have a square that’s half orange and half beige.

3. Sew each row of five squares together with 1/4″ seams.
To do this, place the first two squares on top of each other, right sides together and sew along one side. Open them up, then place the third square on top of the second one, right sides together, and sew. Repeat until all five squares are a strip. Use an iron to press the seams to the side, alternating directions for each row.

4. Sew the four rows together (1/4″ seams), nesting the seams.
Start with the top two rows, placing them right sides together. Try your best to line up the seams so that the squares will stack on top of each other. Pin these rows together, and sew. Then, open them up and repeat, pinning the third row on top of the second, and so on, until your four rows become one big block.

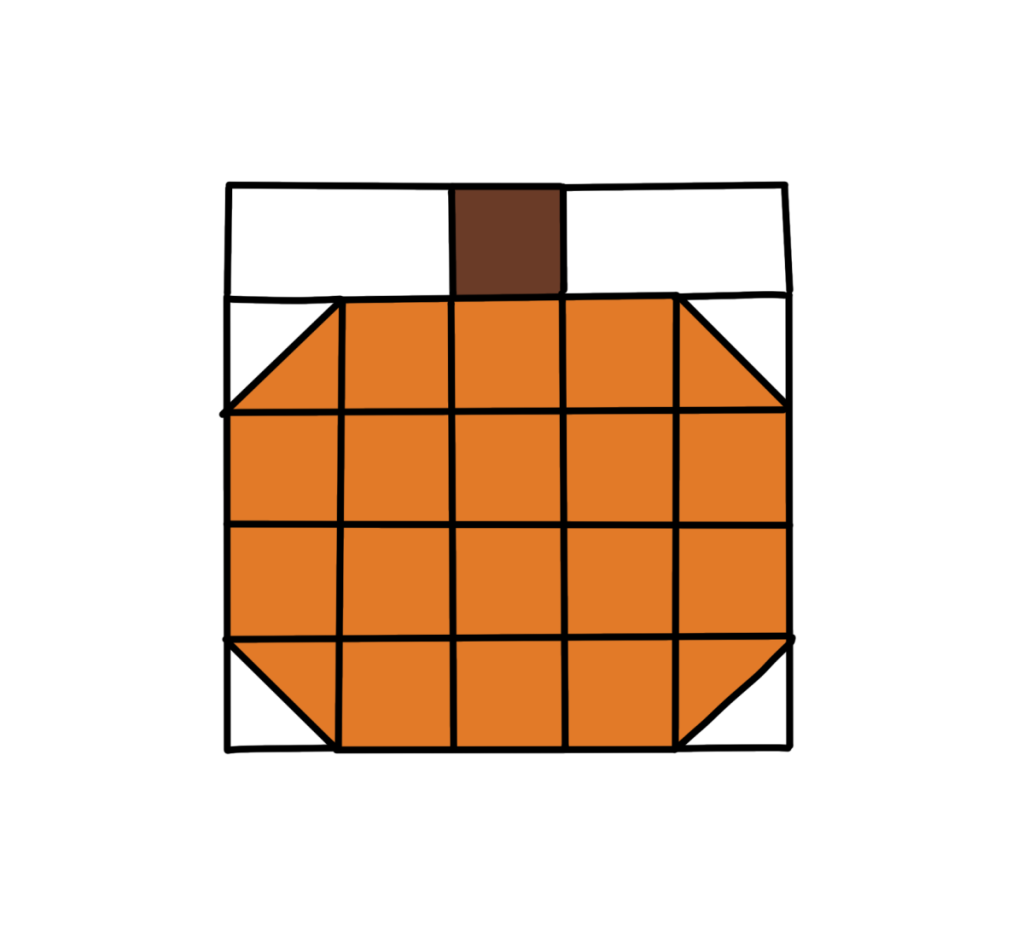
5. Sew the two 2.5″x4.5″ rectangles to the brown square using 1/4″ seams to form the stem.
6. Sew this stem strip to the top row of the pumpkin.
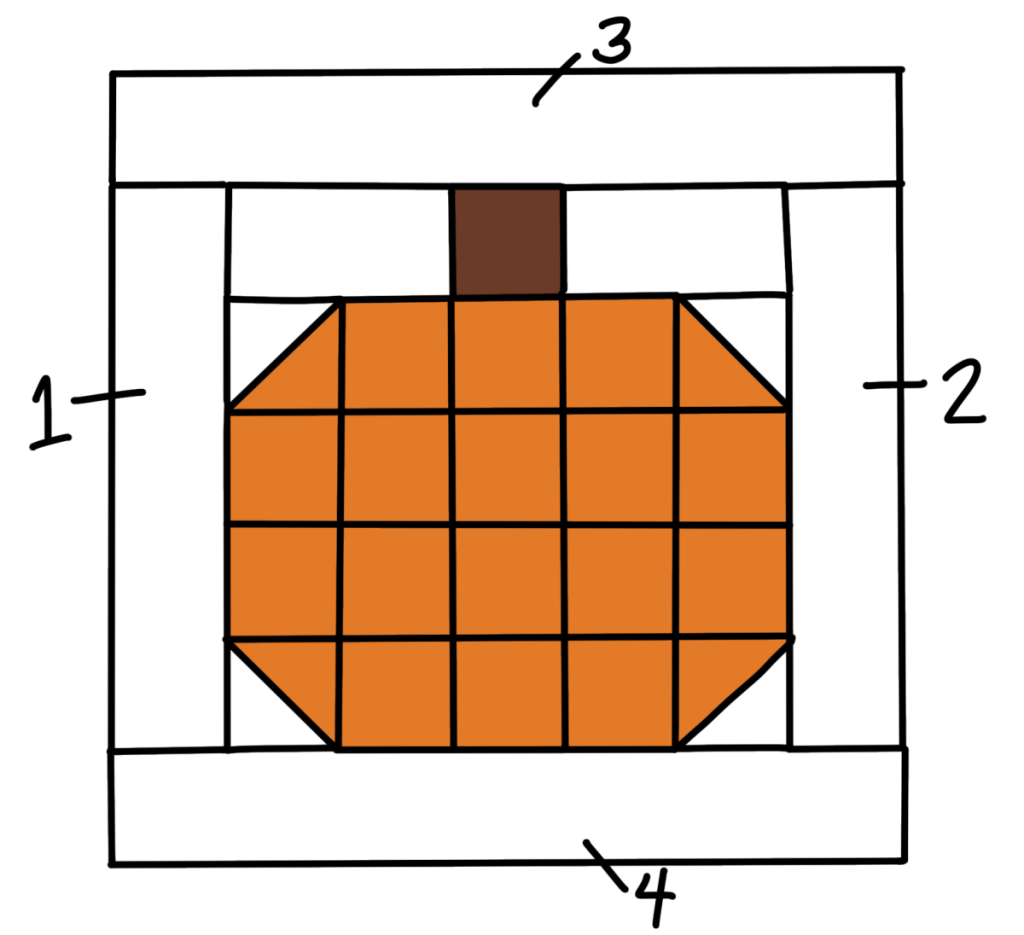
7. Sew the sashing.
This is where the long strips come into play. Start with the two shorter strips (2.5″ x 10.5″) and pin one to each side of your pumpkin block, right sides together. Sew a 1/4″ seam. Open and press. Then, take the longer strips and sew them to the top and bottom of the block. This will create a border/background around your pumpkin.
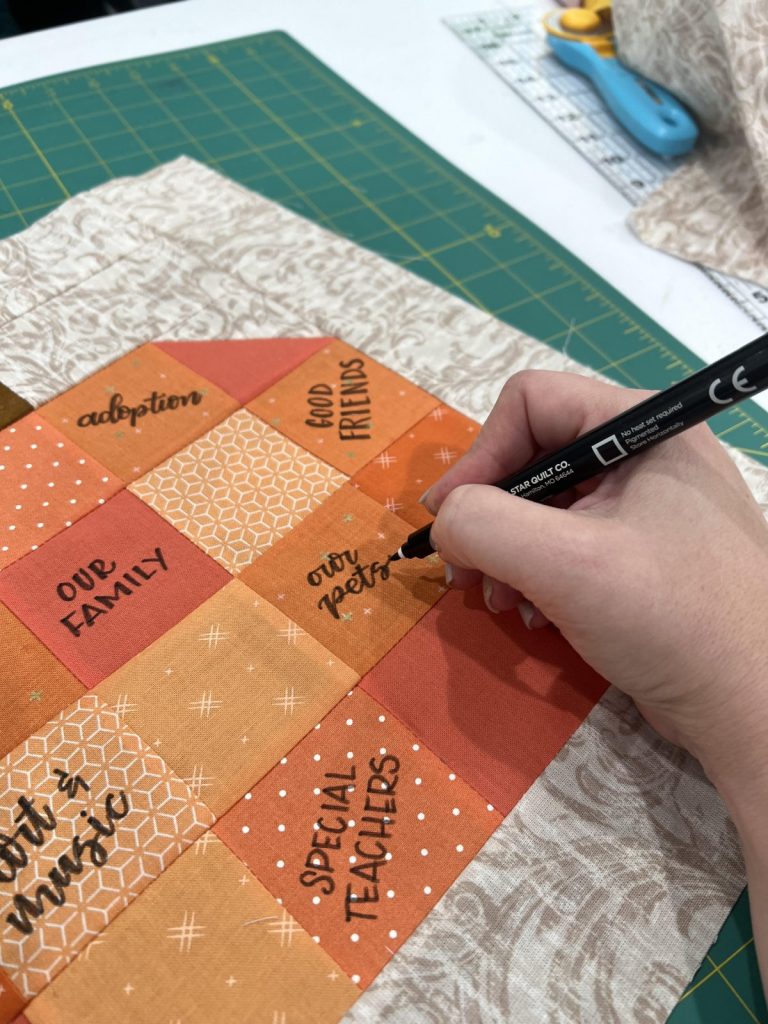
8. Use a fabric marker to write things you’re thankful for on some or all of the squares that make up the pumpkin.
I recommend using the Missouri Star Quilt Company fabric markers, because they don’t bleed and are machine washable. They don’t even need to be heat set. You can have the members of your family each write on a few squares. Don’t worry about your handwriting; having people’s handwriting preserved is part of what makes this such a special keepsake!
9. Quilt as desired.
Cut a piece of batting that’s the same size as your block (14.5″ x 14.5″). Place the batting under your block. If you are making a wall hanging, place your backing fabric underneath, creating a three-layer sandwich. If you are making a pillow, you will only have two layers for this step. Quilt your piece in any way you like (this means to add decorative stitching that goes through all of your layers. I did very little quilting, just used stitching to outline the shape of my pumpkin.
10. Add border or binding.
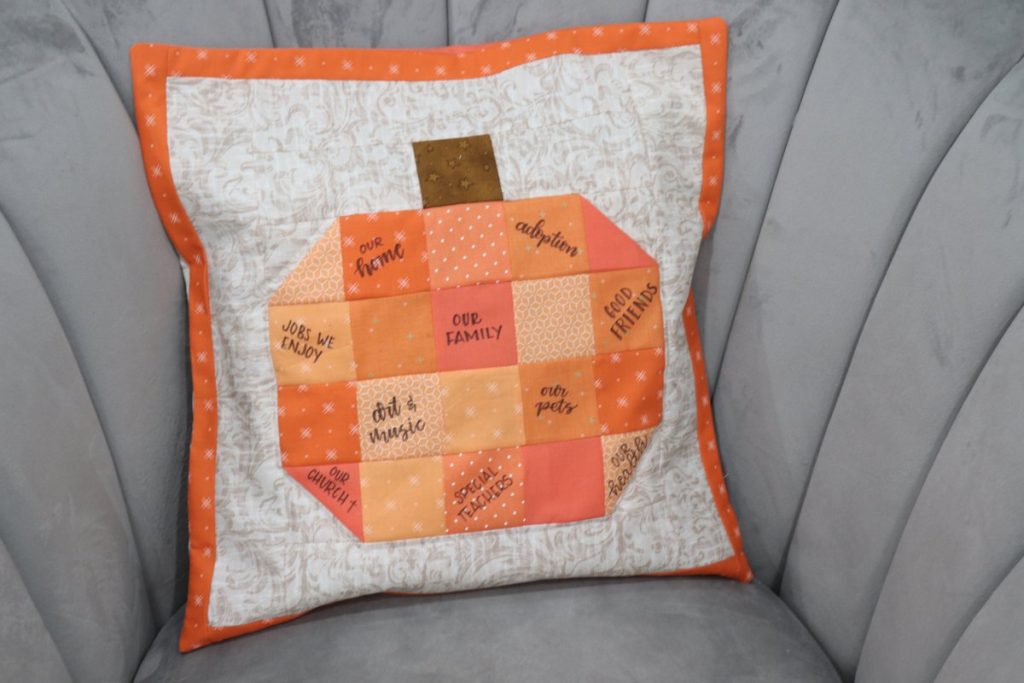
If you are making a wall hanging, the final step is to add a binding. Here is a great tutorial for that step! If you’re making a pillow, you’ll use the sashing technique (step 7) to sew four 2″ wide orange strips around the sides as a border, then create an envelope style pillow back. Here is a tutorial for this process. Fill your pillow with Poly-Fil or a pillow form.
Another fun idea would be to do this yearly, saving your blocks, then eventually sewing them together to create a quilt or a larger wall hanging. However you choose to finish off your block, it’s a really personal and special keepsake to remind you what you and your family are grateful for. If you try this project, or the original Thankful Pumpkin, I’d love to see your version. Be sure you’re part of the Amy Latta & Friends Facebook Group so you can share your photos and we can all be inspired!