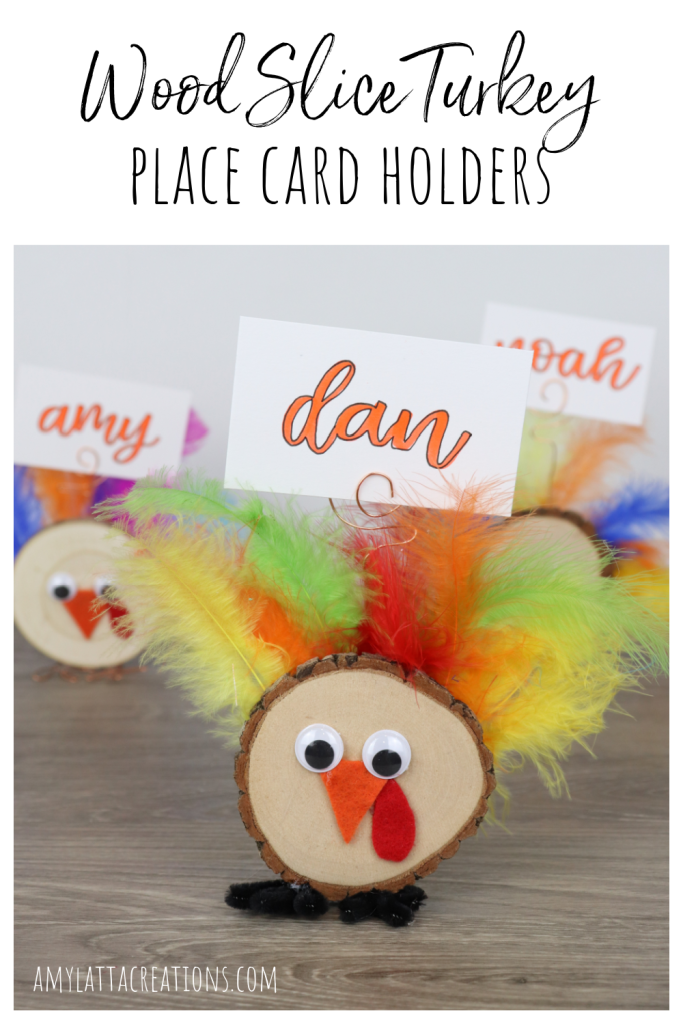
Wood Slice Turkey Place Card Holders
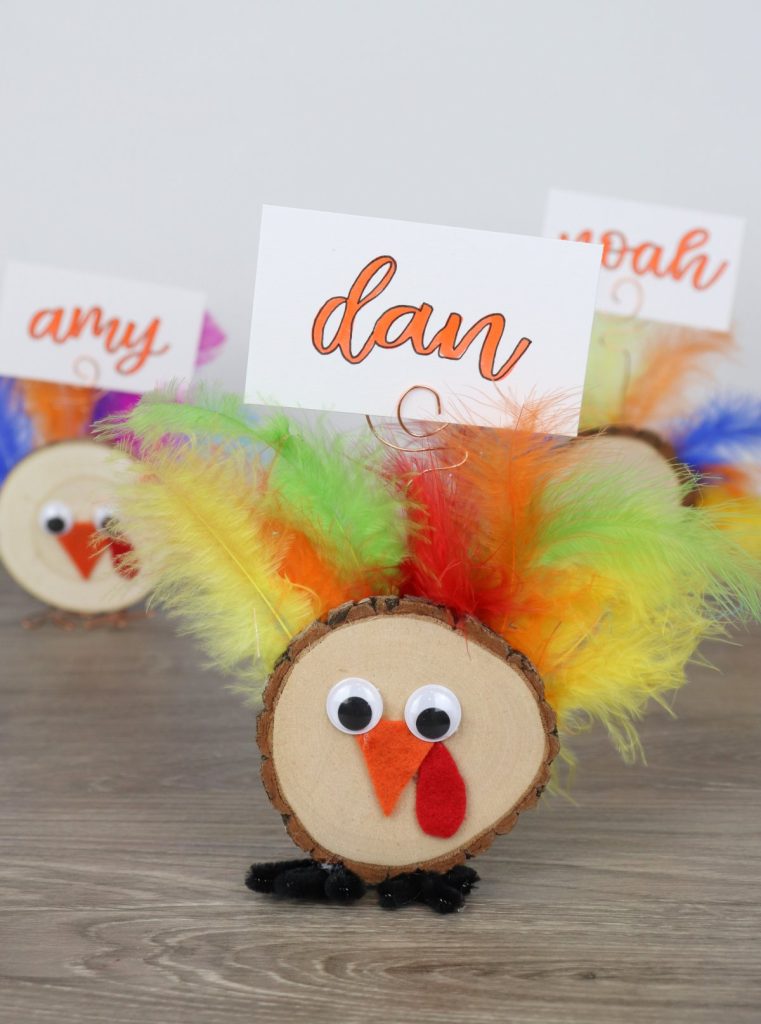
Let’s talk turkey! Here is a quick, inexpensive, and easy Thanksgiving project that crafters of all ages can create.
You’ll need:
wood slices
assorted craft feathers
google eyes
orange and red felt
copper wire and/or pipe cleaners
hot glue gun and glue or craft glue
place cards (ours are made with Bristol Board and Tombow Dual Brush Pens)
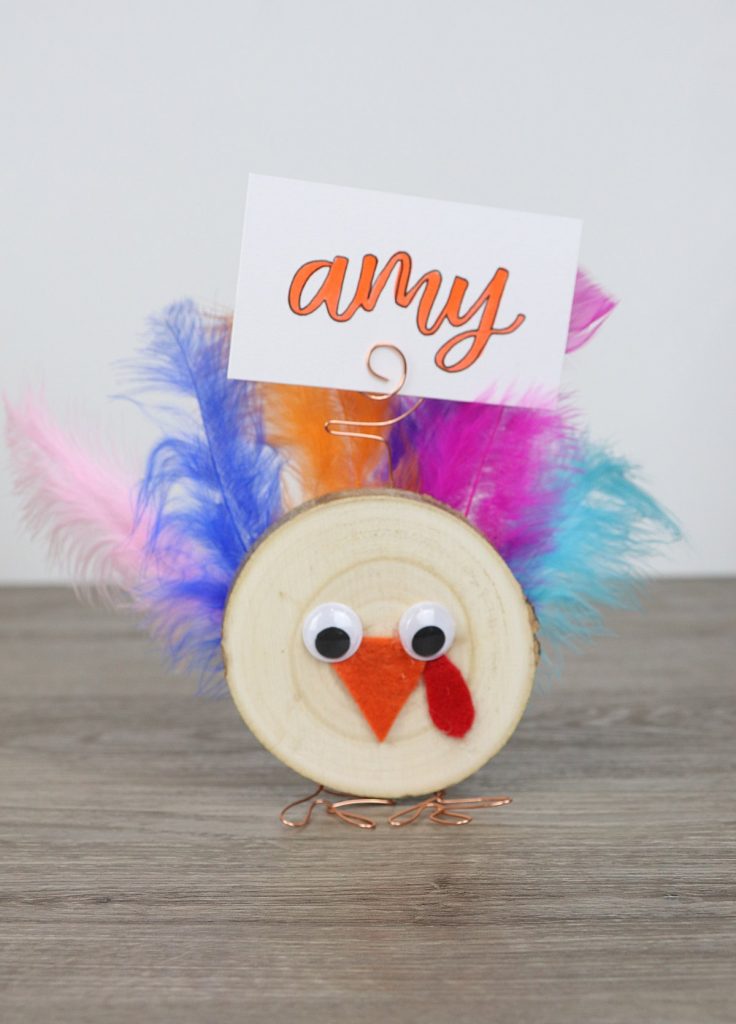
Step 1: Cut a beak and snood (the red thing on the beak) from felt.
The beak is just a triangle, and the snood is a teardrop shape.
Step 2: Glue the beak, snood, and eyes onto the front of the wood slice.
Step 3: Glue feathers to the back.
If you like, you can stop here. You could add a magnet and display the turkey on the fridge, glue it to a napkin ring, or just sit one at each place setting for a fun decoration. If you want to make your turkey stand up and hold a place card, continue on to the next step.
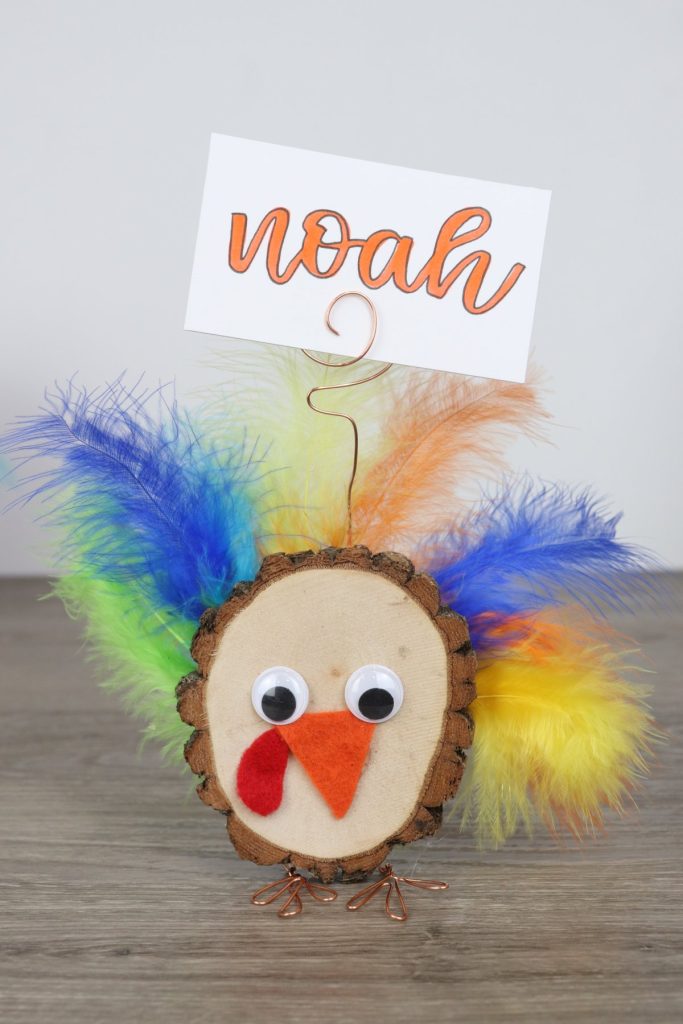
Step 4: Form feet from wire or pipe cleaners.
Make three pinched loops for each foot, then extend the wire up to form a leg. Glue the legs to the back of the wood slice. I found that the wire feet were more sturdy, and I like the look of them better, too.
Step 5: Form and attach a wire spiral.
This is the piece that holds the place card. Use needle nose pliers to form a loose spiral, then let the wire extend down and glue it to the back of the turkey.
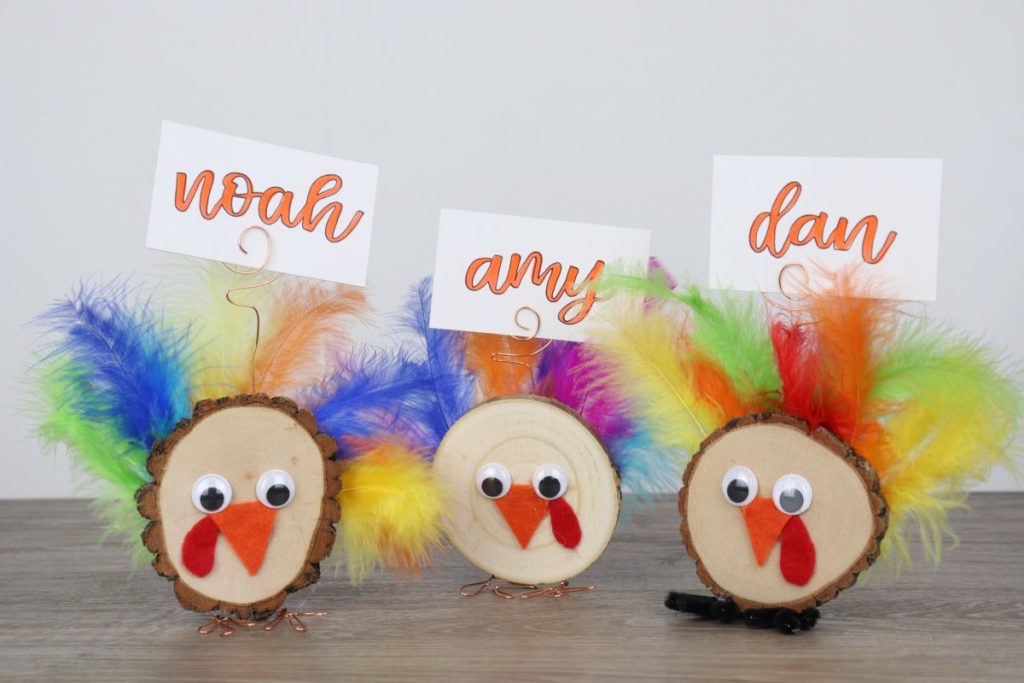
All that’s left to do is add place cards with the names of your dinner guests! Or, if you prefer, these can also hold photos. If you try this project, I’d love to see how your Wood Slice Turkeys turn out…be sure to share your photos in the Amy Latta & Friends Facebook Group so we can all be inspired!