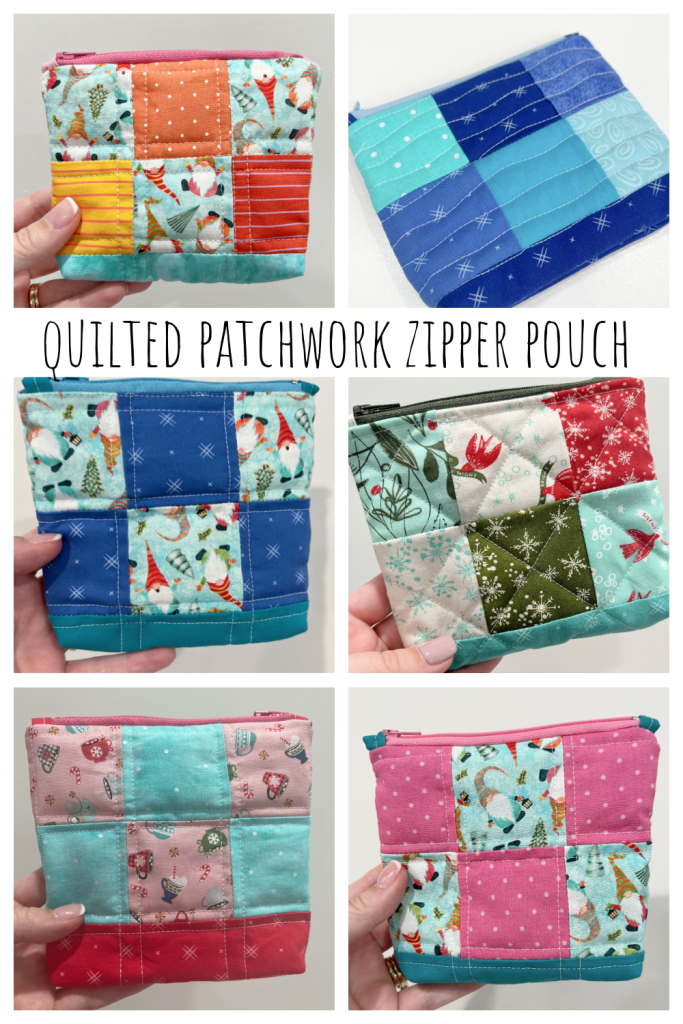
Quilted Patchwork Zipper Pouch – Free Pattern
Friends, I have fallen in love. Quilting has taken over my life and my craft room, and I am especially enjoying projects that are quick and make awesome holiday gifts! This quilted patchwork zipper pouch can be completed in an afternoon, and you can personalize it using colors, prints, and fabrics that your recipient loves. It only takes ten steps, and I promise, adding a zipper is easier than you think. I’ll be with you every step of the way. Let’s get started!
Materials
You’ll need:
Fabric Scraps for squares and base
1/4 yard lining fabric
1/4 yard low loft batting
coordinating color zipper 6″ or longer
Cutting:
Cut your fabric into the following size pieces.
12 – 2.5″ squares (you can use any combination of fabrics you like)
2 – 1.5″ x 6″ rectangles for the bottom strip
2 – 1.5″ x 3″ rectangles for the zipper pockets
2 – 7″ x 6″ rectangles for the lining
2 – 7″ x 6″ pieces of batting
Making your quilted patchwork zipper pouch
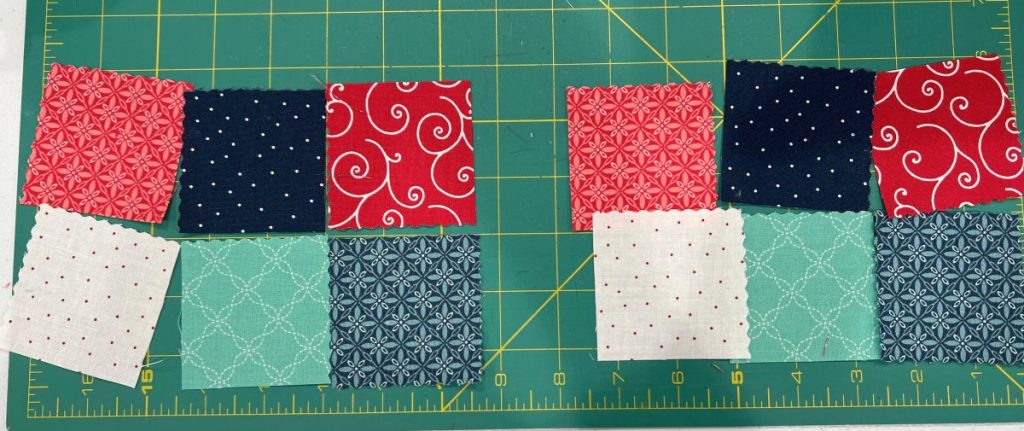
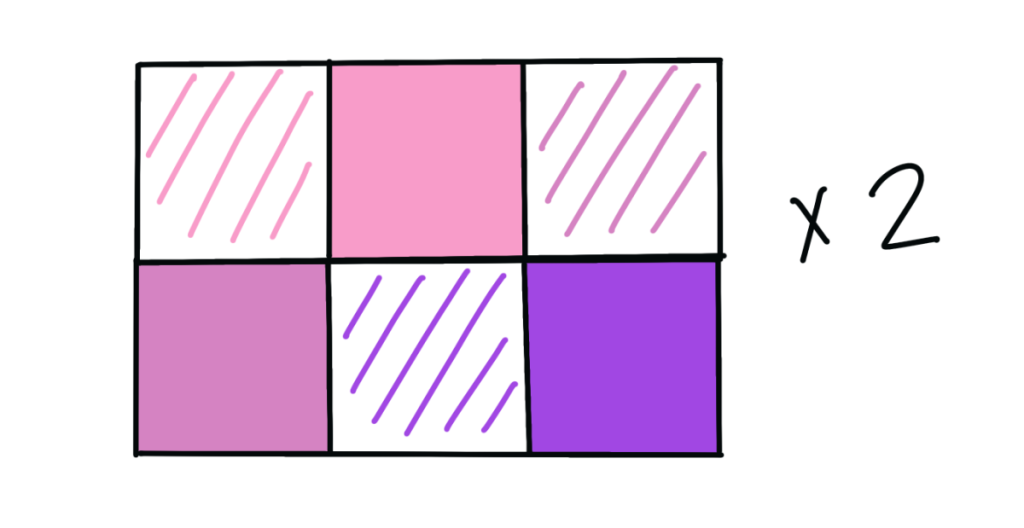
Step 1: Arrange your squares.
Choose whatever pattern you want for your pouch and lay it out in two rows of three squares for the front. Then, repeat for the back.
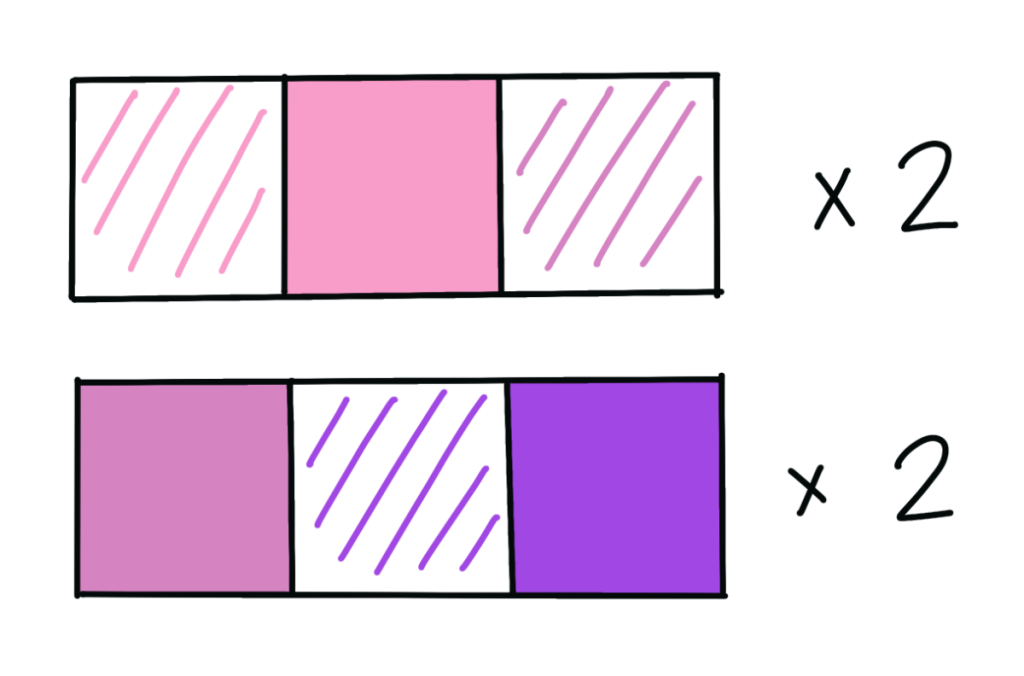
Step 2: Sew your rows together with 1/4″ seams.
Place the first two squares right sides together with the center square on top and sew 1/4″ seam down the right side. Open them up and place the third square face down on top of the center square, then sew 1/4″ seam down the right side. You will have four strips of three squares each. Use an iron to press the seams to one side.
Step 3: Sew the two rows together with 1/4″ seam.
To do this, place the two strips right sides together and sew. Now, you’ll have two pieces with six squares each; one will be the front of your pouch and the other will be the back. Use an iron to press your seam open or to one side.
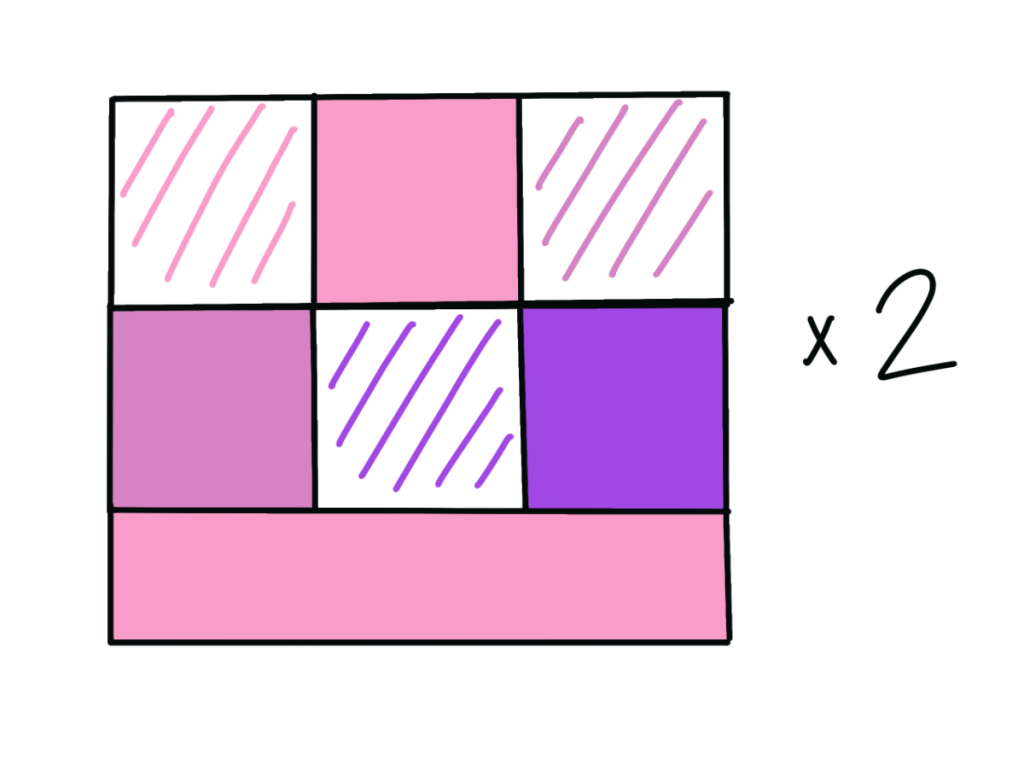
Step 4: Sew a coordinating 6 1/2″ x 1 1/2″ strip to the bottom of each panel with 1/4″ seam.
If you would like your pouch to have a larger bottom, you can increase the width of the strip to 2″ or 2.5.” The wider the strip, the more of it you will see, and the more square your pouch will become. Place the strip face down on top of the bottom section of your six square piece and sew. Then, open it up and press the seam to one side.
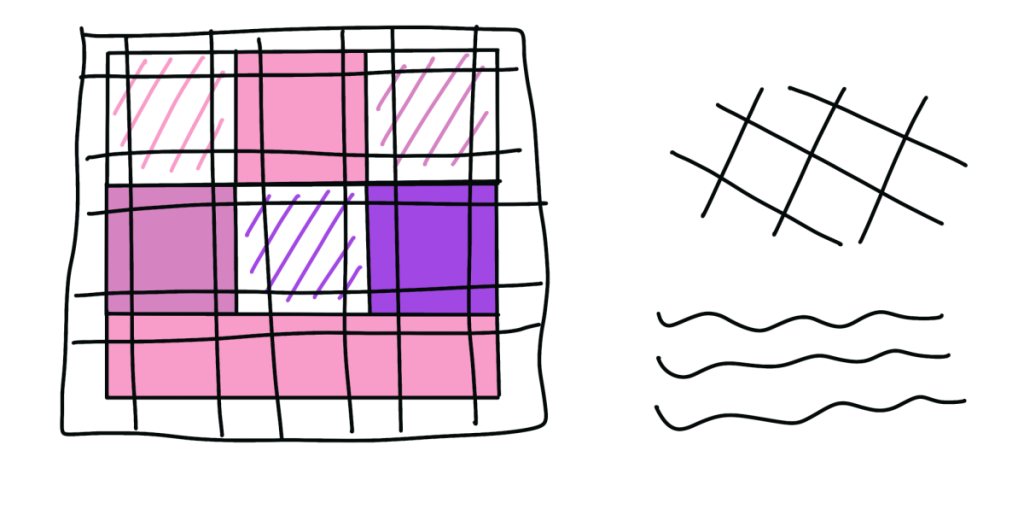
Step 5: Make a fabric and batting “sandwich” and quilt as desired.
Start by placing one of your lining pieces face down on the table. Add your batting square on top, then place your sewn pouch front on top of the batting, right side up and in the center. The lining and batting pieces are slightly larger than the front piece to allow for stretching when you quilt. Pin the three layers together, then stitch through all three using any pattern you like. One option is to sew vertical and horizontal lines through the squares. Another idea is to use diagonal lines, going through the corners of each square. You can also use wavy lines or any other pattern you like.
Here is what the quilt sandwich looks like after the stitching is complete.
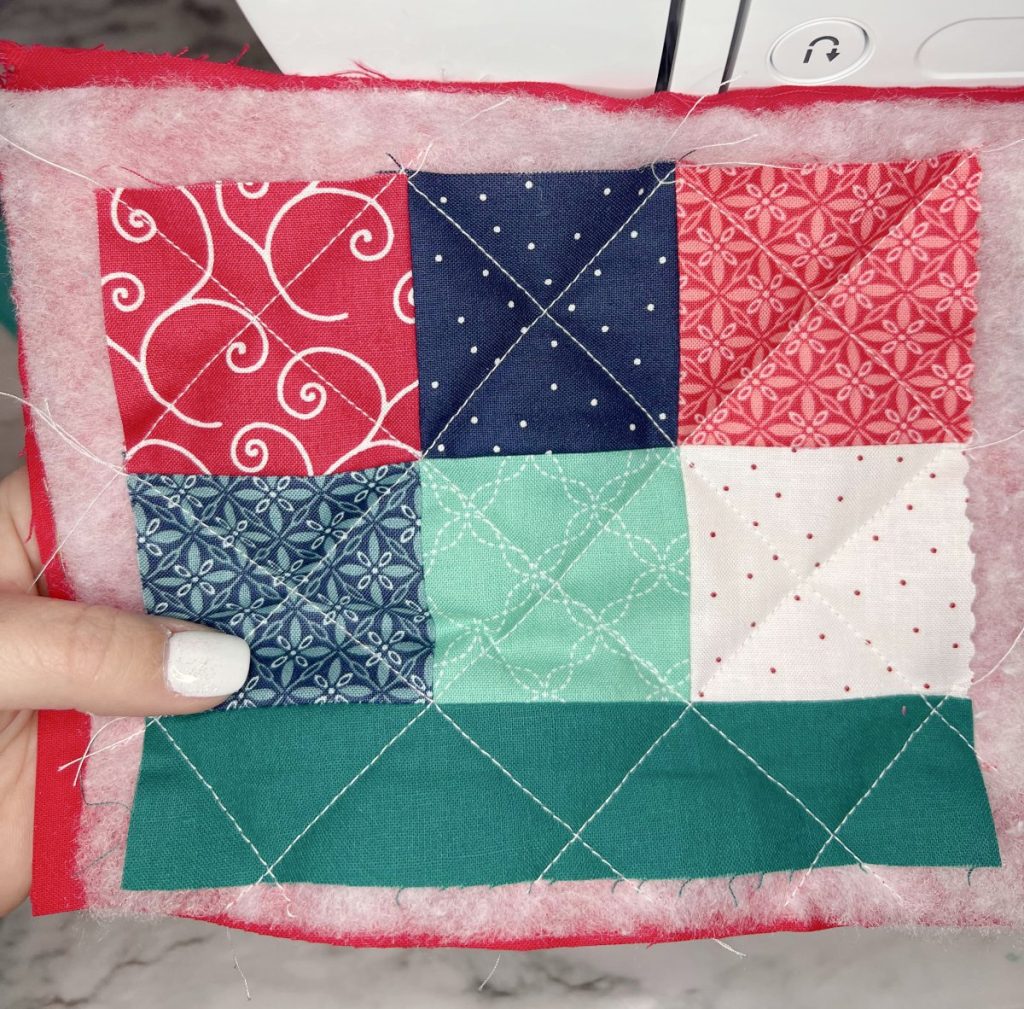
Use your rotary cutter to trim off the excess batting and lining fabric. Repeat this process for the back of the pouch.
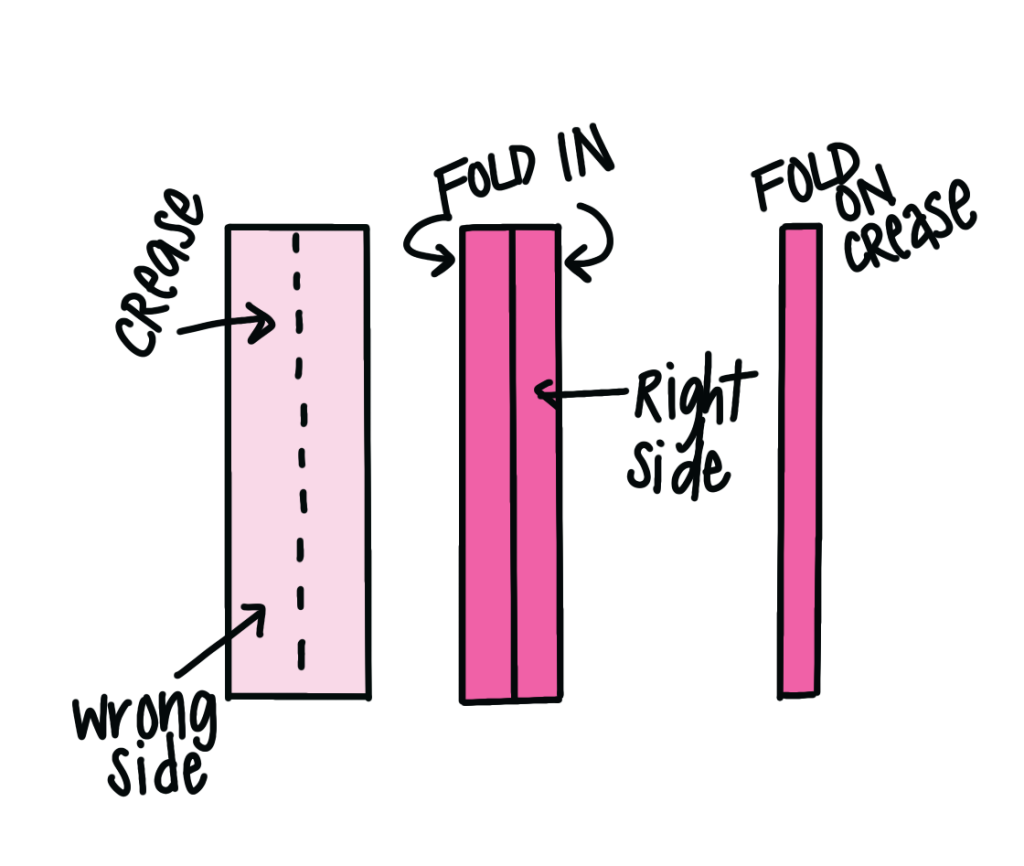
Step 6: Create zipper pockets.
Take one of your 1 1/2″ x 3″ rectangles. Fold it in half lengthwise and use an iron to crease it. Open it back up with the right side facing down. Fold each side in to meet the crease, and press with the iron. Now, fold the rectangle in half along the crease and press. This will give you a long, thin rectangle that’s 3/8″ wide and 3″ long. It will be folded on one side and open on the other. Repeat with the other of your rectangles so you have two of these; one for each end of the zipper.
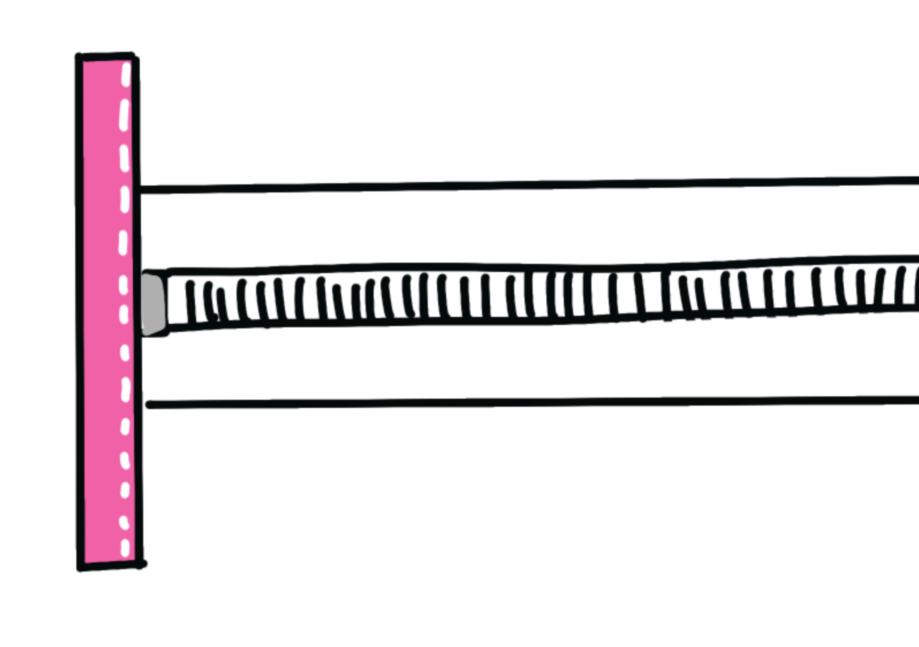
Step 7: Cut your zipper to 5 1/2″ length and attach a zipper pocket to each end.
Measure 5 1/2″ from the bottom of the zipper, then cut off the excess. When you cut, make sure that the zipper pull is pulled down far enough that you don’t cut it off! Open up one of your zipper pockets and insert the bottom end of the zipper. Sew along the edge of the pocket, which will catch the zipper inside. Repeat with the second pocket on the other end of your zipper.
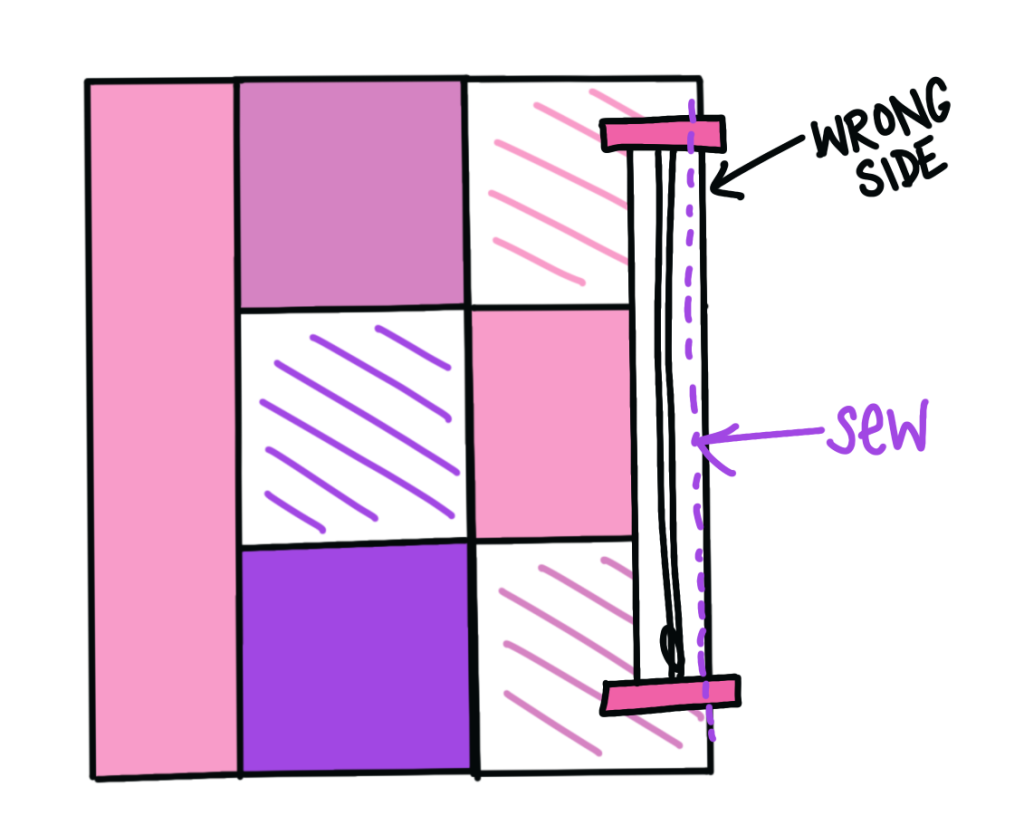
Step 8: Place your zipper face down on top of the front of your pouch and sew it in place.
Center the zipper, with 1/2″ of extra pouch on either side. Line up the edge of the zipper with the edge of the pouch. The zipper pockets will extend a little farther out. Sew at about 1/4″ to attach the zipper. You will need to move the zipper pull to allow you to make a straight seam. I like to start with the pull all the way at the bottom, then when I get about halfway done my seam, I stop, move the zipper pull all the way to the top, then finish sewing.
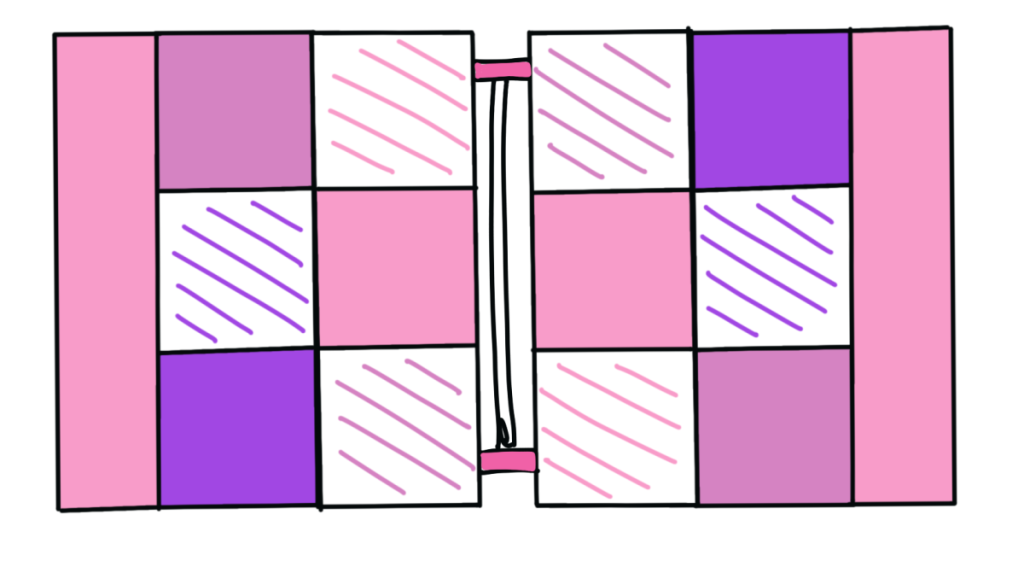
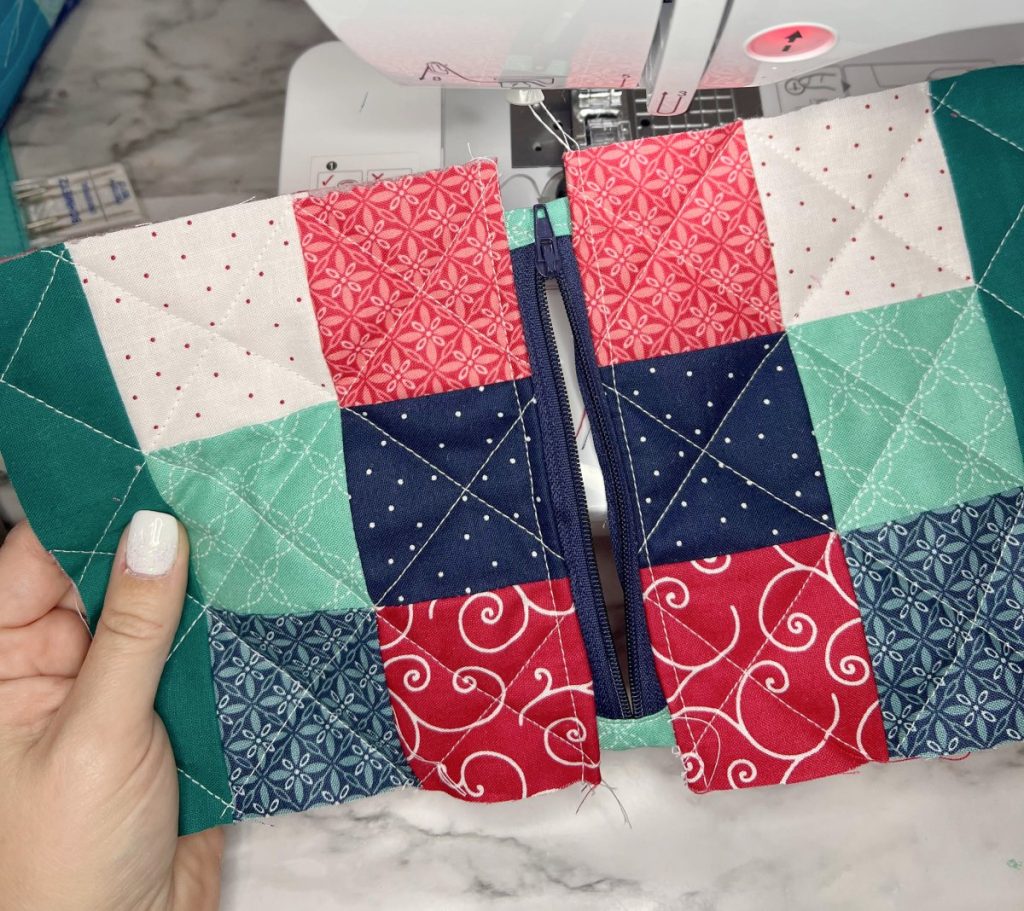
Step 9: Sew the zipper to the back of the pouch.
Fold the zipper away from the pouch front and pin the free edge face down onto the top center of the back piece. Repeat the process to sew them together just like you did for the front. When you open it up, you should have your two quilted pieces joined together with the zipper in the center.
Optional: Top stitch on the outside of the pouch.
I like to sew a 1/4″ seam on either side of the zipper, because that keeps the edges of the zipper flat and out of the way when you’re using the pouch.
We’re almost finished! Just two more steps to go!
Step 9: Pin the front and back of your pouch together and sew around the three open sides with a 1/2″ seam.
Make sure your zipper is at least partially open, or you won’t be able to turn your pouch right side out! (Ask me how I know…)
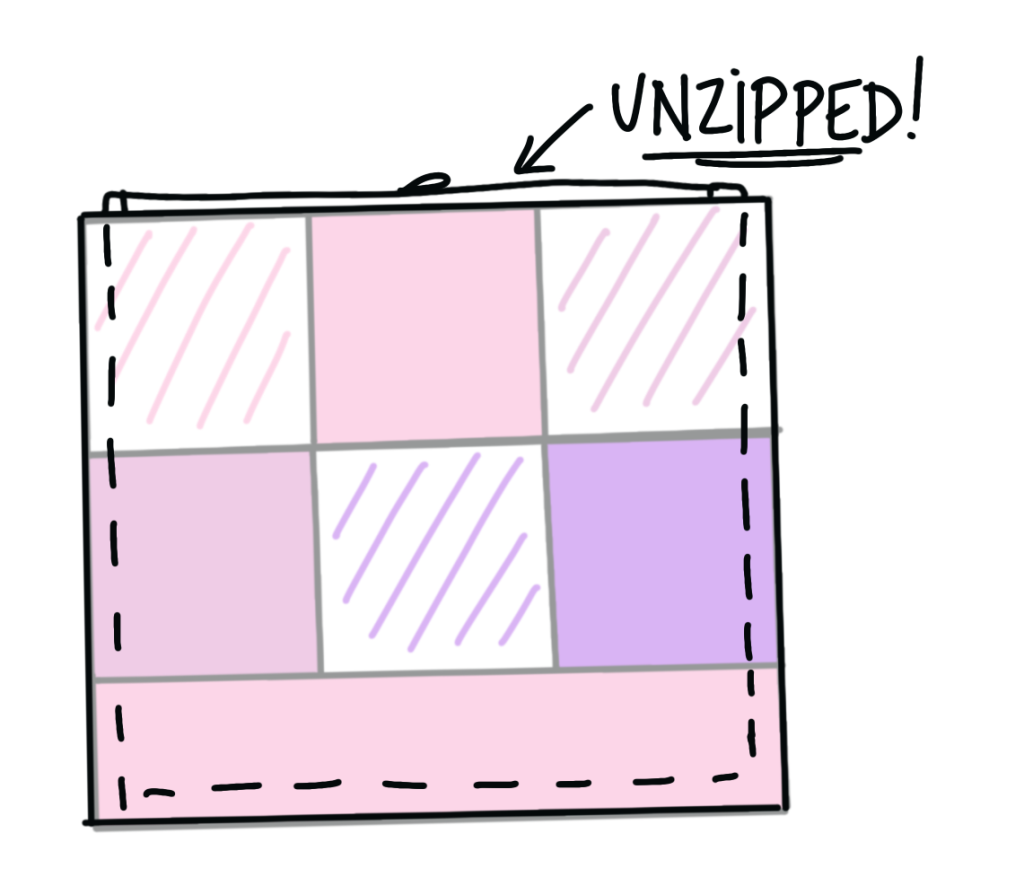
If you’d like to stop here and have a flat pouch, you can! Just turn it right side out, and it’s ready to use. If you’d like to have boxy corners and a defined bottom to the pouch, move on to step 10.
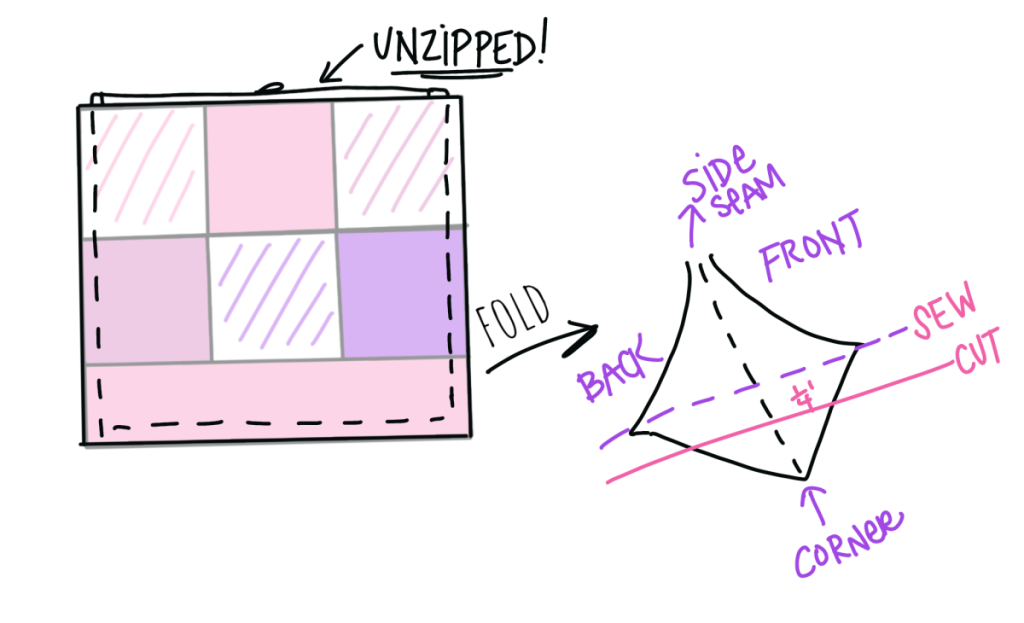
Step 10: Sew and trim the corners.
From one side of the pouch, pull the front and back apart and flatten the fabric so that the seam is in the center. This will give you a triangle shape.
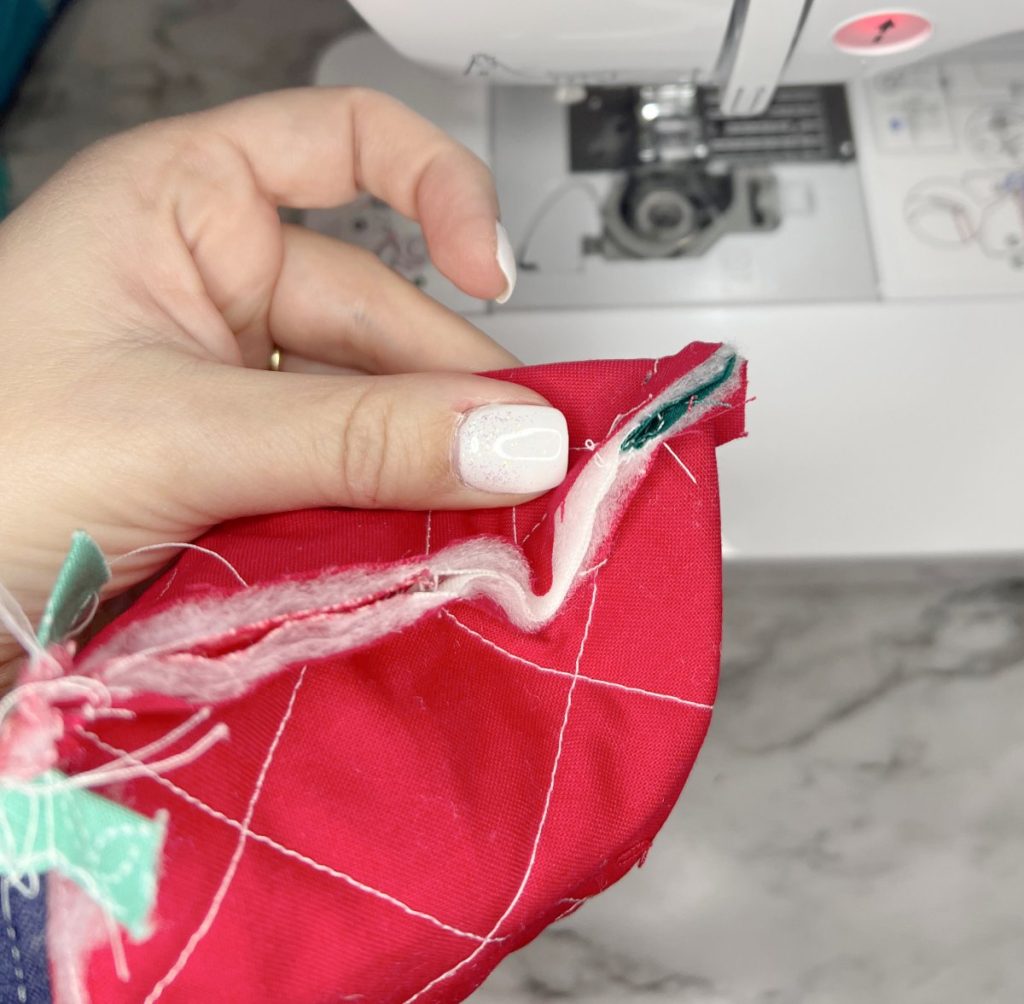
Sew across that triangle about 3/4″ from the point. Cut off the point, leaving about 1/4″ of fabric to the right of the seam.
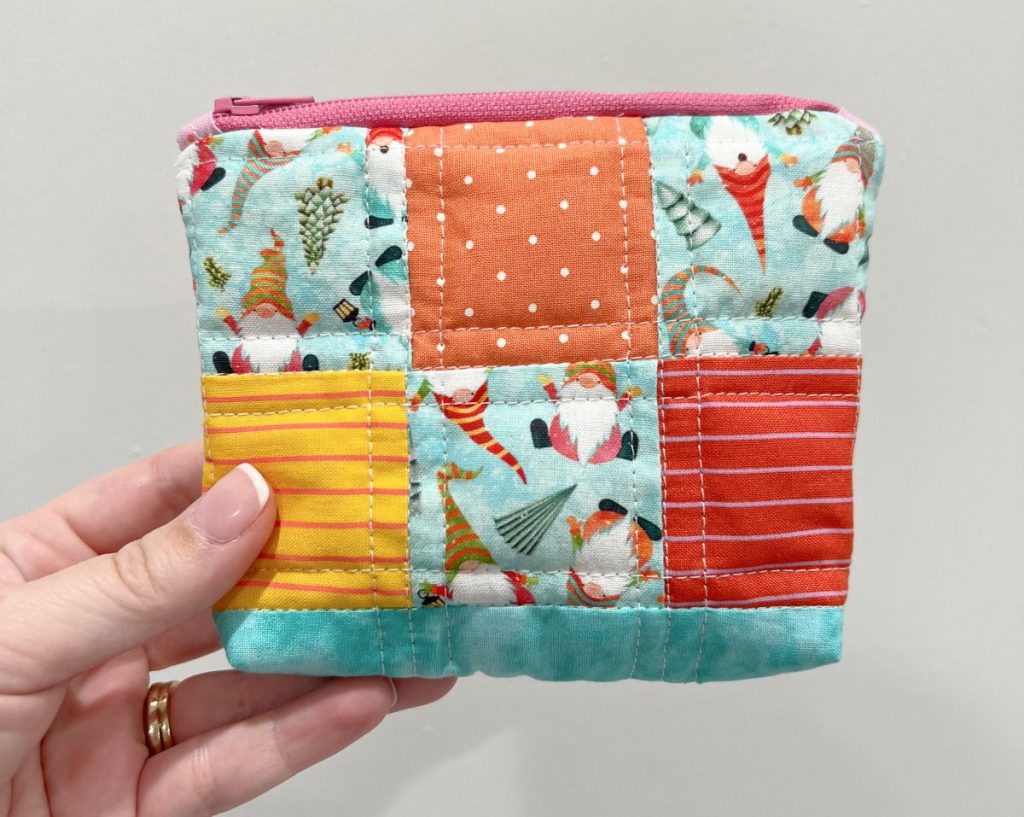
All that’s left to do is turn your pouch right side out, trim any threads, and enjoy! These little pouches are the perfect size for change, for little “must-haves” like lip gloss and hair pins, or for holding your sewing essentials. They make a great holiday gift, either on their own or filled with little treats and/or a gift card.
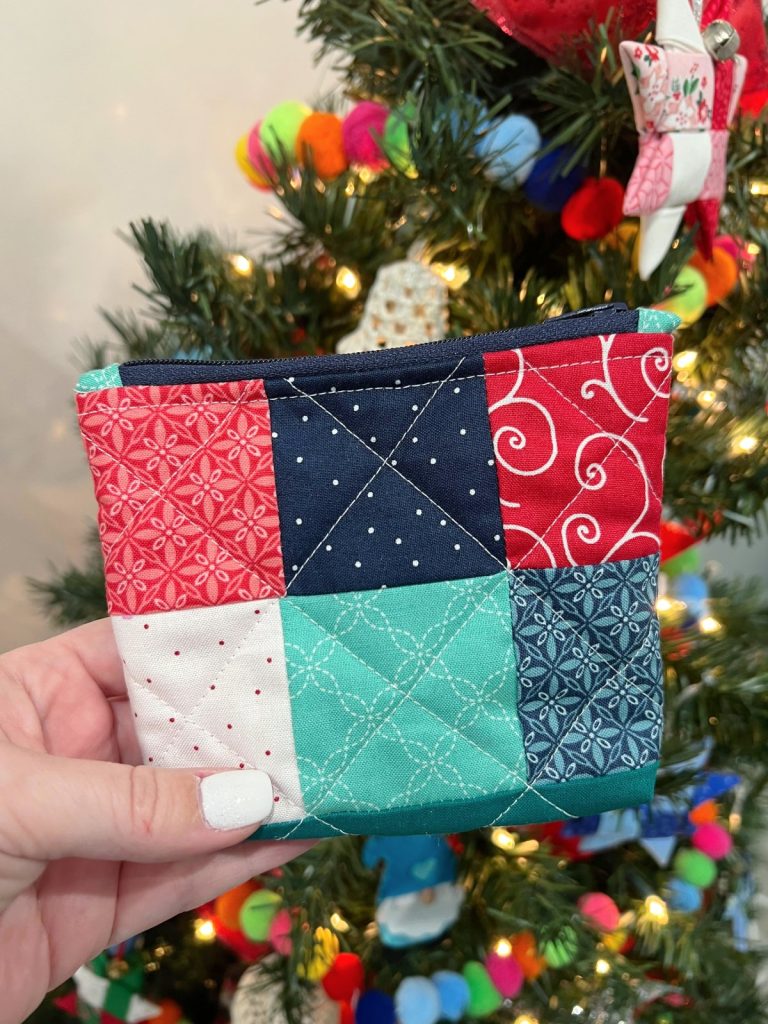
One of my favorite things about this pattern is that by changing the fabrics you use and the quilting pattern, every pouch can look totally unique! You can personalize them using the recipient’s favorite colors and things they love, like flowers, gnomes, coffee cups, and so much more. If you try this, I would absolutely love to see how your pouches turn out. Make sure you’re part of the Amy Latta & Friends Facebook Group so you can share your project photos and we can all be inspired. See you there!

2 Comments