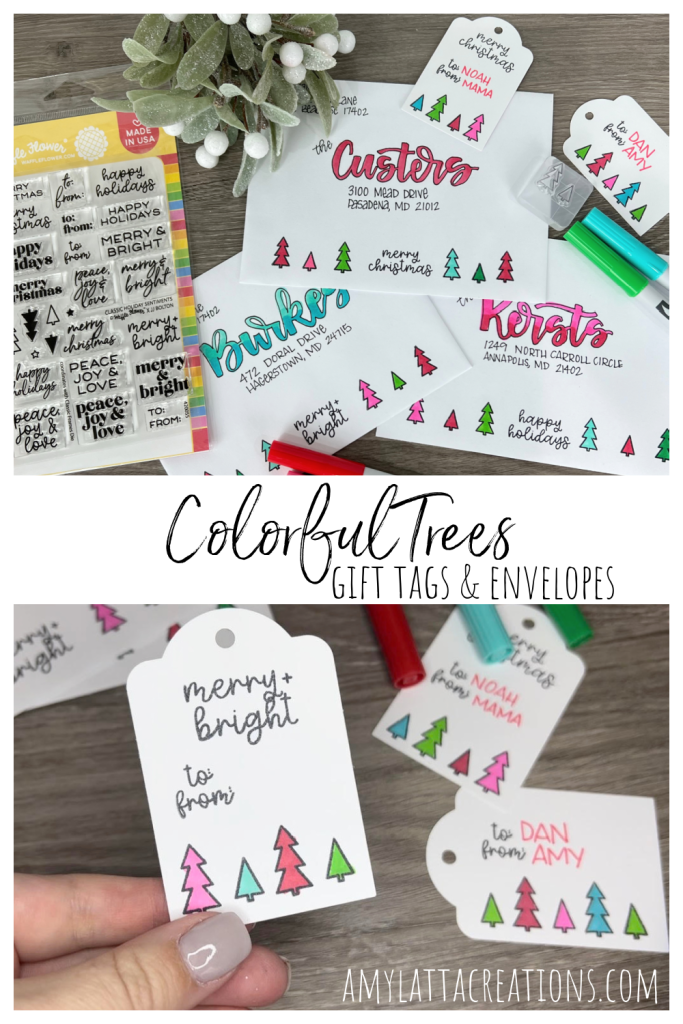
Colorful Trees Gift Tags and Envelopes
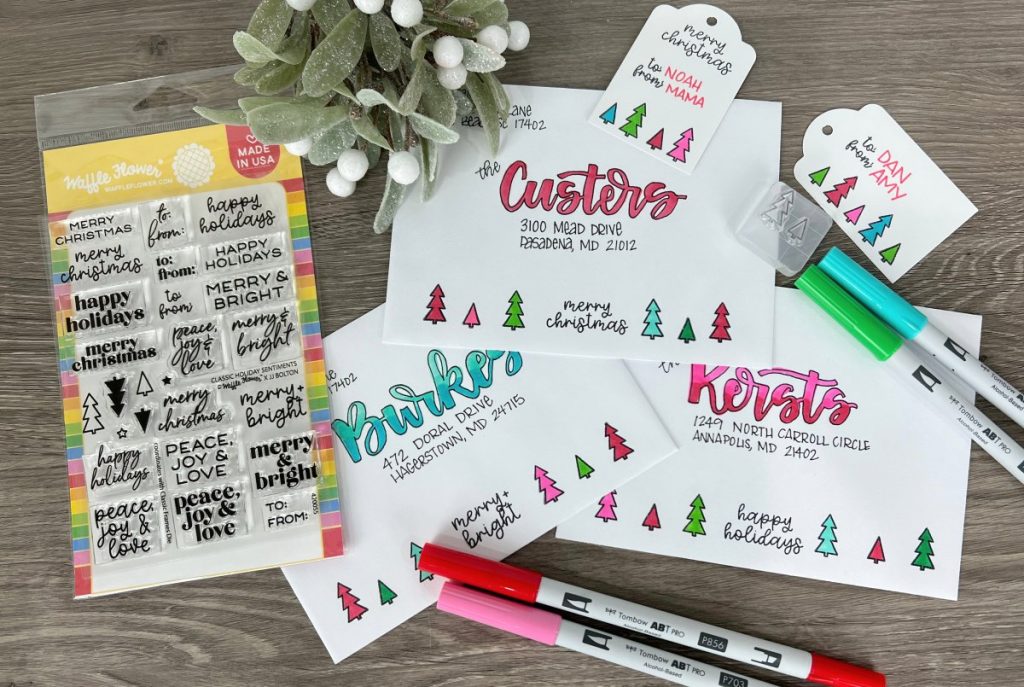
Want to create your own festive gift tags and decorate your envelopes to bring some holiday cheer? Here’s a quick and very easy project that crafters of all ages can do!
You’ll need:
envelopes OR cardstock and a tag punch/paper cutter
Waffle Flower Classic Holiday Sentiments Stamp Set
Black Ink Pad
Acrylic Block(s)
Colored markers (I used Tombow ABT PRO Alcohol-Based Markers in red, bright pink, light green, dark green, and teal)
GIFT TAGS
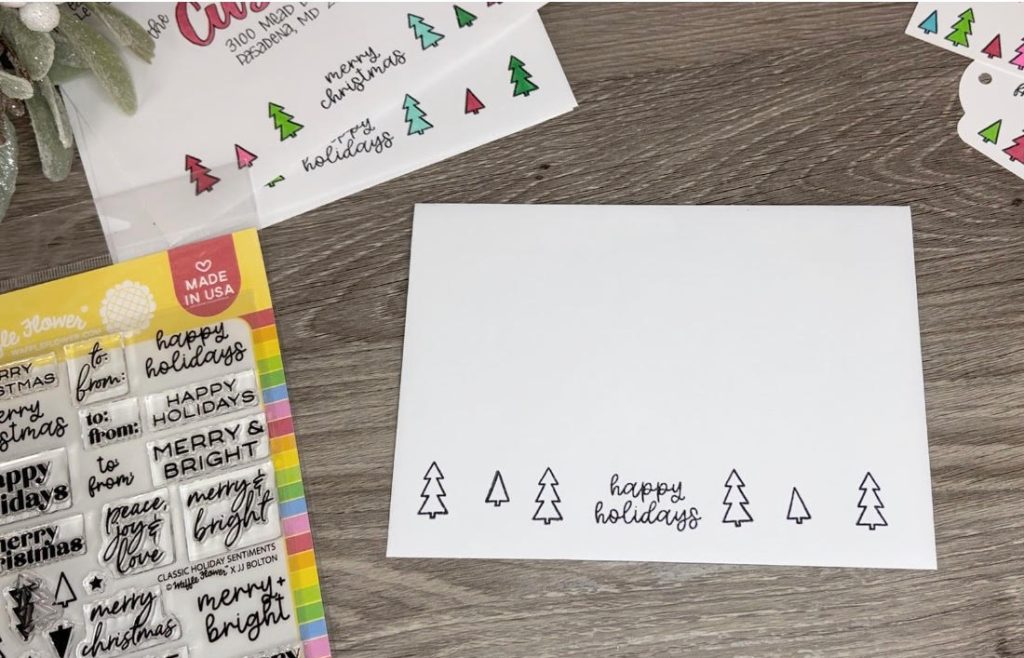
Step 1: Cut or punch your cardstock into tag shapes.
These can be as simple as a rectangle, or more elaborate if you have a tag punch like I do.
Step 2: Place the large and small open tree shapes on an acrylic block.
If you haven’t used this type of stamp before, you’re going to love it! Grid lines on the block will help you see where to line up your stamp images. Just press them onto the block and they’ll stay put until you gently peel them away.
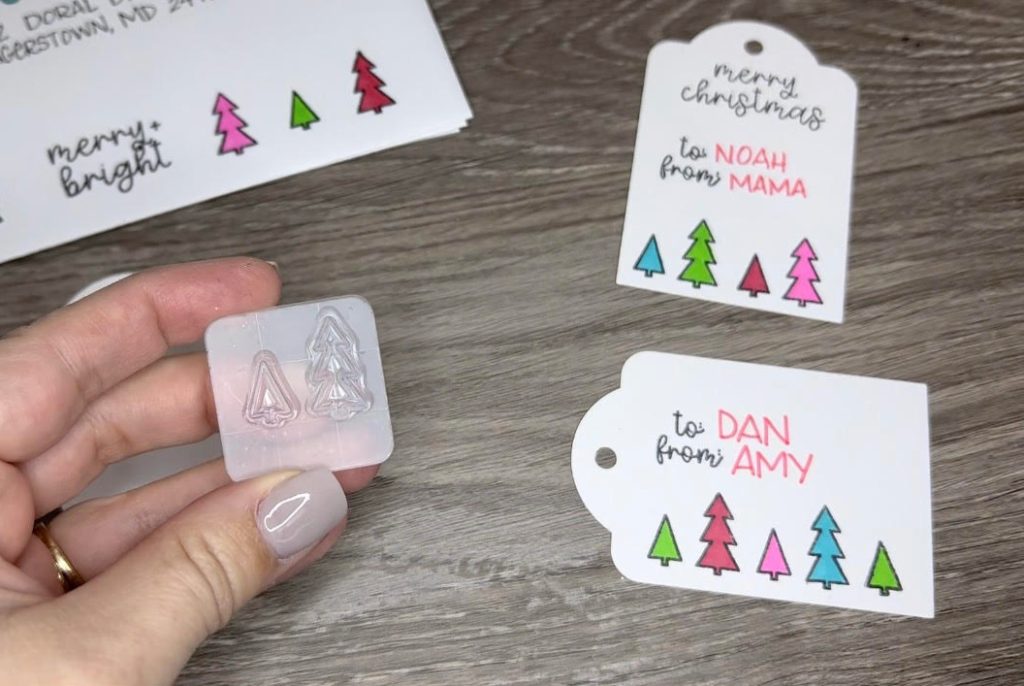
Step 3: Stamp your trees across the bottom of the tag.
You can turn your tag vertically or horizontally. Just tap your stamp firmly into the ink pad, then onto the tag. Try to lift the stamp straight up and down so the ink doesn’t smudge. Repeat until you have as many trees as you like. I was able to fit four trees on a vertical tag and five on a horizontal one.
Step 4: Stamp a message and/or “to/from.”
This stamp set has a variety of messages to choose from in several fun fonts. Choose your favorites and see what you can create! The best part is that each tag can be totally unique! Don’t forget the “to/from” stamp so you can fill out your tags.
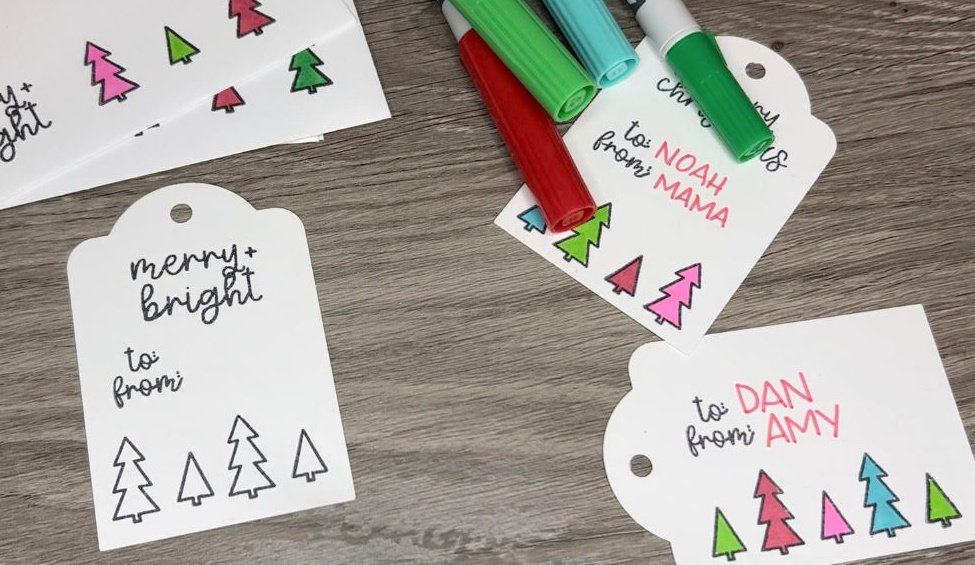
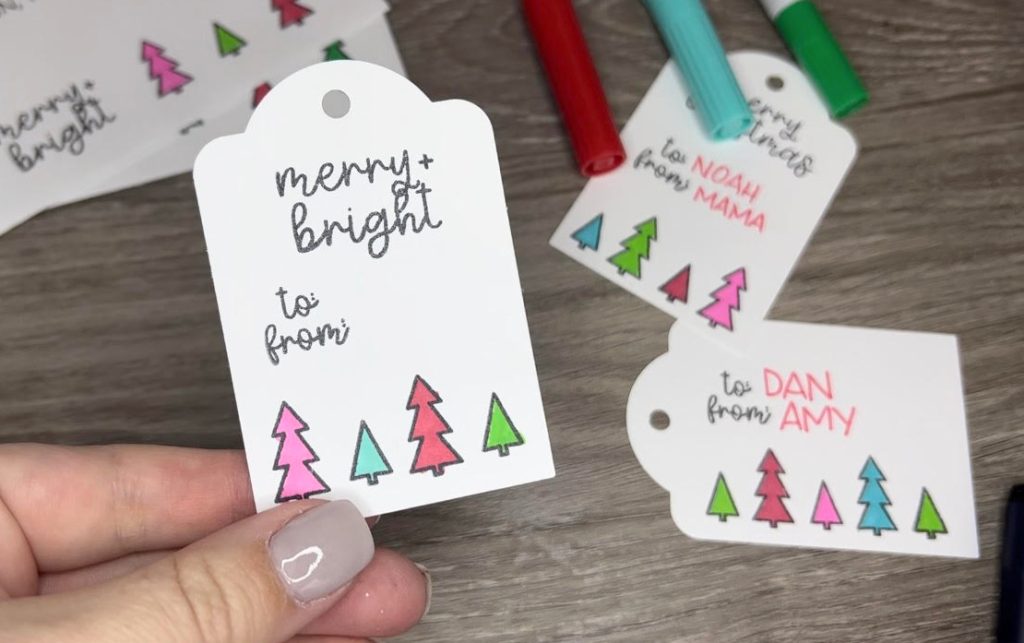
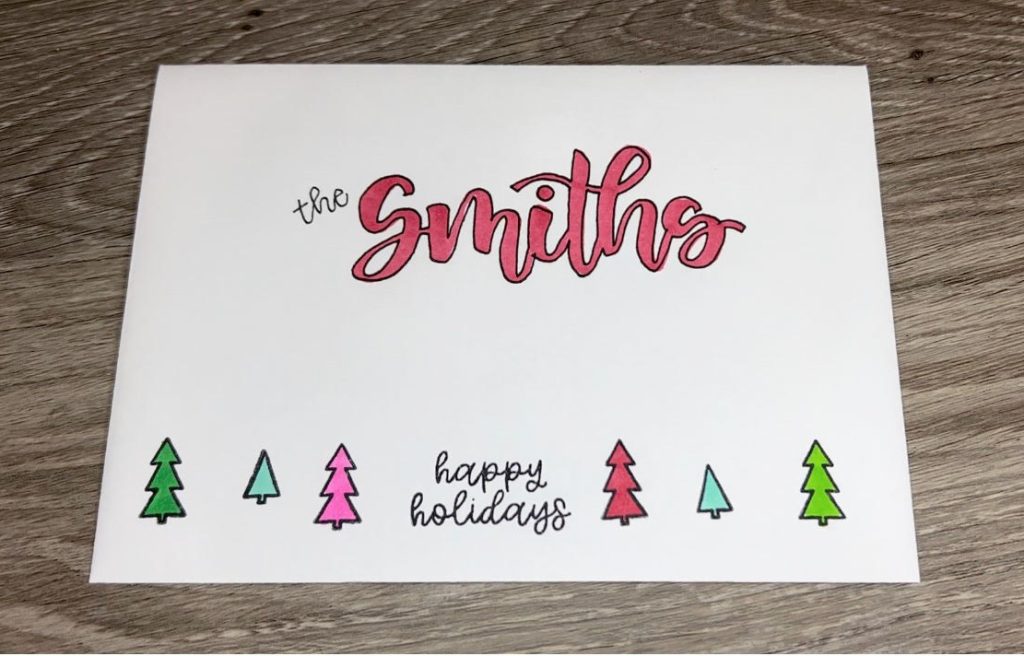
Step 5: Color your trees.
This was my favorite part. You can stay traditional with different shades of red and green, or you can branch out like I did and add some other colors like pink and teal. You can also use metallic markers to make your trees silver and gold.
All that’s left to do is fill out the tags and add them to your wrapped gifts!
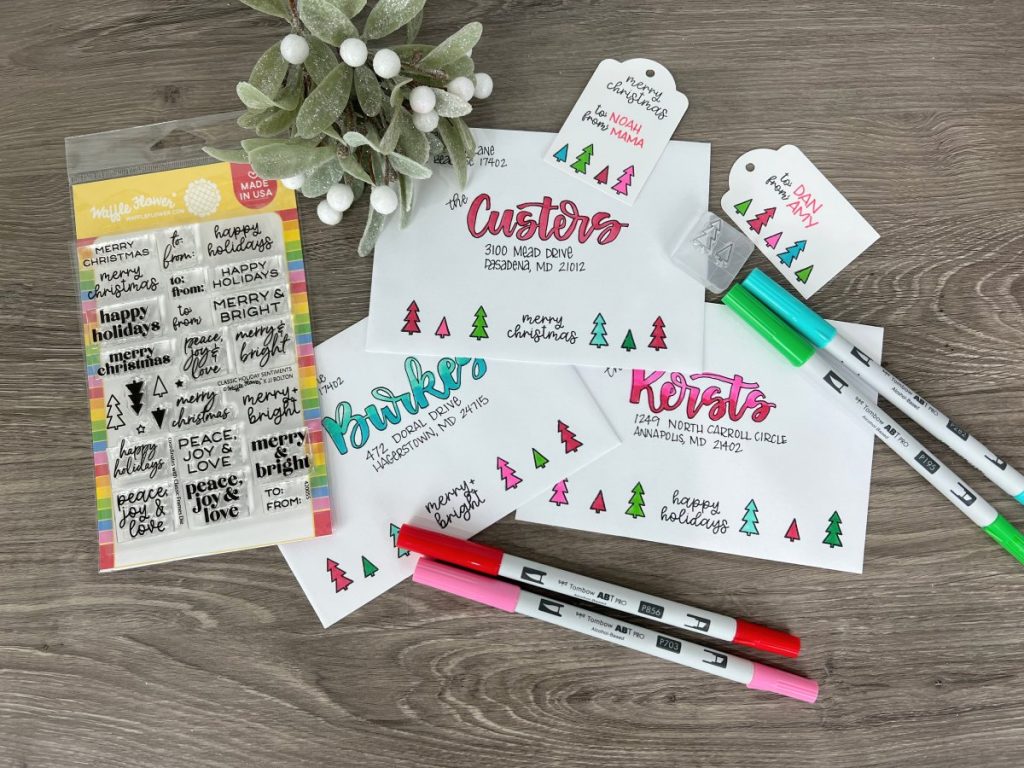
ENVELOPES
To create these festive envelopes, we’ll follow the same basic steps as the gift tags. This time, I started with the word stamp in the bottom center of the envelope, then stamped three trees on each side.
Color in your trees, then you get to address your envelopes! I chose to use brush script for the names, then filled in the addresses with a small, neat print. I outlined the brush script in black to make it match the trees. Of course, you can also use pre-printed address labels or write yours in any style you prefer.
For more information about brush lettering, check out my super-simple faux calligraphy tutorial or my intro to brush lettering for beginners.
Hope you enjoy this quick and easy idea for creating colorful holiday gift tags and envelopes! If you give it a try, I’d love to see how yours turn out! Make sure you are part of the Amy Latta & Friends Facebook Group so you can share your photos and we can all be inspired. See you there!


What a great page and site thank you An awesome inspiration to us all.. 🙂
I’m looking to paint beach stones, rocks etc as memorials or just smiley faces to leave dotted around the town for people to find etc.
If you google memorial pebbles or painted rocks you will see a 1001 ideas. I am wondering what pens should be used for stones that have been painted first and suitable to be left outside. I presume acrylic is the way to go with paint and pens?
I left school at 10 so always had my junior school writing, or capitals only these days. Your site has given me inspiration to have a go at the faux calligraphy myself instead of getting someone else to do them for me. The pebbles will be around 8cm so a thick nib I guess. Waddya reckon guys? Do I need to seal the stone or anything first, then paint it, then write on it? I just know I can do it, certainly good enough to pass muster so thank you Princess. Im now 64 and hanging in there.
Hi,
What you will want to do is use either acrylic paint markers or permanent alcohol markers on the rocks. Then, after they are dry, seal them with Outdoor Mod Podge or another clear acrylic sealer. Good luck!