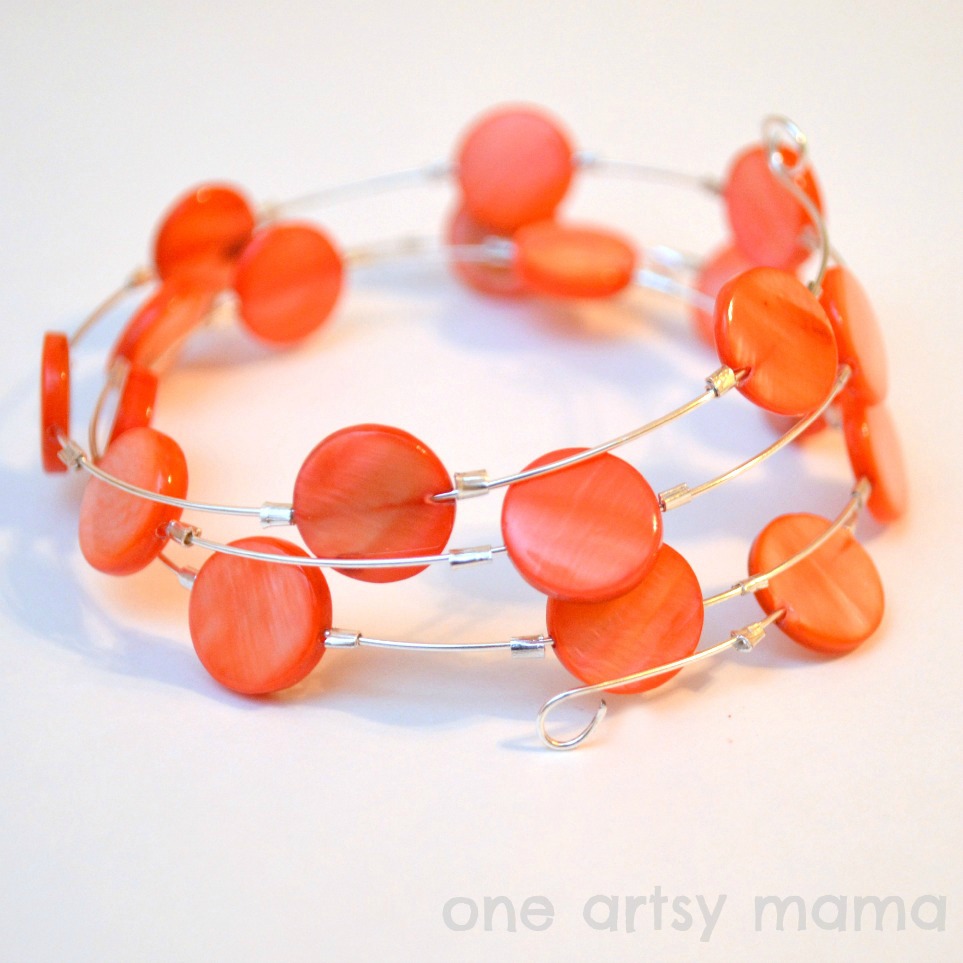
Coral Memory Wire Bracelet

A quick note about the coral beads I used; mine are from Consumer Crafts and they still have them available. They cost less than $2 for a 12″ strand which is more than enough to make this bracelet and a pair of matching earrings. This is not a sponsored post {although I wish it were!}, I ordered and paid for them on my own and just wanted to share the deal with you.
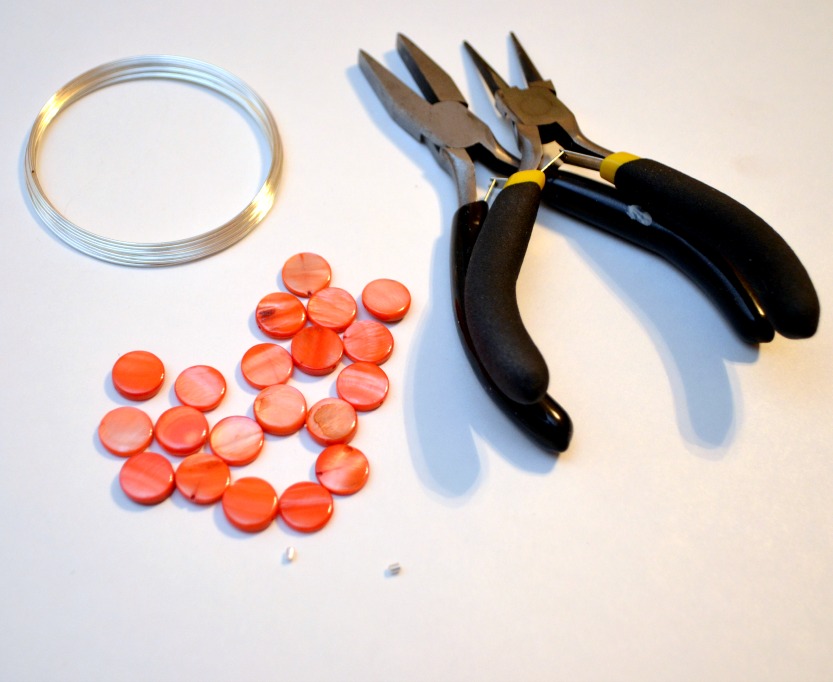
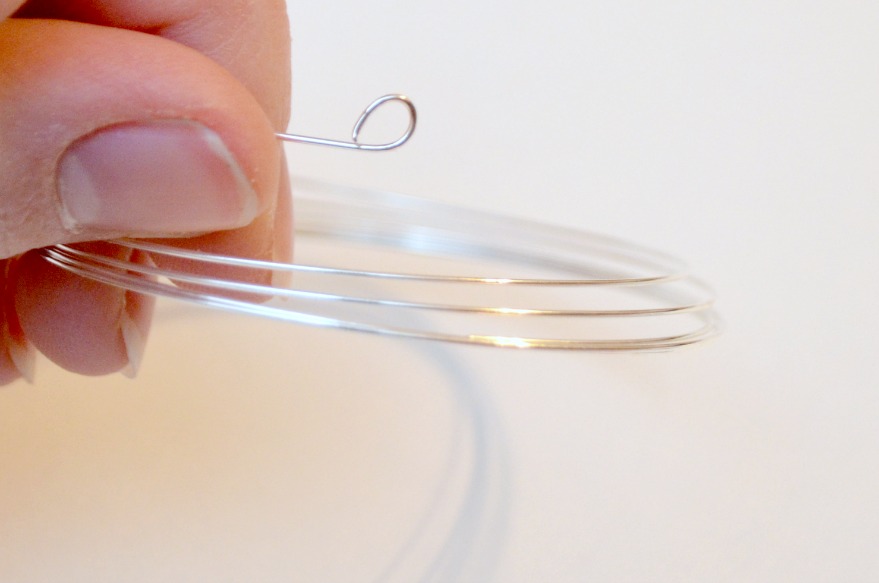
STEP 1: Cut desired length of memory wire. I cut off about 4 coils. You can always trim the excess later. Use pliers to bend one end into a loop.
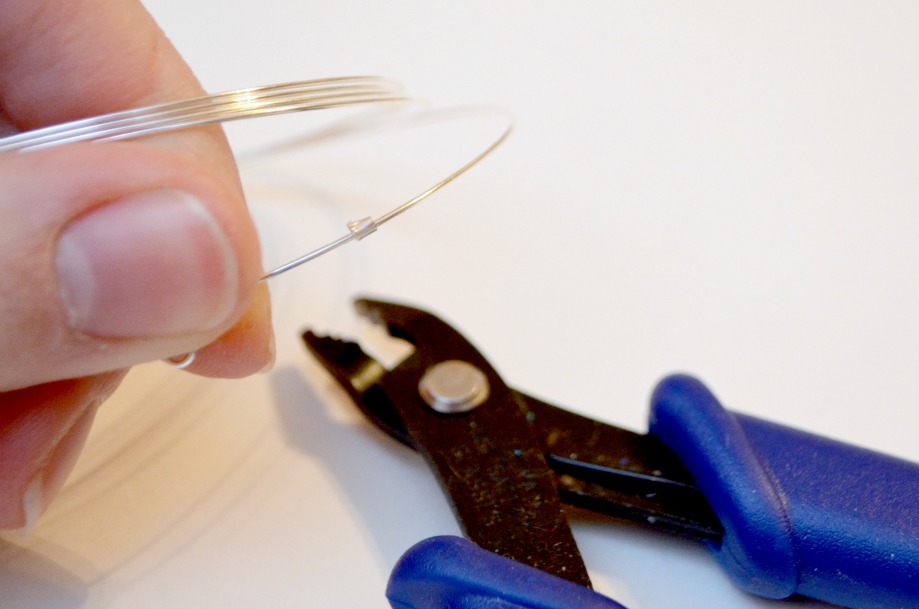
STEP 2: Thread a crimp tube onto your wire until it’s about 1″ from your end loop. Use crimp tool to secure it, or simply squeeze it tightly with flat pliers.
STEP 3: Slide a bead onto the wire and let it rest against your crimp tube. Thread another crimp tube on and secure it on the other side of the bead using your tool or pliers.
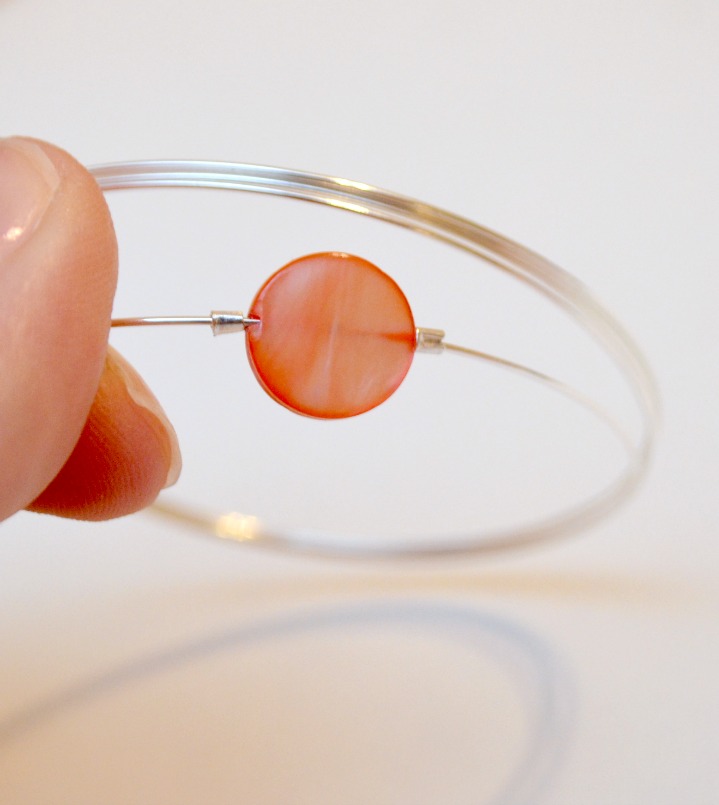
STEP 4: Repeat step 3, continuing the pattern “crimp tube, bead, crimp tube” and leaving about 3/4″ space between beads until your bracelet is the desired length. Cut excess wire and form a loop on the other end.


You can give it as many beads and loops as you like to suit your own personal style. Another option is that you can simply string all the beads side by side, leaving out the crimp tubes, which gives you a different look…see my Memory Wire Shell Bracelet tutorial for more photos and step by step instructions on that variation.

Anyway, I’m loving how this turned out, and I’m excited about the coral trend!
I think it goes really well with my not-exactly-coral-more-like-road-cone-orange skirt, don’t you? {oh, and if you’re wondering, the cool turquoise watch is a Target special.}


Lovely bracelet, Amy. Please don’t make we want to learn a new craft addiction! But I will say that the bracelet looks quite nice with your skirt. Maybe traffic cone orange (which doesn’t come through in the pic) is the new coral?
I love how modern this looks with the crimp beads and I’m a big fan of orange/coral. I posted one finished photo of your bracelet and a link back to you on truebluemeandyou.
I love the bracelet!! So cute and easy to make!! I’ve never made jewelry but I’m going to try because the bracelet is so cute. Thanks for the tutorial!
Very pretty Amy! I love memory wire!
Gorgeous and so easy! This is my kind of project, Amy!
This is really cute…looks great with your new skirt.
Gorgeous, I love the beads!
I love how well your bracelet matches your skirt! 😀
Love your bracelet!!
So cute! Love the color!
Absolutely adorable bracelet. Love it! that coral colors goes so well with the gold.
Katja @ Shift Ctrl Art
Visiting from Monday Funday! I love sweet simple jewelry so this is up my alley. Can I ask where you got the discs? I’ve been looking for something similar for a different craft project.
Newest follower here! I found you through the six sisters’ stuff blog hop 🙂 You have a super cute blog, I can’t wait to read more. You can find me at meandmr.com
-Melanie @meandmr.com
Wonderful tutorial! I loved the outcome!
Great post!! I included it in my post Βόλτα στη Γειτονιά #25 🙂
Have a great week!!
This looks so easy! I have never made jewelry before but this is so cute and looks so easy!! Shhh…I might make one for my mom as well as for myself! Thanks for the tutorial!
What gauge memory wire do you use? I love the design! I’m new to designing/making jewelry and this looks easy!