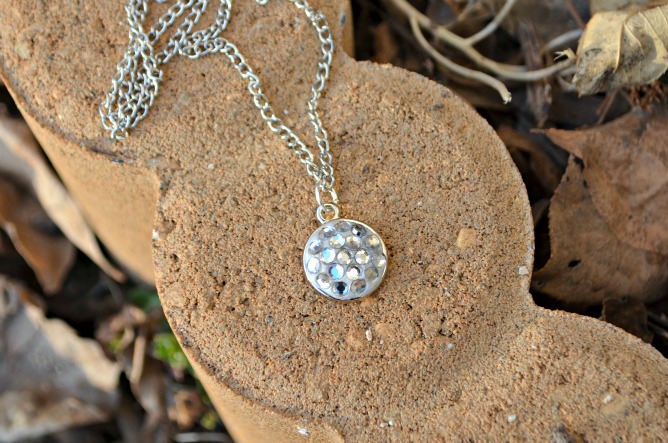
DIY Pave Rhinestone Charm
You all know that around here, we have a saying we like to use…“Glitter makes everything better!” I think, though, that we could expand that to say, “Sparkle makes everything better.” Today’s project is for those of you who love some bling {and perhaps don’t like the mess that comes with glitter}. I don’t know about you, but I’m a sucker for pave style pendants and charms. Did you know how incredibly easy it is to make your own? Honestly, it is! No special skills or tools required! Take a look!

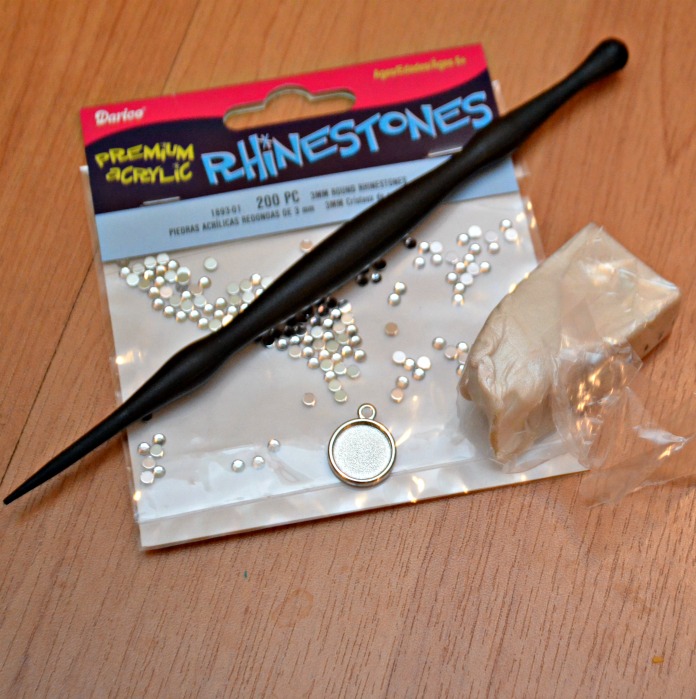
Materials:
– beveled pendant {any size or shape will work; mine was a small round one}
– clay*
– rhinestones or crystals, your choice of color*
– jump ring and chain with clasp
– optional: clay tools
*Before I continue with the tutorial, I want to talk for a second about the type of clay and stones you can use. You have two options for this project. The first option is to use acrylic rhinestones like the ones I used, pictured here, and air dry clay. The other option is to use regular polyform clay like Sculpey, which has to be baked to cure, with *real* Swarovski crystals. I went the cheaper route for my first go at the project, but now that I see how pretty and easy is is, I’m planning on making a few more using different colored crystals. If you try using regular Sculpey with the acrylic rhinestones, you can’t bake it, and the clay won’t ever set.*
Step 1: Fill your bevel charm with clay. You can use any color you like. I chose a pearly white so that it wouldn’t distract from my clear rhinestones, but if you’re using colored crystals, you may prefer to use matching colored clay.
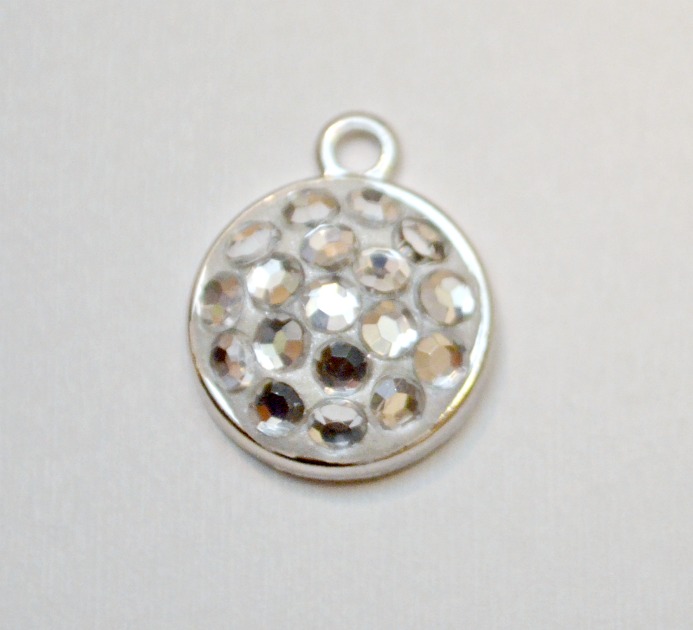
Step 2: Begin in the center and place your rhinestones into the clay, pressing gently.
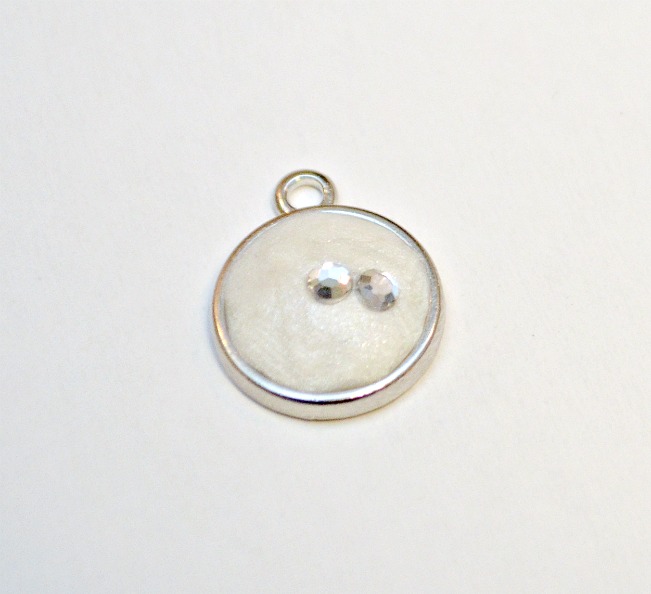
You can place your rhinestones/crystals randomly, mix colors, form patterns, or basically do this any way your heart desires! I am a creature of habit, symmetry, and pattern, so I did one in the center and then two concentric circles going outward – which fit really nicely into my pendant. You just want to get them close together so that the sparkle, rather than the clay, is the focus! Then, either let it dry, or bake it according to package instructions, depending on which type of clay you chose to use.
Step 3: Add a jump ring, then attach your charm to a chain and wear it!
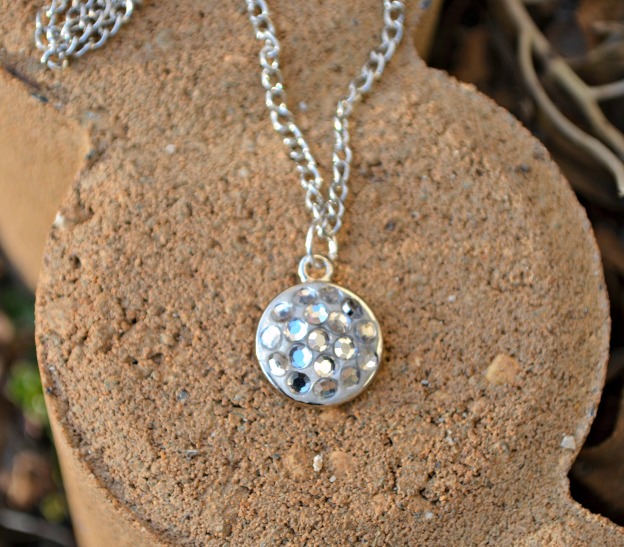
It really is incredibly simple to do, and there’s no wrong way to make these! You can use any shape pendant, any color clay, any color and size rhinestones/crystals…make it to suit your own style! How would yours look?


Wow impressive! The possibilities are endless. Now I want to head to the craft store:)
Very pretty Amy! I’ve never made jewelry, but this looks easy and fun!
REALLY PRETTY!!!
Where do you find chains with clasps?
This is really cute…Looks nice and easy too…May have to try it…
Oh, I will be trying this!!! I love making (EASY) jewelry, so this is a great option! 🙂 Thanks a bunch!
– Brooke –