Personalized Glass Cups with Cricut
Today’s post is sponsored by Cricut. All opinions and ideas are my own.
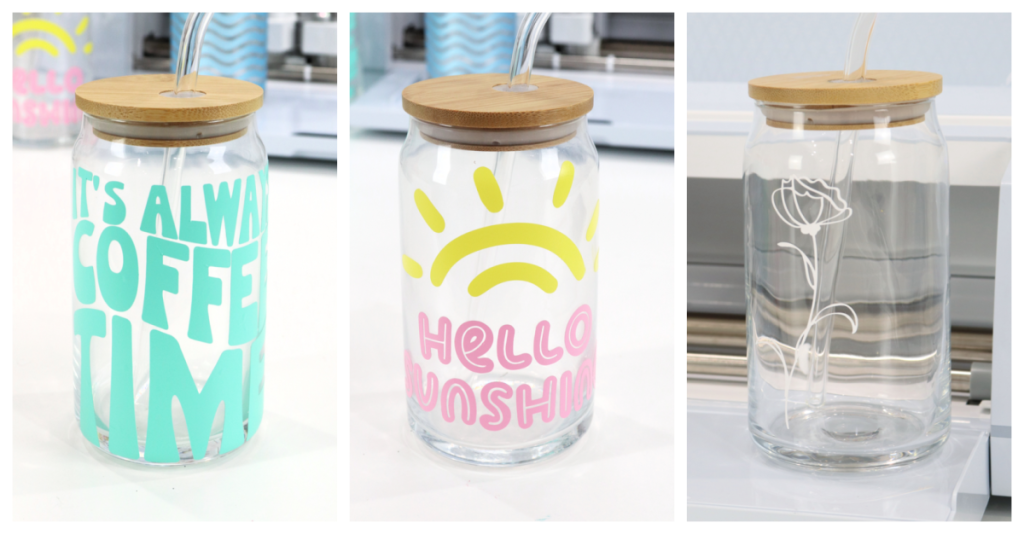
I’m a huge fan of iced coffee, and I think it’s even better in a fun glass! Whether you prefer coffee, iced tea, lemonade, or just plain water, these personalized glass cups are perfect for enjoying your cold beverages this summer. Here’s how I made mine with some help from my Cricut Maker 3 and Cricut Permanent Vinyl.
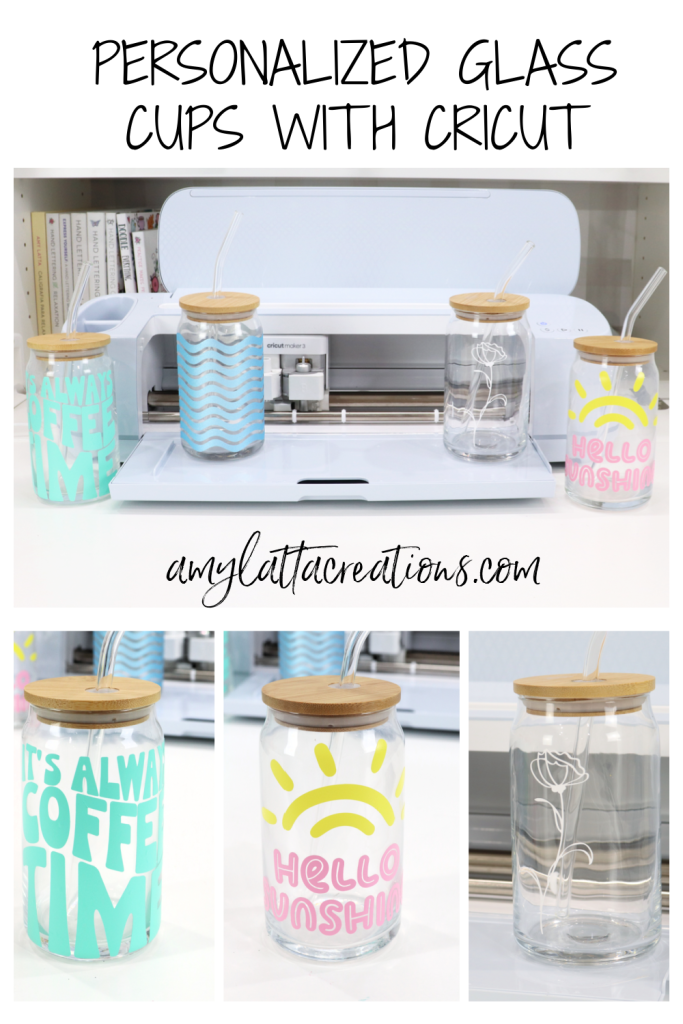
How To Make A Personalized Glass Cup
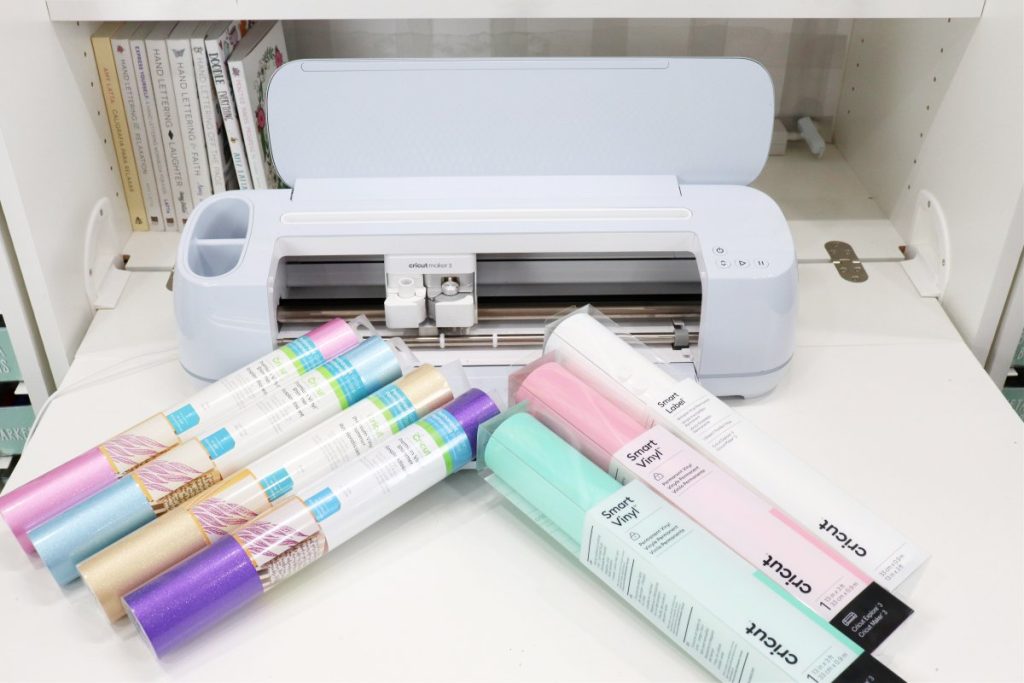
Supplies:
Cricut Maker 3 cutting machine
Smart Vinyl™ – Permanent (3 ft)
Smart Vinyl™ Shimmer – Permanent
Glass cups
Instructions
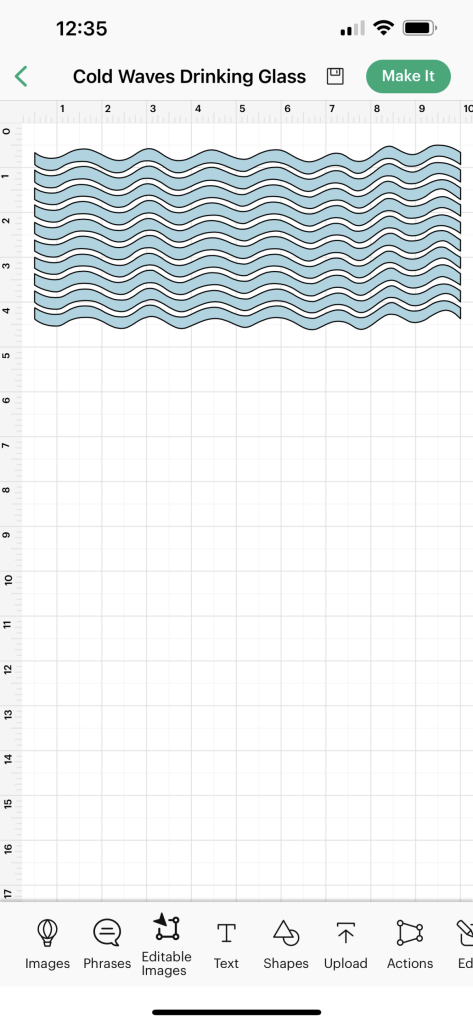
1. Create your design in Design Space.
This is really easy to do, because you can either choose from an existing project and choose “Make it,” or “Customize,” like I did for the Cold Waves Drinking Glass and Hello Sunshine Tumbler, or pick your favorite of the thousands of images available in the app. For my other three glasses, here are the images I chose to use:
It’s Always Coffee Time (Diva Watts Designs) – #M4929BAAF
Poppy Flower Outlines (Jen Goode) – #M490E3673
For these glasses, you’ll want to make sure that your design is equal to or smaller than 4.25” x 9.75” to ensure that it fits. You can size the designs to any dimensions you like, depending on how much of the glass you want it to cover. In addition to using the provided images and projects, you can also choose the text feature and type anything you like in one of the many font options, and/or import your own files.
2. Cut with your Cricut machine.
Once you are ready to cut, follow the prompts in Design Space to load your materials. All Cricut materials are rigorously tested for performance, durability, and quality, and they’re specially calibrated for compatibility with your machine. Since I’m going to be regularly using and washing my cups, I chose to use permanent vinyl. For my waves cup, I used Shimmer Vinyl (who doesn’t love some sparkle?!) and for the others, I used permanent SmartVinyl in a variety of colors.
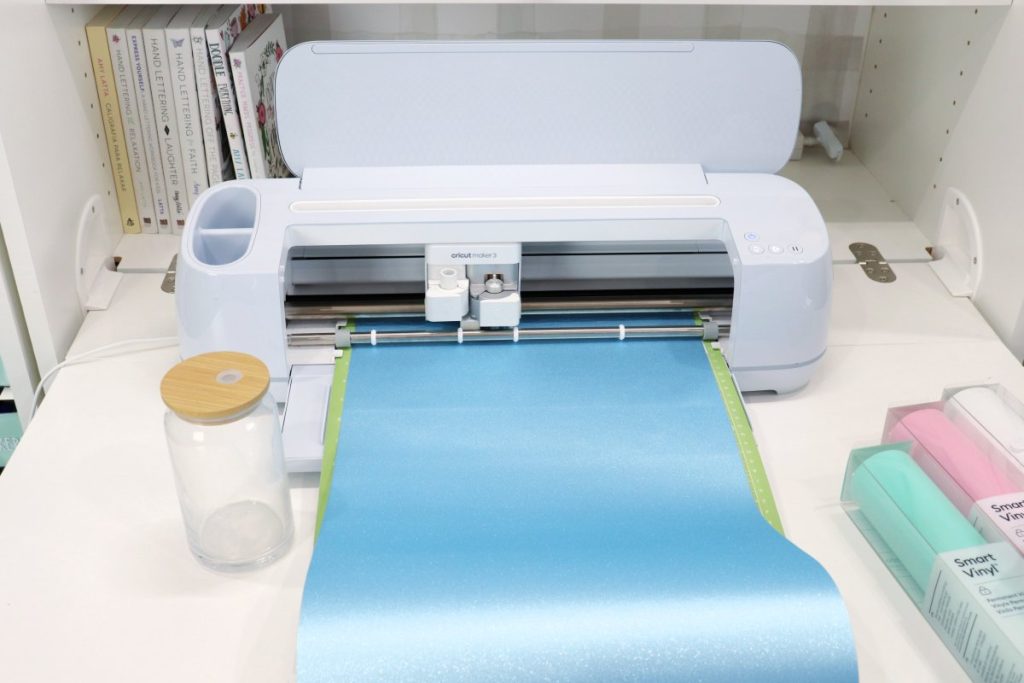
I especially love working with SmartVinyl because it’s designed to make creating easier. You don’t need to use a cutting mat (yay!) and it allows for continuous and extra-long cuts.
3. Assemble your project.
When your cut is complete, the first thing you’ll need to do is weed your design, which means you’ll peel off any vinyl that is not part of your design. Next, cut a piece of Transfer Tape (I used StrongGrip for my Shimmer Vinyl) that’s a little larger than your design. Peel it from its backing and stick it on top of your weeded image. Press firmly and/or use the scraper tool to help adhere the tape to the vinyl. Gently peel the Transfer Tape away, with the vinyl attached. Clean the surface of your glass with rubbing alcohol to remove any oils, fingerprints, and dust. Position the design where you want it on your glass. Rub to adhere, and remove the Transfer Tape.

Once your decal is transferred to the glass, it’s ready to use and enjoy! This is such an easy project, and you can personalize it in so many different ways.

I had so much fun choosing different designs and watching them come to life. Repeated geometric designs, phrases, large images, and intricate line art are all equally easy to create. I really enjoy the variety, and I can’t wait to use these for my daily coffee break!
What about you? What kind of designs and phrases would you love to use to decorate your glass cups? If you try this project, I’d love to see what you create! Make sure you’re part of the Amy Latta & Friends Facebook Group so you can share your photos and we can all be inspired. Also be sure to check out all the other fun Cricut projects here in the projects archives. Happy creating!
Where do i find the glasses?
I got mine on Amazon! https://amzn.to/3N9TLsl