My Sew Station
When it comes to creating, I enjoy doing a little bit of everything. From hand lettering and metal stamping jewelry to wood burning with Scorch Marker and repainting old furniture pieces, I love it all. The one exception was always quilting…that is, until last September. My friends at Missouri Star Quilt Company taught me that quilting is not only doable, it’s also a lot of fun! Now that I’ve caught the quilting bug, I needed to redo my craft studio a bit so that I had a dedicated space to work on my sewing projects. Take a look at how I use the Sew Station from Create Room!
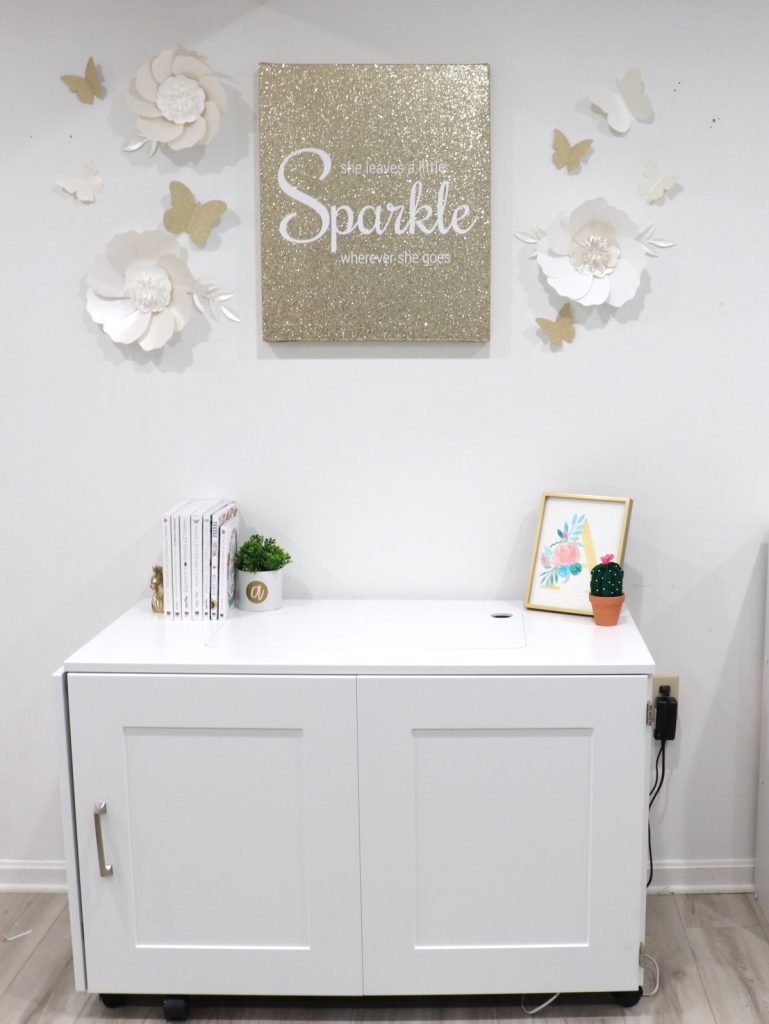
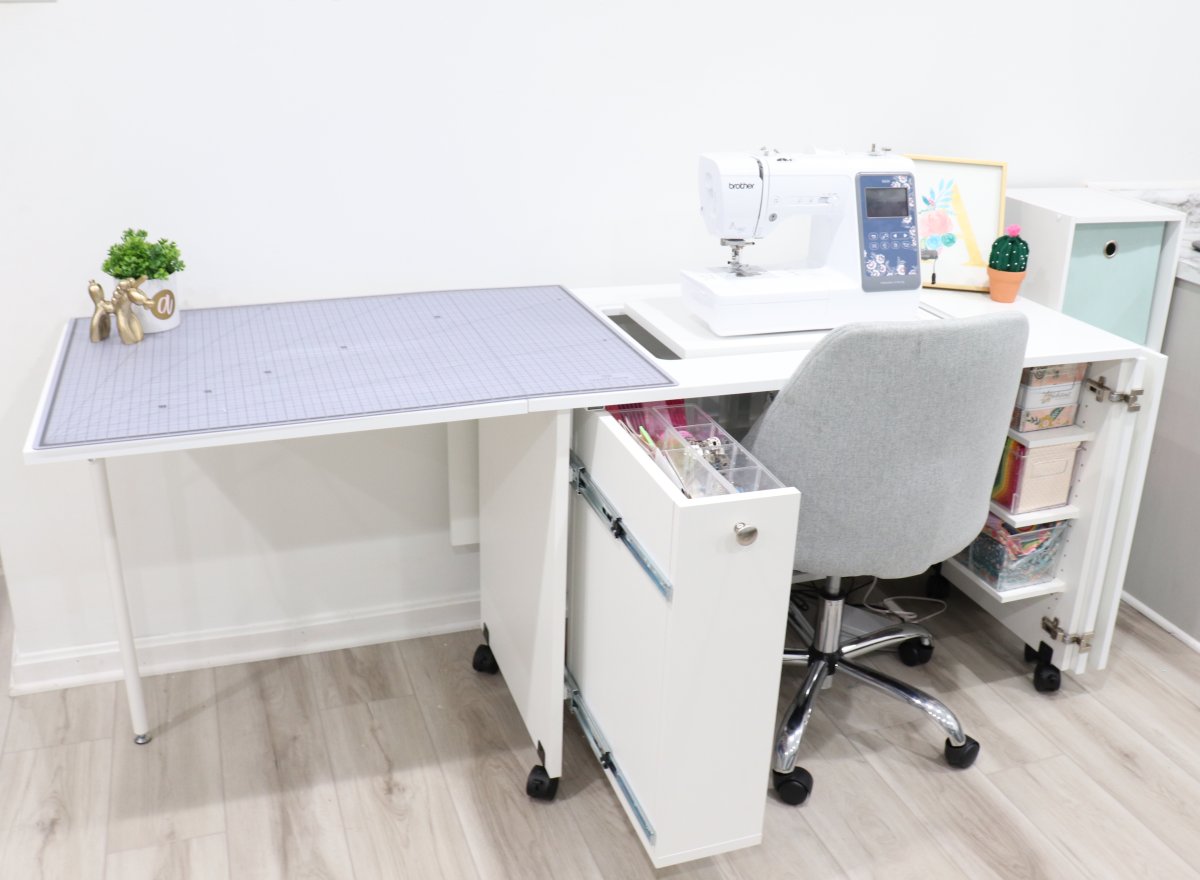
Like the DreamBox, which folds up to save space when it’s not in use, the Sew Station in its most compact form looks like a small cabinet.
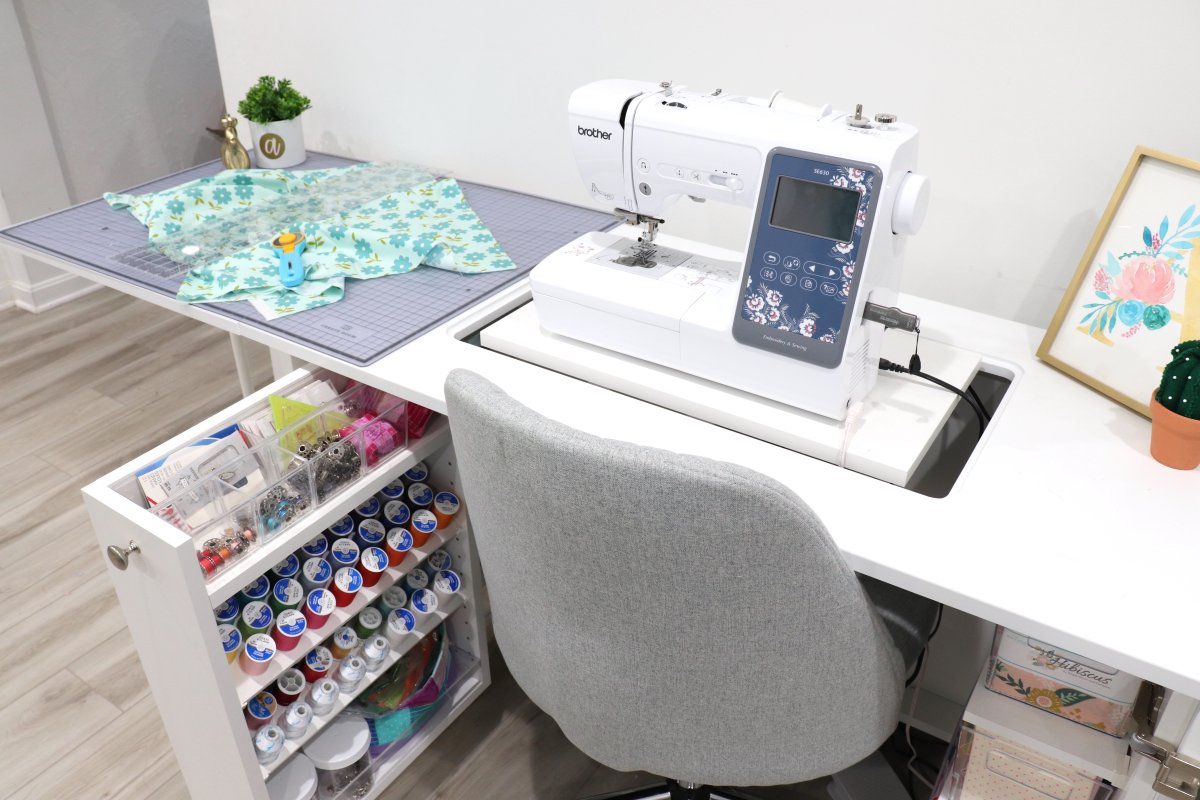
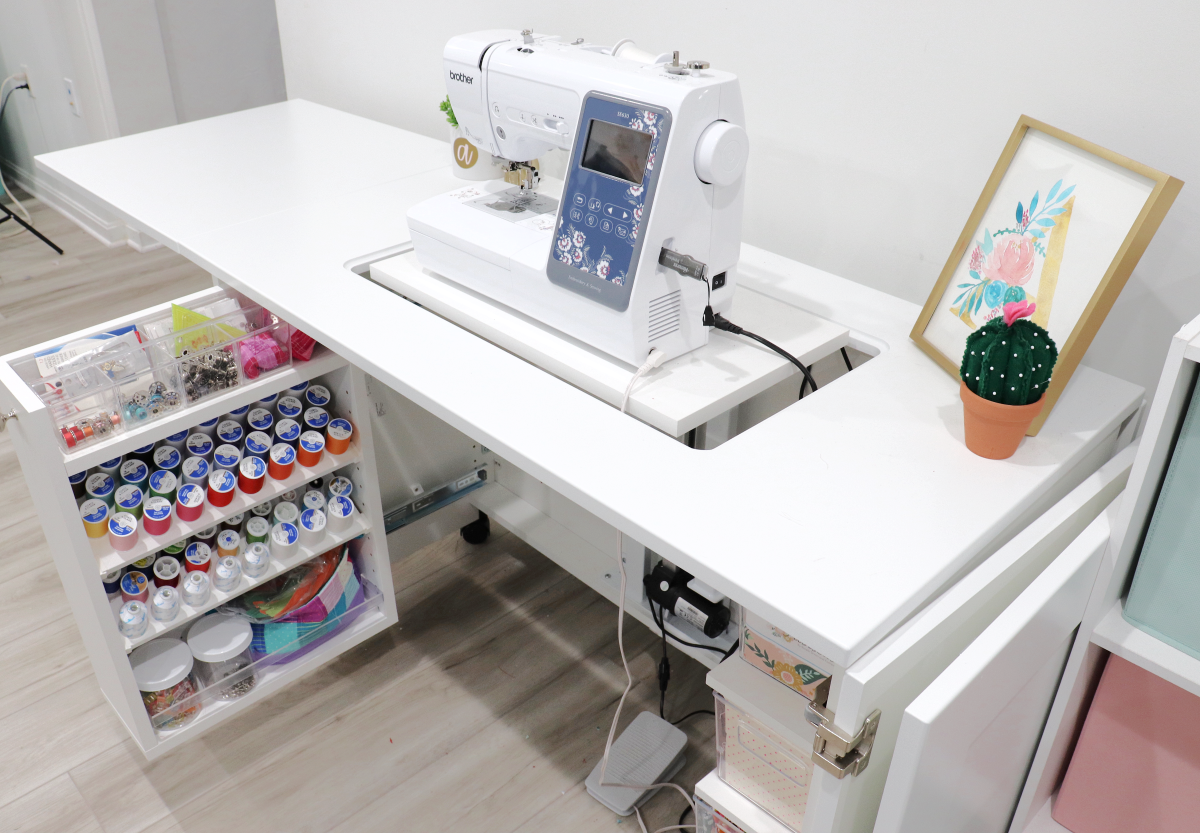
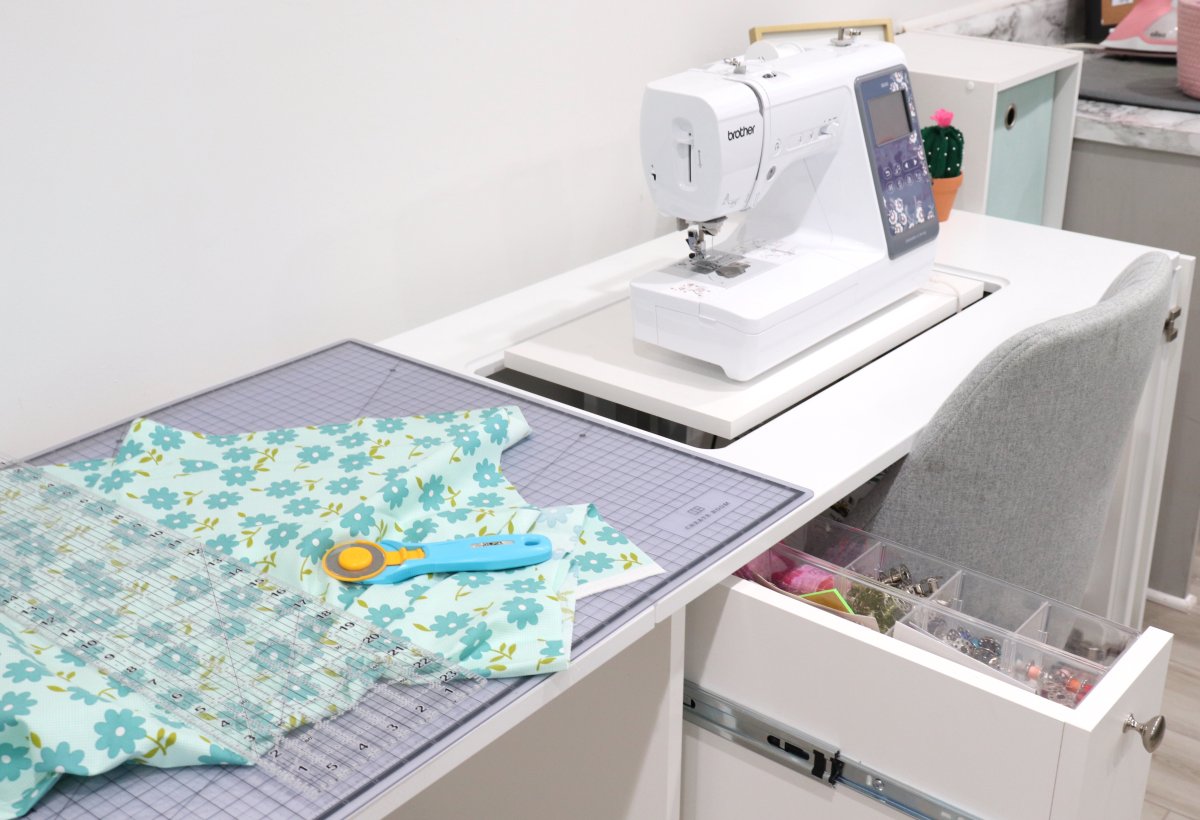
Then, when you’re ready to sew, the magic happens! Just open the door, pull out the tables, and you have a whole area designed with your sewing needs in mind. There are extendable side and back tables, an electric lift for your machine, and storage space for your supplies.
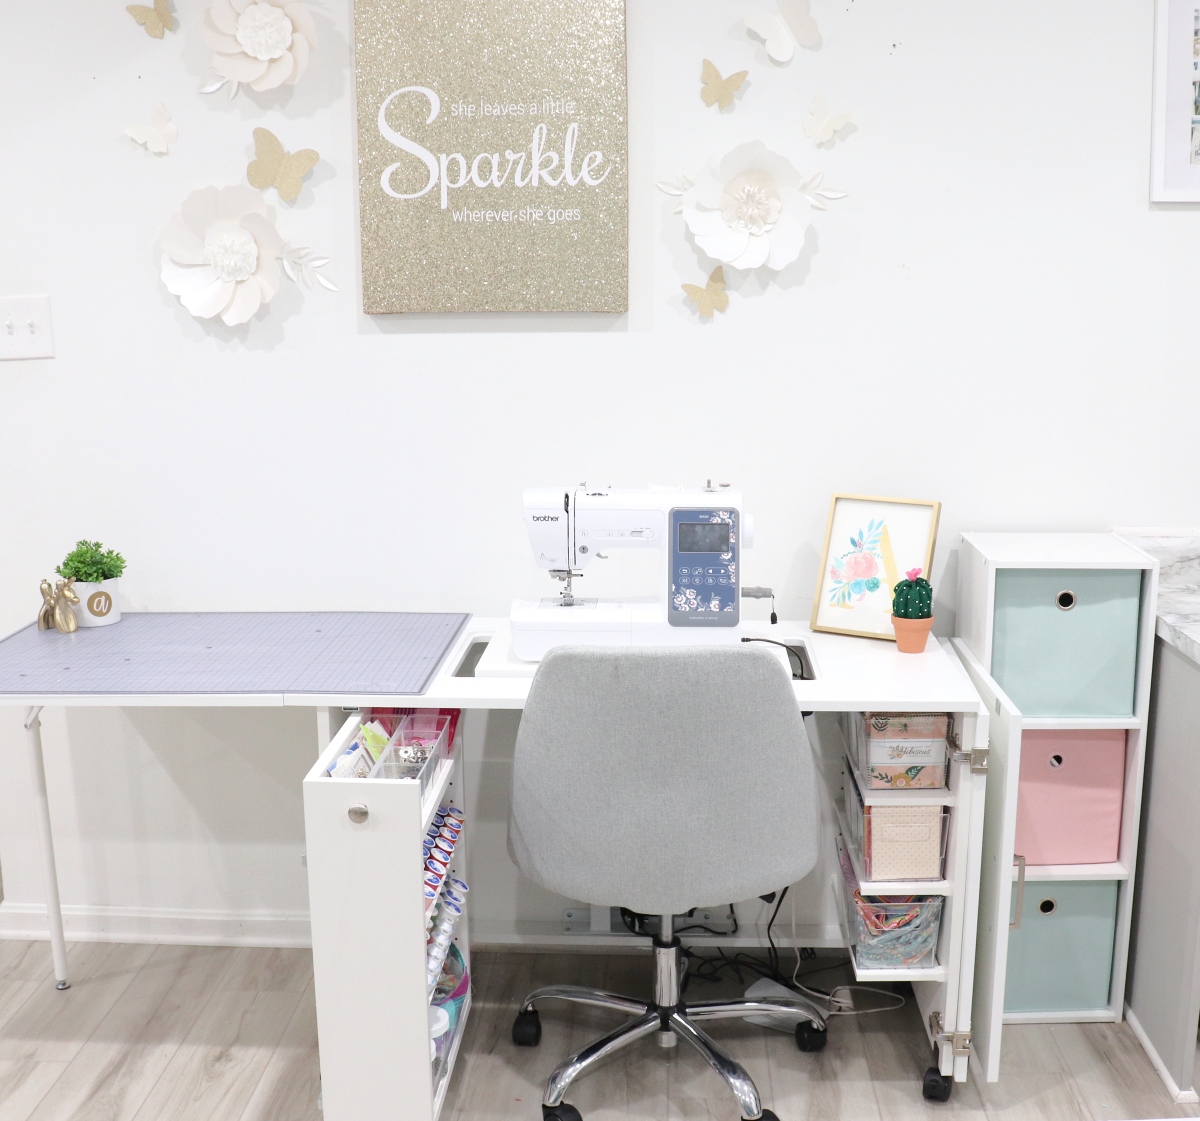
There’s an option for connecting the Sew Station to your DreamBox if you like, or you can have it stand alone like mine does. When you’re assembling the Sew Station, you get to choose which side you want your table extension to go on. Since I quilt, I wanted a lot of space to the left of my machine where my project can lay while I’m sewing. You also get to choose whether you want the rolling drawer on the left and the shelves on the right like mine, or vice versa. Let’s take a closer look at these features.
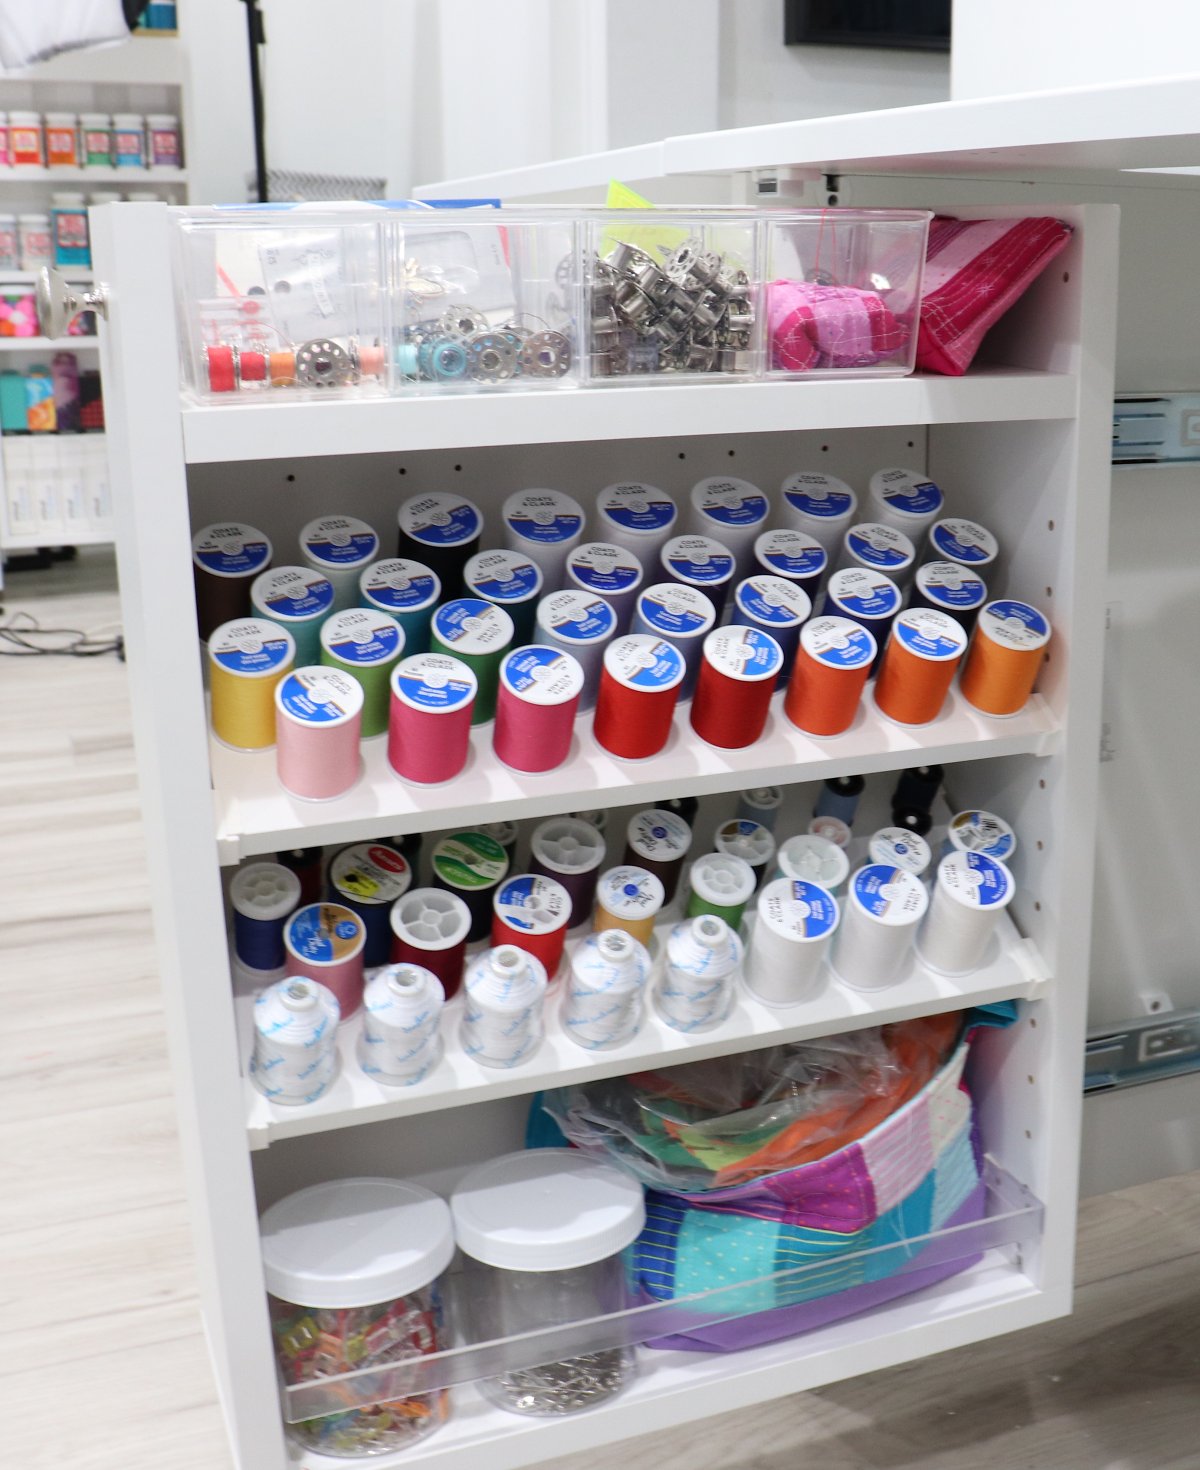
The rolling piece has space for you to store and organize small supplies, as well as two spool holders so that all your thread is in easy reach. I love not having my thread get all tangled up, and not having to dig through a box to find the right color for my project. In the small InView totes on the top, I have bobbins as well as small notions like a pin cushion, machine needles, hand needles, and a seam ripper. On the bottom shelf, I have my quilting pins, clips, and a basket full of zippers.
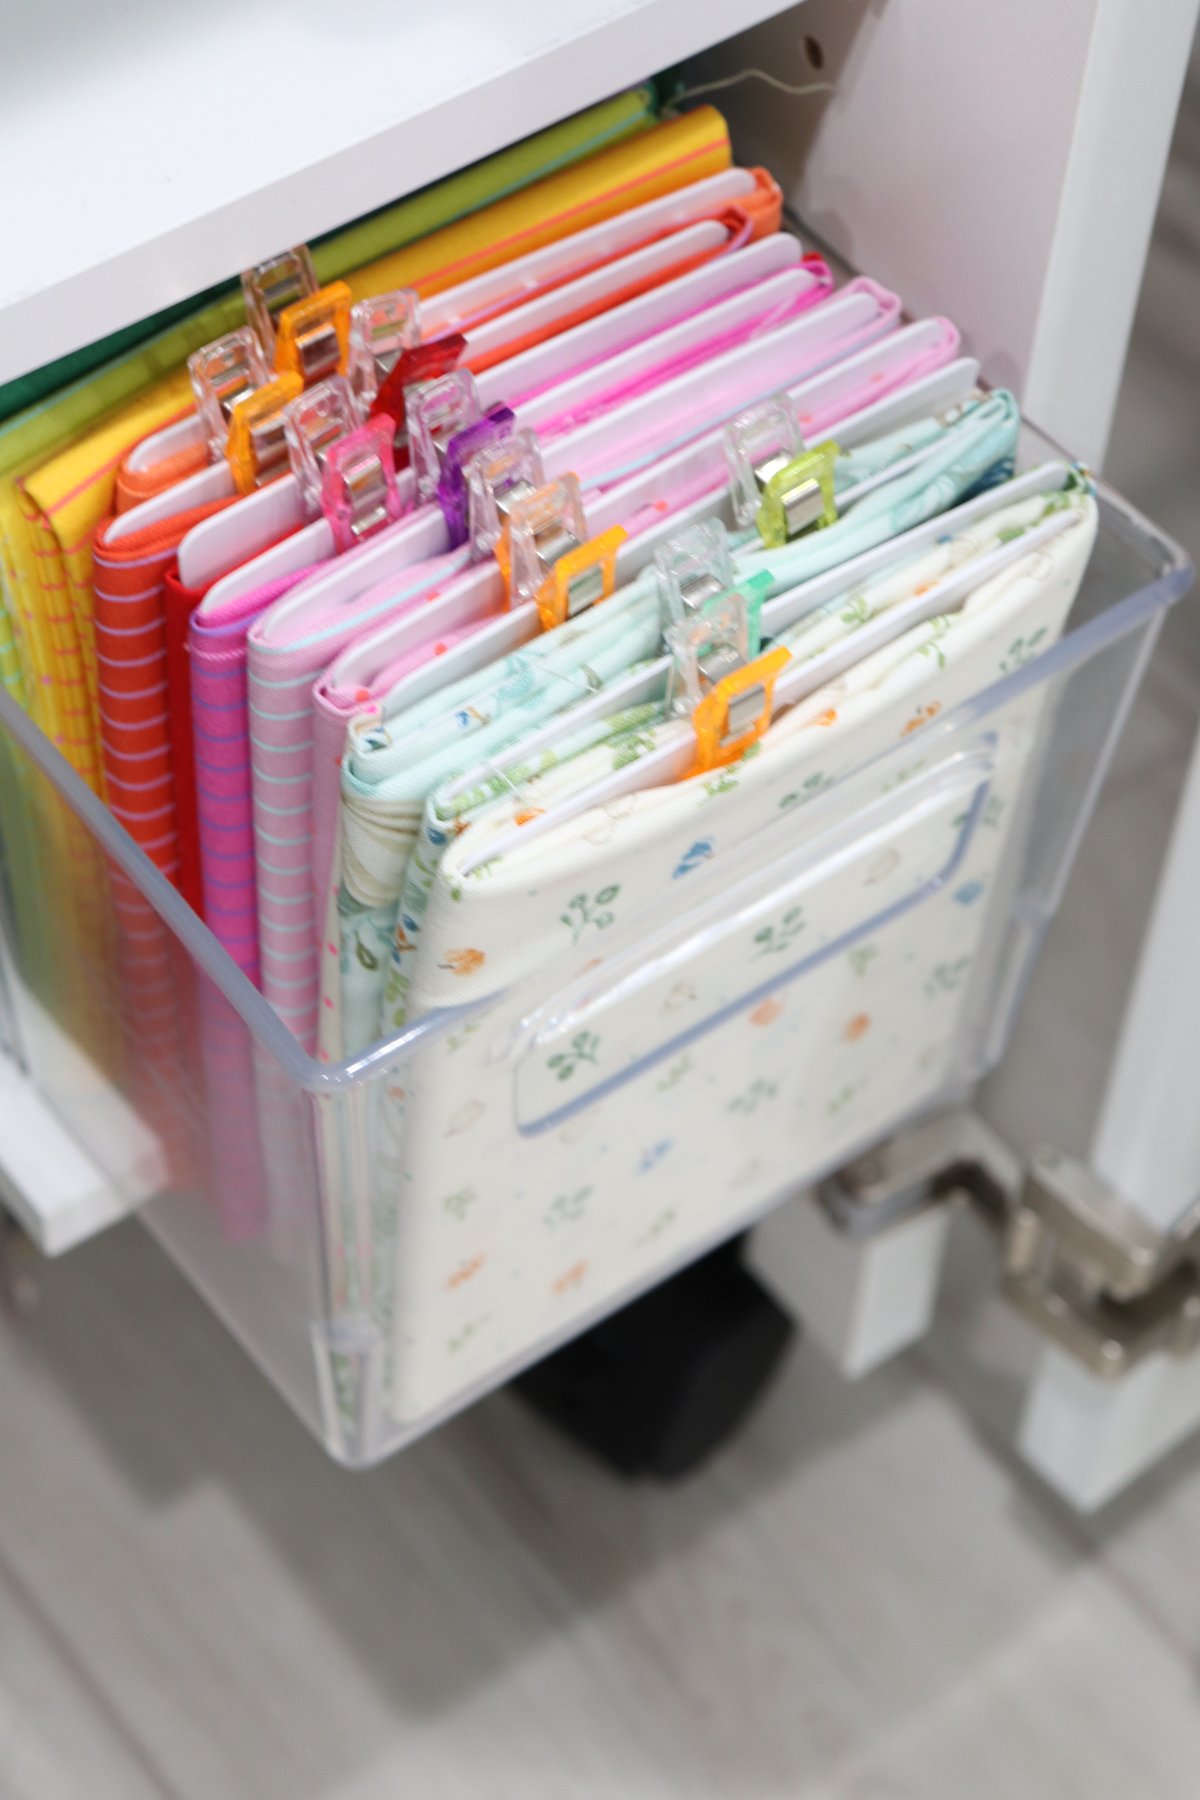
The shelves on the other side are perfect for three Medium InView Totes. I use these to store fabric . One holds fat quarters, one holds charm packs (precut 5” squares), and one holds larger cuts. It’s so nice being able to pull out the clear tote and instantly see all of the options I have to choose from.
More often than not, I have my Sew Station open with the side table up. It’s the perfect size for my Cutting Mat, so that’s where I typically cut the pieces for my quilting projects. It’s also a good spot for piecing small things like pillow tops, potholders, and tote bags. I move all my pieces around until I get a design I love…and it’s much easier to do that at table height than on the floor, where the dogs like to get involved.
When it comes to actually quilting a larger project, I extend the back table too. This gives all my excess fabric a place to lay. Although I use this table less than the side one, I’m very grateful for it when I’m tackling something big! It’s also nice if I’m crafting with someone else so that we can each have a workspace.
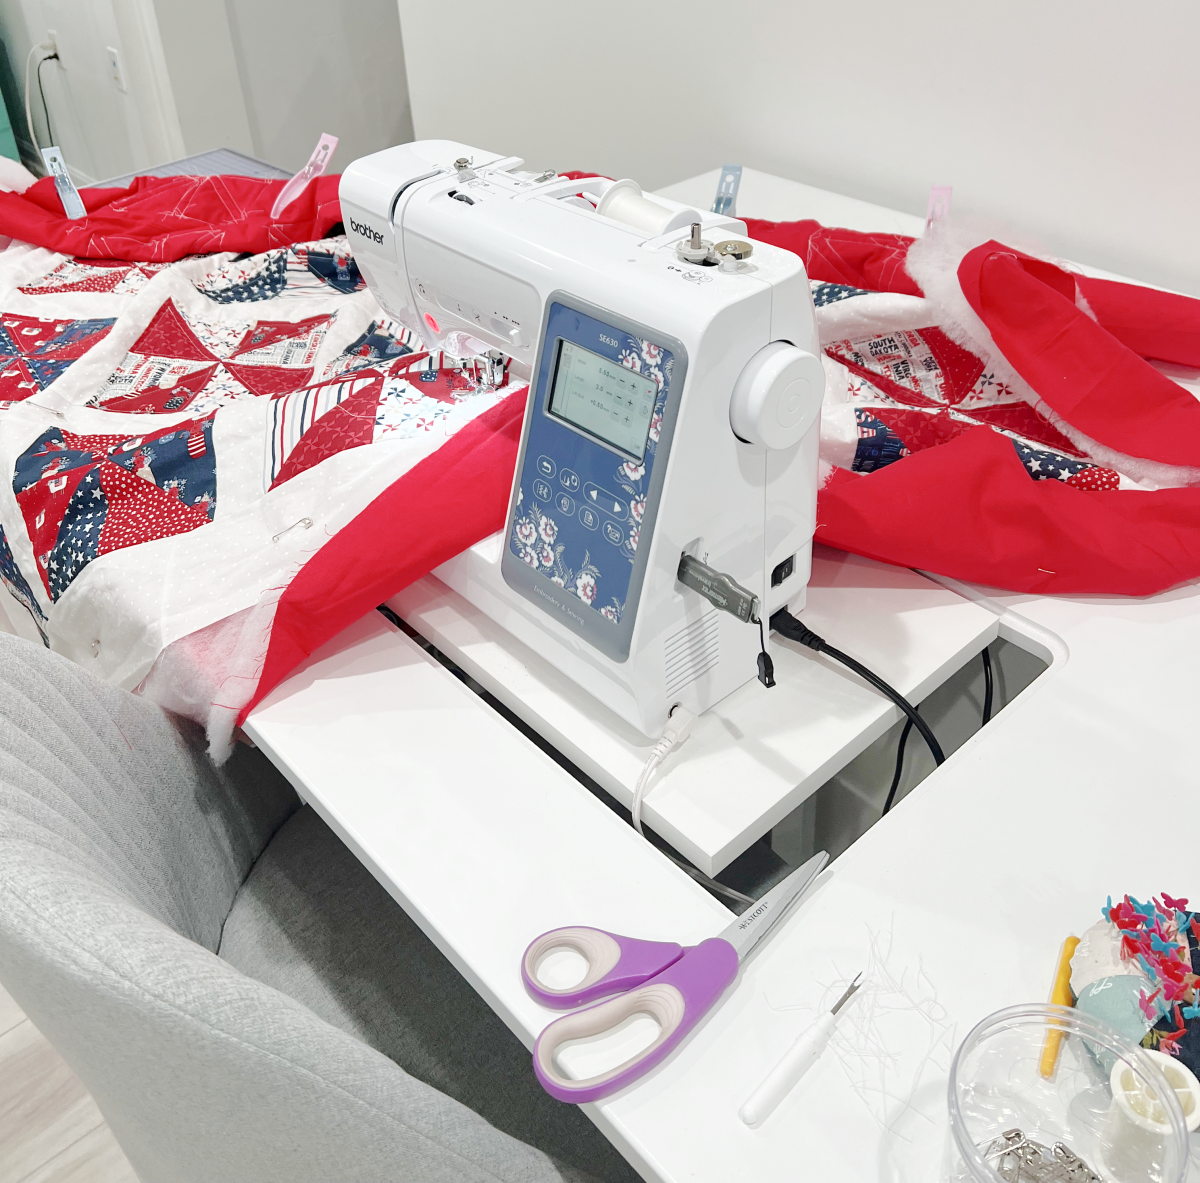
The electric lift that allows me to move the sewing machine up and down is another great feature, and so are the wheels that let me move the whole furniture piece anywhere I need it to go.
Overall, having the Sew Station has helped me to be much more organized with my sewing supplies, and I actually sew more now than I did when my machine was in a less ideal spot. It puts the machine at just the right height, and I have enough workspace to do whatever I need to do.
If you love sewing and are could use a way to store your machine AND supplies while providing an ideal workspace, be sure to check out the Sew Station from Create Room. I know it’s a financial investment, but I promise it’s worth it. I just know you’ll love it as much as I do. In fact, if you use the code AMYLATTASEWS at checkout, you can save $50 on the purchase of your own Sew Station.
Be sure to also check out my DreamBox for more organizational ideas that will transform your creative space! Happy crafting!