How Does Your Garden Grow?
One thing everyone in this house has in common is a love for gardening. All three of us enjoy getting our hands dirty, weeding, and especially planting things. This year, we got Noah his own gloves and garden tools, and I thought it would be especially fun for us to plant vegetables and fruit so he could watch them grow and then have the fun of picking and eating them too. I wanted a way to label each plant so he knew what they were, so I came up with these cute little signs made from mini popsicle sticks {these were left over from our star pin project last month}. Noah and I worked together to create them and they’re just adorable, adding a pop of color to our special garden. Here’s how you can make your own:
WOODEN GARDEN SIGNS
MATERIALS:
– 5 mini popsicle sticks per sign {for larger signs, I’m sure regular ones would work too}
– acrylic paint in various colors
– Mod Podge {I love this stuff!}
– paintbrushes, including at least one small thin one for writing
– glue: we used a low temp glue gun, but any kind would work
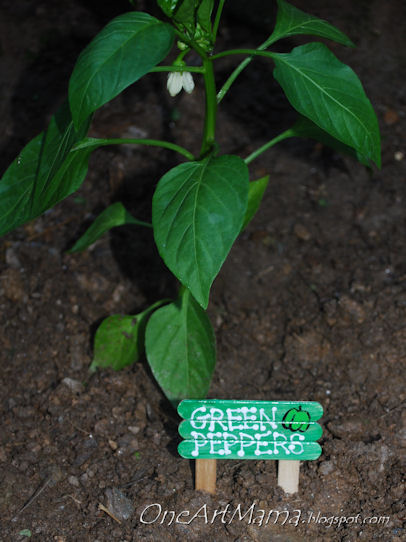
STEP 1: Paint the fronts and edges of your popsicle sticks and let them dry. You need 3 painted sticks for each sign. I let Noah choose the colors for each plant.

STEP 2: After sticks are dry, flip them over so they’re lying next to each other and glue two sticks on to be the sign posts. {See photo…for some reason it rotated itself, sorry}

STEP 3: Using a small brush, paint the name of each vegetable or plant on the front of a sign. You can also add little pictures if you like.
STEP 4: Generously apply Mod Podge over top once all paint is dry. Then add some more. Besides making your signs pretty and shiny, this is what makes them waterproof, so it’s important to make sure the entire painted surface is well covered.
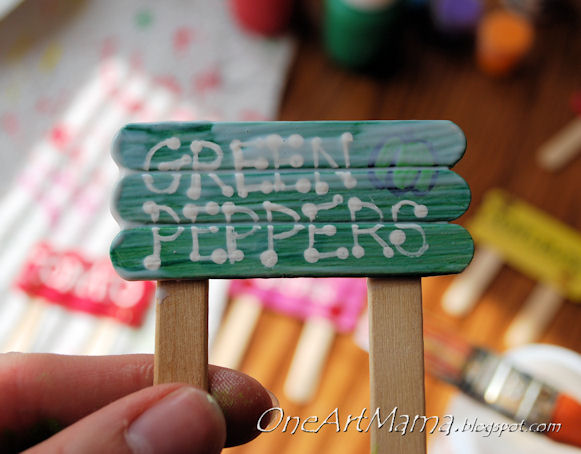
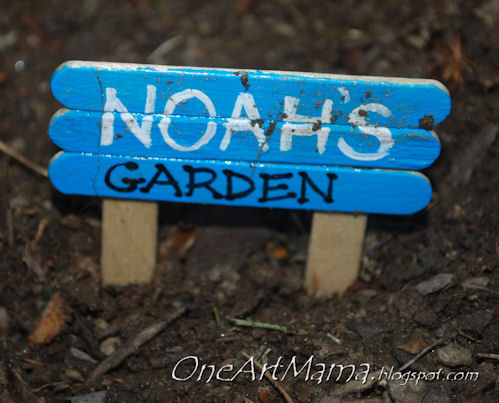
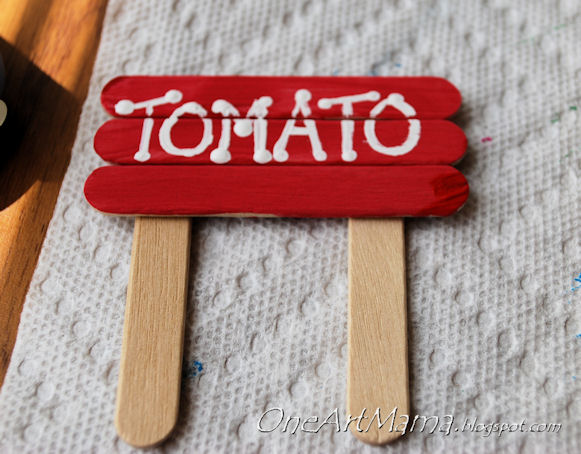
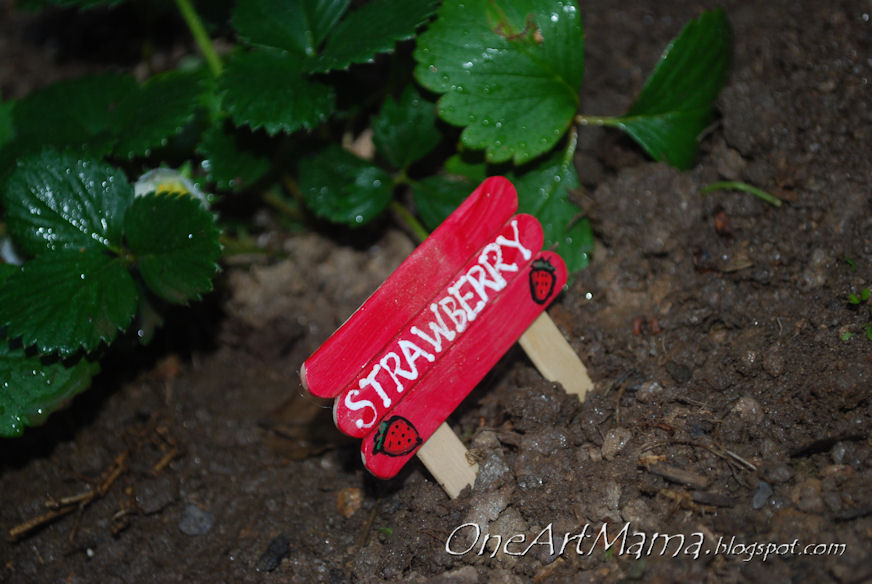
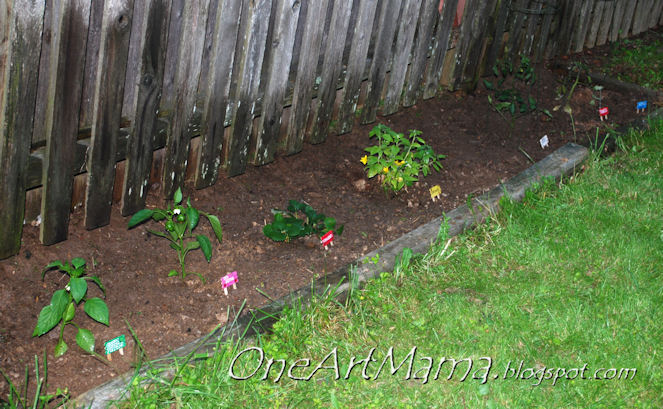
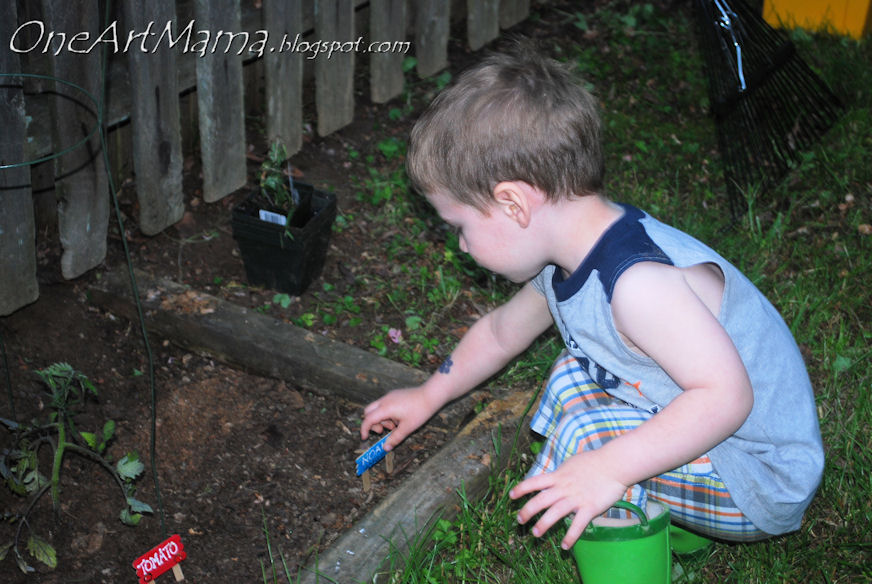
STEP 5: Let dry. Here are ours; we have tomatoes, grape tomatoes, strawberries, red and green peppers, and a sunflower, plus I made one saying “Noah’s Garden,” which he thought was cool.

STEP 6: Place in your garden and ENJOY!

I think Noah’s favorites are the sunflowers because we planted them as seeds back in February, he watered them every day inside, and we finally transplanted them and they’re blooming now!
Here they are the day we planted the seeds:
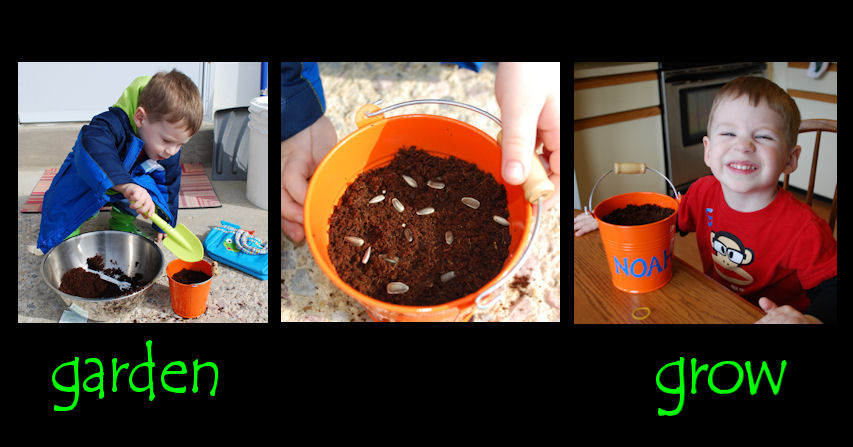
And here they are now…

Noah really enjoyed this project, and I did too! It’s easy, cheap, and really brightens up the garden, making it even more personal. What about you; have you planted anything fun this Spring?
Oh, and I can’t resist showing you this photo comparison I did the other day…do you think he’s mine?

Hope you’re having a great day…and don’t forget about my giveaway!
Blessings,

Linked up to: Made by Little Hands Monday, Debbiedoo’s Newbie Party, Craft-O-Maniac Monday, Making the World Cuter Mondays, and most of the linky parties on the sidebar.


What a fun project…
You two are so precious…I love that smile!!!
NO denying he is yours…
Love you both
He’s yours alright, just look at that sweet smile! I love the garden signs! They look so fun in your garden. We grow a garden every year and we find that the kids eat a ton of vegetables if they are involved in the process..it’s a win/win in my book!
This is a cute project for rainy days when you can’t play in the dirt. Thanks for sharing!
Im your new follower from blog hop! Hope you follow me back too!
Mimi @ DeyiMizu Beauty Blog
Amy that is so sweet, and fun looking together! Thanks for sharing at my newbie party.
I just love that you’re teaching your son to love gardening! Love the little plant signs. Wish I had made some about a month ago when I planted some seeds and then I forgot what I had planted!
Love this !! I just planted a garden and was trying to think of a easy way to label plants.I will be doing this with my son this week. I just became a follower and hope you return the favor! Thanks!
Such cute little plant labels! It’s great that you got the little man involved too! Hope everything grows beautifully!
Oh my, how cute are these!? They look wonderful and make a great garden craft! Love them!!
Thank for sharing on Kids Get Crafty! Much appreciate your visit!
Maggy
Amy the signs are adorable. Fun to get the kiddies involved too. My little guy would love these. Thanks so much for linking to the Sunday Showcase Party – I greatly appreciate it. I have featured this today. Enjoy the rest of your week ~ Stephanie Lynn
http://www.bystephanielynn.com
Those are so cute. Cute photos, too. Thanks so much for linking this up to our Wicked Awesome Wednesday link party!
Cute cute cute! Simple bright and functional, my favorite. I featured you today on my favorite things 🙂
http://sunshineandchaucer.blogspot.com/2011/05/faves.html
I’m a sucker for cute garden signs and for getting kids into the garden, so this post struck chords with me. It helps that your kids are so adorable, too. Thanks for sharing. I found you at Handy Man, Crafty Woman.
Very cute! Too bad I kill anything green. lol Love this. Thanks for sharing at Us and Them. Chris
What a great project! We have many popsicle sticks that we use to make some signs for our own garden! I’m adding this to our summer to-do list! Thanks so much for linking up to Terrific Under Ten!
So adorable! I love the little doodle drawings you added!
These are so sweet and clever! I love them!
Cecilia
This comment has been removed by the author.
so sweet!
Hi stopping by for the first time to see your artistic blog. You’re doing a great job encouraging your little crafter too! What a wonderful way to engage children in all these interesting ways of learning! I’m a new mommy and your crafts with your little one touched my heart like anything and also has inspired me. Thanks for sharing all your loving moments and of course the cute crafts. God bless you.
Sarah
I really love gardening, this article is very interesting!